

Page 1
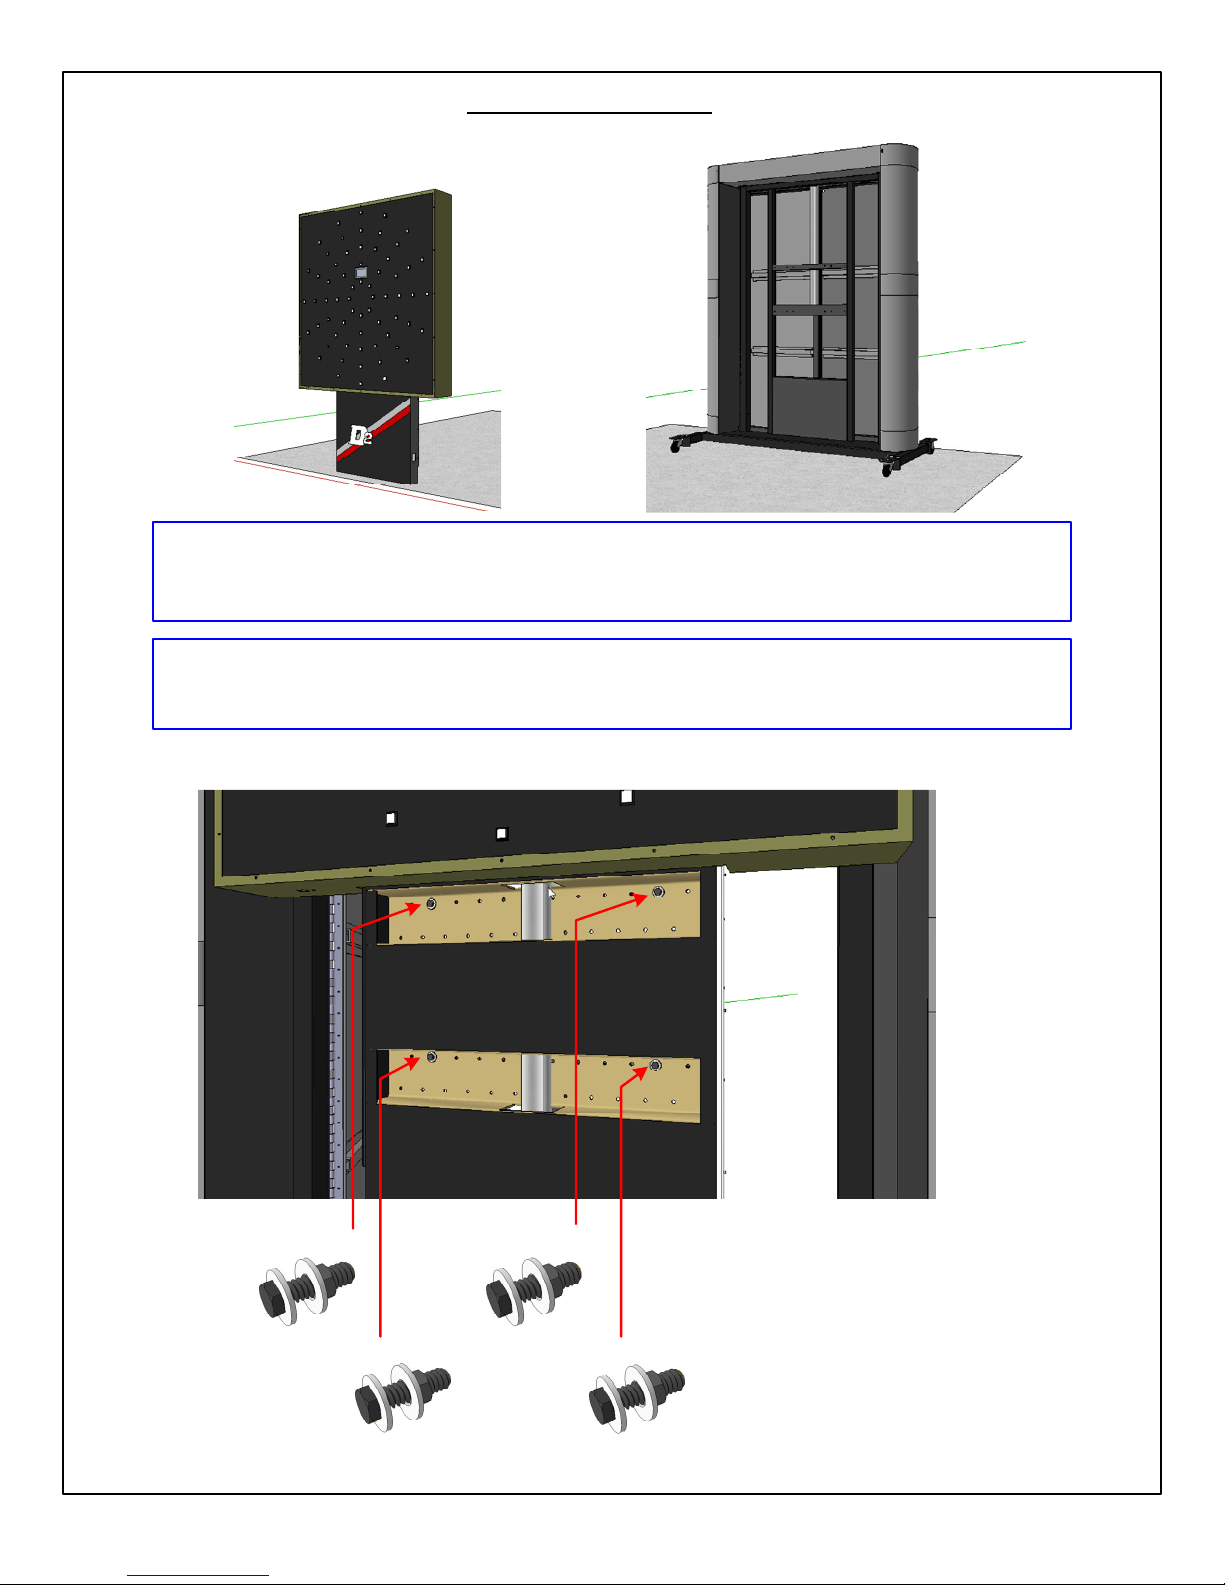
Mounting the D2/Stand
D2 StandD2 unit
Tools required: Socket Set
¼” x 1" nut and bolt set – 4
¼ washers - 8
The D2 and the Stand will have to be raised and lowered separately. It is very
important to take note when lowering or raising each unit.
Mounting Locations.
Secure #3
Secure #4
Secure #1 Secure #2
Secure the D2 and Stand using nuts and bolts with washers for each secure point.
Replace the D2 cover plate after when all the nuts and bolts are secured.
Page 2
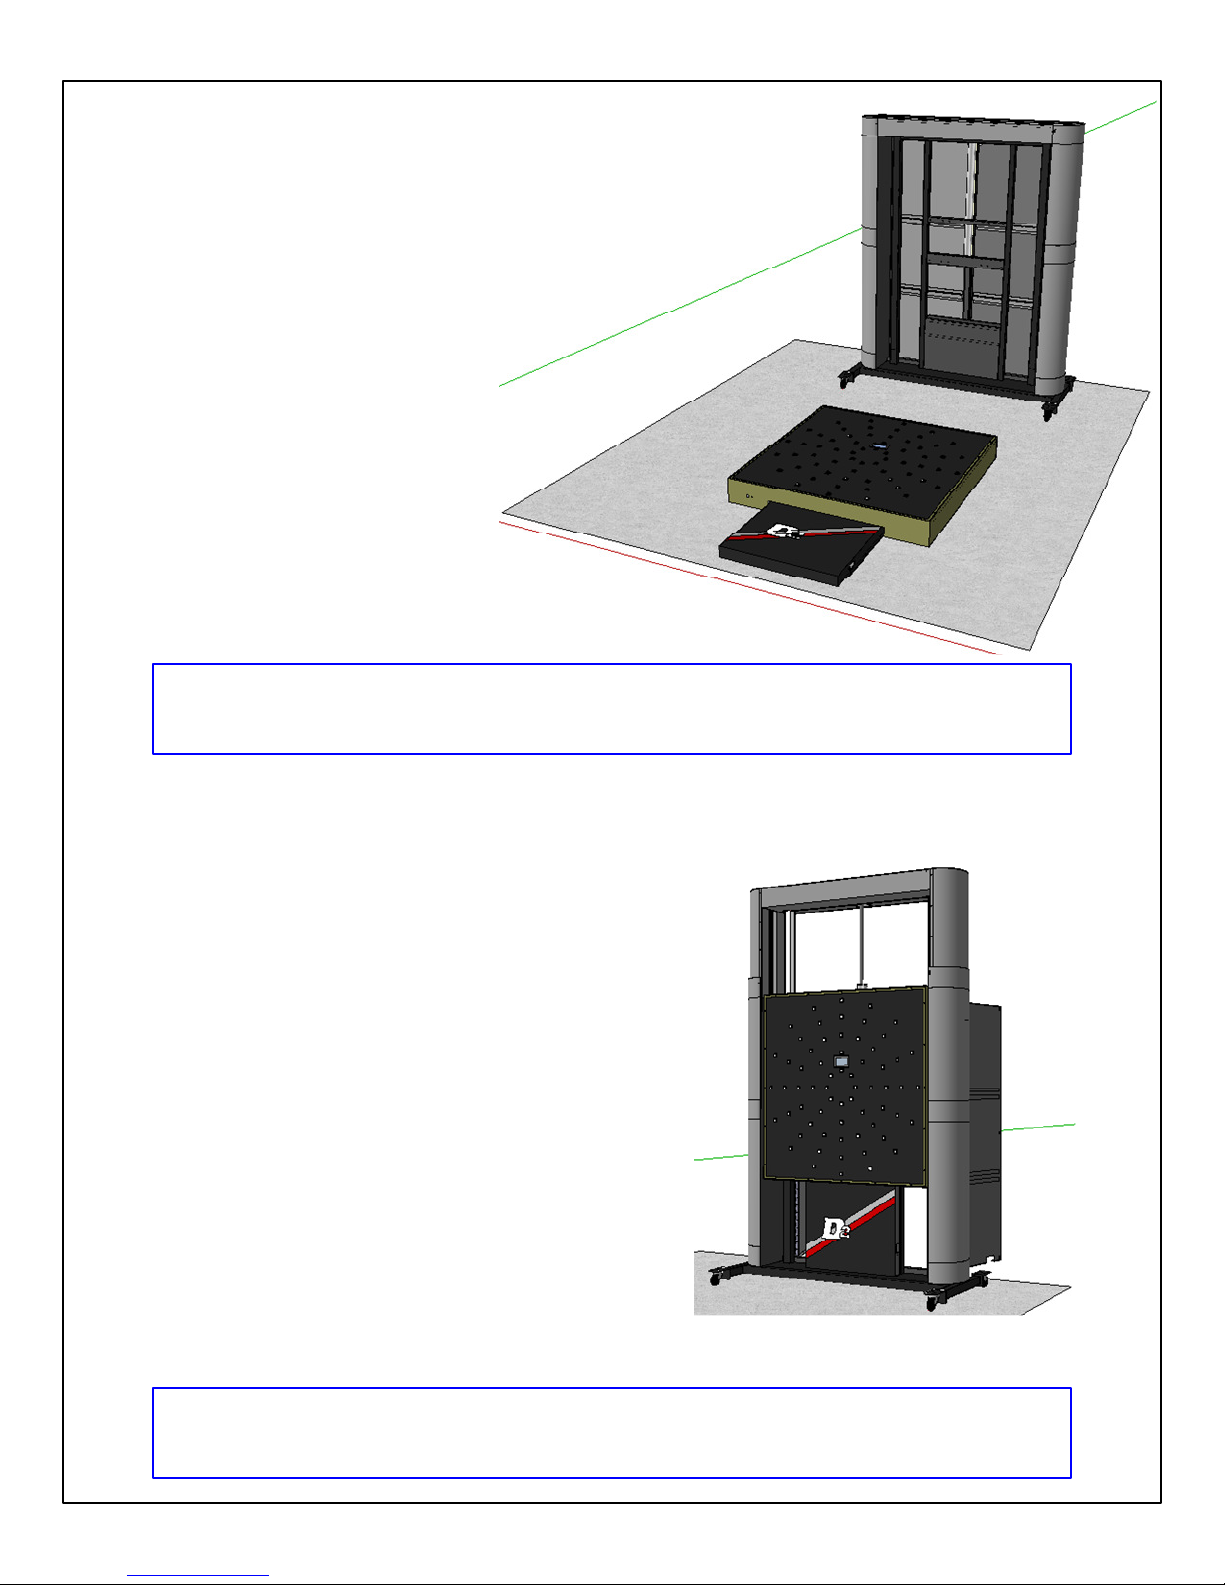
1. Unpack the D2 stand from skid, wheel to desired
mounting location. Desired area shall have a level
floor and close to an AC source. Set leveling casters
to level and stabilize rack (wheels off the floor).
2. Assemble the D2 according to the instructions
provided. Place the D2 close to the rack, laying
down as shown.
Units shall be placed where there is available access to an electrical outlet.
Refer to the Dynavision D2 assembly instructions for assembly and operation details
3. Open both rear panels with the keys supplied.
Connect the rack to an AC source. Raise the
rack to its maximum height.
4. Lift the D2 upright and place the D2 onto the
stand as shown. Holding on to the D2, connect
the the D2 to an AC source. Raise the unit to
expose the first mounting panel – next page.
To accomplish this step safely, you must employ 2 people to do the job.
An AC source is required in order to perform these instructions (units plugged in).
Refer to the Dynavision D2 assembly instructions for assembly and operation details
Page 3
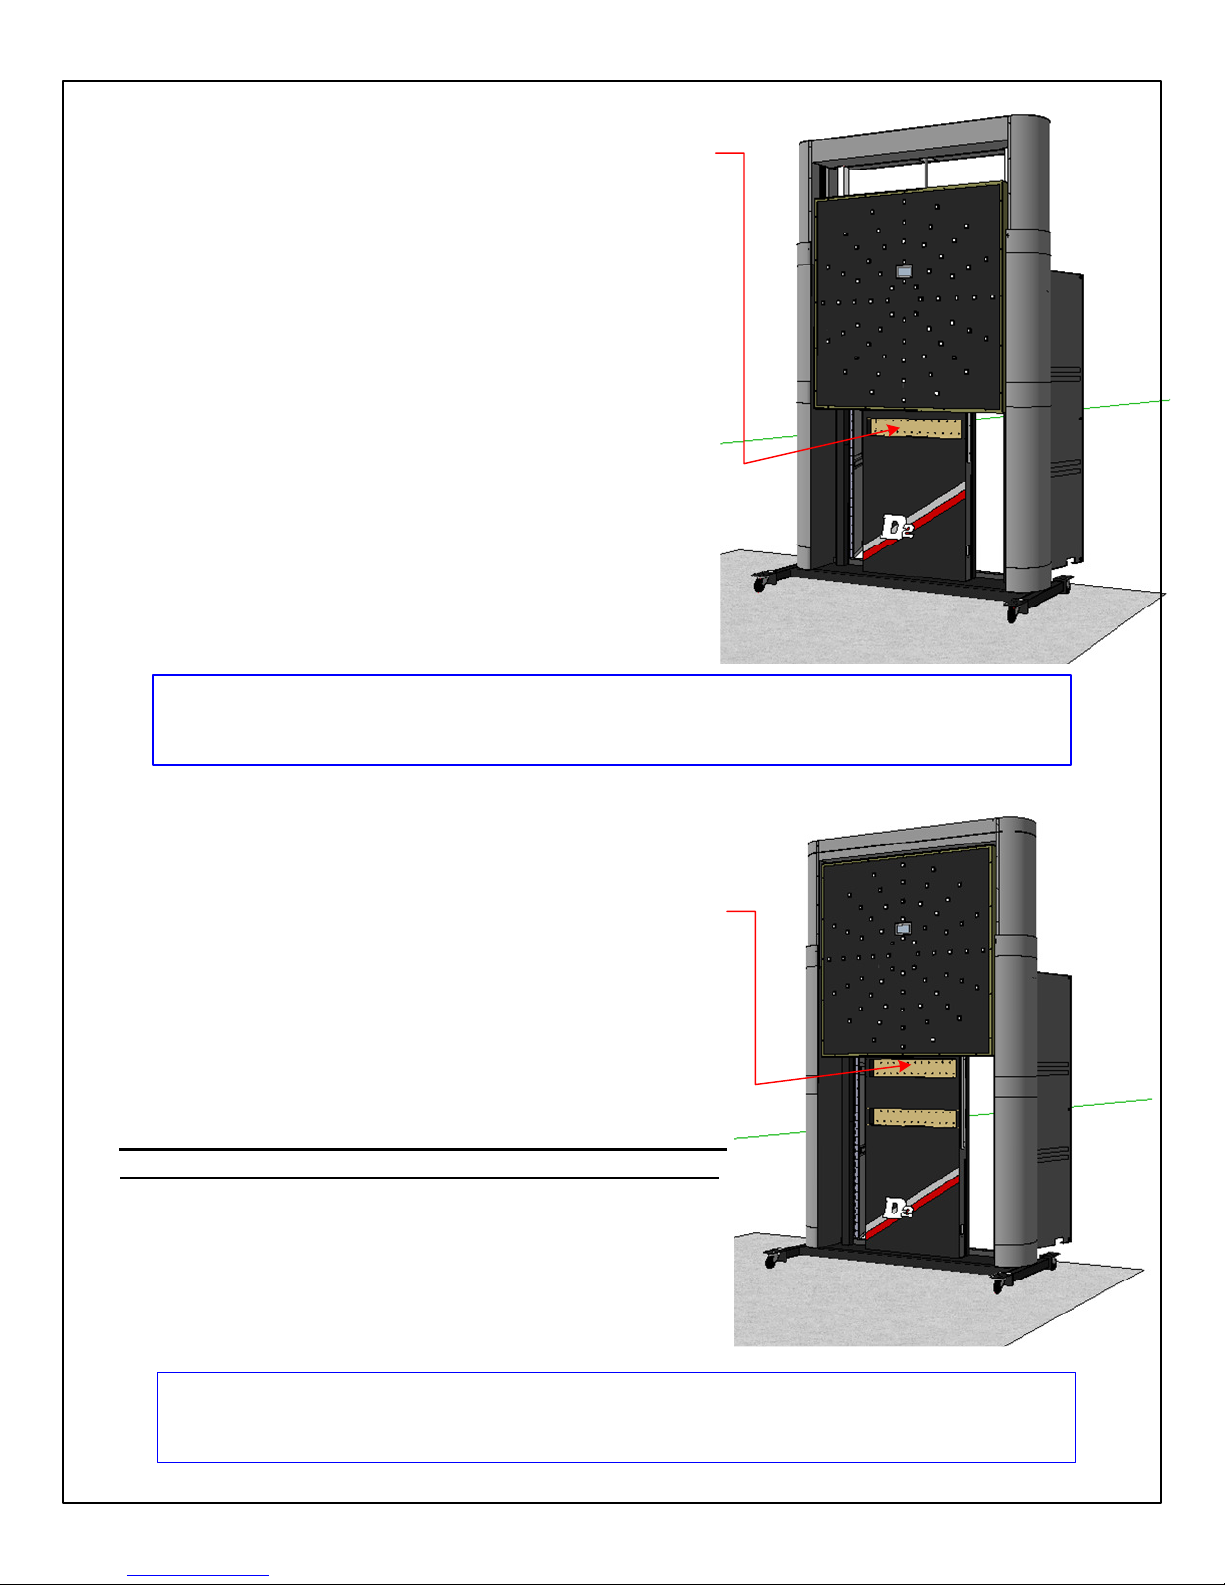
4. D2 Light Panel raised, to expose the mounting bracket/
holes. Locate matching mounting holes and secure D2
to rack using the proper sized washers, nuts and bolts.
Lifting the D2 unit requires 2 people. Bending or twisting the unit will damage the
units sliding mechanism.
Refer to the Dynavision D2 assembly instructions for assembly and operation details
5. After installing the first set of nuts and bolts, raise the D2
until the next mounting bracket/holes are visible. Locate
matching mounting holes and complete the install with
another set of washers, nuts and bolts.
Mounting the D2 to the Stand is completed when all 4
mounting locations are properly and securely bolted.
To properly secure the D2 to the stand, you must install all 4 mounting locations
provided, with ¼” mounting nuts and bolts with washers.
Refer to the Dynavision D2 assembly instructions for assembly and operation details
 Loading...