

Dynaudio Sub 3 Owner's Manual

Sub 3
Owner’s
manual

Hello
Welcome to Dynaudio Sub3
High-end low end:
true Dynaudio performance

This is
Sub3
6 Introduction
8 Important safety instructions
10 About this manual
12 Unpacking
14 Controls and connections
16 Operation
16 Connecting the subwoofer
18 Connecting a single subwoofer
19 Multiple subwoofer connections
20 Connecting loudspeakers
21 Switching the subwoofer on/off
22 Adjusting the volume (GAIN)
23 Selecting the subwoofer cut-off frequency
(SUB Lowpass)
24 Setting the phase (Phase)
25 Setting the satellite cut-off frequency
(Highpass)
26 Positioning the subwoofer
27 Impact of room-modes
28 Positioning possibilities
29 Using multiple subwoofers
30 General tips
32 Volume (GAIN)
32 Cut-off frequencies
34 Control possibilities
35 General tips
36 Specic tips
38 Troubleshooting
40 Care and maintenance
42 Warranty
43 Technical specications

76Introduction
Introduction
Dear music lover
Welcome to your new Dynaudio
subwoofer.
We’ve been designing, engineering and
creating speakers at our Denmark
headquarters since 1977, and ever since
we started we’ve been pouring advanced
R&D technology into every model.
What comes out is audio reproduction at
the highest level, making listening to
even the most familiar recordings a new
listening experience altogether. Our aim:
to reproduce exactly what was
happening in the studio at the time of the
original recording.
In fact, we’re one of very few companies
who can realize such concepts. That’s
thanks to Dynaudio Labs, our in-house
development and production facility.
It’s so advanced, in fact, that we’ve been
given TS16949 certication.
Each loudspeaker is constructed and
rigorously tested by our master-
craftsmen to these incredibly demanding
standards.
If you want to get the best possible
performance from them (that’s why you
bought Dynaudio in the rst place, after
all), take a look at the information on the
following pages. By considering our tips
and suggestions, you’ll be recreating
what our engineers do in our testing
rooms: extracting every ounce of detail
and nuance in the music… and then
enjoying every second of it.
We wish you many years of enjoyment
with your new subwoofer.
Dynaudio

98
Important safety instructions
Important
safety
instructions
12. Use only with the cart, stand,
tripod, bracket, or table specied
by the manufacturer, or sold with
the apparatus. When a cart is used
use caution when moving the cart/
apparatus combination to avoid
injury from tip-over.
13. Unplug this apparatus during
lightning storms or when unused for
long periods of time.
14. Refer all servicing to qualied service
personnel. Servicing is required
when the apparatus has been
damaged in any way, such as power-
supply cord or plug is damaged,
liquid has been spilled or objects
have fallen into the apparatus, the
apparatus has been exposed to
rain or moisture, does not operate
normally, or has been dropped.
15. WARNING: To reduce the risk of
re or electric shock, this apparatus
should not be exposed to rain or
moisture and objects lled with
liquids, such as vases, should not be
placed on this apparatus.
16. To completely disconnect this
equipment from the mains,
disconnect the power supply cord
plug from the receptacle. The mains
plug of the power supply cord shall
remain readily operable.
WARNING
Risk of Electric Shock. Do Not Open.
To reduce the risk of electric shock, do
not remove the rear panel and do not
expose the apparatus to rain or moisture.
No user serviceable parts inside. Refer
servicing to qualied personnel.
1. Read these instructions.
2. Keep these instructions.
3. Heed all warnings.
4. Follow all instructions.
5. Do not use this apparatus near water.
6. Clean only with dry cloth.
7. Do not block any ventilation
openings. Install in accordance with
the manufacturer’s instructions.
8. Do not install near any heat sources
such as radiators, heat registers,
stoves, or other apparatus (including
ampliers) that produce heat.
9. Do not defeat the safety purpose
of the polarized or grounding-type
plug. A polarized plug has two
blades with one wider than the
other. A grounding type plug has
two blades and a third grounding
prong. The wide blade or the third
prong are provided for your safety.
If the provided plug does not t into
your outlet, consult an electrician for
replacement of the obsolete outlet.
10. Protect the power cord from being
walked on or pinched particularly at
plugs, convenience receptacles, and
the point where they exit from the
apparatus.
11. Only use attachments/accessories
specied by the manufacturer.

10 11
About this manual
About this manual
Signal words
NOTICE
Indicates in combination with a safety
sign a hazardous situation which, if
not avoided, will result in damage to
equipment.
CAUTION
Indicates in combination with a safety
sign a potentially hazardous situation
which, if not avoided, could result in
minor or moderate injury or damage to
equipment.
WARNING
Indicates in combination with a safety
sign a potentially hazardous situation
which, if not avoided, could result in
death or serious injury.
DANGER
Indicates in combination with a safety sign
a hazardous situation which, if not avoided,
will result in death or serious injury.
How this operating manual is
structured
This operating manual is divided in three
main chapters, in which you can nd all
the information needed to operate the
Dynaudio Sub3 successfully:
• Before operation: Learn all
about unpacking and connecting
the subwoofer. The controls and
connections on the rear panel are
also described here.
• Operation: In this chapter you will
learn how to operate the subwoofer
in general and how to position it
properly for optimum performance.
• Optimizing settings/
Troubleshooting: Here detailed
explanations can be found how to
optimize the settings in order to
achieve the maximum sound quality.
You will nd this chapter titles on top of
each page for your quick navigation.
Safety signs
In this operating manual following signs
and symbols are used.
General safety sign
The exclamation point within an
equilateral triangle is intended
to alert the user to the presence
of important operating and
maintenance (servicing)
instructions in the literature
accompanying the product.
Dangerous voltage
The lightning ash with
arrowhead symbol within
an equilateral triangle is
intended to alert the user to
the presence of uninsulated
“dangerous voltage” within
the product’s enclosure that
may be of sufcient magnitude
to constitute a risk of electric
shock to persons.
1312
Unpacking
Check that the contents are
complete
• Subwoofer: The factory-set power
requirements (refer to label on rear
of subwoofer) should correspond for
the region where the subwoofer was
purchased. Refer also to chapter
“Important Safety Instructions” on
page 8.
• Front bafe grille
• AC mains lead. The supplied
lead should be suitable for the
region where the subwoofer was
purchased.
• Owners manual
Grille
The subwoofer can be operated without
the grille. However, it is recommended
that the grille is mounted during
normal use to help prevent accidental
damage or dirt settling on the cone of
the loudspeaker. With subwoofers, the
inuence of the grille on the sound is
virtually negligible.
To remove the grille:
Gently pull the grille at all corners.
To t the grille:
Line up the studs with the
corresponding front bafe holes.
Gently push the grille in at all
corners.
To nd the suitable position for the Sub3
in your listening room, please read the
chapter “Positioning the subwoofer” on
page 20.
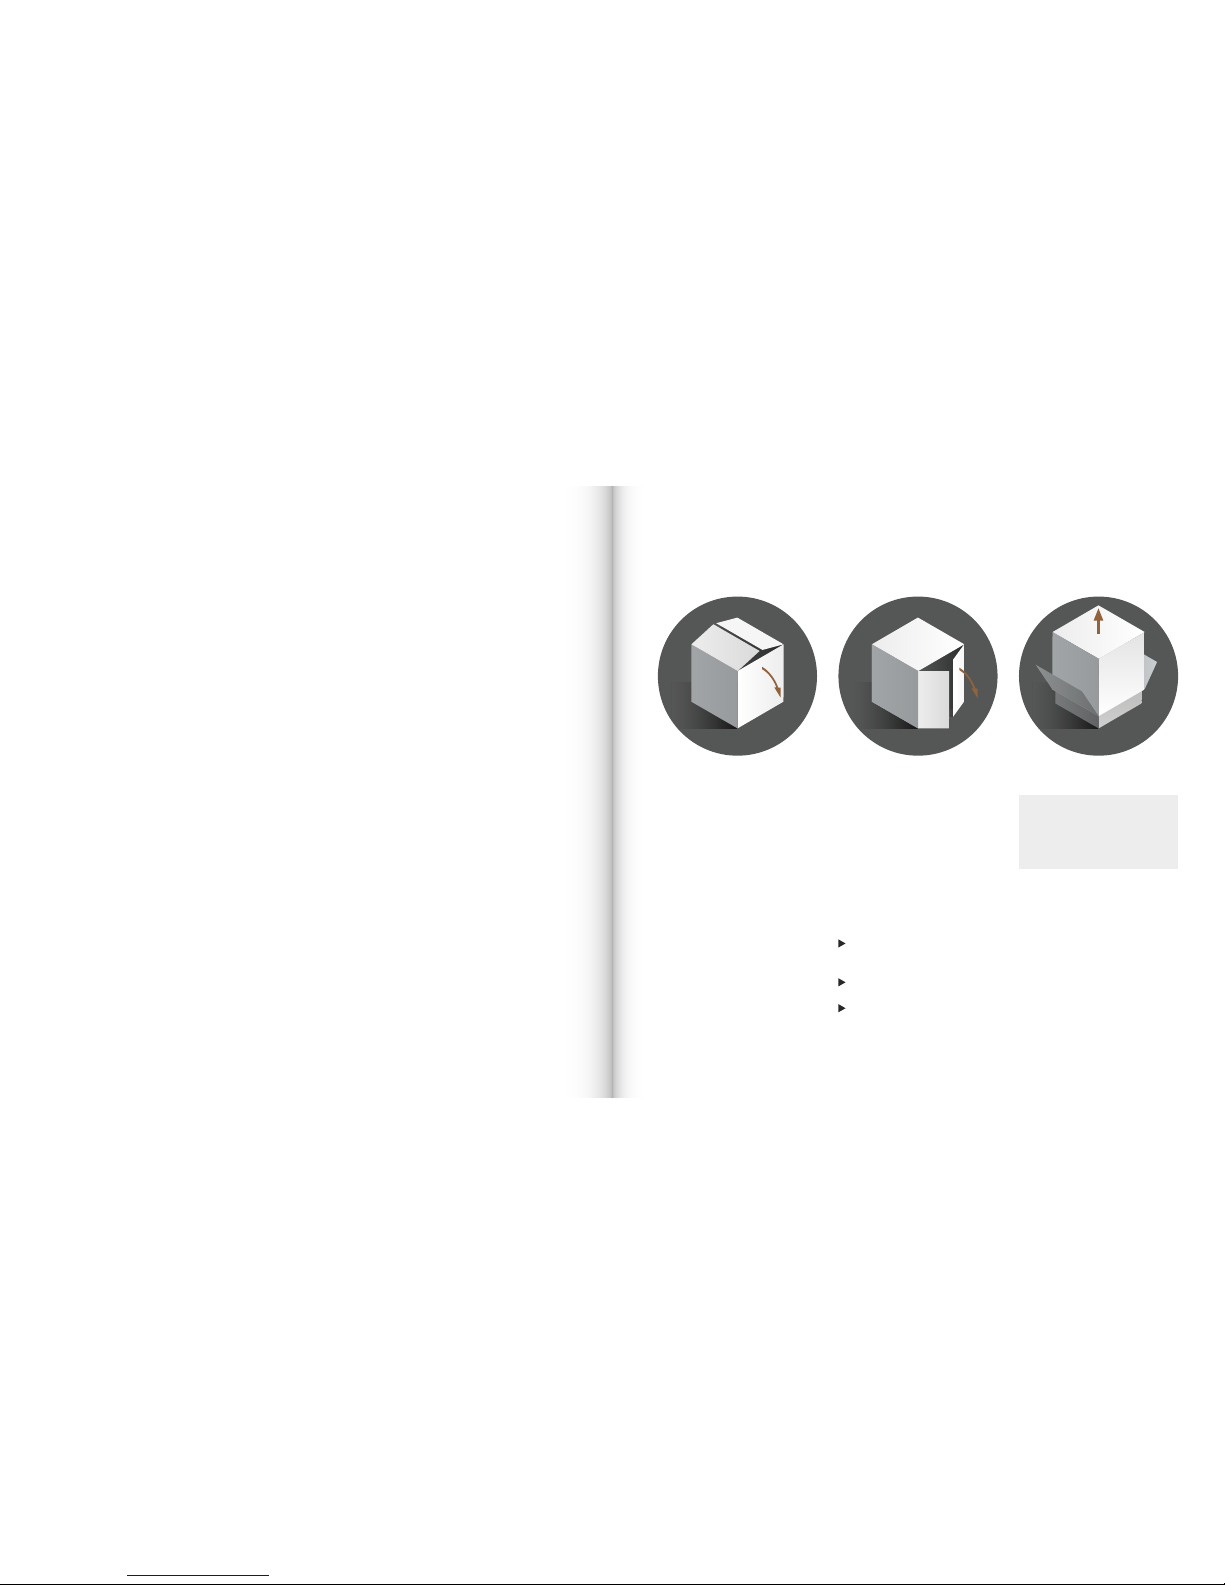
To unpack the subwoofer
1. Unpack the subwoofer on a clean,
even and soft area; oor carpeting is
very suitable.
2. The packaging should be opened
from the top. Remove all accessories
that come packed with the
subwoofer. Do not remove the top
part of the protective material.
3. With the protective material still in
place but with accessories removed,
carefully tilt the packaging on its side
and tilt again to turn it upside-down.
Ensure that no part of the top-cover
is obstructing the opening at the top.
4. The outer packaging can now be
lifted away from the subwoofer itself.
Remove the protective material that
now is on top. Through the bag you
can now see the underside of the
subwoofer.
5. Open the bag and remove such from
around the base of the subwoofer.
6. Again, carefully tilt the subwoofer
on its side and again to turn it onto
its feet. Note that the top part of the
protective material will now come off
easily so ensure that the subwoofer
does not drop or slide away in the
process.
Unpacking
Note
Be careful when mounting the
grille not to touch the cone of the
loudspeaker itself.
1 2 3
 Loading...