

Page 1
English
Operating Manual
English
R
Page 2
Important remarks concerning the manual
2
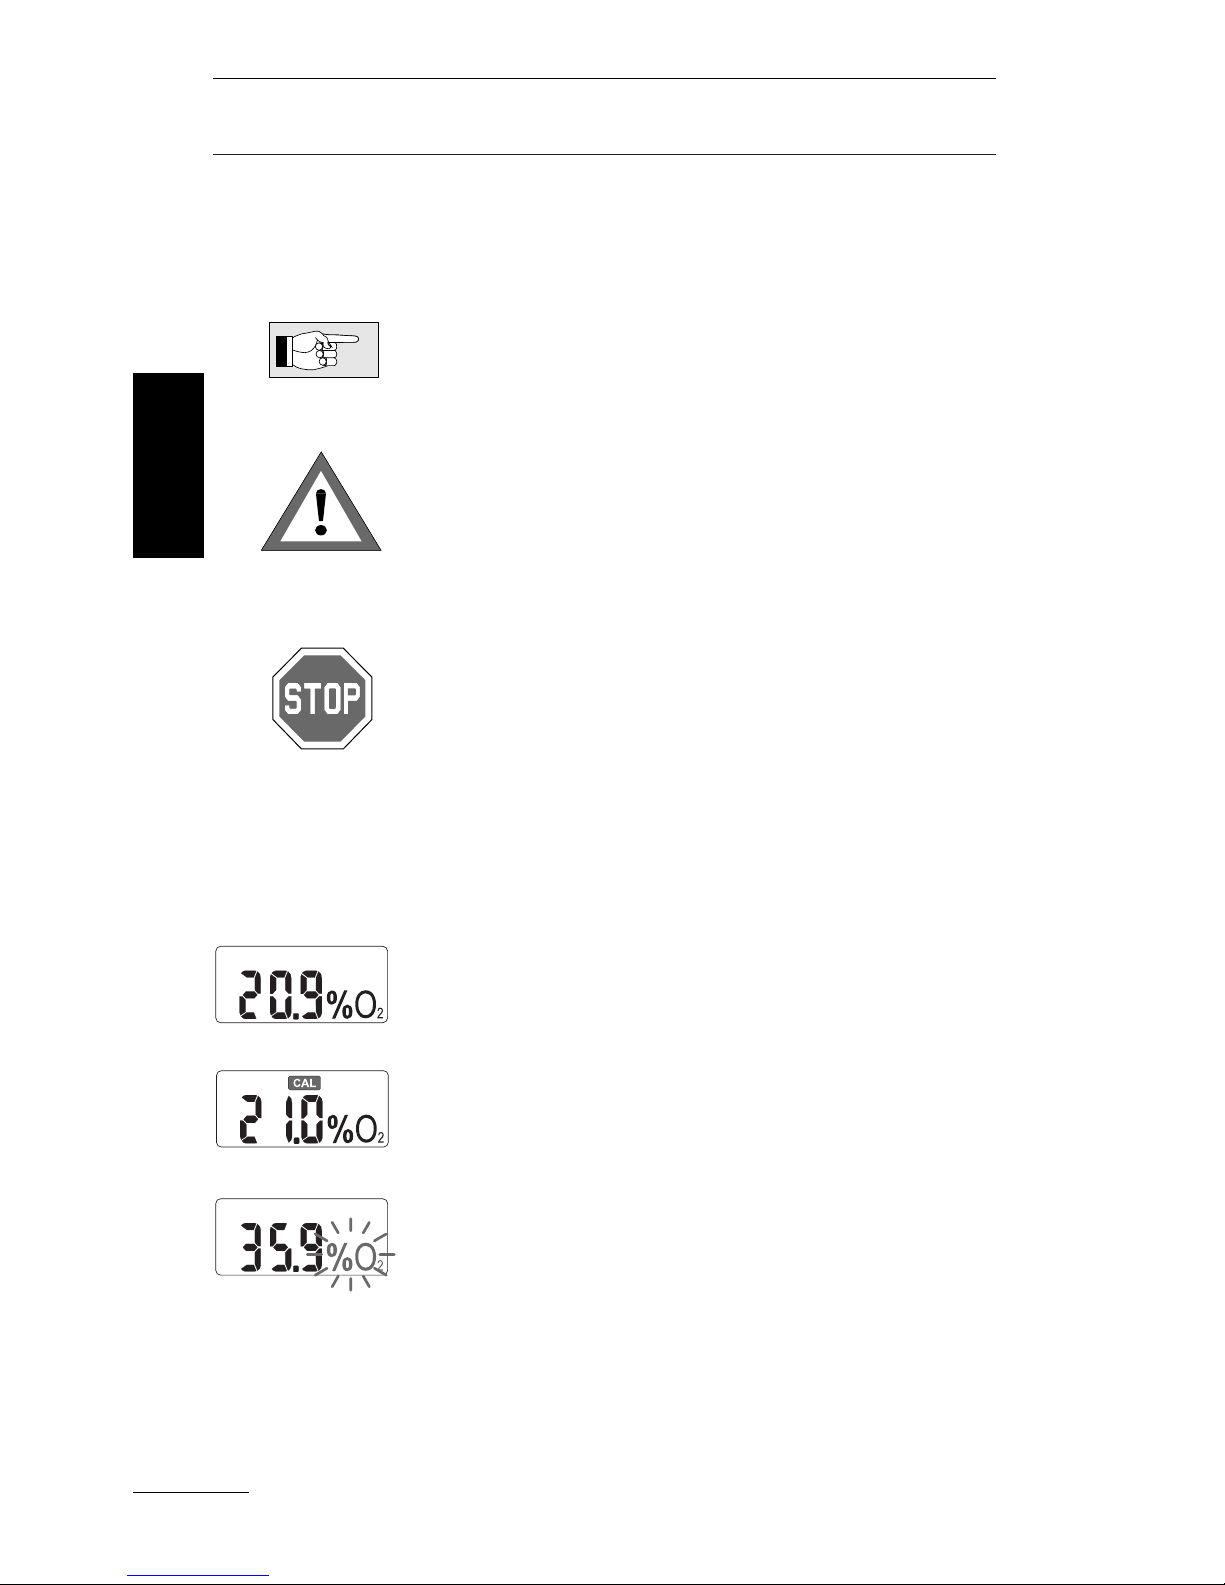
This operating manual makes use of the following icons to indicate especially important
comments:
Information and tips which are important for optimal use of the OxySpy.
Indicates information about details which are
important to prevent a risky situation.
Indicates a potentially hazardous situation
which, if not avoided, could result in death or
serious injury.
The following symbols are used in the operating
manual:
LCD display samples
Grey or red: part of the display actually being
described
Flashing part of the display
Remarks
Attention!
Danger!
English
Page 3

List of chapters
3
Introduction 4
Warnings and Safety Considerations 5
OxySpy Parts List 6
The OxySpy 6
Set Up Procedure / Maintenance
Before first use 6
Switching the OxySpy on and off 7
Opening the OxySpy 7
Fitting the
O2sensor 8
Fitting the battery 10
Calibration 11
Measurement 14
Service Indications / Trouble Shooting
CAL symbol is displayed 16
O2sensor not connected 16
O2sensor symbol is displayed 17
Battery symbol is displayed 18
O2% indication not stable in the air 18
O2sensor 19
Maintenance and Storage 20
Operational limits 20
Technical Information 20
Limited Warranty 21
Notes 22
FCC / Copyright © / Waste disposal 23
Warranty paper 24
English
Page 4

Introduction
4
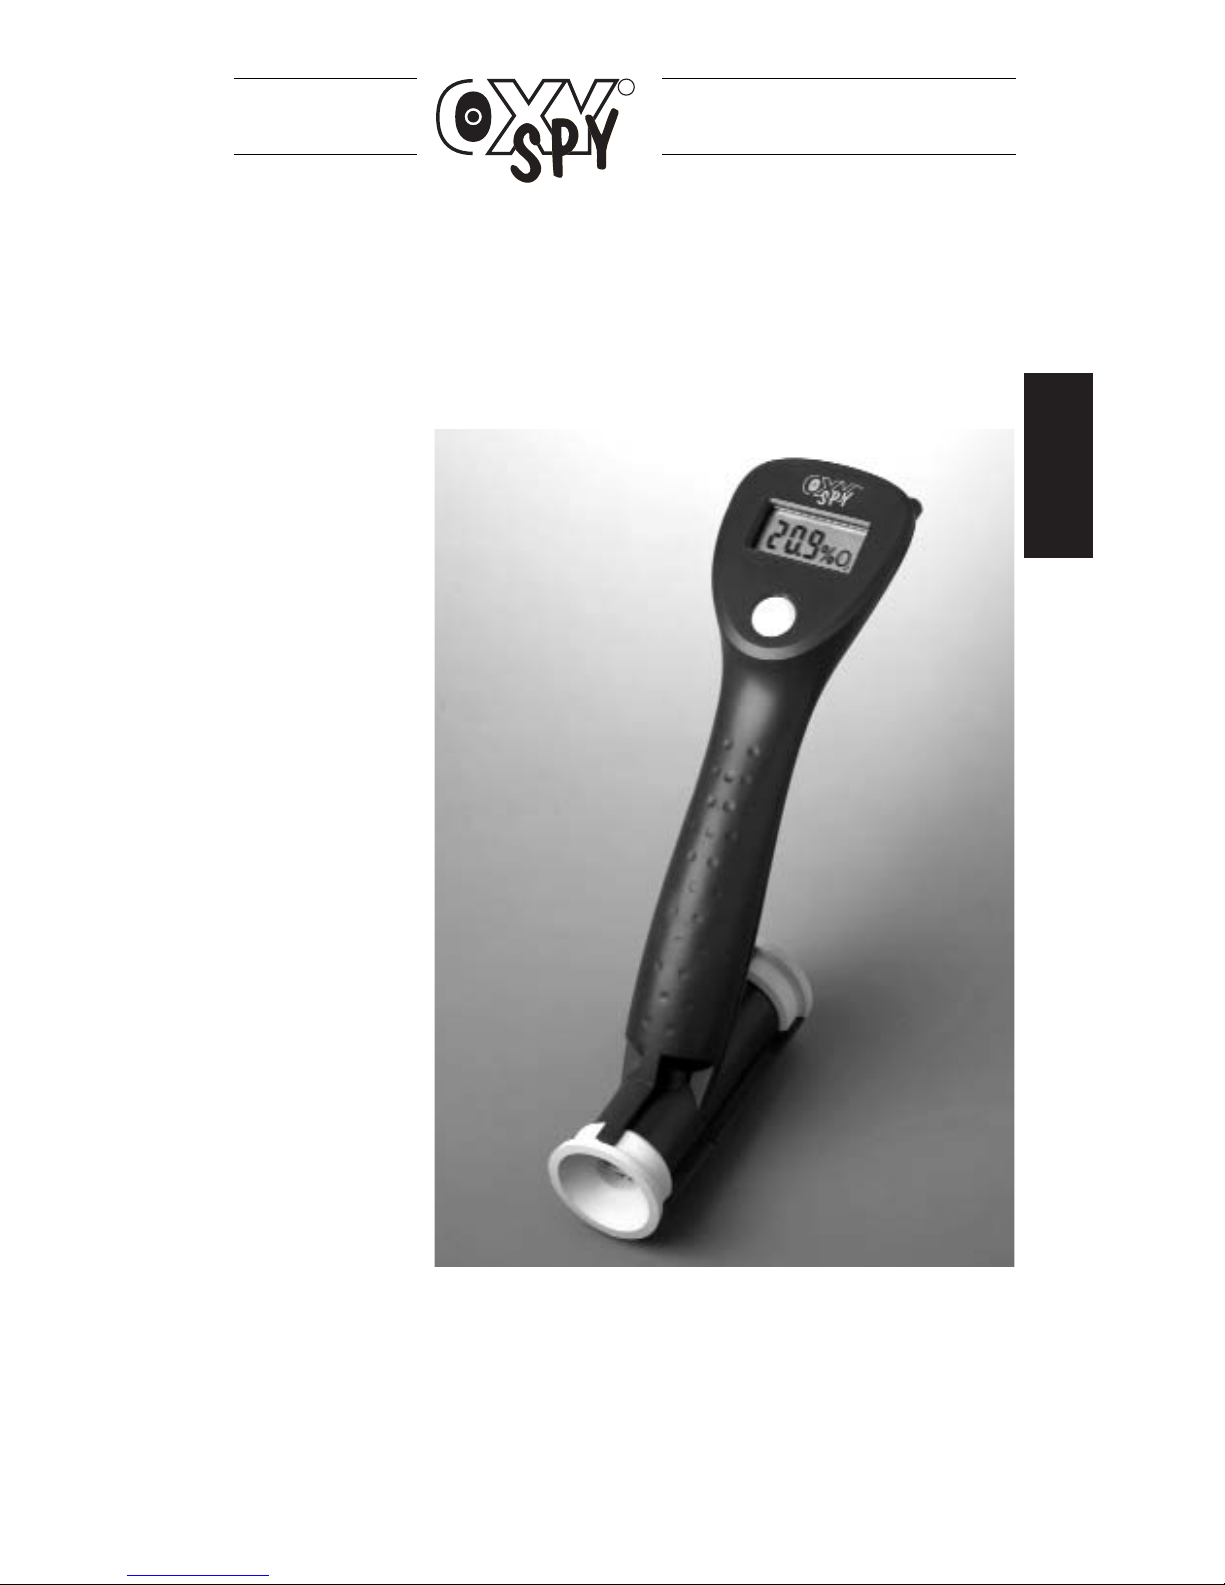
The OxySpy is a portable Oxygen Analyser for
the trained and certified mixed gas diver. The
OxySpy can be held directly against the slightly
opened diving tank and displays within seconds
the oxygen percentage of the gas.
By pressing the push button the display can be
frozen. By pressing the push button once more
the maximum operation depth (MOD) is displayed. The calibration of the OxySpy is as easy:
The unit detects itself whether the calibration is
made in air or with pure oxygen. A calibration
can only be terminated if the
O
2
percentage does
not change during the calibration.
If the OxySpy is not used, it switches off automatically.
Thanks to its ergonomical design and its single
button operation, it can be operated by one
hand.
The OxySpy displays the sensor or battery symbol, if the
O2sensor or the battery are used up.
Both are easily changed by the user.
English
Page 5

Warnings and Safety Considerations
5
• If you are unsure about the displayed
O
2
percentage: Repeat the measurement or check
the value with another system. For measurements after filling the tank and before diving
always use two different measuring units.
• Check the OxySpy in air before each series of
measurements. If necessary, calibrate the
OxySpy. See page 5.
• Using pure oxygen or oxygen enriched gas
needs special safety measures! Please consider the general safety considerations of using
pure oxygen or oxygen enriched gases!
• If the
O2sensor symbol is shown, the display-
ed values can be wrong.
• If the diver uses the wrong value of the gas
mixture he/she or the dive computer could calculate insufficient decompression time (EAD
etc.) or oxygen toxicity (MOD, CNS% etc.).
Both situations could result in death or serious
injury.
• The maximum partial pressure of oxygen
(pp
O2limit) necessary for the calculation of the
maximum operation depth (MOD) should not
exceed 1.6 bar (the max. value for sports
divers). Higher values may result in death or
serious injury.
• Avoid risky situations which are marked in the
this manual with and .
• Do not use the OxySpy in pressure chambers.
• Do not submerge the OxySpy in water.
• The battery and the
O
2
sensor contain corrosi-
ve liquid. If the battery or
O
2
sensor leaks: Do
not let the liquid come into contact with skin,
eyes or mouth. If it does, flush the affected
area with water for at least 15 minutes. Consult
a doctor. Do not inhale vapor. Immediately
clean the leakage from the instrument with a
soft towel and dispose of the towel.
Important
safety considerations
English
Page 6
English
1 OxySpy with case
1 OxySpy Operating Manual
1 Battery CR 2430
1
O2Sensor in a sealed package
1 Philips-type Screwdriver
The supplied battery and the
O2 sensor have to
be fitted. Similar to the finite life of a battery, the
O2sensor has a certain lifetime. From the first
time that a
O
2
sensor contacts oxygen it starts to
be used up. To keep the lifetime of the
O
2
sensor,
its airtight package should only be opened before
the sensor is used the first time.
OxySpy Parts List / The OxySpy / Set Up
6
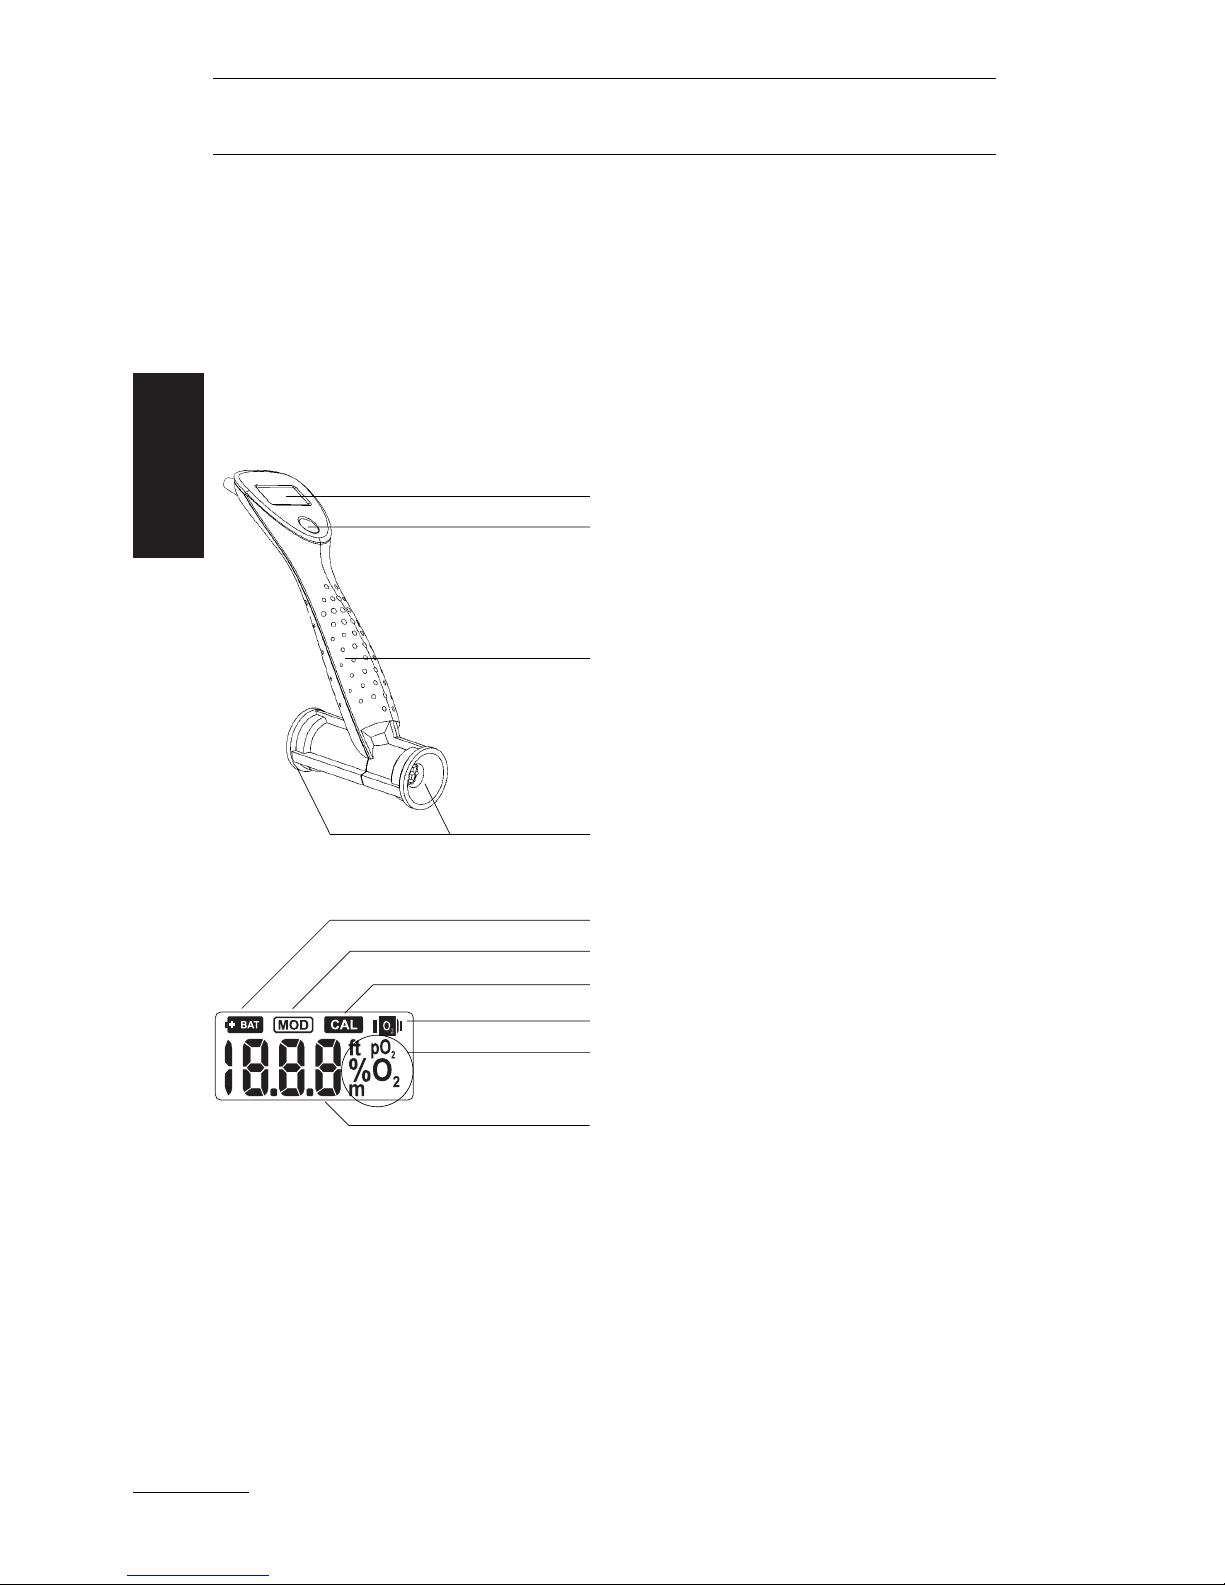
OxySpy
Parts List
The
OxySpy
Before first
use
Display
Push button
Handgrip
Gas Input /Exit openings
with rubber rings
Battery symbol
MOD symbol
(maximum operation depth)
Calibration symbol
O
2
Sensor symbol
Symbols for ppO
2
,% O2, mtr. and ft.
O
2
value, ppO2, MOD, messages
Page 7
English
Set Up Procedure / Maintenance
After a short push on the button, the OxySpy will
display the measured
O
2
percentage. If need be,
the unit indicates that it requires calibration or
indicates that no
O2sensor is connected.
The OxySpy switches off automatically, at the
latest 30 minutes after switching on. The unit
cannot be switched off manually.
• Open the OxySpy only in a clean and dry area
away from water, dust and other contaminants.
It prevents soiling and damage to the electronics and the mounting ring.
• Open the OxySpy only if the battery or the
O
2
sensor must be replaced.
• Do not touch the electronics.
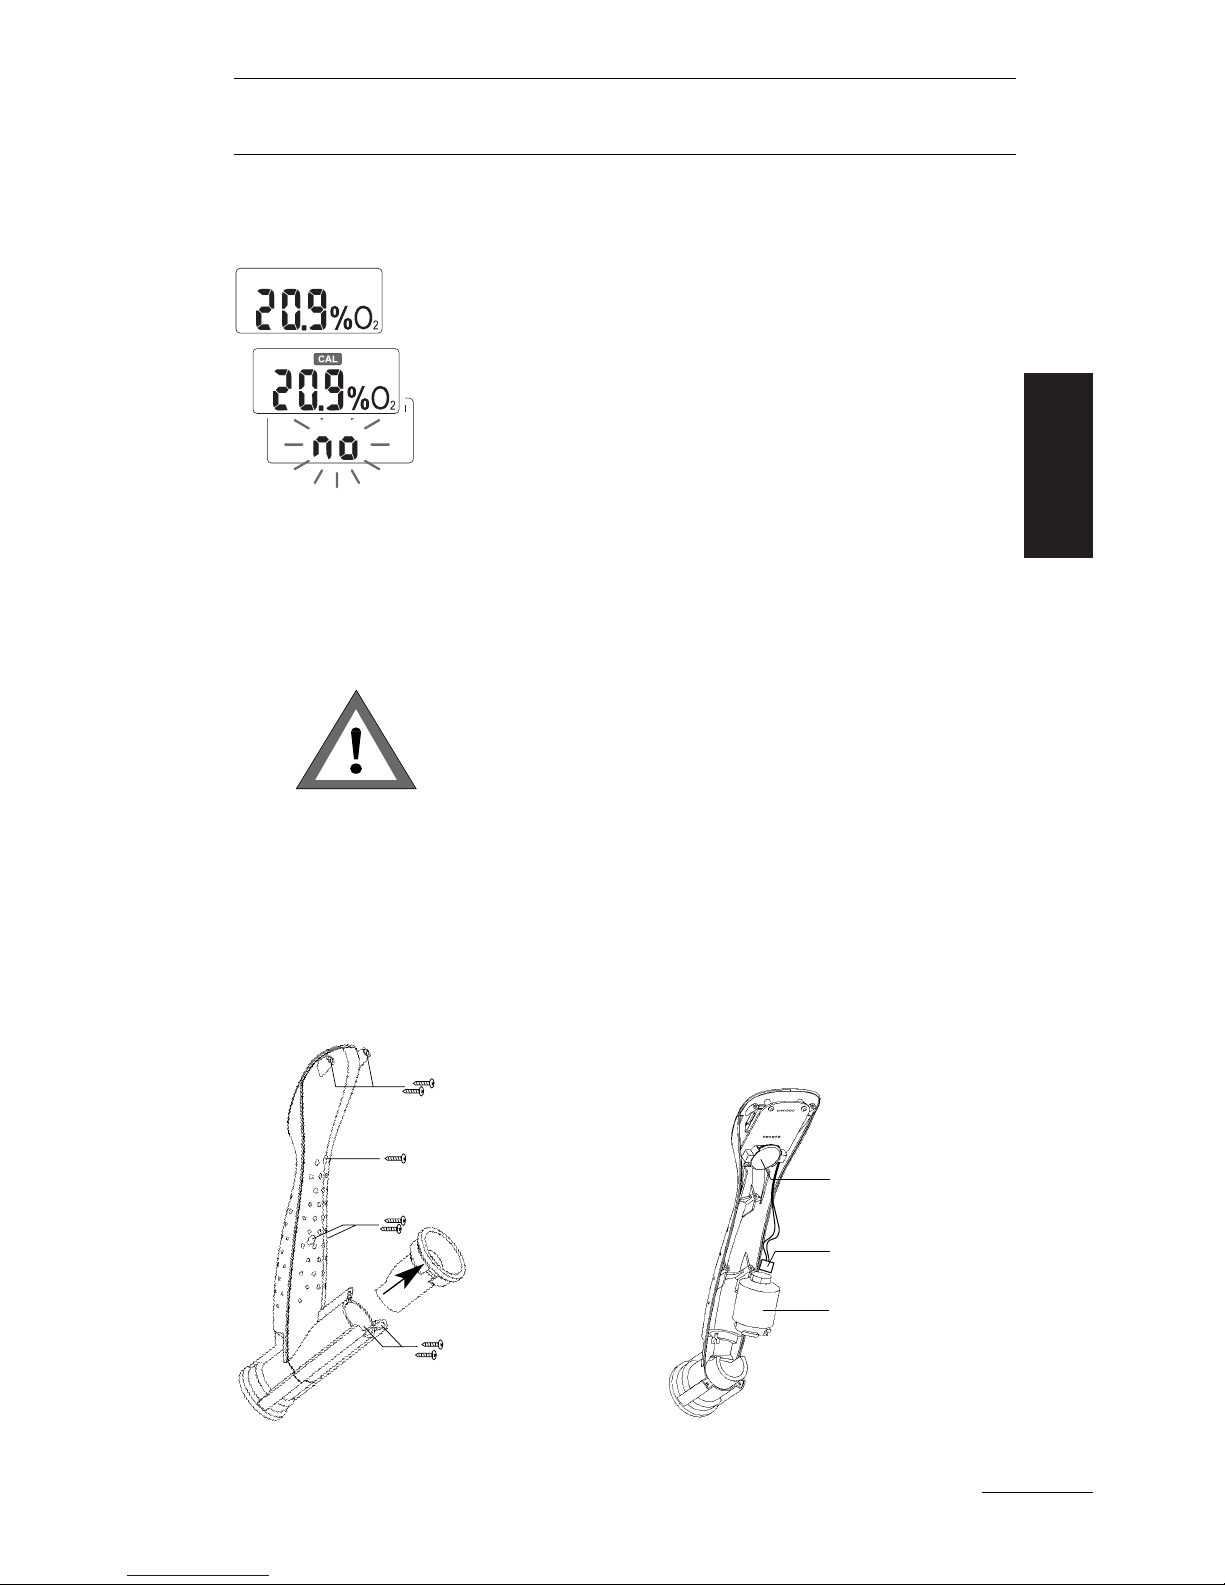
1. Pull the rear rubber ring off the housing.
2. Remove the 7 screws with the enclosed scr-
ewdriver and separate the two parts of the housing.
Switching
on and off
7
Opening
the OxySpy
Battery
O2Sensor
Plug
Page 8
Set Up Procedure / Maintenance
8
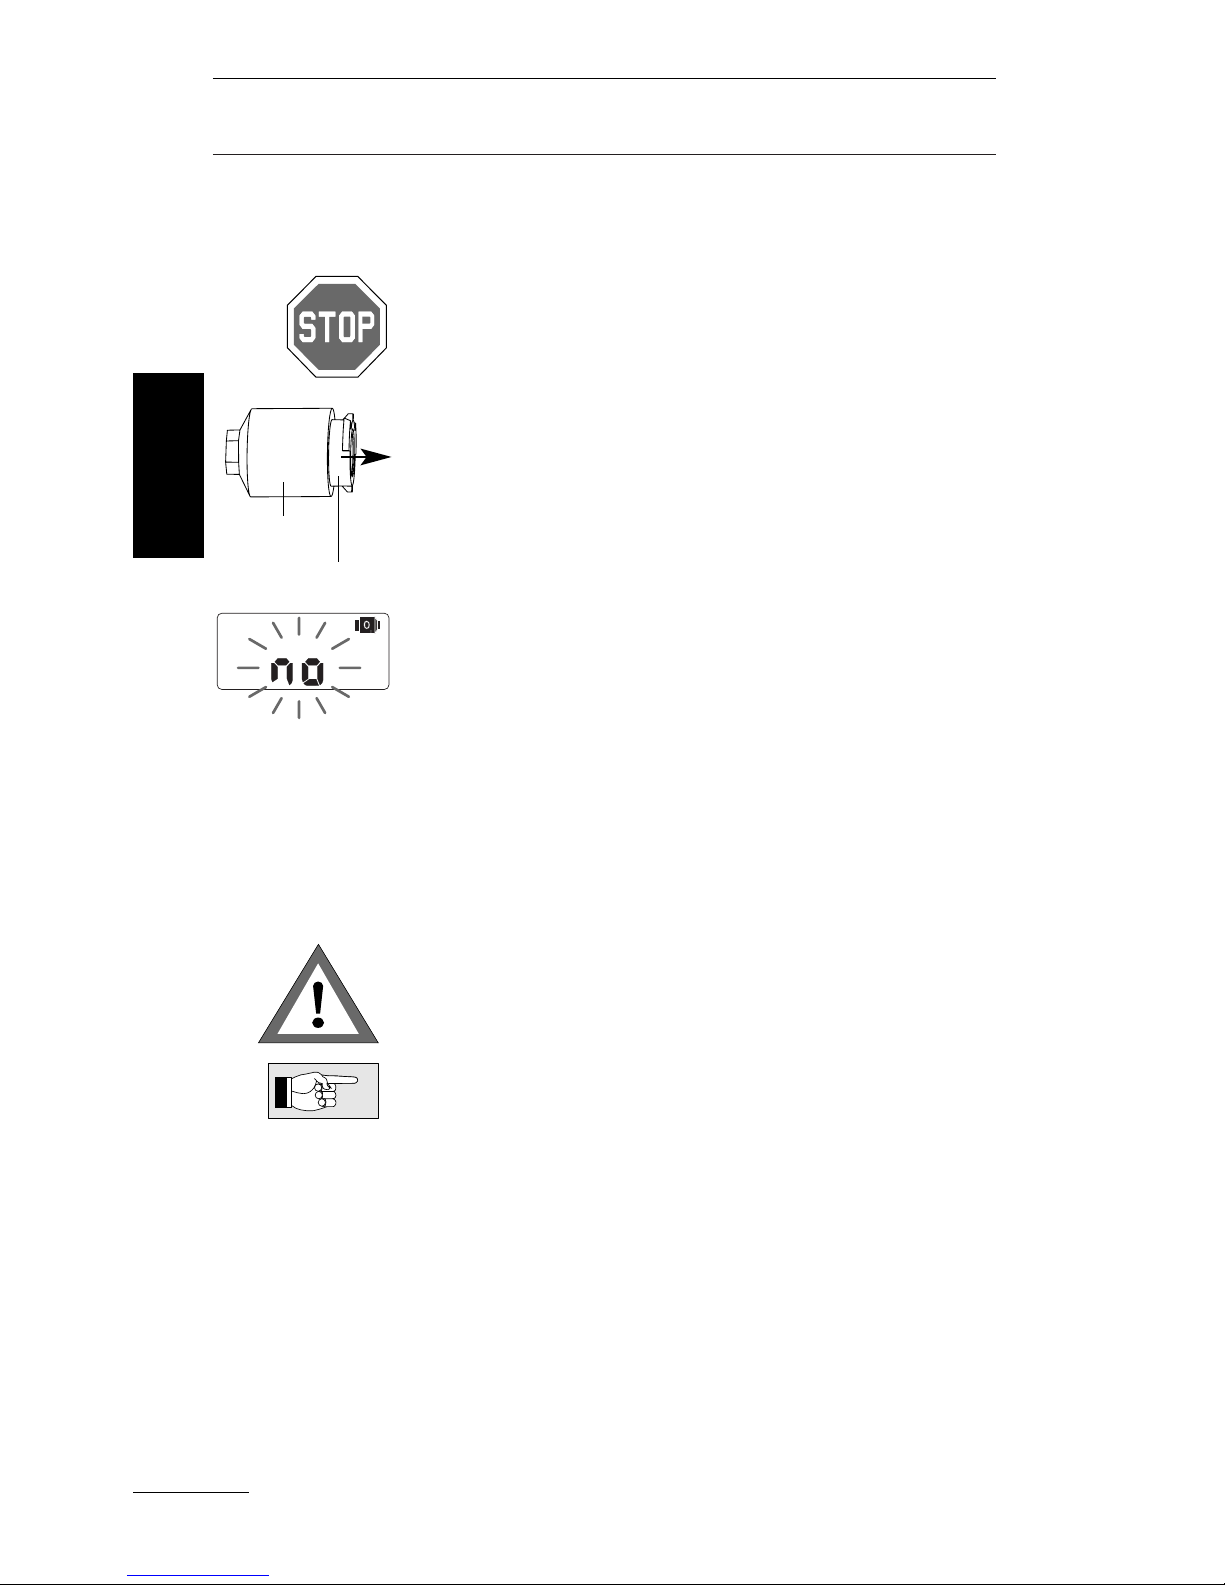
1. Open the rear side of the housing according
to the chapter "Opening the OxySpy" (page 7).
Consider the safety considerations on page 5
and the ones on the
O2sensor and its package.
2. Take the
O2sensor (if there is already one) out
of its position and pull off the mounting ring.
If the
O2sensor is disconnected while the unit is
on, the display shows the word "no" and the
O
2
sensor symbol.
In this situation the OxySpy switches off after 5
minutes automatically.
3. Carefully pull the plug out of the socket. The
tab, which stops the plug from being disconnected, has to be pulled back while pulling out the
plug.
Do not pull on the wires!
• Do not open the airtight container before you
need to use the
O
2
sensor.
• After opening the sealed package the
O
2
sensor needs 30 minutes start-up time. This
means that calibration cannot be made until 30
minutes after opening the package. See "Calibration" page 11.
• Take care of the environment; properly dispose
of used
O
2
sensor! The sensor should be dis-
posed of according to local laws.
Fitting the
O2Sensor
English
O2sensor
Mounting ring
Page 9
English
9
Set Up Procedure / Maintenance
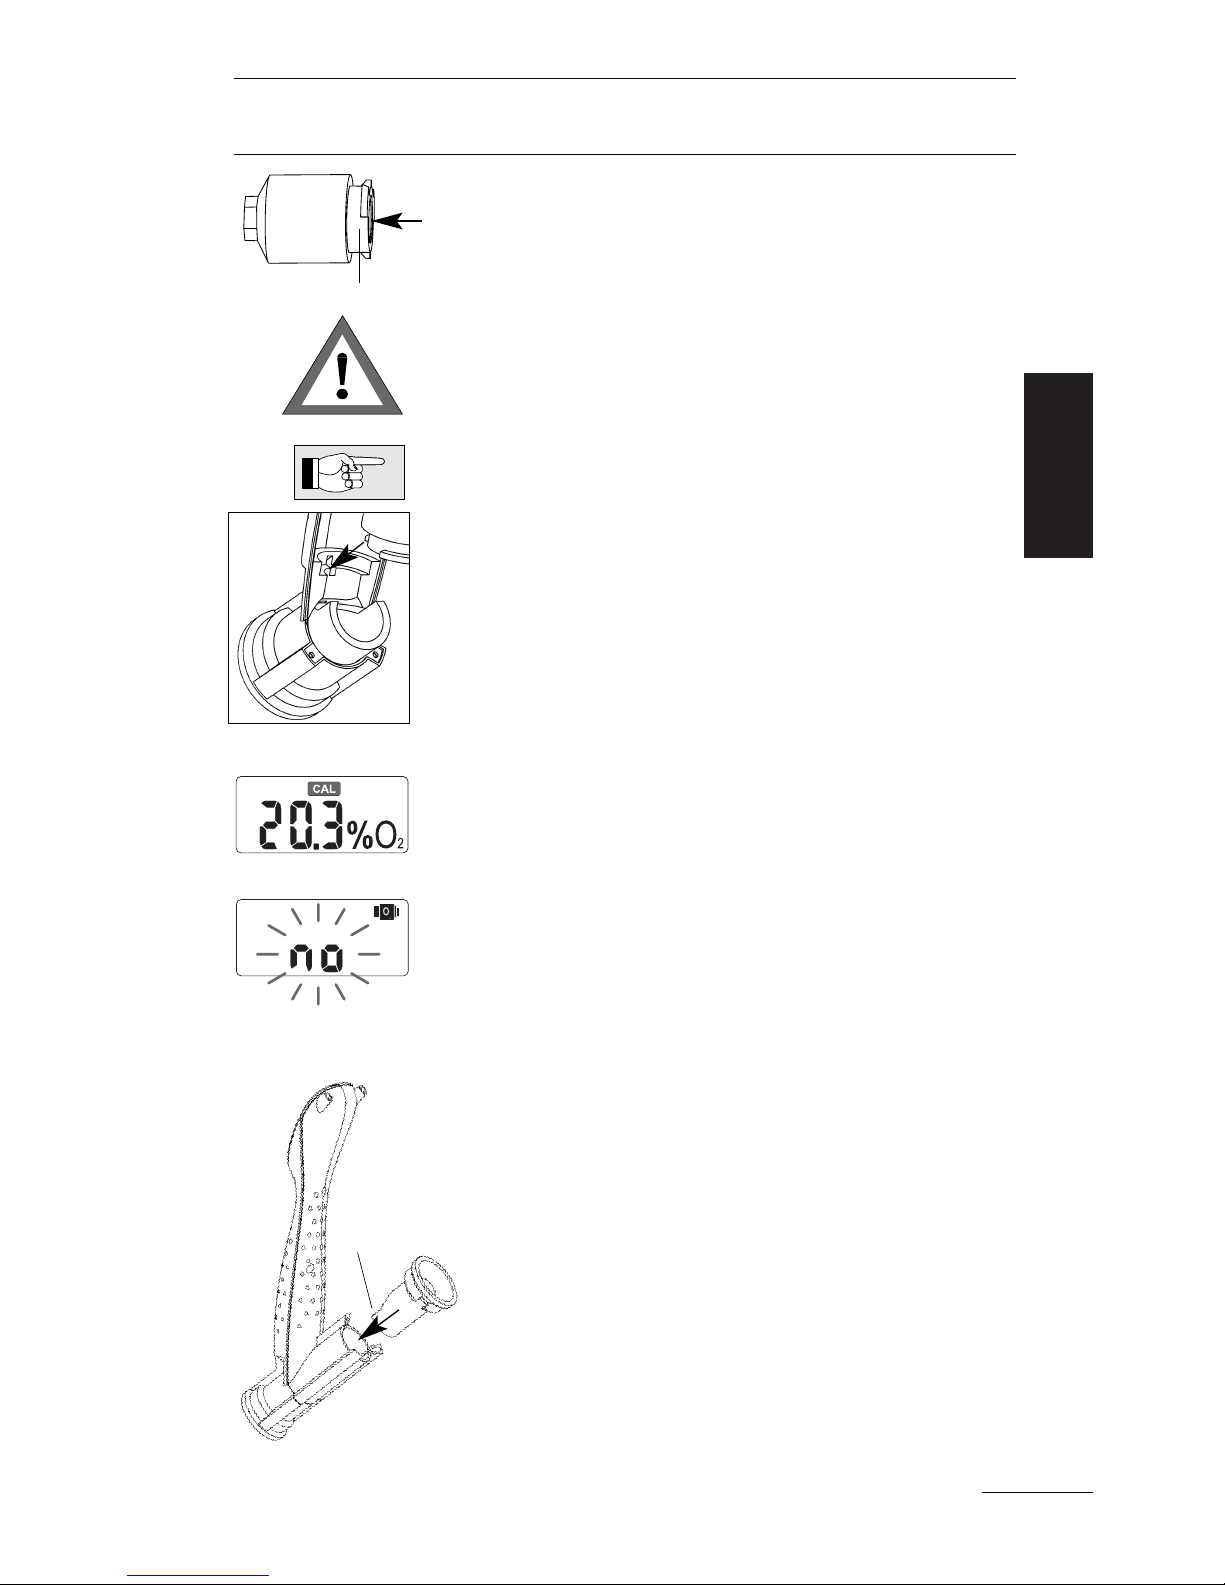
4. Take the new
O2sensor out of its package.
Take the O ring off the
O2sensor (if there is any
O ring).
Attach the mounting ring by twisting it onto the
O2sensor, exactly as shown in the picture on the
left. Maneuver until it fits snugly.
Write the date of the fitting onto the
O
2
sensor.
5. Insert the plug into the socket of the
O
2
sensor. Make sure that the tab, that secures the
plug, is back in place. The lug of the mounting
ring must fit into the notch of the housing.
6. If a battery is mounted: Switch the unit on and
check that the display is on.
The unit will show the CAL symbol, because the
OxySpy requires calibration. The displayed
O
2
percentage may be incorrect.
If "no" and the
O2sensor symbol is displayed
check the chapter "Trouble Shooting", page 16.
7. Carefully refit together the 2 parts of the case.
Make sure that none of the wires get trapped
and damaged by the case. Take care that the
two parts fit together well and carefully tighten
the 7 screws.
8. Locate the rubber ring into the housing so
that its opening does not close the gas flow
to the
O
2
sensor.
9. Calibrate the OxySpy or fit a new battery.
See "Calibration" or "Fitting the Battery" on
page 11 or page 10, respectively.
Opening
Mounting ring
Page 10
Set Up Procedure / Maintenance
10
1. Open the rear side of the housing according
to the chapter "Opening the OxySpy", (page 7).
Consider the safety considerations on
page 5.
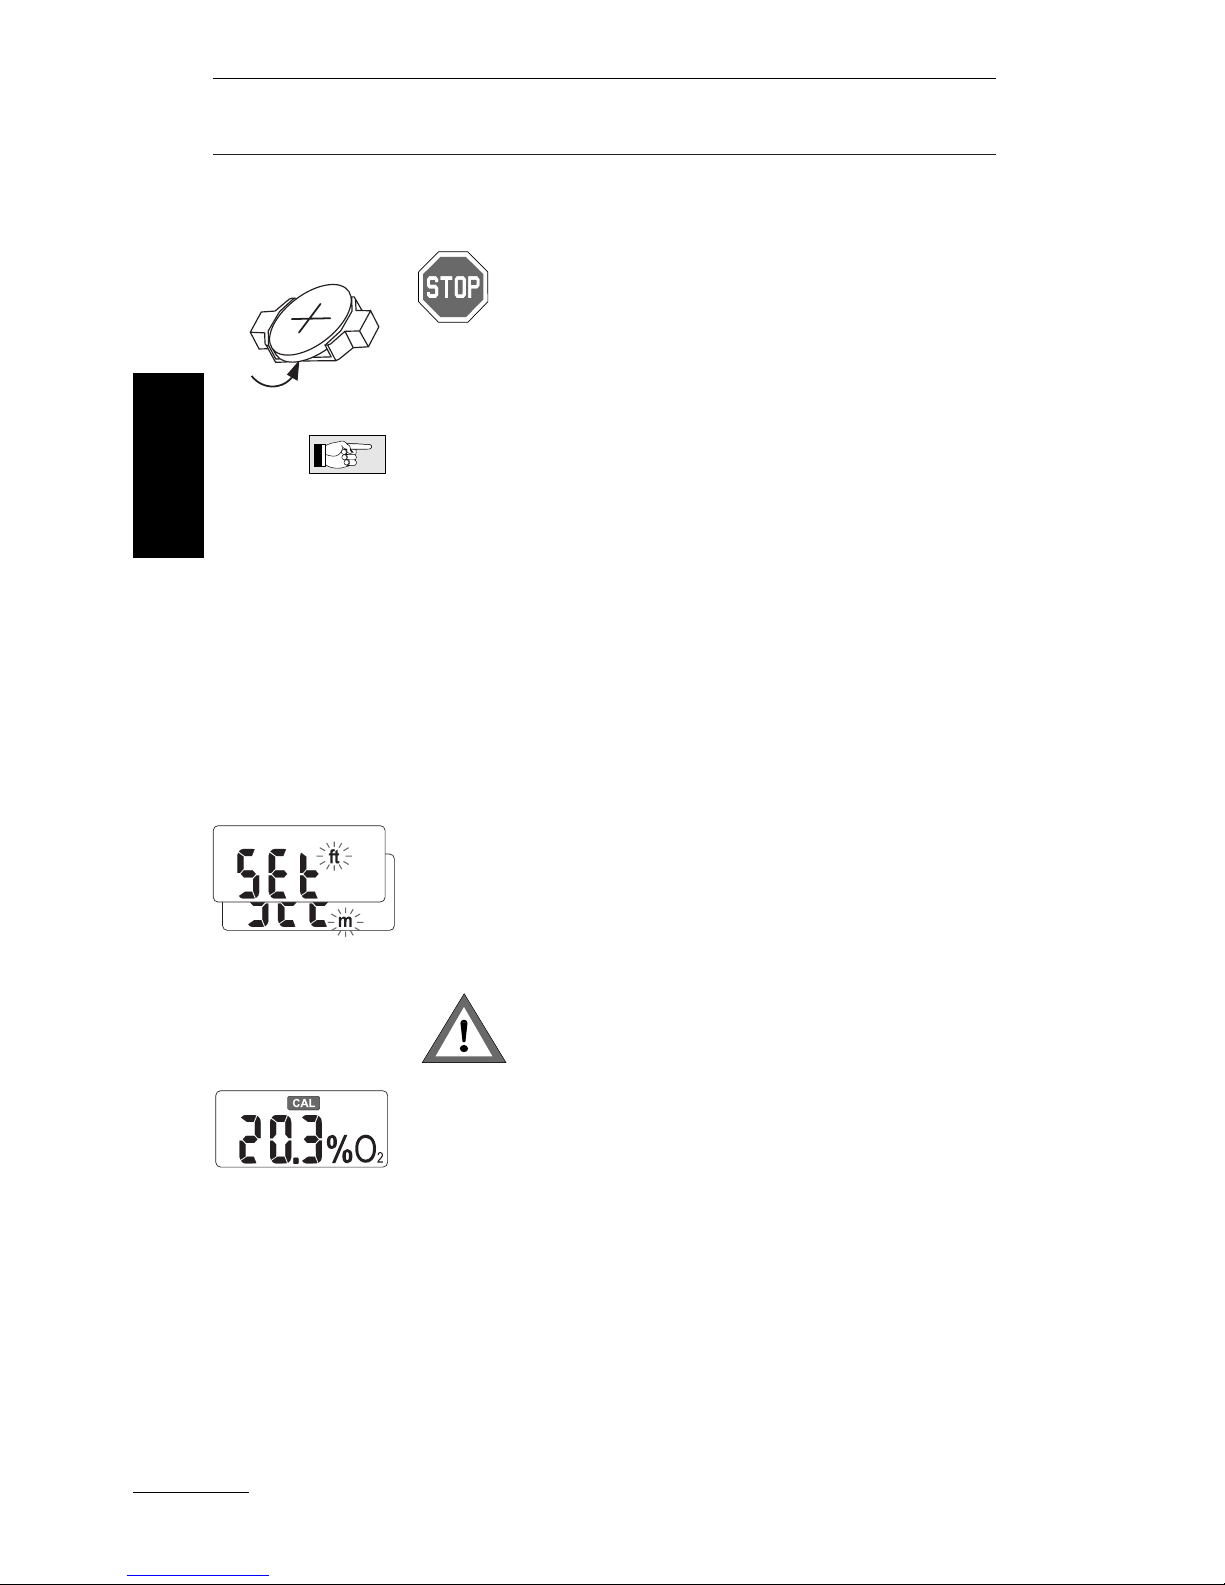
2. Pull the battery (if there is any) out of the battery holder, by hooking a finger under the battery.
Take care of the environment: Dispose of the
used battery properly!
3. Wait a minimum of 2 minutes before installing
the battery. Check that it is the correct type of
battery (see "Technical Information" page 20).
Press the battery into the battery holder until it
snaps in place ( + on the top). The battery holder prevents an incorrect fitting.
4.
Switch the unit on and check if the display is on.
If the unit cannot be switched on, repeat step 2
and 3.
Choose the correct depth unit (mtr. or ft.) to display the maximum operation depth (MOD) by
quickly pressing the push button.
To confirm the depth unit press the push button
for at least two seconds.
Check the chosen metric system before
refitting the parts of the case!
The unit will show the CAL symbol, because the
OxySpy requires calibration. The displayed
O
2
percentage may be incorrect.
5. Carefully refit together the 2 parts of the case.
Make sure that none of the wires get trapped
and damaged by the case. Take care that the
two parts fit together well and carefully tighten
the 7 screws.
6. Calibrate the OxySpy or mount a new sensor.
See "Calibration" or "Fitting the
O
2
sensor" on
page 11 or page 8, respectively.
Fitting the
battery
English
Page 11

Calibration
11
The calibration can be made either in air
(20.9%
O2) or pure oxygen (100%
O2). The OxySpy will automatically detect which gas is being
used for calibration.
The
O2sensor measures the partial pressure of
the oxygen and the OxySpy calculates the
O
2
percentage (
O
2
%) from it. Changes of the
ambient pressure or temperature will influence
the
O2measurement values. This is the reason
why the OxySpy has to be calibrated frequently.
Once the
O2sensor has been calibrated, the
maximum allowed partial pressure of oxygen
(pp
O2limit)
can be set. This value is needed by
the OxySpy to calculate the maximum operation
depth (MOD).
A new calibration is required when:
• The measured
O
2
percentage in the air is
below 20.7%
O
2
.
• The measured
O2percentage in the air
exceeds 21.1%
O2.
• The CAL symbol is displayed.
• If you are unsure about the displayed
O
2
per-
centage.
The
O
2
percentage of the gas mixture (used for
the calibration) must not change during the calibration.
The duration of an OxySpy calibration is a maximum of 30 seconds.
The calibration can be interrupted at any time by
pressing the button.
In hot or humid climates, the OxySpy should be
calibrated either in pure oxygen (100%) or in
compressed air from a tank.
What you
have to
know
about
calibration
English
Page 12
Calibration
12
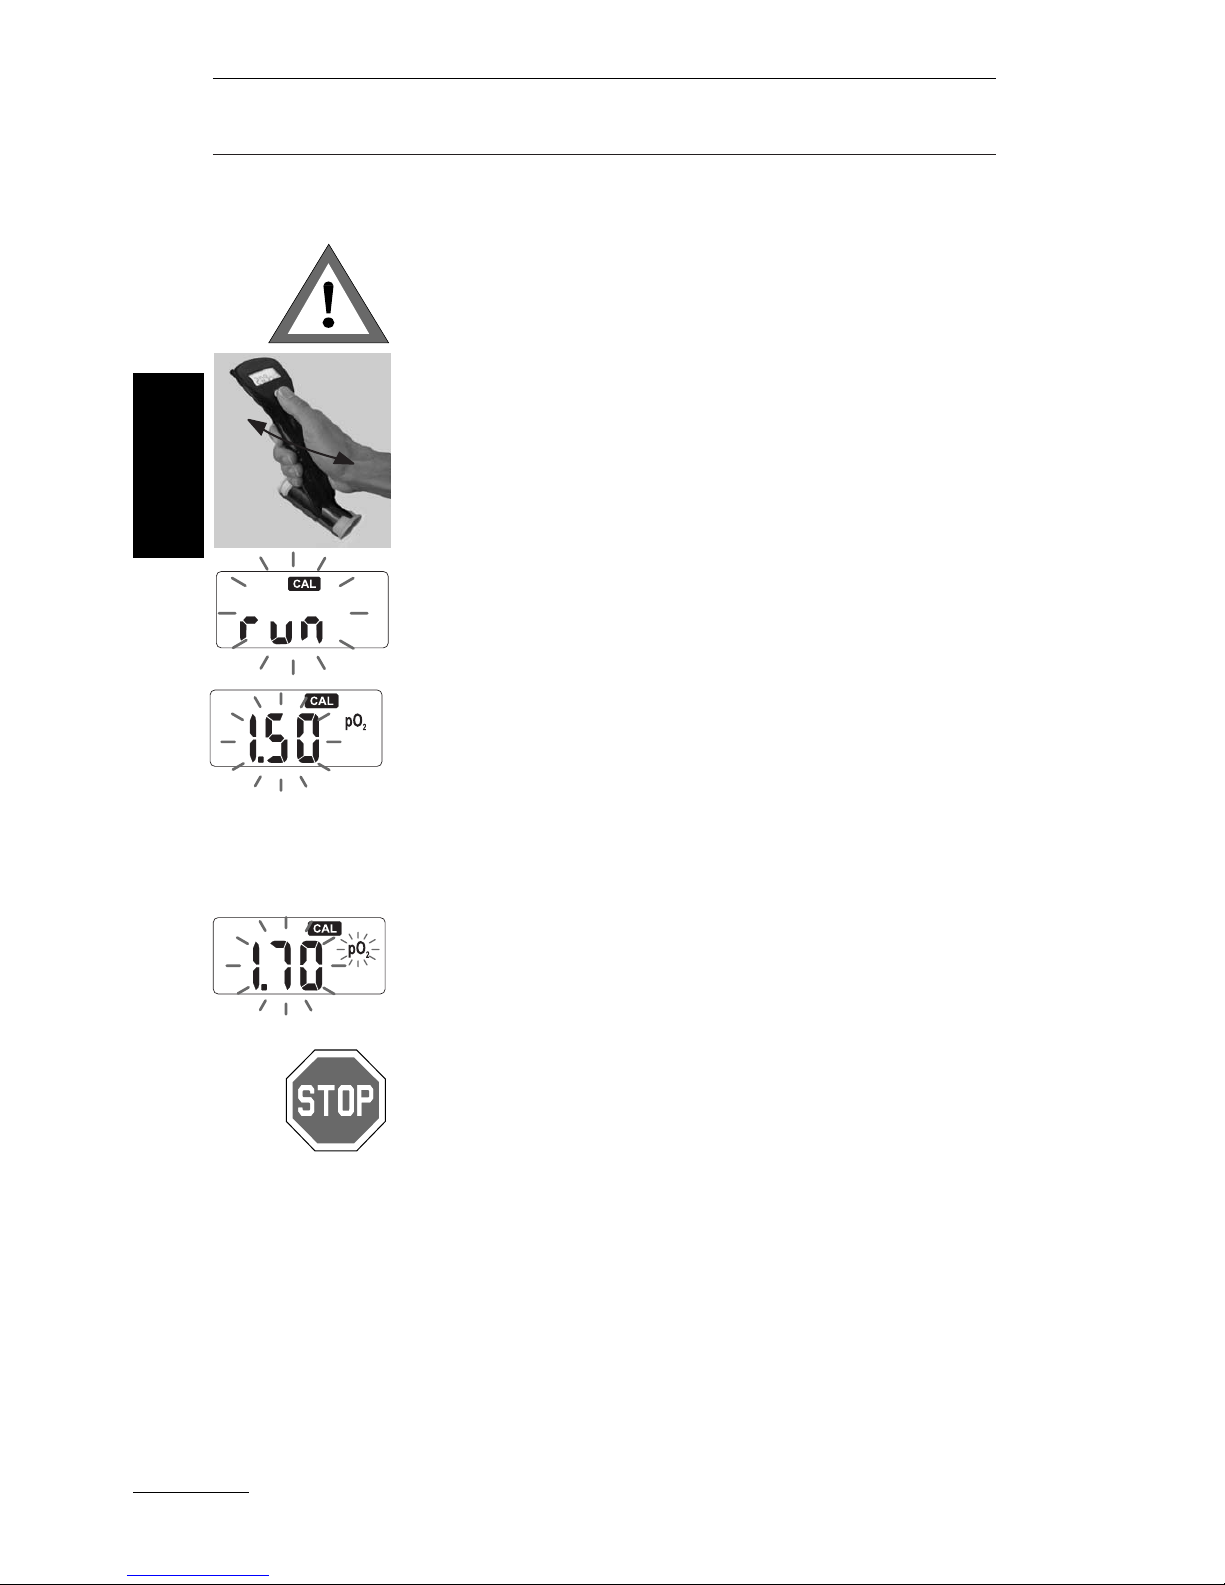
1. Before the calibration of the OxySpy in air
(20.9%
O2) it has to be moved slowly back and
forth, through the air, for about 1 minute to flush
the
O2sensor. Without this flushing, the calibration may not be successfully completed. Do not
blow through the OxySpy as the C
O
2
in your
breath would cause an incorrect calibration.
2. Press the button until "CAL" and "run" appear.
"CAL" and "run" will flash during the calibration.
Move the OxySpy back and forth, slowly, during
the entire 30 second calibration.
3. After the
O2sensor has been calibrated, the
OxySpy will display the pp
O2limit (necessary for
calculating the MOD). By quickly pressing the
push button the setting may be changed in the
range of 1.2 to 1.8 bar, displayed in 0.05 bar
increments.
To confirm the indicated pp
O
2
setting press the
push button for at least 2 seconds.
If neither changes nor confirmations are made
within 30 seconds, the OxySpy automatically
switches back to the default setting of 1.4 bar.
If the selected pp
O
2
limit is higher than 1.6 bar,
the pp
O2symbol will flash to warn the diver.
• The maximum partial pressure of oxygen
(pp
O
2
limit) for calculating the maximum operation depth (MOD) should not exceed 1.6 bar
(the max. value for sports divers). Higher
values may result in death or serious injury.
• For strenuous dives or diving in cold water the
chosen pp
O
2
limit should not exceed 1.4 bar.
The OxySpy switches automatically into the normal measurement mode.
Calibrating
in
air
English
Page 13
Calibration
13
Calibration
was not
successful
English
Calibrating
with pure
oxygen
The OxySpy can also be calibrated with pure
medical oxygen (100%
O2).
• Please consider the general safety considerations of using pure oxygen!
• The calibration gas has to be 100%
medical oxygen.
• At the gas input make sure that there is
a good seal and that air cannot be
sucked in.
The calibration procedure with pure oxygen is
similar to the one described in the chapters
"Calibrating in air" (page 12) and "Measurement" (page 14).
After the pure oxygen calibration: "Flush"(move
it back and forth slowly) the OxySpy for 1 minute in air and check the indicated value. The
value must be between 20.7 and 21.1%
O2. If
not, redo the calibration.
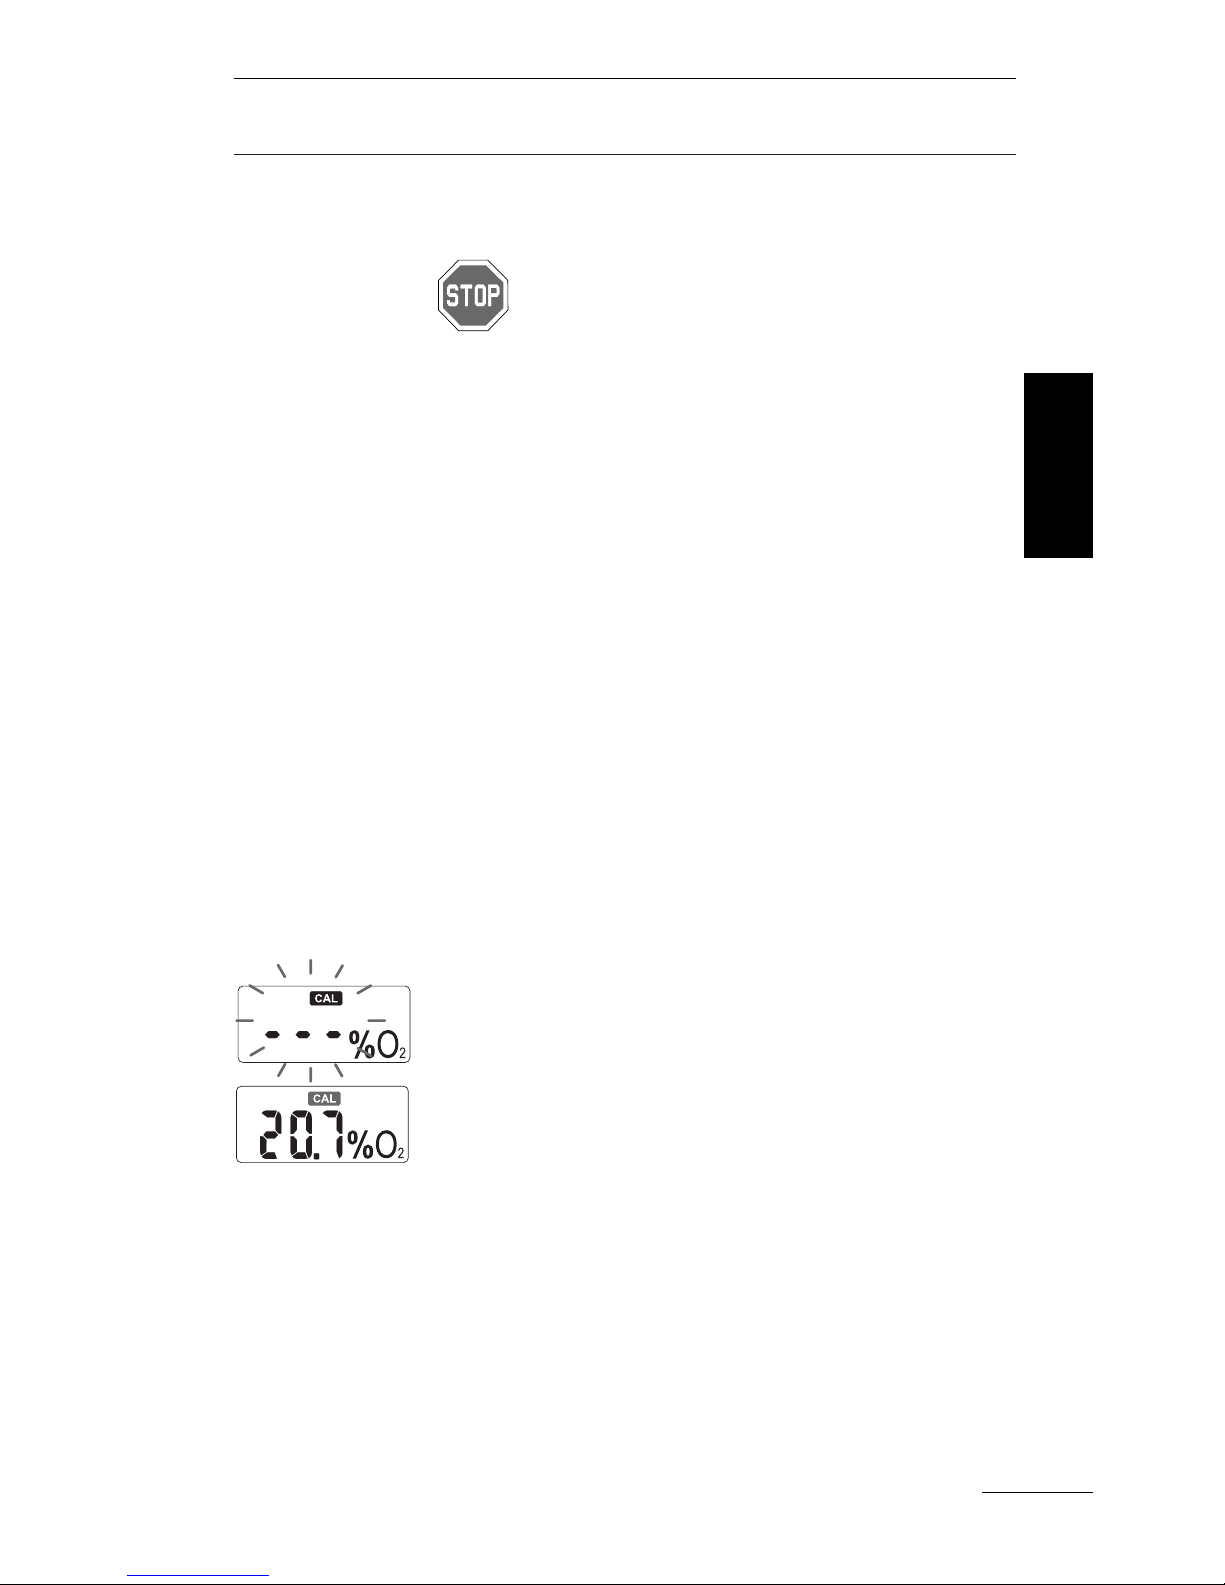
If the calibration has not been successfully completed or the calibration has been interrupted by
pressing the button switch, the display will show
a "- - -", for a short time. The OxySpy will then
change automatically into the measurement
mode. No new calibration values have been
entered and the indicated
O
2
% values are still
based on the old calibration data. The CAL symbol is displayed to inform you about the unsuccessful calibration.
Repeat the calibration if the CAL symbol is still
displayed after the calibration. Several calibrations without success could be an indication that
the
O
2
sensor needs to be replaced or a fluctuation of the mixture of the calibration gas during
the calibration. The fluctuation of the gas mixture might have been caused by air leaking in at
the gas input due to a bad seal.
Page 14
Measurement
14
Consider the following points if you measure
with the OxySpy:
•
The gas must be able to flow through both elastic rings without resistance.
• Check the OxySpy in air before each measurement by "flushing" it (moving it back and forth
for 1 minute in the air). If the displayed value is
not between 20.7 and 21.1%
O2, the OxySpy
has to be calibrated.
• The OxySpy must have a steady stream of the
gas until the displayed
O2% value has stabili-
zed.
• At the gas input (the rubber ring) make sure
that there is a good seal and that air can not be
sucked in.
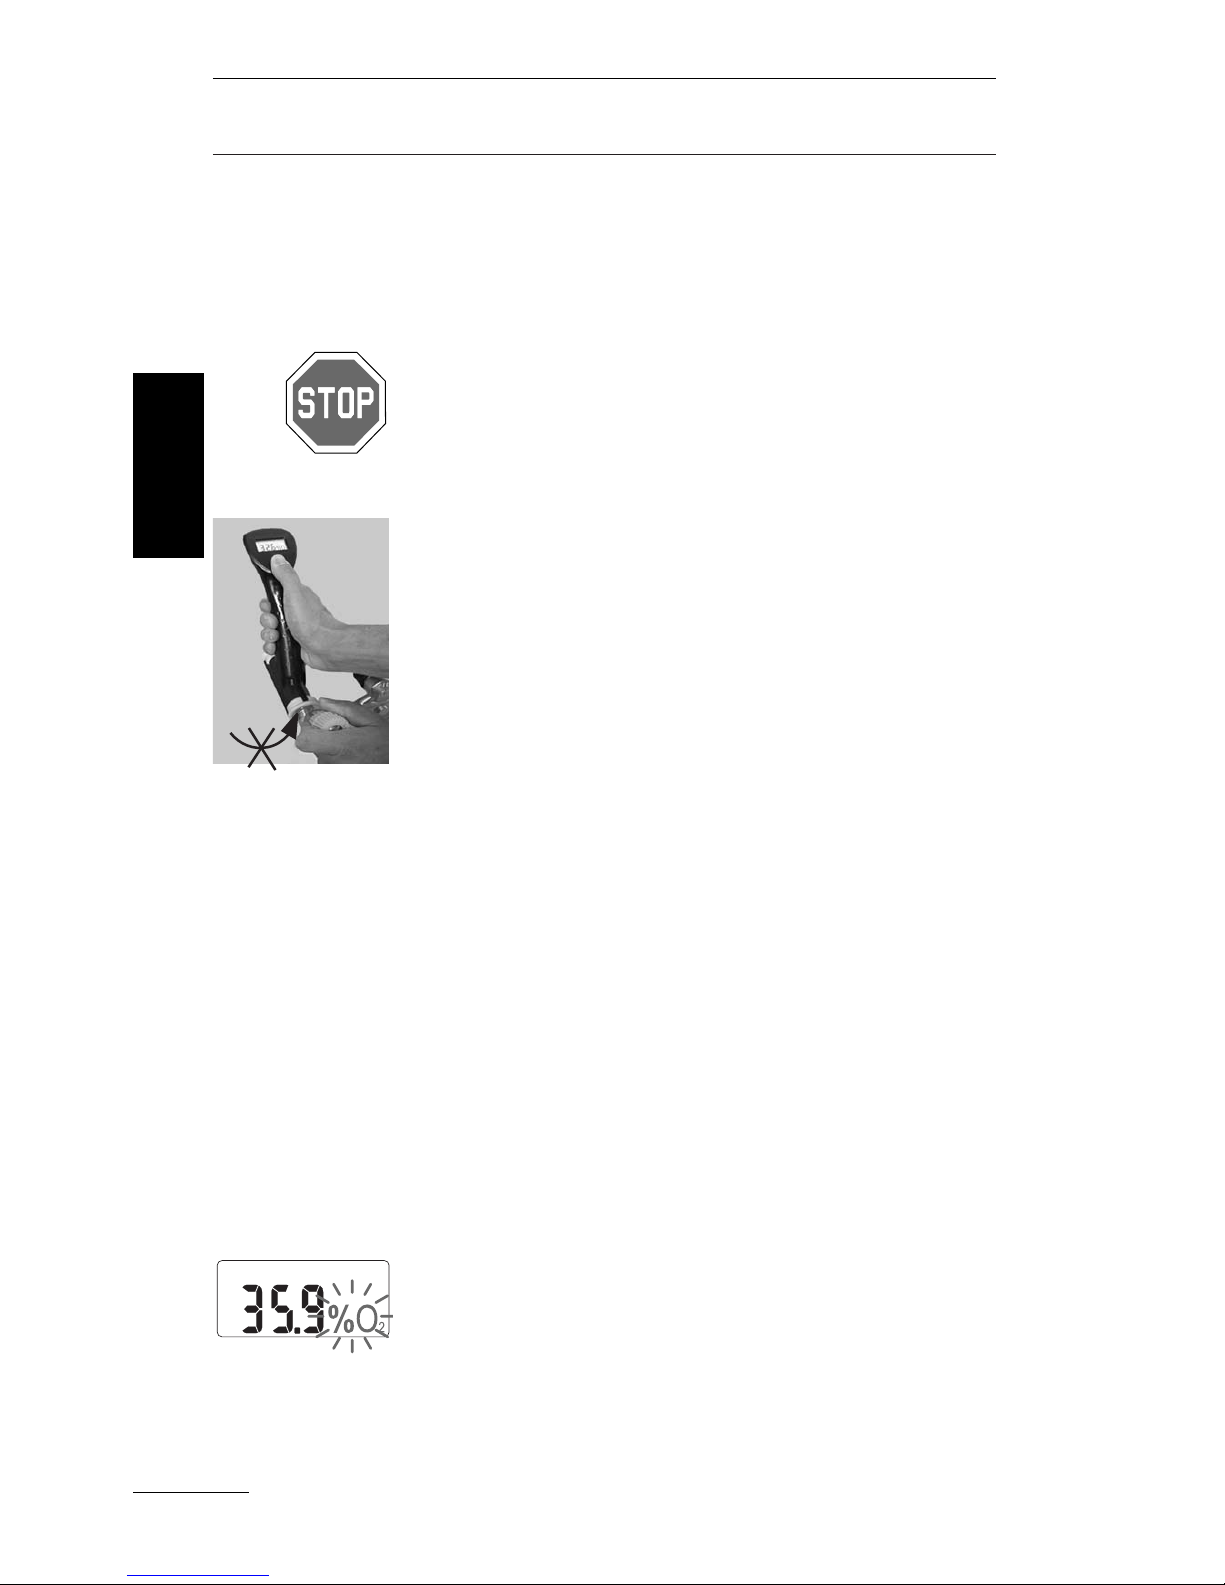
1. Press one of the two rubber rings against the
tank valve.
2. Open the valve until you hear a gentle, uni-
form hiss and wait until the displayed
O2% value
has stabilized.
3. "Freeze" the display by briefly pressing the
push button. For confirmation the "%
O2" starts
flashing.
4. Close the tank valve.
What you
have to
understand
English
Procedure
to measure on
diving
tanks
Page 15
Measurement
15
5. If the displayed value does not match with
your expectation, repeat the measurement or
calibrate the OxySpy. See "Calibration" page 11.
6. Record the results of your measurement.
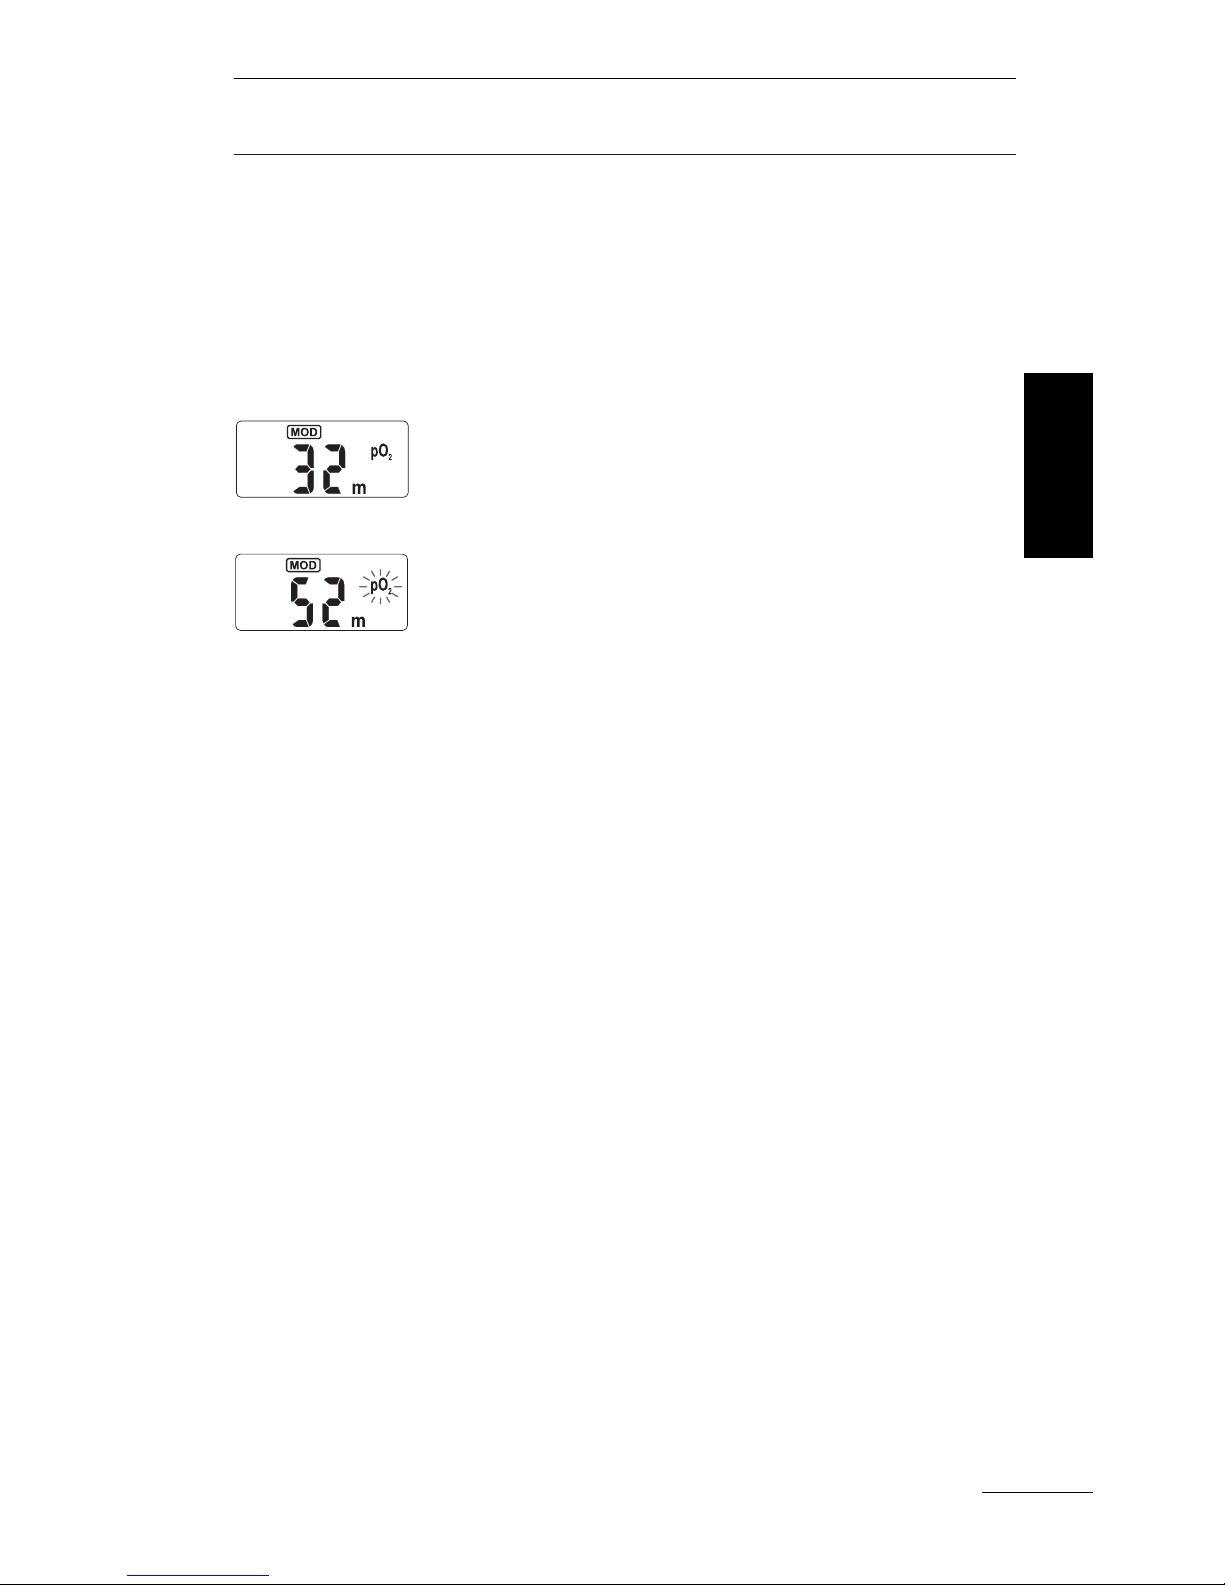
7. After quickly pressing the push button, the
OxySpy will calculate the MOD based on the
measured
O2values and the chosen pp
O2limit.
The indicated maximum operation depth will be
rounded to 0.1 mtr. or 1 ft.
If the selected pp
O2limit is higher than 1.6 bar,
the pp
O2symbol will flash to warn the diver.
8. By pressing the push button once more the
OxySpy returns to measuring mode.
Repeat the measurement until you are sure
that
you measured the actual oxygen percentage
of
the gas mixture.
English
Page 16
Service Indications / Trouble Shooting
16
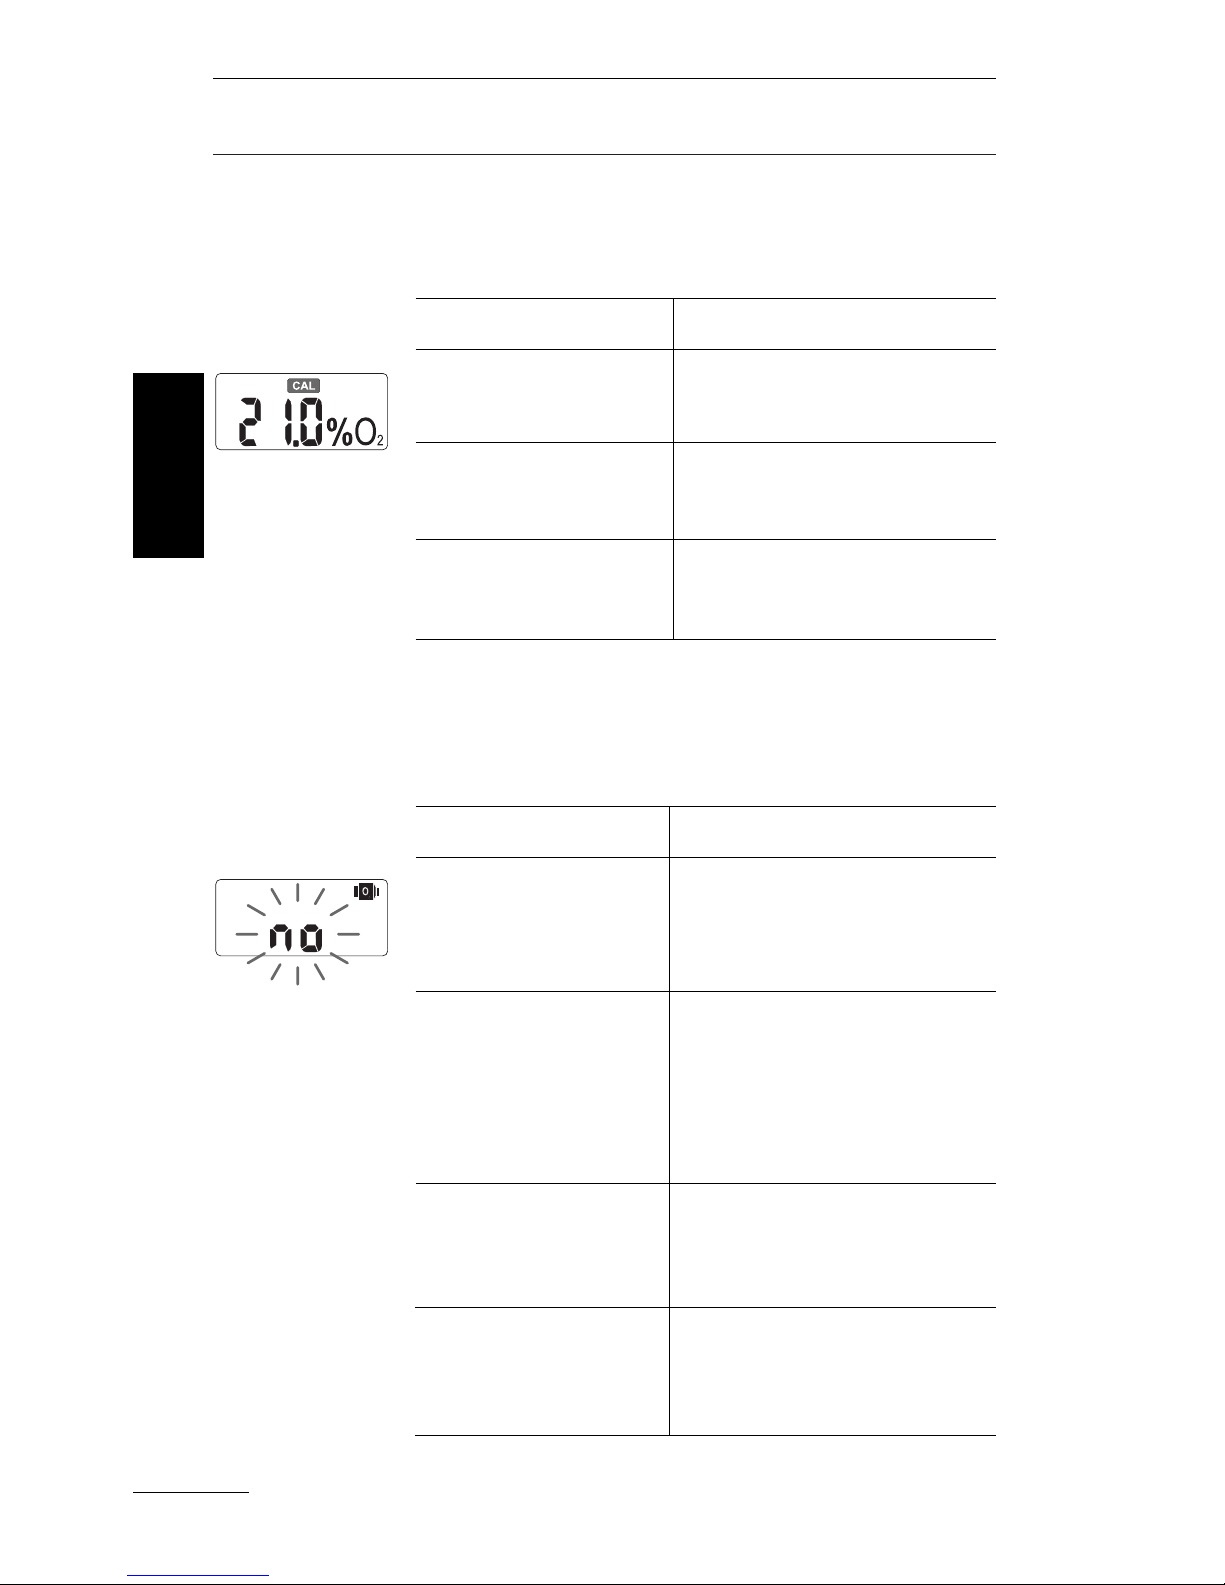
If the CAL symbol appears, the OxySpy has to
be calibrated. The displayed
O2% value could be
wrong.
If the OxySpy does not "see" an
O
2
sensor, the
display shows "no" and the
O2sensor symbol.
The CAL
symbol is
displayed
English
Possible reasons:
New battery has
been installed.
New
O
2
sensor has
been installed.
Calibration was not
successful.
How to solve:
Calibrate the OxySpy.
See page 11
Calibrate the OxySpy.
See page 11
Calibrate the OxySpy.
See page 11
Possible reasons:
No
O
2
sensor
connected
Water in the
housing
Plug or wire defect
Electronic defect.
How to solve:
Install an O2sensor and
plug in. See
"
Fitting the O
2
sensor
"
, page 8.
Remove the battery and
the
O2sensor. Dry the
case with a towel and
warm air (max. 50 °C /
122 °F).
Take the OxySpy to the
store that it was purchased
from.
Take the OxySpy to the
store that it was purchased from.
The O
2
sensor not
connected
Page 17
Service Indications / Trouble Shooting
17
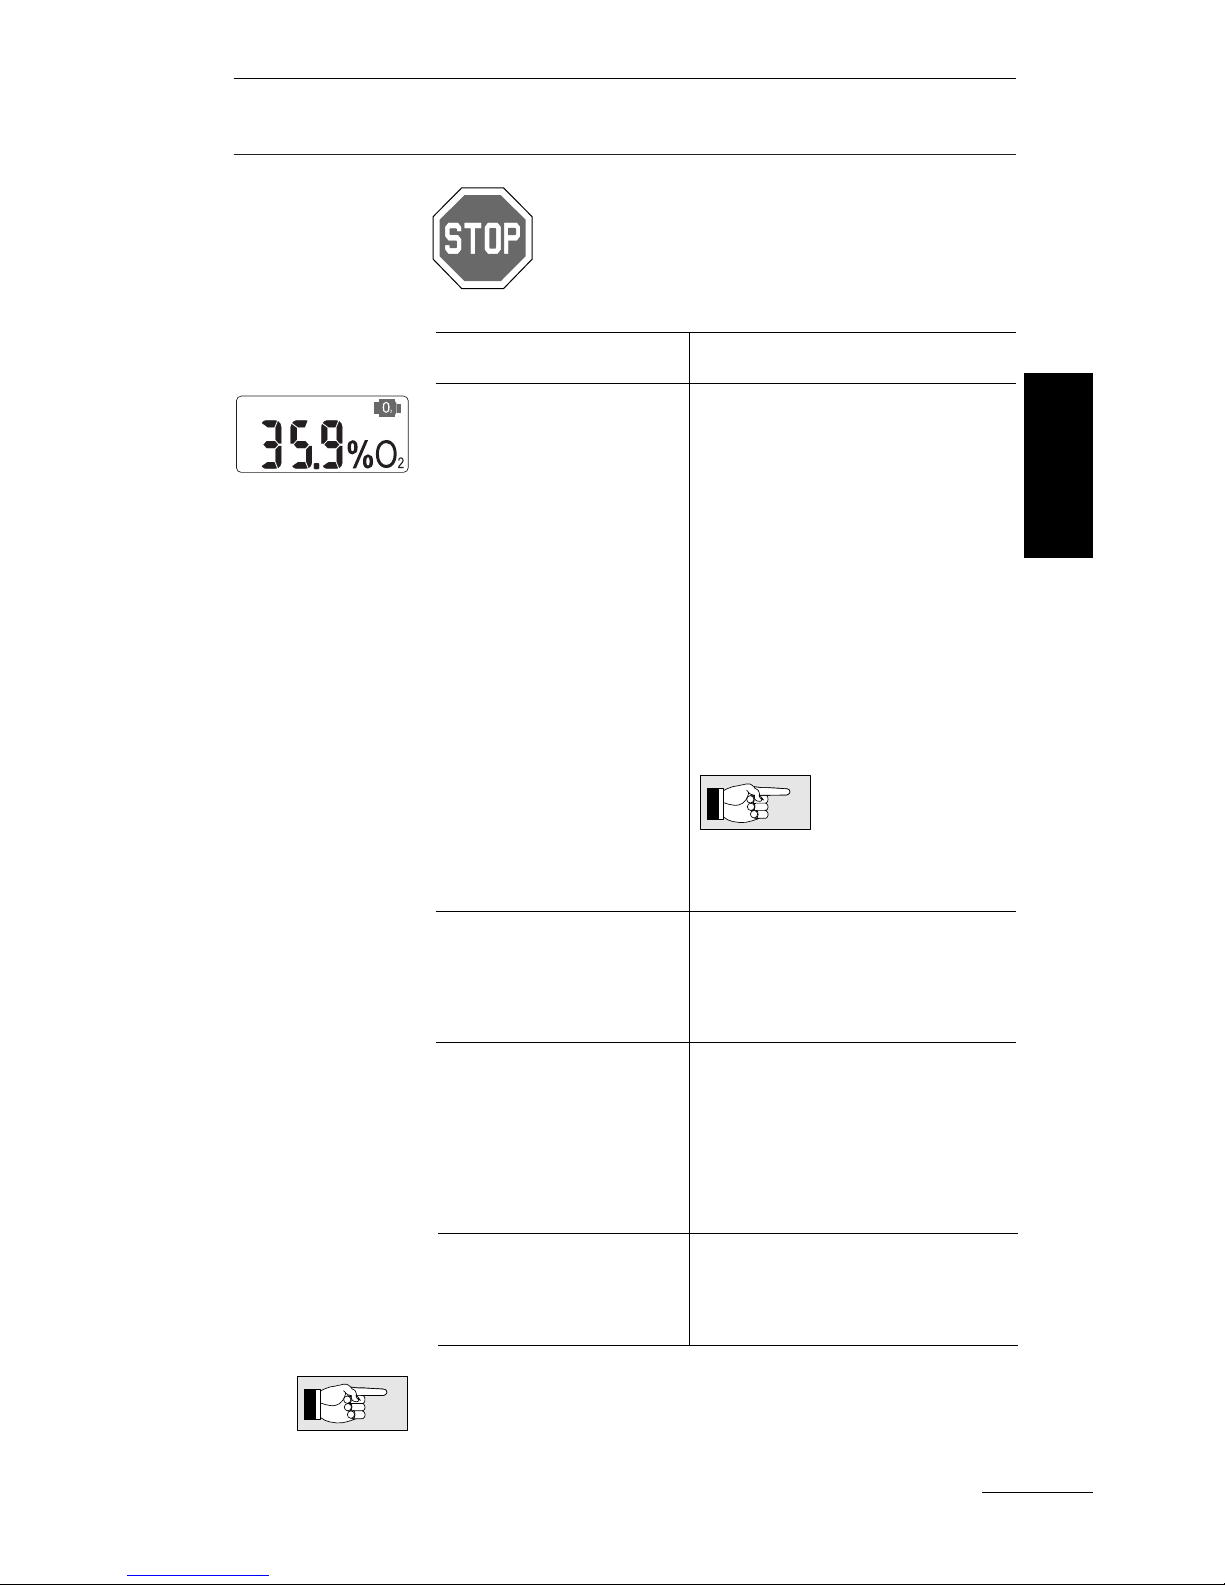
If the
O2symbol appears, the indicated
O2% value could be incorrect.
The
O2 sensors are available at OxySpy sales
points. There is more information, regarding the
O2 sensor, on page 20.
The
O
2 sensor
symbol is
displayed
English
Possible reasons:
The ambient air
pressure is exceptionally low. (for
example in high
altitude)
The
O2sensor is
used up
Water in the housing
Electronic defect.
How to solve:
At high altitudes the
O
2
sensor symbol could be
displayed by mistake.
If the
O
2
sensor symbol
had not been displayed
before ascending (to the
higher altitude), than it is
almost certain, that the low
ambient pressure of the
altitude is the reason for
displaying the O
2
sensor.
Replace the O2 sensor. See
"
Fitting the O
2
sensor
"
,
page 8.
Remove the battery and
the
O2 sensor. Dry the
case with a towel and
warm air (max. 50 °C /
122 °F).
Take the OxySpy to the
store that it was purchased from.
Check the
OxySpy before
ascending to
altitude.
Page 18
18
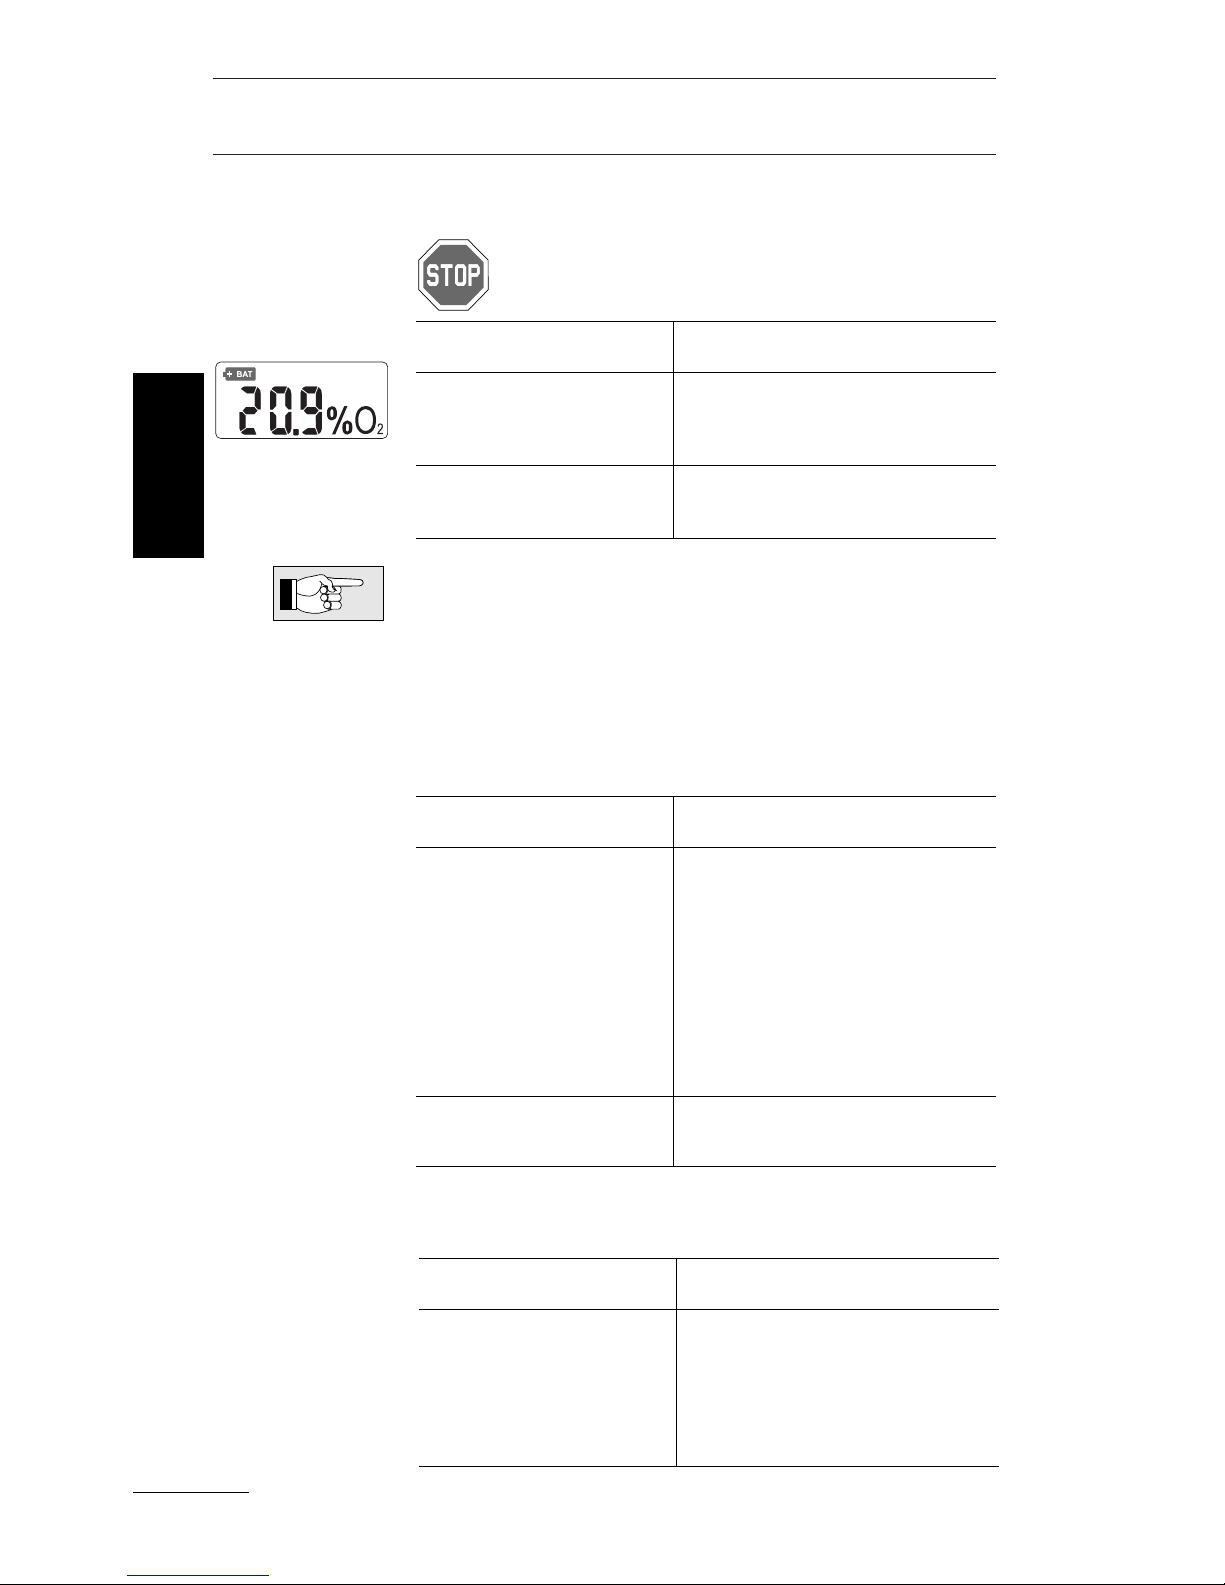
At a low battery voltage, the OxySpy shows the
battery symbol.
If the battery symbol appears, the indicated
O2% value could be wrong.
The battery is sold in camera and electronic stores. For more information about the battery, refer
to page 20.
The displayed oxygen percentage of the air
goes up and down, even if the actual percentage does not change.
The
Battery
Symbol is
displayed
English
Possible reasons:
Extremely low
temperature
The battery is
weak.
How to solve:
Warm up the OxySpy
and check again.
Replace the battery. See
page 10.
Possible reasons:
After a measurement of an
O
2
enriched gas, the high
concentration of
oxygen in the OxySpy has first to be
reduced.
O2sensor is defective or used up.
How to solve:
"Flush" (move it back
and forth) the OxySpy in
air for approximately 30
seconds. Try to measure
again.
Replace the O2sensor.
O2% indication not
stable in
the air
Service Indications / Trouble Shooting
Possible reasons:
The OxySpy has
been calibrated in
extremely humid air.
How to solve:
Calibrate the OxySpy in
pure oxygen (100%) or
in compressed air from
a tank!
The indicated
O2-value is
inaccurate
The measured O2-value deviates from the actual
O
2
-content by more than 1 or 2 percent.
Page 19
O2Sensors
19
The
O
2
sensors have, like batteries, a certain
lifetime. From the first time that a sensor contacts
oxygen it starts to be used up. They can be
replaced by the user (see "Fitting the
O2sensor",
page 8).
Disconnecting the
O
2
Sensor from the socket
does not extend it's life. On page 20 you will find
more information about storing the OxySpy.
After opening the airtight package the
O2sensor
requires 30 minutes to stabilize in air. Calibration
should be made only after this "warm-up" time.
The battery and the O
2
sensor contain corrosive
liquid. If the battery or O2sensor leaks: Do not
let the liquid come into contact with skin, eyes
or mouth. If it does, flush the affected area with
water for at least 15 minutes. Consult a doctor.
Do not inhale vapor. Immediately clean the
leakage from the instrument with a soft towel
and dispose of the towel.
English
Page 20

Maintenance and Storage
20
• Protect the unit from impact and intensive sun
and heat.
• Store the unit in a cool, not too dry place. This
helps to preserve the O
2
sensor life.
• Ideal storage temperature: 5 °C up to +15 °C
(41 °F up to 59 °F)
• Do not leave the OxySpy in an oxygen enriched
atmosphere except when it is necessary.
• Disconnecting the
O2Sensor from the socket
does not extent its life.
• Replace the battery and
O
2
sensor early.
• Do not clean the unit with any solvent (except
water) or detergent.
• Clean the OxySpy with a damp, soft towel.
• Dry the instrument with a soft towel.
• Do not scratch the display window.
• Maximum altitude: 4000 m (13,000 feet)
above sea level
• Temperature range: 0 °C up to +50 °C
(32 °F to 122 °F)
• Relative air humidity: 10-90%,
non-condensing
•O
2
Display: • Resolution: 0.1% O
2
• Display range: 0.0 up to 199.9%O
2
•O2Sensor: • Type Dynatron P/N DiveceL3.D1
or other O2sensors if licensed by
the manufacturer.
• Lifetime: minimum 1 year*
• Battery: • Type: CR2430
• Lifetime: min. 3 years at
500 on/ off cycles per year
• Linearity: <3% (at constant pressure and
temperature)
Maintenance
and Storage
English
Operational
limits
Technical
Information
*
Lifetime depending on environment conditions and the used product.
Page 21

Limited Warranty
21
Please pay attention to the following remarks on
warranty claims:
The limited warranty only covers units which were
purchased from an authorized retailer.
The manufacturer will repair all defects which are
due to faulty materials or workmanship. The warranty covers the repair of the unit, free of charge.
This includes the repair or replacement of the faulty part or the replacement of the entire OxySpy.
The
O
2
sensor, the battery and the rubber rings are
excluded from the warranty. The manufacturer
reserves the right to determine the merits of the
warranty claim and to determine whether the unit
will be repaired or replaced.
The warranty is given for a period of two years
after original date of purchase. Repairs or replacements during the warranty period do not extend
the warranty period. In order to submit a warranty
claim, deliver the unit, along with dated proof of
purchase, to your authorized retailer or an authorized service location.
Please confirm that you have read the complete
manual.
Recognition
of warranty
Scope of
warranty
English
• improper operation or
stress
• exterior influences, e.g.
shipping damage,
impact, damage due to
bumping and hitting
• water damage
• influences of weather
or other phenomena
• repairs preformed or
attempted by unauthorized service agencies
• pressure chamber
tests
Excluded are
faults or
defects
due to:
Warranty
period and
claim:
Place: Date: Signature:
____________ ____________
_______________________
Page 22

Notes
22
English
Page 23
FCC / Copyright ©
23
This device complies with part 15 of the FCC
Rules. Operation is subject to the following two
conditions: (1) This device may not cause harmful interference, and (2) this device must accept
any interference received, including interference
that may cause undesired operation.
Copyright © 2003 by
Dynatron AG
All rights reserved. No portion of this manual
may be reproduced, processed or distributed in
any form (print, photocopy, electronic or any
other process) without prior, written permission
from Dynatron AG.
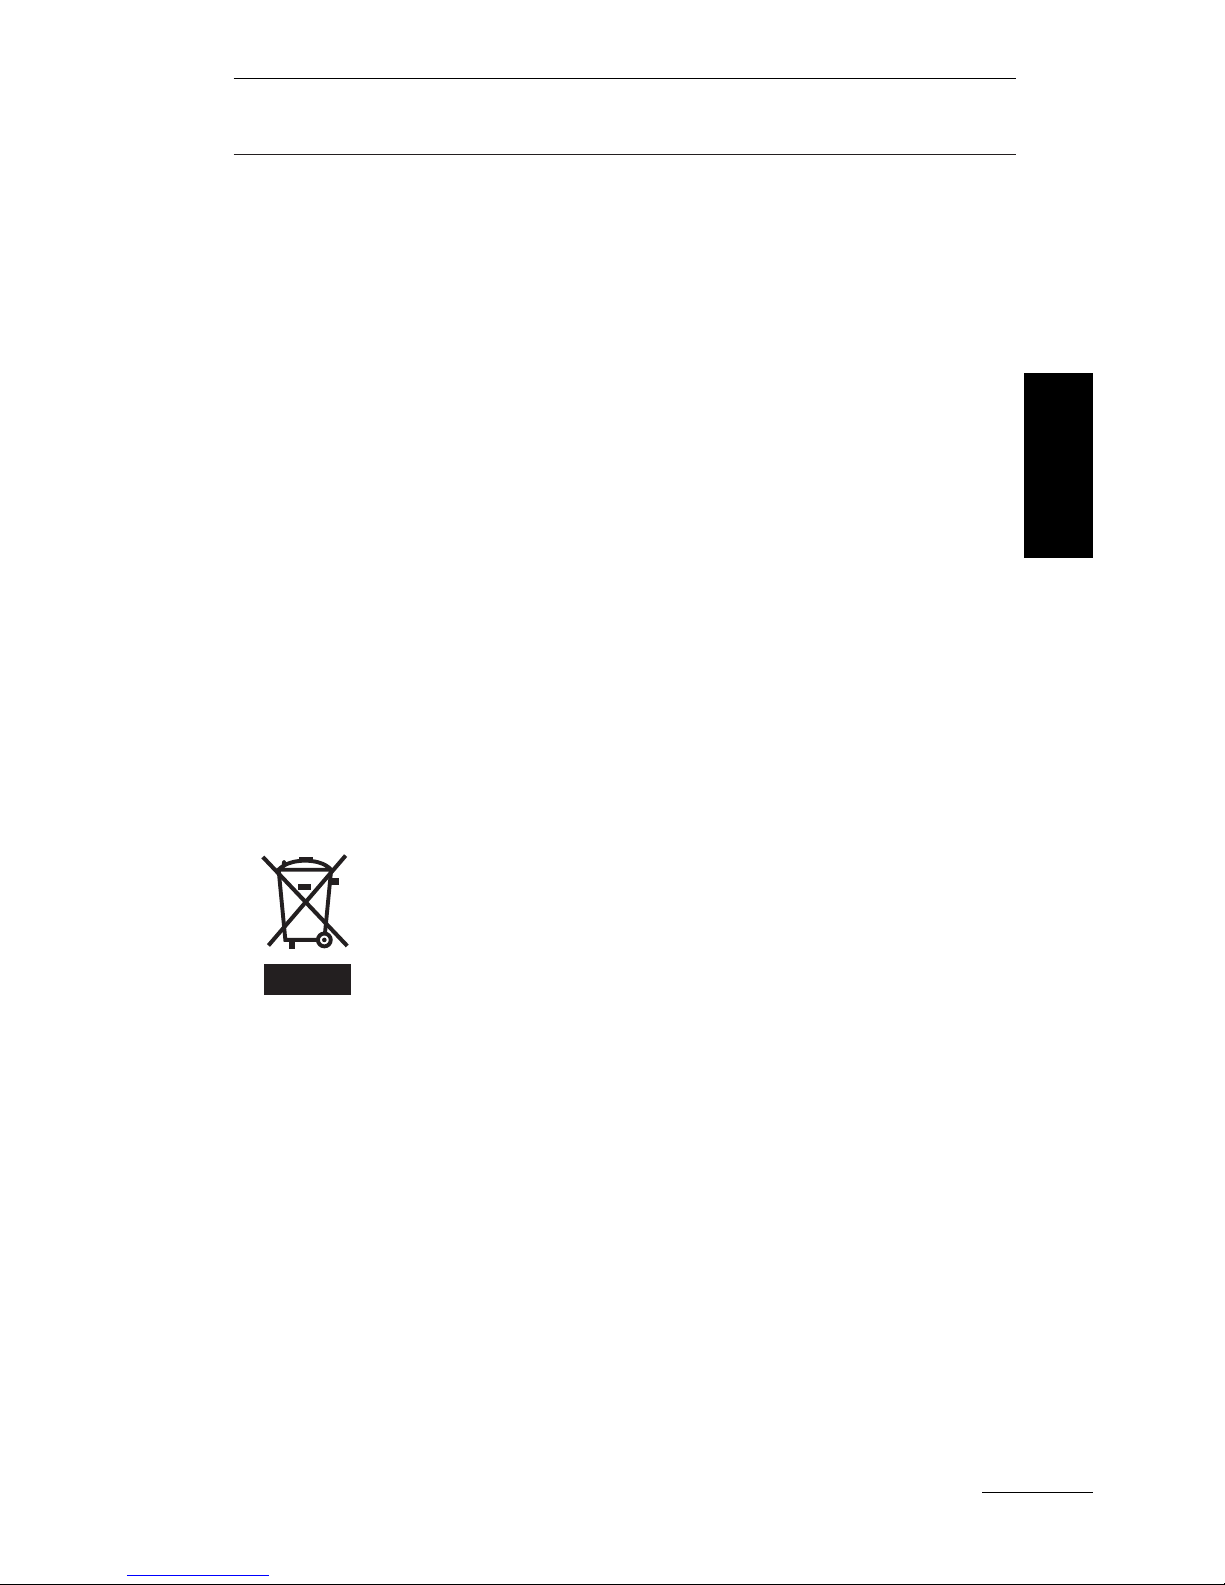
Protect the environment!
When disposing of this OxySpy, do so in an
environmentally friendly way.
Return old products to an appropriate collection
point according (EU Directive 2002/96/EC).
The OxySpy must not be placed in the normal
household waste.
FCC
English
Copyright ©
Waste
disposal
Page 24

English
24
Stamp of the
dealer:
Date of Sale:
Serial No. of
your OxySpy:
Warranty paper
Operating Manual OxySpy / OS-M-GB-B Rev.A
Printed in Switzerland 09-2006
www.oxyspy.biz
 Loading...