

Page 1
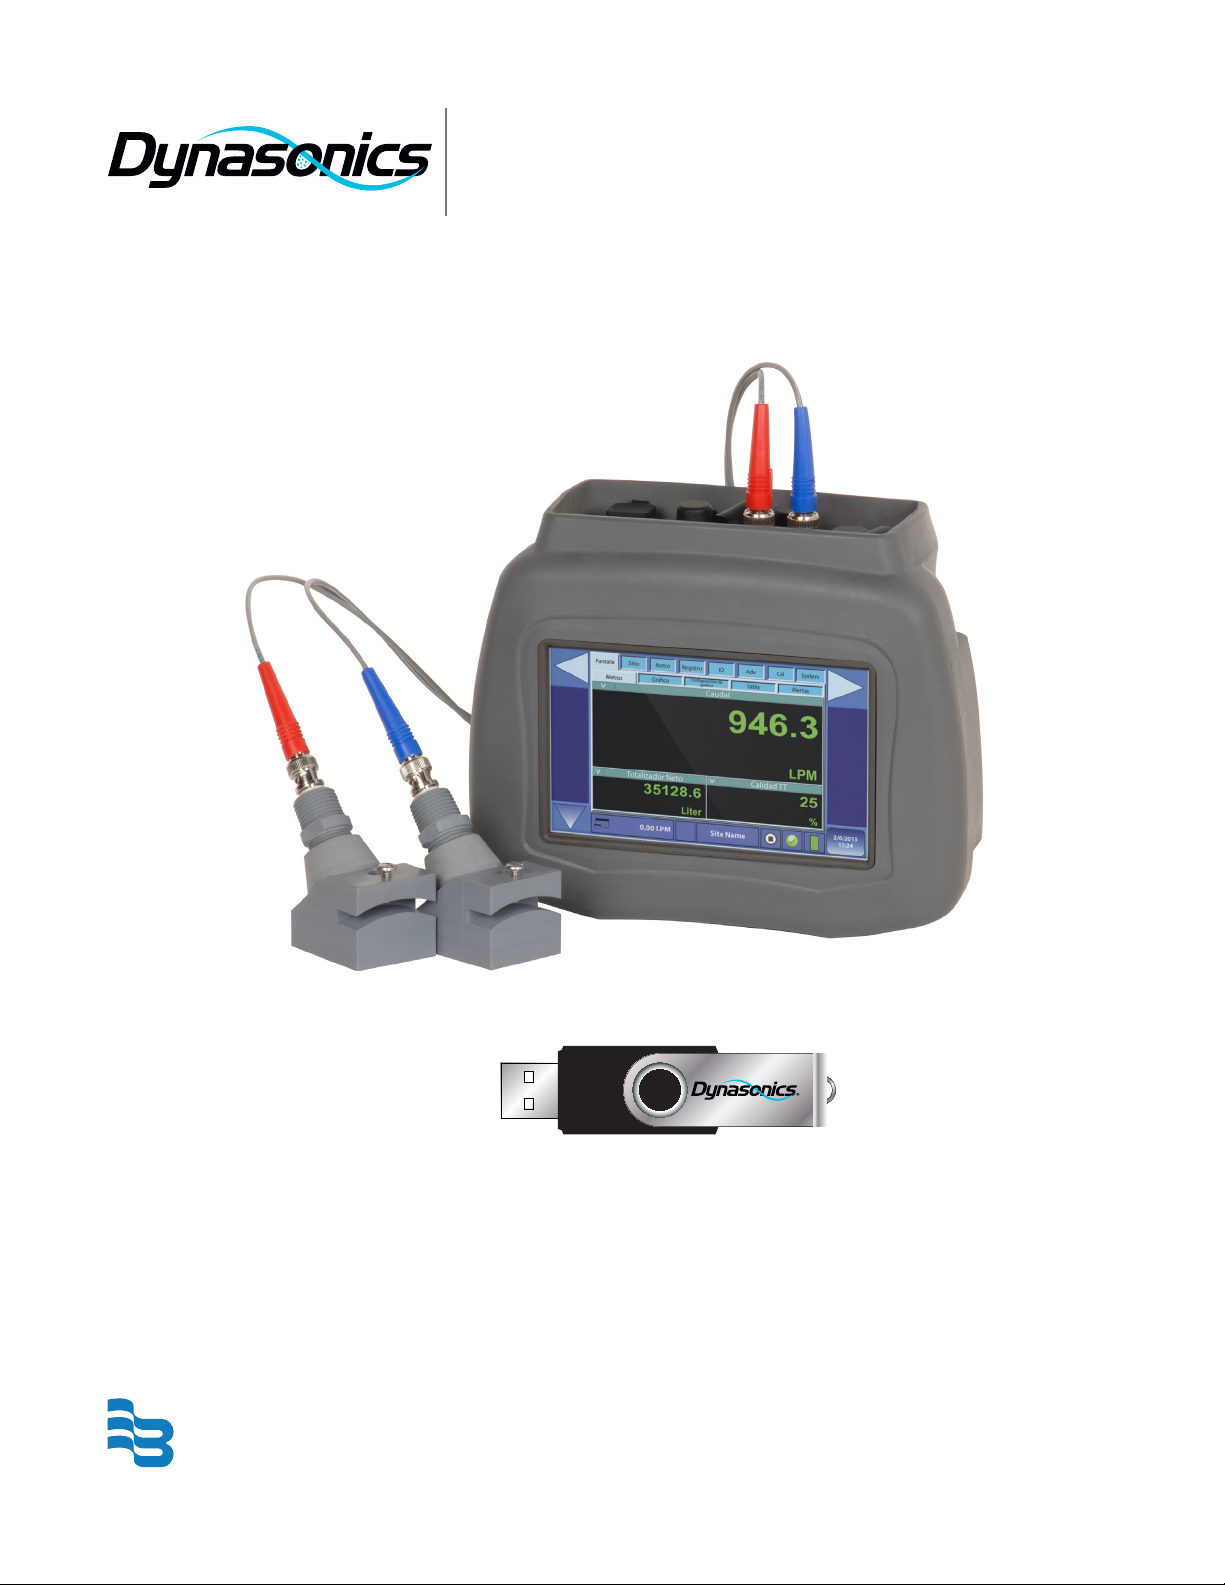
Hybrid Ultrasonic
DXN Portable Ultrasonic Measurement System
®
HYB-PM-00095-EN-02 (May 2013)
Badger Meter
Firmware Update Manual
Page 2

DXN Portable Ultrasonic Measurement System
Page ii May 2013
Page 3

Firmware Update Manual
CONTENTS
UPGRADING SOFTWARE . . . . . . . . . . . . . . . . . . . . . . . . . . . . . . . . . . . . . . . . . . . . . . . . . . . . . . . . . . . . . . . . 4
QUICK BOOT . . . . . . . . . . . . . . . . . . . . . . . . . . . . . . . . . . . . . . . . . . . . . . . . . . . . . . . . . . . . . . . . . . . . . . . 14
Page 3 May 2013
Page 4
ORD
E
M
&
P
R
O
G
R
E
S
S
O
DXN Portable Ultrasonic Measurement System
UPGRADING SOFTWARE
MPORTANTI The Dynasonics USB Update Drive is formatted in FAT/FAT32. NTFS (New Technology File System) formats do
not work.
The upgrade is supplied as a self extracting zip file that you must extract on a PC before it can be loaded into the DXN.
1. Save the supplied zip le to a convenient place on your computer’s hard drive.
2. Double-click on the PortableFlowmeter_YYYYMMDD_RevX.zip le to start the extraction process. The completed
extraction should open the zip le and place the contents in a folder named PortableFlowmeter on your hard drive.
OTE:N The YYYYMMDD indicates the year, month, and day of the current revision. The X in the filename stands for the
current revision letter.
Name Date modied Type Size
PortableFlowmeter 4/12/2013 12:20 PM File Folder
3. When the extraction process is complete, copy the entire PortableFlowmeter folder to the USB Update Drive.
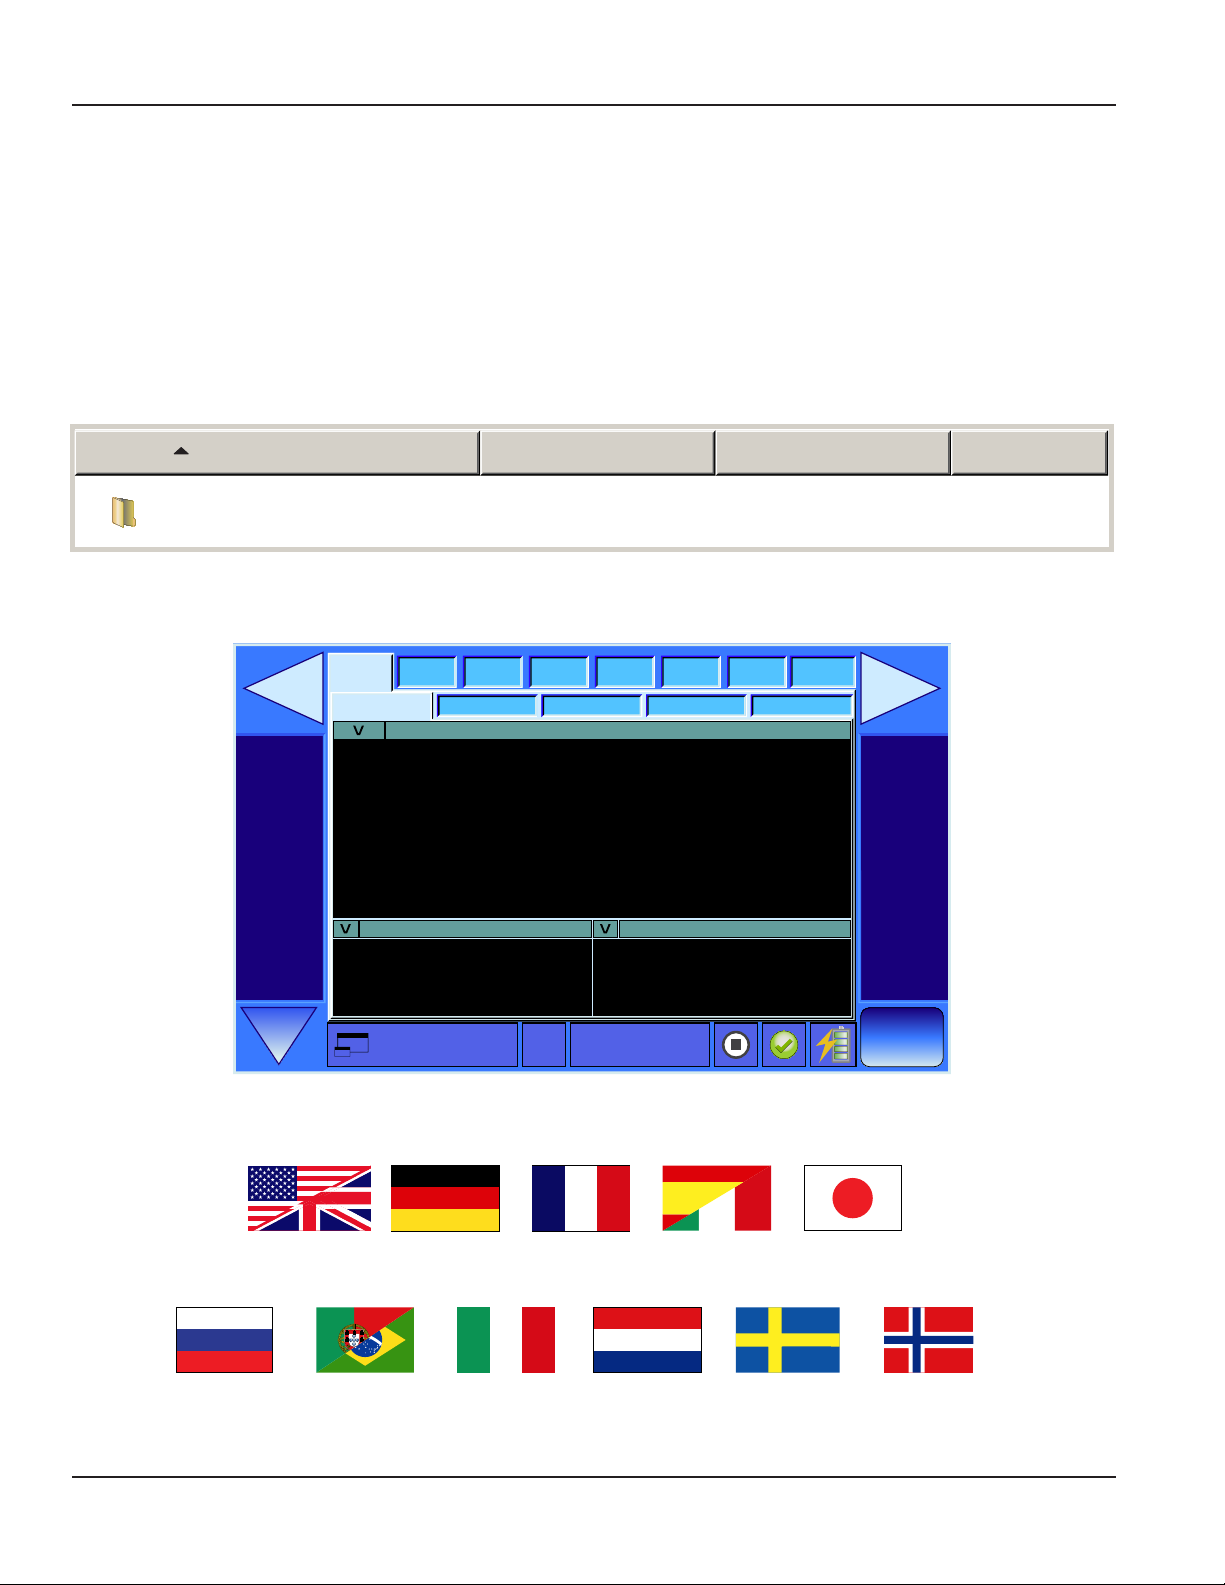
4. Start the DXN and let it to get to the Meters (Display ► Meters) screen.
Display
Meters
Meter Adv Cal System
Site Log I/O
AlertsTableGraph SetupGraph
Flow
0.00
GPM
Totalizer NET TT Quality
0.00
Gallons
Site Name0.00 GPM
OTE:N Revision E and later of the DXN firmware has multi-language capabilities. To change the language displayed on the
menu tabs, press the language button until the proper language is displayed on the screen.
0
%
4/12/2013
12:24 PM
English German French Spanish Japanese
Russian Portuguese NorweagenSwedishDutchItalian
Page 4 May 2013
Page 5
Firmware Update Manual
5. Insert the USB Update Drive into the USB port on the rear of the DXN and wait 30 seconds for the DXN to recognize
the USB Update Drive.
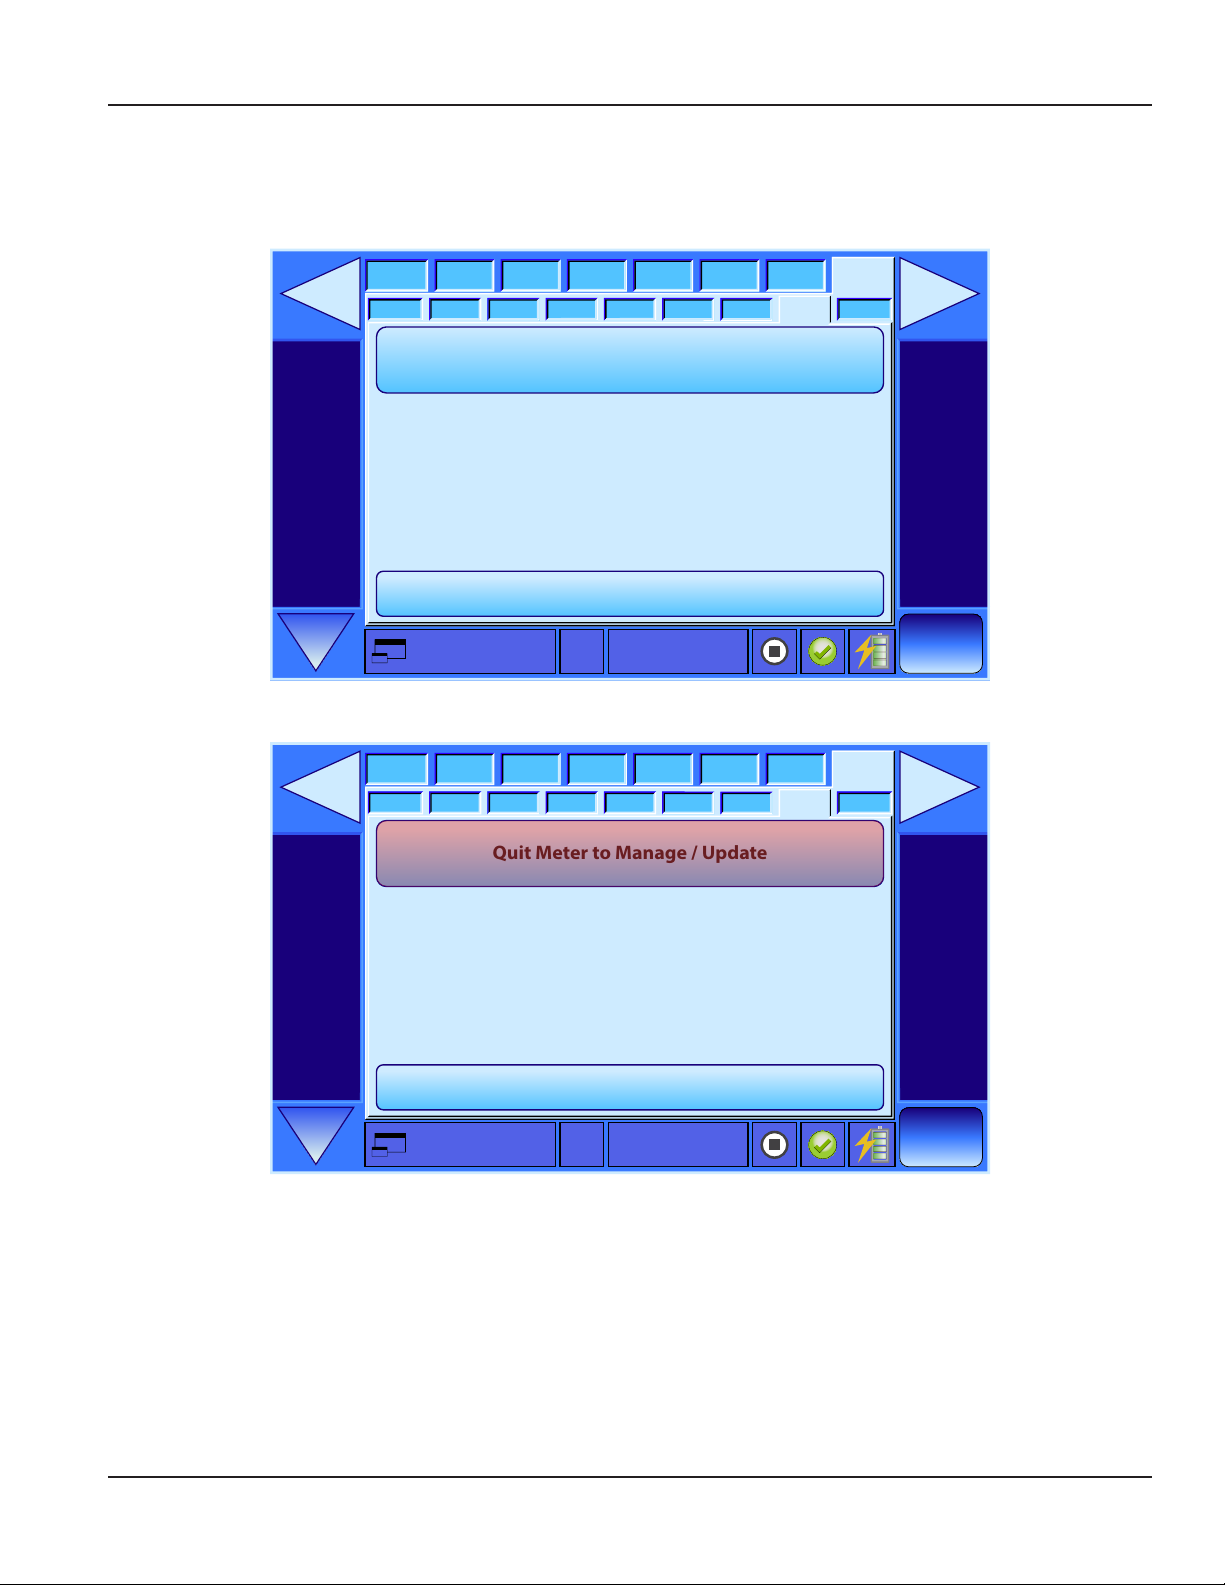
6. From the Display ► Meters screen, press the System tab on the far right of the display.
7. From the System screen, select Update (System ► Update).
Display
Power
Meter Log
Disk
PC
Quit Meter to Manage / Update
GUI -> Rev H = V 001.16 20121205.0
DSP -> Rev H =
DASH -> Rev F =
BIOS -> Rev A =
OS -> Rev A =
V
001.16 20121205.0
V
001.12 20120821.0
V
001.00 20111112.0
V
001.02 20121011.0
Set Up Quick Boot
8. Press the Quit Meter to Manage / Update button.
Display
Power
Meter Log
Disk
PC
Quit Meter to Manage / Update
Storage
Storage
SystemSite I/O CalAdv
Time
Update
ENetMisc
Site Name0.00 GPM
Comm
4/12/2013
12:24 PM
SystemSite I/O CalAdv
Time
Update
ENetMisc
Comm
GUI -> Rev H = V 001.16 20121205.0
DSP -> Rev H =
DASH -> Rev F =
BIOS -> Rev A =
OS -> Rev A =
9. Press the Start Updater button.
V
001.16 20121205.0
V
001.12 20120821.0
V
001.00 20111112.0
V
001.02 20121011.0
Set Up Quick Boot
4/12/2013
Site Name0.00 GPM
12:24 PM
Page 5 May 2013
Page 6

ORDE
M
&
P
R
O
G
R
E
S
S
O
DXN Portable Ultrasonic Measurement System
Launch Updater
Start Flowmeter
Start Updater
Flowmeter Administration Tools
800-535-3569
©2012 Racine Federated Inc., all rights reserved
10. Press the Unlock button (Step 1: Unlock System (Reboot).
Check Update Status
Unlock
Update
System
Copy
Update
Flowmeter
Step 1: Unlock System (Reboot)
Step 2: Update System (Reboot)
Step 3: Copy Updated Files
Step 4: Update Flowmeter
Series DXN
Rev G
dynasonics.com
Restart System
UD: XKey1 exists
UD: SR value is 0
UD: Eth Services IP=192.168.0.100 Subnet = 255.255.255.0
UD: Folders
UD: Registry
C:\Documents and Settings\FlowMeterUser> ewfm
Protected Volume Conguration
Type RAM
State ENABLED
Boot Command NO_CMD
Param1 0
Param2 0
Presistent Data “”
Volume ID C7 A2 27 25 00 7E 00 00 00 00 00
Device Name “\Device\HarddiskVolume1” [C:]
Max Levels 1
Clump Size 512
Current Level 1
Memory used for data 6432256 bytes
Memory used for mapping 16384 bytes
Quit Update Utility
Lock
800-535-3569
Step 5: Lock System (Reboot)
©2012 Racine Federated Inc., all rights reserved
dynasonics.com
×
11. A small panel in the center of the screen asks if it is OK to reboot. Remove the
USB Update Drive and then press the OK button.
Reboot
OK
Page 6 May 2013
Page 7

ORDE
M
&
P
R
O
G
R
E
S
S
O
Firmware Update Manual
Quit Update Utility
dynasonics.com
Unlock
Update
System
Copy
Update
Flowmeter
Lock
800-535-3569
Check Update Status
Step 1: Unlock System (Reboot)
Step 2: Update System (Reboot)
Step 3: Copy Updated Files
Step 4: Update Flowmeter
Step 5: Lock System (Reboot)
©2012 Racine Federated Inc., all rights reserved
Reboot
OK
Restart System
UD: XKey1 exists
UD: SR value is 0
UD: Eth Services IP=192.168.0.100 Subnet = 255.255.255.0
UD: Folders
UD: Registry
C:\Documents and Settings\FlowMeterUser> ewfm
Protected Volume Conguration
×
Type RAM
State ENABLED
Boot Command NO_CMD
Param1 0
Param2 0
Presistent Data “”
Volume ID C7 A2 27 25 00 7E 00 00 00 00 00
Device Name “\Device\HarddiskVolume1” [C:]
Max Levels 1
Clump Size 512
Current Level 1
Memory used for data 6432256 bytes
Memory used for mapping 16384 bytes
After the reboot a screen with a grayed out button that says Insert USB Update Drive appears.
Series DXN
Rev G
800-535-3569
Start Flowmeter
Insert USB Update Drive
Flowmeter Administration Tools
©2012 Racine Federated Inc., all rights reserved
dynasonics.com
Page 7 May 2013
Page 8

ORDE
M
&
P
R
O
G
R
E
S
S
O
DXN Portable Ultrasonic Measurement System
12. Insert the USB Update Drive. When the USB Update Drive containing the update is inserted the grayed out button
changes to an active Start Updater button.
Launch Updater
Series DXN
Rev G
Start Flowmeter
Start Updater
Flowmeter Administration Tools
800-535-3569
©2012 Racine Federated Inc., all rights reserved
dynasonics.com
13. Press the Start Updater button.
14. The meter should now be back on the Update screen. Press Update System button Step 2: Update System (Reboot).
OTE:N If this step was completed in a previous system update the update utility may skip this step and go directly to step 3.
Check Update Status
Restart System
Quit Update Utility
UD: XKey1 exists
Unlock
Update
System
Copy
Update
Flowmeter
Lock
800-535-3569
Step 1: Unlock System (Reboot)
Step 2: Update System (Reboot)
Step 3: Copy Updated Files
Step 4: Update Flowmeter
Step 5: Lock System (Reboot)
©2012 Racine Federated Inc., all rights reserved
UD: SR value is 0
UD: Eth Services IP=192.168.0.100 Subnet = 255.255.255.0
UD: Folders
UD: Registry
C:\Documents and Settings\FlowMeterUser> ewfm
Protected Volume Conguration
Type RAM
State ENABLED
Boot Command NO_CMD
Param1 0
Param2 0
Presistent Data “”
Volume ID C7 A2 27 25 00 7E 00 00 00 00 00
Device Name “\Device\HarddiskVolume1” [C:]
Max Levels 1
Clump Size 512
Current Level 1
Memory used for data 6432256 bytes
Memory used for mapping 16384 bytes
dynasonics.com
When the update process is complete a green appears in the Update System (Reboot) box. The screen now also
indicates Reboot. Remove the USB Update Drive and then press the OK button.
Page 8 May 2013
Page 9

ORDE
M
&
P
R
O
G
R
E
S
S
O
ORDE
M
&
P
R
O
G
R
E
S
S
O
Firmware Update Manual
Quit Update Utility
dynasonics.com
Unlock
Update
System
Copy
Update
Flowmeter
Lock
800-535-3569
Check Update Status
Step 1: Unlock System (Reboot)
Step 2: Update System (Reboot)
Step 3: Copy Updated Files
Step 4: Update Flowmeter
Step 5: Lock System (Reboot)
©2012 Racine Federated Inc., all rights reserved
Reboot
OK
Restart System
SET: D:\WindowsD\WMILogs
SET: D:\WindowsD\MSMQLogs
SET: HKEY_CURRENT_USER\Software\Microsoft
SET: HKEY_CURRENT_USER\Software\Microsoft
SET: HKEY_CURRENT_USER\Envrioment fro
SET: HKEY_CURRENT_USER\Envrioment fro
SET: HKEY_LOCAL_MACHINE\SYSTEM\Current
SET: HKEY_LOCAL_MACHINE\SYSTEM\Current
×
SET: HKEY_LOCAL_MACHINE\SYSTEM\Current
OK: HKEY_LOCAL_MACHINE\SOFTWARE\Microsoft
OK: HKEY_LOCAL_MACHINE\SOFTWARE\Microsoft
OK: HKEY_LOCAL_MACHINE\SYSTEM\CurrentC
OK: HKEY_LOCAL_MACHINE\SYSTEM\CurrentC
SET: HKEY_LOCAL_MACHINE\SOFTWARE\Microsoft
SET: HKEY_LOCAL_MACHINE\SOFTWARE\Microsoft
OK: HKEY_LOCAL_MACHINE\SYSTEM\CurrentC
SET: HKEY_LOCAL_MACHINE\SYSTEM\Current
SET: HKEY_LOCAL_MACHINE\SYSTEM\Current
SET: HKEY_LOCAL_MACHINE\SYSTEM\Current
SET: HKEY_LOCAL_MACHINE\SYSTEM\Current
SET: HKEY_LOCAL_MACHINE\SYSTEM\Current
15. When the opening screen reappears, insert the USB Update Drive. The Insert USB Update Drive button changes to a
Start Updater button.
16. Press the Start Updater button.
17. Press the Copy button (Step 3: Copy Updated Files). The text area to the right shows a series of status messages that
ends with “Copying Files Complete 98 Files”.
Quit Update Utility
dynasonics.com
Unlock
Update
System
Copy
Update
Flowmeter
Lock
800-535-3569
Check Update Status
Step 1: Unlock System (Reboot)
Step 2: Update System (Reboot)
Step 3: Copy Updated Files
Step 4: Update Flowmeter
Step 5: Lock System (Reboot)
©2012 Racine Federated Inc., all rights reserved
Restart System
OK: OS Services
OK: Eth Services IP=192.168.0.100 Subnet = 255.255.255.0
OK: Folders
OK: Registry
C:\Documents and Settings\FlowMeterUser> ewfm
Protected Volume Conguration
Type RAM
State ENABLED
Boot Command NO_CMD
Param1 0
Param2 0
Presistent Data “”
Volume ID C7 A2 27 25 00 7E 00 00 00 00 00
Device Name “\Device\HarddiskVolume1” [C:]
Max Levels 1
Clump Size 512
Current Level 1
Memory used for data 0 bytes
Memory used for mapping 0 bytes
OTE:N If the process hangs-up, press the Restart System button which should clear the hang.
OTE:N The number of files copied may vary from 98.
Page 9 May 2013
Page 10

ORDE
M
&
P
R
O
G
R
E
S
S
O
ORDE
M
&
P
R
O
G
R
E
S
S
O
DXN Portable Ultrasonic Measurement System
Check Update Status
Restart System
Quit Update Utility
Copy Files Complete 98 Files
Unlock
Update
System
Copy
Update
Flowmeter
Lock
800-535-3569
Step 1: Unlock System (Reboot)
Step 2: Update System (Reboot)
Step 3: Copy Updated Files
Step 4: Update Flowmeter
Step 5: Lock System (Reboot)
©2012 Racine Federated Inc., all rights reserved
dynasonics.com
18. Press the Update Flowmeter button (Step 4: Update Flowmeter). A short process runs again indicated by text lling
the text area.
Quit Update Utility
Unlock
Check Update Status
Step 1: Unlock System (Reboot)
Restart System
Copy Files Complete 98 Files
Update
System
Copy
Update
Flowmeter
Lock
800-535-3569
Step 2: Update System (Reboot)
Step 3: Copy Updated Files
Step 4: Update Flowmeter
Step 5: Lock System (Reboot)
©2012 Racine Federated Inc., all rights reserved
At the end of the Update Flowmeter process the last lines of text should say:
“!Successful Embedded Update!”
“Exiting Reprogramming Mode”
At this point a green check mark appears in the Step 4: Update Flowmeter box.
dynasonics.com
Page 10 May 2013
Page 11

ORDE
M
&
P
R
O
G
R
E
S
S
O
ORDE
M
&
P
R
O
G
R
E
S
S
O
Firmware Update Manual
Quit Update Utility
dynasonics.com
Unlock
Update
System
Copy
Update
Flowmeter
Lock
800-535-3569
Check Update Status
Step 1: Unlock System (Reboot)
Step 2: Update System (Reboot)
Step 3: Copy Updated Files
Step 4: Update Flowmeter
Step 5: Lock System (Reboot)
©2012 Racine Federated Inc., all rights reserved
Restart System
15:19:23 Begin Embedded Update
15:19:23 Boot...AAAtrtrtrtr TrRBB Ready
15:19:28 Embedded File:
CRC32B:
18C97728
MD5:
867B861C
7038 D7D4 A2C5
F74EE8D207CE
15:19:30 Erase ............ Success
15:19:41 Program ............ Success
15:20:11 Verify ............ Success
!Success Embedded Update!
Exiting Reprogramming Mode
19. Press the Lock button and then remove the USB Update Drive.
When the Lock button is pressed more code appears in the progress screen. When the process is complete a request
to reboot appears in the middle of the screen.
Check Update Status
Restart System
Quit Update Utility
C:\Documents and Settings\FlowMeterUser>ewfm
Unlock
Update
System
Copy
Update
Flowmeter
Lock
800-535-3569
Step 1: Unlock System (Reboot)
Step 2: Update System (Reboot)
Reboot
Step 3: Copy Updated Files
OK
Step 4: Update Flowmeter
Step 5: Lock System (Reboot)
©2012 Racine Federated Inc., all rights reserved
*** Enabling overlay
Protected Volume Conguration
Type RAM
State DISABLED
Boot Command ENABLE
Param1 0
×
Param2 0
Presistent Data “”
Volume ID C7 A2 27 25 00 7E 00 00 00 00 00
Device Name “\Device\HarddiskVolume1” [C}
Max Levels 1
Clump Size 512
Current Level N/A
Memory used for data 0 bytes
Memory used for mapping 0 bytes
dynasonics.com
20. Press the OK button to reboot the system.
The DXN reboots ending up at the Start screen. This reboot uses a more Window’s like process and requires more
time for completion. When the reboot is complete the meter should return to the Start Screen.
Page 11 May 2013
Page 12

ORDE
M
&
P
R
O
G
R
E
S
S
O
DXN Portable Ultrasonic Measurement System
Normal Start APP
Series DXN
Start Flowmeter
Insert USB Update Drive
Flowmeter Administration Tools
800-535-3569
©2012 Racine Federated Inc., all rights reserved
dynasonics.com
21. Press the Start Flowmeter button to begin normal operations.
OTE:N If the USB Update Drive is not removed before the OK button is pressed, the unit may lock-up. The error message
”Lock EWF Fail” may also appear in the text area. Remove the USB Update Drive. When the meter returns to the
screen that had the grayed out Insert USB Update Drive press the Start Flow Meter button to resume
normal operations.
The meter may also hang with the text in the text area saying “Locking System
. There may also be a large red X
- - - “
in the Lock box instead of a green arrow. If this condition occurs press the Restart System button found in the upper
right portion of the screen.
Quit Update Utility
dynasonics.com
Unlock
Update
System
Copy
Update
Flowmeter
Lock
800-535-3569
Check Update Status
Step 1: Unlock System (Reboot)
Step 2: Update System (Reboot)
Step 3: Copy Updated Files
Step 4: Update Flowmeter
Step 5: Lock System (Reboot)
©2012 Racine Federated Inc., all rights reserved
Restart System
Locking System
–––
OTE:N See below for an additional instructions on clearing a lock-up with a hard reboot.
When the USB Update Drive is removed the DXN may continue on to a system reboot but hang at the Dynasonics
splash screen.
Page 12 May 2013
Page 13

Firmware Update Manual
This condition requires a hard reboot by pressing and holding the main power button until the unit turns off. When
the power button is pressed again the meter should start normally.
A successful update is verified by noting the revision letter in the upper right hand corner of the Start screen. It
should match the revision letter noted when the updater zip file was extracted.
Series DXN
Rev H
Launching in 17 seconds
or click here to begin
Start Using Factory Defaults
Start Using Guided Setup Wizard
800-535-3569
©2012 Racine Federated Inc., all rights reserved
dynasonics.com
Page 13 May 2013
Page 14

DXN Portable Ultrasonic Measurement System
QUICK BOOT
It is highly recommended to configure the DXN to use the Quick Boot process as described in the following.
To enable Quick Boot from the main screen select Update (System ► Update) and then press the Set Up Quick Boot button.
Display
Power
Meter Log
Disk
PC
Storage
ENetMisc
Time
Update
SystemSite I/O CalAdv
Comm
Quit Meter to Manage / Update
GUI -> Rev A = V 001.1 20111116.0
DSP -> Rev A =
DASH -> Rev A =
BIOS -> Rev A =
OS -> Rev A =
V
001.1 20111116.0
V
001.0 20111112.0
V
001.0 20111112.0
V
001.0 20111112.0
Set Up Quick Boot
10/12/2011
Site Name0.00 GPM
13:24
The application reverts to the Normal Start APP screen. Press the Start Flow Meter button. The DXN enters a short hibernation
process and then shuts down.
Normal Start APP
Series DXN
Start Flowmeter
Insert USB Update Drive
Flowmeter Administration Tools
800-535-3569
©2012 Racine Federated Inc., all rights reserved
dynasonics.com
On the next power up, the unit starts in Quick Boot mode.
Page 14 May 2013
Page 15

PRODUCTS COVERED
Badger Meter Warranty
DXN Updater
The Badger Meter warranty shall apply to the Dynasonics
Flow Meter (“Product”).
MATERIALS AND WORKMANSHIP
Badger Meter warrants the Product to be free from defects in
materials and workmanship for a period of 12 months from
the original purchase date.
PRODUCT RETURNS
Product failures must be proven and verified to the
satisfaction of Badger Meter. The Badger Meter obligation
hereunder shall be limited to such repair and replacement
and shall be conditioned upon Badger Meter receiving
written notice of any asserted defect within 10 (ten) days
after its discovery. If the defect arises and a valid claim
is received within the Warranty Period, at its option,
Badger Meter will either (1) exchange the Product with a
new, used or refurbished Product that is at least functionally
equivalent to the original Product, or (2) refund the purchase
price of the Product. DO NOT RETURN ANY PRODUCT UNTIL
YOU HAVE CALLED THE BADGER METER CUSTOMER SERVICE
DEPARTMENT AND OBTAINED A RETURN AUTHORIZATION.
Product returns must be shipped by the Customer prepaid
F.O.B. to the nearest Badger Meter factory or distribution
center. The Customer shall be responsible for all direct
and indirect costs associated with removing the original
Product and reinstalling the repaired or replacement
Product. A replacement Product assumes the remaining
warranty of the original Product or ninety (90) days from
the date of replacement, whichever provides longer
coverage.
LIMITS OF LIABILITY
This warranty shall not apply to any Product repaired or
altered by any Party other than Badger Meter. The foregoing
warranty applies only to the extent that the Product is
installed, serviced and operated strictly in accordance with
Badger Meter instructions. The warranty shall not apply and
shall be void with respect to a Product exposed to conditions
other than those detailed in applicable technical literature
and Installation and Operation Manuals (IOMs) or which have
been subject to vandalism, negligence, accident, acts of God,
improper installation, operation or repair, alteration, or other
circumstances which are beyond the reasonable control of
Badger Meter.
With respect to products not manufactured by Badger Meter,
the warranty obligations of Badger Meter shall in all respects
conform and be limited to the warranty extended to
Badger Meter by the supplier.
THE FOREGOING WARRANTIES ARE EXCLUSIVE AND IN
LIEU OF ALL OTHER EXPRESS AND IMPLIED WARRANTIES
WHATSOEVER, INCLUDING BUT NOT LIMITED TO IMPLIED
WARRANTIES OF MERCHANTABILITY AND FITNESS FOR A
PARTICULAR PURPOSE (except warranties of title).
Any description of a Product, whether in writing or made
orally by Badger Meter or its agents, specifications, samples,
models, bulletins, drawings, diagrams, engineering sheets
or similar materials used in connection with any Customer’s
order are for the sole purpose of identifying the Product
and shall not be construed as an express warranty. Any
suggestions by Badger Meter or its agents regarding
use, application or suitability of the Product shall not be
construed as an express warranty unless confirmed to be
such, in writing, by Badger Meter.
EXCLUSION OF CONSEQUENTIAL DAMAGES
AND DISCLAIMER OF OTHER LIABILITY
Badger Meter liability with respect to breaches of the
foregoing warranty shall be limited as stated herein.
Badger Meter liability shall in no event exceed the contract
price. BADGER METER SHALL NOT BE SUBJECT TO AND
DISCLAIMS: (1) ANY OTHER OBLIGATIONS OR LIABILITIES
ARISING OUT OF BREACH OF CONTRACT OR OF WARRANTY,
(2) ANY OBLIGATIONS WHATSOEVER ARISING FROM TORT
CLAIMS (INCLUDING NEGLIGENCE AND STRICT LIABILITY)
OR ARISING UNDER OTHER THEORIES OF LAW WITH RESPECT
TO PRODUCTS SOLD OR SERVICES RENDERED BY BADGER
METER, OR ANY UNDERTAKINGS, ACTS OR OMISSIONS
RELATING THERETO, AND (3) ALL CONSEQUENTIAL,
INCIDENTAL AND CONTINGENT DAMAGES WHATSOEVER.
HYB-PM-00095-EN-02 May 2013
Badger Meter Warranty
Page 16

Dynasonics is a registered trademark of Badger Meter, Inc. Other trademarks appearing in this document are the property of their respective entities. Due to continuous research ,
product improvements and enhancements, Badger Meter reserves the right to change product or system specications without notice, except to the extent an outstanding
contractual obligation exists. © 2013 Badger Meter, Inc. All rights reserved.
www.badgermeter.com
The Americas | Badger Meter | 4545 West Brown Deer Rd | PO Box 245036 | Milwaukee, WI 53224-9536 | 800-876-3837 | 414-355-0400
México | Badger Meter de las Americas, S.A. de C.V. | Pedro Luis Ogazón N°32 | Esq. Angelina N°24 | Colonia Guadalupe Inn | CP 01050 | México, DF | México | +52-55-5662-0882
Europe, Middle East and Africa | Badger Meter Europa GmbH | Nurtinger Str 76 | 72639 Neuen | Germany | +49-7025-9208-0
Czech Republic | Badger Meter Czech Republic s.r.o. | Maříkova 2082/26 | 621 00 Brno, Czech Republic | +420-5-41420411
Slovakia | Badger Meter Slovakia s.r.o. | Racianska 109/B | 831 02 Bratislava, Slovakia | +421-2-44 63 83 01
Asia Pacic | Badger Meter | 80 Marine Parade Rd | 21-04 Parkway Parade | Singapore 449269 | +65-63464836
China | Badger Meter | 7-1202 | 99 Hangzhong Road | Minhang District | Shanghai | China 201101 | +86-21-5763 5412 Legacy Document Number: 06-HYB-TN-00013-EN
 Loading...