

Page 1
MODEL MOTTK30 TRADITIONAL MICROWAVE TRIM KIT
INSTALLATION INSTRUCTIONS
Before you begin, read these instructions completely and carefully.
Getting Started
■ Remove packaging
Contents Tools Required
Part Description Qty
Trim Assembly 1
Base 1
Mounting Bracket (L/R) 2
Sheet Metal Screws 10
1/8”Drill
#2 Phillip Screwdriver
Installing T rim Kit
1. Cut opening in the cabinet face per the following dimensions:
t: 17”+ 1/16”
Heigh
Width: 24-3/4”+ 1/16”, –0
Note: Refer to diagram on the following page. The minimum
cabinet depth is 20”. When installing the Microwave and
Trim Kit in combination with a Wall Oven or Warming
Drawer, please follow the recommendations in the
Microwave Installation/ Use & Care Manual.
2. Add adequate platform base support in the bottom of the
cabinet for trim kit base to rest on.
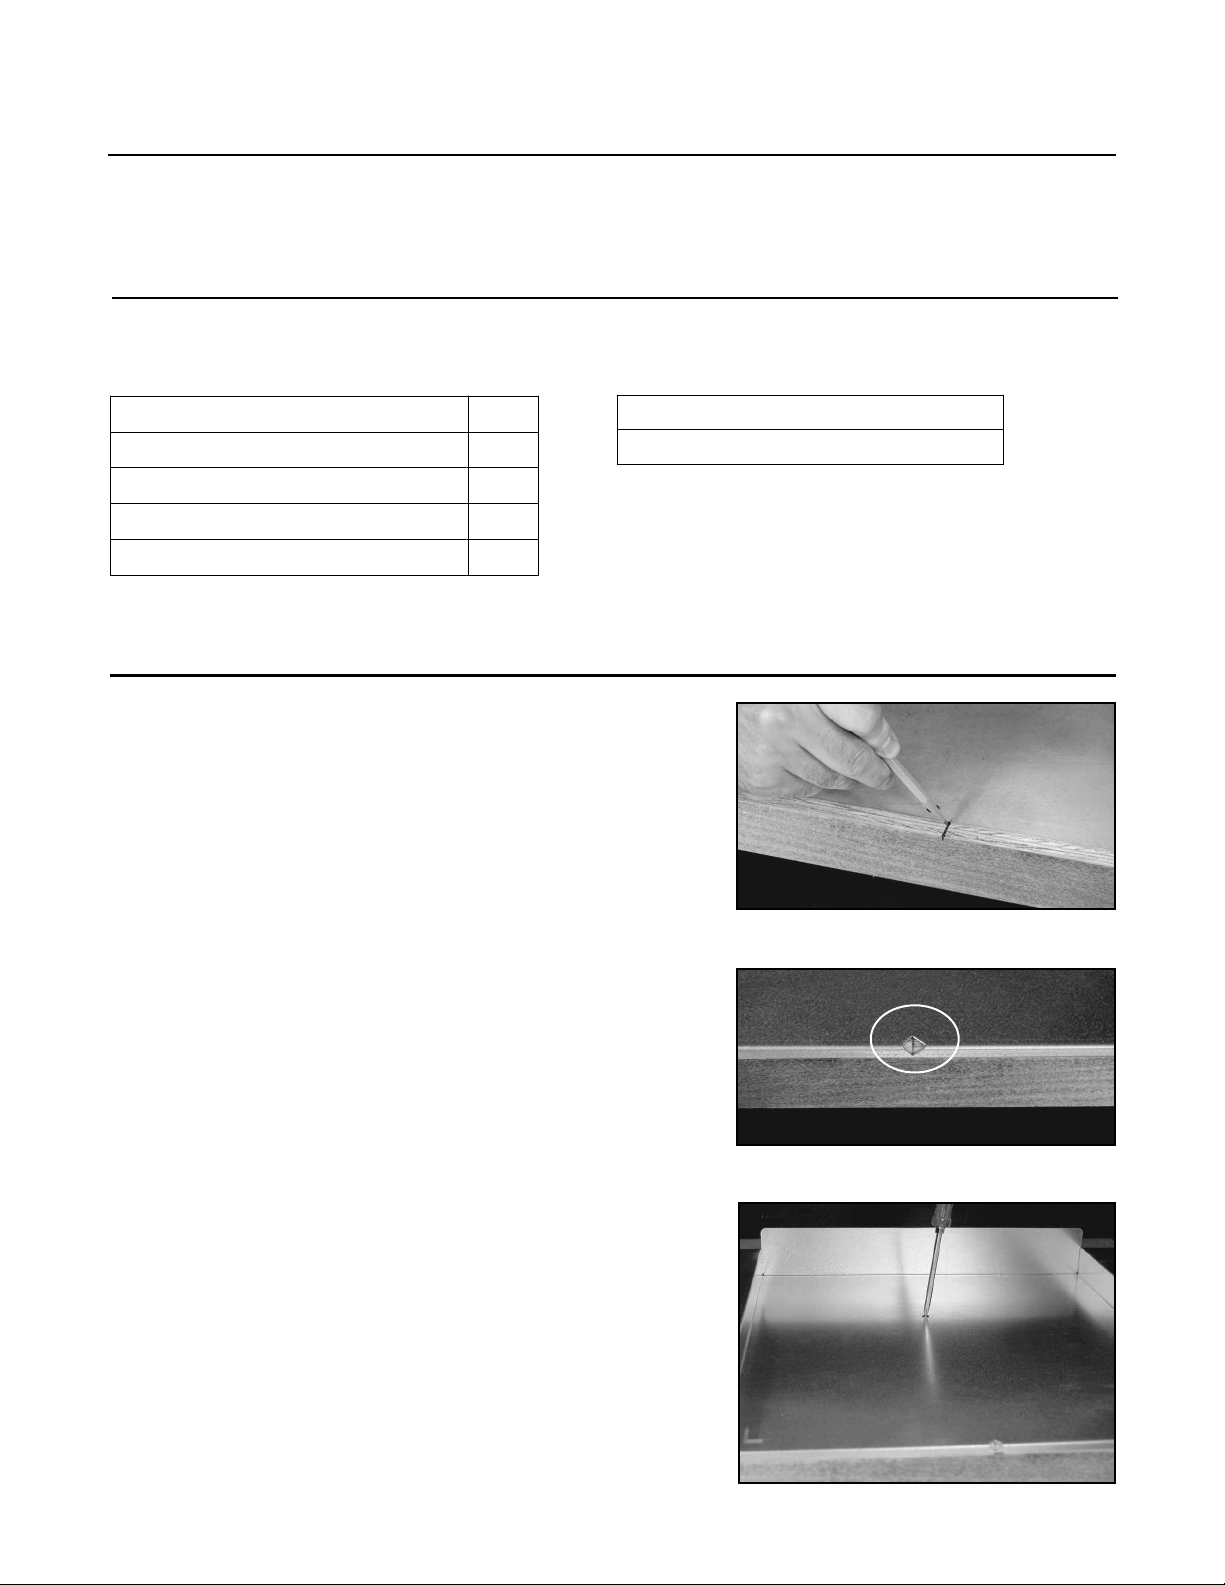
3. Mark a centerline on the front edge of the cabinet bottom
(Fig. 01).
, –0
Fig.01
4. Place trim kit base and align centerline mark to the triangular
notch on the front edge of the base (Fig. 02).
5. Drill 1/8”pilot holes in the cabinet using the base as a
template and install a screw through the base into the cabinet
bottom to prevent the base from shifting (Fig. 03).
6. Insert Microwave into opening on top of the base. The
icrowave feet should sit in the recesses on the base for
M
t alignment. The Microwave should be plugged in at
ec
r
or
c
this point.
Fig. 02
Fig. 03
Page 2
1/16"
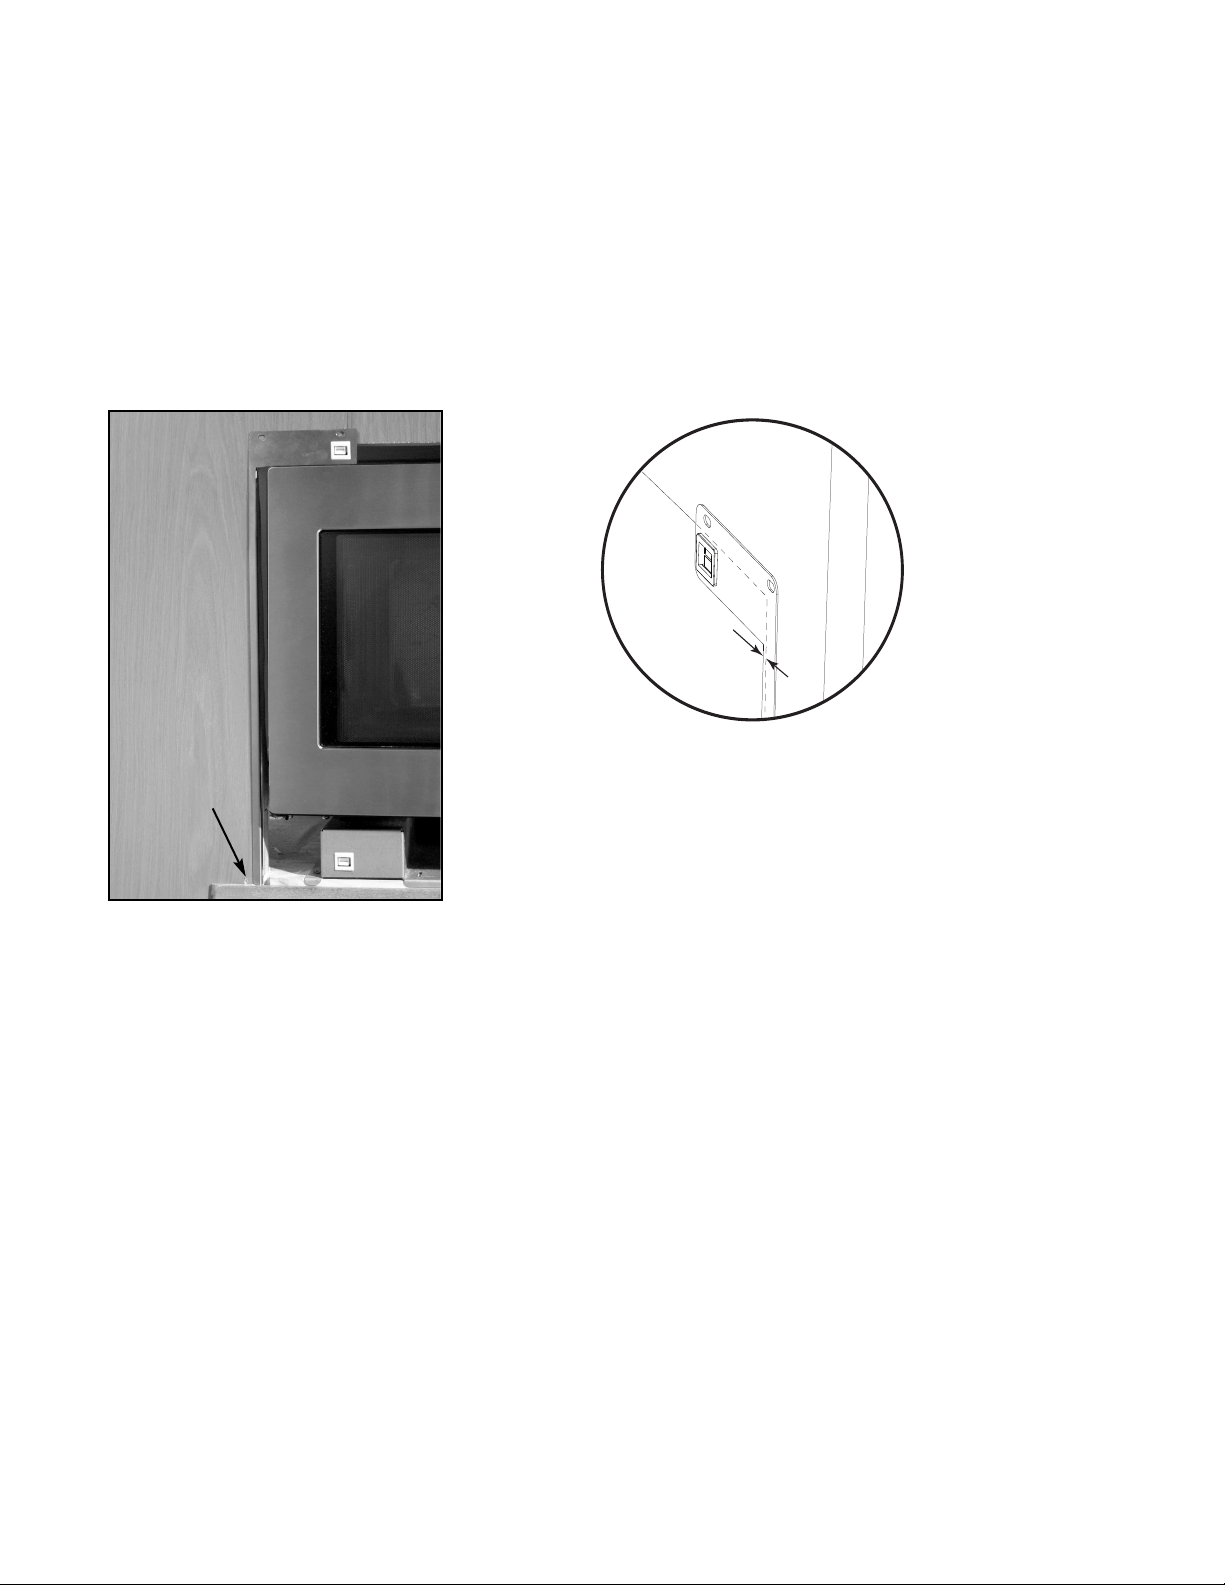
7. Place the right and left mounting bracket supports by resting the bottom edges of the supports on the
bottom of the cutout (Fig 04). The long flange on the side supports should clear the side of the cutout by
approximately 1/16”(Fig. 05). Install top and bottom screws into the cabinet face by first drilling 1/8”
pilot holes (see inserts 3 and 4).
8. Install trim kit face by inserting top pins of trim into corresponding sockets on the top corners of clip
support plates (see insert 1).
9. Finish the assembly by inserting the bottom pins into the
corresponding sockets on front edge of the base (see insert 3). Check for proper door opening
clearances.
Bracket
Support
on the
bottom
of cutout
Fig. 05
Fig. 04
Page 3

TRIM KIT
ASSEMBLY
MOUNTING
BRACKET
SUPPORT
BASE
TRIANGULAR
CENTERING
NOTCH
LOCATE MOUNTING BRACKET
INBOTTOM CORNERS
OFCUTOUT
HORIZONTAL CLIP
ORIENTATION
ON MOUNTING
BRACKET
HORIZONTAL
CLIP ORIENTATION
ONBASE
TOP PIN
OF TRIM
BOTTOM PIN OF TRIM
SCREW HOLE
SCREW HOLE
FLANGE
1/8" HOLE FOR
MOUNTING
SCREW
CENTER
LINE
24 3/4"+1/16"-0
"
CABINET CUT-OUT:
17" +1/16" -0"
CABINET
INSERT 4
INSERT 1
INSERT 3
INSERT 2
Stainless Steel Care
This Trim Kit is made of stainless steel. Use the mildest cleaning procedure first. Start with hot soapy water,
rinse and dry. If the trim kit has food soil remaining, try a general kitchen cleaner, such as Fantastik®, Simple
een® or F
Gr
in the direction of the grain. Do not use a steel wool pad, it will scratch the surface. To touch up noticeable
scratches in the stainless steel, sand very lightly with dry 100 grit emery paper, rubbing in the direction of the
grain. After cleaning use a stainless steel polish, such as Stainless Steel Magic®.
mula 409®. Apply cleaner with a damp sponge
or
inse thor
, r
oughly and dr
y. Always scrub lightly
Page 4

5800 Skylab Road, Huntington Beach, CA 92647
Tel: 714.372.7000 • Fax: 714.372.7001
Customer Service: 888.936.7872
www.dcsappliances.com
P/N 241186 Rev. B 02/09
 Loading...