


Dynamic
CCTVLtd
DYNAMIC MX DVR PTZ SETUP AND OPERATION GUIDE
Page 1 of 1
Our MX range of dvrs have the ability to connect and control many ptz camera models using a whole host of
different protocols, please follow this step by step guide which will give you all the information you need with
regards the setup and use of your ptz product with our MX dvr.
1. CONNECTING YOUR PTZ PRODUCT TO OUR MX DVR
Our MX DVR range have included and Rs485 half duplex serial interface for controlling telemetry devices such
as PTZ cameras, the half duplex method adopts a two wire system which is polarity sensitive + and - this
means + at the DVR must be connected to the relevant + input at your telemetry device and the same for
your - connection. Please see images below which show the location of the Rs485 inputs for our various MX
DVRs models:
NOTE: if your telemetry device does not support Rs485 serial bus it will not be possible to achieve
communication wih any of our MX DVR range.
MX-16. MX-8D & MX-16D
PIN 4 + Rs485 + / PIN 5 + Rs485 -
MX-16PRO
PIN 4 + Rs485 + / PIN 5 + Rs485 -

Dynamic
CCTVLtd
Page 2 of 1
2. CONFIGURING YOUR MX DVR TO YOUR WORK WITH YOUR CHOSEN TELEMETRY DEVICE
Once you have connected your telemetry device to our MX DVR it is now time to configure the communication
settings withing the DVR so that full functionality can be achieved, the first step is to right click your mouse
anywhere on the screen to show OSD icons then click and enter the option labelled SETUP as seen below:
Once in the setup sub menu you will see an option labelled camera click on this to display and choose the tab
option labelled PTZ to display and choose the tab option labelled PTZ to display the below window:
The above window lists all options that relate to communication of your attached telemetry device and each
camera input can be configured with its own independent settings
PROTOCOL: Click on the protocol option next to each camera input number to set independent protocol
language for chosen camera this will display a drop down list of options as below - simply click on the one you
wish to use for your chosen video channel and it will appear within the protocol section next to the video
channel number.
DYNAMIC MX DVR PTZ SETUP AND OPERATION GUIDE

Dynamic
CCTVLtd
Page 3 of 1
CAMERA ID it is common practice to assign an iD address to all telemetry devices that are connected to a
controller or DVR, this enables the control device to differentiate between the different connected device. Each
camera input has a default ID that matched the video input channel number but this can be changed if
necessary, simply click on the ID number that relates to the video channel you wish to change and this will
display a GUI keypad where an ID number between 1 and 255 can be selected.
NOTE: Each connected telemetry device should have its own unique ID, setting two devices to the same ID will
create a conflict and will cause problems when in use.
BAUD RATE This relates to communication bps speed and the below options can be selected.
NOTE: the above options 1) PROTOCOL, 2) CAMERA ID and 3) BAUDRATE must be set the same for each
device both at the DVR and at the telemetry device, failure to match up your settings will cause a loss of
communication.
DURATION This relates to the dwell time for each pre set when running the tour option (see below) the
storing of pre sets will be discussed later in this guide, to set dwell time simply click on the option for the
telemetry device for your chosen video input display dwell time options as below, the dwell time is configurable
from 5 to 60 seconds.
TOUR Our MX DVR rane is capable of storing and running two tour options each containing a maximum of
eight pre set positions, to set your tours simply click on the tour option for the telemetry device next to your
chosen video input and choose the SET option where you will see the below window appear:
DYNAMIC MX DVR PTZ SETUP AND OPERATION GUIDE
Dynamic
CCTVLtd
Page 4 of 1
The storing of Pre sets and how to run your tour will be explained later in this guide but to set each of the
tours simply click on each of the eight options and choose a pre set number from 1 to 15 (the DVR will only
store up to a maximum of 15 pret sets, if your tour contains less pre sets than the maximum allowable eight
simply leave the unused options set to Off.
NOTE : After setting your tour (s) you will see the programmed tour number(s) appear within the tour box for
each telemetry device , any camera inputs that do not have programmed tours will be displayed within the tour
box as Off.
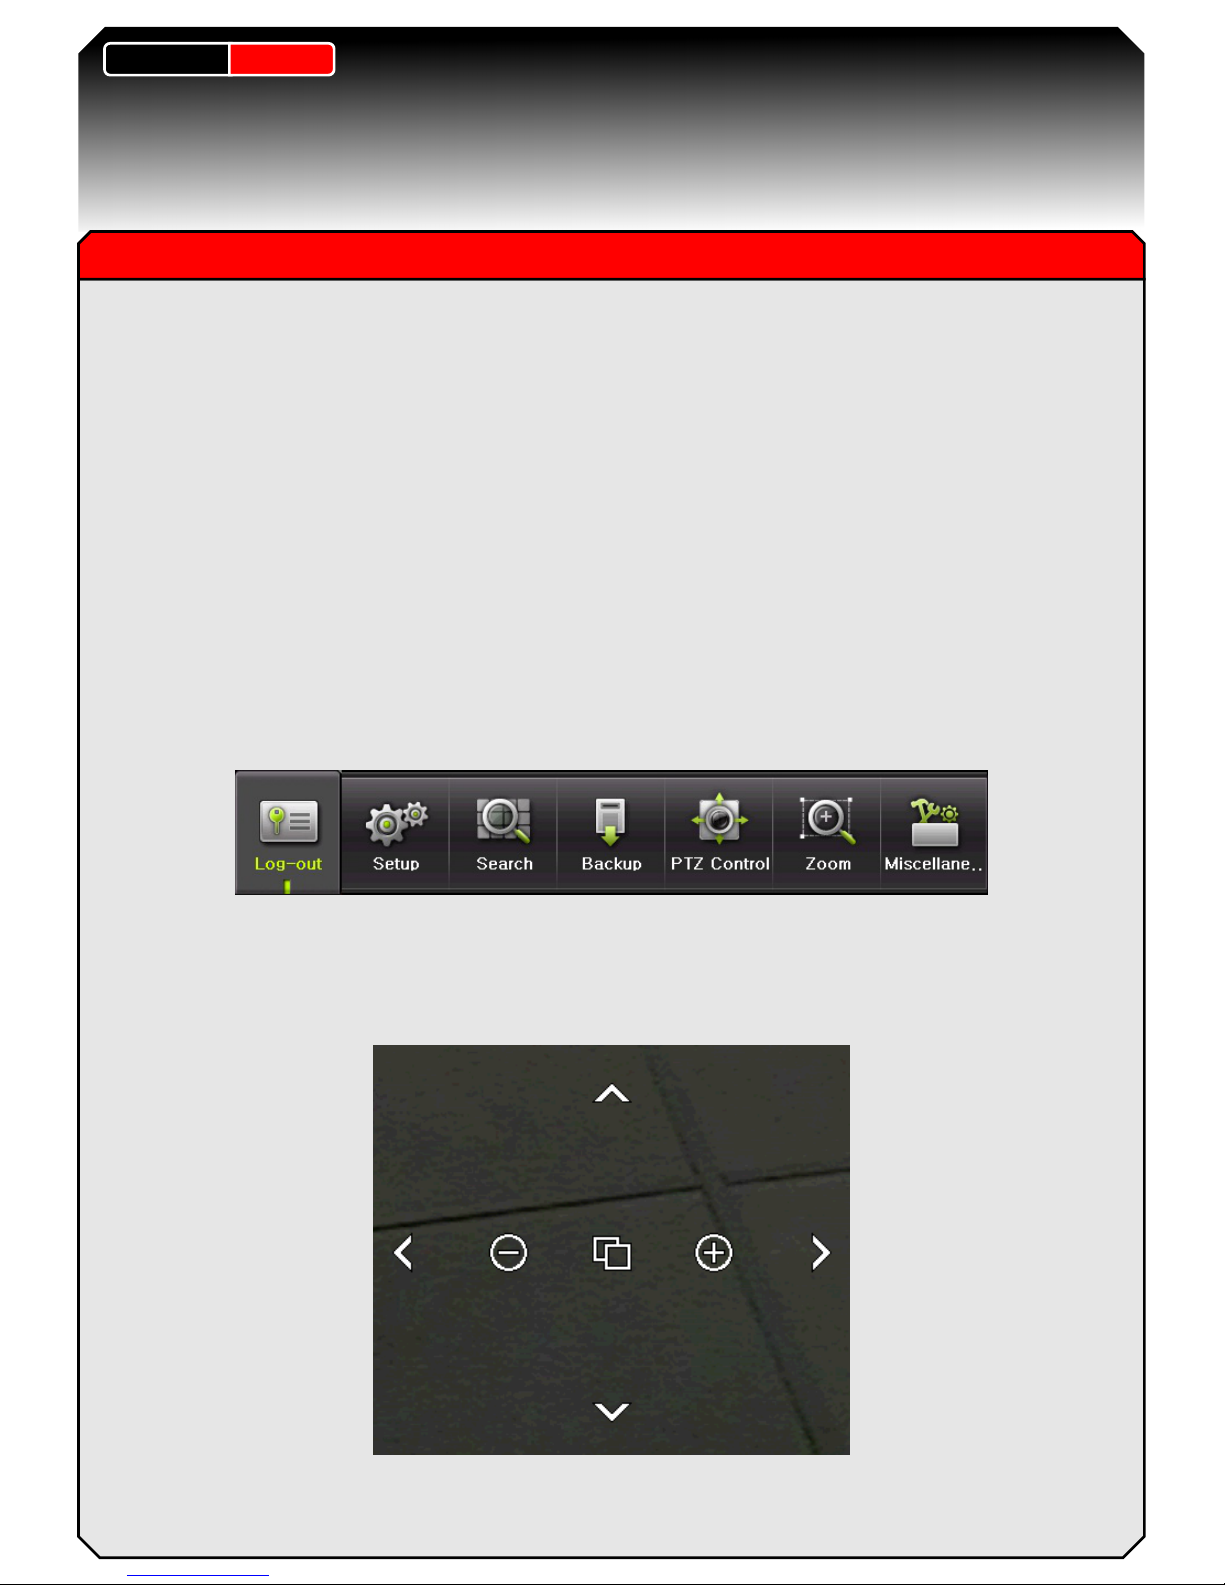
3) OPERATING YOUR NOW SET UP TELEMETRY DEVICE
The operation of all telemetry devices is done using a ptz GUI which can be controlled by either mouse or the
front dvr keys, to bring up the GUI simply right click on the screen or press the menu button to bring up OSD
options then select the option labelled PTZ as seen below :
NOTE : Before selecting the PTZ option you should bring the chosen camera you wish to control up on full
screen view, this is how the dvr knows which telemetry settings to use for each camera input.
Once you have selected the PTZ option you will see a GUI appear as below:
DYNAMIC MX DVR PTZ SETUP AND OPERATION GUIDE

Dynamic
CCTVLtd
Page 5 of 1
This GUI offers basic telemetry control, use the arrow keys to move in the desired location and the + and -
options to zoom in and out where supported. for a more in depth PTZ GUI appear as below:
This PTZ GUI offers more functionality including the ability to activate tours and set positions.
1) CAMERA This displays the camera number that the PTZ interface is currently controlling, to change this
simply click on the channel number and select new input - when this is done your full screen image will change
to the new selected input and PTZ settings that relate to this input will now be used for communication.
2) SPEED This relates the speed in which your telemetry device moves and can be set between 1 and 64,
simply click on the speed number and click on new speed until desired speed is achieved.
3) TOUR Allows you to enable and disable programmed tours simply click on the tour box and select tour
number 1 or 2, when this is done tour will automatically begin in accordance to how it was programmed. To
disable tour click on tour box and set option to Off.
NOTE : When a tour is running it is possible to exit PTZ GUI screen if other functionality is required , the tour
function will continue to run until you reopen PTZ GUI and turn tour option to Off.
4) ARROW CONTROLS For pan and tilt control of your telemetry device, move mouse pointer onto desired
arrow and left click to move your device in the chosen direction.
DYNAMIC MX DVR PTZ SETUP AND OPERATION GUIDE

Dynamic
CCTVLtd
Page 6 of 1
5) ZOOM This is for controlling the zoom level of your telemetry device, left click WIDE to zoom out and left
click TELE to zoom in.
6) FOCUS Control the focus level of your telemetry device, left click FAR to focus when zoomed in and left click
NEAR to focus when zoomed out.
7) PRESET Allows you to program and execute pre set positions, to store a preset position move your PTZ to
the chosen position then select the preset number in the associated box from 1 to 15 then press the SET
button to store the location. To move to a preset position simply select the stored preset number from the
preset box then press the GO button, your PTZ will immediately move to that pre programmed position.
8) HOME It is possible to have the DVR move your telemetry device to a home position after a period of time,
this is useful if you have manually moved your PTZ but wish for it to return to a set position such as a wide
angle view of an area. The home position is fixed as preset 1 so remember this when you are storing your
preset positions, to set the home position dwell time simply click on the home box and choose the required
delay time from 1 to 60 seconds.
9) MENU The button potentially allows you OSD menu access to your telemetry device where additional and
more in depth functions can be accessed, this is not guaranteed to work with every PTZ product and the
success of it will vary with different PTZ brands and protocols.
NOTE : When using Samung SCP range of PTZ product which is readily available from Dynamic CCTV it is
possible to use the MENU button on PTZ GUI for full menu OSD access, to do this simply set your PTZ and
DVR protocol as below :
SCP PTZ : Ensure this is set to Samsung E protocol
MX DVR : Ensure all video channel protocol for connected SCP domes is set to Samsung SCC641
When in the menu of your SCP ptz camera you can use the FOCUS NEAR and FOCUS FAR buttons of PTZ
GUI to access and exit from all sub menus and options.
DYNAMIC MX DVR PTZ SETUP AND OPERATION GUIDE
 Loading...