

Dynalite DPMI940-DALI Installation Manual

important notes
4 x Dry Contact Inputs – Presented on a 2.5mm pitch
165mm long fly leads.
Powered from the DALI Network –
No need for an external
power supply.
DALI network
– Different DALI network devices can be
connected in any order along the network. The DPMI940-
DALI does not need to be directly connected to the lighting
groups that is controlling
Simple Installation -
Compact enclosure allows the device to
be conveniently placed near the device to be controlled. All
connections are accessible without disassembly
Read Instructions – We recommend that you read this
Instruction Manual prior to commencement of installation.
Special Programming
– This device will only operate in basic
modes unless programmed via a computer. Device is to be
commissioned using Envision software.
DALI bus ready
– This device can only be used in junction with a
Philips Dynalite multi master controller such as the DDBC120DALI. DALI is a non polarised communication protocol.
Installation Location
– Install in a dry location, close to the
equipment to be interfaced with.
Dry contact wires:
Maximum recommended length of dry
connector wires is 1 meter. Wires should be kept away from any
mains cables. Inputs must not be connected to any voltage
source, only voltage free dry contacts should be used
Flying Lead inputs
wire
Function
Colour
1
COM
Purple
2
DC1
GREY
3
DC2
GREY
4
DC3
GREY
5
DC4
GREY
6
DA
ORANGE
7
DA
ORANGE
DPMI940-DALI
DALI Auxiliary Input Interface
Installation Manual
features
Electrical diagram
Connecting volt free inputs
WARNING: Do not connect DALI or Dry contact
wires to mains. Dry contact & DALI wires are NOT
SELV and should never be considered touch safe.
Functional level of isolation or better is required
between DALI / dry contact wires and mains cabling.
product specifications
DALI Serial Port: 1 x DALI port 2 x Fly leads (2 x Orange wires) Polarity insensitive.
Dry Contact Inputs: 4 x Dry contact inputs (Inputs = 4 x Grey wires Common = 1 x purple wire)
User interface controls User service switch for DALI address sign on.
Internal Controls: Programmable Logic Controller
Operating Environment: 0º to 50ºC ambient temperature, 0% to 95% RH non condensing
DALI Power Consumption: 9mA Max @ 9.5 – 22.5 VDC
Compliance: CE, C-Tick
Construction: ABS Housing
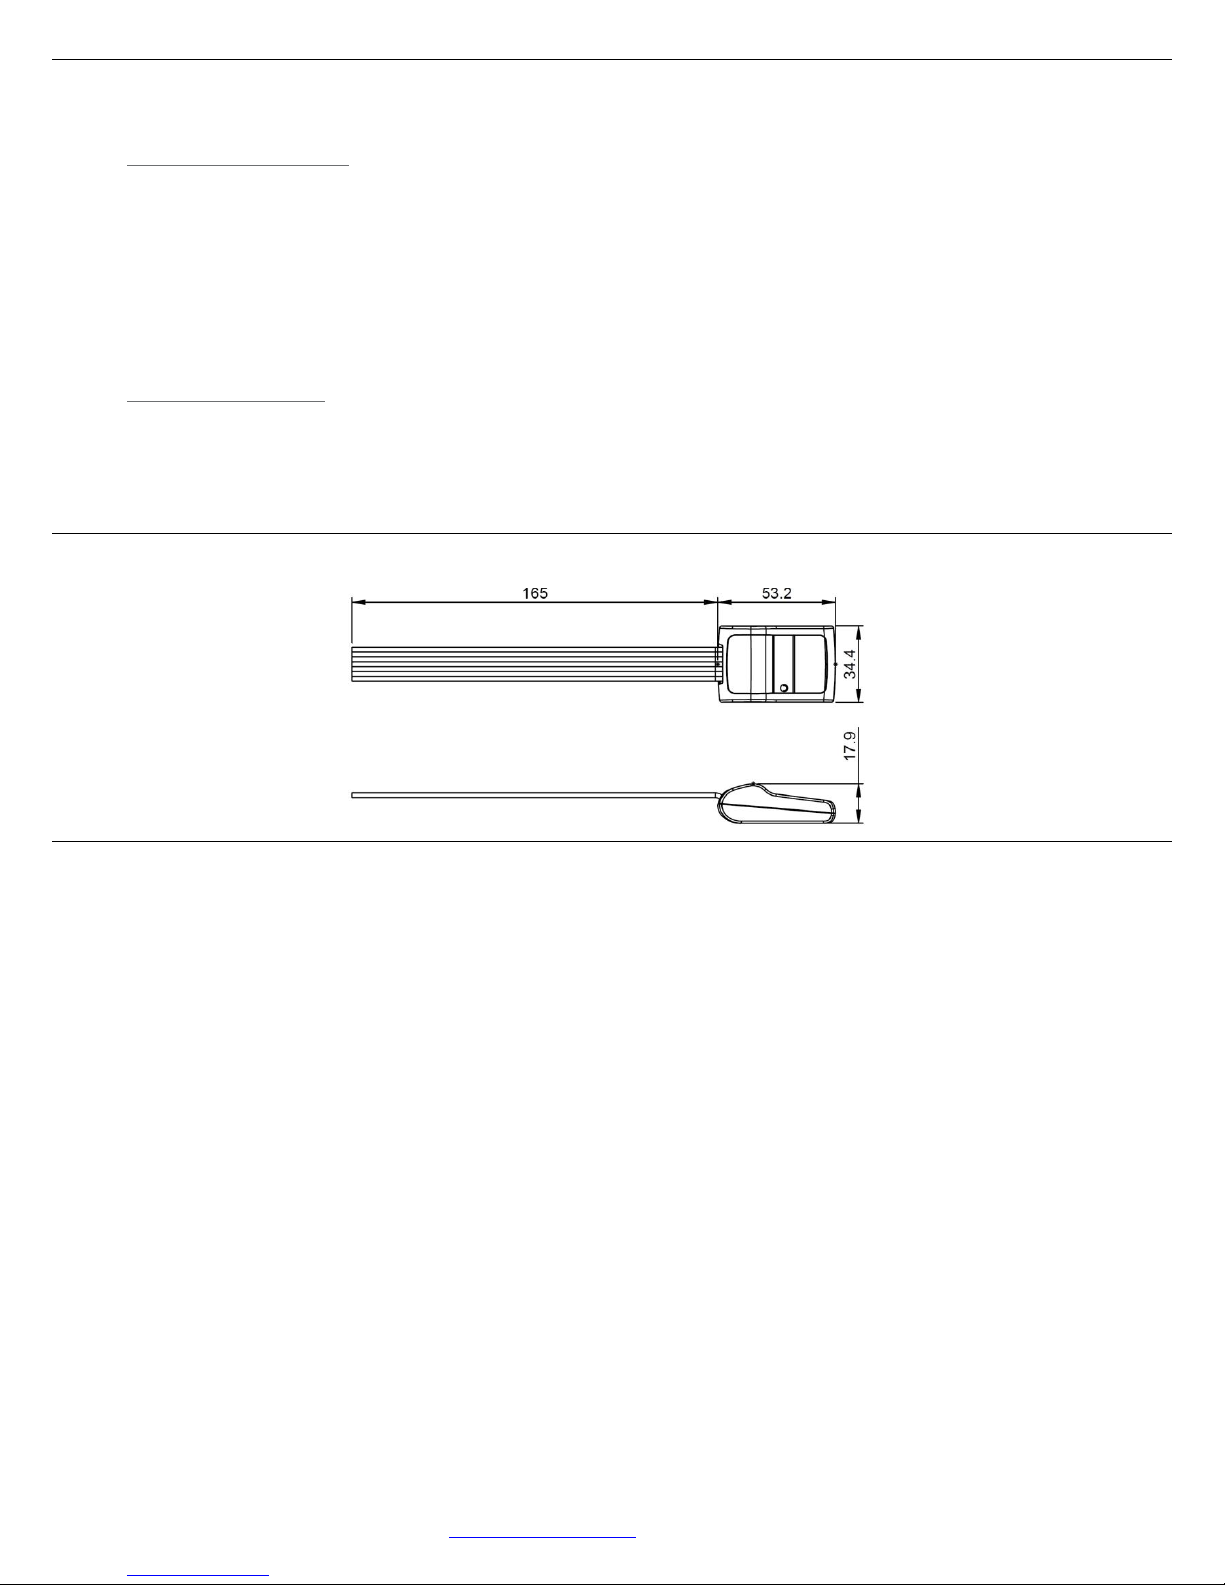
Body Dimensions: H 17.9mm x W 34.4mm x D 53.2mm
Fly leads length 165mm
Weight: 50 grams
DPMI940-DALI Instruction Manual Rev B.Doc Specifications subject to change without notice
Dynalite manufactured by WMGD Pty Ltd (ABN 33 097 246 921) Unit 6, 691 Gardeners Road Mascot NSW 2020 Australia Tel: +61 2 8338 9899 Fax: +61 2 8338 9333
E-Mail:
dynalite.info@philips.com
Web:
Philips.com/dynalite
Installation steps
mounting details
Power down & Isolate DALI bus prior to wiring the device
Switch plate mounting
1. Select a dry location for device and ensure that there is enough physical room for device and switches
without applying excessive pressure on wall plate.
2. If mounting behind switch plate ensure that all wires are not damaged and device is isolated from any
mains wires that may be present.
3. Connect grey input wires into each dry contact switch and use the purple common wire to loop into the
other side of switches contacts. Dry contact input wires must not exceed 1 meter.
4. Connect DALI network to orange wires. DALI is a non polarised communication protocol.
5. Ensure that after mounting none of the bare wires are exposed.
3rd party integration
1. Select a dry location for device and ensure there is enough physical room for the device if mounted
inside a housing
2. Connect grey input wires into the volt free dry contact out of the 3rd part device (BMS, security, reed
switch) and use purple common wire as a loop into the other side of volt free outputs.
3. Ensure that the whole installation is touch safe.
 Loading...