

Page 1
Netbay Internet – RTA1046VW ADSL/ADSL2+ setup guide
Dynalink RTA 1046VW ADSL1/ADSL2+ setup guide
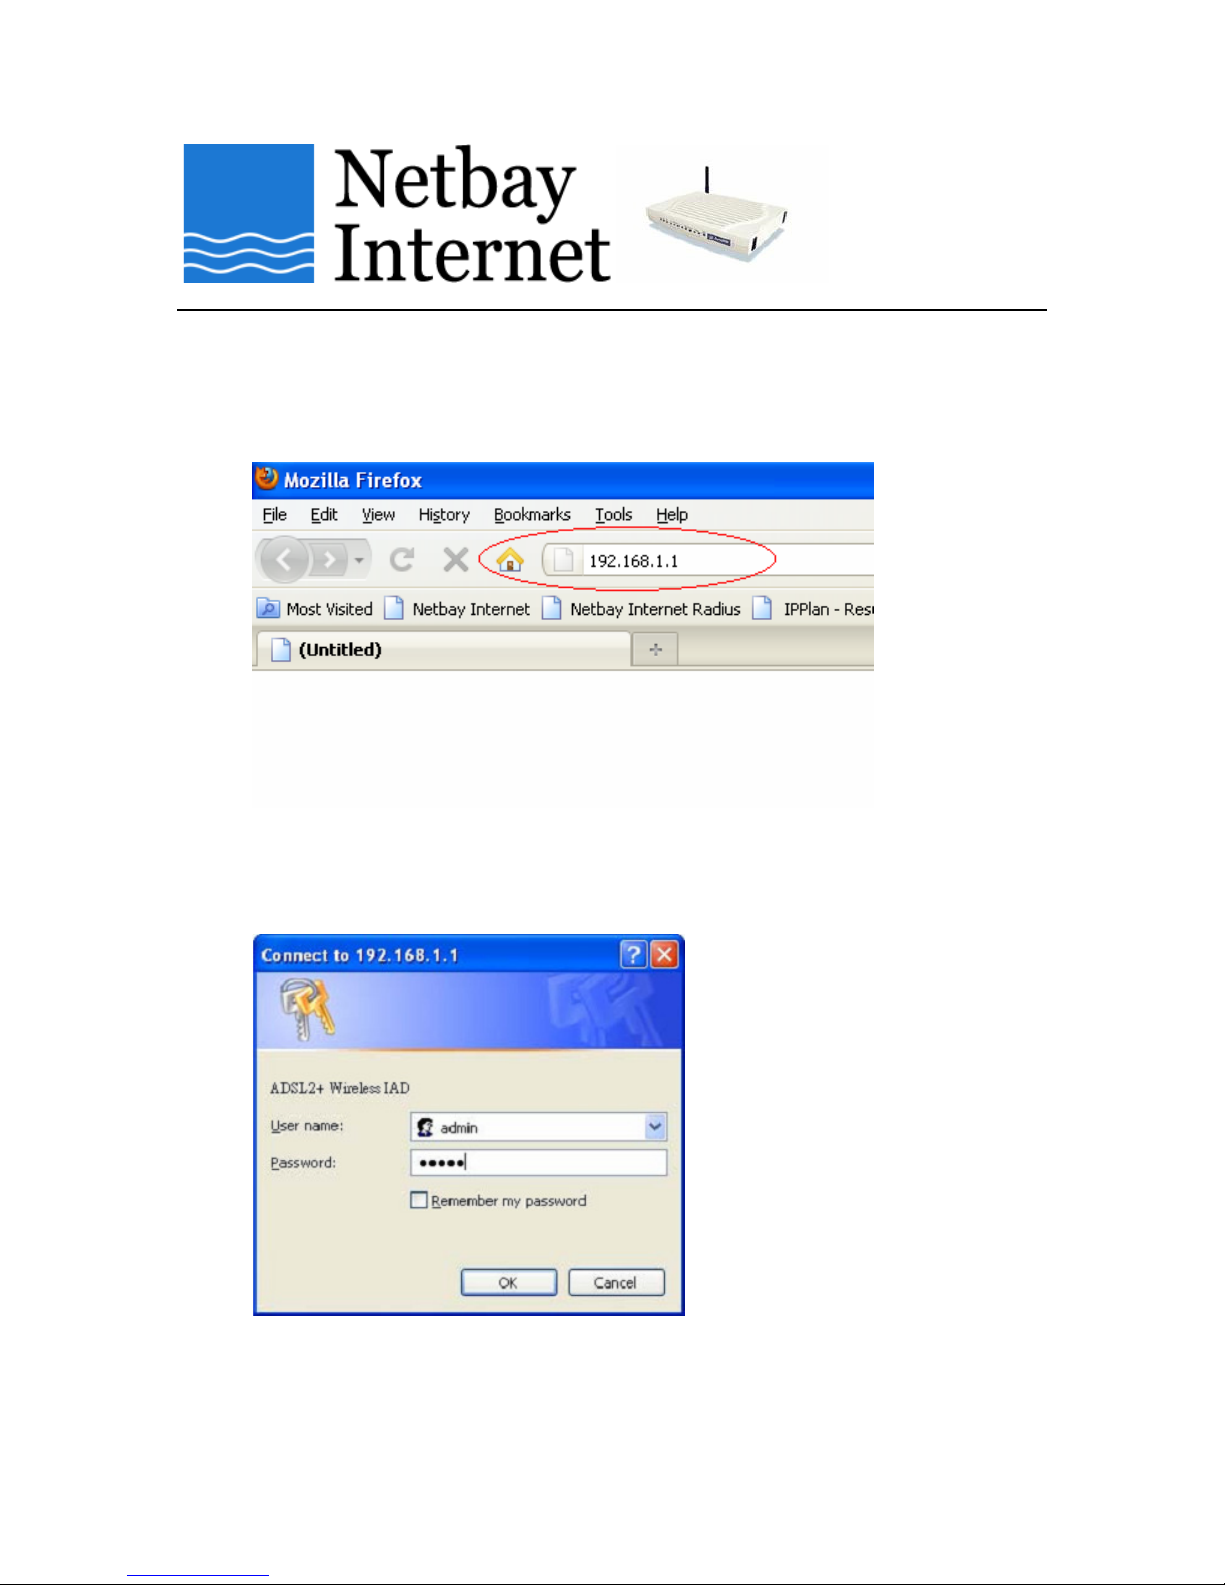
1. Start your browser (Internet Explorer, Mozilla Firefox, Google Chrome etc).
2. In the address bar, type in 192.168.1.1 and press “Enter”
3. WebAdmin login screen:
You will be prompted to enter username and password.
The default username is admin and the password is admin.
After you successfully login, the main page will appear.
Last updated: Page 1 of 5 28 Aug 2009
Ben L & Kein C
Page 2
Netbay Internet – RTA1046VW ADSL/ADSL2+ setup guide
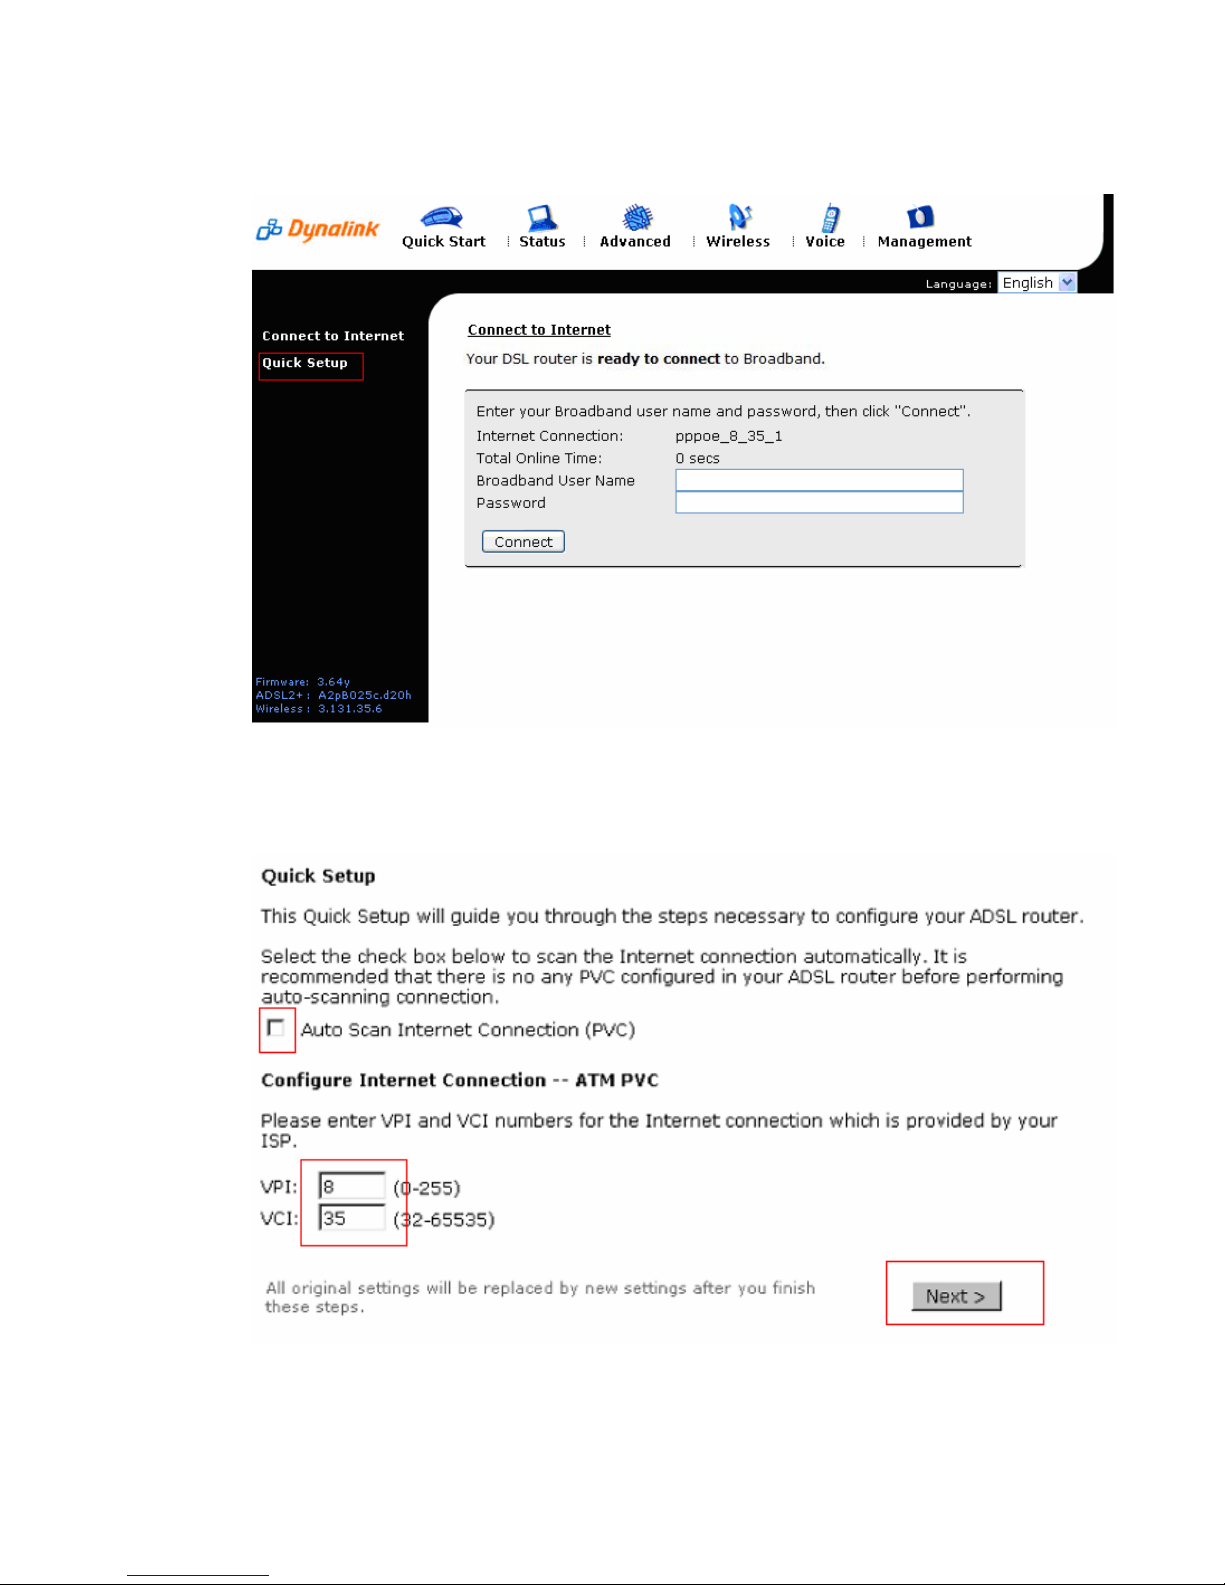
4. RTA1046VW main screen:
Click on Quick Setup
5. Quick Setup screen:
Uncheck Auto Scan Internet Connection (PVC)
Ensure VPI is 8, VCI is 35
Click on Next
Last updated: Page 2 of 5 28 Aug 2009
Ben L & Kein C
Page 3

Netbay Internet – RTA1046VW ADSL/ADSL2+ setup guide
6. Configure Internet Connection – Connection Type screen:
Protocol: Select PPP Over Ethernet (PPPoE)
Encapsulation Type: Select LLC/SNAP
Check Enable QoS
Click on Next
7. Configure Internet Connection – WAN IP Settings screen:
Select Obtain an IP address automatically
Check Enable NAT
Click Next
Last updated: Page 3 of 5 28 Aug 2009
Ben L & Kein C
Page 4

Netbay Internet – RTA1046VW ADSL/ADSL2+ setup guide
8. Configure Internet Connection PPP User Name and Password screen:
PPP User Name: if your username is johndoe
o ADSL1 username: johndoe@dsl.netbay.com.au
o ADSL2+ username: johndoe@dsl2.netbay.com.au
PPP Password: Enter your password.
Session established by: Select Always On
PPP will automatically disconnect and connect back at time: Disabled
Click on Next
Last updated: Page 4 of 5 28 Aug 2009
Ben L & Kein C
Page 5

Netbay Internet – RTA1046VW ADSL/ADSL2+ setup guide
9. Configure LAN side Settings screen:
Ensure the settings on your screen match the screen below.
Click on Next
10. Confirmation screen:
Click on Finish
11. The modem will save the new settings and reboot itself. Wait for a few minutes
and you will be on the internet.
Last updated: Page 5 of 5 28 Aug 2009
Ben L & Kein C
 Loading...