

Page 1

Q1. Cannot connect to the Internet?
• If the DSL light is off this means the broadband service may not have been activated on your telephone line.
Make sure the Phone Cable is plugged into the DSL socket on the modem and the other end is plugged into
the wall socket.
Q2. Cannot browse the Internet?
• Check that the modem’s “LAN1” light is on. Check that the “Ethernet” cable is firmly plugged in.
• Perform a PING test. In Windows XP, Vista or Windows 7, click “Start” then “Run”. Type “Command” then click OK.
Type ping “192.168.1.1” then press “Enter”. The response should resemble:
Pinging 192.168.1.1 with 32 bytes of data:
Reply from 192.168.1.1: bytes=32 time=4ms TTL=30
If there is a similar response, the router is communicating with your computer correctly and the problem lies
elsewhere. If the result is Request timed out, there may be a network problem. Check that the “Ethernet” cable
is firmly plugged in.
• Disable any personal firewall or virus checker temporarily.
• If you are using Internet Explorer, go to “ Tools” on the browser menu and select “Internet options” then
“Security” and reset the security level by clicking on the “Default Level” button.
Troubleshooting
Indicator lights
There are 6 indicators on the front panel. (See Figure 3)
Warranty
Dynalink warrants this product against defects in materials and workmanship for a period of twelve months
from the original date of purchase. Dynalink will, at its discretion, repair or replace the faulty unit, free of charge,
provided it is returned to us with proof of purchase from an authorised dealer within the warranty period.
Return delivery after repair will be paid for by Dynalink.
We reserve the right not to repair or replace goods that:
» have been mishandled, abused or not installed according to the guidelines as outlined in the instructions.
» have been subjected to a power surge from other equipment or other external factors.
» have been altered or modified.
Quick Setup Guide
DYX9667R
Ethernet CablePhone Cable
DYNALINK Modem/Router
This guide has been designed to help you set up your modem
easily and should only take a few minutes to complete.
VDSL2 Wireless Modem Router
Package Contents
Power Adapter
Function Colour & Status Definition
Power is off
Power is on and the device operates normally
Power on self-test in progress.
The device enters the console mode of the boot loader.
Power on self-test failure if this light remains solid.
Firmware upgrade in progress
No USB signal is detected
Data going through USB port
USB interface is ready
No wireless signal is detected
Data going through WLAN port
WLAN interface is ready
No Ethernet signal is detected
Data going through Ethernet port
Ethernet interface is ready
Modem is not online
Modem is online
No DSL signal is detected
DSL line handshaking in progress
DSL line training in progress
DSL line connected
Off
Flash Green
Solid Green
Off
Flash Green
Solid Green
Off
Flash Green
Solid Green
Red
Solid Green
Off
Slow Flash Green
Fast Flash Green
Solid Green
Off
Solid Green
Solid Red
Flash Red
USB
WLAN
LAN
PPP
DSL
Power
“not recommended
for VDSL”
Page 2
Installing your Modem
Step 1: Turn off your computer.
Step 2: Plug one end of the Ethernet cable into the socket marked “LAN1” on the back of the modem
(See Figure1). The other end of the cable is plugged into the Ethernet socket on the back of your
computer.
Step 3: Plug one end of the Phone Cable into the socket marked (DSL) on the back of the modem
(See Figure1). The other end of the cable is plugged into the wall socket.
Step 4: Plug the power adaptor into the “Power” socket on the back of the modem (See Figure1). Plug the
other end of the power adaptor into the wall socket.
Step 5: Turn on the power at the wall socket.Turn on the modem using the power switch. Turn on your
computer.
Step 6: Congratulations - You are now connected and ready to use the internet!
Phone cable
Ethernet
Cable
Computer
Laptop
VDSL2 Wireless Modem Router
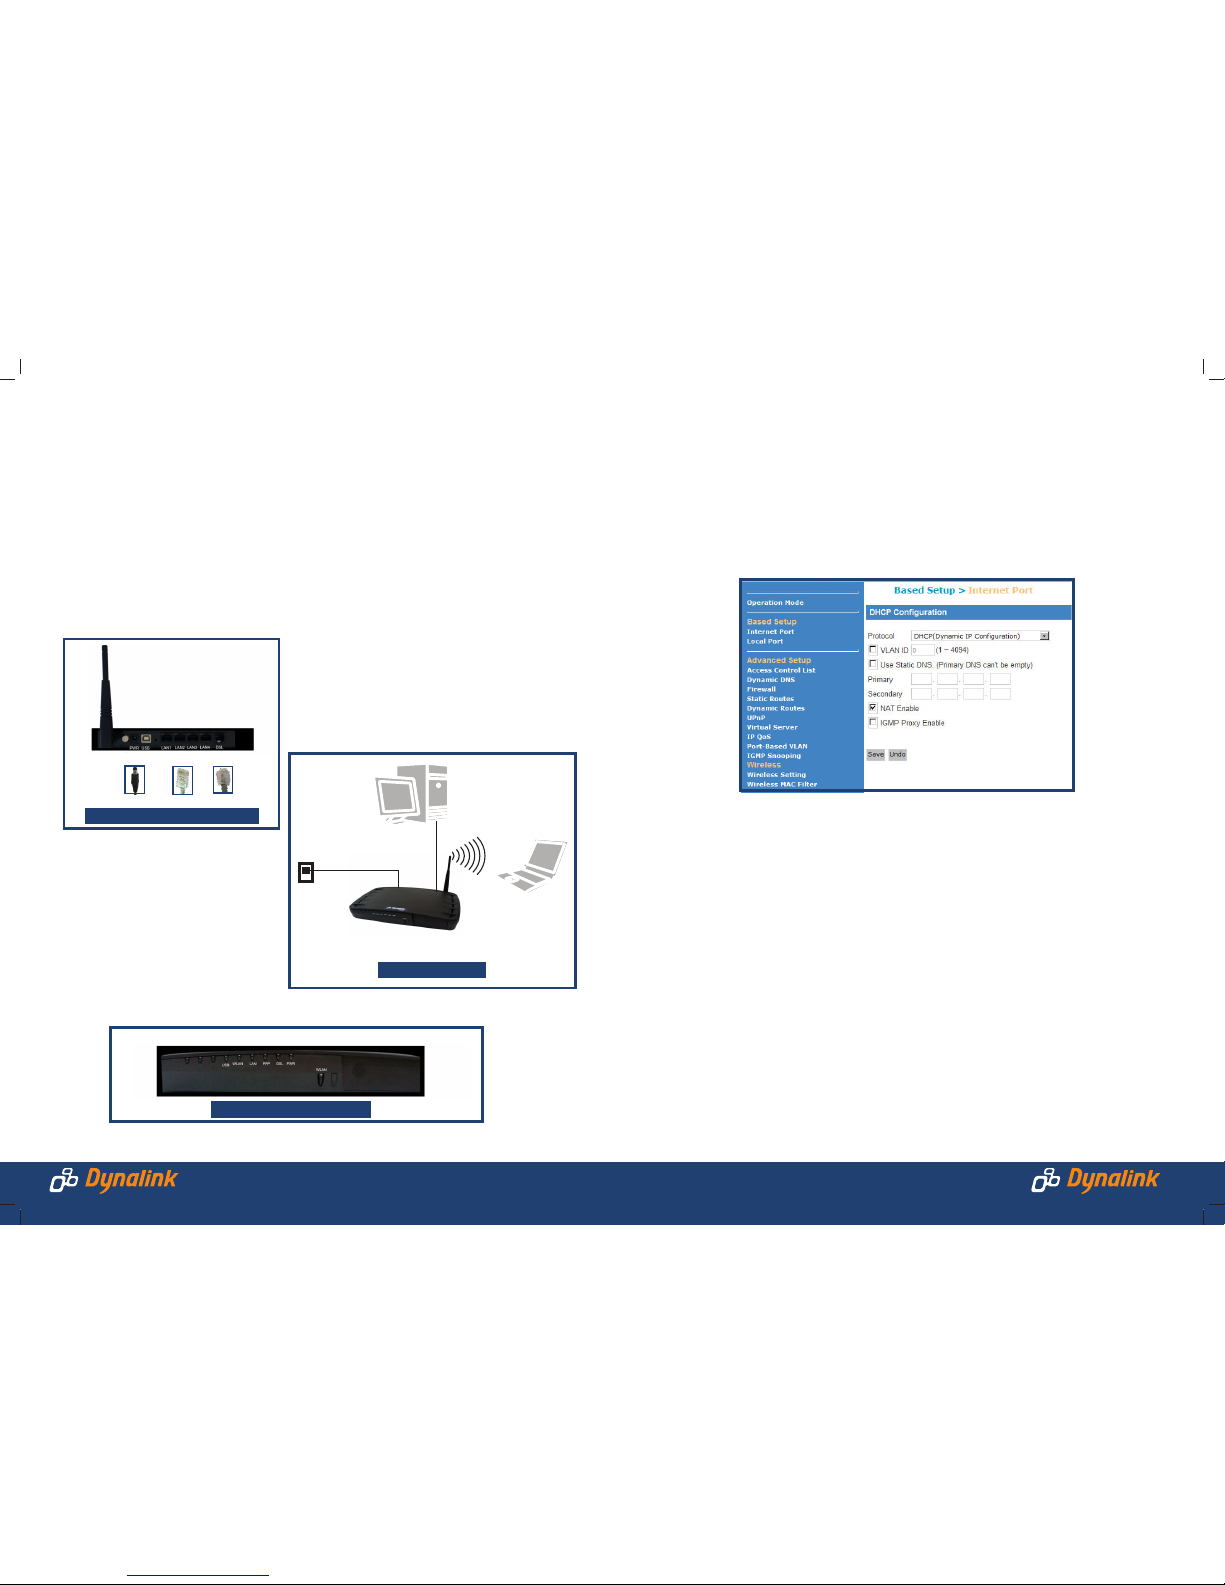
Figure 2: Final Setup Digram
DSL
EthernetPower
Figure 1: View of the back of the modem
Figure 3: View of the front of the modem
Setting up Wireless
This modem is sent with the wireless functionality turned off for security reasons.
You will need to enable this by following the instructions. There is a degree of risk using wireless modems if they
are NOT configured securely. You are responsible for the security of your wireless connection.
Setup Procedure
1. Ensure the Ethernet cable is plugged into the socket marked “LAN1” on the back of the modem and the other
end is plugged into the Ethernet socket on the back of your computer. Start your web browser. Enter the
default address http://192.168.1.1. User name and Password are both “admin”. You should see the screen as
shown:
2. Click on Wireless Setting in the left menu and then place a tick in the box that says
‘Enable Wireless’.
3. Select an SSID of your choice. This is a descripition given to an access point to identify it and is p eriodcally
broadcast to advertise its presence. You may change this description at any time.
4. Select a desired channel. If there are other access points nearby, you may need to choose an alternative
channel to avoid interference. Click Save
5. Set up the wireless network card according to the suppliers instructions.
Wireless Security
To enable wireless security:
1. Go to Wireless Setting and select an option from the dropdown box next to Security Mode. Available options
are: WEP, WPA, WPA2, WPA+WPA2 . The best security is provided by WPA+WPA2. Whichever security protection
method is selected, the wireless network card must also support the same method in order to connect.
2. Enter a password in the WPA key field
3. Enter the same password into your computer when connecting wirelessly
 Loading...