

Page 1
1. Connecting the Router
Before you install the router, you should have connected your PC to the Internet
through your broadband service successfully. If there are any problems, please
contact your ISP. After that, please install the router according to the following
steps. Don’t forget to pull out the power plug and keep your hands dry.
a.
Power off your PC(s), Cable/DSL modem, and the router.
b. Locate an optimum location for the router. The best place is usually near
the center of the area in which your PC(s) will wirelessly connect.
c.
Adjust the direction of the antenna. Normally, upright is a good direction.
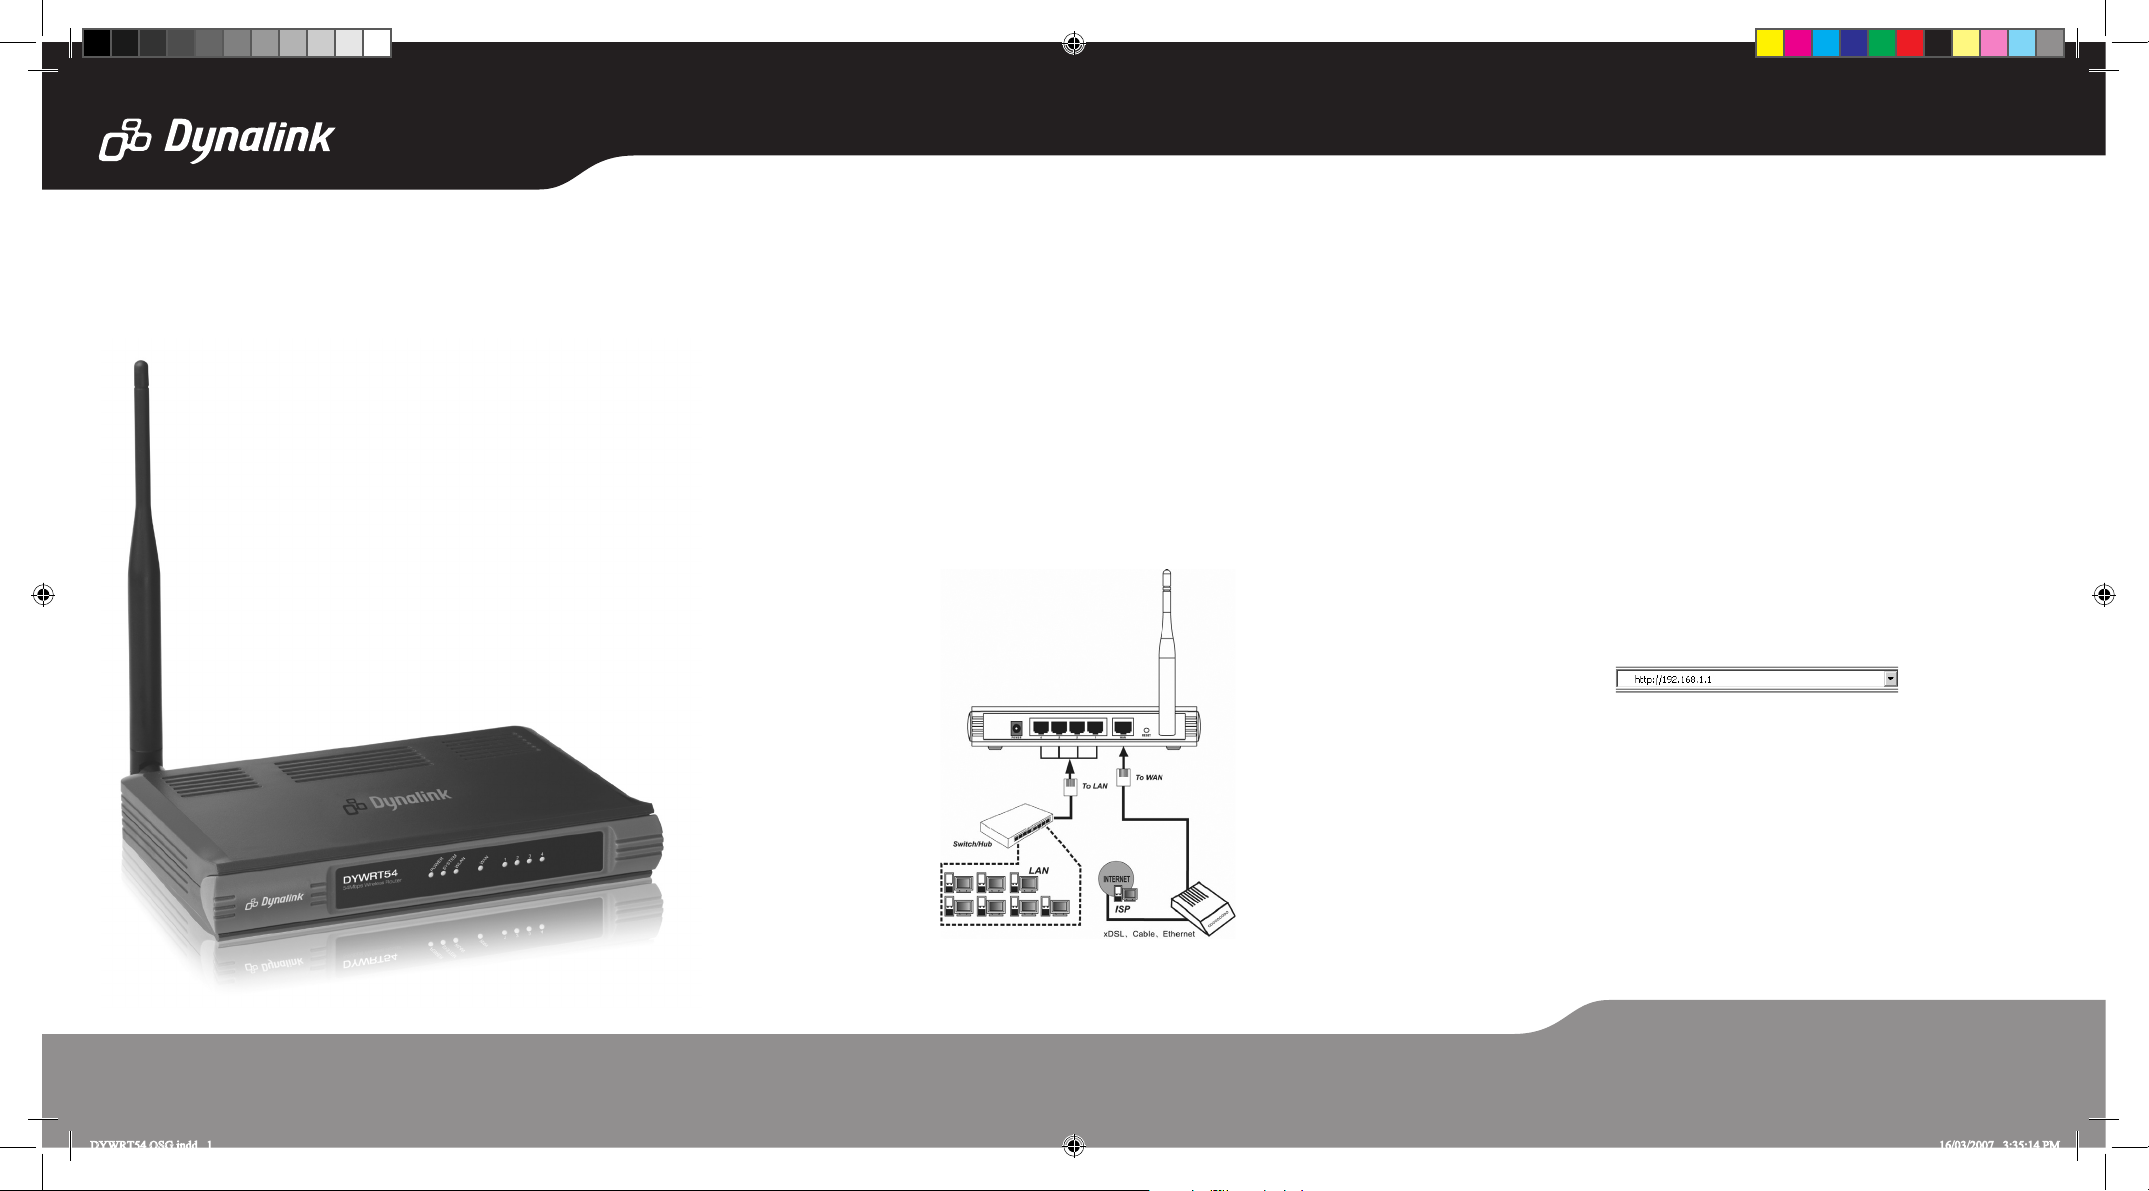
d. Connect the PC(s) and each Switch/Hub on your LAN to the LAN Ports on
the router, shown in the following figure.
e.
Connect the DSL/Cable Modem/Ethernet to the WAN port on the router,
shown in the following figure.
f. Connect the AC power adapter to the AC power socket on the router,
and the other end into an electrical outlet. The router will start to work
automatically.
g. Power on your PC(s) and Cable/DSL modem.
h. When all of the devices boot up completely, make sure that the router’s
LEDs light as follows:
Power LED: Lit up
System LED: Flashing
Link/Act LEDs(WAN&LAN): Lit up
WLAN LED: Flashing
2. Login to the Router
To connect to the router, you should set up the TCP/IP Protocol in “Obtain an IP
address automatically” mode on your PC(s). If you need instructions as to how
to do this, please refer to Appendix B in the User Guide on the Resource CD.
a.
Connect to the router by typing http://192.168.1.1 in the address field of
web browser.
b. After a moment, a login window will appear. Enter admin for the User Name
and Password, in lower case letters. Then click OK or press Enter.
54Mbps Wireless Router
Quick Setup Guide
DYWRT54
71045242
Ver:1.0
DYWRT54 QSG.indd 1 16/03/2007 3:35:14 PM
Page 2
DYWRT54
3. Connecting the Internet
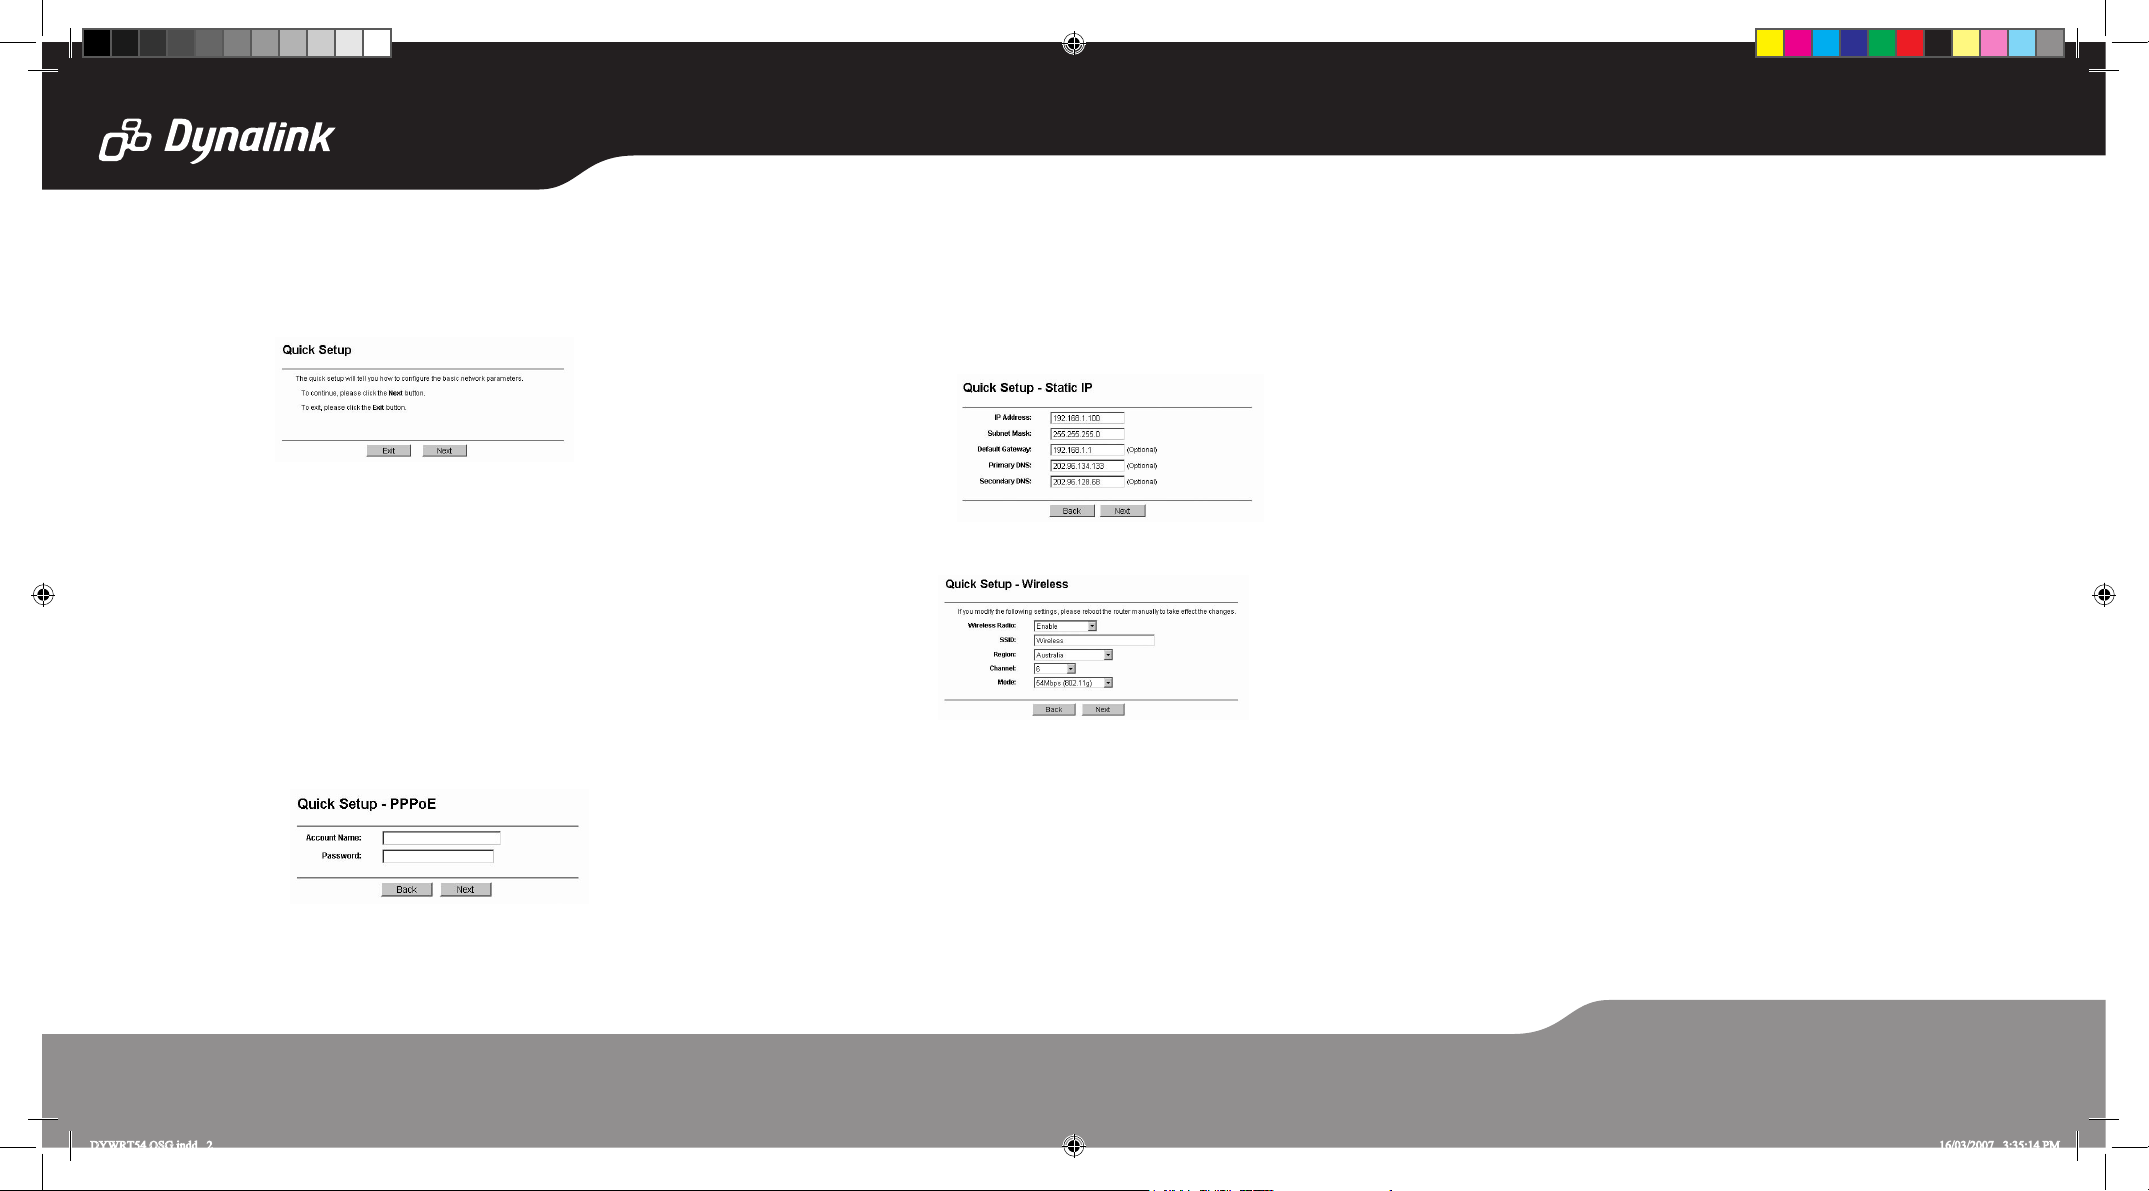
a. If the User Name and Password are correct, you can configure the router
using the web browser. Please click the Quick Setup link on the left of
the main menu and the Quick Setup screen will appear.
b. Click Next, the Choose WAN Connection Type screen will appear. Make
sure which connection type has been provided by your ISP, choose it,
and then click Next.
I.
If you have a PPPoE account, select PPPoE and click Next to load the
following figure, and enter User Name and Password provided by
your ISP.
Please note: If you have an existing modem router and your ISP requires a PPPoE connection, it is
usually recommended that you firstly place your existing modem router into “bridge mode” (if feature
is supported). This mode will turn your modem router into a transparent device thus allowing the
DYWRT54 to establish, maintain and share your broadband connection. In most situations this saves
future configuration e.g port forwarding / virtual server of both devices.
For assistance with configuring your existing modem router into “bridge mode” please refer to the
hardware vendors user guide, online material or make contact with them directly.
II. If you have a Dynamic IP (or automatic IP) account, select Dynamic IP
and click Next, the router will automatically get IP parameters from
your ISP without entering any parameters.
III.
If you have a fixed IP (or static IP) account, select Static IP and
click Next to load the following figure, and fill the blanks with the
parameters provided by your ISP.
c. Fill in the details and click Next. The wireless settings screen will appear:
d. At the end of the Quick Setup, click the Finish button to exit this Quick
Setup. The router should now be connecting you to the Internet.
Note: If you have difficulty with these steps, please refer to the User Guide on the Resource CD for
detailed instructions.
Warranty
Dynalink warrants this product against defects in materials and workmanship
for a period of twelve months from the original date of purchase. We will, at our
discretion, repair or replace the faulty unit, free of charge, provided it is returned
to us with proof of purchase from an authorised dealer within the warranty
period. Return delivery after repair will be paid for by Dynalink. We reserve the
right not to repair or replace goods that:
• have been mishandled, abused or not installed according to the
guidelines as outlined in the instructions.
• have been subjected to a power surge from other equipment or other
external factors.
• have been altered or modified.
Help
Always check that your hardware is installed correctly. Check our web site for
the latest information and troubleshooting guide. If you have difficulties, contact
Dynalink Technical Support for issues relating to installation and operation.
If possible, visit Dynalink’s on-line support area at:
New Zealand – www.dynalink.co.nz/support
Australia – www.dynalink.com.au/support
Contact Dynalink’s Technical Support:
Australia New Zealand
Phone – 1800 653 962 Phone – 0800 653 962
Fax – 1800 063 962 Fax – 0800 503 962
(Monday-Friday: 8:30am-5:30pm) (Monday-Friday: 8:30am-7:30pm)
DYWRT54 QSG.indd 2 16/03/2007 3:35:14 PM
 Loading...