

Page 1

A 1012 Dynalink Learning Universal Remote Control
A 1012 Dynalink 6 In 1 Universal Remote Control
Congratulations on purchasing this learninge universal remote control. It contains one of the
largest infrared code librarys obtainable for up to 6 different devices.
FEATURES
The 6 in 1 universal remote control is suitable for almost all common brands of TV’s (labelled
TV on the remote control), DVD players (labelled DVD), digital and analogue satellite
receiver and cable boxes (SAT), video recorders (VCR), tuners (AUX), CD players (CD),
cassette recorders (AUX), amplifiers and other audio device (AUX). It can operate all of the
main functions of your device.
For preprogrammed codes, all you have to do is to choose the device for which you wish to
control (for example TV) and choose one each of the 3-digit code numbers from the brand
code list (for example 001 under Philips TV) until your TV buttons are programmed. After set
up it will remember all the codes even when batteries are removed / changed.
Alternatively, the unit has an “Auto Search” to scan the code library in case you can’t find a
suitable code under the brand, or you can not find your device brand in the list.
The remote control also has a “learn” function to learn a new code from an original remote
control if your the remote control does not have your remote pre-prgrammed
.
Other features include a “Device shift” which allows you to change a device button(s) to
work as another device. E.g. you can set up a TV code in the AUX and then you will have 2
TV device keys. “Volume lock” (for VOL+/VOL-) allows you to control only the volume from
one device. This is very useful for example for controlling amplifier volume in a home theatre,
ie you can control the volume without switching devices. “Write-protection of Device Codes”
can protect the device codes from being inadvertentl y overwritten or deleted
Button Functions
1
Page 2
A 1012 Dynalink Learning Universal Remote Control
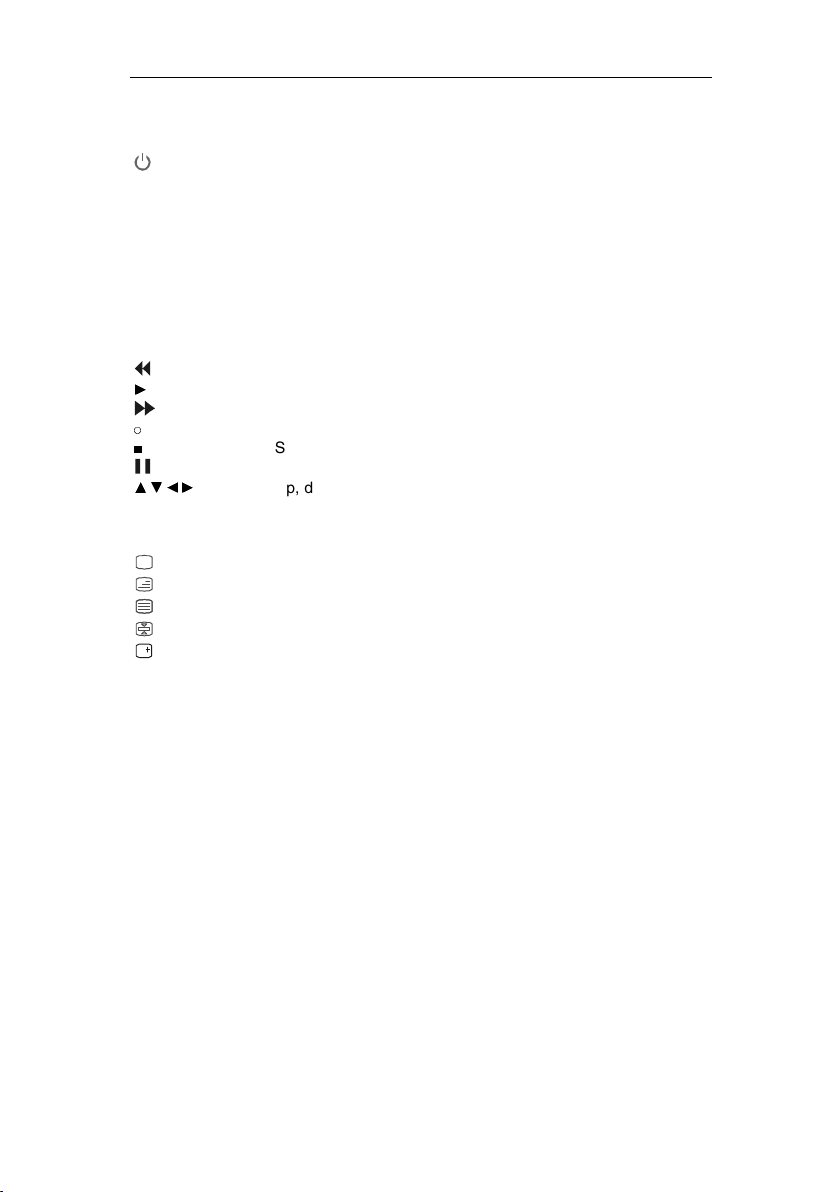
SET For set up of the remote control.
TV, VCR, SAT, CD, DVD, AUX Selects the device you want to control.
Turns the device on and off
-/-- To switch over to 1 or 2 digit number entry
0-9 The number keys operate the same as on your original
remote control, and may also be used for entering device
codes during set up.
AV Operates like the TV/Video button on your original remote,
and TV/SAT key on your original satellite remote.
MENU Menu or on-screen display function
CHAN +/- Channel up and down keys
VOL +/- Volume up and down keys
Mute To mute the sound output
Rewind or fast reverse
►
Play
FF or fast forward
○
Record
■
Stop
Pause
▲▼◄►
Up, down, left, right keys
OK OK/Enter key
EXIT Exit key
Red/Grn/Ylw/Blue TV teletext/programming buttons
Television video
TV and text mixed
Teletext mode
Page hold
Displays info on the selected channel
Battery Installation
This remote control requires 2 AAA batteries to function. Fresh Alkaline batteries are
recommended. To install the batteries:
1. Turn the remote back, and lift the battery cover off.
2. Insert the batteries, matching the batteries to the (+) and (-) marks inside the
battery compartment.
3. Slide the battery cover back into place. All data that has been set up will be
saved in memory even when the batteries are removed, however the clock may
Operating Instructions
A. Set up by Brand Code:
need setting again.
1. In the rear of this manual find the brand name and code no of your device brand
(e.g. Philips 001, 004, 016 …). Note: Ensure you select the correct device type
numbers from the list (eg TV for TV as labelled at the top of each section in the
rear of this manual).
2. Hold down the SET key and the device key (e.g. TV) at the same time. The TV
device key on your remote control will light up, showing that the remote is now in
set-up mode.
3. Enter the 3-digit device code (e.g. 001 for Philips TV) within 10 seconds. If there
is no button entry within 10 seconds, the set-up mode is automatically
terminated.
4. The LED goes out if the code has been accepted by the remote control. If the
LED flashes twice, that means the code may be wrong, and the remote control
2
Page 3

A 1012 Dynalink Learning Universal Remote Control
remains in set-up mode. If this occurs you should enter the correct code from the
list again within 10 seconds.
5. Once programmed,. check the function of the keys on A 1012 remote control. If
most keys on your new remote control do not function correctly, try another 3digit device code (e.g. 004…) from the list under the same brand. Repeat steps 3
to 6 until all the basic functions operate correctly.
6. To leave set up mode, press the device key (e.g. TV). If you do not actuate any
keys within 10 seconds it will automatically exit set up mode.
B. Set up by Automatic Search:
If setting up by brand name and codes is unsuccessful, or you can not find your brand name
in the list, you can use the “Automatic Search” to find the correct code for your remote
control.
1. Switch on the power for the device that you want to control.
2. Point the A 1012 remote control at your device. Press the SET and the device
(e.g. TV) keys simultaneously and hold them down for 3 seconds. The device
key will flash, showing the remote control is now in Automatic Search mode.
3. When the correct device has been found, the remote control will send an OFF
signal to the device from the remote control (code scan). When the device (e.g.
TV) switches off, immediately press any key (except SET key) to stop the
Automatic Search.
4. Switch the device on again by pressing the “POW ER” key to check the operation.
Check the functions of other keys on the remote control. If most or all of the keys
do not function correctly, repeat the automatic search again ensuring you press
any key immediately when your device turns off. If most key’s function properly
then the set up is successful. Press the device key (e.g. TV) again to save the
Note 1 .To abort the “Automatic Search”, press any key (except set key). The LED lamp will
go out and the search is terminated.
Note 2. The “Automatic Search” will be terminated automatically after it goes through all
codes, and the LED will extinguish.
C. Setting up by Manual Search:
If setting up with brand name and codes is unsuccessful, you can also use the “Manual
Search” to find the correct code for operating your device.
Note 1. The Manual Search will be automatically terminated if no entry is made within 30
seconds.
Note 2. The “Manual Search” will be terminated automatically after it goes through all codes
and LED will light off. But you can start it again if necessary.
code and finish the set up.
1. Switch on the device that you want to control.
2. Point the A 1012 remote control at your device. Press and hold the SET key and
press the device key (e.g. TV) in a short time (less than 3 seconds, to prevent
the unit going to Automatic Search), then release both pressed keys.
3. The device key will light up continuously and the remote control is now in set-up
mode.
4. To search for your device press the POWER (ON/OFF) key about every 1.5
seconds.The POWER button will now flash, showing that the remote control is in
Manual Search mode. When your device has been found the device will switch
off. Alternatively, if the device being sought is a video recorder, DVD player, CD
player, AUX etc., you can also press the PLAY instead of POWER and search
for PLAY activation. Once the searched device starts PLAYing the A 1012 is
programmed. Test the functions of other keys (don’t press POWER button or
PLAY button, as the remote will go to next code) on the remote control. If most
of the buttons do not function properl y, continue to press the POWER key about
every 1.5 seconds again to search for the next activated code that turns the
POWER OFF or starts PLAYing. If most of the keys on the remote control work
well, you can save the code by pressing the device key (e.g. TV) to finish the
Manual Search.
3
Page 4
D. Set up by Learning
A 1012 Dynalink Learning Universal Remote Control
The LEARN function is used to either program codes from a remote control not in the preprogrammed codes list, or to supplement the preprogrammed codes. In learn mode, you
need the original device remote control to learn the codes. Please use fresh batteries for
both the learning remote control and the original.
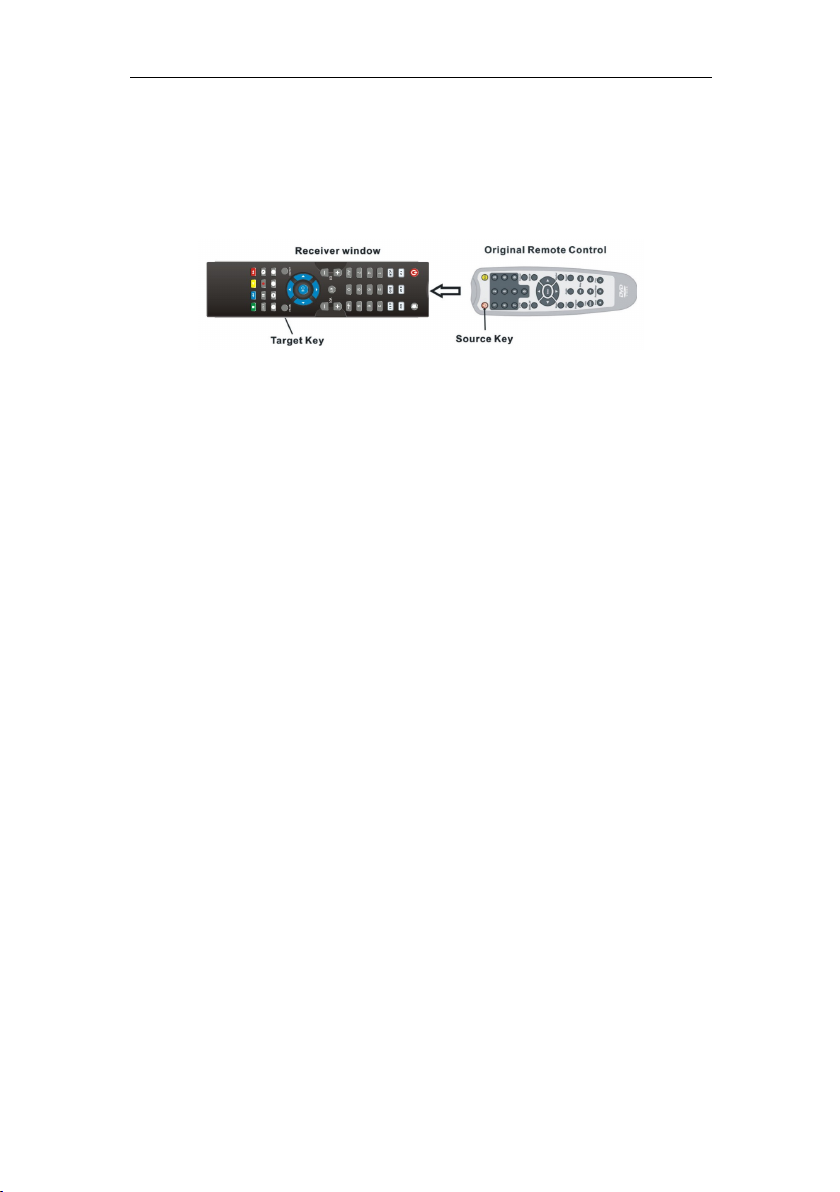
To learn place the remote controls next to each other as shown below. In learning mode the
remotes must not be more than 30 mm apart, with the remotes in a straight line. The receiver
LED on the A 1012 for learning is next to the transmitter LED.
1. To learn, press and hold the Learn key and press the A 1012 device type button
that you want to learn (e.g. DVD), then release both pressed keys. The DVD
device button on your new remote control blinks and the A 1012 remote control is
now in learning mode for DVD codes.
2. Press and release the A1012 remote button that you want to learn to
(e.g.POWER). The device button now illuminates continuously.
3. Press and hold the source button on your original remote control (e.g.POWER)
until the LED on your new remote control blinks 2 times and illuminates
continuously for 2 seconds, then blinks again. (This means you have learnt the
POWER signal from the original remote. You’re A 1012 remote control is now
ready to learn the next button
4. Repeat steps 2 to 4 to learn all required buttons.
If there is a learning problem, the light blinks 4 times and lights up for 2 seconds then blinks.
Repeat learning steps again to learn the required button. When learning is finished, to exit
the learning mode, press and release LEARN key.
Note 1. The remote will exit learning mode if no key press for 30 seconds .
Note 2. You can press SET and 4 together to delete all buttons you have learnt under a
device button. Ensure you select the device button first. The device LED will flash 2 times to
confirm.
Note 3. If the remote controls memory is full, the LED will blink 4 times then exit learning.
Note 4. The last learnt signal will overwrite the previous signal stored in that device and
button. About 100 commands can be stored in this remote control and about 40 commands
can be learnt for one device.
Other Functions
A. Display the Device Code:
The device code, which has been set up in your new remote control, can be called up
as follows:
1. Press the SET key and hold it down. Now actuate number “1” key to display
the 100th position of the 3-digit code. Count the number of times the LED
flashes. If the LED doesn’t flash, that means the digit is ZERO.
2. Similarly, press the SET key and hold it down, at the same time actuate the
number “2” key to display the 10
number of times the LED flashes.
3. Press the SET key and hold it down, at the same time actuate number key “3”
to display the 1
LED flashes.
For Example, for Code 028:
a. Press SET and “1”, LED flashes 0 times, no flashes.
b. Press SET and “2”, LED flashes 2 times.
st
position of 3-digit code. Again count the number of times the
th
position of the 3-digit code. Count the
c. Press SET and “3”, LED flashes 8 times.
4
Page 5

B. Reset / Delete Function:
To delete the codes which have been set up in the remote control, press and hold down the
SET key, then press the “0”key simultaneously for more than 3 seconds. Release both
pressed keys. The LED will flash twice and all preprogrammed and learned commands in the
remote control are deleted.
C. Device Shift
Device Shift allows one device’s buttons to be programmed under another device. E.g. If you
have 2 TV’s you can set up a TV code under AUX, or you can set up a CD under DVD.etc.
To set up a device under another device name:
1. Press the [SET] key and hold it, and then press the device buttton you want to
change. Release both pressed keys. e.g. To change AUX to another device
type, press AUX. The LED under AUX will be illuminated.
2. Press the new device button that your want to use e.g.[TV]. The LED under
TV button flashes.
3. Press SET and AUX (as a TV device now), then input the TV code from the
Note
D. Volume lock
This function makes it very convenient when you only require one device to adjust volume.
For example, you may use your amplifier as your main volume control.
Any or all devices can be programmed so that for example the amplifier volume or Mute is
adjusted when using the other device(s), without switching to the amplifier.
The Volume and Mute on the on remote control will still control the volume and mute of your
amplifier.
To set the Volume Lock feature:
To unlock the Volume Lock feature, Press [SET] and [6] to unlock it.
E. Write-protection of Device Codes:
To protect the device codes from being inadvertently overwritten / deleted, you can carry out
the following:
To cancel write protection, press the SET key and hold it down, and press the “8” key at the
same time, and then release the both pressed keys. The LED flashes twice and the
protection has been cancelled.
“set up by device brand code” to finish the set up.
1. All devices butttons can be set to be another device type except TV.
2. If you want to revert to previous device , press the [SET] key and hold it, then
press the device eg [AUX] button. The LED will illuminate. Release both
pressed keys, and then press AUX device button again. The LED will
extinguish . Then AUX is now an AUX button.
3. A Shifted device can only be programmed via code set up (and not auto
search). The code lock will function on a shifted device but all other functions
such as “Volume lock“ etc will not work.
1. Press the device button which you want to lock. E.g. [AUX]
2. Press [SET] and [5]
twice to confirm.
1. Press the device key (e.g. TV) that you would like to protect on your remote
control.
2. Press and hold down the SET key and press the “7” key at the same time. Then
release both pressed keys. The LED will flash twice and the code is then
protected from being overwritten/deleted.
the current VOL and Mute will be locked. The LED will flash
A 1012 Dynalink Learning Universal Remote Control
5
Page 6

A 1012 Dynalink Learning Universal Remote Control
Device Brand Code List
TV
Brand TV
Accent 023
Acme 004,010,313
Acura 010,309
ADA 015
ADC 002,006
Admiral 001,002,003,020,050,054,109,187,196,197,234,308
Adyson 004,186,210,213,296
Agashi 185,187,212,214,296
Agazi 003,308
Agb 124
Agef 234
Aiko 004,005,010,023,296,309
Aim 023
Aiwa 088,213,318,339
Akai
AKI 185
Akiba 012,023,101,212
Akito 023,026
Akura 003,012,016,023,072,101,185,191,212,308
Alba 309,317,326
Albe
Albiral 038,185,207
Alcyon 209
Alkos 165
Allorgan 021,027,195,212,219
Allstar 023,052
Amplivision 004,198,207,214,228
Amstrad 003,010,012,014,023,031,069,070,072,075,109,124,226,308,309,317,341
Anam 010,066,110,309
Anglo 010,309
Anitech 003,010,016,023,044,110,183,184,209,224,231,308,309
Ansonic 010,015,023,198,275,309
Arcam 296
Arcam delta 004
Arc en ciel 046,127,140,204,207
Aristona 016,023,052,170,195
A.R.Systems 023
ArthurMartin 159
Art-tech 212
ASA 001,017,018,019,050,111,234
Asberg 023,044,052,182,187,195,209
Astra 010,309
Astro sound 207,212
Asuka 003,004,012,101,212,214,218,296,308
Atlantic 004,021,022,023,052,170,182,197,296
Atori 010,309
Audiosonic 004,010,012,021,023,052,140,170,198,309
Audioton 004,182,198,231,233
Ausind 044,209,212
Autovox 001,003,004,021,044,058,102,126,209,234,308
AWA 023,296
007,009,010,011,012,023,052,062,069,070,071,134,142,170,185,221,296,309,
314,317,340
004,010,012,023,028,029,054,063,069,087,163,170,184,185,187,195,198,215,
217,296
6
Page 7

A 1012 Dynalink Learning Universal Remote Control
Baird 140,185,186,200,232
Bang&olufsen 001,234
Barcom 210
Basic line 010,012,023,052,101,184,186,212,309
Bastide 004
Baur 023,077,119,133,142,170
Bazin 183,185,201,217
Beijin 263
Beknteknik 228
Beko 008,023,035,084,198,214,228,311,342
Beon 023,052,170
Best 114,115,198
Bestar 023,052,116,198,228,321
Binatone 004
Black diamond 326
Black star 130
Blacktron 101,212
Blackway 101,212
Blaupunkt 009,113,120,136,179
Blausonic 207
Blue sky 012,023,101,212,228
Blue star 101,121
Bondstec 130
Boots 004,026
Boston 208,218
BPL 023,096,101,121
Brandt 037,046,047,127,128,140,204
Brinkmann 023
Brion vega 001,023,052,058,170,208,234,343
Bristol 208
Britannia 004,296
Bruns 001,008,040,227,234
BSR 027,132,197,210,212,215
BTC 012
Bush
California 195
Capsonic 003,214,308
Carad 023
Carena 023,212,214
Carrefour 028
Cascade 010,023,309
Casio 023,201
Cathay 023,052,170
CCE 023
Centrum 325,326
Centurion 023,052,170
Century 001,191,234
CGE 044,054,130,132,187,198,204,209
CGM 226,233
Changhong 241,242,245,246,247,248,264,278,279,288
CIE 196,212,226
Cihan 214
Cimline 010,029,212,213,309
City 010,309
Clarivox 038,040,170
Clatronic 003,004,010,012,023,031,044,052,084,130,185,198,209,212,214,308,309
Cofadel 204
010,012,020,023,025,026,028,029,033,052,063,069,101,116,121,132,133,140,
168,170,172,309,317,320,321,326
7
Page 8

A 1012 Dynalink Learning Universal Remote Control
Colombia 228
Colombus 182
Concorde 010,309
Condor 004,022,023,052,084,101,182,184,187,198,211,296
Conrowa 265
Contec 004,010,028,030,031,211,212,217,296,309
Cont.ediso 204
Continentaled
ison
Cosmel 010,309
Crezar 182,226
Crosley 001,044,130,132,209,234
Crown 010,023,044,052,054,084,096,115,122,170,198,209,228,309,371
Cs electronics 004,012,130,296
CTC 130
CTC clatronic 015,187,198,207,210,212,226
Cybercom
Cybermaxx
Cybertron 012
Cytron
Daewoo 004,010,023,052,059,095,116,196,296,309,321,345
Dainichi 012,212,296
Dansai 003,023,052,170,212,296,308
Dantax 035,149,162,198,213,326
Datronic 196,211
Datsura 096,122
Dawa 023,195
Dayton 010,309
Daytron 023,196
Deawoo 023
Decca 004,011,023,026,031,052,124,170
Decca(uk) 229
De graaf 007,020,034
Deitron 023
Denko 185,214
Denver 211,212
Desmet 023,052,170,182
Diamant 023
Digiline 023,213
Digital 212
Dixi 010,023,040,052,170,309
Domland 219
Domoh 182
Drean 023
DTS 010,309
Dual
Dual-Tec 004,010,132,197,309
Dumont 001,004,015,018,019,234
Dux 023,170,195
Dynatron 023,052,170
Elbe 023,038,109,158,180,198,275
Elcit 001,234
Electa 121
037,046,047,112,127,140
308,309,310,311,312,313,314,315,316,317,318,319,320,321,322,323,324,325,
326,327,328,329,330,331,332,333,334,335,336,337,338
308,309,310,311,312,313,314,315,316,317,318,319,320,321,322,323,324,325,
326,327,328,329,330,331,332,333,334,335,336,337,338
308,309,310,311,312,313,314,315,316,317,318,319,320,321,322,323,324,325,
326,327,328,329,330,331,332,333,334,335,336,337,338
004,023,090,126,127,132,140,161,185,195,197,207,211,219,308,309,310,311,
312,313,314,315,316,317,318,319,320,321,322,323,324,325,326,327,328,329,
330,332,333,334,335,338
8
Page 9

A 1012 Dynalink Learning Universal Remote Control
Electro Tech 010,309
Elekta 101
Elektronska 207
ELG 023
Elin 004,017,019,023,052,170,181,186,197,233,296
Elite 012,022,023,052,179,184,197
Elman 015,132,207,213
Elsay 184,229
Elta 010,296,309
Emerson 001,023,101,128,142,234
Emperor 101
Engel 207,227
Erres 016,023,052,170
ESC 023
Estel 207
Etron 010,023,309
Eurocom 207,212
Euro-Feel 003,308
Euroline 089,170
Euroman 023,185,196,198,212,214,296
Euromann 003,004,052,115,308
Europa 023,228
Europhon 004,015,023,026,052,073,124,132,207,226
Eurotronic 228
Expert 021,186,188,197
Exquisit 023
Fenner 010,116,184,191,195,212,309,321
Ferguson 036,037,038,051,053,082,112,128,164,170,232
Fidelis 182,211
Fidelity 004,020,023,069,097,296,317
Filsai 217
Finlandia 007,020,111,129,181,186,200
Finlux
First Line 004,010,023,027,052,063,130,183,296,309
Fisher 001,004,007,019,028,030,040,041,084,132,195,198,200,211,227,234
Flint 023,052,149,183,184,187,196,214
Formenti 001,002,004,022,044,126,132,134,170,182,209,234,296
Fortress 001,002,234
Fraba
France
Concept
Friac 023
Frontech 003,010,020,050,069,119,130,183,184,191,213,308,309,317
Fujitsu 011,021,197,207,212
Funai 003,027,211,212,308,346
Galaxi 023,054,084
Galaxis 023,198
Galeria 196
Galway 184
GBC 010,028,132,226,233,309
GCM 195,212
GEC 004,011,023,042,050,052,124,133,142,170
GEC(UK) 186,224,229,231
Geloso 010,020,132,231,309
General
Technic
Genexxa 012,023,050,052,212
001,004,011,015,017,018,019,023,044,052,064,111,124,132,158,168,170,181,
209,225,234,314,315
023,198
184
010,309
9
Page 10

A 1012 Dynalink Learning Universal Remote Control
Germanvox 226
Goldhand 231,296
Goldstar
Goodmans
Gorenje 084,115,198
GPM 012,210,212
Gradiente 023
Graetz 050,142,143,188
Granada
Grandin 010,012,023,101,121,170,184,309
Gronic 180,191,212
Grundig 009,018,023,044,092,102,117,118,136,137,185,209,347
GTT 187,211
H-150a 276
Haaz 338
Halifax 003,004,296,308
Hampton 004,183,226,296
Hanseatic
Hantarex 010,023,124,309
Hantor 023
Harwood 023,186,326
Hauppauge 023
HCM 003,004,010,023,075,101,121,200,211,226,308,309
Hemmermann 183,201
Hifivox 140,204
Higashi 185
Highline 023
Hinari 007,010,012,023,028,044,052,138,170,200,212,213,227,230,309,326
Hisawa 012,101,121,149,212
Hit 234
Hitachi
Hitsu 185,212
Horizont 306,307
Hornyphon 023,052
Hoshai 012,212,233
Huanyu 004,116,296,321
Hygashi 004,296
Hyper 004,010,130,132,226,233,296,309
Hypson 003,004,023,052,101,121,170,212,214,308
Iberia 023
Ibervisao 188,207
Ibico 196
ICE 003,004,010,012,023,052,069,187,210,212,296,308,309,317
ICES 296
Imperial 023,044,050,052,054,084,130,132,187,198,209
Indesit 025,102
Indiana 023,052,170
Ingelen 050,188
Ingersol 010,309
Inno Hit 004,010,011,012,023,052,094,124,170,206,209,211,222,309
Innovation
Interbuy 010,110,130,309
004,010,013,020,023,052,085,094,130,132,170,172,198,206,210,223,296,309,
326,344
003,010,011,023,028,029,052,069,094,112,116,128,154,170,206,230,308,309,
317,321,326
004,007,011,020,023,028,032,041,044,052,055,065,124,128,129,134,135,139,
170,209
004,008,010,022,023,027,028,052,074,096,101,119,132,142,170,198,234,275,
309
004,011,017,020,023,024,028,034,042,045,046,047,048,049,050,086,119,124,
132,133,139,140,141,142,143,145,186,224,257,258,280,313,348
003,010,062,068,069,088,104,108,112,116,155,157,169,172,176,177,178,308,
309,314,316,317,318,319,320,321,322,324,325,326,327,328,329
10
Page 11

A 1012 Dynalink Learning Universal Remote Control
Interfunk 001,016,023,050,052,130,140,142,170,198,234
Internal 023
Intersound 182
Intervision 003,004,015,023,101,110,198,308
Irradio 010,012,023,052,069,170,206,209,212,309,317
Iskra 183,231
Isukai 012,023,101,212
ITC 004,132,184,204,233
ITE 207
ITL 196
ITS 012,023,052,069,101,121,212,296,317
ITT 010,050,062,133,134,135,142,143,144,188,220,309,314,349
ITV 023,309,326
JEC 165
Jet Point 199
JVC 028,052,069,082,189,317,350
Kaisui 004,010,012,023,121,212,296,309
Kamosonic 004
Kamp 004,296
Kapsch 021,050,188,197,200
Karcher 004,010,017,023,038,101,170,198,309
Kasai 212
Kendo 015,020,023,029,109,180,183,186,196,197,198,207,213
Kennedy 021,132,182,197,231
Kennex 182,226,233
Kerion 182,212
Kingsley 004,296
Kitt 212
Kneissel 023,175,180,182,196,198,212,275
Kolster 023,052,191,210,214
Konka
Kontact 204
Korpel 023,052,170
Korting 001,022,198,234
Kosmos 023
Kotron 226
Koyoda 010,309
Kronne 180
KTV 004,210
Kuba 186,195
Kuro 096,122,200
Kyoto 038,217
Lavis 211
Lenco 010,023,226,233,309
Lenoir 004,010,196,199,208,211,309
Lesa 130,191
Leyco 003,011,023,027,052,170,214,308
LG 004,010,013,020,023,052,085,089,094,130,132,150,170,172,198,206,210,223,
Liesenk 170
Liesenkotter 023,179,195
Life 003,010,062,068,069,088,104,108,112,116,155,157,169,172,176,177,178,308,
Lifetec
Loewe 023,098,099,198,234,275,351
012,023,185,238,242,243,244,248,249,254,255,260,261,285,287,289,303,313,
373
296,309,326
309,314,316,317,318,319,320,321,322,324,325,326,327,328,329
003,010,023,062,068,069,088,104,108,112,116,155,157,169,172,176,177,178,
211,214,308,309,310,311,312,313,314,315,316,317,318,319,320,321,322,323,
324,325,326,327,328,329,330,331,332,333,334,335,336,337,338
11
Page 12

A 1012 Dynalink Learning Universal Remote Control
Loewe Opta 001,052,170,190
Logik 031
Luma 020,021,023,052,142,170,186,197
Lumatron 020,021,023,052,142,170,308
Lux May 023,052
Luxor 004,020,048,078,094,102,133,139,142,147,206,313
Madison 023,182,212
Magnadyne 001,015,124,130,132,170,191,234
Magnafon 004,015,044,073,124,181,182,183,195,207,209,296
Magnavox 023
Magnum 003,010,062,068,069,088,104,108,112,116,155,157,169,172,176,177,178,308,
Mandor 003,308
Manesth 003,004,022,023,029,052,170,182,184,188,213,308
Manhattan 023
Marantz 023,052,170,187,195
Marech 182
Marelli 001,234
Mark 023,052,170,296
Marshall 212
Matsui 004,005,010,011,014,020,023,026,027,028,029,031,052,063,069,092,124,148,
Matsushita 066
Mcmichael 042
Mediascreen 214
Mediator 016,023,052,170,195
Medion 003,010,023,062,068,069,088,104,108,112,116,155,157,169,172,176,177,178,
M-Electronic 004,010,017,019,037,050,052,069,110,111,116,140,170,309,
Melectronic 023,296
Memorex 010,309
Memphis 010,011,114,309
Mercury 023
Metz 001,076,081,136,152,153,218,234
Micromaxx 003,010,023,062,068,069,088,104,108,112,116,155,157,169,172,176,177,178,
Microstar 003,010,062,068,069,088,104,108,112,116,155,157,169,172,176,177,178,308,
Minerva 018,102,136,185,209
Minoka 023,052
Mitsubishi 001,023,028,031,052,055,056,061,099,102,136,171,192,234,276,278,279,280,
Mivar 004,044,074,094,124,193,198,206,209,275,290,291,292,293,294,295,374,375
Morgans 023
Motion 044,209
MTC 133,198
Multi System 170
Multitec 023
Multitech 004,010,015,020,023,028,044,046,130,132,170,198,207,212,233,296,309
Murphy 004,019,134,296
NAD 142
Nagoya 207
Naiko 023
Nakimura 023
309,314,316,317,318,319,320,321,322,324,325,326,327,328,329,378,379,380,
382
149,165,170,174,213,215,309,317
211,308,309,310,311,312,313,314,315,316,317,318,319,320,321,322,323,324,
325,326,327,328,329,330,331,332,333,334,335,336,337,338
317,321
308,309,310,311,312,313,314,315,316,317,318,319,320,321,322,323,324,325,
326,327,328,329,330,331,332,333,334,335,336,337,338
309,310,311,312,313,314,315,316,317,318,319,320,321,322,323,324,325,326,
327,328,329,330,331,332,333,334,335,336,337,338
326,352
12
Page 13

A 1012 Dynalink Learning Universal Remote Control
Naonis 020,109
National 065,102,194,284
NEC 023,028,057,331
Neckermann 001,004,009,020,023,052,084,119,133,170,198
NEI 023,052,069,114,170,183,199,212,317
Nesco 130
Neufunk 023
Newmar 182,183,207
Newtech 010,023,052,309
New World 012
Nicamagic 004,296
Nikkai 003,004,011,012,023,052,114,165,170,186,205,211,212,296,308
Nikkei 226,233
Noblex 023,184,199,200
Nobliko 004,015,018,044,209,296
Nogamatic 140,204
Nokia 050,062,064,133,134,135,142,143,144,188,220,314,315,353
Nordic 212,213
Nordmende 023,025,037,046,047,050,052,058,112,127,128,140,204,354
Nordvision 170
Nordway 217
Nortek 233
Novatronic 023,183,187,212,226
Oceanic 050,142,143
Oceanic(F) 188,220
Octan 195
Okano 023,084,187,198,233
Onceas 004,196,211
Onwa 070,196,212
Opera 023
Orbit 023,052
Orion 010,014,022,023,027,029,031,052,063,076,100,124,143,148,160,170,172,213,
Orline 023
Ormond 172,326
Orsowe 207
Osaki 003,004,005,011,012,023,075,166,308
Osio 023
OSO 012
Osume 011,030
Otto Versand 002,004,009,022,023,028,052,077,112,119,121,122,132,133,140,142,170
Pael 004,181,185,296
Palladium 004,013,023,084,198
Palsonic 023
Panama 003,004,010,023,166,296,308,309
Panasonic 023,050,065,066,067,068,102,125,142,143,152,153,194,266,286,316,356
Panavision 023
Panda 267
Pathe Cinema 004,022,038,074,132,182,207,211,228,275,296
Pathe Marconi 038,046,047,127,140,204
Pausa 010,309
PCM 211
Perdio 005,011,022,023,182,207,213
Perfekt 023
Philarmonic 185
Philco 001,023,044,054,130,132,187,198,209,234
Philharmonic 004,166
309,326,355
13
Page 14

A 1012 Dynalink Learning Universal Remote Control
Philips 001,004,016,023,039,042,044,052,089,090,112,116,132,142,156,170,195,219,
Phoenix 001,023,052,170,182,195,198,234,296
Phonola 001,016,023,052,170,195,219,234,296
Pioneer 037,050,052,140,146,170,198,216,358
Pionier 198
Plantron 003,023,052,308
Polar 305
Poppy 010,211,309
PrandoniPrince
Precision 004,166
Prima 010,050,309
Prinz 048,186,195,217,230,313
PRO2 308,309,310,311,312,313,314,315,316,317,318,319,320,321,322,323,324,325,
Profex 010,044,142,309
Profilo 172,326
Profi-Tronic 023,052
Proline 011,016,023,052,063,184,213,214
Prosonic 023,043,108,162,170,172,198,296,311,320,326
Protech 003,004,010,015,023,052,114,130,132,133,166,170,308,309
Provision 023,170,326
Pye 016,023,052,069,170,195,234,317
Pygmy 208
Pymi 010,309
Quasar 130
Quelle 003,004,017,018,019,023,027,031,052,077,130,132,136,142,151,170,206,308,
Questa 028
Radialva 023
Radiola 016,023,039,052,170,195
Radiomarelli 001,023,124,130,191
Radionette 017,019,181,188
Radio Shack 023
Radioton 185,211
Radiotone 008,023,052,198
Raduga 307
Rank 018,028
RBM 018
Rc 259
RCA 032
Recor 023
Record 307
Rectiligne 023
Rediffusion 142
Redstar 023
Reflex 023
Revox 023,052,170,190,198
REX 003,020,021,050,109,158,197,308
RFT 001,008,040,198,227,234,275
R-Line 023,052,170
Rm-d 268
Roadstar 003,010,012,023,226,233,308,309,359
Robotron 001,227,234
Royal Lux 198
RTF 001
Rubin 304,306,307
234,321,323,357
020,124,142,182,197,207,209,212
326,327,328,329,330,331,332,333,334,335,336,337,338
326
14
Page 15

A 1012 Dynalink Learning Universal Remote Control
Saba 001,037,046,047,050,059,112,124,127,128,140,142,143,204,360
Saccs 038
Sadec 212
Sadko 307
Sagem 101,184
Saisho 003,004,010,014,029,031,124,183,213,215,308,309
Saito 207
Salora 020,048,050,094,096,108,109,119,122,129,132,133,135,139,142,186,206,313,
Sambers 015,044,073,124,181,207,209,211
Samsung 003,004,010,011,023,031,052,084,091,094,105,106,161,166,170,173,198,199,
Sandra 004,296
Sandra Color 195,231
Sansui 023,052,183,196,212
Sanwa 188
Sanyo 004,007,011,017,019,023,028,030,031,032,040,041,044,074,096,128,132,135,
Save 023
SBR 016,023,042,170
Schaub Lorenz 050,142,143,188,220
Schneider 004,012,023,039,052,069,072,126,130,132,140,161,170,317,329,372
Schneider
France
Scott 182
SEG 003,004,015,023,028,040,044,089,130,132,170,296,308,326
SEI 023,201,234
SEI-synudyne 001,014,015,027,050,076,124
Seleco 020,021,028,050,109,132,158,197,364
Sencora 010,309
Senday 182
Sentra 165,205,212
Serino 184,212
Sharp 002,006,028,030,060,202,243,365
Shivaki 195,196
Shiwan 212
Shorai 027,212
Siam 023
Siarem 001,015,124,132,180,191,234
Sicatel 038,207
Siemens 009,023,030,136,179,366
Siera 023
Sierra 016,052
Siesta 161,198
Silva 023,211,212,224,296
Silver 028
Singer 001,015,023,130,132,180,188,191,204,211,234,338
Sinudyne 001,014,015,023,027,029,076,132,170,201
Skantic 050,139,147
Skyworth 239,271,272,273,301,338
Sogera 022
Sokol 306,307
Solavox 050,093,188
song 251,269,283
Soniko 214,217,233
Sonitron 007,135,198
Sonneclair 023
Sonoko 003,004,010,023,052,101,170,211,212,214,308,309
314,320,361
206,296,308,309,362
161,198,200,244,252,275,278,296,363
195,212,219
15
Page 16

A 1012 Dynalink Learning Universal Remote Control
Sonolor 007,050,188
Sontec 023,052,161,170,196,198,210,220
Sony 010,011,028,030,031,077,107,128,131,166,203,237,302,309,367
Soundcolor 211,212,214,215
Soundmaster 226
Sound&Vision 012,015
Soundwave 023,052,170
Standard 004,010,012,022,023,052,166,182,183,191,196,309
Starlight 170
Starline 228
Starlite 023,212
Starlux 196,226
Stenway 101,121,185,212
Stern 020,021,050,197
STM 221
Strato 023
Sunic Line 182
Sunkai 010,023,027,063,183,211,212,213,309
Sunstar 023
Sunwood 010,023,052,309
Superla 004,296
Supertech 023,119,212,226,233,296
Supertone 185,207
Supra 010,184,214,309
Susumu 012
Sutron 010,309
Sydney 004,166,296
Sysline 170
Sytong 212,296
Taisho 207,213
Tamashi 212
Tandberg 081,158
Tandy 002,004,011,012,049,050,166
Tashiko 004,020,028,042,057,129,166,296
Tatung 004,011,023,026,052,124,166,170,229
TCL 196,240,241,250,253,274,277,297,298,299,300
TCM 003,010,062,068,069,088,104,108,112,116,155,157,169,172,176,177,178,308,
Teac 023
Teak 190
TEC 004,010,049,130,132,166,309
Tech Line 023
Technema 182
Technics 066,194
Technisat 040
Tecnema 022
Teinelsa 182,207
Teknant 211
Teleavia 037,046,112,127,140,204
Telecor 023
Telefunken 023,036,037,051,052,053,079,080,102,103,112,127,128,140,164,204,368
Telefusion 023
Telegazi 023
Telemeister 022,023
Teleopta 226
Telesonic 023
Telestar 023
309,310,311,312,313,314,315,316,317,318,319,320,321,322,323,324,325,326,
327,328,329,330,331,332,333,334,335,336,337,338,381,383
16
Page 17

A 1012 Dynalink Learning Universal Remote Control
Teletech 010,023,089,114,130,170,309
Teleton 004,021,081,119,133,166,197
Televideon 022,182,296
Tempest 023
Tennesee 233
Tensai 010,012,019,022,023,027,052,184,185,207,211,213,217,325
Tenson 182
Tesla 180,207
Tesmet 052
Tetran 182,197
Tevion 003,010,023,062,068,069,088,104,108,112,116,155,157,169,172,176,177,178,
Texet 004,166
Thomson 004,023,037,046,047,051,052,053,059,102,103,112,127,128,140,164,167,204,
Thorn 011,019,023,036,038,055,082,112,128,142,165,170,232
Tokai 011,023,052,183,184,210,212,226
Tokyo 004,296
Tomashi 101,121,212
Top Vision 210
Toshiba 018,028,083,165,205,245,270,279,281,370
Towada 050,132
Trans
Continens
Transonic 023
Transtec 296
Trevi 199,226,233
Trident 166
Triumph 014,023,083,124,181,211,226
Tsoshi 212
Uher 021,022,023,044,050,052,181,184,190,195,197,198,209
Ultravox 001,004,015,023,130,132,134,182,183,186,191,201,234,296
Unic Line 023,182,183,212
Unic Radio 180,188,228
Uniden 212
United 023,089,170,326
UnitedSatellite 228
Universum 003,017,019,023,052,084,103,111,115,123,130,132,170,198,206,209,308,314
Univox 023,038,188,191,195,207,234
Uranya 182,191,211
Utax 211
Vanguard 186,212
Venus 262
Vestel 023,050,052,170,183,199,319,325,326
Vexa 010,023,170,212,231,309
Victor 028,052,066
Video Logic 185
Videologique 004,012,296
Videosat 130
Video System 023,052
Videotechnic 296
Videoton 184,217
Vidion 196
Visiola 004,180,296
Vision 022,023,052,182
Visorex 097
Vistar 049,188
308,309,310,311,312,313,314,315,316,317,318,319,320,321,322,323,324,325,
326,327,328,329,330,331,332,333,334,335,336,337,338,378
331,369
023
17
Page 18

A 1012 Dynalink Learning Universal Remote Control
Vityaz 306,307
Vortec 023,052,170
Voxson 001,020,023,044,050,052,109,189,197,208,209,234
Walkie 197
Waltham 004,023,038,049,139,166,217
Watson 022,023,052,170
Watt Radio 004,015,038,132,187,201,210,231,296
Wega 001,023,028,234
Wellfund 233
Weltblick 023,052,170,182
Weston 132
Wharfedale 023
White 182
White
Westinghouse
Windstar 101
Xoceco 235,236,242,260
Xrypton 023,182
Yamishi 023,101,184,212
Yokan 023
Yoko 003,004,010,012,023,052,166,170,183,198,212,224,296,308,309
Yorx 012,185,196
Zanussi 020,021,109,197
Zoppas 197
7el 256
Others 282
VCR
Brand VCR
Adelsound 098
Adyson 099
Aiwa 001,002,003,004,017,100,101,102,103,104,105,106,165,166
Akai 003,005,006,007,008,009,019,063,102,105,113,121,145,146
Akiba 041,099
Akitan 107
Akura 003,013,041,099,102
Alba
Allorgan 073,145,169
Allstar 114,115
Ambassador 019
Amstrad 002,022,023,099,101,108,116,117
Anitech 041,099,114
Anitsch 091
Ansonic 098
Aristona 115
ASA 025,026,086,106,115
Asuka 002,025,026,041,099,101,106,115,118
Audiosonic 108
Audioton 019
AWA 106,108,119,120
Baird 002,003,005,014,027,028,045,101,102,107,108,121,122,123
Basic line 004,014,019,041,099,103,108,165
Baur 026,032
Bestar 014,019,108
Black Panther 108
Black panther
line
004,015,022,023,044,170,182,296
004,014,015,016,017,019,041,099,101,103,104,105,107,108,109,110,111,113,
165,166
014
18
Page 19

A 1012 Dynalink Learning Universal Remote Control
Blaupunkt 026,029,030,031,032,039,071,115,125,126,127,128,129,130,167
Blue sky 099,103,104,105,106
Bondstec 019,099
Brandt 066,067,102,131,132,133,134
Brinkmann 103,104
Brion vega 033,135
Broksonic 042
Bush
Canon 137
Carena 103,115
Carrefour 138
Casio 101
Cathay 108
Catron 019
CGE 002,003,101,102
CGM 089
Cimline 004,041,099,103,165
Clatronic 019,099
Combitech 017,105,166
Condor 014,019,107,108
Crown 014,019,041,099,108,114
Cybercom 165,166,167,168,169,170
Cybermaxx 165,166,167,168,169,170
Cytron 165,166,167,168,169,170
Daewoo 014,019,034,040,079,103,105,108,138,170
Dansai 041,099,107,108
Dantax 165
Daytron 014,108
Decca 002,003,026,101,102,104,115,142,143
De graaf 026,035,115,122,139,140,141,147
Deitron 108
Denko 099
Diamant 106
Domland 103
Dual 003,026,101,102,108,115,165,166,167,169,170
Dumont 002,026,035,045,101,115,122,144
Elbe 062,108,118
Elcatech 099
Elin 021,145
Elsay 099
Elta 041,099,107,108
Emerson 053,099,138
ESC 014,019,108,145
Etzuko 041,099
Europhon 019
Fenner 019
Ferguson 003,028,039,043,046,057,067,101,102,108,123,133,134,146
Fidelity 002,099,101,116,145
Finlandia 026,035,045,101,115,122,139,140,147
Finlux 002,003,005,026,035,045,050,061,101,115,122,144,147
First Line 004,025,034,035,041,061,099,103,104,106,108,120,136,138,147,148,165
Fisher 019,044,045,118,122,141,149,150
Flint 004,103,165
FormentiPheonix
Frontech 019,114
Fujitsu 002,101
004,014,015,016,017,041,052,099,101,103,104,105,107,108,109,110,113,136,
165,166
026
19
Page 20

A 1012 Dynalink Learning Universal Remote Control
Funai 002,101
Galaxi 101
Galaxy 002
GBC 019,041
GEC 026,115
Geloso 041
General 019
General
Technic
Genexxa 122
Goldhand 041,099
Goldstar 002,025,101,106
Goodmans
Gradiente 142
Graetz 003,033,045,102,122,135,145
Granada 010,026,029,035,039,045,049,101,106,115,122,127,140,141,145,147
Grandin 002,014,019,025,041,099,101,103,106,108
Grundig
Haaz 165
Hanimex 105,107
Hanseatic 025,026,103,106,108,115
Harwood 099
HCM 041,052,099,114
Hinari 004,017,041,052,053,098,099,102,103,105,108,114,136,148,152,156,165,166
Hisawa 004,103,105,165
Hitachi 002,003,026,035,037,098,101,102,115,129,139,144,145,147
Hornyphon 115
Hypson 004,041,099,103,105,108,165
Impego 019
Imperial 002,101,145
Ingersoll 098,103,145
Inno Hit 014,019,021,026,041,099,108,114,145
Innovation 004,017,038,073,165,166,167,169
Interbuy 025,106
Interfunk 026,045,099,115,122
Internal 108
International 108
Intervision 002,101,103,104,106,107,108
Irradio 025,041,099,106,115
ITT 003,005,033,045,055,056,102,121,122,135,141,145,157
ITT/Nokia 082,084,085,088,089,090,092,140
ITV 014,019,025,106,108
JVC 003,056,057,058,059,060,102,132,142,143,157
Kaisui 041,099
Karcher 026,108
Kendo 004,005,006,014,019,034,063,099,103,104,106,113,121,146,165
Kenwood 003,102,118
Kimari 149
Kneissel 103,104,105,106
Korpel 041,099
Kuba 149
Kuwa 029
Kyoto 099
Lenco 014
Leyco 041,099,148
LG 002,025,101,106,108
004,017,038,073,104,165,166,167,169
002,014,019,021,025,028,041,047,048,099,101,103,104,106,108,115,129,136,
145,151,152
026,029,032,039,041,050,051,052,054,084,104,115,127,128,129,133,153,154,
155
20
Page 21

A 1012 Dynalink Learning Universal Remote Control
Lifetec 004,017,038,073,103,104,165,166,167,168,169,170
Loewe 031,036,098,106,115,126,127,144,158,159,167
Loewe Opta 025,026,039
Logik 021,041,098,099,103,121,145
Luma 093
Lumatron 014,108
Luxor 005,045,047,061,099,120,121,122,141,149,151
Magnasonic 045
Magnavox 115,129
Magnum 172
Manesth 034,041,099,103,115,138
Marantz 026,039,047,062,103,107,115,118,127,151,160
Mark 019,108
Marquant 114
Matsui 004,017,025,053,064,098,101,103,104,105,106,107,111,117,145,148,156,165,
Mediator 026,115
Medion 004,017,038,073,103,104,105,165,166,167,168,169,170
Melectronic 002,101,106,118
Memorex 002,010,025,044,045,101,106,122,140,141,149
Memphis 041,099
Metz 029,030,031,032,039,084,115,125,126,127,128,153,158,159,161,167
Micormay 104
Micromaxx 004,017,038,073,103,165,166,167,168,169,170
Microstar 004,017,038,073,165,166,167,168,169,170
Migros 002,101
Minerva 032,039,128
Mitsubishi 002,026,057,061,115,119,120,143,162
Multitech 002,019,026,041,099,101,114,122
Murphy 002,101
NAD 096,122
National 029,031,126,167
NEC 003,057,062,102,106,118,122,143
Neckermann 003,026,033,053,102,115,127,135,156
NEI 026
Nesco 041,099,101,105
Neufunk 103
Nikkai 019,065,099,108
Nobliko 083,097
Nokia 003,005,010,021,033,045,055,102,108,113,115,121,122,135,140,141,145,147
Nordmende 003,056,057,066,067,102,131,133,134,143,148,157
Oceanic 002,003,010,101,102,115,121,122,140,141
Okano 004,063,099,103,104,108,113,114,165
Orion 004,015,017,048,053,064,098,103,104,105,107,109,110,148,152,156,165,166
Orson 002,101
Osaki 002,025,041,099,101,106
Osume 136
Otake 109,110
Otto Versand 026,032,115
Palladium 003,025,039,041,063,098,099,102,103,106,113,127,145
Palsonic 099,101
Panasonic 029,030,031,038,076,125,158,159,161,167
Pathe Cinema 064,098,120
Pathe Marconi 003,102
Penney 062
Pentax 035
Perdio 002,101,103
Philco 062
166
21
Page 22

A 1012 Dynalink Learning Universal Remote Control
Philips 012,026,039,054,056,077,115,127,129,160
Phonola 026,115
Pioneer 026,057,115,143,147
Portland 014,019,107,108
Prinz 002,101,148
PRO2 165,166,167,168,169,170
Profex 041,114
Profi-Tronic 115,145
Proline 002,052,101,133,134,136
Prosco 108
Prosonic 101,103,107,108,165
Protech 115
Provision 108
Pye 026,115
Quartz 045
Quelle 002,026,027,032,033,039,045,053,115,127,135,156
Radialva 099,106,115,140
Radiola 026,115
Rank 102
RCA 094
REX 003,056,102,157
RFT 019,026,099,129
Roadstar 014,021,025,041,099,106,108,145
Royal 099,114
Saba 003,046,056,066,067,081,102,108,131,132,133,134,151,157
Saisho 004,017,041,053,064,098,103,104,111,148,156,165,166
Salora 005,045,055,061,120,121,122,141
Samsung 021,073,074,145,163,169
Samurai 019
Sansui 003,013,057,099,102,104,114,121,143
Sanwa 098
Sanyo 027,044,045,122,140,141,143,149
Saville 017,105,107,108,145,166
SBR 026,115
Scan Sonic 145
Schaub
Lorenz
Schneider 002,004,014,019,025,026,034,041,099,101,106,108,115,145,165
Seaway 108
SEG 021,041,099,108,114,119,145
SEI sinudyne 026,098,115
Seleco 003,019,102,106,142,157
Semivox 103,138
Sentra 019,099,136
Sentron 041
Setron 099
Sharp 010,011,047,106,140,151
Shintom 041,045,099,122
Shivaki 025,106
Shorai 098,148
Siemens 025,032,039,045,050,106,115,122,127,128,150,155,160
Siera 115
Silva 025,106
Silver 108
Sinudyne 026,098,115
Solavox 019
Sonitron 149
Sonneclair 099
002,003,005,033,045,101,102,113,121,122,135
22
Page 23

A 1012 Dynalink Learning Universal Remote Control
Sonoko 014,108
Sonolor 010,140
Sontec 025,106
Sony 018,020,024,070,071,072,075,078,112,121,124,130,161,164
Soundwave 103,106
Ssangyong 099
Standard 014,108
Starlite 106,122
Stern 108
Strong 013
Sunkai 004,103,104,108,165
Sunstar 002,101
Suntronic 002,101
Sunwood 041,099
Supra 106,145
Symphonic 099,101
Taisho 004,098,103,148,165
Tandberg 032,053,108
Tashiko 002,010,101,106,115,140,145
Tatung 002,003,026,101,102,103,104,115,120,140,146
TCM 004,017,038,073,165,166,167,168,169,170,171
Teac 100,101,102,106,108,115
TEC 019,099,107,108
Technics 029,031,167
Technisat 103,104
Teleavia 003,102,131
Telefunken 003,056,057,058,066,067,068,069,080,081,102,108,131,133,134,157
Telemeister 095
Teletech 099,101,108,114
Tempest 019
Tenosal 041,099
Tensai 002,025,041,098,099,101,106,114
Tevion 004,017,038,073,103,104,165,166,167,168,169,170
Thomson 003,012,056,057,058,067,080,081,102,132,133,134,157
Thorn 003,045,064,102,106,122
Tivo Hdd 012,078
TMK 087
Tokai 025,041,099,102,106,122
Tokiwa 099
Tonsai 041
Topline 104
Toshiba 003,026,034,056,061,102,115,120,129,138,157,170
Towada 041,099,114
Towika 041
Trakton 019
Triumph 053,156
TVA 019
Uher 025,033,106,135,145
Ultravox 033,107,108,135
Unitech 021,145
United Quick
Star
Universum 002,005,009,022,025,026,032,039,054,101,103,104,106,114,115,116,121,127,
Vector 062
Victor 057,058,142,143
Video 062
Videon 004,017,038,073,165,166,167,169
014,107,108
128,129,145
23
Page 24

A 1012 Dynalink Learning Universal Remote Control
Watson 105,115
Weltblick 025,106
White 085,086
White
Westinghouse
Xenon 093
Yamishi 041,099,107,108
Yokan 041
Yoko 019,021,025,041,106,145
ZX 103
SAT
Brand CBL/SAT
AGS 249
Akai 003,125,242
Akena 249
Alba 003,004,005,006,007,008,009,102,133,328
Aldes 007,010,011
Allantide 015
Allsat 012,014,055,125,242
Allsonic 010,029,309
Alpha 242,249
Ampere 024
Amstrad 017,018,019,021,023,154
Ando ver
cablevision
Ankaro 010,029,243,244,309
Anttron 004,009,014,247
Apollo 004
Arcon 017,024,025,027,056,243,325
Armstrong 021,242
Asat 125,242
AST 036
Astacom 249,250
Aston 164
Astra 003,021,030,031,032,033,034,093,284
Astro 009,011,029,040,041,042,241,247,309
Astrx 288
Athena 249
Audioton 009,055,247
Aura 034
Axiel 249
Axis 017,029,033,050,309
Barcom 025,243,325
Best 025,029,309,325
Blaupunkt 040,241
Boca 021,093,246
Brain wave 044
Brandt 136,137,138,145,316
Broadcast 043
Brunor 126
BT 249,250
BT cable 260
BT satellite 003,022,145
Bush 005,006,012,045,102,133,328
Cabletime 261,262,263,264
Cambridge 003,046
Camundosat 047
033,085,086,135
258
24
Page 25

A 1012 Dynalink Learning Universal Remote Control
Canal+ 140,174,222
Canal Satellite 245
Century 279
Channel
master
Chaparral 098
Chess 318
Citycom 005,052,253
Clark 247
Clatronic 044
Clemens
kamphus
Clyde
cablevision
CNT 011
Colombia 249
Columbus 069
Commander 244
Commlink 010
Comtech 050,051
Condor 029,309
Connexions 039,047,048
Conrad 246,
Contec 050,052,246
Cosat 055
Crown 021
Cryptovision 266
Cybercom 306,307,308,309,310,311,312,313,314,315,316,317,318,319,320,321
Cybermaxx 306,307,308,309,310,311,312,313,314,315,316,317,318,319,320,321
Cytron 306,307,308,309,310,311,312,313,314,315,316,317,318,319,320,321
Daeryung 039
Dansat 012,014
DDC 007
Decca 053
Delega 007
DEW 050
Diamond 054
Discovery 249
Diseqc 250
Disk Express 243
Diskxpress 025,048,325
Distrisat 242
Ditristrad 055
DNT 039,125,242
Dong Woo 092
Drake 056,128
Dual 306,307,308,309,311,312,313,316,317,318,319,320,321
Dynasat 031
Echostar 026,039,057,058,060,073,149,150,151,156,249,318
EEC 015
Einhell 004,010,015,019,021
Elekta 011
Elta 004,008,029,055,125,242,309
Emanon 004
Emme Esse 029,031,045,083,309
Ep Sat 005
Eurodec 062,063,337
Europa 022,242,244,246
007
015,083
265
25
Page 26

A 1012 Dynalink Learning Universal Remote Control
Eurosat 021
Eurosky 021,029,031,309
Eurospace 061
Eurostar 008,021,080
Exator 003,004,009,247
Fenner 249
Ferguson 005,012,014,045,062,064,065,066,337
Fidelity 017,019
Filmnet
Cablecrypt
Filmnet
Comcrypt
Finlandia 005
Finlux 003,005,030,067,072,079,335
Finnsat 050,062,337
Force 148
Fortec Star 285,286
Foxtel 324
Fracarro 133,249
France
Satellite/Tv
Freecom 004,068
FTE 022,024,051,087,246
Fuba 004,025,029,032,039,040,069,072,122,125,241,243,309,325
Galaxi 025,243
Galaxis 010,029,033,050,055,070,076,152,153,309,317
Galaxy 325
Gardiner 253
GEC 265
GMI 021
Goldbox 245,322
Goldbox-D+ 222,233
Goldstar 068
Gooding 075
Goodmans 005,074,328
Granada 030
Grothusen 004,068
Grundig 005,009,040,045,075,077,086,124,154,235,241,251,252,324
G-Sat 014,015
Hanseatic 095,312
Hantor 004,019,044,092
Hanuri 011
Harting Und
Helling
HEDY 277
Heliocom 024
High
Performance
Hinari 007,008,014
Hirschmann 015,039,040,078,079,080,083,122,129,178,179,180,181,241,250,335
Hisawa 044
Hitachi 005,045,115
Houston 055,244,249
Humax 152,192,193,234,281
Huth 010,013,021,043,044,050,055,083,244,246
Hyundal 326
Imperial 102,133
Innovation 029,085,095,153,156,157,309,311,312,313,317,318,319,320,321
267
267
069
015
082
26
Page 27

A 1012 Dynalink Learning Universal Remote Control
Intertronic 021
Intervision 055
Italtel-Stream 223,224
ITT/Nokia 005,030,045,048,079,115,122,335
Jerrold 257,270
Johansson 044
Jok 250
Jsr 055
JVC 003,075,236
Kathrein 015,040,042,052,087,088,089,090,098,125,177,241,242,247,249,253,254
Kosmos 068,083,087,088
KR 009,247
Kreiselmeyer 040,241
Kyostar 004,247
Labgear 327
Lasat 011,029,091,092,093,136,137,138,309,316
Lenco 004,022,068,094,244
Leng 044
Lennox 055
Lenson 336
Lexus 242
Leyco 003
LG 068
Lidcom 328
Life 137,153,317
Lifesat 029,085,095,137,153,156,157,306,307,308,309,310,311,312,313,314,315,316,
Lifetec
Lion 015,061
Lorenzen 244
Lorraine 068
Lupus 029,309
Luxor 019,030,115,122
Lyonnaise 337
Macab 062,337
Manata 249,250
Manhattan 005,011,045,055,249,250
Marantz 125,242
Mascom 011,088
Maspro 005,045,064,075,098,129,235,241,251
Matsui 003,075,145,235,241,250
Mb 095,312
Mediabox 245
Mediamarkt 021
Mediasat 033,245
Medion 029,085,095,137,153,156,157,214,215,216,217,218,219,306,307,308,309,310,
Mega 125,242
Melectronic 253
Metronic 004,009,010,171,247,253,325
Metz 040,241
Micro 247
Micromaxx 029,085,095,137,153,156,157,306,307,308,309,310,311,312,313,314,315,316,
Microstar 029,085,095,137,153,156,157,306,307,308,309,310,311,312,313,314,315,316,
317,318,319,320,321
029,085,095,137,153,156,157,306,307,308,309,310,311,312,313,314,315,316,
317,318,319,320,321
311,312,313,314,315,316,317,318,319,320,321
317,318,319,320,321
317,318,319,320,321
27
Page 28

A 1012 Dynalink Learning Universal Remote Control
Micro
Technology
Mimtech 096
Minerva 040,075,235
Mitsubishi 005,040,145
Mitsumi 093
Morgans 021,093,097,125,242,246
Morgan
sydney
Movie Time 269
Multichoice 172,324
Multistar 087,092
Multitec 318,319
Muratto 038,068
Navex 044
NEC 100,101
Network 014
Neuhaus 033,055,071,244,246,336
Nextwave 016,155
Nikko 021
Nimbus 096
Nokia 005,030,045,048,079,110,111,122,134,135,194,195,196,197,198,199,200,201,
Nomex 339
Nordmende 004,005,007,011,062,065,123,337
Novis 044
OAK 271
Oceanic 015,054,061
Octagon 004,008,009,050,244,247
Okano 021,083,087,236,237,238,239
Ondigital 186,229,230
Optex 052,055
Orbit 015,036
Orbitech 004,103,246
Origo 105
Osat 009
Otto Versand 040
Oxford 003,249
Pace 005,012,014,040,045,064,074,099,107,112,130,154,186,189,191,195,204,205,
Pacific 054
Packsat 250
Palcom 007,032,069,071,336
Palladium 021,075,077,235
Paltec 032
Panasonic 005,045,154,183
Panda 005,012,241
Pansat 329
Patriot 249,
Patriot
Worl dsat
Philips 005,014,028,035,037,045,049,059,075,086,099,104,121,124,125,132,169,170,
Phoenix 014,050,074
Phonotrend 010,055,083
Pioneer 245,272,273,275
Pk Sat 015
015,034,061
338
202,203,204,222,223,227,230,236,280,292,335
206,207,208,209,210,211,212,213
003,249,250
222,224,225,235,237,238,241,242,243,244,245,246,247,248,249,250,251,252,
253,254,311
28
Page 29

A 1012 Dynalink Learning Universal Remote Control
Polsat 173,337
Polytron 052
Predki 044
Preisner 246
Premiere 055,140,245
Priesner 021
PRO2 306,307,308,309,310,311,312,313,314,315,316,317,318,319,320,321
Profi 094
Profile 249
Promax 005
Prosat 006,007,010,102,133
Protek 015,054
Proton 015
Provision 011
Ptt Telecom 047
Pye 235,
Quadral 007,010,029,246,249,250,309
Quelle 019,040
Quiero 173,337
Radiola 125,242
Radix 039
Rainbow 009,247
RE 096
Rebox 330
Rediffusion 101
Redpoint 033
Redstar 029,309
Remoshack 296
Revox 096
RFT 010,103,125,242,244
Ruefach 094
Saba 006,011,014,045,061,064,065,120,127,133,136,142,143,144,146,250
Sabre 005
Sagem 062,337
Sakura 050,074
Salora 030,100,101,107,274
Samsung 004,027,078,272
Sat 007,017,036,038
Satbox 276
Satcom 043,095,106,312
Satec 014,045
Satford 043
Satmaster 043
Satpartner 004,009,011,044,068,083,247
Schäcke 247
Schneider 049,248,250,252,254,309,313,317,318,319,320
Schwaiger 013,014,052,054,089,095,137,144,146,147,152,155,157,168,246,306,312,316,
Scientific
Atlanta Sts
Seemann 003,021,033,039
SEG 004,008,029,034,044,095,119,309,312
Seleco 055
Siemens 040,241
Silva 068
Skardin 033
Sky 154,182,190,191,220,221,278,282,283,323
Sky Digital 154
317,319
255,256,268
29
Page 30

A 1012 Dynalink Learning Universal Remote Control
Skymaster 010,095,148,156,158,159,160,161,162,293,294,295,297,298,299,300,301,302,
Skymax 015,125,242
Skyvision 055
Sony 020,154
SR 021,065,093
Starion 034
Starland 156,318
Starring 044
Star Trak 004
Stella 047
Strong 004,009,029,048,051,081,133,222,228,247,289,309
Sumida 021
Sun/Moon/Star 184
Sunstar 021,093,107
Tandberg 062,337
Tandy 009
Tantec 005,045,064,069,071,336
Tatung 053,105
TCM 029,085,095,137,153,156,157,306,307,308,309,310,311,312,313,314,315,316,
Techniland 043
Technisat 039,071,103,108,109,126,242,336
Teco 021,093
Telanor 007
Telasat 095,312
Tele+1 222,228,267
Teleciel 247
Telecom 047
Telefunken 004,045,131,136,137,138,145,250,316
Teleka 009,021,027,039,088,247,251
Telemaster 011
Telemax 091
Telesat 095,312
Telestar 071,336
Televes 005,185,187,188,338,340
Telewire 055
Tevion 029,085,095,137,153,156,157,218,219,306,307,308,309,310,311,312,313,314,
Thomson 005,065,084,131,139,145,173,245,249,250,337
Thorens 054
Thorn 005,012,014,045,064,066
Tioko 052
Tokai 242
Tonna 005,043,055,249
Topfield 331,332,333
Toshiba 239
TPS 141,175
Triad 015,036,038,068,113
Triasat 072
Triax 040,071,136,242,336
Tristar 051
Tudi 259
Twinner 338,340
Uniden 114,287
Unisat 021,050,242
Unitor 025,044,243
Universum 040,067,075,079,235,241,335
303,304,305,312,315,318,319
317,318,319,320,321
315,316,317,318,319,320,321
30
Page 31

A 1012 Dynalink Learning Universal Remote Control
Variosat 241
Variostat 040
Vector 015,061
Ventana 125,242
Via Digital 135,139,231,232
Visiopass 335
Visiosat 044,055,156,163,164,165,166,167,318
Viva 244
Vivanco 334,341
Vortec 004,027,078
VTech 253
V-Tech 036,038,104,115
Way 291
Wela 246
Westminste r
Cable
Wevasat 005,015
Wewa 005
Winer 290
Winersat 044
Wisi 005,036,038,039,040,113,116,117,118,241,246
Wittenberg 017
Wolsey 082
Woorisat 011
Xsat 176,249
Zehnder 011,029,038,087,089,119,243,253,309,325
Zeta
Technology
Zodiac 009,247
CD
Brand CD
Adcom 006
Aiwa 007,008,009,098
Akai 010,011,012,013
Alba 014
Arcam 083
Asuka 015
Audiosonic 015
Bestar 016
BSR 017
Bush 018
California
audio lab
Carrera 020
Classic 119
Condor 017
Crown 021
Cybercom 103,104,105,106,107,108,109,110,111,112,113,114,115,116,117,118,119,120
Cybermaxx 103,104,105,106,107,108,109,110,111,112,113,114,115,116,117,118,119,120
Cytron 103,104,105,106,107,108,109,110,111,112,113,114,115,116,117,118,119,120
Denon 022,023
Dual 015,024,103,104,105,107,108,109,110,111,112,113,114,115,116,117,118
Elta 105,108,113
Emerson 006,016,025
Fisher 026,027
Genexxa 016,025,028,029,030,031,032,033,034,107
Goldstar 020
260
242
019
31
Page 32

A 1012 Dynalink Learning Universal Remote Control
Goodmans 025,035,036
Grundig 037,083
Harmon
Kardon
Hitachi 006,024,041,042,043
Innovation 081,089,090,091,092,093,094,109,110,111,112,113,114,115
Intersound 015
JVC 044
Kenwood 026,029,045,046,047,100
Kodak 005
LG 020
Lifetec
Linn 083
Luxman 048,049
Magnum 081,089,090,091,092,093,094,109,110,111,112,113,114,115
Marantz 051,052,083
Matsui 051,053,083
Mcintosh 054,055
Medion 081,089,090,091,092,093,094,103,104,105,106,107,108,109,110,111,112,113,
M-Electronic 050
Memorex 006,016,025,031,034
Meridian 083
Micromaxx 081,089,090,091,092,093,094,103,104,105,106,107,108,109,110,111,112,113,
Micromega 083
Microstar 081,089,090,091,092,093,094,103,104,105,106,107,108,109,110,111,112,113,
Mission 083
NAD 028,049,084,085,086,087
Naim 083
Nakamichi 056,057
Onkyo 002,058,059,060,061
Panasonic 018,019,062
Philips 003,063,064,082,083
Philips Cd-I 064
Philips Cd-V 002
Pioneer 030,034,099
PRO2 103,104,105,106,107,108,109,110,111,112,113,114,115,116,117,118,119,120
Proton 083
Quad 083
Realistic 006,016,031,032,107
Roadstar 050,063,065
Rotel 083
Saba 024
SAE 083
Samsung 102
Sansui 003,025,066,067,068,083
Schneider 001,017,083
Scott 016,025
Sharp 029,069,070,071
Sherwood 124
Siemens 072
Signature 010
Singer 118
Skymaster 121
Sony 028,073,074,075,088,095,096,097
010,038,039,040
081,089,090,091,092,093,094,103,104,105,106,107,108,109,110,111,112,113,
114,115,116,117,118,119,120
114,115,116,117,118,119,120
114,115,116,117,118,119,120
114,115,116,117,118,119,120
32
Page 33

A 1012 Dynalink Learning Universal Remote Control
Sunwood 015
Tandberg 083
TCM 081,089,090,091,092,093,094,103,104,105,106,107,108,109,110,111,112,113,
Teac 122
Technics 019,062,077,101
Telefunken 024
Tevion 081,089,090,091,092,093,094,103,104,105,106,107,108,109,110,111,112,113,
Theorie$anwe
nding
Thomson 004,024
Toshiba 049,078,079
Universum 083
Vector
Research
Victor 044
Welltech 107,108,112
Yamaha 069,076,080
Yorx 065
DVD
Brand DVD DVR
Accoustic
solutions
Aiwa 129
Akai 010,034,064
Alba 130,131,132
Ames 128
Amstrad 130
AMW 091
Apex 132,133,134,135
Arena 120 120
A-trend 136
BBK 075,076,077,078,079,080,081,082,083,084,085
Black diamond 130
Brandt 118
Broksonic 137
Bush 097,130,131,132,147
Centrum 138,139,140,141
Cinevision 142
Classic 128
CMI 120 120
Crown 118
Cybercom
CyberHome 042,068,136
Cybermaxx
Cytron
Daewoo 070,091
Daytron 143
Denon 005,036,058
Denver 131
DIK 114
Dmtech 144
Dual
114,115,116,117,118,119,120
114,115,116,117,118,119,120
123
020
128
102,103,104,105,106,107,108,109,110,111,112,113,114,115,116,
117,118,119,120,121,122,123,124
102,103,104,105,106,107,108,109,110,111,112,113,114,115,116,
117,118,119,120,121,122,123,124
102,103,104,105,106,107,108,109,110,111,112,113,114,115,116,
117,118,119,120,121,122,123,124
102,103,104,105,107,108,109,110,111,112,113,114,115,116,117,
118,119,120,128,130,167
120
120
120
120
33
Page 34

A 1012 Dynalink Learning Universal Remote Control
DVD 1024 145
ECG 095
Elta 146,147,168
Emerson 142
Ferguson 118
Finlux 142
Fisher 148
GE 132
Golden Sphere 108
Goldstar 142
Goodmans 118,147
Go-Video 105
Gradiente 118
Grundig 011,158
GVG 096
Haaz 108,109
Harman/Kard
on
H&B 110
Himage 094
Hitachi 009,025,030,043,063,127,163 127
HTY 086
Initial 132
Innovation 012,013,014,114,116,117,118
JBL 150
JVC 002,032,066
Kendo 114,120 120
Kenwood 005,028,058
KLH 132
Koss 118
Labwave 023,048
Lasonic 067,108
Lecson 151
Lenoxx 152
LG 016,142,153
Life 012,013,014,116,117,118
Lifetec
Limit 108
Linn 035
Loewe 011,039,158
Magnavox 056,089,125,126,157
Magnum 170,171 174
Marantz 003,038,142,157,158,159
Matsui 118
Maxim 091
MBO 154
Medion 012,013,014,041,102,103,104,105,106,107,108,109,110,111,112,
Metz 009,024,163
Mico 087,088
Micromaxx 012,013,014,102,103,104,105,106,107,108,109,110,111,112,113,
Microsoft 155
Microstar 012,013,014,102,103,104,105,106,107,108,109,110,111,112,113,
Mintek 132
Mitsubishi 007,130
050,150
012,013,014,102,103,104,105,106,107,108,109,110,111,112,113,
114,115,116,117,118,119,120,121,122,123,124
113,114,115,116,117,118,119,120,121,122,123,124
114,115,116,117,118,119,120,121,122,123,124
114,115,116,117,118,119,120,121,122,123,124
120
120
120
120
34
Page 35

A 1012 Dynalink Learning Universal Remote Control
Mustek 069,071,072,128
NAD 027,142,162
Nakamichi 156
Noname 045
Norcent 093
Nortek 091
Onkyo 015,029,065,149
Optimus 059
Orion 137
Oritron 118
Pacific 114
Panasonic 005,006,017,022,036,051,054,055,058
Panda 090
Philco 053
Philips 003,011,039,040,047,052,125,126,157,158,159 125,126
Philips
magnavox
Pioneer 009,024,026,059,062,163
Prism 104
PRO2 102,103,104,105,106,107,108,109,110,111,112,113,114,115,116,
Proline 118
Proscan 155
Prosonic 160,161
RCA 057,073,132,155
Reoc 108
REX 138
RTL 120 120
Saba 118
Salora 142
Sampo 108
Samsung 008,030,063,105
Sanyo 092,148
Schneider 014,113,114,118,130,144,161
SEG 108,130
Sharp 012,013,116,162
Sherwood 044
Shinco 132
Shinsonic 132
Siltex 076
Skymaster 098,099,100,101,128,147
Sm electronic 128,147
Sony 004,031,046,060
Strong 091
Sunsui 137
Supervision 147
SVA 074
Sylvania 106
TCM 012,013,014,102,103,104,105,106,107,108,109,110,111,112,113,
Teac 108,132,163
Technics 005,036,037,058,155
Techwood 162
Tevion 012,013,014,102,103,104,105,106,107,108,109,110,111,112,113,
Theta digital 163
Thomson 001,033,155
Toshiba 003,049,137,157
157,158,159
117,118,119,120,121,122,123,124
114,115,116,117,118,119,120,121,122,123,124,169
114,115,116,117,118,119,120,121,122,123,124,172
120
120,173
120
35
Page 36

A 1012 Dynalink Learning Universal Remote Control
United 164,165
Universum 130
Wharfedale 151
Xenius 115,118
Yamaha 005,036,058,061,125,126 125,126
Yamakawa 166
Zenith 142
Others 018,019,020,021
AUX
AMP,TUNER,TAPE,LD,Other
Brand AMP TUNER TAPE LD/OTHER
ADT 161
Aiwa
Akai
Amplifier 158
Amst rad
Arion 162
ASH 027 250
Aswo 043 253 328
Audio Comb1 040,190
Braun 104 347
Bush 032,116 239 314
CD Photo 039
CDR 041,191
CD Video 038
Centrum 301
Cybercom
Cybermaxx
Cytron
Daewoo 022 284 384
DBS 179
Denon
Diora 081 287 376,377
Disco Vision 003(LD)
DMT 161
Dual
Elta 305,306 176,184
Fischer 021,085,134 260 370,371,382,440
Goldstar 029 201 439
Gold Vision 166,167
Goodmanns 015,018,032 274 312
Goodmans 239 344
Grundig
Harman
Kardon
HDT 159
Hitachi 098 228,279 356,392 003(LD)
Home
automation
ITT 073 227 395,396
028,128,129 203,204,245 319,320,321,437,
018,112,121 223,274,286 326,390,400,410,
014,034,077,
086,145
169,170,171 302,303,304 173,174,175,176,
169,170,171 302,303,304 173,174,175,176,
169,170,171 302,303,304 173,174,175,176,
020,080,098,
131,139
062,124,169,
170
043,142,148 253,255,307 328,332,337,445 005(LD),043,044
091 281 368,403
192
278,290,294,
295
198,199,228,
249,271,297
208,222,302,
303
438
411,421
393
313,317,318,356,
369,443
327,412,413 173,174,175,176,
181,182
177,178
177,178
177,178
001(LD)
183
,046
36
Page 37

A 1012 Dynalink Learning Universal Remote Control
JBL 068,118
JVC
Kenwood
Lifetec
Linn 043,148 298 365 043
Luxman 099,100,149,
Magnavox 445 046
Magnum 194
Marantz 043,148,153 253,307 328,364,399,445 043,044,046,
Medion 034,169,170,
Meridian 148 043
Micromaxx 169,170,171 302,303,304 173,174,175,176,
Microstar 169,170,171 302,303,304 173,174,175,176,
Minowa 013 236
Mission 155 215
Mitsubishi 005(LD)
NAD 048 285 380,381 005(LD),047,048
Naim 043
Nakamichi 069 246 404
Niam 148
Nokia 072 237 397
Noname 032 239
Okano 016,017 276,289 424,425
Onkyo 024,125 252,266 323,324,333,378,
Palladium 033,090,133 277 420
Palladium/Ok
ano
Panasonic 136,138,141 198,258 359,405,406
Philips 043,101,140,
Pioneer 011,119,148 207,210,211,
PRO2 169,170,171 302,303,304 173,174,175,176,
Quad 148 043
Radiola 006(LD)
Radiotone 087
Radix 160
Radmor 140,153,154 254 364
Revox 089,120 213 338
Revox/Studer 101,153,154 253 328
Rotel 126,127 205
Saba 151
Samsung 010,074,083,
Sansui 307 445 044,046
Sany 382
Sanyo 134,157 219,259 383,407,414
067,146,150 241,270,273 322,339,340,434,
023,062,156 222,263,265,
169,170,171 302,303,304 173,174,175,176,
152
171
143
148,153,154
092
268,272
264,300 353,354,361,408
302,303,304 173,174,175,176,
253,307 328,337,398,445 004(LD),006(LD)
262
206,238,275,
291,299
435
325,394,409,412,
413,427,432,433
379
330,331,389,415,
417,418,419
360,362,363,373,
374
062
177,178
177,178
177,178
177,178
,049,050
,043,044,045,046
003(LD),005(LD)
,043,055,185
177,178
065,186
37
Page 38

A 1012 Dynalink Learning Universal Remote Control
Schneider 012,013,016,
Sharp 132,156 200,272 316,341,427 187
Sherwood 071,078,079 240,282,283 367,385,386,387,
Siemens 016,018,019,
Sinotec 035 221
Sinotec(PepsiDose)
Sony 036,117,133 216,243,247,2
Supertech 032 239
Switch Box 180
T+A 025,103 232,251 348,436
T+A
Elektroakustik
TCM 169,170,171,
Teac 309,310
Techmate 163
Technics 082,097,135,
Techsan 164,165
Telefunken 005(LD)
Tensai 102
Tevion 169,170,171,
Theorie&anw
ending
Thomson 123 209 329 064
Thorn 009(LD)
Uher 130 202
Universum 010,016,018,
Video CD 037,189
Welltech 173,178
Yamaha 030,070,076,
Others 137
019,026,029,
032,033,034,
035,043,073,
075,086,088,
096,105,106,
107,108,109,
110,111,113,
114,115,143,
144,145,147
022,026,029,
031,034,043,
075,093,094,
095,142
035 221
025 251 436
172,195,196
138
197
311
084,107
122
201,215,217,
218,220,221,
225,226,227,
229,230,231,
234,235,236,
239,267,269,
277,286,289,
290,295
201,215,233,
234,244,253,
274,284,289,
292,296
48
302,303,304,
308
214,256,257,
288
302,303,304 173,174,175,176,
230,274,289,
293,299
212,224,242,
261,280
328,343,344,345,
346,349,350,351,
355,395,396,423,
439
388
326,328,357,358,
422,423,426,428,
429,430,431,439
342,402,416,
441,442,444
173,174,175,176,
315,366,375,405 063
345,352,363,372,
423,426
334,335,336,391,
401
002(LD),007(LD)
,008(LD),051,052
,053,056,057,058,0
59,060,061,168,
188,193
177,178
177,178
042,054,066
38
 Loading...