

Dynabook UPA3490G3 User Manual
Exploring Your Computer’s Features
Using PC Cards
1 Prepare the card for removal by right-clicking the Safely
Remove Hardware icon on the system tray and then
selecting the card or device you want to remove.
If the system is unable to prepare the card for safe
removal, a message will tell you to try again later. If the
card can be removed now, the system displays Safe to
Remove Hardware.
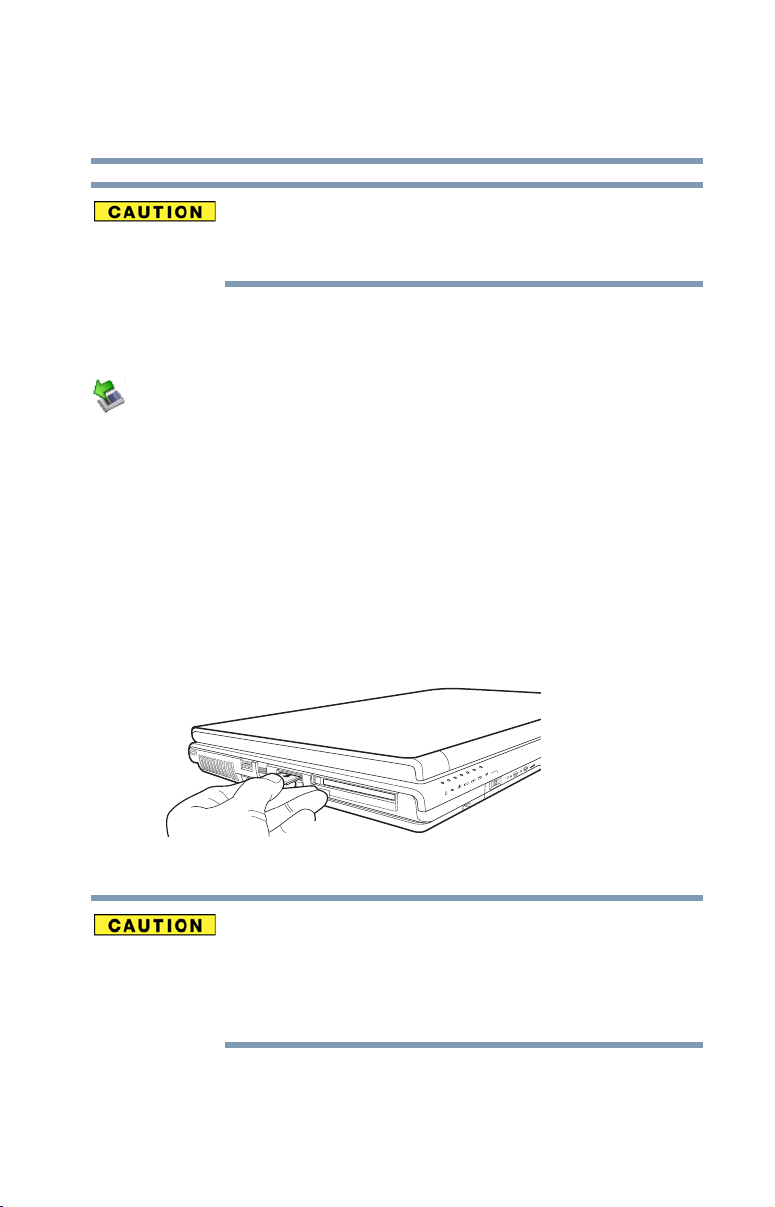
2 Locate the PC Card eject button.
3 Press the PC Card eject button once to pop it out slightly,
and push it in to remove the PC Card.
The PC Card ejects slightly from the slot.
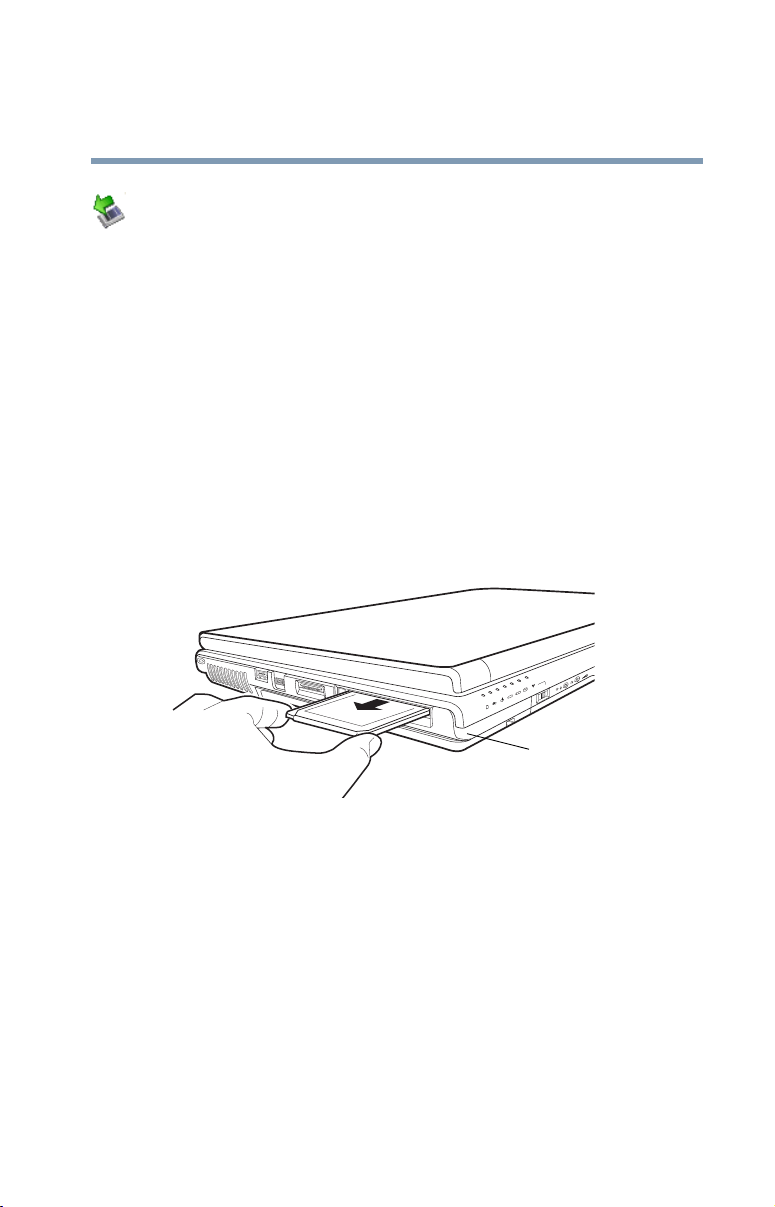
4 Grasp the edges of the PC Card and slide it out of the
slot.
151
(Sample Illustration) Removing a PC Card
Setting up a PC Card for your computer
Some PC Cards are ready to use as soon as you install them.
Others, such as hard disk cards, network cards, and SCSI
adapters, may need to be set up to work with your computer.
To set up your PC Card, refer to the documentation that came
with the card or refer to your operating system manual or
online Help.
PC Card
eject button

Exploring Your Computer’s Features
NOTE
152
Using the Bridge Media Adapter Slot
Using the Bridge Media Adapter Slot
(Available on certain models)
The Bridge Media Adapter slot (available on certain models)
supports the use of Memory Stick
Secure Digital
xD-Picture Card
variety of digital products: digital music players, cellular
phones, PDAs, digital cameras, digital video camcorders, etc.
The Bridge Media Adapter slot may also support other types
of media. For a complete list of supported media, visit
Toshiba’s Web site at accessories.toshiba.com.
™
(SD™), MMC™ (MultiMediaCard™), or
™
media. These media can be used with a
Do not use the Copy Disk function for this type of media. To
copy data from one media to another, use the drag-and-drop
feature of Windows.
Inserting memory media
The following instructions apply to all types of supported
media devices.
1 Turn the media so that the contacts (metal areas) are face
down.
2 Push the media into the adapter until it locks in place.
™
, Memory Stick™ PRO,
(Sample Illustration) Inserting memory media
Exploring Your Computer’s Features
Using the Bridge Media Adapter Slot
When inserting memory media, do not touch the metal
contacts. You could expose the storage area to static
electricity, which can destroy data.
Removing memory media
1 Prepare the media for removal by right-clicking the
Safely Remove Hardware icon on the system tray and
then selecting the card or device you want to remove.
If the system is unable to prepare the media for safe
removal, a message will tell you to try again later. If the
media can be removed now, the system displays Safe to
Remove Hardware.
2 Gently press the card inward to release it.
The card pops out slightly.
3 Grasp the card and pull it straight out.
153
(Sample Illustration) Removing memory media
Do not remove memory media while data is being written or
read. Even when the Windows message “copying...”
disappears, writing to the media might still be in progress and
your data could be destroyed. Wait for the indicator light to go
out.

Exploring Your Computer’s Features
154
Using the i.LINK® port
Using the i.LINK® port
(Available on certain models)
The i.LINK
side of the computer provides an extremely fast data transfer
rate.
In addition to high speed, the i.LINK
isochronous data transfer (the delivery of data at a guaranteed
rate). This makes it ideal for devices that transfer high levels
of data in real-time, such as video devices.
As with USB ports, the i.LINK
Play (automatic configuration) and hot swapping (the ability
to connect and disconnect devices while the computer is on).
®
port (available on certain models) on the left
Using an expansion device
The expansion port is used to connect your computer to an
expansion device. This is an excellent investment if you are
using your computer both in and out of the office.
®
port also supports
®
port supports both Plug-and-
When you return to your desk, you can then connect to your
network, print reports from your computer, or use a mouse
instead of your computer’s pointing device. Connecting
cables for each of these devices every time you return to the
office can be time-consuming.
With an expansion device, you can leave external devices
connected while you are using your computer away from
your desk. When you return, you can quickly connect your
computer and have immediate access to all the devices.
For more information, see the accessories information
package that comes with the device or visit
accessories.toshiba.com.

Chapter 5
Toshiba Utilities
Your computer includes several utilities designed to help you
to reconfigure your system to best meet your individual
needs. Together, these allow you to ascertain certain system
details, set additional options, or change default options.
These utilities are described in this chapter.
❖ TOSHIBA Assist
❖ TOSHIBA Application Installer
❖ Supervisor password
❖ User password
❖ TOSHIBA Password Utility
❖ TOSHIBA PC Diagnostic Tool Utility
❖ TOSHIBA HDD Protection Utility
❖ Fn-esse®
❖ TOSHIBA Hotkey Utility
❖ TOSHIBA SD™ Memory Card Format Utility
❖ TOSHIBA SD™ Memory Boot Utility
❖ TOSHIBA Power Saver
❖ Mouse Utility
155

Toshiba Utilities
156
TOSHIBA Assist
❖ Toshiba Hardware Setup
❖ TOSHIBA Rotation Utility
❖ Tablet and Pen Settings
❖ Cross Menu Utility
❖ TOSHIBA Tablet Access Code Utility
❖ TOSHIBA Zooming Utility
❖ TOSHIBA Button Controls
❖ CD/DVD Drive Acoustic Silencer
❖ TOSHIBA Accessibility
❖ TOSHIBA Mobile Extension
❖ Fingerprint Authentication Utility
TOSHIBA Assist
The TOSHIBA Assist provides quick access to computer
functions and allows you to customize a range of computer
settings.
To access TOSHIBA Assist, do one of the following:
❖ Double-click the TOSHIBA Assist shortcut icon on the
desktop.
❖ Click Start, All Programs, Tos hi ba , Utilities, and then
TOSHIBA Assist.
The TOSHIBA Assist window appears.
Toshiba Utilities
TOSHIBA Assist
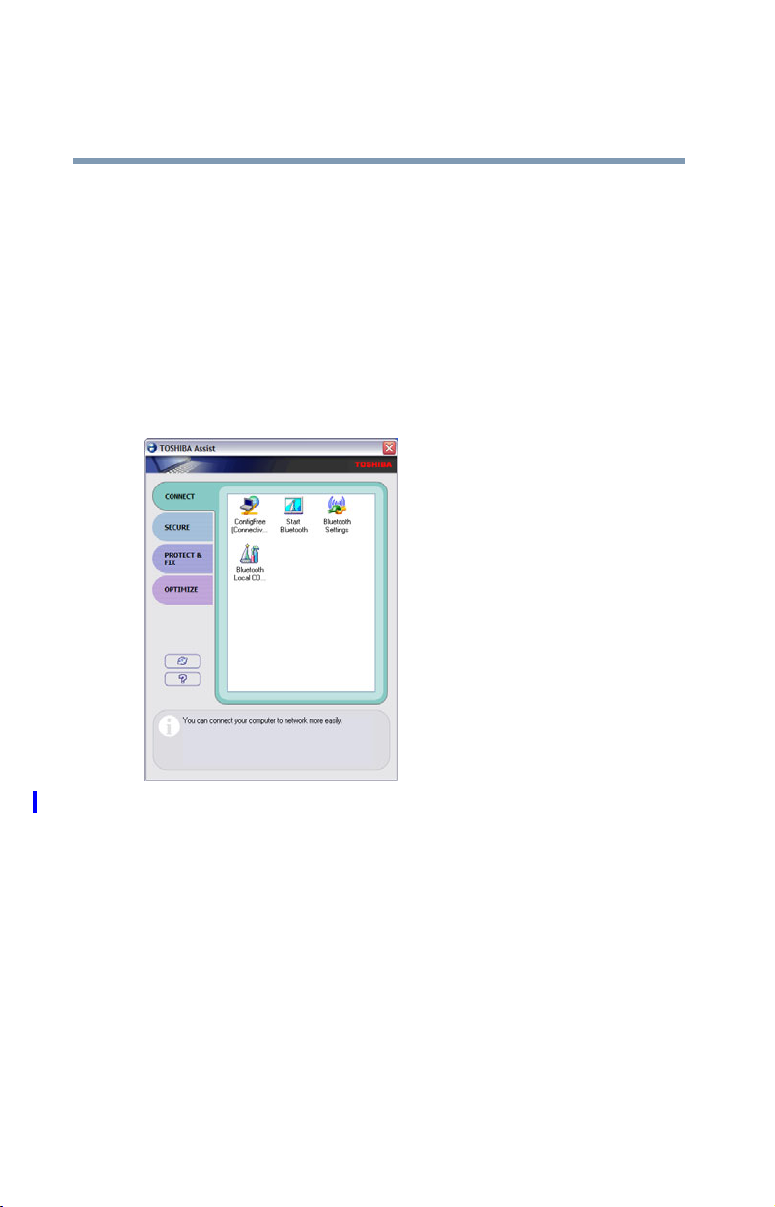
(Sample Image) TOSHIBA Assist window
The TOSHIBA Assist offers four categories of options:
❖ Connect
157
❖ Secure
❖ Protect & Fix
❖ Optimize
158
Connect
Toshiba Utilities
TOSHIBA Assist
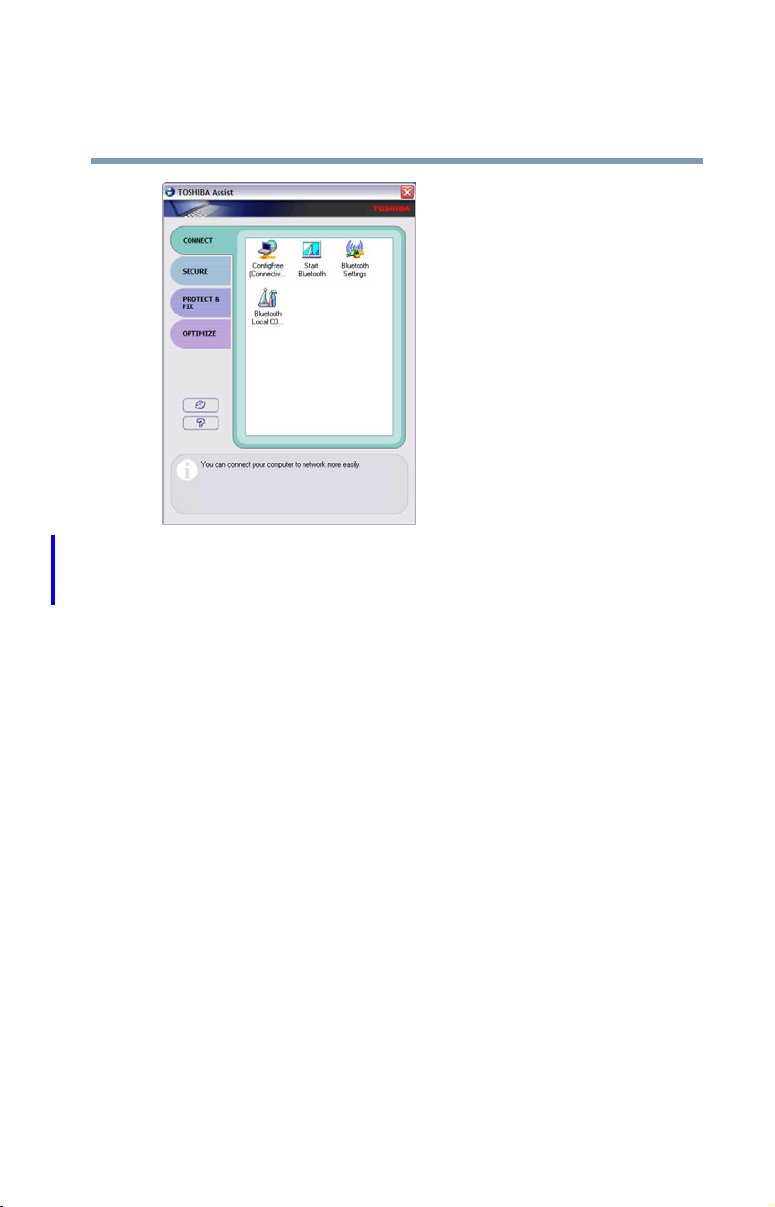
The features available in this category are:
❖ ConfigFree™ Connectivity Doctor
❖ ConfigFree
❖ Bluetooth
❖ Bluetooth Local COM Settings
❖ TOSHIBA Application Installer
®
Settings
(Sample Image) TOSHIBA Assist window – Connect tab

Secure
Toshiba Utilities
TOSHIBA Assist
The features available in this category are:
❖ User password
❖ Supervisor password
❖ TOSHIBA Password Utility
159
(Sample Image) TOSHIBA Assist window – Secure tab
Toshiba Utilities
160
TOSHIBA Assist
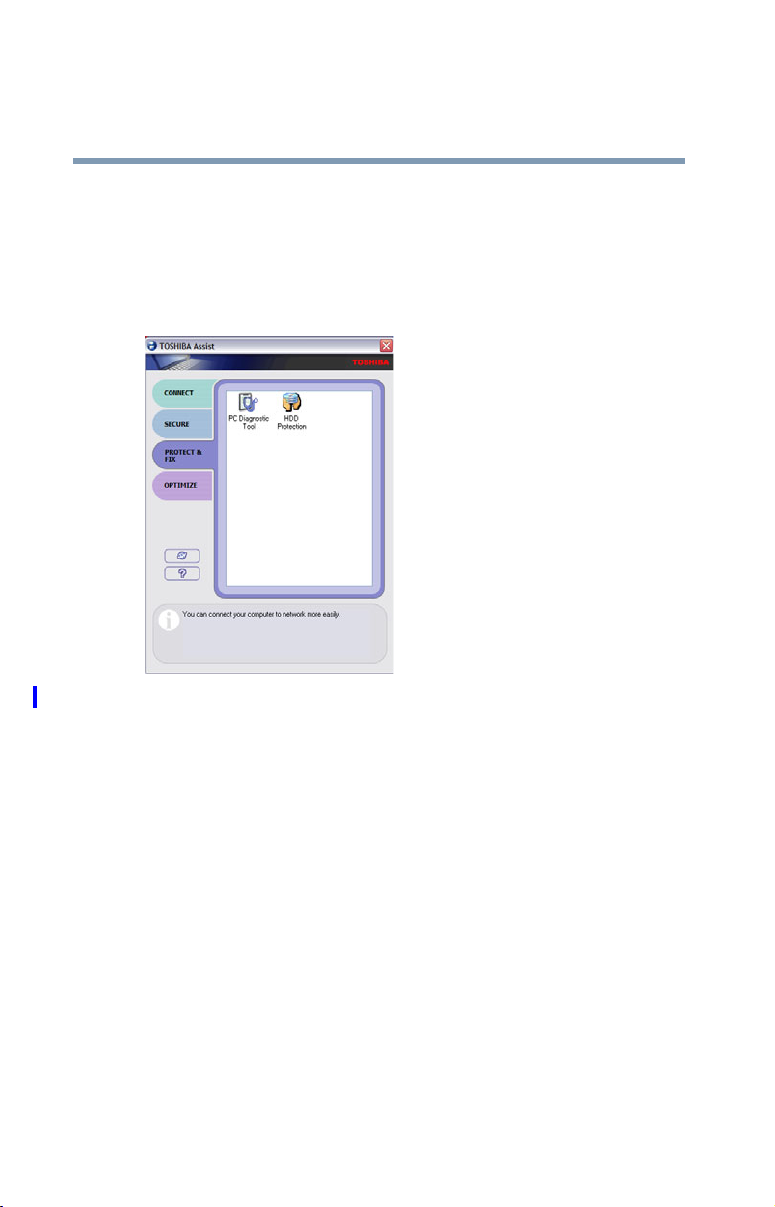
Protect & Fix
The features available in this category are:
❖ TOSHIBA PC Diagnostic Tool Utility
❖ TOSHIBA HDD Protection Utility
(Sample Image) TOSHIBA Assist window – Protect & Fix tab
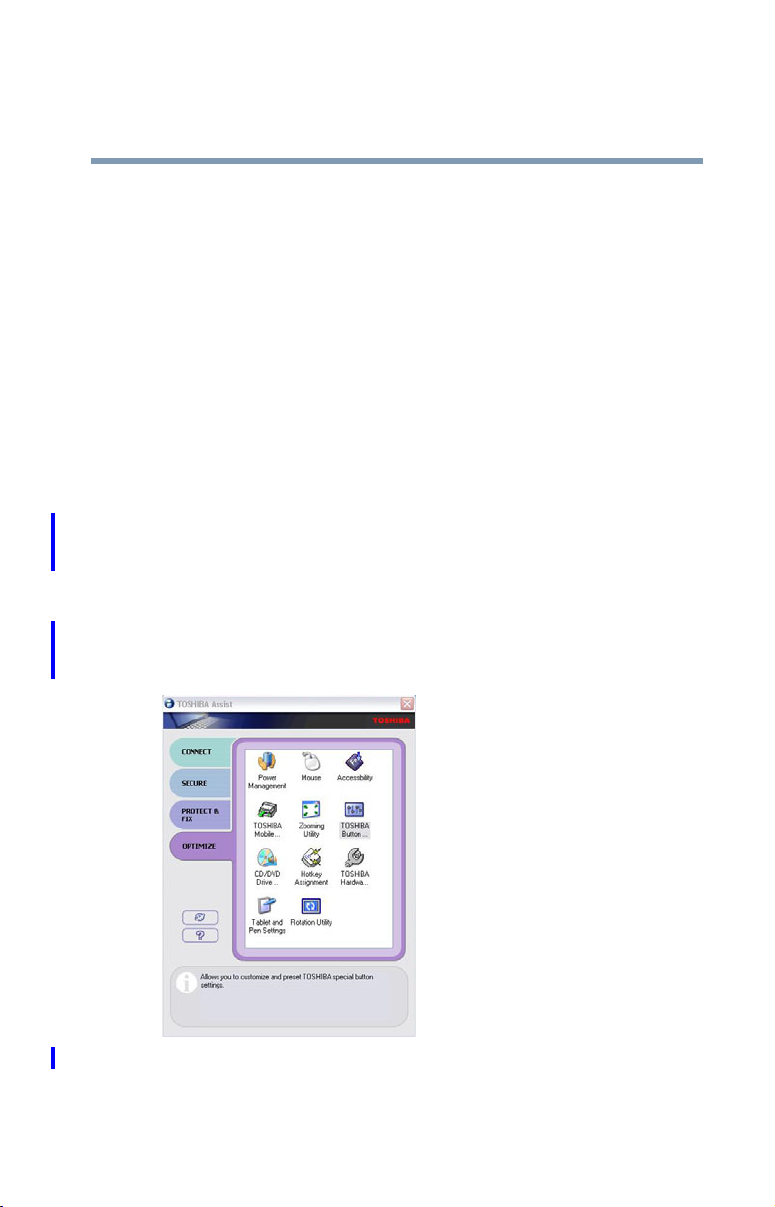
Optimize
The features available in this category are:
❖ Hotkey assignment using Fn-esse®
❖ TOSHIBA Hotkey Utility
❖ TOSHIBA SD™ Memory Card Format Utility
❖ TOSHIBA SD™ Memory Boot Utility
❖ TOSHIBA Power Saver
❖ Mouse Utility
❖ Toshiba Hardware Setup
❖ TOSHIBA Zooming Utility
❖ TOSHIBA Button Controls
❖ CD/DVD Drive Acoustic Silencer
❖ TOSHIBA Accessibility
Toshiba Utilities
TOSHIBA Assist
161
❖ Fingerprint Authentication Utility
(Sample Image) TOSHIBA Assist window – Optimize tab
Toshiba Utilities
162
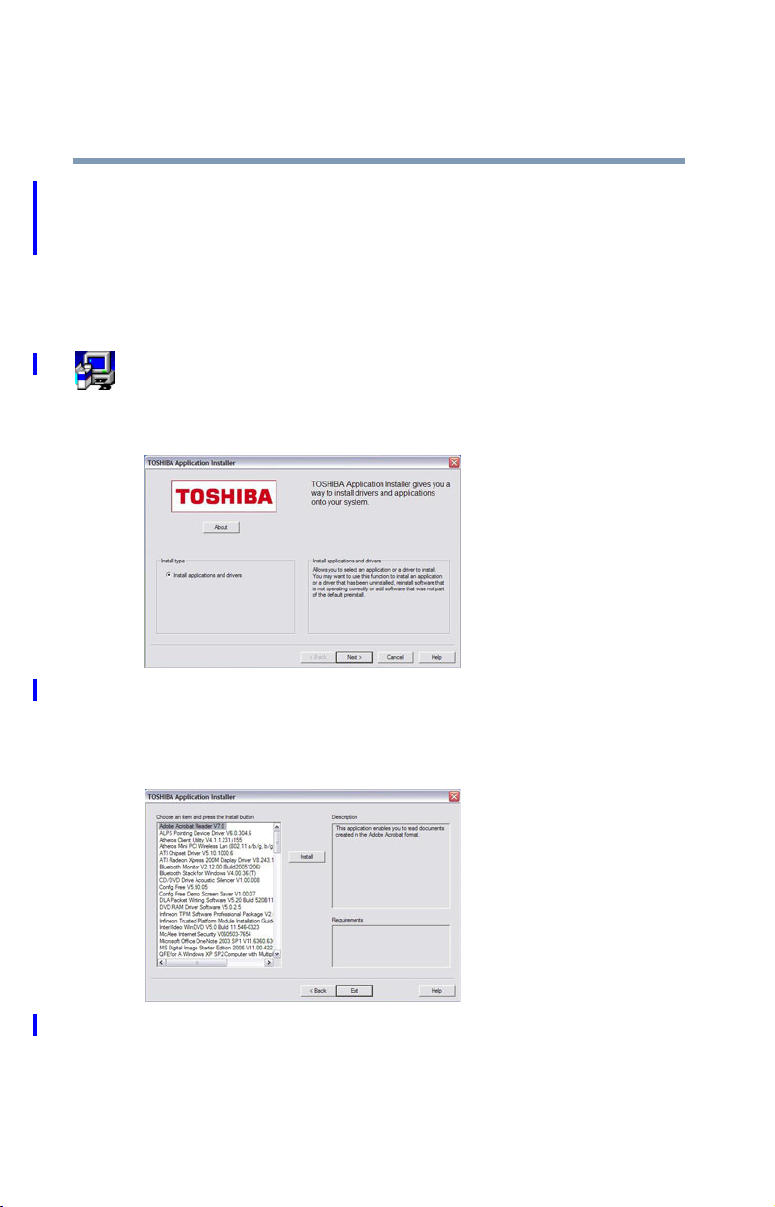
TOSHIBA Application Installer
TOSHIBA Application Installer
The TOSHIBA Application Installer allows you to reinstall
the drivers and applications that were originally bundled with
your computer.
To reinstall drivers and applications:
1 Double-click the TOSHIBA Application Installer icon
on the Windows
2 Click Next.
(Sample Image) TOSHIBA Application Installer screen
3 Click the item(s) you want to install. To select multiple
items, hold down the
®
desktop.
Ctrl key as you make your selections.
(Sample Image) TOSHIBA Application Installer selection screen
4 Click Install, then follow the on-screen prompts to
complete the installation process.

Setting passwords
Setting a password lets you walk away from your computer,
secure in the knowledge that nobody can access your files.
When you set a password, you must enter the password
before you can work on your computer again.
Toshiba supports several types of passwords on your
computer:
❖ An instant password — Secures your open programs and
files when leaving the computer temporarily.
❖ A power-on password — Prevents unauthorized users
from starting or restarting the computer.
❖ A supervisor password — Prohibits unauthorized users
from accessing certain functions such as TOSHIBA
Hardware Setup. This is useful if more than one person
uses the computer.
A single user password supports the instant and power-on
password functions.
Toshiba Utilities
Setting passwords
163
When setting up the various passwords, keep the following in
mind:
❖ The user password can be set up under the supervisor
password.
❖ The supervisor password must be set before the user
password, or the user password must be deleted and then
re-entered after the supervisor password is set.
Using an instant password
An instant password secures your system with a single
keystroke. Use this feature when you leave your desk for a
few minutes and do not want to turn off the computer.
To use an instant password, press
freezes the keyboard and TouchPad, and blanks the screen.
An instant password has no effect on an optional USB mouse
or trackball.
Fn, then press F1. This

164
Toshiba Utilities
Setting passwords
To unlock your system, press any key or touch the pointing
device and the Windows
your user name and enter your password, if any.
Setting a user password
To register a password for the power-on password functions:
1 Click Start, All Programs, Tos hi ba , Utilities, and then
TOSHIBA Assist.
The TOSHIBA Assist window appears.
2 On the left side, select Secure.
3 Select the User Password icon.
4 Click Set.
5 Enter your password then enter it again to verify.
6 Click Set.
7 Click OK if you want to save the password to a text file
on a diskette or media of your choice, or click Cancel to
continue without saving the password to a text file.
8 Click OK to exit.
®
Logon screen will appear. Select
Disabling a user password
To cancel the power-on password function:
1 Click Start, All Programs, Tos hi ba , Utilities, and then
TOSHIBA Assist.
The TOSHIBA Assist window appears.
2 On the left side, select Secure.
3 Select the User Password icon.
4 Click Delete.
5 Follow the on-screen instructions to remove the user
password.
Toshiba Utilities
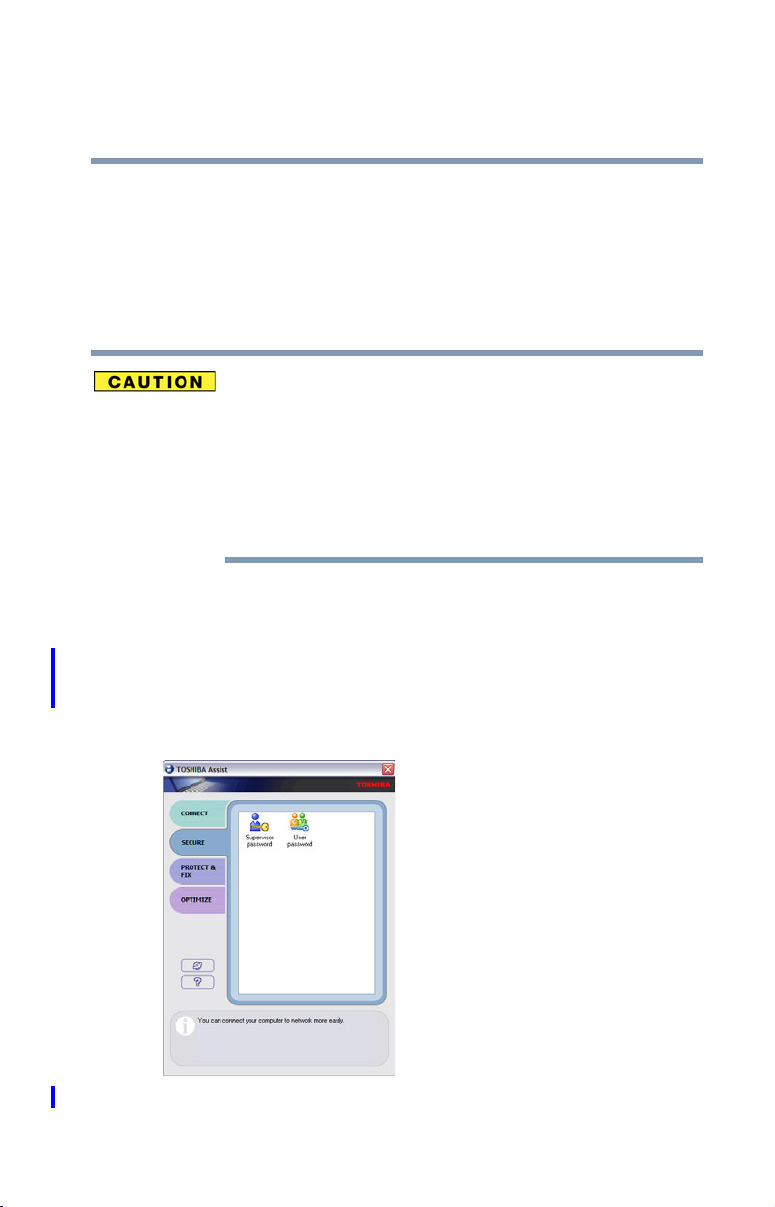
Using a supervisor or user password
Using a supervisor or user password
A supervisor password prevents other users from changing
hardware configuration options.
Setting a supervisor password
If you choose to set a supervisor or user password, Toshiba
strongly recommends that you save your password in a
location where you can later access it should you not
remember it.
Toshiba is not responsible for any losses that may occur to
you, your organization or others as a result of the inability to
access the computer.
To register a password for the power-on password functions:
1 Click Start, All Programs, Tos hi ba , Utilities, and then
TOSHIBA Assist.
165
The TOSHIBA Assist window appears.
2 On the left side, select Secure.
(Sample Image) TOSHIBA Assist Security window

Toshiba Utilities
166
TOSHIBA Password Utility
3 Select the Supervisor Password icon.
4 Click Set.
5 Enter your password then enter it again to verify.
6 Click Set.
7 Click OK if you want to save the password to a text file
on a diskette or media of your choice, or click Cancel if
you do not want to save the password to a text file.
8 Click OK to exit.
Deleting a supervisor password
To cancel the power-on password function:
1 Click Start, All Programs, Tos hi ba , Utilities, and then
TOSHIBA Assist.
The TOSHIBA Assist window appears.
2 On the left side, select Secure.
3 Select the Supervisor Password icon.
4 Click Delete.
5 Follow the on-screen instructions to remove the
supervisor password.
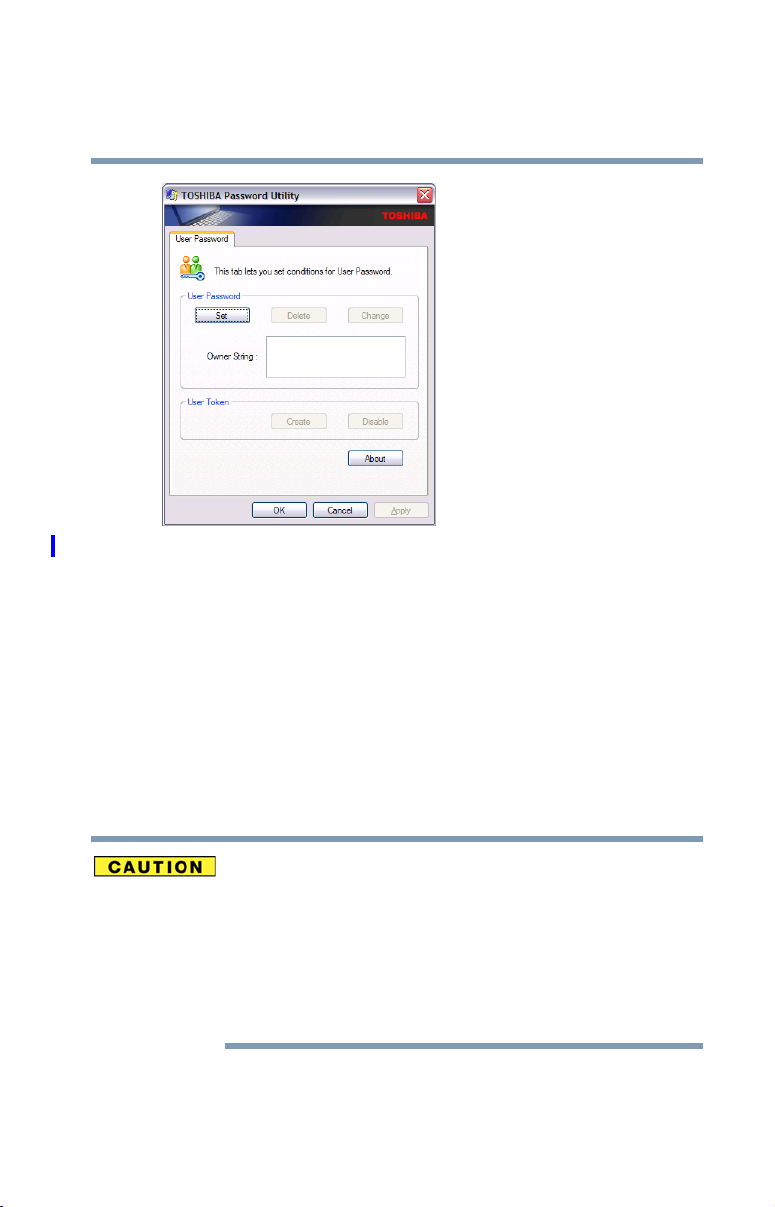
TOSHIBA Password Utility
The TOSHIBA Password Utility allows you to set a userlevel password in TOSHIBA Assist or in System Setup.
To use the TOSHIBA Password utility:
1 Start TOSHIBA Assist.
2 Click the Secure tab, then click the User Password icon.
The TOSHIBA Password Utility window appears.
Toshiba Utilities
TOSHIBA Password Utility
(Sample Image) TOSHIBA Password Utility window
167
3 Click Set
4 Enter a password, then enter it again to verify.
5 Click Set
6 Click OK if you want to save the password to a text file
on a diskette or media of your choice. Click Cancel
you do not want to save the password to a text file. This is
known as the password service diskette.
7 Click OK
.
.
if
to exit.
If you choose to set a supervisor or user password, Toshiba
strongly recommends that you save your password in a
location where you can later access it should you not
remember it.
Toshiba is not responsible for any losses that may occur to
you, your organization or others as a result of the inability to
access your computer.

Toshiba Utilities
NOTE
168
TOSHIBA PC Diagnostic Tool Utility
TOSHIBA PC Diagnostic Tool Utility
This utility can help diagnose problems with devices in your
computer. Refer to the online Help documentation within the
application for additional help.
To use the TOSHIBA PC Diagnostic Tool utility:
1 Click Start, All Programs, Tos hi ba , Utilities, and then
PC Diagnostic Tool, or click the PC Diagnostic Tool
icon in the Protect & Fix tab of TOSHIBA Assist.
The PC Diagnostic Tool window appears.
(Sample Image) PC Diagnostic Tool window
2 Select the devices that you would like to test by clicking
the check box that appears to the left of the device.
Click the + (plus) and - (minus) symbols to expand and
collapse the categories.
3 Click Start Diagnostics when you are ready to begin the
tests.
Toshiba Utilities
TOSHIBA HDD Protection Utility
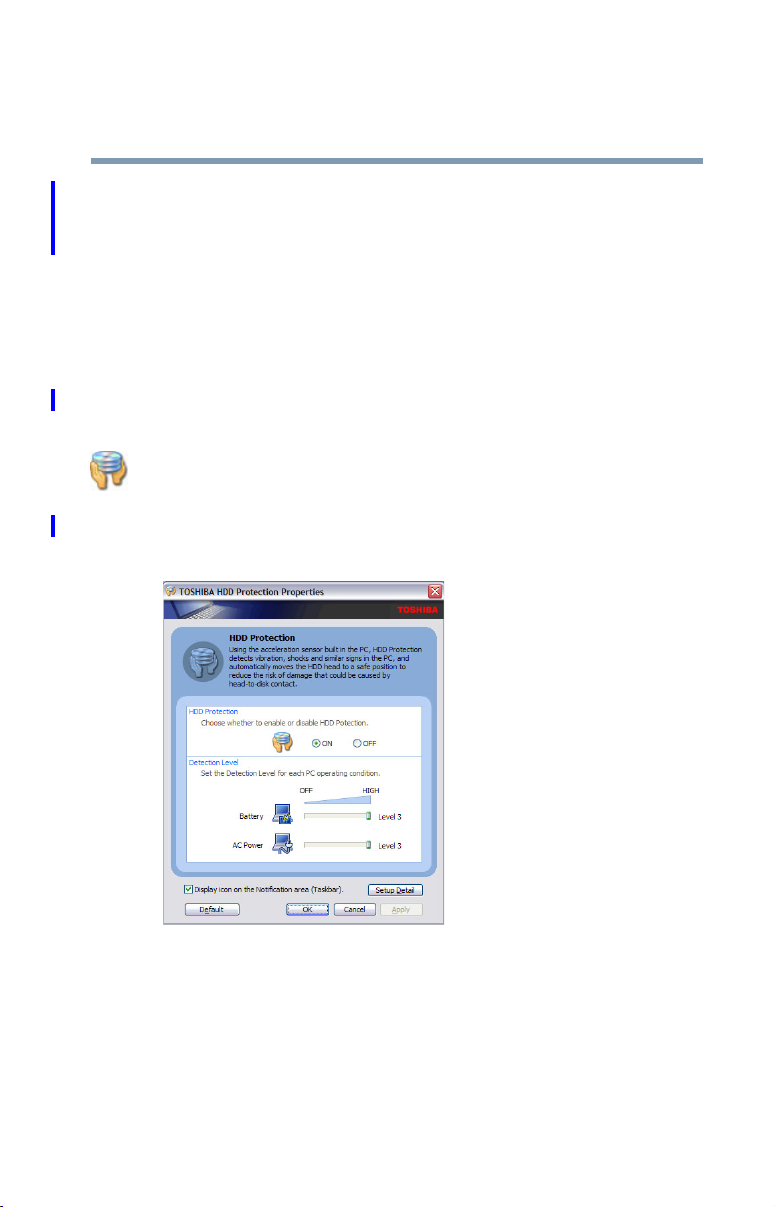
TOSHIBA HDD Protection Utility
The TOSHIBA HDD Protection utility controls your
computer’s hard disk drive (HDD) protection feature, which
parks the HDD whenever motion is detected on the computer.
Using this utility, you can enable or disable hard disk drive
(HDD) protection, and set the motion detector’s sensitivity
level for AC power and battery power operation.
To use the TOSHIBA HDD Protection utility:
1 Click Start, All Programs, Tos hi ba , Utilities, and then
HDD Protection, or click the HDD Protection icon in
the Protect & Fix tab of TOSHIBA Assist.
The TOSHIBA HDD Protection Properties window
appears.
169
(Sample Image) HDD Protection Properties window
2 Select ON to enable HDD protection, or select OFF to
disable HDD protection.
3 Set the battery and AC power detection levels as desired.
4 Click OK.

170
Toshiba Utilities
Fn-esse®
Fn-esse
Desktop shortcuts and Toshiba’s Fn-esse program provide
quick ways to open programs, documents, and folders from
within any Windows
For more information on creating desktop shortcuts, refer to
the operating system documentation that came with your
computer.
This section describes how to use the Fn-esse program to
quickly access your programs and files.
With Fn-esse, you can assign an
❖ Open a Windows
❖ Open a file in its associated program
❖ Display a customized folder of programs and/or files
Fn-esse also has several keys, known as hot keys, that
perform preassigned operations. For more information, see
“Hot Keys” on page 255.
You can assign any key that is not associated with a hot key
or a keyboard overlay.
®
®
program without using the Start menu.
®
operating system program
from which to choose
Fn key combination to:
Starting Fn-esse®
Click Start, All Programs, Tos hi ba , Utilities, and then
Fn-esse, or click the Hotkey Assignment icon in the
Optimize tab of TOSHIBA Assist.
The Fn-esse keyboard appears.
(Sample Image) Fn-esse screen

The keys are color-coded as follows:
❖ Available keys are dark gray with white letters.
❖ Assigned keys and keys associated with a popup list are
shown on the Fn-esse keyboard in the selected color.
❖ Unavailable keys are light gray.
There are two ways to assign a key to open a program or
document:
❖ Using drag-and-drop
❖ Using the keyboard or pointing device
The method most often used is drag-and-drop.
Using drag-and-drop to assign a key
To assign a key to open a program or document:
1 Start both Fn-esse and Windows
program supporting drag-and-drop).
Toshiba Utilities
Fn-esse®
®
Explorer (or the
171
2 Resize the Explorer window so that you can see both the
Fn-esse keyboard and Explorer at the same time.
3 In the Explorer window, highlight the program or
document file you wish to assign to a key.
4 Click and hold the primary button as you drag the
highlighted item from Explorer to the key on the Fn-esse
keyboard which you are assigning to the item.
5 Release the primary button.
Fn-esse displays the Add/Edit Command dialog box with
the Description, Command Line, and Working Directory
fields automatically completed.
6 Click OK to close the Add/Edit Command dialog box
with your key assignment in place.
The program or document is now associated with the key
you just selected. To open the program or document, press
plus the appropriate key from within any Windows
program.
®
-based
Fn
Toshiba Utilities
172
Fn-esse®
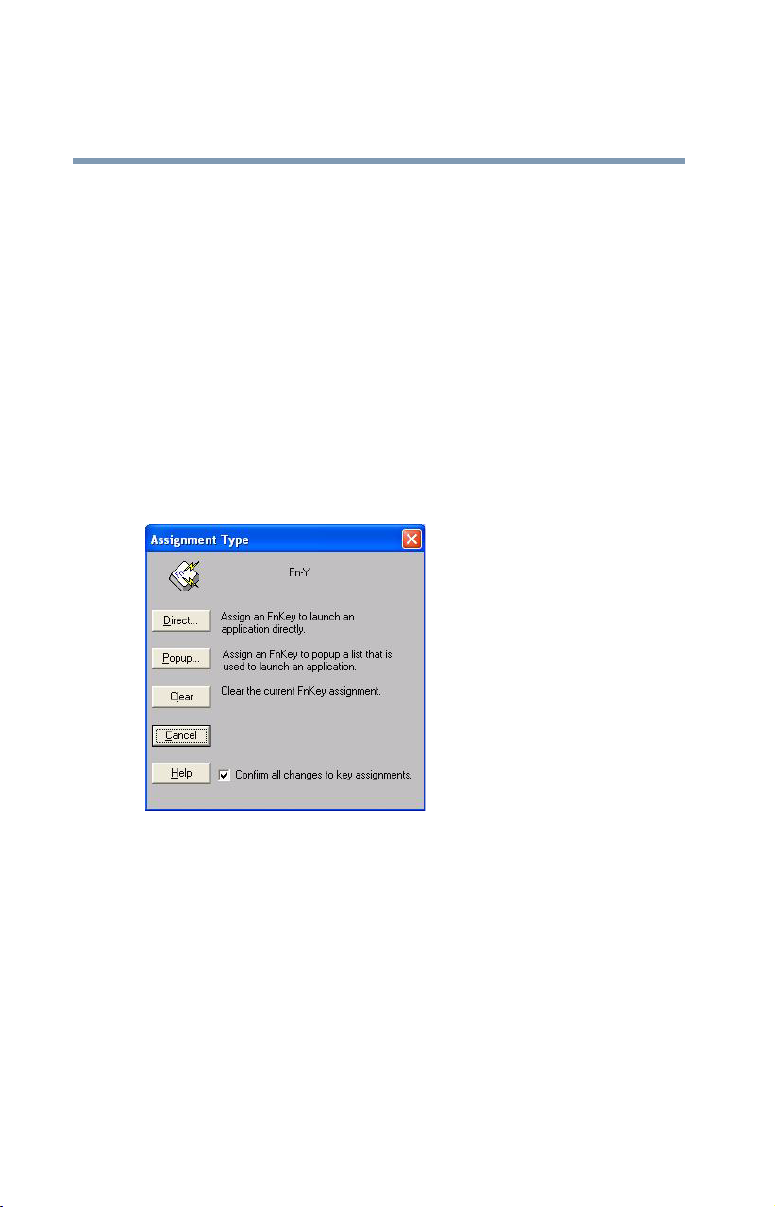
Using the keyboard or pointing device to assign a key
To assign a key to open a program or document:
1 Start Fn-esse.
2 Perform one of the following:
❖ Using the keyboard, press and hold the Fn key, then
press the desired assignment key.
❖ Using the pointing device, move the cursor over the
desired key in the Fn-esse window and press the
secondary button.
The Assignment Type dialog box appears.
(Sample Image) Fn-esse assignment type dialog box
Follow the instructions in “Making a direct key assignment”
on page 172 or “Making a popup assignment” on page 173.
Making a direct key assignment
1 Select Direct to display the Add/Edit Command dialog box.
2 Enter the Description, Command Line, and Working
Directory for the new Fn-esse key assignment, or click
the Browse button to specify this information.
3 Click OK.

Toshiba Utilities
Fn-esse®
173
Making a popup assignment
1 Select Popup to display the Application Explorer dialog box.
2 Select the desired folder. The left side of the Application
Explorer window displays the folders in the All Programs
menu. The right side lists the programs and documents in
the folder. These are the items that will appear in the
popup list.
3 To create a popup list with items from various folders, or
to pick only a few items from a folder, create a new folder
containing only the desired programs and documents. If
you are unsure how to do this, refer to your operating
system documentation.
4 Click OK to associate the folder with the key you just
selected.
To open a popup list showing the items in that folder,
press
Fn plus the appropriate key from within any
®
Windows
-based program.
Viewing existing key assignments
To view the existing key assignments, choose Assignments
from the Fn-esse keyboard. Fn-esse displays the Function Key
Assignments dialog box. This box lists all the key assignments
and the program or document to which each key is assigned.
To view items in a popup list, select the Expand popup lists
check box.
Changing or removing existing key assignments
On the Fn-esse keyboard, click the key you wish to change
with the secondary button.
Fn-esse displays the Assignment Type dialog box.
❖ To change the key assignment, click Direct or Popup and
continue as if you were creating a new assignment.
❖ To remove the key assignment, click Clear.
Toshiba Utilities
174
TOSHIBA Hotkey Utility
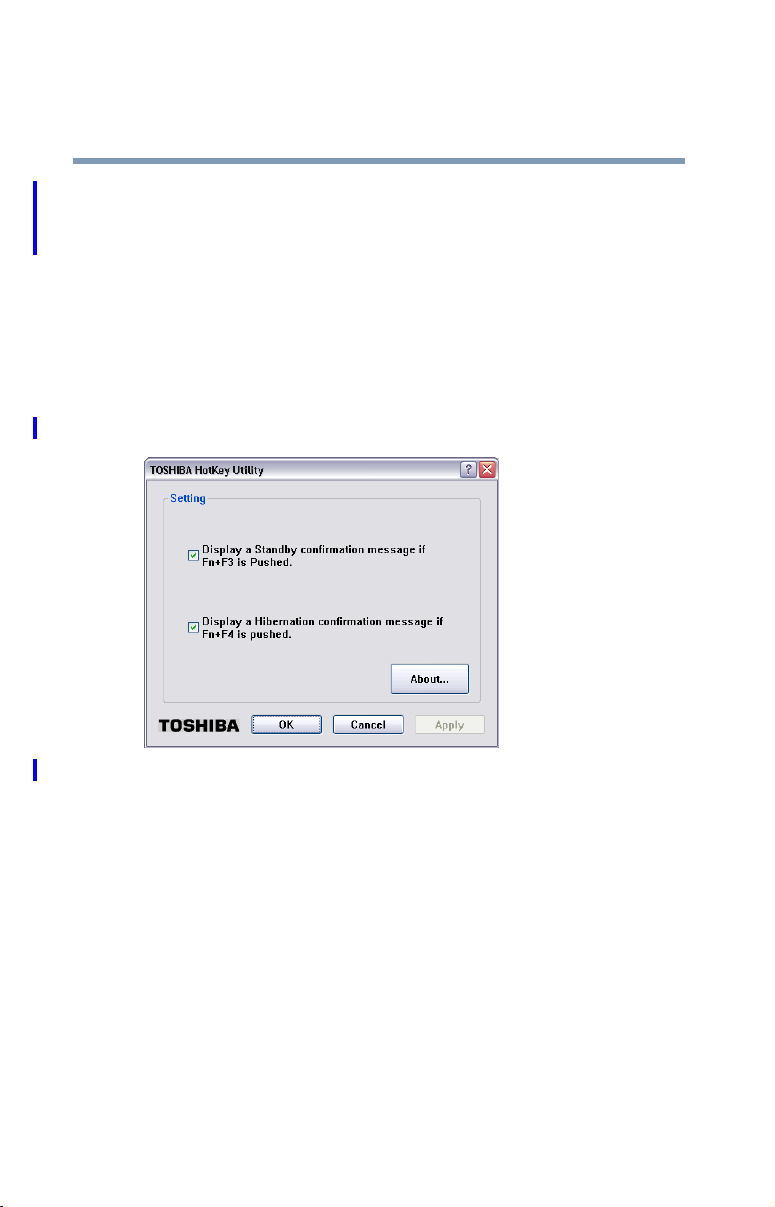
TOSHIBA Hotkey Utility
The TOSHIBA Hotkey utility allows you to receive a
confirmation message when you use the Hotkey combination
for Standby [
To activate the Hotkey utility:
1 Click Start, All Programs, Tos hi ba , Utilities, and then
Hotkey utility.
The TOSHIBA Hotkey window appears.
Fn+F3] and Hibernation [Fn+F4].
(Sample Image) TOSHIBA Hotkey Utility window
2 Select the desired option(s).
3 Click OK.
Toshiba Utilities
TOSHIBA SD™ Memory Card Format Utility
175
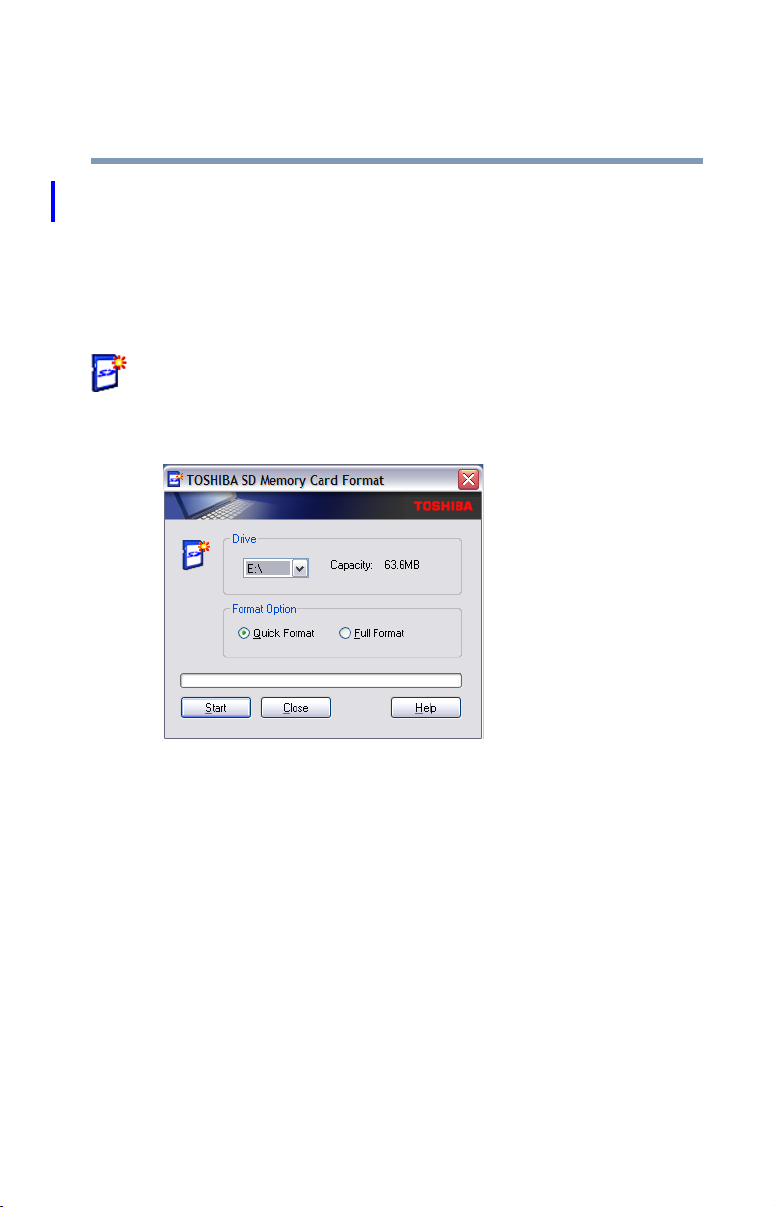
TOSHIBA SD™ Memory Card Format Utility
This utility is used to format SD™ cards used with the Bridge
Media Adapter slot.
To format an SD memory card using this utility:
1 Click Start, All Programs, Tos hi ba , Utilities, and then
SD Memory Card Format, or click the SD Memory
Card icon in the Optimize tab of TOSHIBA Assist.
The SD Memory Card Format screen appears.
(Sample Image) SD Memory Card Format screen
2 Select the drive corresponding to the SD memory card.
3 Select the formatting option:
❖ Quick Format
❖ Full Format
4 Click Start to begin formatting. The formatting progress
is displayed in the horizontal bar in the window.
5 When formatting is completed, click Close to exit the
utility.

Toshiba Utilities
NOTE
176
TOSHIBA SD™ Memory Boot Utility
TOSHIBA SD™ Memory Boot Utility
The TOSHIBA SD™ Memory Boot Utility allows you to
create an SD card you can use to boot up your computer.
This utility also allows you to easily format SD Memory
Cards. Refer to the online Help documentation within the
application for any additional help.
To make a bootable SD card:
1 Attach a USB floppy drive to your computer and insert a
bootable floppy disk.
2 Insert the SD card.
Be sure to back up your data to external media before
performing this procedure as data on the drive may be lost.
3 Click Start, All Programs, Tos hi ba , Utilities, and then
SD Memory Card, or click the SD Memory Card icon
in the Optimize tab of TOSHIBA Assist.
The TOSHIBA SD Memory Boot Utility screen appears.
(Sample Image) TOSHIBA SD Memory Boot Utility screen

TOSHIBA SD™ Memory Boot Utility
NOTE
4 Select the drive where the SD card is located.
5 Select Read from a floppy disk.
6 Click Start.
To create a bootable SD card with the Read from an image
file option, you need a third-party application.
Booting from a bootable SD card
To boot from a bootable SD card:
1 Create a bootable SD card (see “TOSHIBA SD™
Memory Boot Utility” on page 176 for instructions).
2 Verify that no floppy disk is installed in the optional
external floppy disk drive.
3 Insert a bootable SD card into the SD card slot.
4 Power on the computer.
Toshiba Utilities
177
5 During the boot process, press the
The system displays the Boot menu.
6 Use the arrow keys to select the SD/Floppy icon.
7 Press the
Enter key.
F12 key.
Toshiba Utilities
178
TOSHIBA Power Saver
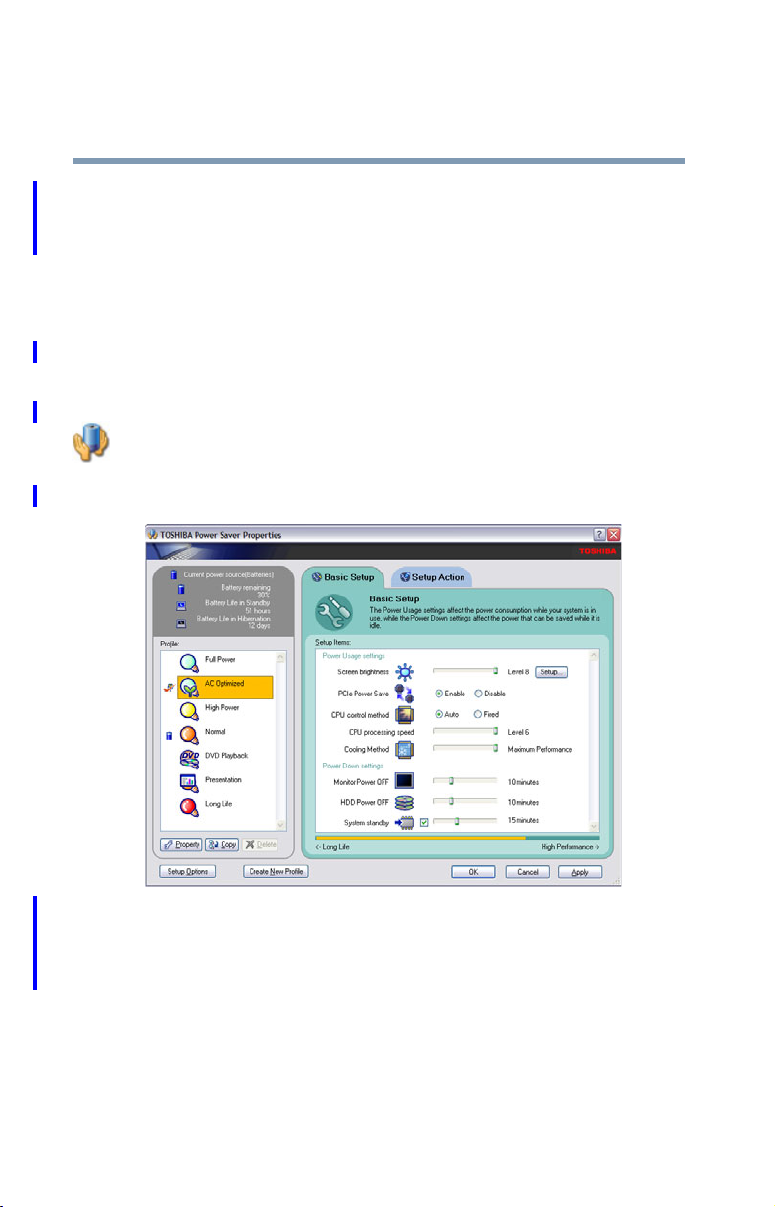
TOSHIBA Power Saver
The TOSHIBA Power Saver is used for power management,
enabling you to control your computer’s power usage,
regardless of the source, and use the many preset power
profiles, or create one yourself.
To access TOSHIBA Power Saver:
❖ Click Start, Control Panel, Performance and
Maintenance, and then TOSHIBA Power Saver, or
click the Power Management icon in either the
Optimize tab of TOSHIBA Assist or in the system tray.
The TOSHIBA Power Saver Properties window appears.
(Sample Image) TOSHIBA Power Saver Properties window
The Profile panel on the left of the TOSHIBA Power Saver
Properties window shows the power profiles used to control
power usage for both AC power and battery power, as well as
the estimated battery life for each power profile mode.
The profiles shown in the Profile panel consist of the preset
power profiles that come with your computer, plus any
customized power profiles that you have created.

Preset Power Profiles
The preset power profiles are:
❖ Full Power
❖ AC Optimized
❖ High Power
❖ Normal
❖ DVD Playback
❖ Presentation
❖ Long Life
These profiles cannot be deleted. It is not recommended to
change the settings of these profiles. If you need a custom
profile, create a new profile with the properties you require.
The DVD Playback profile applies only when a DVD program
is playing while running the computer on battery power.
Toshiba Utilities
TOSHIBA Power Saver
179
Quickly creating a new power profile
1 Highlight one of the preset profiles.
2 Click Copy.
A new profile appears with the title “Copy of Name”
where Name is the title of the profile you copied.
3 To rename the profile, click Property.
4 Type the name for your new profile, and then click OK.
Customizing a power profile
1 Select the profile to be customized in the Profile panel.
2 Make the desired changes to the settings on the Basic
Setup tab and the Setup Action tab.
3 Click Apply, then OK.
Toshiba Utilities
180
Mouse Utility
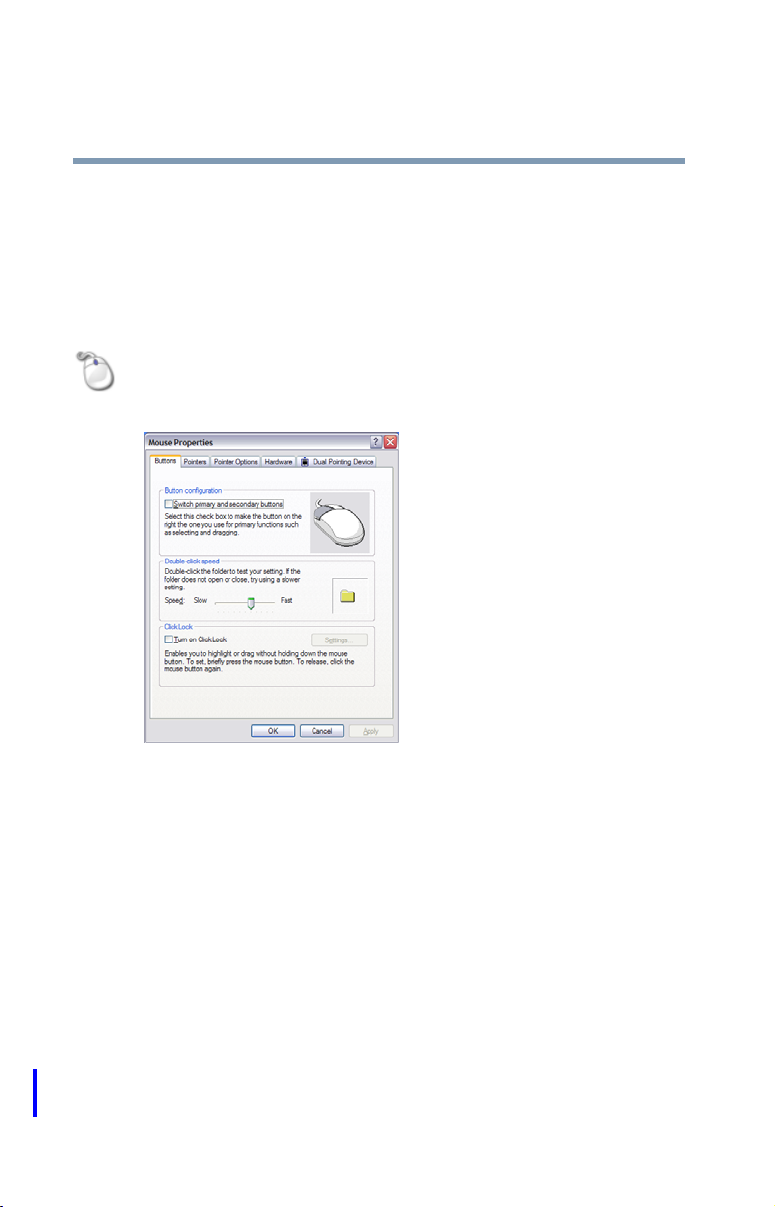
Mouse Utility
The Mouse utility allows you to change your pointing device
or mouse settings.
To access the Mouse utility:
1 Click Start, Control Panel, and then Mouse, or click the
Mouse icon in the Optimize tab of TOSHIBA Assist.
The Mouse Properties screen appears.
(Sample Image) Mouse Properties screen
The settings you can change are divided into these
categories:
❖ Buttons
❖ Pointers
❖ Pointer options
❖ Hardware
You may see additional categories depending on your
particular pointing device. For information on these
settings, see “Using the keyboard or pointing device to
assign a key” on page 172.
 Loading...