

dye RIZE CZR Series Owner's Manual

O W N E R ’ S MANU A L
DYEPA I N T B A L L . C O M

RIZE CZR™ OWN ER’S MANUAL
W W W . D Y E P A I N T B A L L . C O M
INC LUD ED W I TH YOUR RIZE CZR ™
RIZE CZR™ Mar ker
14“ 2pc Proto Barrel
A llen to o l set inc lu d ing 0 .0 5”, 1/ 16 ”, 5 / 64 ”,
3/ 32”, 1/ 8 ”, 5/ 32”, 3/ 16” and 1/ 4 ”.
1/ 4 oz . DYE Slick L ub e™
Pa rts K it
Ba rrel P lu g
Quick Start Guide
Warr a nt y C a rd
9V Batt er y
Th e RIZE CZR™ comes
genera l mai nt en a nc e an d se tt ing up .
Fo r a c o mp lete ser vice t he fo l lo wing to o ls ar e req uired
C- clip plie rs
# 0 Phillip s hea d sc rew d r iv er
A shar p pic k to r em ove O- ring s
wit h the to o ls req ui re d to p er fo r m
TA B L E O F C O N T E N T S
- IMPO RTAN T SAF ETY I NSTR UCTI O NS A ND GUID EL IN ES . . . . . . . . . . . . . . . . . . . . . . . . PAGE 0 2
- QUI CK STAR T UP GUID E . . . . . . . . . . . . . . . . . . . . . . . . . . . . . . . . . . . . . . . . . . . . . . . . . . . PAGE 0 4
- RIZE
™ BO AR D SETT IN GS AND F UNC TI O NS . . . . . . . . . . . . . . . . . . . . . . . . . . . . . . . . . . . PAGE 0 6
- TRI GGE R AD JUSTMENTS . . . . . . . . . . . . . . . . . . . . . . . . . . . . . . . . . . . . . . . . . . . . . . . . . . . PAGE 13
- ™ BO LT A SSEMBLY A ND MAINT ENA NC E . . . . . . . . . . . . . . . . . . . . . . . . . . . . . . . . . PAGE 1 4
RIZE
RIZE
- ™ BO LT O - RI NG L I ST . . . . . . . . . . . . . . . . . . . . . . . . . . . . . . . . . . . . . . . . . . . . . . . . . . . PAGE 17
- F EED NEC K A DJUSTMENT . . . . . . . . . . . . . . . . . . . . . . . . . . . . . . . . . . . . . . . . . . . . . . . . . . PA GE 18
- H YP E R3 ™ REGULATO R A DJUSTMENT A ND MAINT EN ANC E . . . . . . . . . . . . . . . . . . . . . . PAGE 20
- V EL OC I TY A DJUSTMENT . . . . . . . . . . . . . . . . . . . . . . . . . . . . . . . . . . . . . . . . . . . . . . . . . . . PAGE 2 0
- A NT I CH OP E YE S A ND BA L
ON /OFF A IRPORT AD JUSTMENTS
- . . . . . . . . . . . . . . . . . . . . . . . . . . . . . . . . . . . . . . . . . . . PAGE 2 4
- TRO UB LE SHO OT ING . . . . . . . . . . . . . . . . . . . . . . . . . . . . . . . . . . . . . . . . . . . . . . . . . . . . . . PAGE 25
- EXP LO DE D VI EW . . . . . . . . . . . . . . . . . . . . . . . . . . . . . . . . . . . . . . . . . . . . . . . . . . . . . . . . . PAGE 2 8
- W A RR AN TY AND L E GAL I NF O RMATIO N . . . . . . . . . . . . . . . . . . . . . . . . . . . . . . . . . . . . . . PA GE 2 9
L D E TE N
TS . . . . . . . . . . . . . . . . . . . . . . . . . . . . . . . . . . . . . . . PAGE 2 2
W W W . D Y E P A I N T B A L L . C O M
01

W A R NIN G
IMPORTANT SAFETY INSTRUCTIONS AND GUIDELINES
W A RNIN G
IMPORTANT SAFETY INSTRUCTIONS AND GUIDELINES
• The RIZE
• Plea se read, und erstand a nd follow the d irectio ns in the ™
owner’s manual.
• Eye protectio n that is d esig ned sp ecifically fo r p aintball a nd meets
AST M/ CE stand ard s must be worn b y user and perso ns within ra ng e.
• Reco mmend 18 yea r s o r old er to purchase. Perso n und er 18 must
have a d ult sup er
• A lways t rea t
• Do no t exceed 850 p si inp ut p ressure.
• Only use .68 calib er p a intb alls that meet A STM/CE stand a rd s.
• Ensure all air lines and fitting s are t ig htened an d secured before
gassing up the ™.
• A lways c hronog rap h the ™ ma rker b efore p lay ing pa int b all.
• Never shoot t he ™ marker a t velocities in excess of 30 0 feet
per seco nd , or at velocities g rea ter t han lo cal or natio nal laws allow.
• Never look into t he barrel or b reech area of the ™ when the
ma rker is switched o n a nd ab le to fire.
™ marker is not a toy. Misuse may cause serious injury or death.
RIZE
visio n.
the ™ marker as if it were load ed a nd able to fire.
RIZE
RIZE
RIZE
RIZE
RIZE
02
• Co mp ressed gas is dang ero us, do not a llow co mp ressed gas to
co me in contact with your skin or try to stop a lea k b y covering it
with your hand .
• A lways fit a barrel b lo cking device to yo ur ™ when no t in use on
the field of p lay.
• The owner ’s manual and any related war ning s or instr uctio ns should
always accompany the p rod uct fo r reference or in t he event o f resale
a
nd new ownership.
• Do no t p oint the ™ marker at anything that you do no t intend to
sho o t .
• Do no t shoo t a t p eop le, anima ls, houses, cars o r a nything no t related
to the sport o f paint b all.
• Do no t fire t he ™ without the b o lt screwed in co mp letely.
• If you read these instructions and do no t fully und ersta nd them o r a re
unsure o f your ability to make necessary a d justments p rop erly,
ca ll DYE Precision o r yo ur local
RIZE
RIZE
pro shop for help .
W W W . D Y E P A I N T B A L L . C O MWWW . D Y E P A I N T B A L L . C O M
RIZE
03

Q UIC K R E F E RENC E
USI NG YO UR MA RK E R
Q UIC K R E F E RENC E
USI NG YO UR MA RK E R
QUICK START UP GUIDE
Before playing with your ne w RIZE ™ paintba ll marke r t here a re a f ew
impo rtant step s to take.
STEP 1. BATT ER Y INSTALLATI O N
A . Remo ve t hr ee rig h t ha n d side g rip p a nel scr ews wit h a 3/ 32” alle n key.
B. Op en g rip p anel and install 9V b attery into the co nnec tor inside the frame. Start
by inserting th e top of the b attery into the recess and alig nin g t he battery terminals
with the contac ts on
pla ce. Ensure that the b at tery removal ribb o n leaves a small tail accessible fro m
und er b attery when installed to aid for easy b at tery removal. Note the ma rkings
ab ove th e ba tter y ho using which indicate which of the b oard conta cts are po sitive
and neg ative and insta ll the b attery accordingly.
C. C lo se g rip p anel a nd t ig h te n th e th ree scr ews
ob serve tha t no wires g et c a ug ht b etwe en t he fr ame a nd the g rip p anel.
STEP 2. BA R RE L INSTALLATIO N
A . Screw o n th e b arr el to th e fro nt o f th e RIZE ™. Make sure it t hr ea d s al l t h e
way i n an d i s sec u re.
B. A tta c h the b a rr el p lug so th a t it c ov er s t h e t ip of t h e b arr el and secur e
t he g u n.
STEP 3. LOA D ER I NSTALL ATION
With the clamp lever lifted away from the feed neck press your hopper into the feed
neck collar. Then lower the lever down to secure the loader. If the collar’s grip needs
to be adjusted turn the upper screw with a 3/32” hex tool. If the grip is too tight turn
the b oa rd , then pushing the b ot tom of th e ba tter y fully into
bac k . W hile c lo sing t h e p anel
W W W . D Y E P A I N T B A L L . C O M W W W . D Y E P A I N T B A L L . C O M
04
the screw counter- clockwise. If the grip is not tight enough turn the screw clockwise. For
best results use a force feeding motorized loader, preferably a DYE Rotor Loader.
STEP 4 . ATTACHING GAS SOURC E
Screw on a preset air system i nt o t he a ir p o r t lo c a te d o n the b o tt
Be sur e t h e a ir system is scr ewed in a ll the way into th e A ir p o r t. If t h ere is a le ak
fro m t he a ir p o r t wh en sc rew in g in t h e a ir system, rep lace t he o - r ing on t he p reset
When sc rewing th e a i r syst em in to the air p o rt, a lway s c he ck th at th e th re ad s o n
th e air syst em a nd t he a ir p o r t a re clea n a nd not wo r n o ut. If y ou th in k the thr ea d s
are no t in g ood con d iti o n, c o nt a ct DY E Pre cisio n o r a p r o fessiona l sto re b e fo re
scr ewing in the air system .
Th e RIZE ™ a ir p o r t will work wit h b o th 3 0 00 psi ,
ta nks fit t ed w it h an an t i - siph o n.
STEP 5. TURNING ON TH E RA IL™ AND CHECK ING TH E VELOCI TY
A . Make sur e y o u a nd everyb od y a ro u nd yo u is wea r in g A STM / CE ap pro ve d
pai ntb a ll m a sks.
B. Press an d h o ld the to p b ut ton l o cat ed beh in d t he g rip fr
tu rns o n .
AND D O NOT PO INT T HE RAI L™ AT ANY TH ING YOU D O N’T INT END TO SHOOT.
C. F ill up the lo a d er wit h .68 c a li b er p a int b a ll s.
D. Shoo t t h e R A IL™ ov er a c hro nog ra p h to check t he v elocity. If a d ju st me nt i s
need ed , a d j ust t he v eloci ty by tu r ni ng the Hy p er3 ™ velo cit y a d ju stment sc rew wi th
a 3/ 16” al len k ey. In ( c lo c kwise) wil
will i nc rea se t h e v el oci ty. A ft er eac h a d ju stment it ta kes a few shots b efo r e t h e
ch ang e can be seen o n th e ch ron o g rap h. Never a d ju st the RA IL™ to sho o t fa ster
th an 30 0fp s o r wh a t the field rules / lo c a l laws p er m it .
WARNI NG, T HE RAI L™ I S LI VE . MAK E SURE BA RR EL PLUG IS I N PLACE
l red u ce t he velo c it y a n d o u t ( coun te r cl o ckwi se)
450 0 p si air syst em s a nd CO
om o f the g rip fr a me.
2
am e un til th e RA IL™
reg ulat o r.
05
RIZE CZR™BOA RD
SE T TINGS A ND F UN C TI ONS
RIZE CZR™BOA RD
SE T TINGS A ND F UN C TI ONS
06
TURNI NG T HE RIZE CZR™ O N AND O F F
To t urn o n t he RIZE CZR
un t il t he LED ’s tu rn b lue. The b lu e light ind icat es b oard b oot u p .
After the b o o t up sequ en ce, th e LE D’s will t ur n ei ther R ED
( n o b a ll ) or G R EE N ( ball in b rea ch, rea d y to fire) . To tu rn th e
™ o ff, pr ess a n d h o ld th e powe r b utt o n un til th e LE D’s
RIZE
tu rn o ff.
NOTE : T he RIZE CZR
minute s of no n- use
FI
RING TH E ™
A s so o n as th e ma r ke r is t u rn ed on and th e LE D’s t ur n fr o m
blue t o ei ther red or g re en , th e ™ is r ea d y t o fi re. If t here
is n o b a ll a nd the LE D ’s are R ED, yo u need to ho ld the
tr ig ger fo r 1 se co n d t o fo r ce the ™ t o fire o nce. If t he re is
a paintb all i nsi d e th e breec h an d t h e L ED i s g r een, ju st p ress
th e t r ig ger to fire th e ma r ke r.
LE D LI GHT INDI CATOR
The ™ uses a sup er b right LED mou nt ed o n
bo a rd insid e t he g rip fra me. This lig ht is used to p ro vi d e
info rma tion to t he user ab out t he ™. It is mo un ted behind
the PROTO™ log o on t he left sid e o f t he grip panel.
W W W . D Y E P A I N T B A L L . C O M W W W . D Y E P A I N T B A L L . C O M
RIZE CZR
RIZE CZR
™, press an d h o ld the p ower b u tto n
™ automatic ally switc he s off after 10
.
RIZE CZR
RIZE CZR
the
RIZE CZR
cir cu it
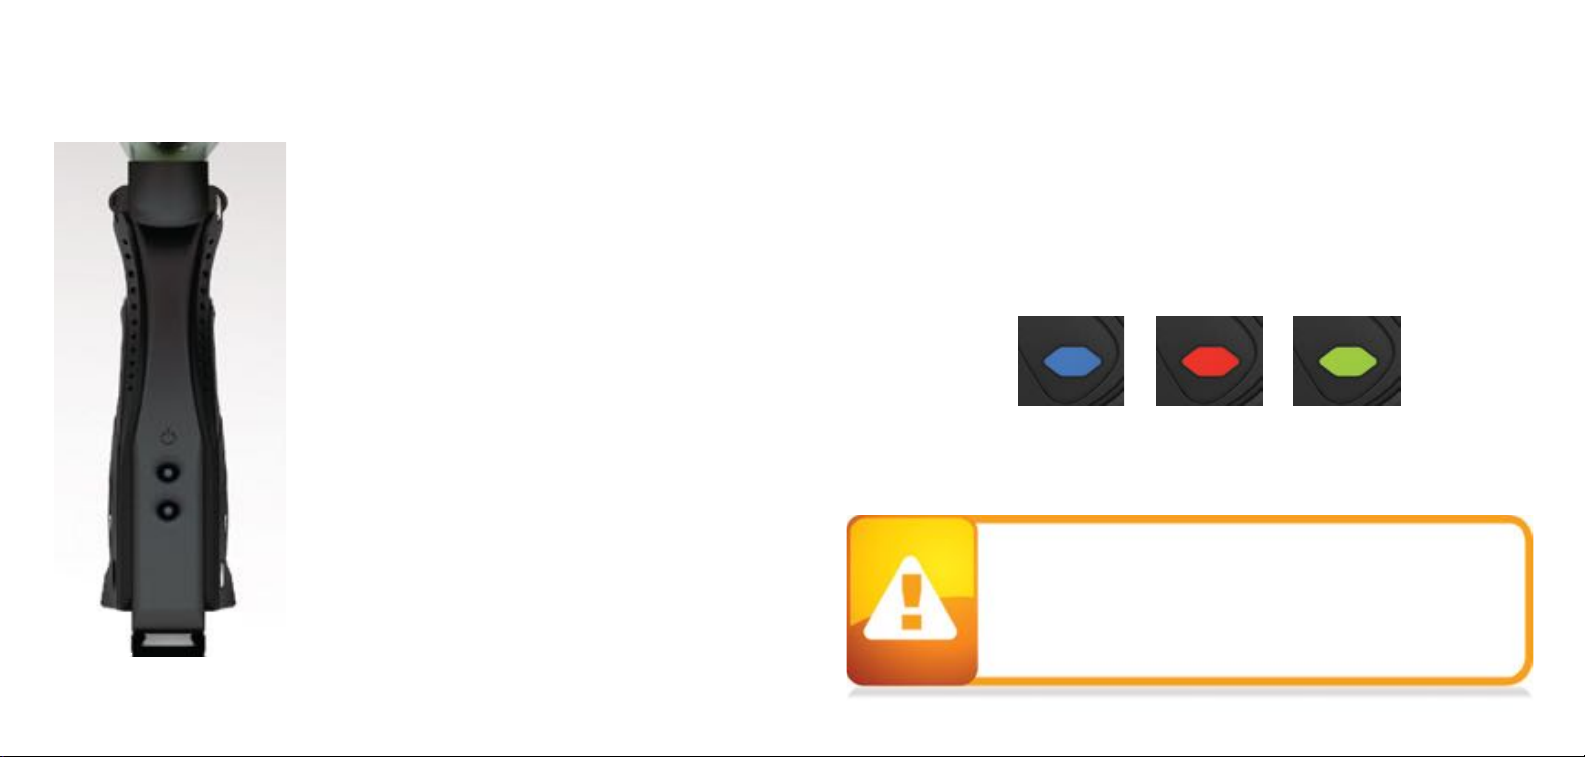
Wh en yo u t urn on the m arker in nor ma l o p er at io n mo d e wit h the p ower b utton , the lig h t c olors
mea n t he following:
Blue - Bo o t seq uenc e
Red - Breec h is cl ea r, no b all d etec te d inside t he ™ ( eye i s o n)
Gree n - Ba ll in b reech, rea d y to f
Blinking Red - Eye is t urn ed off
Blinking Green - Eye fa ilur e, ey e i s b loc ked o r d irty (see ™ Eye, p a g e 26 )
NOTE : T he eye is always a ctivated when you turn the marker o n.
To t urn o ff t he ey e f ea tur e p ress an d h o ld the b o tto m b u tt o n un t il the LED li g ht sta r ts b link in g
Red ind ic a tin g t he ey e fea ture is tur ned o ff.
When se rvi cing your m ark er :
• Mak e su re a b a r re l p lug is fitt ed to t he ™.
• Make sure yo u r hopp er is remo ved fro m the ™.
• Make sure there ar e no p aint b a lls in th e b reech of t he ™.
• A lway s r em ov e th e fir st stag e reg u la tor an d r el iev e a l l r esid ua l g a s
pressure fr o m the ™ before d isa ssem b ly.
• T he
RIZE CZR
th e f ir st sta g e reg u la tor r em oved . A lwa y s
directi o n to r el iev e t h is r esi d ual g a s p r essure.
RIZE CZR
™
can ho ld a smal l r esi d ual c ha rg e o f g a s, typ ically 2 sh o ts, wit h
ire
( ey e o n )
RIZE
RIZE CZR
d isc har g e th e ma r ke r in a sa fe
RIZE
RIZE CZR
RIZE CZR
07
 Loading...