Page 1

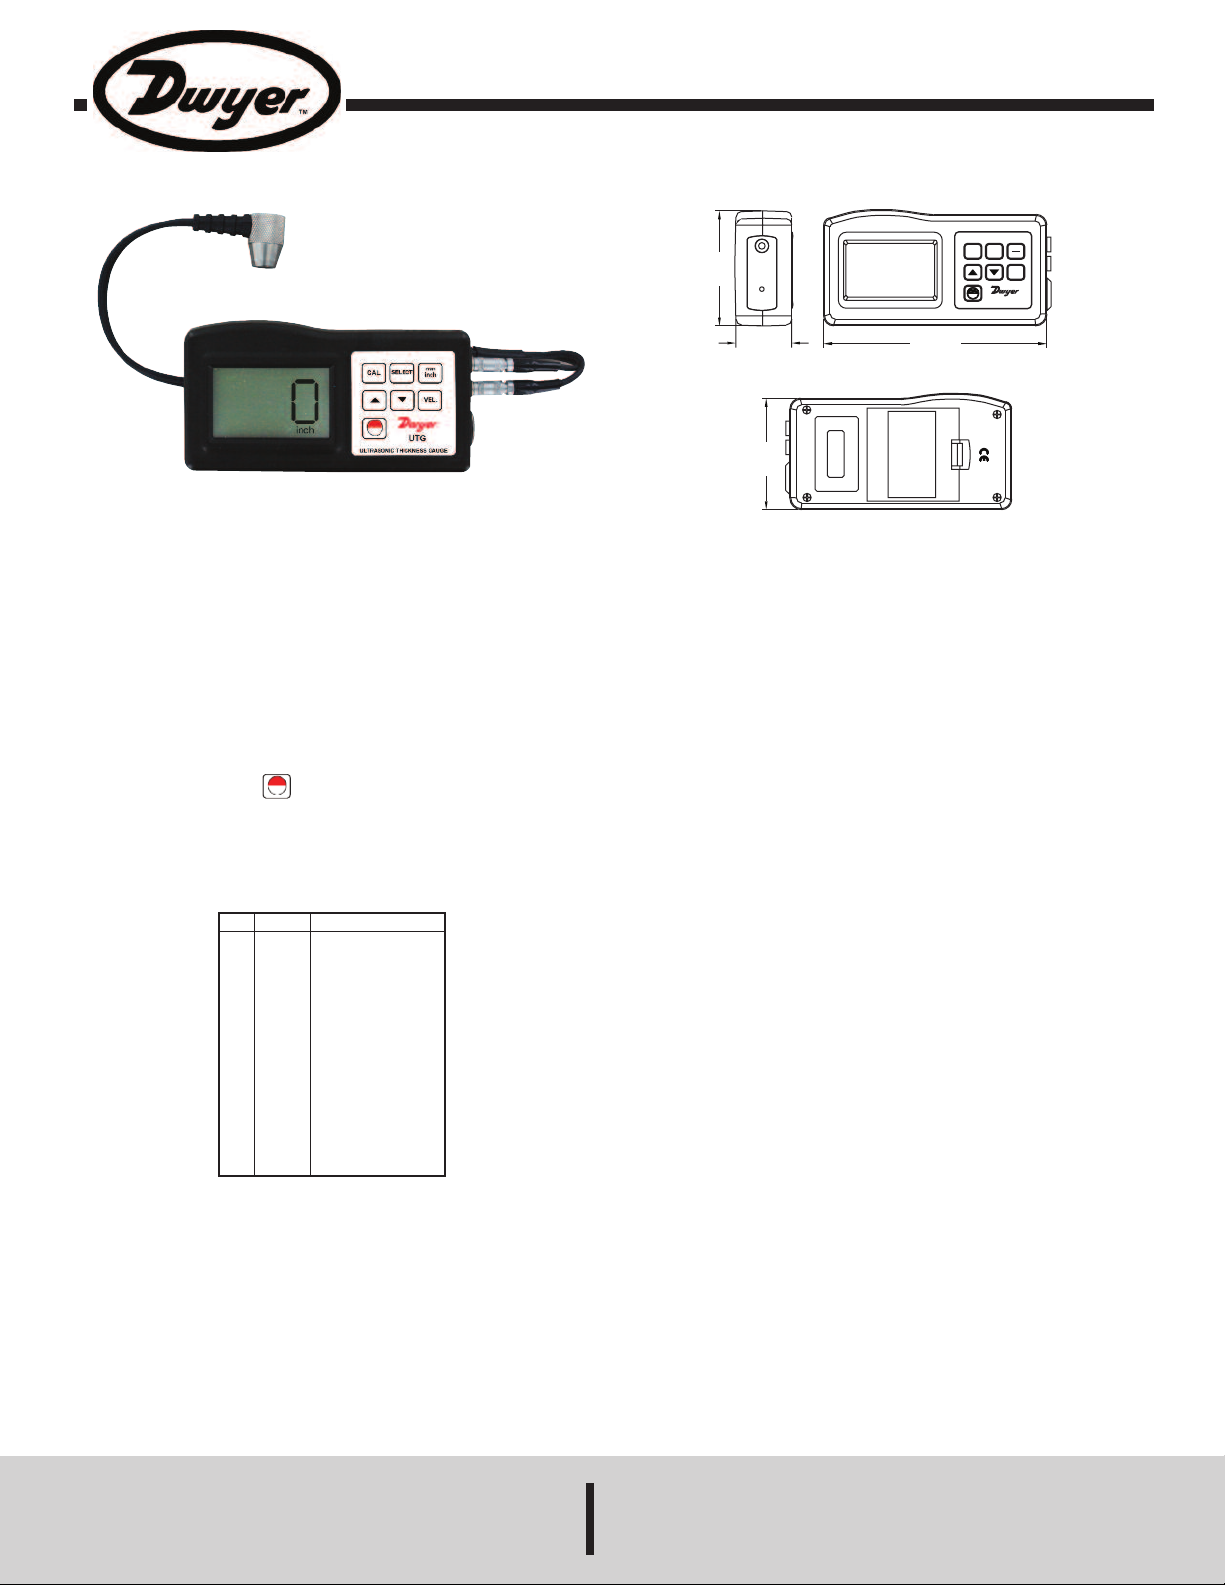
Model UTG Ultrasonic Thickness Gauge
4
-23/32
[
120.00]
2-7/16
[62.00]
1
-3/16
[
30.00]
2
-23/64
[
60.00]
UTC
ULTRASONIC THICKNESS GAUGE
SELECT
VEL.
CAL.
mm
inch
Specifications - Installation and Operating Instructions
Bulletin TE-UTG
The compact Model UTG Ultrasonic Thickness Gauge can measure
the thickness of a variety of materials. The UTG has a wide range of
applications including industrial, automotive, HVAC, and plumbing. The
UTG reads in inches or millimeters, and features an adjustable sound
velocity to allow for an array of materials to be measured. The UTG is
useful when using any pipe-mount ultrasonic transmitter. The UTG
allows the user to find the wall thickness of the pipe when programming
an ultrasonic transmitter without cutting or removing a section of the pipe
to measure it. The UTG is also great for monitoring corrosion in closed
vessels such as boilers and chemical tanks.
MATERIAL SELECTION
1. Press the Power button to turn on the unit.
2. Press the Select button and the display will show the code `Cdxx` or
`XXXX`. `Cd` is the abbreviation for `code` and `xx` is one number
among 01~11. `xxxx` is a 4-digit number which is the sound velocity of
material defined by the user. The `Cdxx`-material relationship is as
follows.
No.
CODE
Material
1
cd01
Steel
2
cd02
Cast Iron
3
cd03
Aluminum
4
cd04
Red Copper
5
cd05
Brass
6
cd06
Zinc
7
cd07
Quartz Glass
8
cd08
Polyethylene
9
cd09
PVC
10
cd10
Gray Cast Iron
11
cd11
Nodular Cast Iron
12
xxxx
Sound Velocity
SPECIFICATIONS:
Service: Steel, cast iron, aluminum, red copper, brass, zinc, quartz
glass, polyethylene, PVC, gray cast iron, nodular cast iron, other.
Selectable option for special materials with known sound propagation
rate.
Range: 0.047 to 7.874˝ (1.2 to 200 mm).
Accuracy: ±0.5%.
Resolution: 0.001˝ / 0.1 mm.
Sound Velocity: 1118 to 20132 mph (500 to 9000 m/s).
Temperature Limits: 32 to 122°F (0 to 50°C).
Humidity Limit: < 80%.
Display: 4 digits, 0.394˝ (10 mm) LCD.
Power Requirement: (4) 1.5 V AAA alkaline batteries, not included, user
replaceable.
Weight: 5.78 oz (164 g).
Agency Approvals: CE.
3. Press the Up button or Down button to select the material code to
measure, and then press the Select button to confirm. The display will
show `0`. If you select a material code but do not confirm the selection,
the code will automatically change to `0` after several seconds. In such
case, the meter will still reserve the material code before exiting.
4. A 4-digit number will be shown on the display when the Up button is
pressed when the display shows `Cd11` or by pressing the Down button
when the display shows `Cd01`. The 4-digit number is the last sound
velocity to be define by the user. By selecting this velocity, you could
measure the thickness of the same material as previously selected.
DWYER INSTRUMENTS, INC.
P.O. BOX 373 • MICHIGAN CITY, INDIANA 46360, U.S.A. Fax: 219/872-9057 e-mail: info@dwyer-inst.com
Phone: 219/879-8000 www.dwyer-inst.com
Page 2

5. It is unnecessary to select the material code once the material code is
confirmed (automatically stored to the memory of the meter) unless the
material to measure is different from before.
6. To browse the material code selected, press the Select button. To quit
browsing, press the Select button again or wait till the code automatically
changes to `0` after several seconds or the meter will automatically return
to measurement state if measuring.
CALIBRATION
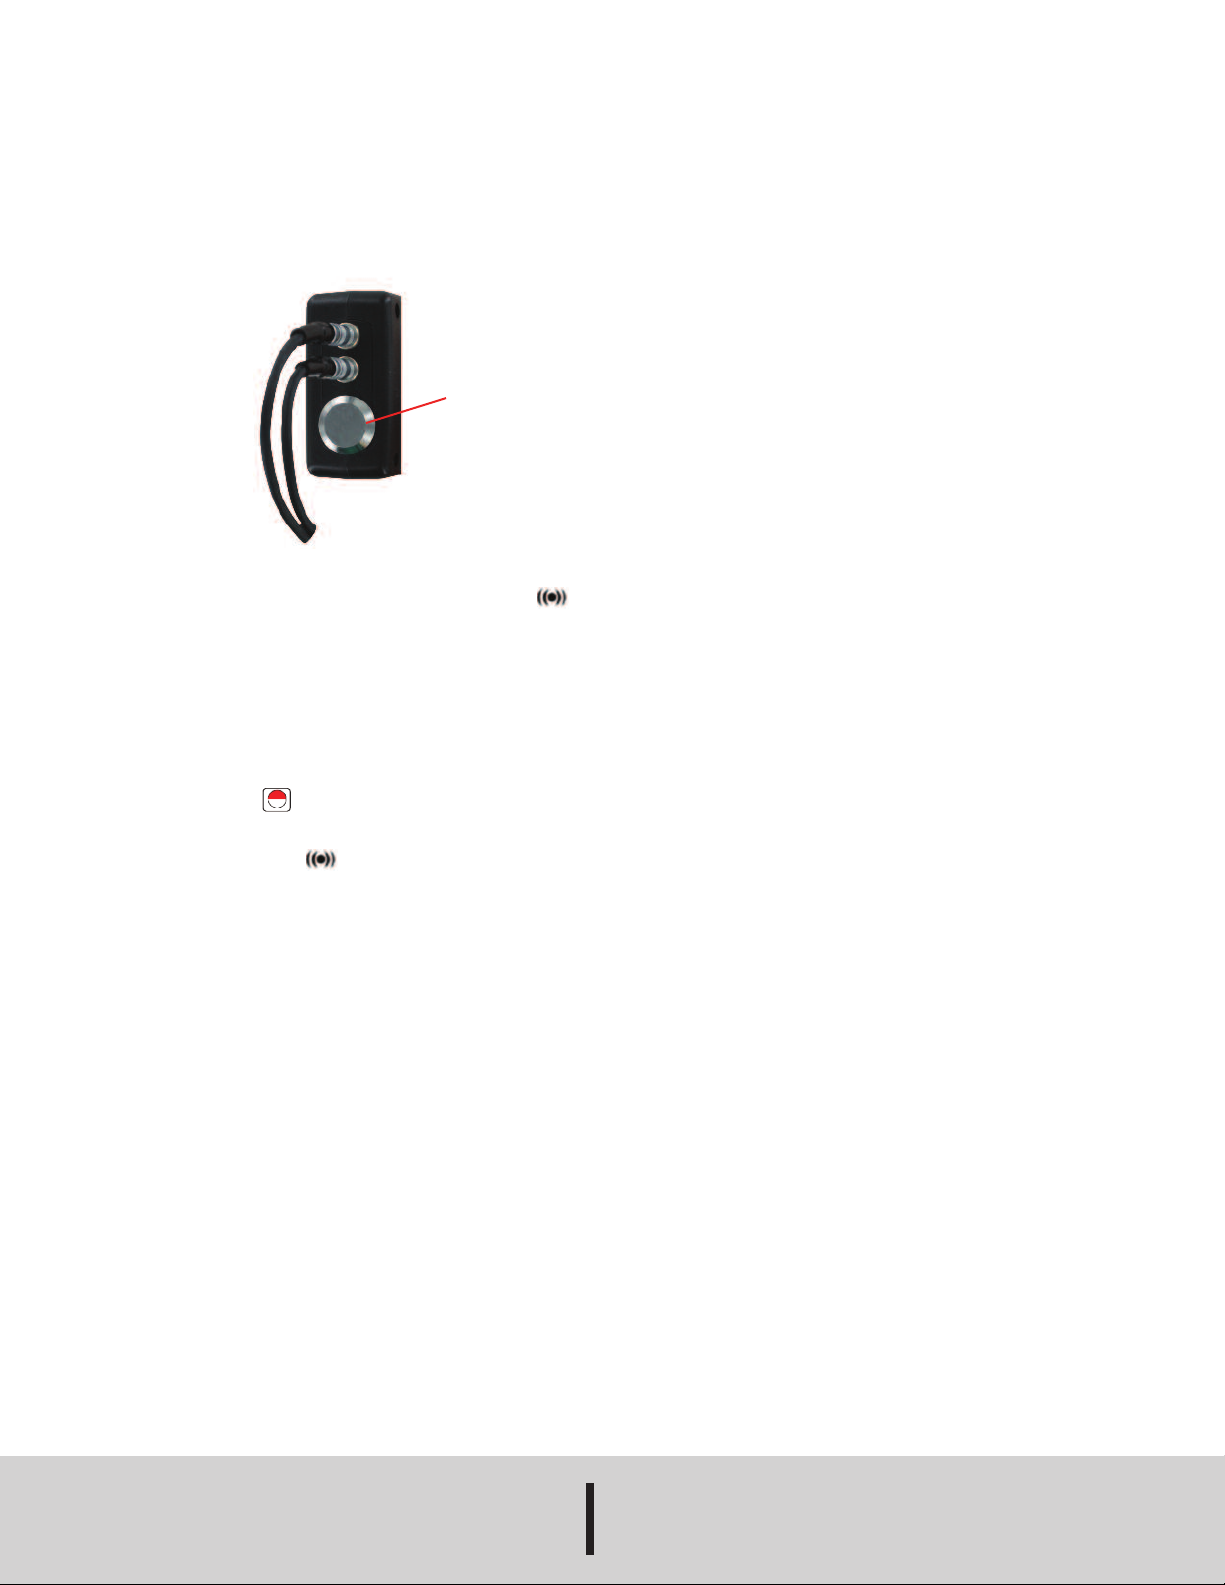
1. Drop a little lubricating oil on the 5 mm standard block (see below).
Standard Block
2. Press the Calibration (CAL) button, and the word `CAL` will be shown
on the display.
3. Press the sensor on the standard block. If the coupling symbol is
on the display and the standard block is coupling well, `5.0` mm (or
`0.197`”) and `CAL` will be shown on the display also. When the reading
is steady, press the CAL button to confirm and then the unit will return to
measuring state.
4. The calibration result will be auto-saved to the unit once confirmed. It
is unnecessary to calibrate frequently unless you suspect an inaccuracy
in the measurement.
MEASURING PROCEDURE
1. Press the Power button to turn on the unit.
2. Press the mm/inch button to select the right measurement unit.
3. Apply a little lubricating oil onto the sensor, and be sure that there is a
good coupling and the symbol is on. Press the sensor onto the
material surface to measure on the premise that the material code
selected is right. The reading on the display is the measurement value.
4. The reading is held until a new measurement value is made. The last
value is held on the display until the unit is powered off.
5. There are 2 methods to turn off the power to the unit. Manual shut off
can be done at any time by pressing the power button, or auto power off
signified by a beeping sound that occurs after about 1 minute from the last
key operation.
MEASURING BY VELOCITY SETTING
1. Press the VEL. button and the display will show the velocity that was
set last.
2. If measuring the thickness of a material with known velocity, the
velocity can be changed by pressing the Up or Down button to the value
of the known velocity. The increment is in 10 m/s every time when
pressing the up or down button, and increment of 100 m/s if pressing the
button for more than about 4 seconds.
3. Drop a little lubricating oil onto the material to be measured and press
the sensor onto the surface. The reading on the display is the thickness
of the material if the sensor is coupling well.
4. When measuring the thickness of a sample with a known thickness just
get the sample of known thickness. Then repeat the last two steps until
the measurement value is the same as the known thickness. In such a
case, the set value is the velocity of the material to measure, with this
process you can measure any unknown thickness of same material.
5. To browse the velocity, press the VEL. button. To quit browsing, press
the VEL. button again or wait till the unit automatically shows `0`.
6. By using the velocity measurement, it is easy to measure the thickness
of any hard material.
BATTERY REPLACEMENT
1. When the battery symbol appears on the display, it is time to replace
the batteries.
2. Remove the battery cover from the instrument and remove the
batteries.
3. Install the new batteries ensuring to pay close attention to the polarity.
MAINTENANCE/REPAIR
Upon final installation of the Model UTG, no routine maintenance is
required. The Model UTG is not field serviceable and should be returned
if repair is needed. Field repair should not be attempted and may void
warranty.
WARRANTY/RETURN
Refer to “Terms and Conditions of Sales” in our catalog and on our
website. Contact customer service to receive a Return Goods
Authorization number before shipping the product back for repair. Be
sure to include a brief description of the problem plus any additional
application notes.
©Copyright 2013 Dwyer Instruments, Inc. Printed in U.S.A. 11/13 FR# R2-444087-00
DWYER INSTRUMENTS, INC.
Phone: 219/879-8000 www.dwyer-inst.com
P.O. BOX 373 • MICHIGAN CITY, INDIANA 46360, U.S.A. Fax: 219/872-9057 e-mail: info@dwyer-inst.com
 Loading...