Page 1

Bulletin P-PTGD
Series PTGD Differential Pressure Piston-Type Gage
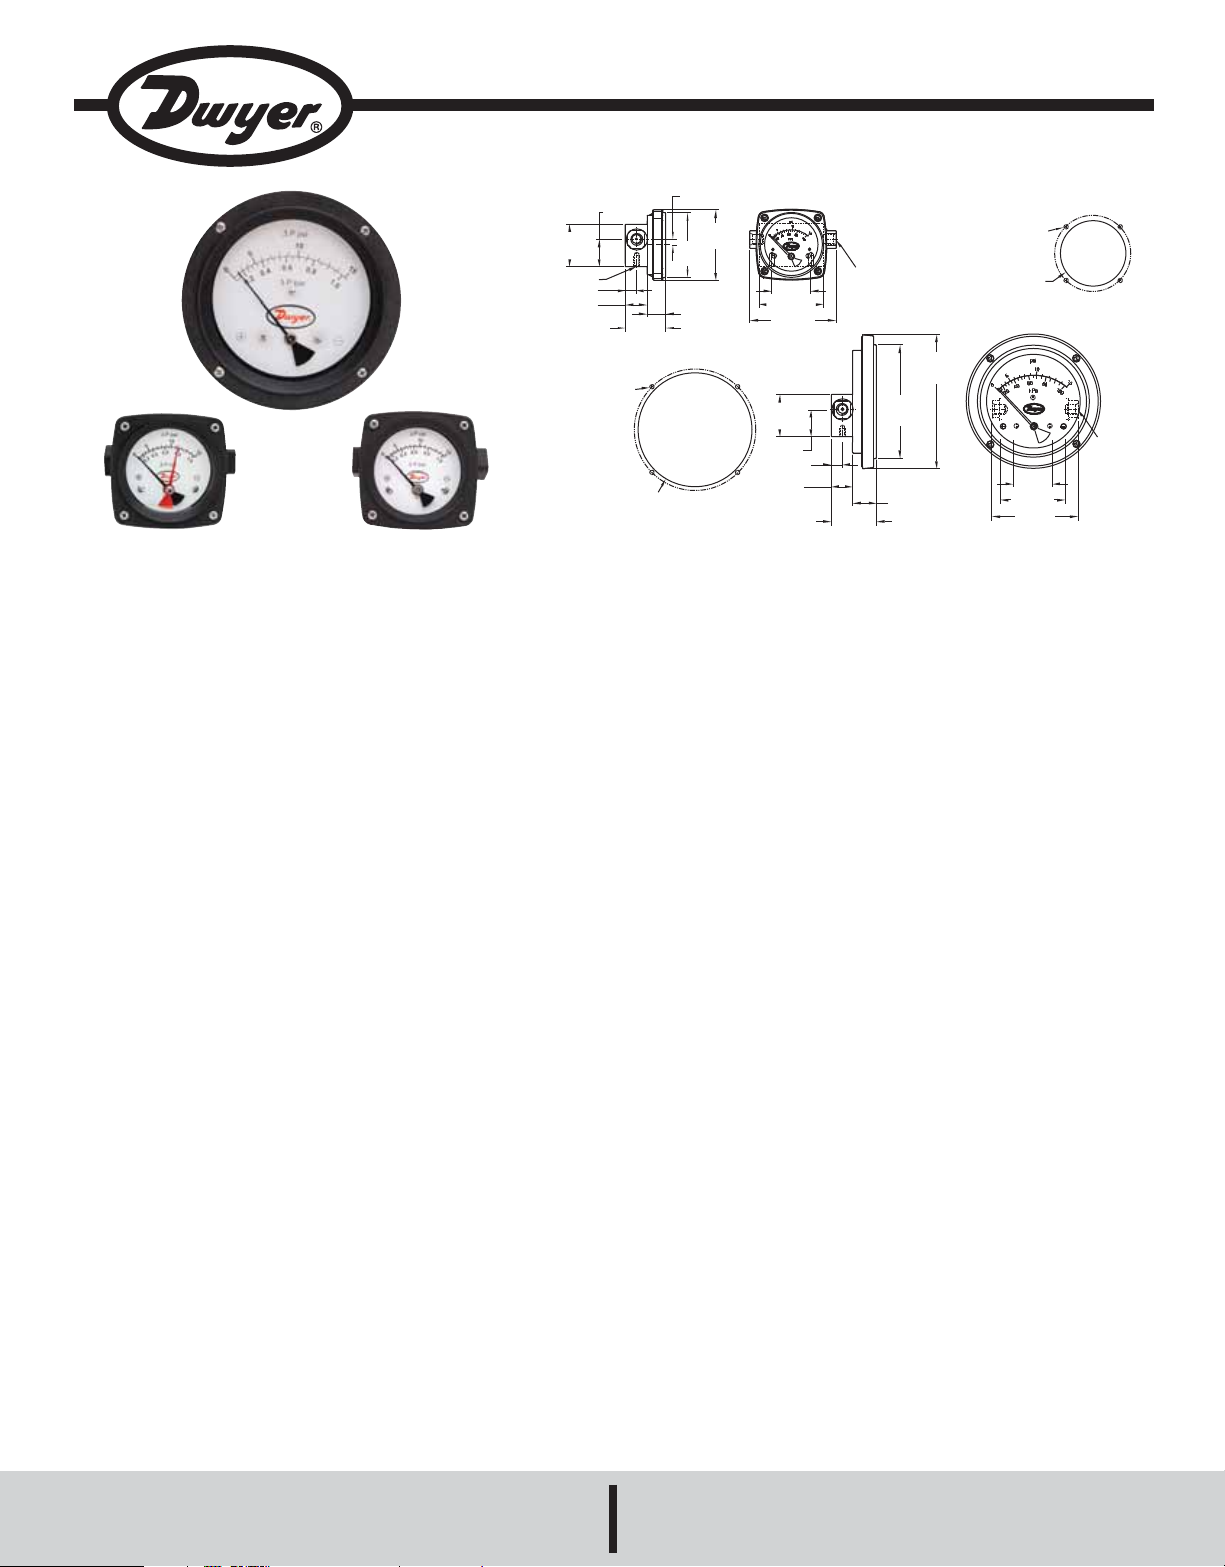
Specifications - Installation and Operating Instructions
1-4
1-7/8
[47.60]
[6.50]
3-3/32
[83.00]
3
[76.20]
7/8 [22.00]
HIGH LOW
1-13/16
[46.00]
3[76.00]
3-31/32
[101.00]
1-31/32
[50.00]
7-9/32
[32.20]
1/2 [12.60]
1 [25.20]
EQUALLY SPACED ON A
ø3-1/2 [ø88.90] BOLT CIRCLE
1/4˝ NPT
BOTH ENDS
6-7/32
[157.93]
5-1/4
[133.30]
1-3/32 [28.10]
2-1/8
[54.00]
4X ø3/16 [ø5.16]
ø3-1/32 [ø76.99]
PANEL CUTOUT
HIGH LOW
1-13/16
[46.00]
3 [76.00]
3-31/32
[101.00]
1-9/32
[32.20]
1-31/32
[50.00]
2X 1/4˝ UNC
1/2 [12.60]
1 [25.20]
4X ø3/16 [ø5.16]
EQUALLY SPACED
ON A ø5-5/8 [ø142.85]
BOLT CIRCLE
ø5-9/32 [ø133.97]
PANEL CUTOUT
1/4˝ NPT
BOTH ENDS
The Series PTGD Differential Pressure Piston-Type Gage
can be
used to measure the pressure drop across filters, strainers, pump performance testing, and heat exchanger pressure drop monitoring. Its simple,
rugged design possesses weather and corrosion resistant gage front with a
shatter resistant lens. The Series PTGD contains a piston-sensing element
which provides different differential pressure ranges with full-scale accuracies
of ±2%. Constructed with aluminum or 316SS and available with two 1/4˝
FNPT end connections, the Series PTGD provides over-range protection rated
to 3000 PSIG (200 bar) or 6000 PSIG (400 bar) depending on model.
Inspection
Before installation check the name plate on each instrument against the
receiving paperwork and the intended application for correct part number, materials of construction, working pressure, dial range, etc. Inspect
for shipping damage and if damaged, report it immediately.
INSTALLATION
The Series PTGD is calibrated and tested prior to shipment and is ready
for immediate installation. Use of the following installation procedures
should eliminate potential damage and provide optimum trouble free
operation.
1. Process Connections: 1/4˝ FNPT are provided as standard. There
are two connections on the housing identified as “HI” and “LO” for high
pressure and low pressure. Be sure to get these plumbed to the proper
connections on your system. Improper connection will not damage the
instrument but it will not function properly. Flexible tubing is recommended to minimize the effect of possible vibration.
2. Instrument Location: On liquid service, the instrument should be
mounted below the process connections to facilitate self-bleeding. On
gas service, it should be located above the process connections to promote self-draining. If the process contains particulates, a “pigtail” loop or
drop leg (manometer “U-tube” configuration) in the tubing will minimize
the possibility of it migrating into the instrument. Shielded cable is recommended for control loop wiring.
3. Panel Mounting: Gages with 2-1/2˝ dials can only be mounted
through the rear of the panel. Make the proper panel cutouts as shown
in figure above. Remove the (4) bezel screws. Insert the screws through
the front of the panel and into the gage bezel. Tighten the screws
securely, alternating in a diagonal pattern.
SPECIFICATIONS
Service: Compatible gases and liquids.
Wetted Materials: Gage body: Aluminum or 316 SS; Piston: Aluminum
or 316 SS; Spring: 302 SS; Seals: Buna-N (standard); PTFE, Ceramic
Magnet; Dial Case: Nylon 6 30% glass filled gage case.
Window: Acrylic.
Accuracy: ±2% FS ascending.
Pressure Limits: 3000 psi (206 bar) for aluminum body; 6000 psi (413
bar) for SS body.
Size: 2.5˝ (63 mm) or 4.5˝ (115 mm).
Mounting Orientation: Mount in any position.
Process Connections: 1/4˝ female NPT end connections standard;
1/4˝ female NPT back or bottom connections available. All styles available with 1/4˝ BSP.
Weight: Aluminum: 2.5˝ .88 lbs (399 g); 4.5˝ 1.35 lbs (612 g); Stainless
Steel: 2.5˝ 1.75 lbs (794 g); 4.5˝ 2.3 lbs (1.04 kg).
Gages with 4-1/2˝ dial should be mounted from front of the panel. Make
the cutout as indicated in above figure. Insert the (4) panel mounting
studs, finger tight into the metal inserts located in the rear of bezel. Insert
the gage through the panel aligning the panel mounting studs with the
holes in the panel. Install the (4) M4 nuts onto the studs and tighten
securely.
TROUBLESHOOTING
A. Check for proper hook up. High to “HI” low to “LO”.
B. Make sure that certain block valves are open.
C. If A & B check out correctly, loosen high-pressure line to determine if
there is pressure to the instrument.
D. Verify that the gage is not in an electromagnetic/magnetic
environment, i.e., close proximity to high current power lines.
MAINTENANCE
The Series PTGD Differential Pressure Gages are not field serviceable
and should be returned if repair is needed. (Field repairs should not be
attempted and may void warranty). Be sure to include a brief description
of the problem plus any relevant application notes. Contact customer
service to receive a return goods authorization number before shipping.
©Copyright 2009 Dwyer Instruments, Inc. Printed in U.S.A. 12/09 FR# R1-443804-00
DWYER INSTRUMENTS, INC.
Phone: 219/879-8000 www.dwyer-inst.com
P.O. BOX 373 • MICHIGAN CITY, INDIANA 46361, U.S.A. Fax: 219/872-9057 e-mail: info@dwyer-inst.com
 Loading...