Page 1

BULLETIN TE-PHP
VACUUM
FOR
PUSH
8-25/64
[213]
7-21/64
[186]
3-1/64
[80] MAX
1-1/4
[32]
1/4 NPT(F)
PRESSURE PORT
4-7/8
[124]
VACUUM
FOR
PUSH
1
7
5
6
2
3
4
8
9
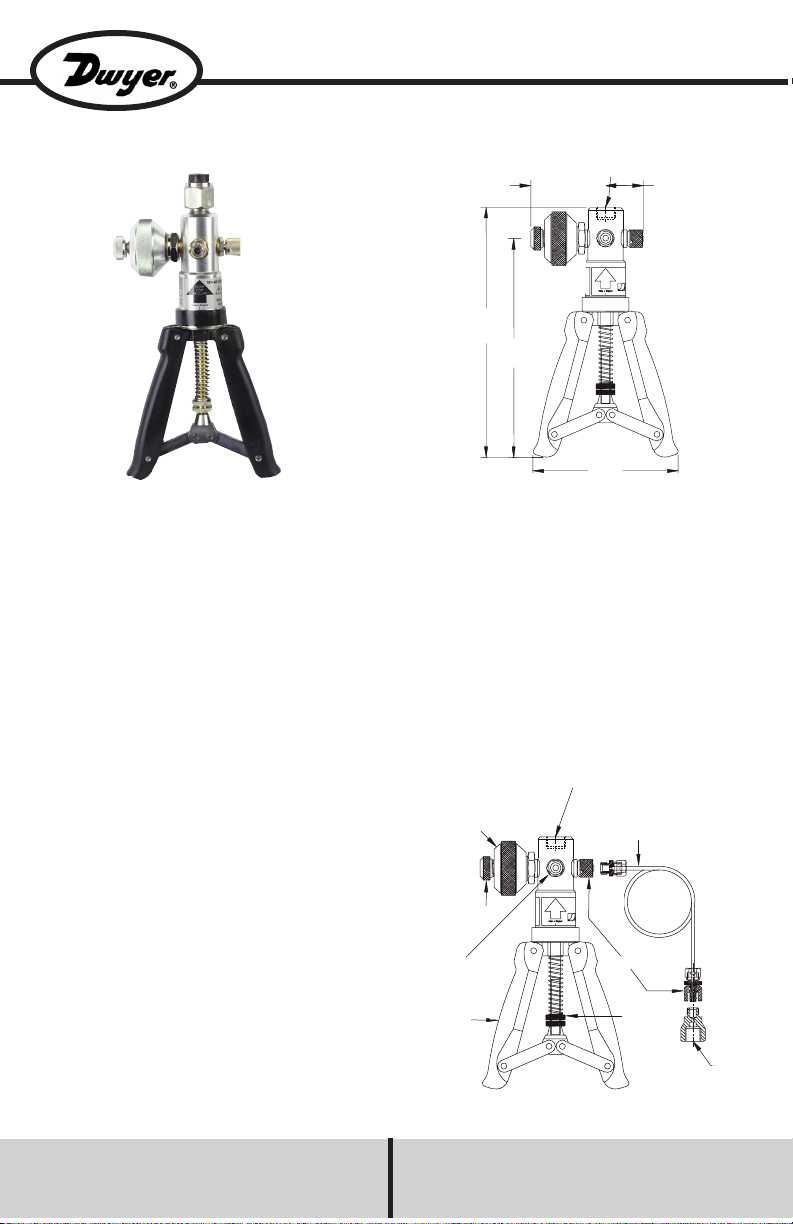
Model PHP Pneumatic Hand Pump
Specifications – Operating Instructions
Model PHP Pneumatic Hand Pump verifies
calibration of pressure transmitters, switches,
controllers, indicators, and recorders. The Model
PHP is a hand operated pump for sourcing
pressure and vacuum. Use in conjunction with an
analog or digital gage for a complete calibration
system.
The unit provides output pressures up to 600 psi
(40 bar) or vacuum down to -28.5˝ Hg (-0.960 bar).
The reliable pump reaches 100 psi in 4 strokes.
Model PHP is fitted with a fine adjustment valve
for precise volume control and an adjustable
stroke to provide over pressure protection.
Model PHP includes a 39˝ (1 m) hose with a 1/4˝
female NPT quick fit connector. The optional
service kit includes seals, O-rings, retaining
screws and an allen key.
Figure 1 Key:
1. Pressure port - NPT female connection to
take master instruments. E.g. Digital/Analog gage.
2. Fine adjustment valve.
3. Pressure release valve.
4. Pressure/Vacuum selector.
5. Adjustable stroke for varying maximum
pressure output (over pressure protection).
6. NPT adaptor set.
7. Flexible hose to item under test.
8. Knurled ‘quick-fit’ connectors.
9. Pump Handles.
SPECIFICATIONS
Output Ranges: -28.5˝ Hg to 600 psi
(-0.960 to 40 bar).
Process Connection: 1/4˝ female
NPT (quick fit).
Gage Connection: 1/4˝ female NPT.
Materials: Nickle plated brass,
anodized aluminum, and nylon.
Weight: 1.4 lbs (0.65 kg).
Fig. 1
Phone: 219/879-8000 www.dwyer-inst.com
Lit-By Fax: 888/891-4963
DWYER INSTRUMENTS, INC.
P.O. BOX 373 • MICHIGAN CITY, INDIANA 46361,U.S.A. Fax: 219/872-9057 e-mail: info@dwyer-inst.com
Page 2

DESCRIPTION OF KEY ITEMS:
Hose/Adaptors
The hoses (7) and adaptors (6) are fitted by
simply screwing them into the connectors (8) by
turning the knurled nut on the connector fully
anti-clockwise.
Release Valve (3)
This can be used to reduce or release the
pressure in the system. The rate of pressure
reduction is dependent upon the degree of
rotation when opening the valve. Minimal force
is required to seal the system.
Volume Control (2)
The pressure generated can be finely adjusted
by turning the fine adjustment valve (2) either
clockwise or anti-clockwise to increase or
decrease pressure accordingly.
Over Pressure Protection (5)
To adjust the maximum output pressure of the
system turn the nuts (5) to increase or decrease
the stroke length.
IMPORTANT
Under no circumstances should the fine
adjustment valve (2) be wound back beyond
the red line indicator on the body. Should this
occur, then the pressure must be released from
the system before attempting to re-engage the
fine adjustment valve.
Pressure/Vacuum Selection (4)
Press the selector (4) as indicated on the label
to engage the desired mode. Ensure that the
release valve (3) is open before changing mode.
Note:
The system should only be used for
pressurizing small volumes due to its small
displacement. If the system has not been used
for a period of time, it could be difficult to
operate on the first stroke. The cylinder has
been lightly greased on assembly but, if
additional lubrication should ever be required,
then apply a minimal amount to the inside of
the cylinder.
Access is via the three retaining screws located
under the black collar.
WARNING: Do Not Connect To External
Pressure Source.
GUIDELINES FOR USE:
1. Calibration/Comparison against Analog
gauge
1.1 Fit a Test Gage to the top of the test system
(1), and correct seal.
Note: The retaining nut should be screwed fully
down but needs to be no more than finger tight
as seal is achieved by O-ring.
1.2 Connect item under test using appropriate
adaptor and sealing (6) at the end of the flexible
hose (7) or directly to body.
Note: Adaptors tightened to a maximum torque
of 15 Nm.
1.3 Screw fine adjustment valve (2) fully
clockwise.
1.4 Screw fine adjustment valve (2) 4 - 6 full
turns anti-clockwise.
1.5 Screw pressure release valve (3) fully
clockwise, tightening to ensure good seal.
1.6 Operate handles (9) until the pressure is
close to that finally required. Ensure handles
are fully squeezed together on each stroke
to achieve maximum pressure output.
1.7 Wind the fine adjustment valve (2) clockwise
to increase pressure or anti-clockwise to
decrease pressure until required pressure is
reached.
Note: The pressure may settle for up to 30
seconds after increasing pressure due to
thermodynamic effects, settling of seals and
expansion of the flexible hose.
Caution: NEVER screw the fine adjustment
valve (2) beyond the red line indicator.
1.8 Reductions in pressure can also be
achieved by careful use of the pressure release
valve (3).
1.9 Vacuum is achieved using the above
procedure and having the changeover valve (4)
pushed completely towards the vacuum
position. Note: release pressure before
changing mode.
2. Fault Investigation
In the event that the system appears to lose
pressure then the procedure above should be
repeated ensuring new seals are used, adaptors
are tightened sufficiently and the pressure
release valve (3) is tightened firmly.
Note: The connections to the hand held test
system are sealed with O-ring or bonded seals
and should not leak. The pipe to body
connection can be checked but tightened no
more than 2 Nm.
DO NOT attempt to tighten the other fittings to
the test system as this could lead to damage of
sealed joints. When testing for leaks it may be
noticed that air is drawn in or expelled from
around the changeover valve. This is normal
and should cause no concern.
©Copyright 2003 Dwyer Instruments, Inc Printed in U.S.A. 5/03
DWYER INSTRUMENTS, INC.
P.O. BOX 373 • MICHIGAN CITY, INDIANA 46361,U.S.A. Fax: 219/872-9057 e-mail: info@dwyer-inst.com
Phone: 219/879-8000 www.dwyer-inst.com
Lit-By Fax: 888/891-4963
 Loading...