Page 1

Series BCHP Low Pressure Hand Pump
11/32
[
8.67]
9
/64
[
3.61]
11/32
[8.91]
3-3/16
[81.02]
4
3/64
[
16.88]
A
PPROX. 18˝
1/4˝ FEMALE BSP W/
O-RING TEST GAGE
CONNECTION
29/64
[11.54]
7/8
[22.07]
61/64
[24.26]
29/64
[11.43]
1
-13/32
[
35.83]
3
-3/16
[
81.02]
1/2˝ FEMALE BSP
W/ O-RING
REFERENCE PORT
4-27/64
[112.40]
1-25/32
[45.16]
2
-3/64
[
51.85]
3
-1/64
[
76.57]
Specifications - Installation and Operating Instructions
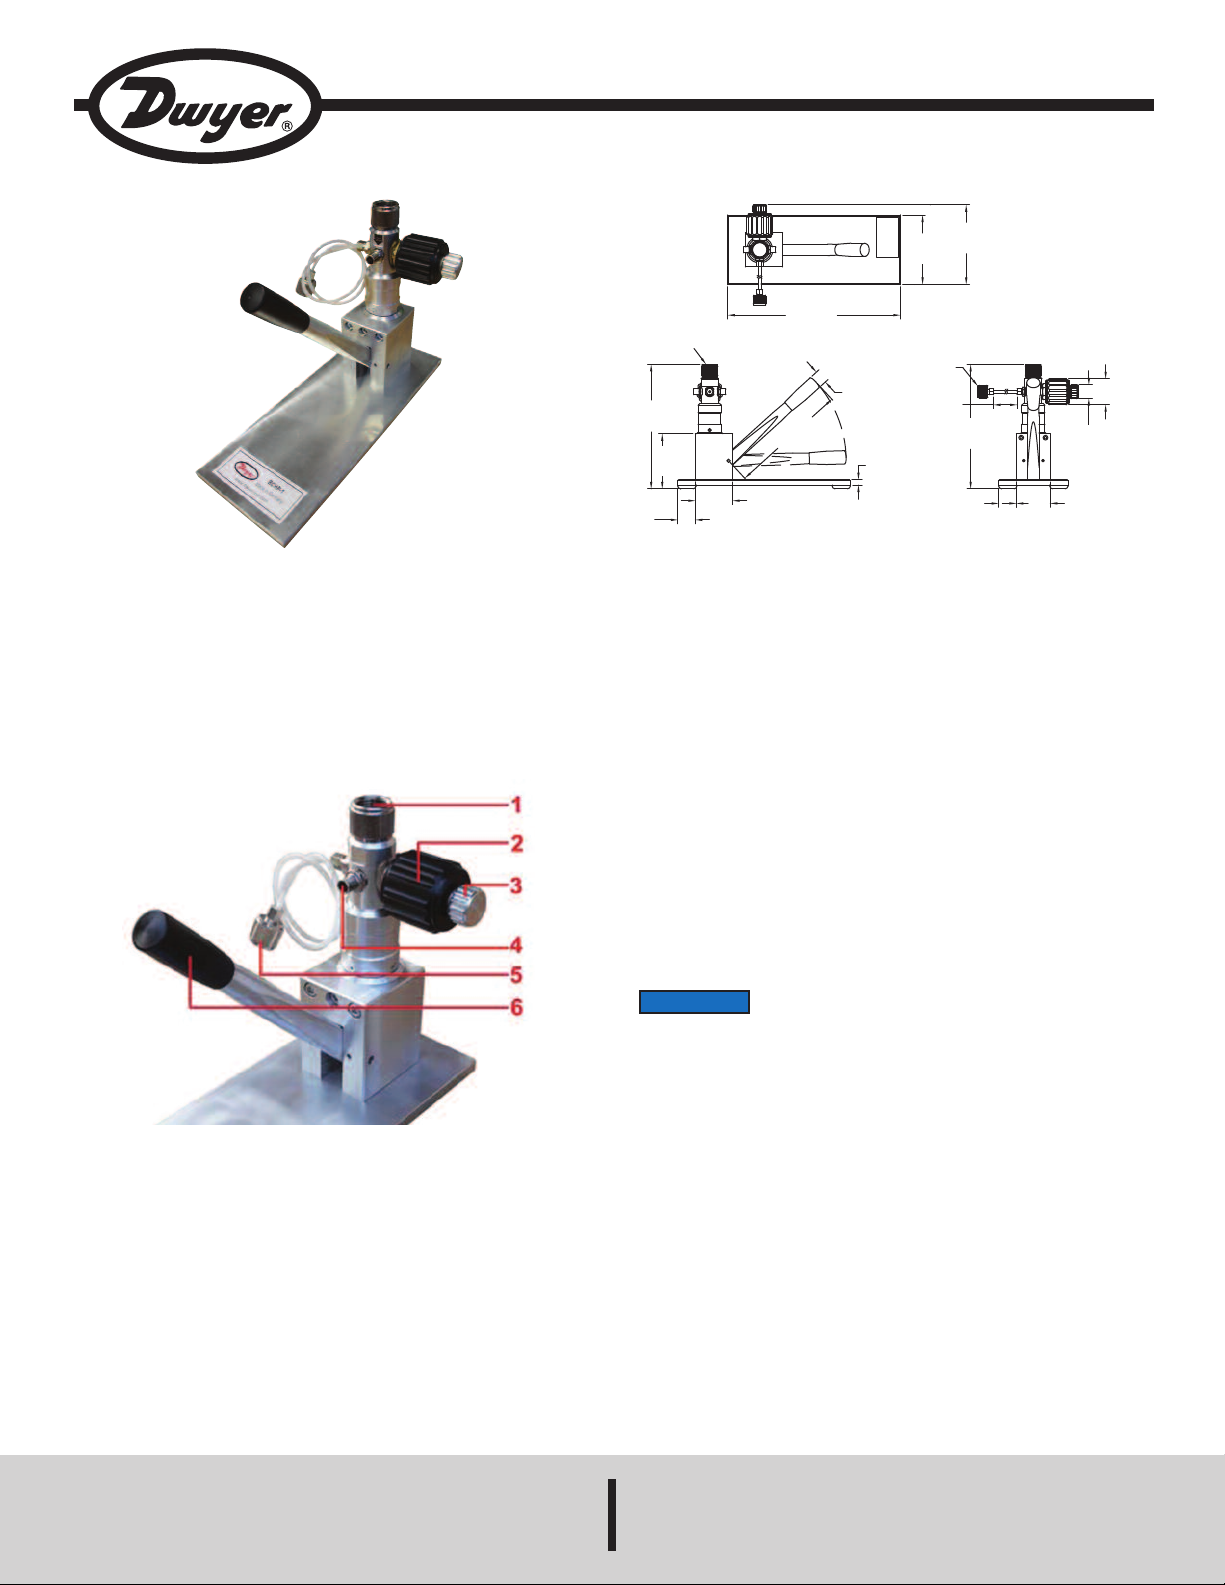
The Series BCHP Calibration Test Pump is able to generate pressure
and vacuum for adjusting or calibrating pressure gauges, transmitters, or
switches. The pump is hand operated and has a pneumatic pressure
range of -28 in Hg to 870 psi (-0.95 bar to 60 bar). Dual pressure ports
allow two instruments to be connected to the pump without additional
fittings. The Series BCHP can be used in laboratories and production
areas. The fine adjustment valve on this pump ensures precise
measurements.
PECIFICATIONS:
S
edia: Air.
M
utput Ranges: -28 in Hg to 870 psi (-0.95 to 60 bar).
O
Process Connections: 1/4˝ female BSP
Gauge Connection: 1/2˝ female BSP.
Materials: Anodized aluminum, brass, and ABS.
Weight: 8.4 lb (3.8 kg).
Bulletin TE-BCHP
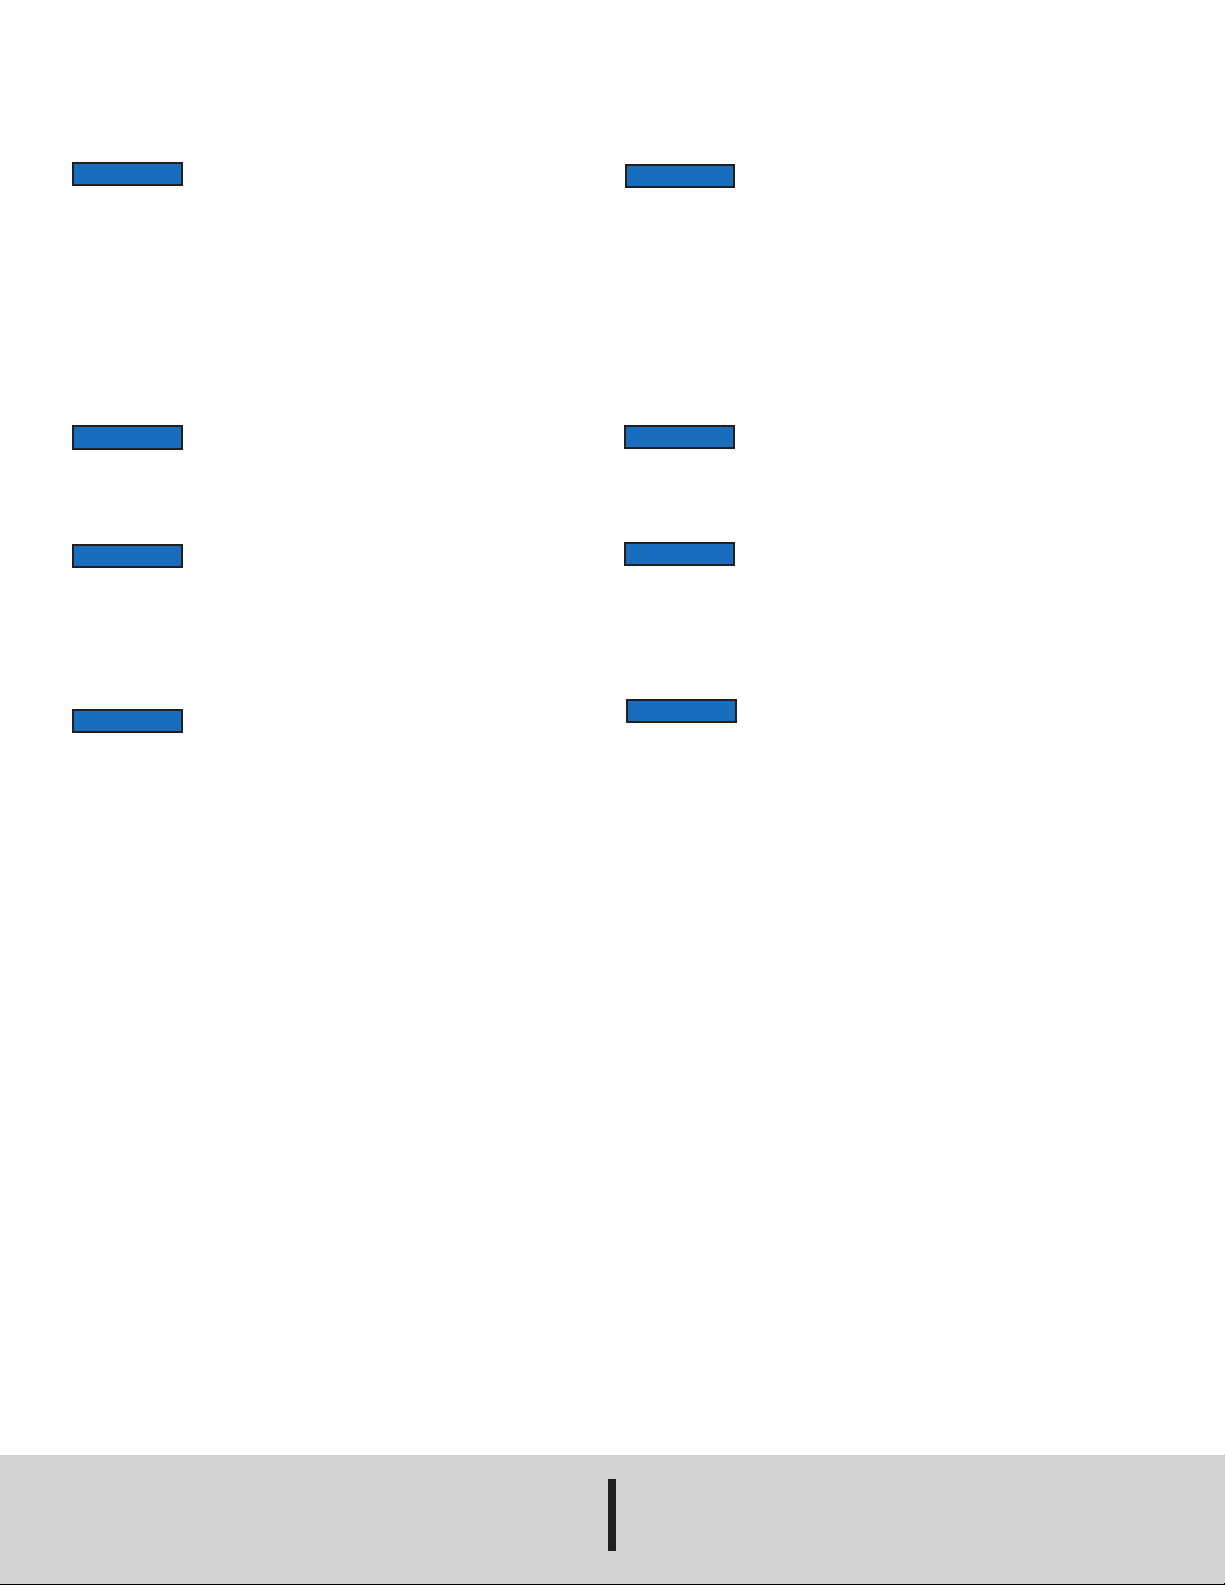
PRODUCT OVERVIEW
1. Pressure connector
for reference instrument
1/2˝ BSP female rotating
2. Fine adjustment knob
3. Pressure relief knob
Figure 1
4. Change-over switch for
pressure/vacuum generation
5. Pressure connector for test
instrument 1/4˝ BSP female
rotating
6. Pump handle
MOUNTING INSTRUCTIONS
The reference instrument is to be mounted on the top connection of the
pump. Fastening with the knurled nut by hand is sufficient. An integral Oring seals the reference instrument pressure port without the use of
teflon tape.
The test instrument is attached to the connection at the end of the hose.
The optional NPT adapter set includes sealing gaskets and different
adapters to best fit the instrument being tested. The tube can also be
removed to attach the test instrument directly to the pump using the
same adapter.
NOTICE
Do not use tape sealant to seal the ports, as it may damage the
pump.
DWYER INSTRUMENTS, INC.
P.O. BOX 373 • MICHIGAN CITY, INDIANA 46360, U.S.A. Fax: 219/872-9057 e-mail: info@dwyermail.com
Phone: 219/879-8000 www.dwyer-inst.com
Page 2

PRESSURE OPERATION
Step 1: Check whether the change-over switch (4) has pressure selected.
(See label on neck of the pump) If pressure is not selected, use a small tool
to push the switch to the correct position.
OTICE
N
o not move the change-over switch (4) when the test pump is
D
nder operation.
u
Step 2: Make sure the pressure relief knob (3) is not completely closed.
VACUUM OPERATION
Step 1: Check whether the change-over switch (4) has vacuum selected.
(See label on the neck of the pump) If vacuum is not selected, use a small
tool to push it to the correct position.
NOTICE
Do not move the change-over switch (4) when the test pump is
under operation.
Step 2: Make sure the pressure relief knob (3) is not completely closed.
Step 3: Turn the fine adjustment knob (2) counter-clockwise until it stops.
Then, turn the knob three turns clockwise to ensure the adjustment is
adequate to increase or decrease the pressure.
Step 4: Turn the pressure relief valve (3) until it closes.
Step 5: Press down on the pump handle (6) until the approximate pressure
level has been reached.
NOTICE
Do not exceed a pressure of 650 psi (45 bar).
Step 6: Turn the fine adjustment valve (2) clockwise to increase the
pressure or counter-clockwise to decrease the pressure. Do this until the
required pressure level has been reached on the reference instrument.
NOTICE
connection, and the sealing gaskets. (If the pressure does not come to a standstill
within that time, check the ports to be sure they are sealed tightly.)
fter increasing the pressure, the reading may slightly drop for
A
about 30 seconds, due to thermodynamic effects, the tube
Step 7: To reduce the pressure in the pump, turn the fine adjustment valve
(2) counter-clockwise. If more pressure still needs to be decreased,
carefully turn the pressure relief knob (3).
NOTICE
Only remove the reference or test instrument when the relief
valve (3) is open and no pressure is in the test pump.
Step 3: Turn the fine adjustment knob (2) clockwise until it stops. Rotate
the knob counter clockwise three turns so that the vacuum pressure can be
increased or decreased.
Step 4: Turn the pressure relief knob (3) until it closes.
Step 5: Press down on the pump handle (6) until the approximate vacuum
level has been reached.
NOTICE
o not exceed a vacuum of -26.5 in Hg (-0.9 bar.)
D
Step 6: Turn the fine adjustment valve (2) clockwise to decrease the
vacuum or counter-clockwise to increase the vacuum. Do this until the
required pressure has been reached on the reference instrument.
NOTICE
ube connection, and the sealing gaskets. (If the vacuum does not come to a
t
tandstill within that time, check the ports to be sure they are sealed tightly. )
s
fter increasing the vacuum, the reading may slightly increase
A
for about 30 seconds, caused by thermodynamic effects, the
Step 7: To reduce the vacuum in the pump, turn the fine adjustment valve
(2) counter-clockwise. If additional vacuum pressure needs to be relieved,
carefully open the pressure relief valve (3).
NOTICE
Only remove the reference or test instrument when the relief
valve (3) is open and no vacuum is in the test pump.
FAULT INVESTIGATION
1. If the pressure or vacuum cannot be generated correctly or if the set
pressure and vacuum does not stay stable, it may be caused by incorrect
positioning or sealing of the gaskets. Be sure any adapters on the test
instrument have been sufficiently tightened.
2. Before assuming there is a leak in the pump, check if the pressure relief
valve (3) is closed and if the change-over switch (4) is correctly positioned.
3. Do not apply any force to the operating elements of the calibration test
pump and do not connect an external pressure supply to the pump.
MAINTENANCE/REPAIR
Upon final installation of the Series BCHP, no routine maintenance is
required. The Series BCHP is not field serviceable and should be returned
if repair is needed. Field repair should not be attempted and may void
warranty.
WARRANTY/RETURN
Refer to “Terms and Conditions of Sales” in our catalog and on our website.
Contact customer service to receive a Return Goods Authorization number
before shipping the product back for repair. Be sure to include a brief
description of the problem plus any additional application notes.
©Copyright 2014 Dwyer Instruments, Inc. Printed in U.S.A. 7/14 FR# R6-444183-00
DWYER INSTRUMENTS, INC.
Phone: 219/879-8000 www.dwyer-inst.com
P.O. BOX 373 • MICHIGAN CITY, INDIANA 46360, U.S.A. Fax: 219/872-9057 e-mail: info@dwyermail.com
 Loading...