

Page 1
B/C Series Quick Start
Guide
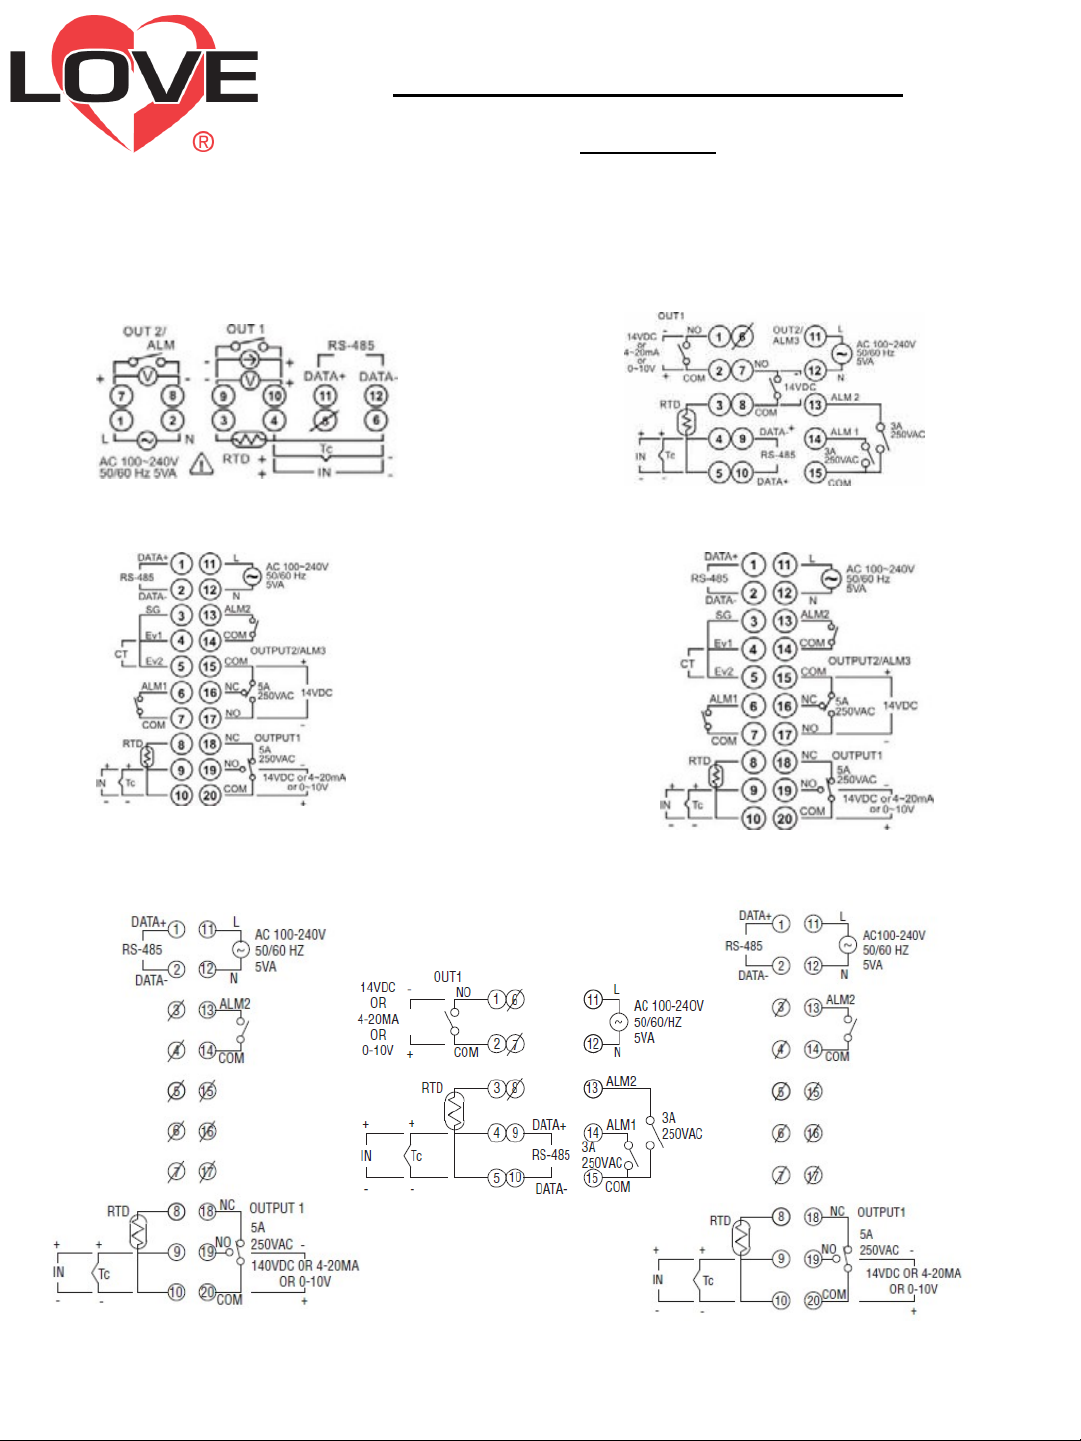
1. Connect wires to the corresponding terminals
32 B Series
4B Series 8B Series
4C Series
16C Series
16 B Series
8C Series
1
Page 2
B/C Series Quick Start
Guide
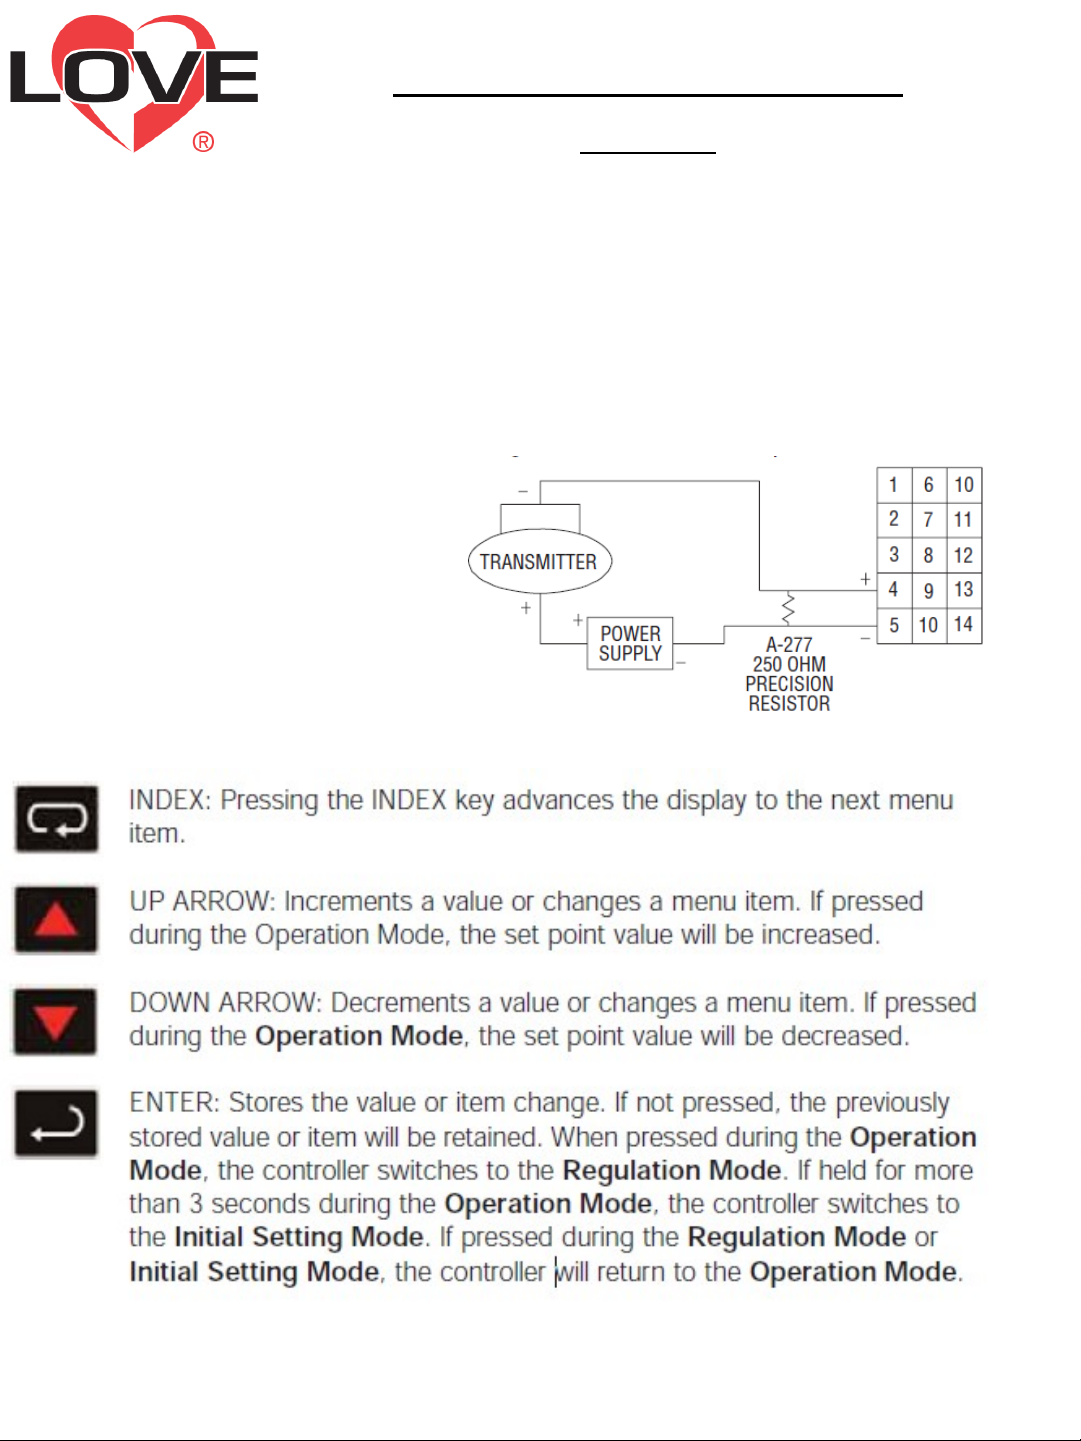
2. Wiring for 4-20 mA transmitter inputs.
Note: 16B terminal layout used in
example. Use appropriate terminal layout
for selected controller.
3. Basic Key Functions:
2
Page 3

B/C Series Quick Start
Guide
4. Verify wiring and then turn on power
5. The following is a quick solution to programming,
for more information please refer to the manual:
Programming
6. Press the ENTER Key for at least 3 Seconds to
enter initial settings menu while in Home
display to enter Initial Settings Menu
7. Advance through the menus by pressing the
INDEX key you will advance through the menu
items.
8.The first menu item shown in the top display is
InPt (Input Type) See Below For B series input
type. See next page for C series input types
9. Using the UP/Down Keys Select your input type
B Series Input Types
3
Page 4

B/C Series Quick Start
Guide
C Series Input Types
10. Press ENTER to save setting
11. If Inpt is an analog input enter these parameters,
if not skip to Ctrl
–
–
tP-L - Scale Low (0 VDC or 4mA)
tP-H – Scale High (10 VDC or 20mA)
12. At CtrL, select the method of control operation
using UP/DOWN.
–
–
PID – Auto-Tune to set point value
ON/OFF – Simple High and Low point
control
13. Press ENTER to save your setting
14. Press INDEX to S-HC parameter
15. Select type of control using UP/DOWN
–
–
HEAt – Output 1 will Heat
Cool – Output 1 will cool
4
Page 5

B/C Series Quick Start
Guide
16.Press ENTER to Save your setting
17. Press ENTER for the Operation Menu
18. Press UP/DOWN to change Set point value to
your desired setting
19. Press ENTER to save your setting
20. Press ENTER for the Regulation Menu
21. If you selected PID on step 13 proceed,
otherwise skip to step 30
22. The first parameter is AT, Select ON
using UP/DOWN
23. Press ENTER to save your Setting
24. Press ENTER the Operation Menu
25. Press INDEX to parameter r-S
26. Press UP/DOWN to change to run
27. Press ENTER to save your setting
28. Press ENTER to return to your set point
29. END - controller will now program itself. Unit will
be complete when the AT light stops flashing
30. Proceed through Regulation Menu until you
reach either:
–
–
HtS – Heat control Hysteresis
CtS – Cool Control Hysteresis
5
Page 6

B/C Series Quick Start
Guide
31. Change Value to desired Hysteresis
using UP/DOWN (Allowable difference of
temperature around set point) See Below:
32. Press ENTER to save your setting
33. Press ENTER to return to Operation
Menu.
34. End-The unit is programmed.
6
 Loading...