

Dustless DustBuddie User Manual
Installation Instruction
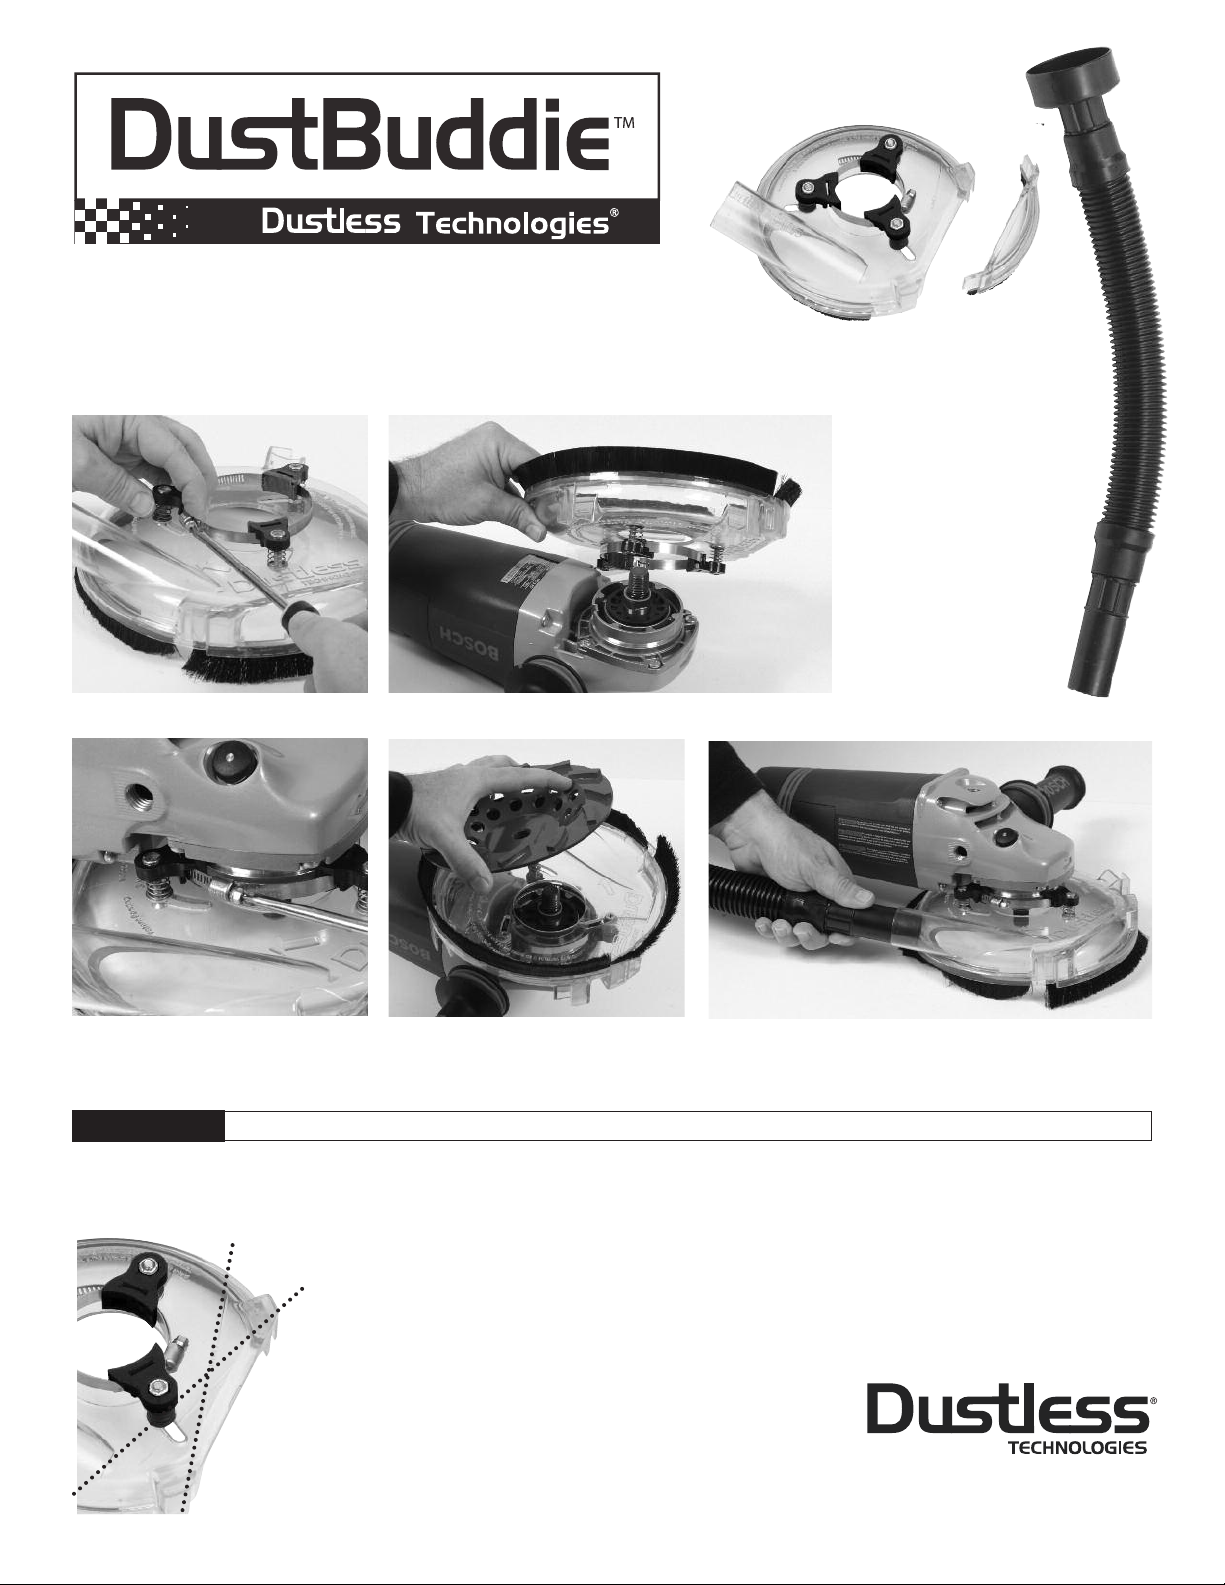
DUST COLLECTION SYSTEM FOR RIGHT ANGLE GRINDERS
Installation Steps:
1. Loosen band clamp. 2. Slip around grinder’s collar.
Includes:
1 Clear polycarbonate
shroud w/brackets
and clamp
1 18” Flexible Hose
4 Washers
1 Removable clip
1 Releasable tie
3. Center DustBuddie on the arbor
and tighten band clamp.
WARNING
Always make sure grinder is UNPLUGGED when removing or attaching front nose clip. Before use, refer to your tool manual for warnings and instructions.
4. Install grinding wheel.
(Use the washers provided to adjust
wheel slightly below the brushes. You
may also adjust the 3 screws if needed)
5. Insert hose to port. Secure other end of hose to
the electric cord with releaseable tie provided.
Instructions for Crack Chasing/Tuckpointing Application
Cut
Line 1
Cut
Line 2
1. Tighten all 3 screws until bracket touches shroud.
2. Remove brushes. In the brush groove there is a plastic
thin rib that will have to be cut out in order to snap
coverplate in place.
3. Remove shroud clip, trim with band saw or cutting blade
as follows:
a. Trim on “Cut line 1” if cutting blade is directly in front
of grinder
b. Trim on “Cut line 2”, if cutting blade is at a 45° angle
4. Install cutting wheel using washers provided to center
the wheel
5. Snap cover plate in place (not included with grinding kit)
Go to www.dustlesstechnologies.com for
more installation videos and tips
This product was inspected and
packaged carefully before being
shipped from the factory. If you
should happen to need assistance
during assembly or operation, call
1-800-568-3949 for our customer
service department.
800.568.3949
dustlesstechnologies.com
 Loading...