

Page 1
1
5033
5304
5305
5307
5308
➊
➋
5304
5305
5307
5308
5033
Assembly guide
and directions of use
Directions of use
1. Set the temperature and water
pressure with the singe grip mixer.
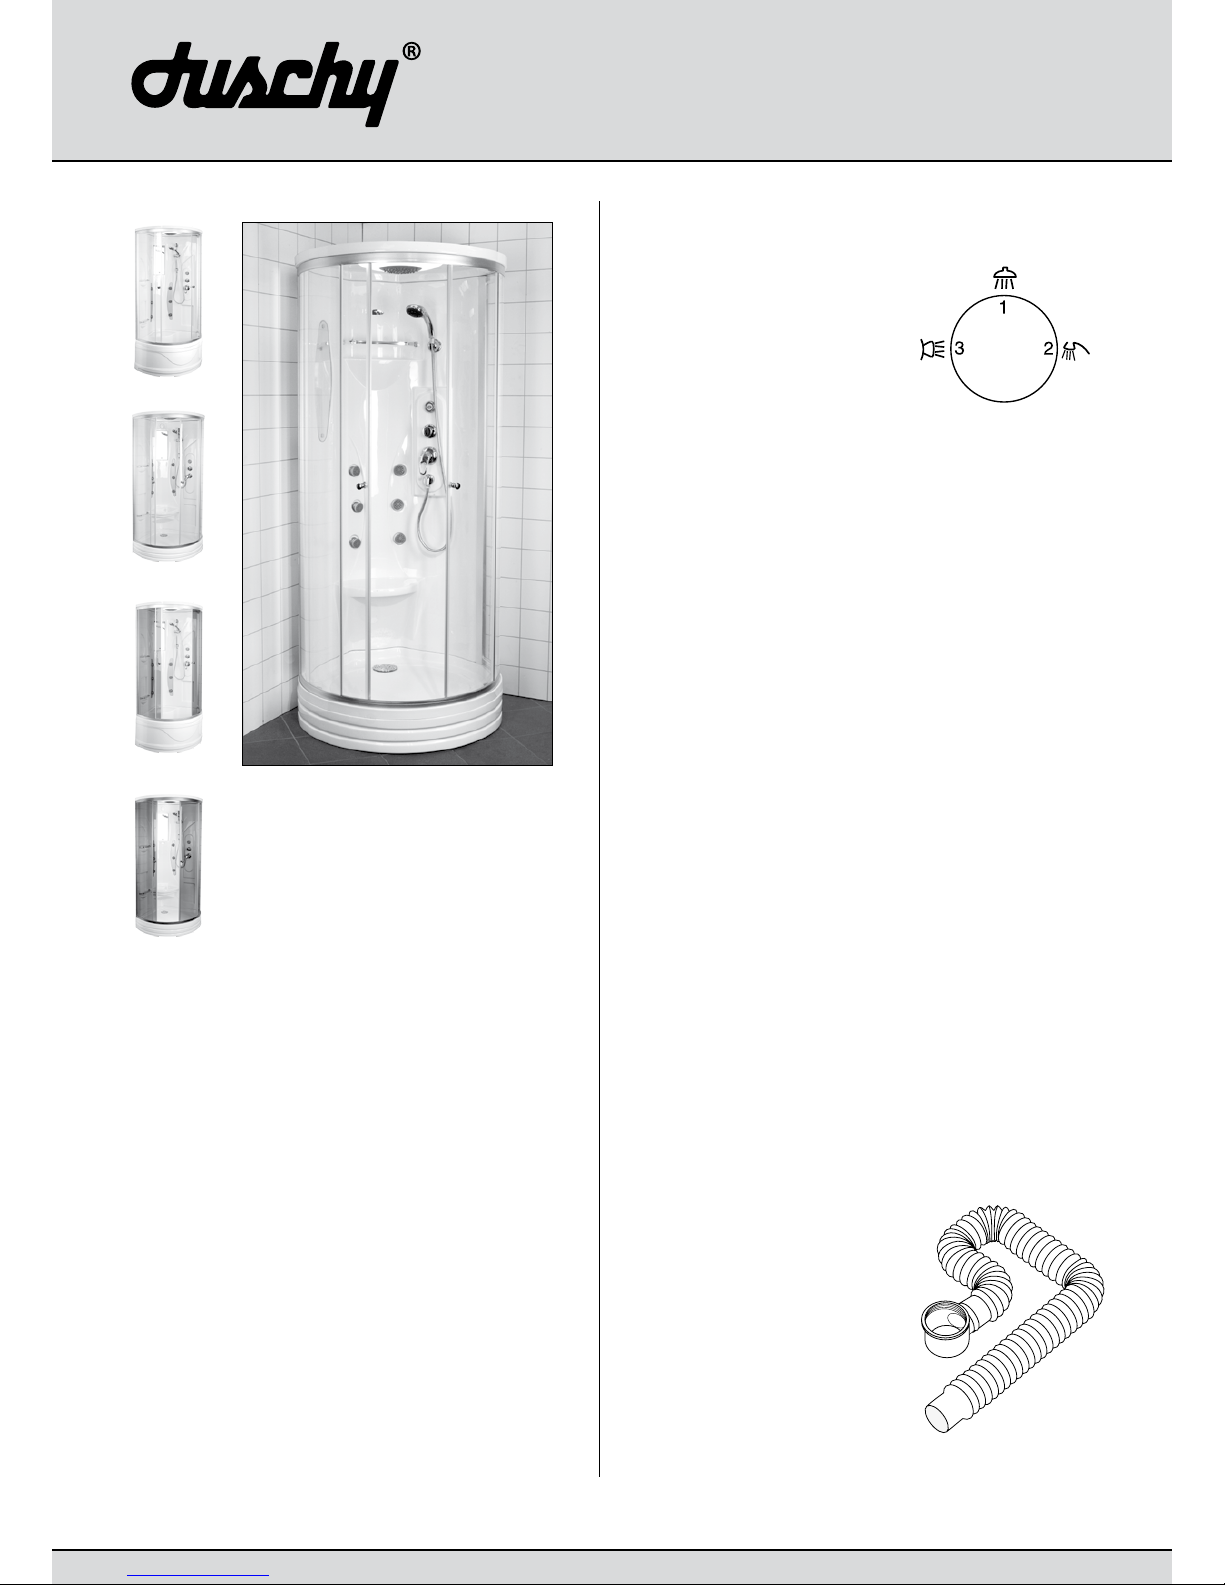
With the diverter ➊ you can
switch between overhead shower
(➊:1), hand shower (➊:2) and
body sprays (➊:3).
2. The overhead lighting is switched
on and o using the button above
the diverter.
Package content
The shower cabin is delivered in two or three boxes, containing:
• Assembly guide
• Shower tray
• Glass front including 2 doors
• 2 cover strips
• Back wall
• Roof section
• Assembly bag
• Hand shower with hose
Assembly preparation
1. For water supply, there are 2
exible hoses of 1 m with R ½”
inner grooves on the back of the
shower cabin.
2. Water is drained by a 70 cm exible
plastic pipe ➋.
3. The overhead lighting shall be
connected to a 230 V wall socket.
Maintenance
1. Cleaning the shower cabin should be done using a soft
cloth with cleaning agent. In order not to damage the shiny
surface, pls do not use cleaning agents containing polish
grains, acetone or ammoniac.
2. Lime deposits can be solved using a lime solvent.
3. Drains and spouts should be cleaned regularly to prevent
stops.
4. Polish chromed parts with care.
Page 2
2
➊
➋
➌
➍
➎
Assembly guide
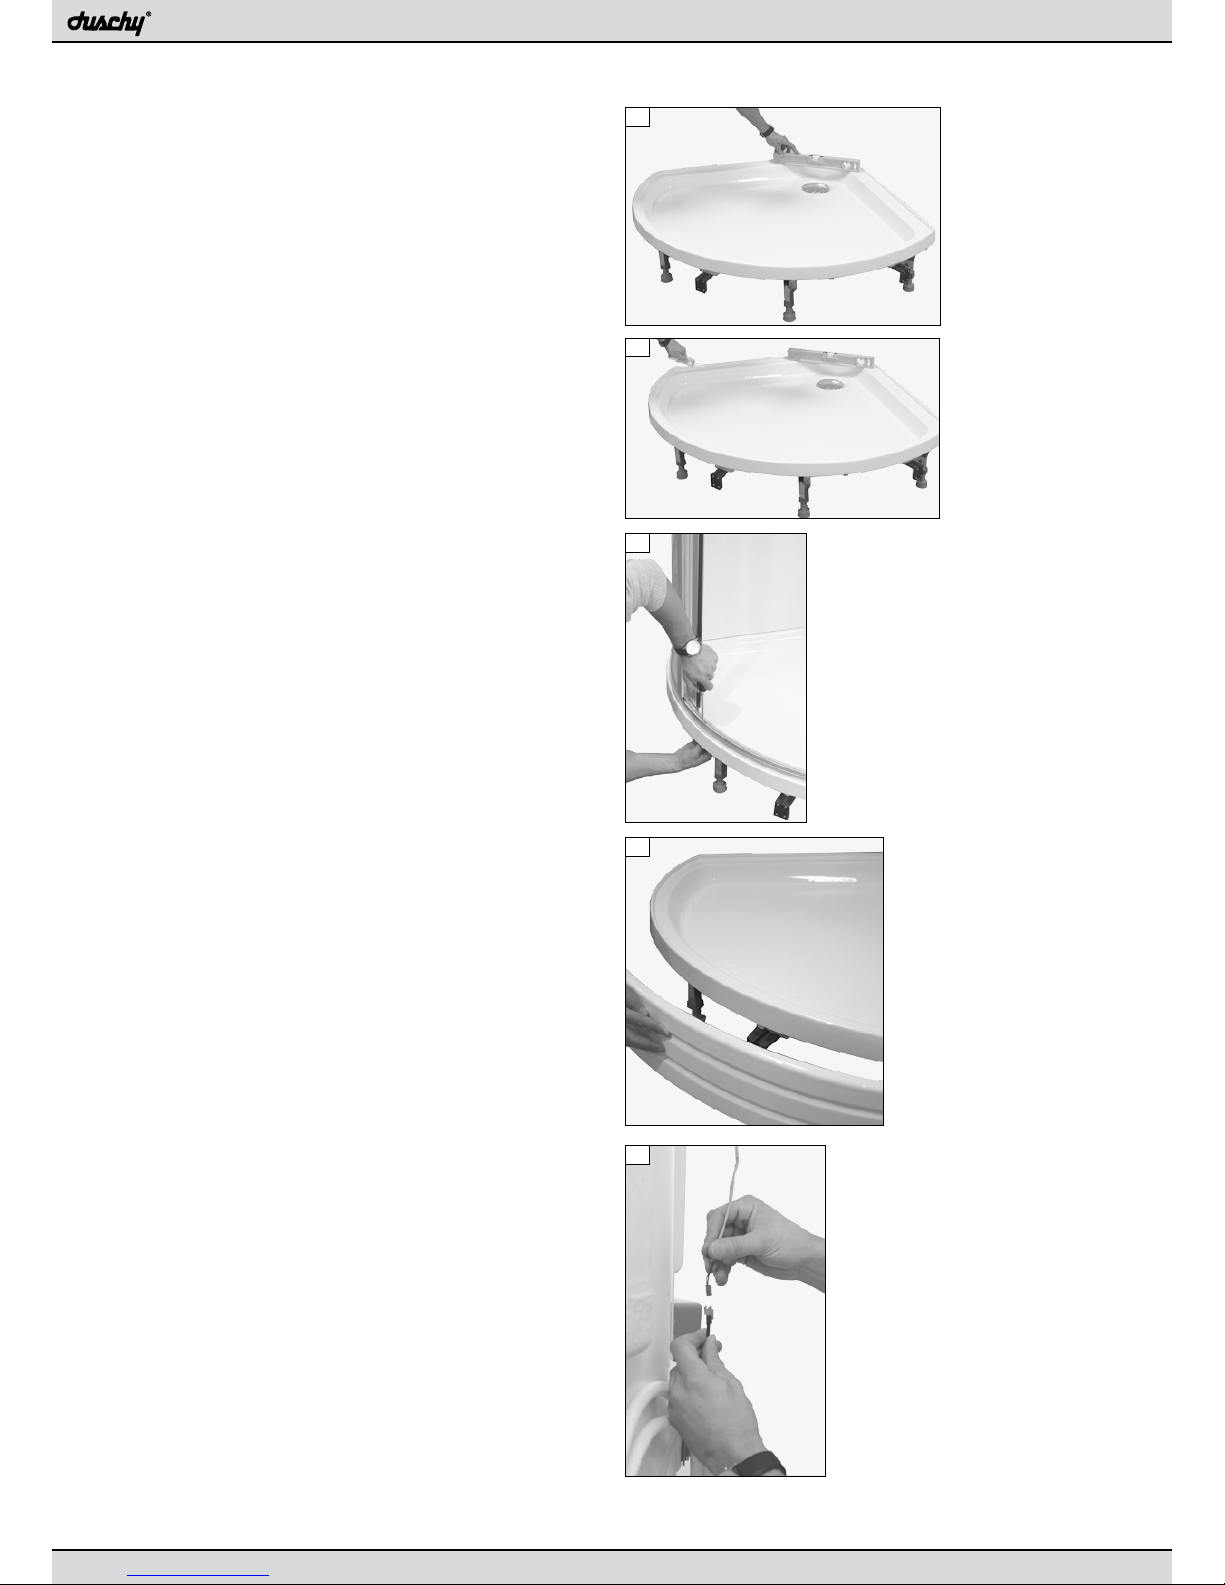
1. Put the tray in the desired place ➊ and adjust the feet until the
tray is level and at the desired height. Use a water level. Tighten
the bolts of the feet.
2. Put a string of wet silicone ➋ on the parts of the tray that will
face the back wall. Put the back wall on the tray and fasten it
with screws and nuts.
3. Put a string of wet silicone where the tray will face the glass
front. Put the glass front on the tray.
NOTE! The arrows on the outside of the glass walls must point
upwards.
4. The glass front is tted along the round edge of the tray, with
screw and nuts. ➌
5. Attach the cover strips on the edges of the glass wall doorway.
6. Attach the detachable front piece on the tray with the velcro
strips and the snap fastening. ➍
8. Put a string of wet silicone on the top of the glass and back
wall, where the roof section will face them. First screw the roof
to the upper forward part of the glass front using screws and
nuts. Then fasten the back part of the roof to the back wall with
screws and nuts.
9. Tighten all screws that have been tted so far.
10. Connect the hose from the overhead shower to the diverter. Attach with a hose clip. Connect the hand shower using a washer
in both ends of the hoses.
11. Connect the exible hoses (R ½” inner grooves) to the hot and
cold water pipes of the house. Red mark for hot water and blue
for cold.
If the water contains a lot of lime, a lter should be used to
avoid problems.
12. Connect the cord from overhead lighting to the cord from the
power box on the cabin backside ➎. Connect the cabin to a
230 V wall socket. Lamp: circular light tube 32W/54.
13. If needed, you can use more wet silicone when the cabin is assembled.
Changing the light tube
Lamp: circular light tube 32W/54.
1. Unscrew the hose from the overhead shower. Then unscrew the
locking nut that holds the overhead shower.
2. From inside the cabin, take out the overhead shower.
3. Then take o the plastic hood.
4. Take out the electric cable from the light tube.
5. Take out the light tube from the holders and insert the new
light tube.
 Loading...