

Page 1
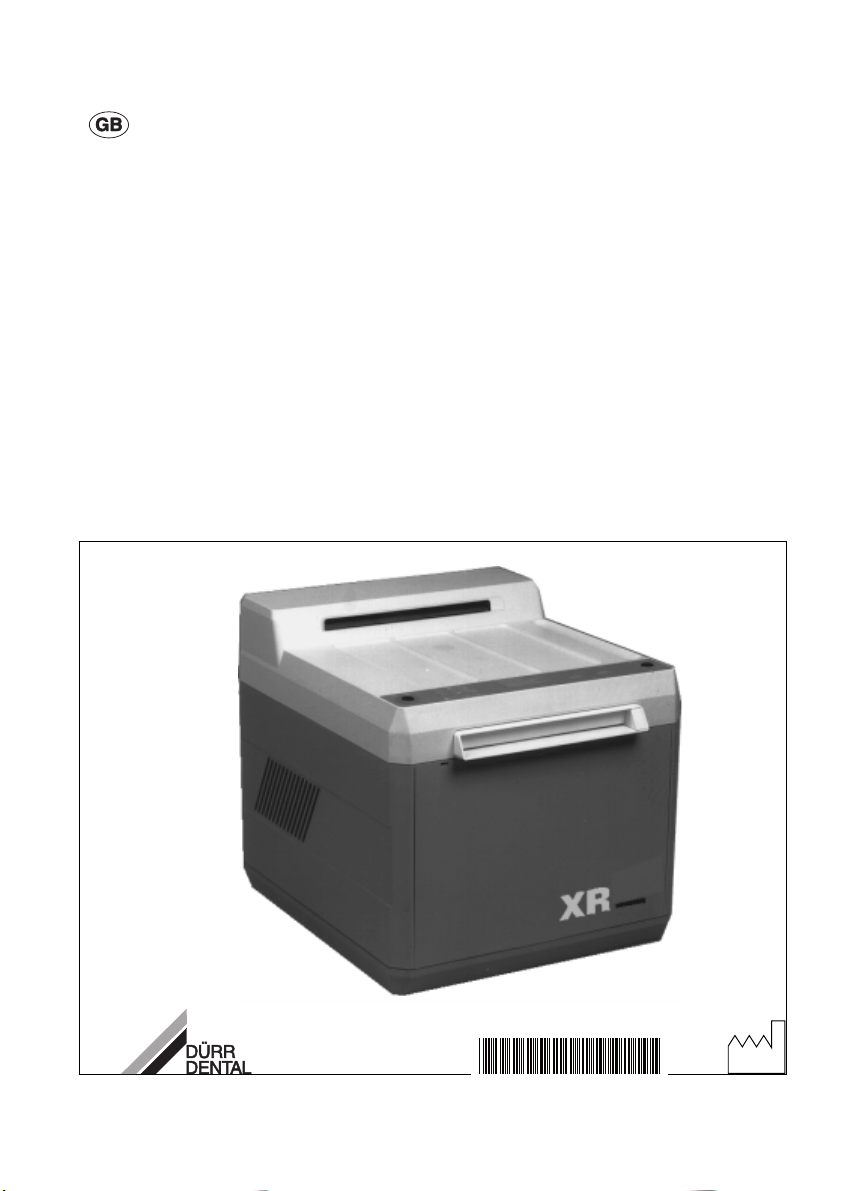
Operating manual DÜRR X-RAY film processor XR25
1995/04
9000- 600- 04
51
Page 2

52
Page 3

CONTENTS
1. SAFETY ADVICE
1. Safety advice .......................................... 51
1.1 Electrical safety advice ................... 51
1.2 General information ......................... 51
2. Scope of XR 25 ...................................... 52
3. Model review .......................................... 52
3.1 The whole programme at a glance .. 52
4. Operation ............................................... 53
5. Changing of chemicals ......................... 54
5.1 Cleaning the roller sets....................54
5.2 Cleaning the bath ............................ 55
5.3 Before draining the chemicals ........ 56
5.4 Draining the chemicals .................... 56
5.5 Cleaning the tanks ........................... 57
5.6 Filling up with chemicals ................. 58
5.7 Inserting roller sets .......................... 58
5.8 Putting on lid .................................... 58
5.9 Switching on XR25 for operation ..... 58
6. Daylight attachment .............................. 59
7. Film storage ........................................... 59
8. Surgery breaks ...................................... 60
9. Fault finding info . ................................. 61
1.1 Electrical safety advice
Work on electrical apparatus must only be
carried out by qualified electricians (VBG 4)
or through our trained Service Technicians.
With the combination of equipment, as well
as with electrical repairs, the relevant safety
and check regulations must be observed.
(VDE 0100, or else, IEC 364, 0105 pt.1, 0701,
EN603351, VBG4, in other countries the
relevant regulations such as IEC, CEE must
be complied with). For repairs only use
original parts otherwise the guarantee and
test certification will be invalidated.
1.2 General advice
In the BRD, as well as some other countries,
used x-ray chemicals are regarded as special
waste and must be collected and disposed of
separately.
53
Page 4

2. XR 25 OUTLINE
3. MODEL SURVEY
• Automatic film developing of various film
sizes from 2x3 to max. 24x30 cm.
• A fresh mix of chemicals lasts approx. 3
weeks based on a usage rate of 10 intra-oral
and 3 panorama films per day. This
statement only refers to Durr Automat XR
Chemicals.
• Films can be fed in continuously.
• The run through time is approx. 6 mins. With
model 1702-03 (variable) it is between
3-6 mins.
• The transport of films in processing is via
roller sets.
• In the Processor the developer and fixer
solutions are warmed and kept to a constant
temperature within an accepted tolerance
range. The warm-up phase is approx 20
mins. depending upon ambient temperature.
• If the XR 25 is installed in a darkroom, no
daylight attachment is required.
XR25 X-ray film processor
Model: 1702-01 (230V)
1702-02 (110V)
1702-03 (110V, variable processing
time)
3.1 The whole programme at a
glance
Please open up left fold-in page!
Pos./Description Order n.
((1) XR25 X-ray film processor
230V, 50Hz .....................................1702-01
or
XR25 X-ray film processor 110V, 50-
60Hz ............................................... 1702-02
or
XR25 X-ray film processor 110V, 50-60Hz
(variable)........................................1702-03
(2) Darkroom light ...................... 1482-000-00
(3) *Collecting container
for Developer ........................ 1700-062-00
Collecting container
for Fixer ................................. 1700-061-00
(4)* Storage container
for Developer ....................... 1700-060-00
Storage container
for Fixer ................................. 1700-070-00
(5) Daylight attachment DL24
with filter pane ...................... 1700-910-00
Darkroom attachment
DA 24 ..................................... 1700-930-00
suitable for commonly used dental films
e.g. 2x3 up to 18x24 or 15x30 cm films
(6) Daylight attachment DL26
with filter pane ...................... 1700-920-00
suitable for film sizes up to 24x30
* It is possible to order a Collection system
consisting of:
1 Collecting container and
3 Storage containers
Collection system for Developer .. 1700-060-00
Collection system for Fixer .......... 1700-070-00
54
Page 5

XR25
DÜRR
DENTAL
FilmTransport
A
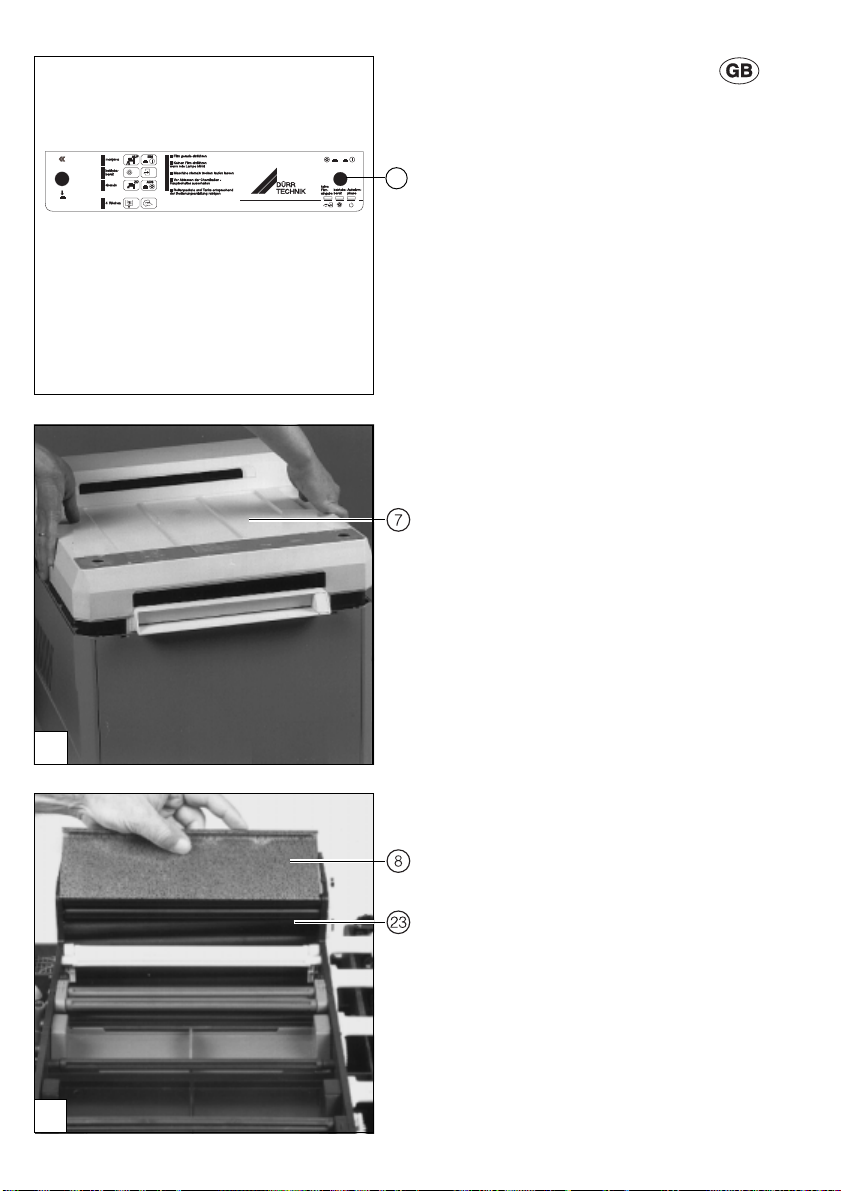
4. OPERATION
MORNING: Open water tap
EVENING: Close water tap
Never let machine run when dry and
never without D/F roller in situ. Pull out
power plug on emptied machine.
Morning
• Open water tap
• Mains switch (G) ON
Warming up phase begins (approx,
20mins.)
Yellow indicator light (D) shines
Ready for use
The correct processing temperature
(28°C) is reached as soon as the green
indicator (C) lights up.
Film transport
• Film transport switch (A) ON
Red light indicator (B) lights up
Advice: Insert DURR cleaningfilm, order no.
1410-007-00- before starting the day’s
processing by feeding in film at the
film entrance.
• Feed in film at film entrance.
Advice: Always feed in films straight and do
not have them overlapping, to avoid
bending or blocking the transportation.
• When the last film in a sequence has
been processed, switch OFF transport
switch (A).
Red light (B) goes out.
B C D G
(A) Film transport switch ON/OFF
(B) Film transport ON
RED indicator lights up
(C) Ready for use
Green indicator lights up
(D) Warm up phase
Yellow indicator lights up
(G) Mains switch ON/OFF
55
Page 6
5. CHANGING CHEMICALS
Chemicals should be changed every 3
weeks.
Advice: The 3 weekly chemical change
G
1
5.1 Cleaning the roller sets
▲▲
▲
▲▲
▲
▲▲
▲▲
2
▲▲
▲
▲▲
▲▲
▲
▲▲
Advice: Any hard particle deposits can
Left and right fold-in pages:
• Mains switch (G) off, see fig. 1
• Pull out mains plug.
• Lift off lid (7) and put to one side.
• Open all latches (25) and catches (24),
• Remove guide plate (8) from dryer set.
• Tilt dryer set (23) backwards and then lift out.
• Remove water roller set (26) and film
specifically refers to:
a) The use of „DURR Automat XR
chemicals“.
b) A daily max. film throughput of 10
intra-oral and 3 panoral films.
In the BRD, as well as some other
countries, used x-ray chemicals are
regarded as special waste and
must be collected and disposed of
separately. We recommend the use
of a DURR Collection & Storage
system, see left fold-in page (3) and
(4).
safely and easily be removed with
the special DURR Spray Cleaner
WR 200 (P/N CCB800C55..). For
Cleaning the roller racks periodically
(3-6 mos) please use DURR
Cleaning Bath set (P/N 1700-007-
00).
see right fold-in page.
entrance set (28).
56
3
Page 7
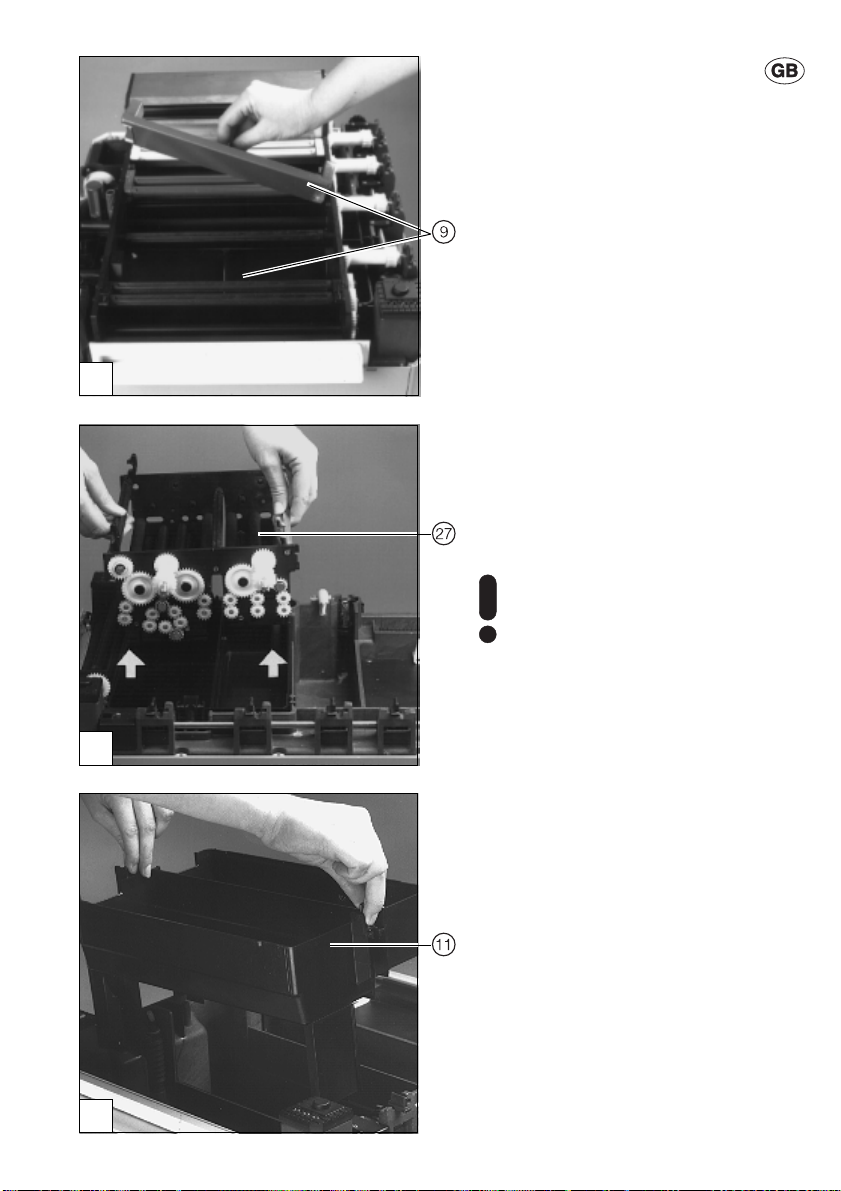
• Remove both bath covers (9) (only on model
1702-03 variable) from the developer and
fixer bath, let drip off and then lay aside.
4
• Take out Developer/Fixer roller set (27).
Firstly, lift the roller set vertically with both
hands, then carefully pour the remainder of
the chemicals into the baths over the front
side of the roller set.
• Clean all roller sets under warm water
(approx.40°C).
When cleaning the roller sets use the
correct coloured sponge.
Fixer - red
Developer - black
To disregard this advice could cause
contamination of fresh chemicals.
5
5.2 Cleaning the bath
• Lift bath (11) with both hands. Pour remaining
chemicals back into the tanks of the XR25.
• Rinse empty bath with warm water using the
appropriate sponges provided.
6
57
Page 8
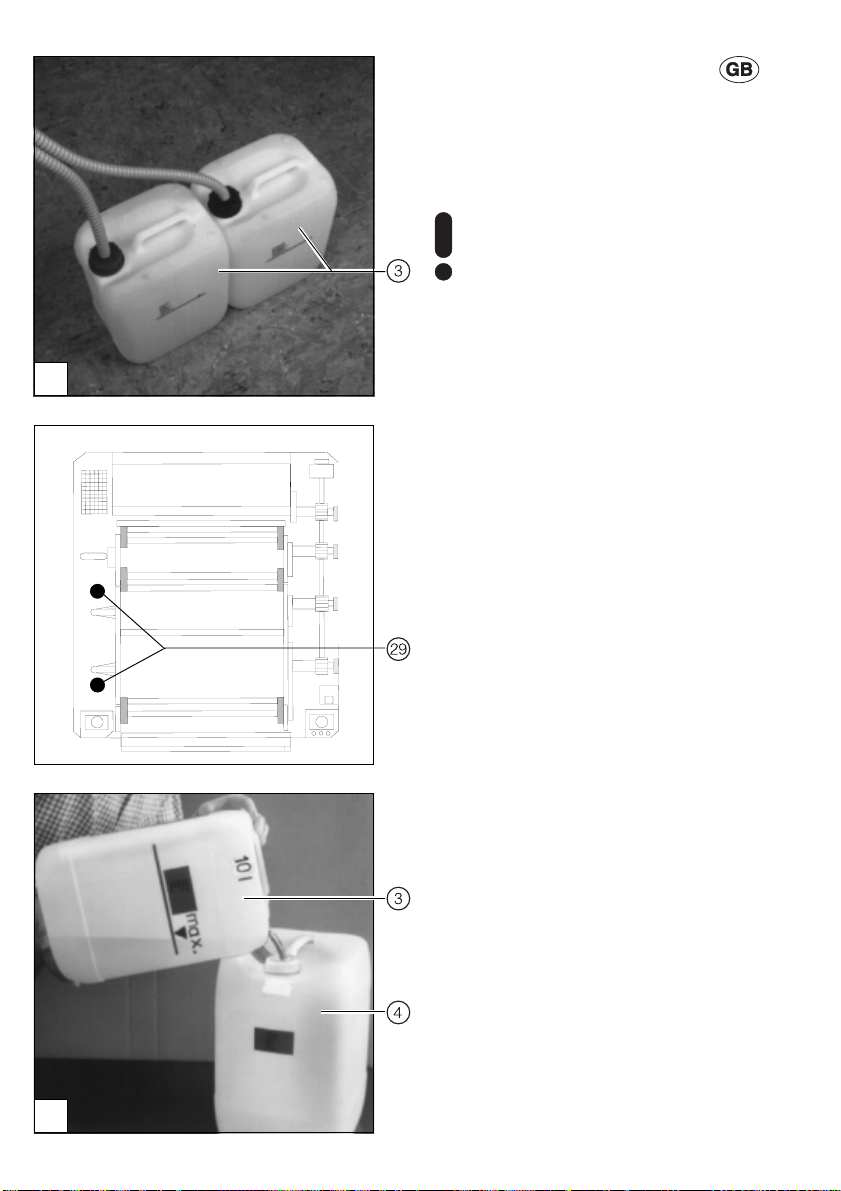
5.3 Prior to draining the chemicals
Please observe the following:
If collection vessels (3) are present,
check whether they are empty.
Otherwise empty the chemicals from
them (4).
To avoid overflow it is important that the
vessels (3) are previously emptied.
Sobald die Chemiekalien vom Entwicklungsgerät abgelassen werden, fließen
sie in die Auffangbehälter.
7
5.4 Draining the chemicals
• Unscrew the red and black plugs (29).
58
8
With collection vessels (3) in position, the
used chemicals flow into them.
• Decant the collected and used chemicals
from the collection vessel (3) into the storage
containers (4).
9
Page 9

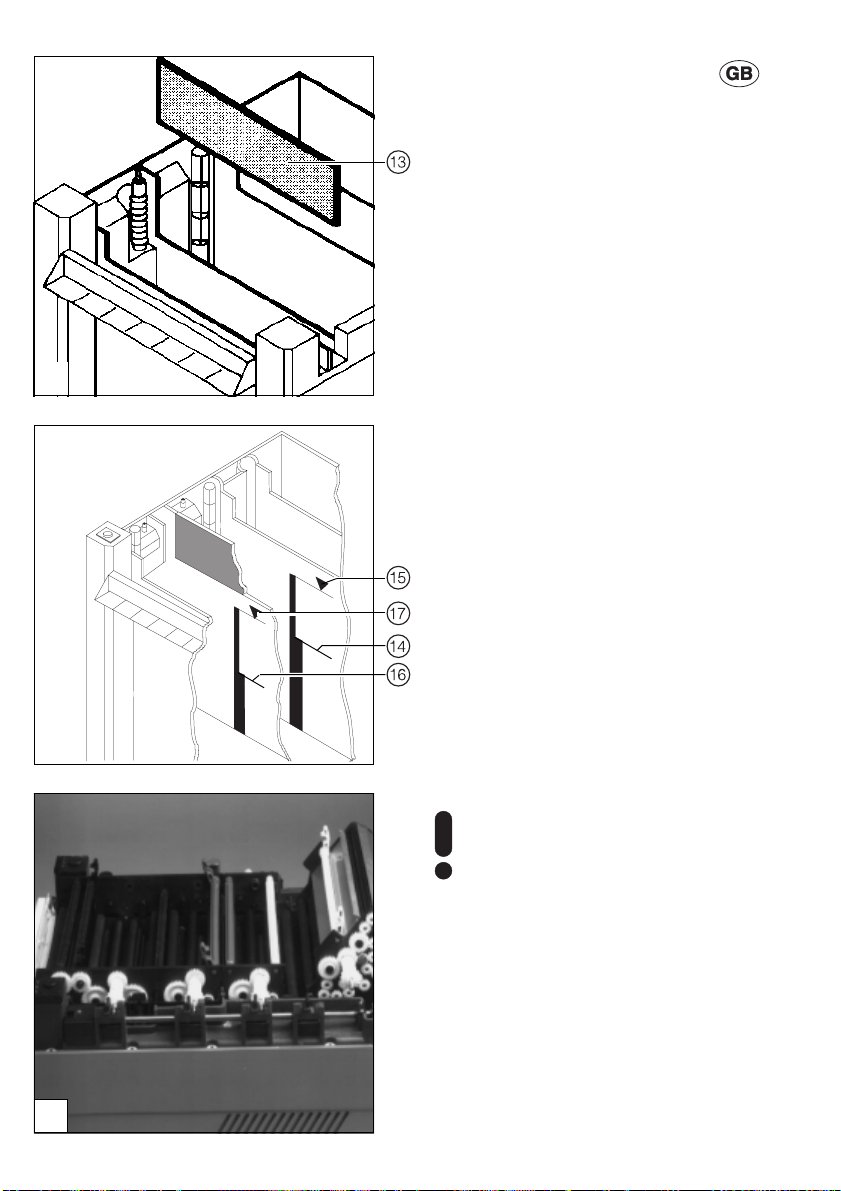
5.5 Cleaning the tanks
• With the appropriate wet sponge, wipe both
Tanks (13)(Developer-black, Fixer-red).
• Screw in red and black plugs (29), see fig.8.
9
10
• Fill both tanks up to the mark (14) with warm
water (approx.40°C).
• Insert Developer/Fixer roller set, close latches
and catches (24), see right fold-in page.
Never let Processor run when dry.
If there are no chemicals or water in the
tanks and the mains switch is activated,
this can lead to a technical defect.
If the Developer/Fixer roller set is not
inserted, the water will spurt upwards
as the conduit for the solution is not in
place.
• Replace lid (7) again, see fig.2.
• Insert mains plug.
• Mains switch (G) ON, see p. 5.
• Film transport switch (A) ON, let XR25 run for
approx. 10 mins. The remaining chemicals
are removed from the hoses and circulation
pump.
• Mains switch (G) OFF
• Pull out mains plug.
• Remove lid (7).
• Take out developer/fixer roller set (27), see
fig.5.
• Unscrew red and black plugs (29). The water
will flow into the empty collection vessels (3).
• Empty vessels (3) again.
11
59
Page 10
12
13
▲▲
▲
▲▲
EE
E
EE
EE
E
EE
FF
F
FF
FF
F
FF
▲▲
▲
▲▲
5.6 Filling with chemicals
• Screw in red and black plugs (29), see right
fold-in page.
• Insert separating plate (13) between Fixer
tank „F“ and Developer tank „E“, black side
towards developer, red side towards fixer.
1.Filling up tank F-fixer (red):
• Pour in large red bottle A and top up with
cold water to the lower mark (14).
• Now pour in small red bottle B and top up
with cold water to the upper mark (15).
2.Filling up tank E-developer (black):
• Pour in large black bottle A and top up with
cold water to the lower mark (16).
• Now pour in small black bottle B and top up
with cold water to the upper mark (17).
• Take out separating plate (13), clean it and
store it.
• Replace bath (11), see fig.6.
5.7 Insert roller sets
see right fold-in page and fig.14.
• Firstly, lift all latches (25) ready to receive
roller sets.
• Insert roller sets. Secure all latches (25) and
catches (24).
5.8 Replace lid
see fig.2 (7).
The lid should fit easily. If not, check
that all catches (24) and latches (25)
are properly closed.
60
5.9 Making XR25 ready for use
• Insert mains plug
• Power switch (G) ON, see p.5.
Yellow indicator (D) lights up, warm up phase
begins (approx.20mins.) As soon as the
green indicator (C) lights up, the correct
temperature has been reached and the XR25
is ready for use.
14
Page 11
15
16
▲▲
▲
▲▲
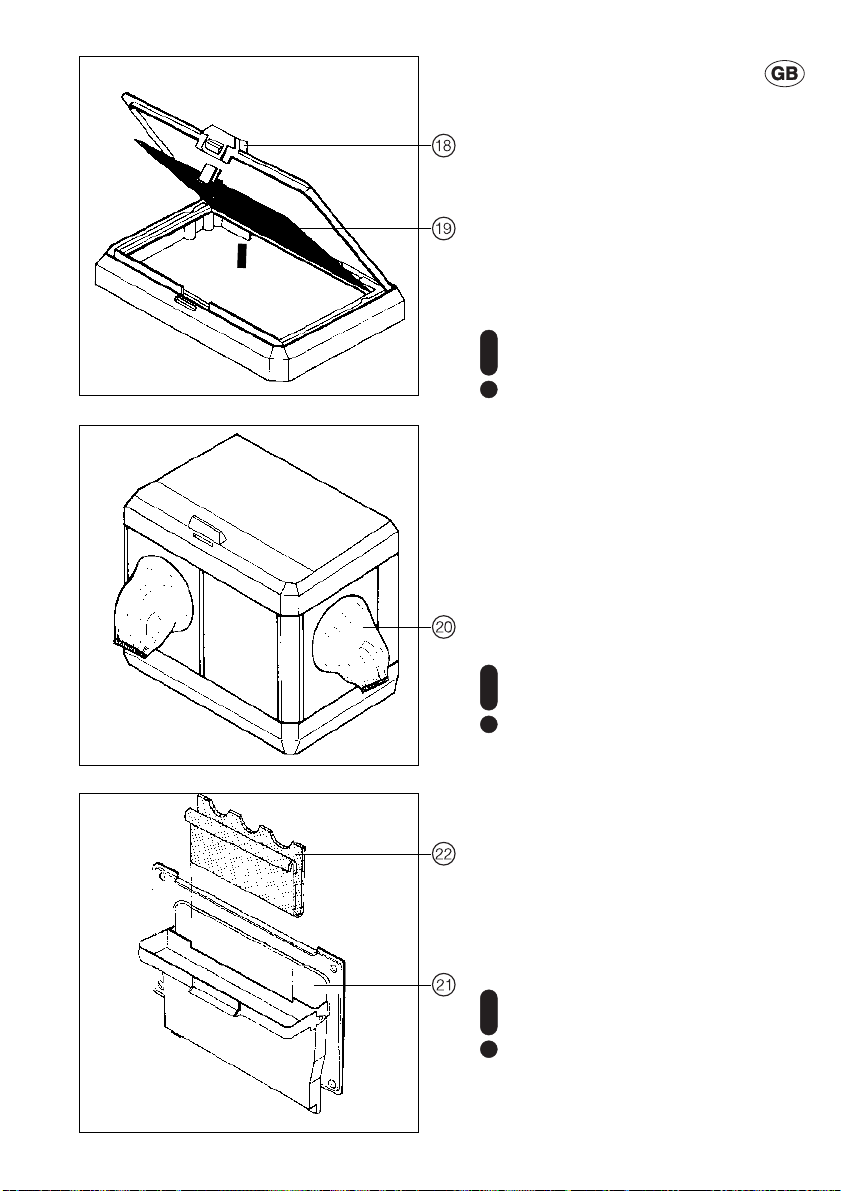
6. DAYLIGHT ATTACHMENT
If no darkroom is present, two daylight
attachments, DL24 und DL26, are available to
choose from, see left fold-in page, fig.(5) and
(6). The order no. as well as the recommended
max. film size for each is on p.4 under pt. 3.1.
„The whole programme at a glance“ can be
seen. For easier handling of wrapped intra-oral
films, the lid (18) can be lifted whilst the filter
pane (19) remains closed.
When processing thin coated (Extraoral) RP films, the lid must be
definitely closed. Otherwise the film
will be pre-exposed.
When necessary, individual elements of the
daylight attachment can be altered. Through
this, the arm sleeves (20) can be adjusted to
suit individual requirements.
7. FILM STORAGE
In the film compartment (21) which is situated
in the daylight attachment, a max. of 10
extraoral films can be stored.
When storing films in the compartment it is
important to observe the following:
When using the film storage
compartment always use up the films
before refilling. This will prevent films
being stored too long which, if
ignored, will cause ‘veiling`of the
films.
• Films 12x30, 13x18 and 15x30 place in film
holder (22).
- Hang film holder in storage compartment
- Lay films in film holder.
• Films 24x30 and 24x18 do not require the film
holder
- Lay films directly into film compartment
- The 24x18 films are stood upright in the film
compartment.
Close film compartment (21) each time
after taking out a film. If the film
storage area is not closed there is
always the danger of exposing the
films whenever the lid is lifted.
17
61
Page 12

8. SURGERY BREAKS
The max. lifespan of the chemicals in the tanks
is 4 weeks. If this period is exceeded during a
Surgery break,e.g. holidays, the chemicals
should be drained beforehand. The tanks and
roller sets cleaned with warm water (approx.
40°C) and then left standing empty. The
procedure as under pt.5 „CHANGING THE
CHEMICALS“.
62
Page 13

9. FAULT FINDING INFO.
Condition
1. Film too light
2. Films too
dark
3. Yellow/Green
veiling on the
film
4. Dark veiling
on films
Possible causes
• Developer temperature too
low
• X-ray exposure time too short
• Developer solution exhausted
• Developer temperature too
high
• X-ray exposure time too long
• Film not properly fixed
• Light getting into darkroom,
e.g. through keyhole
• Darkroom light wrongly
positioned
• Film has been affected by
Processor control lights
• Lid of daylight attachment not
properly closed
Remedy
Set temperature to 28°C
If possible, longer exposure time
Drain chemicals and mix fresh solutions.
Set temperature to 28°C
Shorten x-ray exposure time
Test whether Fixer solution is OK: Swish
film to and fro for approx. 40 secs. If the
film is transparent, the fixer is fine.
Should veiling persist: Drain chemicals
and mix fresh ones.
Check darkroom for light leakage and
seal off source.
Only indirect light allowed
Check all control lights and if necessary
dim them
When inserting extraoral and panoral
films the cover of the filter pane must be
closed.As films are light sensitive, the
lid must be properly closed.
5. Increased
background
veiling on the
film
6. Brownish
veiling on the
film
• Films out of date
• Film falsch gelagert.
• Film not properly washed
Check sell-by date
Store films in a cool place. Films should
not be kept near the x-ray machine.
(Scattered radiation)
Open water tap.
Safety switch in water bath has
switched off water inlet valve - Check
water drain..
63
Page 14

64
 Loading...