

Page 1
Duo, Trio, Quattro,
Duo Tandem, Quattro Tandem
Installation and operating instructions
EN
0297
9000-610-45/30
1811V007
Page 2

Page 3

Contents
Important information
1 About this document � � � � � � � � � � � � � � � 3
1�1 Warnings and symbols � � � � � � � � � � 3
1�2 Copyright information � � � � � � � � � � � 3
2 Safety � � � � � � � � � � � � � � � � � � � � � � � � � � � 4
2�1 Intended purpose � � � � � � � � � � � � � � 4
2�2 Intended use � � � � � � � � � � � � � � � � � � 4
2�3 Improper use � � � � � � � � � � � � � � � � � 4
2�4 General safety information � � � � � � � � 4
2�5 Qualified personnel � � � � � � � � � � � � � 4
2�6 Electrical safety � � � � � � � � � � � � � � � � 4
2�7 Only use original parts � � � � � � � � � � � 4
2�8 Transport � � � � � � � � � � � � � � � � � � � � 5
2�9 Disposal � � � � � � � � � � � � � � � � � � � � � 5
Product description
3 Overview� � � � � � � � � � � � � � � � � � � � � � � � � 6
3�1 Scope of delivery � � � � � � � � � � � � � � 6
3�2 Optional accessories � � � � � � � � � � � � 6
3�3 Wear parts and replacement
parts � � � � � � � � � � � � � � � � � � � � � � � � 6
4 Technical data � � � � � � � � � � � � � � � � � � � � 7
4�1 Duo � � � � � � � � � � � � � � � � � � � � � � � � 7
4�2 Duo � � � � � � � � � � � � � � � � � � � � � � � � 9
4�3 Trio � � � � � � � � � � � � � � � � � � � � � � � � 11
4�4 Quattro � � � � � � � � � � � � � � � � � � � � � 13
4�5 Duo Tandem � � � � � � � � � � � � � � � � � 15
4�6 Quattro Tandem � � � � � � � � � � � � � � 17
4�7 Distance between rubber feet � � � � 19
4�8 Type plate � � � � � � � � � � � � � � � � � � � 19
5 Operation � � � � � � � � � � � � � � � � � � � � � � � 20
5�1 Duo with membrane drying unit � � � 20
Assembly
6 Requirements� � � � � � � � � � � � � � � � � � � � 21
6�1 Installation/setup room � � � � � � � � � 21
6�2 Setup � � � � � � � � � � � � � � � � � � � � � � 21
6�3 Information about electrical
connections � � � � � � � � � � � � � � � � � 22
7 Transport � � � � � � � � � � � � � � � � � � � � � � � 22
8 Quattro Tandem assembly and
installation � � � � � � � � � � � � � � � � � � � � � � 23
9 Installation � � � � � � � � � � � � � � � � � � � � � � 23
9�1 Remove the transport locks � � � � � 23
9�2 Establishing the compressed air
connection � � � � � � � � � � � � � � � � � � 23
9�3 Pressure reducer � � � � � � � � � � � � � 24
9�4 Place a collector tray underneath � 24
9�5 Electrical connections � � � � � � � � � � 24
10 Commissioning� � � � � � � � � � � � � � � � � � � 25
10�1 Check the motor protection
switch � � � � � � � � � � � � � � � � � � � � � � 25
10�2 Checking the switch-on/cut-off
pressure � � � � � � � � � � � � � � � � � � � � 25
10�3 Checking the safety valve � � � � � � � 26
10�4 Draining the condensation water � � 26
10�5 Adjusting the rate of flow at the
pressure reducer � � � � � � � � � � � � � � 27
11 Adjustment options � � � � � � � � � � � � � � � 27
11�1 Adjusting the pressure switch � � � � 27
11�2 Adjusting the motor protection
switch � � � � � � � � � � � � � � � � � � � � � � 28
12 Circuit diagrams� � � � � � � � � � � � � � � � � � 29
12�1 1/N/PE AC 110-127 V, 230 V
layout � � � � � � � � � � � � � � � � � � � � � � 29
12�2 3/N/PE AC 400 V layout � � � � � � � � 29
12�3 1/N/PE AC 230 V layout, Duo
Tandem � � � � � � � � � � � � � � � � � � � � 30
12�4 3/N/PE AC 230 V layout, Quattro
Tandem � � � � � � � � � � � � � � � � � � � � 31
EN
9000-610-45/30 1811V007 1
Page 4

Contents
Usage
13 Operation � � � � � � � � � � � � � � � � � � � � � � � 32
13�1 Switching the unit on/off � � � � � � � � 32
14 Maintenance� � � � � � � � � � � � � � � � � � � � � 33
14�1 Maintenance schedule � � � � � � � � � 33
14�2 Replacing the air intake filter � � � � � 34
14�3 Replacing the filter in the
condensate separator � � � � � � � � � � 34
EN
14�4 Replacing the filter of the
membrane drying unit � � � � � � � � � � 35
15 Taking out of use � � � � � � � � � � � � � � � � � 36
15�1 Taking the unit out of use � � � � � � � 36
15�2 Storage of the unit � � � � � � � � � � � � 37
Troubleshooting
16 Tips for operators and service
technicians � � � � � � � � � � � � � � � � � � � � � � 38
2 9000-610-45/30 1811V007
Page 5
Important information
1 About this document
These installation and operating instructions
represent part of the unit�
If the instructions and information in
these installation and operating instructions are not followed, Dürr Dental will
not be able to offer any warranty or assume any liability for the safe operation
and the safe functioning of the unit�
1.1 Warnings and symbols
Warnings
The warnings in this document are intended to
draw your attention to possible risks of personal
injury or material damage�
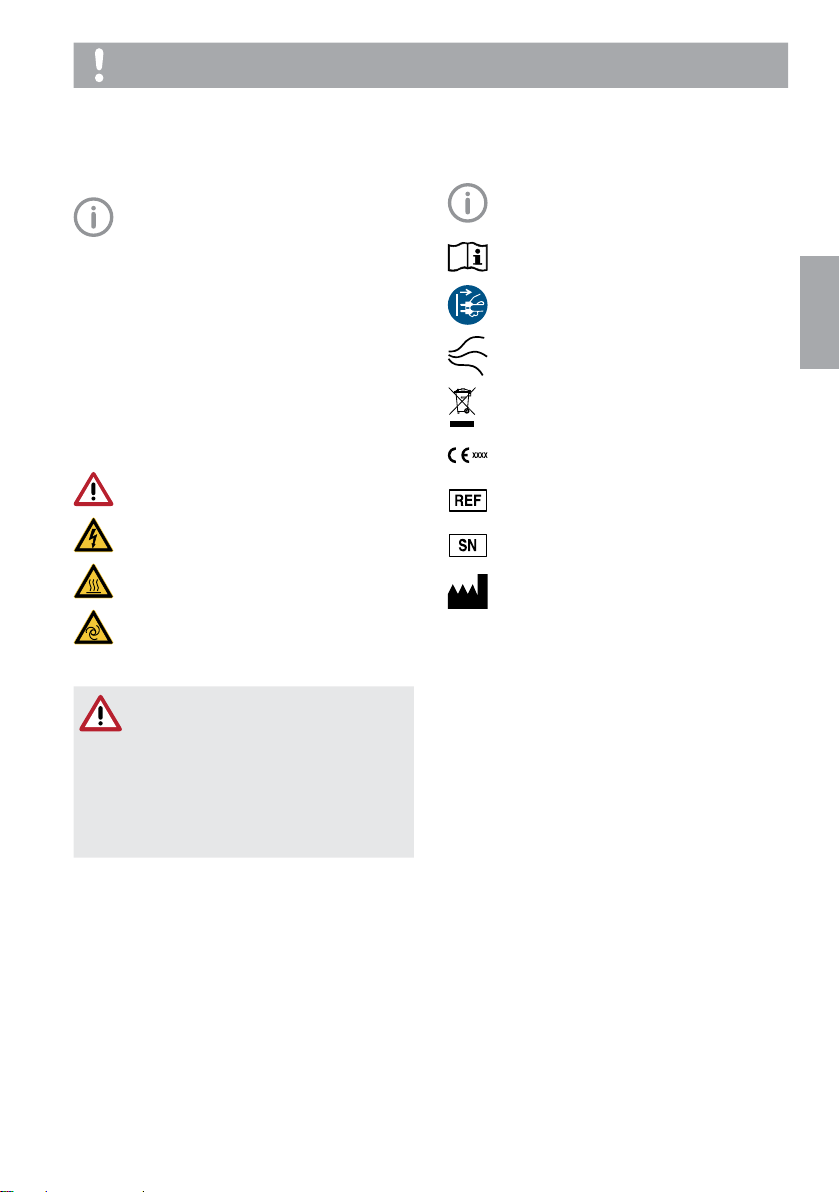
The following warning symbols are used:
General warning symbol
Warning – dangerous high voltage
Warning – hot surfaces
Warning - automatic start-up of the unit
The warnings are structured as follows:
SIGNAL WORD
Description of the type and source of
danger
Here you will find a description of the
possible consequences of ignoring the
warning�
i Follow these measures to avoid the
danger�
The signal word differentiates between four
levels of danger:
– DANGER
Immediate danger of severe injury or death
– WARNING
Possible danger of severe injury or death
– CAUTION
Risk of minor injuries
– ATTENTION
Risk of extensive material/property damage
Other symbols
These symbols are used in the document and
on or in the unit:
Note, e�g� specific instructions regarding
efficient and cost-effective use of the unit�
Observe the operating instructions�
Switch off and de-energise the unit
(e�g�unplug from mains)�
Air
Dispose of correctly in accordance with
EU Directive 2012/19/EU (WEEE)�
CE labelling with the number of the notified body
Order number
Serial number
Manufacturer
1.2 Copyright information
All circuits, processes, names, software programs and units mentioned in this document are
protected by copyright�
The Installation and Operating Instructions must
not be copied or reprinted, neither in full nor in
part, without written authorisation from Dürr
Dental�
EN
9000-610-45/30 1811V007 3
Page 6
Important information
2 Safety
Dürr Dental has designed and constructed this
unit so that when used properly and for the intended purpose it does not pose any danger to
people or property� Nevertheless, residual risks
can remain� You should therefore observe the
following notes�
2.1 Intended purpose
The compressor is designed to supply compressed air for dental applications�
EN
2.2 Intended use
The air supplied by the compressor is suitable
for driving dental tools�
The compressed air generated by the compressor is delivered to the pipeline system of the
surgery� The entire compressed air system must
be designed in such a way that the quality of the
compressed air generated by the compressor is
not impaired�
With this prerequisite, the air provided by the
compressor is also suitable for blow-drying
tooth preparations�
2.3 Improper use
Any other usage or usage beyond this scope is
deemed to be improper� The manufacturer accepts no liability for damages resulting from improper use� In these cases the user/operator will
bear the sole risk�
WARNING
Risk of explosion due to ignition of
combustible materials
i Do not operate the unit in any rooms
in which inflammable mixtures may be
present, e�g� in operating theatres�
i The unit is not suitable for providing an air
supply to respirators�
i This unit is not suitable for drawing up fluids
or for compressing aggressive gases or potentially explosive gases�
2.4 General safety information
i Always comply with the specifications of all
guidelines, laws, and other rules and regulations applicable at the site of operation for the
operation of this unit�
i Check the function and condition of the unit
prior to every use�
i Do not convert or modify the unit�
i Comply with the specifications of the Installa-
tion and Operating Instructions�
i The Installation and Operating Instructions
must be accessible to all operators of the unit
at all times�
2.5 Qualified personnel
Operation
Unit operating personnel must ensure safe and
correct handling based on their training and
knowledge�
i Instruct or have every user instructed in han-
dling the unit�
Installation and repairs
i Installation, readjustments, alterations, up-
grades and repairs must be carried out by
Dürr Dental or by qualified personnel specifi-
cally approved and authorized by Dürr Dental�
2.6 Electrical safety
i Observe and comply with all the relevant elec-
trical safety regulations when working on the
unit�
i Replace any damaged cables or plugs imme-
diately�
2.7 Only use original parts
i Only use Dürr Dental parts or accessories and
special accessories specifically approved by
Dürr Dental�
i Only use only original wear parts and replace-
ment parts�
Dürr Dental accepts no liability for damages or injury resulting from the use of
non-approved accessories or optional
accessories, or from the use of non-original wear parts or replacement parts�
The use of non-approved accessories,
optional accessories or non-genuine
wear parts / replacement parts (e�g�
mains cable) can have a negative effect
in terms of electrical safety and EMC�
4 9000-610-45/30 1811V007
Page 7
2.8 Transport
The original packaging provides optimum protection for the unit during transport�
If required, original packaging for the unit can be
ordered from Dürr Dental�
Dürr Dental will not accept any responsibility or liability for damage occurring during transport due to the use of incorrect
packaging, even where the unit is still under guarantee�
i Only transport the unit in its original packag-
ing�
i Keep the packing materials out of the reach of
children�
2.9 Disposal
Unit
The unit must be disposed of properly�
Within the European Union, the unit must
be disposed of in accordance with EU
Directive 2012/19/EU (WEEE)�
i If you have any questions about the correct
disposal of parts, please contact your dental
trade supplier�
Important information
EN
9000-610-45/30 1811V007 5
Page 8

Product description
3 Overview
3.1 Scope of delivery
The following items are included in the scope of
delivery (possible variations due to country-specific requirements and/or import regulations):
Duo 110V, 1~, with condensate separator � � � � � � � � � � � � � � � � � � � � � � 5250100004
Duo 110V, 1~, with membrane drying unit � � � � � � � � � � � � � � � � � � � � � 5252100001
EN
Duo 230V, 1~, with membrane drying unit � � � � � � � � � � � � � � � � � � � � � � � � 5252-01
Duo 230V, 1~, with membrane drying unit � � � � � � � � � � � � � � � � � � 5252-01/Service
Duo 400V, with membrane drying
unit � � � � � � � � � � � � � � � � � � � � � � � � � � � 5252-51
Trio 230V, 1~, with membrane drying
unit � � � � � � � � � � � � � � � � � � � � � � � � � � � 5352-01
Trio 230V, 1~, with membrane drying
unit � � � � � � � � � � � � � � � � � � � � � � � � 5352100001
Quattro 400V, with membrane drying
unit * � � � � � � � � � � � � � � � � � � � � � � � � � 5452-51
Quattro 400V, with membrane drying
unit * � � � � � � � � � � � � � � � � � � � � � � 5452100001
Duo Tandem 230V, 1~, with membrane drying unit � � � � � � � � � � � � � � � � 4252-01
Duo Tandem CAD/CAM 230V, 1~,
with membrane drying unit * � � � � 4252100004
Quattro Tandem 230V, 3~, with
membrane drying unit * � � � � � � � � � � � 4682-52
Quattro Tandem 400V, 3~, with
membrane drying unit * � � � � � � � � � � � 4682-53
– Fabric reinforced hose
– Hose nozzle
– Hose clamp
– Installation and operating instructions
– Appliance log book
– Collector tray
* with sterile filter
3.2 Optional accessories
The following items can optionally be used with
the unit; these items do not bear the CE mark:
Pressure reducer � � � � � � � � � � � � � � 6040-992-00
Sterile filter � � � � � � � � � � � � � � � � � � 1640-981-00
Wooden cabinet for for sound insula-
tion of Duo Compressors � � � � � � � 5150-500-00
Wooden cabinet for for sound insula-
tion of DuoTandem, Trio and Quattro
Compressors � � � � � � � � � � � � � � � � 4251-500-00
3.3 Wear parts and replacement parts
The following working parts must be replaced at
regular intervals (refer also to "Maintenance");
these articles do not bear the CE mark:
Air intake filter � � � � � � � � � � � � � � � � 0832-982-00
Fine filter � � � � � � � � � � � � � � � � � � � � 1610-121-00
Sterile filter � � � � � � � � � � � � � � � � � � 1640-981-00
Sintered filter � � � � � � � � � � � � � � � � � 1650-101-00
Fleece filter � � � � � � � � � � � � � � � � � �4280-982-00
Any repairs exceeding routine maintenance may only be carried out by qualified personnel or our service�
Information about replacement parts is
available from the portal for authorised
specialist dealers at:
www�duerrdental�net�
If the mains cable of this unit is damaged
it must only be replaced by an original
mains cable from the manufacturer�
6 9000-610-45/30 1811V007
Page 9
Product description
4 Technical data
4.1 Duo
Electrical data 5252-01
5252-01/Service
Rated voltage V 230 400
Mains frequency Hz 50 60 50 60
Nominal current at 8 bar (0�8 MPa) A 6�3 7�0 3�1 2�5
Motor protection switch, recommended
settings A 6�5 7�6 3�1 2�5
Speed rpm 1360 1600 1410 1690
Type of protection IP 24 IP 24
Mains fuses * A 10 10
Max� permissible mains impedance in ac-
cordance with EN61000-3-11 ** W ≤ 0�142 * Circuit breaker fuse characteristics B, C or D in acc� with EN60898-1
** Mains impedance at 6 switching cycles per hour� If the number of switching cycles per hour is
higher a lower mains impedance is required�
General technical data
Pressure tank volume l 20 20
Suction power, approx� l/min 210 255 210 255
Delivery at 5 bar (0�5 MPa) l/min 115 130 115 130
Pressure build-up phase 0 - 7�5 bar (0 -
0�75 MPa) approx� s 85 70 85 70
Duty cycle % 100 100
Start-up pressure bar (MPa) 6 (0�6) 6 (0�6)
Cut-off pressure bar (MPa) 7�8 (0�78) 7�8 (0�78)
Cut-off pressure, max� adjustable bar (MPa) 9�5 (0�95) 9�5 (0�95)
Safety valve, maximum permissible oper-
ating pressure bar (MPa) 10 (1) 10 (1)
Pressure dew point at 7bar (0�7MPa) * °C ≤+5 ≤+5
Dimensions (H x W x D) ** cm 69 x 49 x 46 69 x 49 x 46
Weight kg 47 47
Noise level ***
without sound insulation
with sound insulation
* Value determined at an ambient temperature of +40°C
** Values without accessories and add-on parts
*** Noise level in accordance with ENISO1680 "Airborne noise emissions"; measured in a room
with sound damping� The levels are average values with a tolerance of ± 1�5 dB(A)� Higher values may be obtained in rooms with reverberating sound characteristics�
dB(A)
dB(A)
66
55
69
61
5252-51
66
55
69
61
EN
Filter mesh size
Compressor air intake filter µm 3
Fine filter for membrane drying unit µm 3
Sterile filter for membrane drying unit µm 0�01
Sintered filter for membrane drying unit µm 35
9000-610-45/30 1811V007 7
Page 10

Product description
Ambient conditions during storage and transport
Temperature °C -10 to +55
Relative humidity % max� 95
Ambient conditions during operation
Temperature °C +10 to +40
Ideal temperature °C +10 to +25
Relative humidity % max� 95
Classification
Medical Devices Directive (93/42/EEC) Class IIa
EN
8 9000-610-45/30 1811V007
Page 11

Product description
4.2 Duo
Electrical data 5250100004 5252100001
Nominal voltage V 110-115 110-127 110-115 110-127
Electrical frequency Hz 50 60 50 60
Nominal current at 8 bar (0�8 MPa)
Motor protection switch, recommended
settings A 17 16 17 16
Speed
Type of protection IP 24 IP 24
Mains fusing * A 20 20
* Circuit breaker fuse characteristics B, C or D in acc� with EN60898-1
General technical data
Pressure tank volume l 20 20
Suction power, approx� l/min 210 255 210 255
Delivery at 5 bar (0�5 MPa) l/min 130 145 115 130
Pressure build-up phase 0 - 7�5 bar (0 -
0�75 MPa) approx� s 75 65 85 70
Duty cycle % 100 100
Start-up pressure bar (MPa) 6 (0�6) 6 (0�6)
Cut-off pressure bar (MPa) 7�8 (0�78) 7�8 (0�78)
Cut-off pressure, max� adjustable bar (MPa) 9�5 (0�95) 9�5 (0�95)
Safety valve, maximum permissible oper-
ating pressure bar (MPa) 10 (1) 10 (1)
Pressure dew point at 7bar (0�7MPa) * °C - ≤+5
Dimensions (H x W x D) ** cm 69 x 49 x 44 69 x 49 x 46
Weight kg 46 50
Noise level ***
without sound insulation
with sound insulation
* Value determined at an ambient temperature of +40°C
** Values without accessories and add-on parts
*** Noise level in accordance with ENISO1680 "Airborne noise emissions"; measured in a room
with sound damping� The levels are average values with a tolerance of ± 1�5 dB(A)� Higher values may be obtained in rooms with reverberating sound characteristics�
A
rpm
dB(A)
dB(A)
14�1-
14�6
1350-
1370
66
55
14�2-
13�3
1560-
1640
69
61
14�1-
14�6
1350-
1370
66
55
14�2-
13�3
1560-
1640
69
61
EN
Filter mesh size
Compressor air intake filter µm 3
Fine filter for membrane drying unit µm 3
Sterile filter for membrane drying unit µm 0�01
Sintered filter for membrane drying unit µm 35
Fleece filter for automatic condensate
drain µm 5
Ambient conditions during storage and transport
Temperature °C -10 to +55
Relative humidity % max� 95
9000-610-45/30 1811V007 9
Page 12

Product description
Ambient conditions during operation
Temperature °C +10 to +40
Ideal temperature °C +10 to +25
Relative humidity % max� 95
Classification
Medical Devices Directive (93/42/EEC) Class IIa
EN
10 9000-610-45/30 1811V007
Page 13

Product description
4.3 Trio
Electrical data 5352-01
5352100001
Rated voltage V 230
Mains frequency Hz 50
Nominal current at 8 bar (0�8 MPa) A 8�6
Motor protection switch, recommended
settings A 8�6
Speed rpm 1350
Type of protection IP 24
Mains fuses * A 10
Max� permissible mains impedance in ac-
cordance with EN61000-3-11 W ≤ 0�078
* Circuit breaker fuse characteristics B, C or D in acc� with EN60898-1
General technical data
Pressure tank volume l 50
Suction power, approx� l 315
Delivery at 5 bar (0�5 MPa) l/min 160
Pressure build-up phase 0 - 7�5 bar (0 -
0�75 MPa) c� s 140
Duty cycle % 100
Start-up pressure bar (MPa) 6 (0�6)
Cut-off pressure bar (MPa) 7�8 (0�78)
Cut-off pressure, max� adjustable bar (MPa) 9�5 (0�95)
Safety valve, maximum permissible oper-
ating pressure bar (MPa) 10 (1)
Pressure dew point at 7bar (0�7MPa) * °C ≤+5
Dimensions (H x W x D) ** cm 76 x 74 x 52
Weight kg 70
Noise level ***
without sound insulation
with sound insulation
* Value determined at an ambient temperature of +40°C
** Values without accessories and add-on parts
*** Noise level in accordance with ENISO1680 "Airborne noise emissions"; measured in a room
with sound damping� The levels are average values with a tolerance of ± 1�5 dB(A)� Higher values may be obtained in rooms with reverberating sound characteristics�
dB(A)
dB(A)
69
54
EN
Filter mesh size
Compressor air intake filter µm 3
Fine filter for membrane drying unit µm 3
Sterile filter for membrane drying unit µm 0�01
Sintered filter for membrane drying unit µm 35
Ambient conditions during storage and transport
Temperature °C -10 to +55
Relative humidity % max� 95
9000-610-45/30 1811V007 11
Page 14

Product description
Ambient conditions during operation
Temperature °C +10 to +40
Ideal temperature °C +10 to +25
Relative humidity % max� 95
Classification
Medical Devices Directive (93/42/EEC) Class IIa
EN
12 9000-610-45/30 1811V007
Page 15

Product description
4.4 Quattro
Electrical data 5452-51
5452100001
Rated voltage V 400
Mains frequency Hz 50 60
Nominal current at 8 bar (0�8 MPa) A 4�4 4�8
Motor protection switch, recommended
settings A 5�0 5�0
Speed rpm 1440 1700
Type of protection IP 24
Mains fuses * A 10
Max� permissible mains impedance in ac-
cordance with EN61000-3-11 ** W ≤ 0�24
* Circuit breaker fuse characteristics B, C or D in acc� with EN60898-1
** Mains impedance at 6 switching cycles per hour� If the number of switching cycles per hour is
higher a lower mains impedance is required�
General technical data
Pressure tank volume l 50
Suction power, approx� l/min 420 505
Delivery at 5 bar (0�5 MPa) l/min 215 240
Pressure build-up phase 0 - 7�5 bar (0 -
0�75 MPa) c� s 105 95
Duty cycle % 100
Start-up pressure bar (MPa) 6 (0�6)
Cut-off pressure bar (MPa) 7�8 (0�78)
Cut-off pressure, max� adjustable bar (MPa) 9�5 (0�95)
Safety valve, maximum permissible oper-
ating pressure bar (MPa) 10 (1)
Pressure dew point at 7bar (0�7MPa) * °C ≤+5
Dimensions (H x W x D) ** cm 76 x 74 x 52
Weight kg 82
Noise level ***
without sound insulation
with sound insulation
* Value determined at an ambient temperature of +40°C
** Values without accessories and add-on parts
*** Noise level in accordance with ENISO1680 "Airborne noise emissions"; measured in a room
with sound damping� The levels are average values with a tolerance of ± 1�5 dB(A)� Higher values may be obtained in rooms with reverberating sound characteristics�
dB(A)
dB(A)
70
54
75
55
EN
Filter mesh size
Compressor air intake filter µm 3
Fine filter for membrane drying unit µm 3
Sterile filter for membrane drying unit µm 0�01
Sintered filter for membrane drying unit µm 35
9000-610-45/30 1811V007 13
Page 16

Product description
Ambient conditions during storage and transport
Temperature °C -10 to +55
Relative humidity % max� 95
Ambient conditions during operation
Temperature °C +10 to +40
Ideal temperature °C +10 to +25
Relative humidity % max� 95
Classification
Medical Devices Directive (93/42/EEC) Class IIa
EN
14 9000-610-45/30 1811V007
Page 17

Product description
4.5 Duo Tandem
Electrical data 4252-01 4252100004
Rated voltage V 230 230
Mains frequency Hz 50 60 50 60
Nominal current at 8 bar (0�8 MPa) A 12�2 14�3 12�2 14�3
Motor protection switch, recommended
settings A 6�5 7�6 6�5 7�6
Speed rpm 1410 1690 1410 1690
Type of protection IP 24 IP 24
Mains fuses * A 20 20
* Circuit breaker fuse characteristics B, C or D in acc� with EN60898-1
General technical data
Pressure tank volume l 50 50
Suction power, approx� l/min 420 505 420 505
Delivery at 5 bar (0�5 MPa) l/min 230 260 230 260
Pressure build-up phase 0 - 7�5 bar (0 -
0�75 MPa) c� s 115 100 115 100
Duty cycle % 100 100
Start-up pressure bar (MPa) 6 (0�6) > 7 (0�7)
Cut-off pressure bar (MPa) 7�8 (0�78) 9 (0�9)
Cut-off pressure, max� adjustable bar (MPa) 9�5 (0�95) 9�5 (0�95)
Safety valve, maximum permissible oper-
ating pressure bar (MPa) 10 (1) 10 (1)
Pressure dew point at 7bar (0�7MPa) * °C ≤+5 ≤+5 **
Dimensions (H x W x D) *** cm 76 x 79 x 52 76 x 79 x 52
Weight kg 90 90
Noise level ****
without sound insulation
with sound insulation
* Value determined at an ambient temperature of +40°C
** With ORANGE rinsing nozzle
*** Values without accessories and add-on parts
**** Noise level in accordance with ENISO1680 "Airborne noise emissions"; measured in a room
with sound damping� The levels are average values with a tolerance of ± 1�5 dB(A)� Higher values may be obtained in rooms with reverberating sound characteristics�
dB(A)
dB(A)
69
55
74
56
69
55
EN
74
56
Filter mesh size
Compressor air intake filter µm 3
Sterile filter for membrane drying unit µm 0�01
Sintered filter for membrane drying unit µm 35
Ambient conditions during storage and transport
Temperature °C -10 to +55
Relative humidity % max� 95
9000-610-45/30 1811V007 15
Page 18

Product description
Ambient conditions during operation
Temperature °C +10 to +40
Ideal temperature °C +10 to +25
Relative humidity % max� 95
Classification
Medical Devices Directive (93/42/EEC) Class IIa
EN
16 9000-610-45/30 1811V007
Page 19

Product description
4.6 Quattro Tandem
Electrical data 4682-52 4682-53
Rated voltage V 230 / 3~ 400 / 3~
Mains frequency Hz 50 60 50 60
Nominal current at 8 bar (0�8 MPa) A 15�2 16�6 8�8 9�6
Motor protection switch, recommended
settings A 9 9 5 5
Speed rpm 1440 1700 1440 1700
Type of protection IP 24 IP 24
Mains fuses * A 20 20
Max� permissible mains impedance in ac-
cordance with EN61000-3-11 ** W ≤0�445 ≤0�18
* Circuit breaker fuse characteristics B, C or D in acc� with EN60898-1
** Mains impedance at 6 switching cycles per hour� If the number of switching cycles per hour is
higher a lower mains impedance is required�
General technical data
Pressure tank volume l 90 90
Suction power, approx� l/min 845 1010 845 1010
Delivery at 5 bar (0�5 MPa) l/min 430 480 430 480
Pressure build-up phase 0 - 7�5 bar (0 -
0�75 MPa) c� s 90 80 90 80
Duty cycle % 100 100
Start-up pressure bar (MPa) 6�5 (0�65) 6�5 (0�65)
Cut-off pressure bar (MPa) 8�5 (0�85) 8�5 (0�85)
Cut-off pressure, max� adjustable bar (MPa) 9�5 (0�95) 9�5 (0�95)
Safety valve, maximum permissible oper-
ating pressure bar (MPa) 10 (1) 10 (1)
Pressure dew point at 7bar (0�7MPa) * °C ≤+5 ≤+5
Dimensions (H x W x D) ** cm 76 x 102 x 62 76 x 102 x 62
Weight kg 143 143
Noise level *** dB(A) 69 74 69 74
* Value determined at an ambient temperature of +40°C
** Values without accessories and add-on parts
*** Noise level in accordance with ENISO1680 "Airborne noise emissions"; measured in a room
with sound damping� The levels are average values with a tolerance of ± 1�5 dB(A)� Higher values may be obtained in rooms with reverberating sound characteristics�
EN
Filter mesh size
Compressor air intake filter µm 3
Fine filter for membrane drying unit µm 3
Sterile filter for membrane drying unit µm 0�01
Sintered filter for membrane drying unit µm 35
Ambient conditions during storage and transport
Temperature °C -10 to +55
Relative humidity % max� 95
9000-610-45/30 1811V007 17
Page 20

Product description
Ambient conditions during operation
Temperature °C +10 to +40
Ideal temperature °C +10 to +25
Relative humidity % max� 95
Classification
Medical Devices Directive (93/42/EEC) Class IIa
EN
18 9000-610-45/30 1811V007
Page 21

Product description
1
1
b
a
1
4.7 Distance between rubber feet
Distances between the rubber feet for different
pressure vessel volumes:
a (cm) b (cm)
20 l 23 27
50 l 32�5 45
90 l 32�5 59
4.8 Type plate
Complete system
The type plate of the overall system is located
on the mounting plate for the compressor unit�
Compressor unit
The type plate of the compressor unit is located
on the crankcase below the cylinder�
EN
1 Compressor unit type plate
Membrane drying unit
The type plate of the membrane drying unit is
located on the side of the membrane drying
unit�
1 Membrane drying unit type plate
1 Type plate for the complete system
9000-610-45/30 1811V007 19
Page 22

Product description
1
2
34
14
15
16
17
18
19
5 Operation
5.1 Duo with membrane drying unit
13
6
EN
7
5
1 Compressor unit
2 Air intake filter
3 Pressure tank
4 Condensate drain valve
5 Non-return valve
6 Pressure switch
7 Safety valve
8 Pressure gauge/display
9 Pressure relief valve
10 Cooler with ventilating fan
11 Membrane drying unit
12 Pressure limiting valve
13 Humidity display
14 Fine or sterile filter
15 Rinsing nozzle
16 Membrane fibre
17 Sinter filter
18 Water collection chamber
19 Water outlet valve
The compressor unit draws in atmospheric air and compresses it without oil� It then transports the oilfree compressed air to the membrane drying unit� The cooler and the membrane dryer extract moisture from the compressed air� The oil-free, hygienic and dry air is stored in the pressure tank ready for
use in connected devices�
20 9000-610-45/30 1811V007
9
8
10 11
12
Page 23

Assembly
6 Requirements
The unit must not be set up or operated
within the vicinity of the patients (within a
radius of 1�5m)�
The unit can be installed either at the same level
as the surgery room or on a floor below (e�g�cellar)�
Due of the amount of noise generated, we recommend that the unit is installed in an adjoining
room�
The pipes provided on-site must at least meet
the country-specific requirements for drinking
water�
Further information can be found in our
separate planning information leaflet for
compressed air�
6.1 Installation/setup room
The room chosen for set up must fulfil the following requirements:
– Closed, dry, well-ventilated room
– Should not be a room made for another pur-
pose (e�g� boiler room or wet cell)
– If the unit is installed in a machine room, e�g�in
an adjoining room or cellar, the requirements
set out in ISO-TS22595 must be complied
with�
NOTICE
Risk of overheating due to insufficient ventilation
The units generates heat� Possibility of
heat damage and/or reduced service life
of the unit�
i Do not cover the unit�
i Install a fan for auxiliary ventilation in
rooms where ambient temperatures
exceed ≥40 °C while the unit is in operation�
≥ 40 °C
EN
6.2 Setup
The following conditions must be taken into account for installation:
The air is filtered when it is sucked in�
This does not alter the composition of
the air� For this reason it is important to
keep the sucked-in air free of harmful
substances (e�g�do not suck in exhaust
gases or contaminated exhaust air)�
– Clean, level and sufficiently stable subsurface
(note the weight of the unit)�
– Type plate easy to read�
– Unit easy to access for operation and main-
tenance�
– Easy-to-access power outlet to which the unit
is connected�
– Maintain sufficient distance to the wall (at least
20cm)�
– The compressed air pipe should be routed as
closely as possible to the place of installation
(note the length of the hose supplied)�
9000-610-45/30 1811V007 21
Page 24

Assembly
6.3 Information about electrical connections
i Ensure that electrical connections to the
mains power supply are carried out in accordance with current valid national and local regulations and standards governing the installation of low voltage units in medical facilities�
i Install an all-pole disconnect switch with a
contact opening width of at least 3mm in the
electrical connection to the mains power supply�
i Observe the current consumption of the de-
vices that are to be connected�
EN
7 Transport
WARNING
Risk of explosion of the pressure
tank and pressure hoses
i The pressure tank and the pressure
hoses must be vented before they are
stored or transported�
i Protect the unit against moisture, dirt and ex-
treme temperatures during transport ("4 Technical data")�
i Always make sure that the condensate collec-
tor chamber is empty before transporting the
unit ("15 Taking out of use")�
i Always transport the unit in an upright posi-
tion�
i Only transport the unit using the transport
handles provided�
i Check the unit for transport damage�
22 9000-610-45/30 1811V007
Page 25

Assembly
1 21
8 Quattro Tandem assembly
and installation
For weight reasons the unit is not supplied fully
assembled� Instead, the compressor units are
installed at the site of use�
i Set up the tank at the planned installation site�
i Screw the vibration reducers into the motor
mounting�
i Place the compressor units on the vibration
reducers�
i Attach the compressor units with the lock
washers and nuts�
9 Installation
9.1 Remove the transport locks
For safe transport, the unit is secured with foam
padding blocks and a transport strap�
i Cut and remove the transport strap�
i Remove the foam padding blocks�
9.2 Establishing the compressed air connection
The supplied flexible pressure hose between the pipe system and the compressor prevents vibrations from being transmitted and thus reduces noise� This ensures safe and reliable operation�
i Connect the pre-assembled connecting
sleeve of the pressure hose to the quick release coupling�
i Measure the required length of the pressure
hose and shorten if necessary�
i Press a fitting hose connector (not included in
the scope of delivery) onto the pressure hose
(internal diameter 10mm) and secure it with a
hose clip�
i Connect the connecting sleeve of the pres-
sure hose to the compressed air tube�
EN
i Insert the compressed air connections from
the compressor unit into the cooler�
i Plug in the electrical connections of the com-
pressor units at the control box� Connect the
left-hand unit to the left-hand plug connector
and the right-hand unit to the right-hand plug
connector�
1 Compressed air connections
2 Electrical connections
9000-610-45/30 1811V007 23
Page 26

Assembly
i Place a collector tray under the condensate
separator or the membrane drying unit (depending on type)�
EN
Figure 1: Duo with condensate separator
9.3 Pressure reducer
i Insert the pressure reducer into the quick re-
lease coupling�
i Insert the pressure hose into the quick release
coupling on the pressure reducer�
9.4 Place a collector tray underneath
During operation, condensation water on the
unit is continuously separated and automatically
drained� In order to prevent water damage due
to drained condensation, it is collected in the
collector tray�
As an option, the condensation can also
be drained through a hose into the waste
water system� Always comply with applicable national regulations for waste water
systems�
9.5 Electrical connections
Safety when making electrical connections
The unit has no main power switch� For
this reason it is important that the unit is
be set up in such a way that the plug can
be easily accessed and unplugged if required�
i The unit must only be connected to a correct-
ly installed power outlet�
i Make sure that none of the electrical cables
leading to the unit are under any mechanical
tension�
i Before initial start-up check that the mains
supply voltage and the voltage stated on the
type plate match (see also "4� Technical
data")�
Establishing the electrical connections
DANGER
Risk of electric shock due to defective mains cable
i Mains cables must not be allowed to
come into contact with any hot surfaces on the unit�
i Connect the mains plug to an earthed power
outlet�
24 9000-610-45/30 1811V007
Page 27

Assembly
1
2
10 Commissioning
In many countries technical medical
products and electrical devices are subject to regular checks at set intervals� The
owner must be instructed accordingly�
i Turn on the unit power switch or the main sur-
gery switch�
i Carry out an electrical safety check in accord-
ance with applicable local regulations (e�g� the
German Ordinance on the Installation, Operation and Use of Medical Devices / Medizinprodukte-Betreiberverordnung) and record the results as appropriate, e�g� in the technical log
book�
10.1 Check the motor protection switch
After installation of the compressor the motor
protection switch needs to be checked and adjusted if it is not set up correctly� It was set to
the recommended setting in the factory (see "4
Technical data")�
i Switch on the unit at the pressure switch by
rotating the switch to the "I" position�
10.2 Checking the switch-on/cut-off pressure
The switch-on/cut-off pressure is preset at the
factory� Check the setting during first start-up�
i Switch on the unit at the pressure switch by
rotating it to the position "I AUTO"�
i Read off the cut-off pressure from the pres-
sure gauge�
i Drain the air from the pressure tank (e�g� via
the condensate drain valve) until the unit starts
and then close it again�
i Read off the pressure when the unit switches
on�
If the readings deviate from the values preset
at the factory, adjust the pressure switch to
the factory settings�
EN
1 On/off switch
2 Pressure gauge
i Measure the maximum current consumption
(this is the value just before the cut-off pressure is reached)�
If the reading deviates from the recommended setting then the motor protection switch
needs to be adjusted (see "11�2 Adjusting
the motor protection switch")�
9000-610-45/30 1811V007 25
Page 28

Assembly
10.3 Checking the safety valve
Correct operation of the safety valve must be
checked when the unit is started up for the first
time and again subsequently at regular intervals�
At the factory, the safety valve is set to
10 bar (1 hPa), checked and stamped�
DANGER
Risk of explosion of the pressure
tank and pressure hoses
i Do not change the safety valve set-
EN
tings�
i Switch on the unit at the pressure switch and
fill the pressure tank to the cut-off pressure�
WARNING
Risk of damage to the safety valve
Risk of explosion of the pressure tank
and pressure hoses due to a defective
safety valve
i Do not use the safety valve to vent the
pressure tank�
i To open, rotate the screw of the safety valve
anti-clockwise until the valve begins to blow
off� Only allow the safety valve to blow for a
short period�
i Then turn the screw clockwise as far as it will
go to close the valve� The valve must now be
closed again�
10.4 Draining the condensation water
Temperature changes during transport may
cause condensation water to accumulate in the
pressure tank� The condensation water can only
be drained from the pressurised pressure tank�
i Switch on the unit at the pressure switch and
wait until the cut-off pressure is reached�
Pressure tank
i At maximum tank pressure, open the conden-
sate drain valve�
i Close the condensate drain valve as soon as
all of the accumulated condensation water
has been blown out�
Condensate separator
i At maximum tank pressure, unscrew the bot-
tom screw fitting on the condensate separator�
26 9000-610-45/30 1811V007
Page 29

Assembly
+
1.
i Close the screw connection as soon as all of
the condensate has been blown out�
Figure 2: Duo with condensate separator
10.5 Adjusting the rate of flow at the pressure reducer
The pressure reducer regulates the rate of flow
in the system and adjusts it to the required operating pressure� In order to adjust the rate of
flow air needs to be extracted via a consumer�
i Activate the air consumer unit�
i Lift the rotary knob at the pressure reducer�
i Adjust the rate of flow via the rotary knob�
Turn the knob in the "+" direction to increase
the rate of flow�
Turn the knob in the "-" direction to reduce the
rate of flow�
i Press in the rotary knob until it engages and
cannot be adjusted�
2.
11 Adjustment options
11.1 Adjusting the pressure switch
WARNING
Risk of explosion of the pressure
vessel
The pressure vessels used in the compressors are designed to withstand
continuous pressure changes of 2bar
and can be used continuously under
these pressure changes�
i For load changes > 2bar (max� per-
missible: 3bar), comply with the maximum load change cycles specified in
the operating instructions of the pressure vessel�
DANGER
Exposed live parts
Risk of electric shock due to live parts
i Disconnect all power from the device�
i Use insulated tools�
i Do not touch live parts�
The cut-off pressure must be at least 0�5
bar (0�05 hPa) below the maximum pressure of 10 bar (1 hPa) of the safety valve�
Otherwise the safety valve can open too
early, which will prevent the compressor
unit from attaining the cut-off pressure,
as a result of which it will run continuously� The maximum permitted pressure is
marked by a red line on the attached
pressure gauge�
If the read-off values differ from the factory settings or if other settings are required, the cut-off
pressure of the compressor can be adjusted at
the adjusting screw on the pressure switch� The
start-up pressure can then be adjusted using
the pressure difference Δp�
i Take off the pressure switch cover�
i Adjust the cut-off pressure P at the adjust-
ment screw�
The cut-off pressure increases in the "+"
arrow direction and decreases in the "-" arrow
direction� The pressure difference ∆p is also
influenced by this adjustment�
EN
-
3.
9000-610-45/30 1811V007 27
Page 30

Assembly
i Adjust the start-up pressure via the pressure
difference ∆p at the adjustment screw�
The pressure difference increases in the "+"
arrow direction and decreases in the "-" arrow
direction�
The maximum permissible pressure difference
must not be set to more than 3bar�
EN
11.2 Adjusting the motor protection switch
Pressure switch
i Take off the pressure switch cover�
i Adjust the motor protection switch with the
adjustment screw to the measured value (observe the range between the MIN permissible
setting and the MAX permissible setting of the
motor protection switch, see "4 Technical
data")�
Controller
i Remove the cover from the controller�
i Adjust the motor protection switch with the
adjustment screw to the measured value (observe the range between the MIN permissible
setting and the MAX permissible setting of the
motor protection switch, see "4 Technical
data")�
28 9000-610-45/30 1811V007
Page 31

12 Circuit diagrams
X1 M1
1~
LP
X1 M1
1~
12.1 1/N/PE AC 110-127 V, 230 V layout
135
P>
I >
I >I >
Q1
246
EN
X1 Mains connection L/N/PE AC 230V
Q1 Pressure switch
M1 Compressor unit
M2 Fan motor, membrane drying unit
M3 Fan motor, noise insulation (if required)
12.2 3/N/PE AC 400 V layout
Z2/U1U2Z1
M
1~
Assembly
PE
EN
PE
1~
M2 M3
X1 Mains connection 3/N/PE AC 400V
Q1 Pressure switch
M1 Compressor unit
M2 Fan motor, membrane drying unit
M3 Fan motor, noise insulation (if required)
9000-610-45/30 1811V007 29
L1 L2 L3 PEN
135
P>
I >
I >I >
Q1
246
3~
PE
N
1~
M2 M3
Page 32

Assembly
Q1
M1
M2 M5
12.3 1/N/PE AC 230 V layout, Duo Tandem
A1
246
135
P>
333 222 111 777
X1 X4
PE PE PE
PE
2211
EN
L1/PE/N
X5
X5 Mains connection L/N/PE AC 230V
Q1 Pressure switch
A1 Controller
X1 Distributor rail
X2 Plug connection of compressor unit
X3 Plug connection of compressor unit
X4 Distributor rail
Q1�2 Motor protection switch
Q1�3 Motor protection switch
M1 Compressor unit
M2 Compressor unit
M5 Fan motor, membrane drying unit
13
21
Q1.2 Q1.3
246
14 22
I>
I>
I>
135
X2
64
31
PE
3~ 1~
X3
246
I>
135
13
21
14 22
I>
I>
31
64
PE
1~
30 9000-610-45/30 1811V007
Page 33

12.4 3/N/PE AC 230 V layout, Quattro Tandem
Q1
M1X1 M2 M3 M4
A1
246
135
P>
444555
X5 X4
PE
Assembly
PE
2211
EN
Q2
I> I>
X2
L1/L2/L3/N/PE
X1 Mains connection 3/N/PE AC 230V
Q1 Pressure switch
A1 Control box
X2 Plug connection of compressor unit
X3 Plug connection of compressor unit
X4 Distributor rail
X5 Distributor rail
Q2 Motor protection switch
Q3 Motor protection switch
K1 Time-lag relay
M1 Compressor unit
M2 Compressor unit
M3 Fan motor, membrane drying unit
M4 Fan motor, membrane drying unit
246
135
321
3~
14 22
13 21
I>
PE
64
135
A1
K1
A2
246
Q3
X3
I> I>
246
135
321
3~
14 22
13 21
I>
PE
64
1~
1~
9000-610-45/30 1811V007 31
Page 34

Usage
13 Operation
Prior to working on the device or in case
of danger, disconnect it from the mains
(e�g� pull the mains plug)�
13.1 Switching the unit on/off
i Switch on the unit at the pressure switch by
rotating it to the position "I AUTO"�
The compressor unit will start up automati-
EN
cally and fill the pressure tank� When the
cut-off pressure is reached the compressor
unit switches itself off automatically�
i The unit can be switched off when required by
turning the pressure switch to the "0 OFF"
setting�
32 9000-610-45/30 1811V007
Page 35

14 Maintenance
Prior to working on the device or in case of danger, disconnect it from the mains (e�g� pull the
mains plug)�
CAUTION
Risk of infection due to burst filters
Particles enter the compressed air network and can therefore enter the mouth of the patient�
i Replace filters in accordance with the maintenance schedule�
14.1 Maintenance schedule
Usage
NOTICE
Risk of damage to the unit due to blocked filters
Continuous running due to reduced delivery� Damage to the unit due to burst filters�
i Replace filters in accordance with the maintenance schedule�
Unit with condensate separator
Maintenance
interval
At regular intervals i Empty the collector tray under the condensate separator (the interval may
Annually i Replace the air intake filter in the compressor unit – every six months if the
Every 4 years i Replace the vibration dampers�
In accordance
with national law
Unit with membrane-drying unit
Maintenance
interval
At regular intervals i Empty the collector tray under the membrane drying unit (the interval may
Annually i Replace the air intake filter in the compressor unit – every six months if the
Every 4 years i Replace the vibration dampers�
In accordance
with national law
Maintenance work
vary depending on the ambient conditions and method of working; empty it
daily if the humidity is high)�
concentration of dust is high�
i Replace the fleece filter in the condensate separator�
i Check the safety valve�
i Carry out recurring safety inspections (e�g� pressure tank inspections, electri-
cal safety inspections) in accordance with applicable national laws�
Maintenance work
vary depending on the ambient conditions and method of working; empty it
daily if the humidity is high)�
concentration of dust is high�
i Replace the fine or sterile filter�
i Replace the sintered filter�
i Check the safety valve�
i Carry out recurring safety inspections (e�g� pressure tank inspections, electri-
cal safety inspections) in accordance with applicable national laws�
EN
9000-610-45/30 1811V007 33
Page 36

Usage
14.2 Replacing the air intake filter
i Switch off the compressor at the pressure
switch�
i Pull off the noise reducer from the air intake fil-
ter�
i Remove the air intake filter�
i Insert a new air intake filter�
i Push on the noise reducer onto the air intake
filter�
1
EN
1 Noise reducer
2 Air intake filter
2
14.3 Replacing the filter in the condensate separator
i Switch off the compressor at the pressure
switch�
i Unplug the mains plug�
i Release the pressure from the pressure tank�
To do this, unscrew the bottom screw fitting
on the condensate separator�
i Push the slider of the housing locking mecha-
nism downwards�
i Open the housing by rotating and pulling
downwards�
i Rotate the black filter mount (approx� 45°)�
i Remove the filter mount upwards from the
water accumulation chamber�
45°
i Unscrew the rejected part downwards�
i Remove the filter element�
34 9000-610-45/30 1811V007
Page 37

Usage
i Replace the filter element�
i Re-assemble the condensate separator�
During assembly pay attention to detents and markings�
14.4 Replacing the filter of the membrane drying unit
Fine/sterile filter
i Switch off the unit�
i Disconnect all power from the device�
i Unscrew and remove the filter cover�
i Remove the fine/sterile filter�
i Insert the new fine/sterile filter�
i Replace the filter cover and close�
Sintered filter
i Unscrew and remove the filter housing�
i Remove the sintered filter�
i Insert a new sintered filter�
i Replace the filter housing and close�
EN
9000-610-45/30 1811V007 35
Page 38

Usage
15 Taking out of use
15.1 Taking the unit out of use
If the unit is not to be used for a prolonged period of time, we recommend that it is properly
shut down and taken out of use�
To do this, the accumulated condensation water
from the unit must be drained�
i Switch on the unit and wait until the cut-off
pressure is reached�
Condensate separator
i Open the condensate drain valve on the con-
EN
densate separator�
Once the start-up pressure has been
reached the compressor will switch on�
i With the compressor switched on and the
condensate drain valve open, wait until no
more condensation water emerges�
i Switch off the unit�
i Close the condensate drain valve when no
more air emerges�
i Disconnect the mains plug�
i Disconnect the compressed air connection on
the quick release coupling�
Membrane drying unit
i While the compressor unit is running, open
the condensate drain valve on the membrane
drying unit� When no more condensation water emerges, close the condensate drain
valve�
i Switch off the device�
Pressure tank
i Open the condensate drain valve�
Once the start-up pressure has been
reached the compressor will switch on�
i With the compressor switched on and the
condensate drain valve open, wait until no
more condensation water emerges�
i Switch off the unit�
i Close the condensate drain valve when no
more air escapes�
i Disconnect all power from the device�
Figure 3: Duo with condensate separator
36 9000-610-45/30 1811V007
Page 39

i Disconnect the compressed air connection on
the quick release coupling�
15.2 Storage of the unit
WARNING
Risk of explosion of the pressure
tank and pressure hoses
i The pressure tank and the pressure
hoses must be vented before they are
stored or transported�
i Protect the unit against moisture, dirt and ex-
treme temperatures during transport (refer to
the section on "Ambient conditions")�
i Only store the unit when it has been com-
pletely emptied�
Usage
EN
9000-610-45/30 1811V007 37
Page 40

Troubleshooting
16 Tips for operators and service technicians
Any repairs exceeding routine maintenance may only be carried out by qualified personnel or
our service�
Prior to working on the device or in case of danger, disconnect it from the mains (e�g� pull the
mains plug)�
Fault Probable cause Solution
Compressor will not start No mains voltage� On three-
EN
phase units: one phase is missing
or not connected (generation of a
humming sound)
i Check the mains fuse; if neces-
sary, switch the circuit breaker
back on� If the fuse is defective,
replace it� Check the mains
supply voltage�
Humming noise from
motor
Compressor does not
switch off
Compressor switches on
from time to time even
though no air is being taken for a consumer unit
Undervoltage or overvoltage i Measure the supply voltage; call
Relief valve defective, unit starts
against pressure
Mechanical sluggishness of a unit
(piston is stuck); motor protection
has tripped
Motor capacitor is defective i Replace the capacitor�
Wrong size of compressor, air intake too high
Leak in the compressed air system
Defective membrane drying unit i Check whether there is an
Leak in the compressed air system
an electrician if necessary�
i Check that the relief valve
discharges after switching off
the unit� Free up the movement
of the relief valve operable or
replace it�
i Switch the unit off and discon-
nect it from the power supply,
remove the fan hood from the
blocked compressor and turn
the fan wheel� If this is not
possible, replace the piston and
cylinder or the complete unit�
i Calculate the air requirement
(this can be up to 50 l/min per
treatment unit), if necessary
install a larger compressor�
i Locate and seal the leak�
i Inform a service technician�
increased flow of air at the filter
housing of the membrane drying
unit (bottom), if necessary replace the membrane drying unit�
i Locate and seal the leak�
i Inform a service technician�
38 9000-610-45/30 1811V007
Page 41

Fault Probable cause Solution
Knocking or loud noises
on the compressor
Reduced delivery. Compressor needs longer to
charge the pressure tank,
see charging times in "4
Technical data"
Water dripping from air
consumers
Compressor unit defective i Disconnect all power from the
Air intake filter dirty i Replace the air intake filter at
Defective membrane drying unit i Replace the membrane drying
Maintenance work not carried out
regularly (without membrane drying unit)
Defective membrane drying unit i Inform a service technician�
device and inform a service
technician�
least 1x per year� The air intake
filter must never be cleaned�
unit�
i Inform a Service Technician�
i Regularly drain the condensation
water from the pressure tank,
see "10�4 Draining the condensation water"
Troubleshooting
EN
9000-610-45/30 1811V007 39
Page 42

Page 43

Page 44

Hersteller/Manufacturer:
DÜRR DENTAL SE
Höpfigheimer Str. 17
74321 Bietigheim-Bissingen
Germany
Fon: +49 7142 705-0
www.duerrdental.com
info@duerrdental.com
 Loading...