

Page 1
Installation Instructions
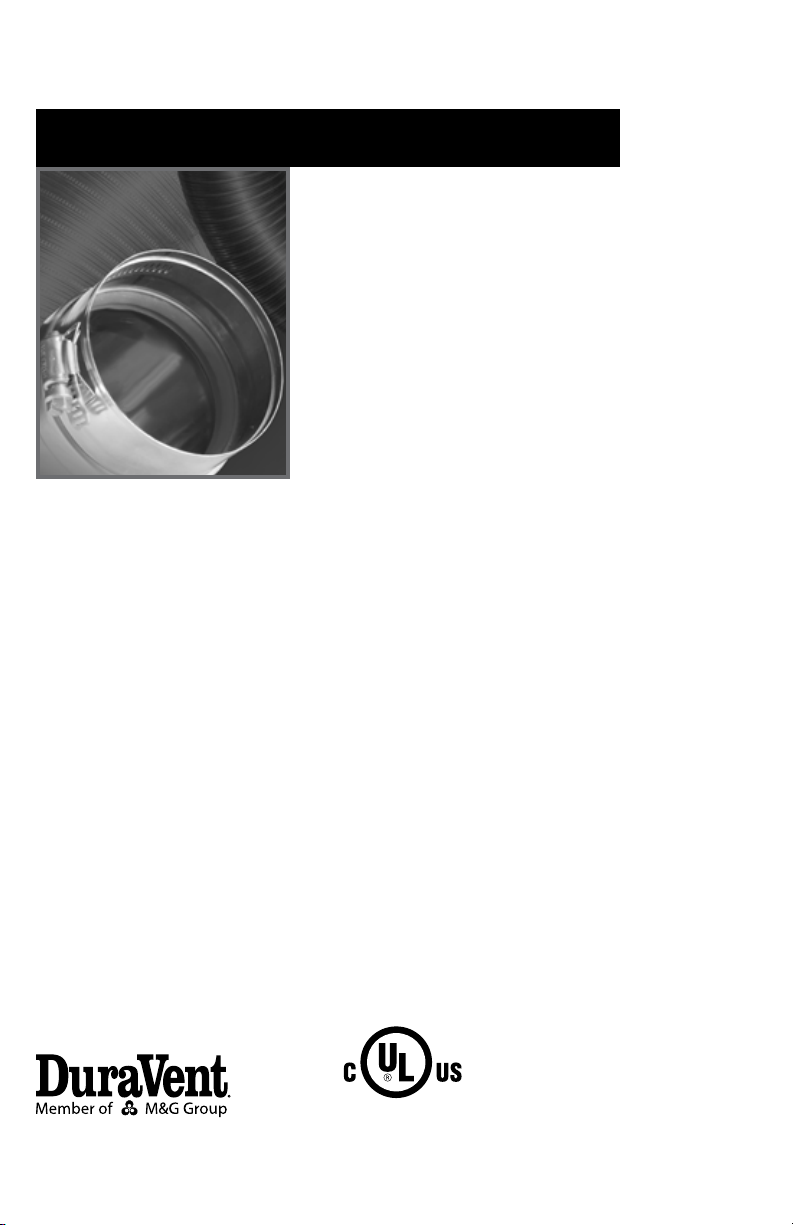
FasNSeal Fixed Blade Damper
instruction- Fixed Damper
FasNSeal- Supplemental
®
A MAJOR CAUSE OF VENT RELATED FIRES IS
FAILURE TO MAINTAIN REQUIRED CLEARANCES
(AIR SPACES) TO COMBUSTIBLE MATERIALS. IT IS
OF THE UTMOST IMPORTANCE THAT FASNSEAL
BE INSTALLED ONLY IN ACCORDANCE WITH
THESE INSTRUCTIONS.
LISTED
Page 2
INTRODUCTION
The purpose of the Fixed Blade Damper is
to ensure optimum pressures through an
appliance. The Damper will aid in the proper
operation and eciency of the appliance
by preventing higher than desired draft
readings.
INSTALLATION
• IMPORTANT: The max rated temperature
for the xed blade damper is 392°F
(200°C). When the damper is installed,
the entire FNS system is to be de-rated in
maximum temperature to this value.
• Always follow appliance manufacturer’s
installation instructions for proper appliance
setup and venting requirements.
• Refer to the FasNSeal SW & W2 Installation
Instructions for correct installation to
FasNSeal vent lengths and adapters.
• It is important to note that the Damper
can be installed vertically, diagonally and
horizontally.
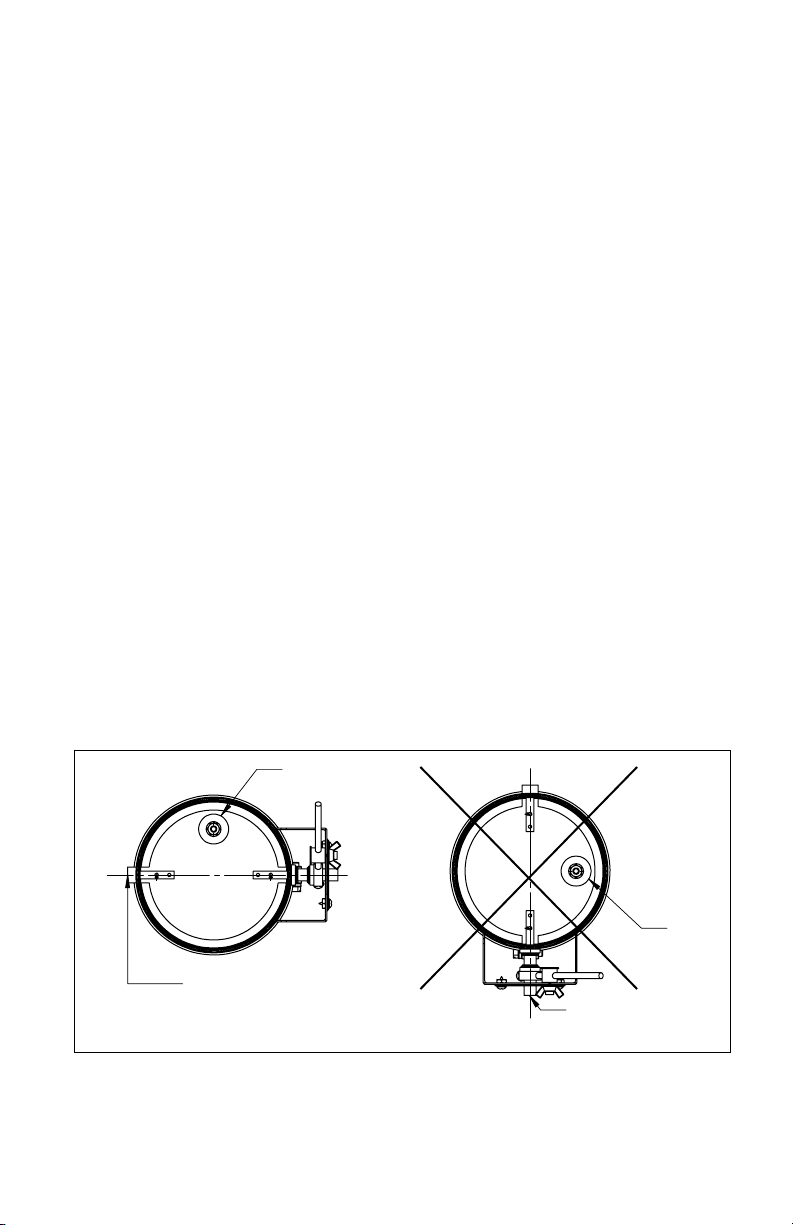
• If the Damper is going to be installed
horizontally, make sure the Damper Axis is
horizontal (Fig.1). Make sure the venting is
pitched towards the boiler by a value of ¼”
drop for every foot of vent length (Fig.2 and
Fig.3) for proper condensate management.
The weight on the damper is a fail safe to
make certain that the damper will be open in
the event of failure. Ensure that the weight is
at the top of the damper plate when closed in
the Horizontal (Fig.1).
Horizontal Installation (Fig.1, Fig.2, Fig.3)
• To prevent the build up of condensation in
horizontal installations, it is required to use
an Eccentric Increaser rather than Tapered
Increasers at the male connection of the
damper (Fig.2).
• Installation of the Damper in the ue
venting of an appliance should be at the
breech of the appliance or as close as
possible.
• Lock the Damper position to the 90 degree
value so that it is in the full open position.
• Ensure the female end is pointing away
from the appliance.
• Once the damper has been correctly
installed in the venting ue, lock the damper
to 90° and then operate the burner until
the appliance is suciently warmed up and
chamber pressure has stabilized.
• After the chamber pressure is lower than
what is prescribed by the OEM, proceed
WEIGHT
WEIGHT
CORRECT
ORIENTATION OF
SHAFT AXIS
INCORRECT
ORIENTATION OF
SHAFT AXIS
Figure 1
2
Page 3

with closing o the damper until the desired
chamber pressure has been achieved.
• At this point lock the damper blade in
position and begin the burner set up as
prescribed by the OEM.
ECCENTRIC
INCREASER
EXHAUST FLOW
TAPERED
INCREASER
EXHAUST FLOW
Figure 2
1/4" PER FT
PROPER
SLOPE
EXHAUST FLOW
Figure 3
1/4" PER FT
PROPER
SLOPE
3
Page 4

M&G DURAVENT LIMITED LIFETIME WARRANTY
M&G DuraVent, Inc. (“DuraVent”) provides this limited lifetime warranty for all of its products with the exception of Ventinox® (lifetime), and
PolyPro® (ten years). Subject to the limitations set forth below, DuraVent warrants that its products will be free from defects in material or
manufacturing, if properly installed, maintained and used. DuraVent products are fully warranted if installed only by a professional installer.
This Warranty is transferable from the original homeowner to the buyer of the home. This warranty does not cover normal wear and tear, smoke
damage or damage caused by chimney res, acts of God, or any product that was: (1) purchased other than from an authorized DuraVent
dealer, retailer or distributor; (2) modied or altered; (3) improperly serviced, inspected or cleaned; or (4) subject to negligence or any use not
in accordance with the installation instructions included with the product as determined by DuraVent. Installation instructions are available
online at www.duravent.com under Support/Literature and through our Customer Service Department 800-835-4429 or customerservice@
duravent.com. This limited lifetime warranty applies only to parts manufactured by DuraVent.
DuraVent provides the following warranties for its products: One Hundred Percent (100%) MSRP 15 years from the date of purchase, and Fifty
Percent (50%) thereafter, except for the following limitations on: all Termination Caps and DuraBlack® are warranted at One Hundred Percent
(100%) for ve years.
All warranty obligations of DuraVent shall be limited to repair or replacement of the defective product pursuant to the terms and conditions
applicable to each product line. These remedies shall constitute DuraVent’s sole obligation and sole remedy under this warranty. This warranty
provides no cash surrender value. The terms and conditions of this warranty may not be modied, altered or waived by any action, inaction or
representation, whether oral or in writing, except upon the express, written authority of an executive ocer of DuraVent.
Corn, bio-fuels, driftwood or other wood containing salt, preservative-treated lumber, plastic and household trash or garbage, or wood pellets
containing such materials must not be burned in the appliance or replace. In case of a chimney re, the chimney must be inspected and
approved by a certied Chimney Sweep before reuse. After each annual inspection, maintenance, and cleaning, the certied Chimney Sweep
must ll out and date the appropriate section of the warranty card provided with the chimney liner.
LIMITATIONS ON INTERNET SALES: Notwithstanding any other terms or conditions of this Limited Lifetime Warranty, DuraVent provides no
warranty for the following specic products if such products are not installed by a qualied professional installer: DuraTech®, DuraPlus HTC®,
DuraChimney® II, PelletVent Pro®, DirectVent Pro®, FasNSeal®, FasNSeal® W2, FasNSeal® Flex, and PolyPro®, and M&G DuraVent’s relining
products including DuraLiner®, DuraFlex® (SW, Pro, 316, 304), and Ventinox®. For purposes of this warranty, a trained professional installer is
dened as one of the following: licensed contractors with prior chimney installation experience, CSIA Certied Chimney Sweeps, NFI Certied
Specialists, or WETT Certied Professionals.
DuraVent must be notied and given the opportunity to inspect defective product prior to replacement under the terms of this limited lifetime
warranty. All warranty claims must be submitted with proof of purchase. Labor and installation costs are not covered under this warranty. To
obtain warranty service contact: DuraVent Warranty Service, 877 Cotting Ct., Vacaville CA 95688, or call 800-835-4429.
WHERE LAWFUL, DURAVENT DISCLAIMS ALL OTHER WARRANTIES, INCLUDING BUT NOT LIMITED TO IMPLIED WARRANTIES OF
MERCHANTABILITY AND FITNESS FOR A PARTICULAR PURPOSE. IN NO EVENT WILL DURAVENT BE LIABLE FOR INCIDENTAL, CONSEQUENTIAL,
PUNITIVE OR SPECIAL DAMAGES OR DIRECT OR INDIRECT LOSS OF ANY KIND, INCLUDING BUT NOT LIMITED TO PROPERTY DAMAGE AND
PERSONAL INJURY. DURAVENT’S ENTIRE LIABILITY IS LIMITED TO THE PURCHASE PRICE OF THIS PRODUCT. SOME STATES DO NOT ALLOW
LIMITATIONS ON IMPLIED WARRANTIES, OR THE EXCLUSION OR LIMITATION OF INCIDENTAL OR CONSEQUENTIAL DAMAGES, SO THE ABOVE
LIMITATIONS AND EXCLUSIONS MAY NOT APPLY TO YOU. THIS LIMITED WARRANTY GIVES YOU SPECIFIC LEGAL RIGHTS, AND YOU MAY ALSO
HAVE OTHER RIGHTS THAT VARY FROM STATE TO STATE.
For the most up-to-date installation instructions, see
www. duravent.com
REV 3.22.2012
Manufactured in Vacaville CA and Albany NY
Customer Service Support 800-835-4429 707-446-4740 FAX www.duravent.com
FasNSeal is a registered trademark of the M&G DuraVent, Inc.
All rights reserved. Made in the USA. M&G DuraVent is a member of M&G Group. ©2012
820013661 - L1150SUP 04/2014
 Loading...