

Page 1
Installation Instructions
Converting a Class-A
Metal Chimney or Masonry
Chimney to a
Direct Vent System
DirectVent Pro
®
Page 2

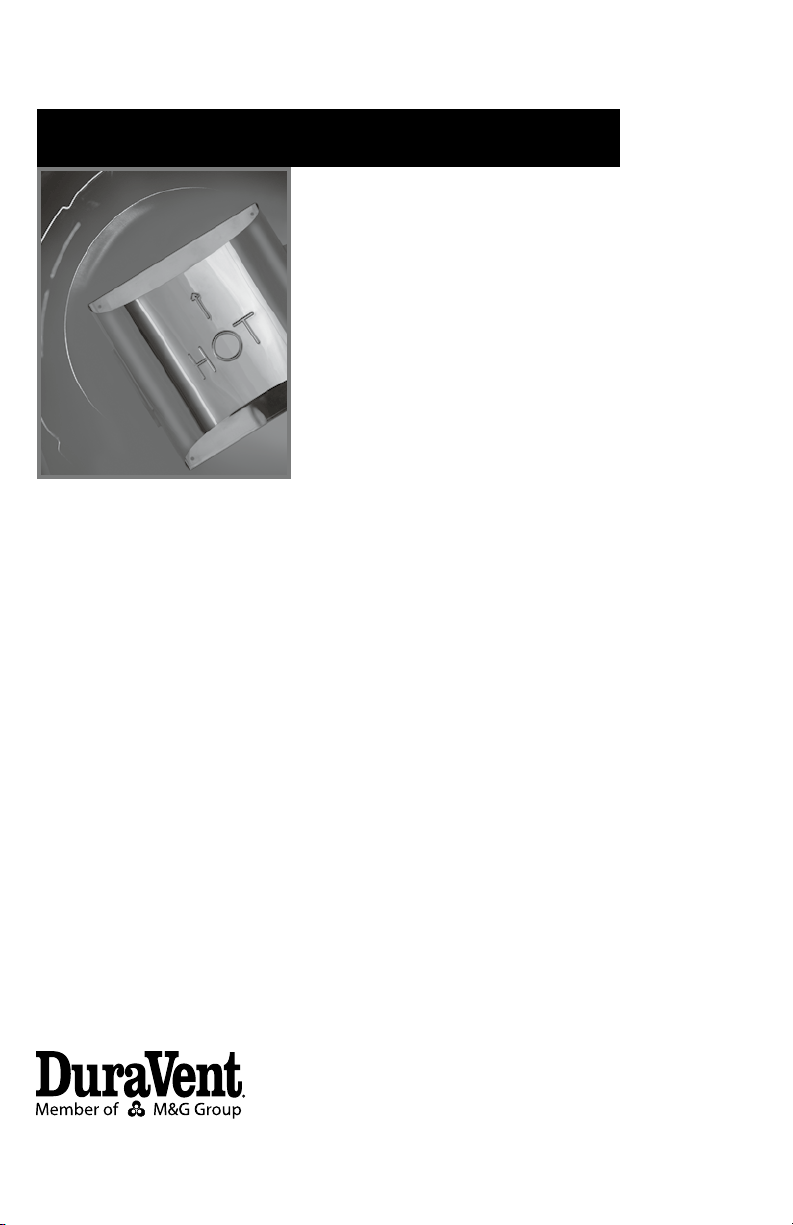
A MAJOR CAUSE OF VENT RELATED FIRES IS FAILURE
TO MAINTAIN REQUIRED CLEARANCES (AIR SPACES)
TO COMBUSTIBLE MATERIALS. IT IS OF THE UTMOST
IMPORTANCE THAT DIRECTVENT PRO BE INSTALLED ONLY
IN ACCORDANCE WITH THESE INSTRUCTIONS.
NOTE:
Read through all of these instructions
before beginning your installation.
Failure to install as described in this
instruction will void the manufacturer’s
warranty, and may have an eect on
your homeowner’s insurance and UL
listing status. Keep these instructions for
future reference.
.
Dear Customer, Installer, or End User:
We welcome any comments regarding
matters pertaining to our DuraVent
products. We welcome any ideas, input
or complaints to help improve our
product oering. Send your emails to:
president@duravent.com
If you are searching for tech support or
product information, please phone us at
800-835-4429.
Or email us at:
techsupport@duravent.com
Page 3
CONVERTING CLASS A METAL OR MASONRY CHIMNEY TO A DIRECT VENT
For the most up-to-date installation instructions, see www.duravent.com
CONTENTS
Precautions | General . . . . . . . . . . . . . . . . . . . . . . . . . . . . . . . . . . . . . . . . . . . . . . . 4
Typical Factory-Built Metal Chimney Conversion illustration . . . . . . . . . . . 5
Converting a Factory-Built Metal Chimney . . . . . . . . . . . . . .. . . . . . . . . . . . . . . . . 6
Converting a Masonry Chimney . . . . . . . . . . . . . . . . . . . . . . . . . . . . . . . . . . . . . . . 8
Typical Masonry Chimney Conversion illustration . . . . . . . . .. . . . . . . . . . . . . . . 8
Warranty . . . . . . . . . . . . . . . . . . . . . . . . . . . . . . . . . . . . . . . . . . . . . . . . . . . . . . . . . . . . . 11
DirectVent Pro
®
Page 4

INSTALLATION INSTRUCTIONS
FOR CONVERTING A CLASSA
METAL CHIMNEY OR MASONRY
CHIMNEY TO A DIRECT VENT
SYSTEM
These instructions apply to the DuraVent
Direct Vent Conversion Kits for factorybuilt Class A metal chimneys and masonry
chimneys. These venting systems, in
combination with the gas appliance, have
been tested and listed by a major testing
agency such as UL, AGA, Omni or Warnock
Hersey. Check the manufacturer’s rating
plate and instruction manual to conrm that
a DuraVent Direct Vent Chimney Conversion
system is approved for use on the brand
name appliance you have selected.
IMPORTANT
Read all instructions carefully before starting
the installation. Failure to follow these
instructions may create a re or other safety
hazard, and will void the warranty. Be sure
to check the appliance manufacturer’s
installation instructions for specic venting
and clearance to combustible requirements,
which may vary from one appliance to
another.
INSTALLATION PRECAUTIONS
The DuraVent Direct Vent System is an
engineered product that has been designed
and tested for use with an approved list of
direct vent gas appliances. The DuraVent
warranty will be voided, and serious re,
health, or other safety hazards may result
from any of the following actions:
• Installation of any damaged Direct Vent
component.
• Unauthorized modication of the Direct
Vent System
• Installation of any component part not
manufactured or approved by DuraVent.
• Installation other than as instructed by
DuraVent and the appliance manufacturer.
Consult your local building codes before
beginning the installation.
Have the existing installation inspected by
a qualied chimney sweep or professional
installer, prior to converting to direct vent.
The existing chimney system must be in
serviceable condition, and functionally
sound. The direct vent conversion described
herein applies only to factory-built metal
ceiling-supported type systems and masonry
through-the-wall type systems. Note: You
cannot install a Conversion Kit in a throughthe-wall type factory-built metal chimney.
GENERAL
Two dierent types of direct vent conversion
systems are described here. One is through
an existing factory built metal chimney going
through the ceiling. The other is through the
wall of an existing masonry chimney. Follow
the appropriate directions for your situation.
A typical direct vent conversion of a factory
built metal chimney is shown in Figure 1.
The concept of direct vent conversion is
to connect an adapter to an Underwriters
Laboratories listed 4-inch diameter aluminum
ex pipe (DuraVent’s DuraFlex is an example
of an UL listed ex pipe). This is then passed
this down through the center of the existing
metal chimney system. Three sizes of Top
Adapters are available which should t
most sizes and makes of metal chimney
systems. The Retro Connector (909B) is then
attached to the bottom of the ex pipe. Both
the Top Adapter, and the Retro Connector
are attached to the existing chimney with
sheet metal screws. The appliance is then
connected to the chimney with appropriate
black direct vent pipe, and an adjustable
length section.
A typical conversion of an existing masonry
chimney is shown in Figure 6. For installation
through the wall of an existing masonry
4
Page 5

TYPICAL FACTORYBUILT METALCHIMNEY CONVERSION
Use Conversion Kit A (0931)
for the following chimneys:
6” ID Metalbestos
6” ID Security Chimney
6” ID Jackes-Evans
6” ID Hart & Cooley
6” ID Pro-Jet
Use Conversion Kit B (0932)
Termination Cap
0985K Top Adapter
0986K Top Adapter
0987K Top Adapter
Existing Metal
Chimney
System
4-inch
aluminum ex
pipe
for the following chimneys:
6” ID Simpson Dura-Vent
7” & 8” ID Metalbestos
6” ID Security Chimney
7” & 8” ID Jackes-Evans
7” & 8” ID Hart & Cooley
7” & 8” ID Pro-Jet
6” ID Air-Jet
6” & 7” ID Metal-Fab
6” & 7” ID American Metals
Use Conversion Kit C (0933)
for the following chimneys:
7” & 8” ID Simpson Dura-Vent
8” ID Air-Jet
8” ID Metal-Fab
8” ID American Metals
0909B
0909B Retro
Connector
Any black
direct vent
pipe plus an
adjustable
length
to make
a proper
connection
4-inch ex pipe
Figure 1
5
Page 6

Top Adapter
Flex Pipe
Figure 2
Sheet Metal
Screws
chimney, a Top Adapter (985K) and Flashing
are used at the top of the masonry chimney.
The 4-inch aluminum liner is connected to
the adapter and is passed down the chimney
and out through the masonry wall. This
is attached to the Retro Connector (909B)
which is in turn, attached to the masonry wall
and is then connected to the direct vent pipe
leading to the appliance.
INSTALLATION INSTRUCTIONS
FOR CONVERTING A FACTORY
BUILT METAL CHIMNEY
Step 1. Remove the existing chimney cap.
Step 2. Measure the distance from the top
end of the chimney to the bottom of the
ceiling support box, add 3 inches to this
measurement, and cut a section of 4-inch ex
pipe to that length (the ex should already be
extended to its nominal length).
Step 3. Connect the end of the ex pipe
section to the underside of the Top Adapter
you have selected, using (3) sheet metal
screws. (Figure 2.)
Step 4. Pass the ex pipe down through the
center of the chimney system, and center
the adapter on the top of the chimney pipe.
Drill (4) 1/8-inch diameter holes through the
adapter, and into the chimney top. Insure
that you are in fact, drilling into the metal on
the chimney. Twist-lock the Termination Cap
Figure 3
(980 or 991) onto the Adapter. (Figures 3 and
4.)
Step 5. Pull the ex pipe down through
the ceiling support box, until it protrudes
approximately 3 inches. Connect the ex
pipe to the Retro Connector by slipping it
into the 4-3/4-inch diameter sleeve on the
top side of the Connector. Use (3) Sheet
Metal Screws, to assemble these two parts.
6
Page 7

Step 6. Push the ex pipe back up into the
ceiling support box, center the Retro
Connector, and attach it to the support box,
or decorative sleeve for double wall solid
packed pipe, with the Sheet Metal Screws
furnished. The holes in the Retro Connector
are pre-punched. (Figure 5.)
Termination
Cap
Sheet Metal
Screws
Drill (4)
1/8-inch
diameter holes
Figure 4
(3) Sheet Metal
Screws
Existing Ceiling
Support Box
(3) Sheet Metal
Screws
Figure 5
7
Page 8

TYPICAL MASONRY CHIMNEY
CONVERSION
INSTALLATION INSTRUCTIONS
FOR CONVERTING A MASONRY
CHIMNEY
Important: The existing masonry ue
opening needs to have an area of at least a
35-sqr-in. to insure proper intake / exhaust
ow.
4” Flex Liner
Connector
Black Direct
Vent Pipe
Termination Cap
Top Adapter
Flashing
Retro
Step 1. Before cutting any holes, assemble
the desired sections of black direct vent
pipe to determine the center of the masonry
penetration.
Step 2. Once the center point of the
penetration has been determined, cut a 6”
diameter hole in the masonry. Be careful,
if the hole is too large, the Retro Connector
might not mount properly, and if the hole is
too small, then the appliance might starve
for intake air. If there is a frame wall in front
of the masonry wall, cut and frame a 10” clear
square opening in wall (centered around the
6” masonry opening). If there is sheet rock
only (no studs) in front of the masonry, the
10” clear opening is still needed, but does
not need to be framed. This allows the Retro
Cut & bend ashing as
needed to t chimney
Sealant adhesive
Figure 6
Figure 7
8
Page 9

Connector to mount directly on the masonry
and provide clearance to the combustibles.
Refer to Figure 11.
Step 3. Secure the Flashing (705C) to the top
of the masonry chimney using a bead of nonhardening sealant-adhesive. If the Flashing is
larger than the top of the chimney, then cut
and fold ashing as needed to t chimney.
See Figure 7.
Step 4. To determine the length of ex
required, measure from 3” above the top
of the Flashing down to the level of the
opening. Add to this measurement the
distance from the center of the chimney to
out through the wall. Cut a piece of 4-inch
ex to this length (the ex should already be
extended to its nominal length).
Step 5. Connect the 4-inch ex liner to the
Top Adapter (985K) using (3) sheet metal
screws. Refer to Figure 2.
Step 6. Feed the 4-inch ex liner through
the Flashing into the chimney. Continue to
feed the liner out through the opening in the
masonry wall.
Step 7. Secure the Top Adapter to the
Flashing. Use (3) sheet metal screws through
the side of the adapter into the ange on the
Flashing, as shown in Figure 8. Twist lock the
Termination Cap (980 or 991) on to the Top
Adapter.
Highwind Termination
Cap
Standard
Termination
Cap
Top Adapter
(3)
Sheet
Metal
Screws
Flashing
Figure 8
6” diameter
opening in
masonry wall
Step 8. Attach the ex to the Retro
Connector. Use (3) sheet metal screws to
attach the ex liner to the Connector. See
Figure 9. Mount the Retro Connector to the
masonry wall using masonry bolts. Redrill larger holes on connector as needed.
Be careful to insure that the connector is
centered in the opening and the mounting
holes line up with the masonry wall.
(3) masonry bolts (not
included)
Figure 9
Retro Connector
9
Page 10

Wall Thimble Cover
(4) Masonry Bolts
(Not Included)
Figure 10
Retro Connector
Masonry Chimney
10” x 10” framed
opening in wall
Step 9. Slide the Wall Thimble Cover (940)
over the Retro Connector and secure with
masonry bolts. (Figure 10) If you have a
framed wall in front of the masonry, use
wood screws to mount the Wall Thimble
Cover to the framed wall, over the Retro
Connector and the 10” square framed
opening. (Figure 11) If needed, add a section
of direct vent pipe to the Retro Connector in
order to extend through the opening in the
Wall Thimble Cover.
Step 10. The connection between the
appliance and the Retro Connector may be
completed with section of black direct vent
pipe, together with adjustable length pipe
section.
Stud Wall
10
Retro
Connector
Wall Thimble Cover
(4) Masonry Bolts
(Not Included)
Figure 11
Page 11

M&G DURAVENT WARRANTY
M&G DuraVent, Inc. (“DuraVent”) provides this limited lifetime warranty for all of its products to the original purchaser, with the exception of Ventinox®
(lifetime), PolyPro® (ten years), DuraBlack® (ve years) and all Termination Caps (ve years). Subject to the limitations set forth below, DuraVent warrants that
its products will be free from substantial defects in material or manufacturing, if properly installed, maintained and used. This Warranty is non-transferable with
the exception of Ventinox which is transferable from the original homeowner to the buyer of the home for a period of ten (10) years. This warranty does not cover
normal wear and tear, smoke damage or damage caused by chimney res, acts of God, or any product that was: (1) purchased other than from an authorized
DuraVent dealer, retailer or distributor; (2) modied or altered; (3) improperly serviced, inspected or cleaned; or (4) subject to negligence or any use not in
accordance with the printed materials provided with the product as determined by DuraVent. This limited lifetime warranty applies only to parts manufactured
by DuraVent.
DuraVent provides the following warranties for its products: One Hundred Percent (100%) of the purchase price or MSRP at time of purchase, whichever is lower,
for 15 years from the date of purchase, and Fifty Percent (50%) thereafter, except for the following limitations: Ventinox liner and components in wood, oil, wood
pellet, and gas installations are warranted at One Hundred Percent (100%) for the lifetime of the original homeowner; Ventinox 316 liner and components for
coal burning installations which are warranted One Hundred Percent (100%) for ten years; all Termination Caps and DuraBlack® are warranted at One Hundred
Percent (100%) for ve years, and at Ten Percent (10%) thereafter.
All warranty obligations of DuraVent shall be limited to repair or replacement of the defective product pursuant to the terms and conditions applicable to each
product line. These remedies shall constitute DuraVent’s sole obligation and sole remedy under this limited warranty. This warranty provides no cash surrender
value. The terms and conditions of this limited lifetime warranty may not be modied, altered or waived by any action, inaction or representation, whether oral
or in writing, except upon the express, written authority of an executive ocer of DuraVent.
VENTINOX WARRANTY CONDITIONS
Liner and Component warranties contained herein are subject to the following conditions: (1) The Liner and Components must be installed according to DV’s
installation instructions; (2) The Liner and Components are used only to line or reline chimneys venting residential appliances for which the liner was intended;
and (3) documented annual inspection of the Liner and Components and maintenance as deemed necessary, beginning one year after the date of installation
and continuing throughout the warranty period, by a Nationally Certied Chimney Sweep or Ventinox® installer. The Liner and Components warranty is further
subject to compliance with the following requirements throughout the warranty period: The chimney must have a chimney cap and chemical chimney cleaners
must not be used when cleaning the Liner or Components. Plastic-bristle ue cleaning brushes are recommended. Corn, bio-fuels, driftwood or other wood
containing salt, preservative-treated lumber, plastic and household trash or garbage, or wood pellets containing such materials must not be burned in the
appliance or replace. In case of a chimney re, the chimney must be inspected and approved by a certied Chimney Sweep before reuse. After each annual
inspection, maintenance, and cleaning, the certied Chimney Sweep must ll out and date the appropriate section of the warranty card provided with the
chimney liner.
LIMITATIONS ON INTERNET SALES:
Notwithstanding any other terms or conditions of this limited lifetime warranty, DuraVent provides no warranty for the following specic products if such
products are both: (a) purchased from an Internet seller; and (b) not installed by a qualied professional installer: DuraTech®, DuraPlus HTC®, PelletVent Pro®,
FasnSeal®, and DuraVent’s relining products including DuraLiner®, DuraFlex® 304, DuraFlex® 316, DuraFlex® Pro, DuraFlex® SW, and Ventinox®. For purposes of
this warranty, a trained professional installer is dened as one of the following: licensed contractors with prior chimney installation experience, CSIA Cer tied
Chimney Sweeps, NFI Certied Specialists, or WETT Certied Professionals.
DuraVent reserves the right to inspect defective product to determine if it qualies for replacement under the terms of this limited lifetime warranty. All warranty
claims must be submitted with proof of purchase. Labor and installation costs are not covered under this warranty. To obtain warranty service contact DuraVent
promptly at DuraVent Warranty Ser vice, 902 Aldridge Rd., Vacaville CA 95688, or call 800-835-4429.
WHERE LAWFUL, DuraVent DISCLAIMS ALL OTHER WARRANTIES, INCLUDING BUT NOT LIMITED TO IMPLIED WARRANTIES OF MERCHANTABILITY AND FITNESS
FOR A PARTICULAR PURPOSE. IN NO EVENT WILL DuraVent BE LIABLE FOR INCIDENTAL, CONSEQUENTIAL, PUNITIVE OR SPECIAL DAMAGES OR DIRECT OR
INDIRECT LOSS OF ANY KIND, INCLUDING BUT NOT LIMITED TO PROPERTY DAMAGE AND PERSONAL INJURY. DuraVent’S ENTIRE LIABILITY IS LIMITED TO THE
PURCHASE PRICE OF THIS PRODUCT. SOME STATES DO NOT ALLOW LIMITATIONS ON IMPLIED WARRANTIES, OR THE EXCLUSION OR LIMITATION OF INCIDENTAL
OR CONSEQUENTIAL DAMAGES, SO THE ABOVE LIMITATIONS AND EXCLUSIONS MAY NOT APPLY TO YOU. THIS LIMITED WARRANTY GIVES YOU SPECIFIC LEGAL
RIGHTS, AND YOU MAY ALSO HAVE OTHER RIGHTS THAT VARY FROM STATE TO STATE.
For the most up-to-date installation instructions, see www. duravent.com
REV 3.30.2011
M&G DuraVent, Inc.
Manufactured in Vacaville CA and Albany NY
Customer Service Support 800-835-4429 707-446-4740 FAX www.duravent.com
DIrectVent Pro is a registered trademark of the M&G DuraVent, Inc.
All rights reserved, ©2010 Made in the USA. M&G DuraVent is a member of M&G Group.
L904 10|2011
 Loading...