

Page 1
Graphic Products, Inc.
1-800-788-5572
Local: 503-644-5572
www.DuraLabel.com
www.GraphicProducts.com
E-mail: info@GraphicProducts.com
QuickStart Guide
DuraLabel
®
7000
Page 2

© 2008 Graphic Products, Inc.
Page 3

- 1 -
Introduction
Thank you for purchasing the DuraLabel 7000 wide-format label and sign printer.
This guide will provide the steps needed to start making labels immediately. For
more details, refer to the DuraLabel 7000 User’s Guide.
Please contact us for all your labeling needs. From standardized to custom
labels, we’re ready to provide the labeling supplies you need. Please call
1-800-788-5572 today to get your labeling problems solved.
Graphic Products, Inc.
1-800-788-5572
Contents:
Unpack Printer & Supplies ................................................ pg. 2
Equipment Checklist ....................................................... pg. 2
Connect Printer, Install & Configure Driver ...................... pg. 3
Connect the Printer ......................................................... pg. 3
Install Software & Driver ................................................. pg. 3
Configure Driver ............................................................... pg. 3
Load Supplies .................................................................... pg. 4
Load Vinyl Supply ............................................................. pg. 4
Adjust Printer for Different-Sized Vinyl ........................... pg. 6
Load Ribbon Supply ........................................................ pg. 7
Print a Label ....................................................................... pg. 8
Format Document to Print Label .................................... pg. 8
Page 4

- 2 -
Unpack Printer & Supplies
Check that all equipment and supplies are present and undamaged before
proceeding.
Equipment Checklist
• The DURALABEL 7000 thermal transfer printer unit with cutter
• Ribbon paper core
• Ribbon supply/rewind spindle (2 pieces)
• Label supply roll spindle
• Power supply
• Power cord
• CD with printer driver and label templates
If an
y parts are missing, please contact the Graphic Products customer service
department.
Page 5
- 3 -
Connect Printer, Install & Configure Driver
Connect the Printer
1. Connect the printer to a power supply using the provided power adapter.
2. Connect the printer to a computer using either the RS-232 or USB cable.
3. Turn the printer ON using the power switch.
4. A Found New Hardware dialogue window may appear. If so, select “No, not at
this time.”
Install Software & Driver
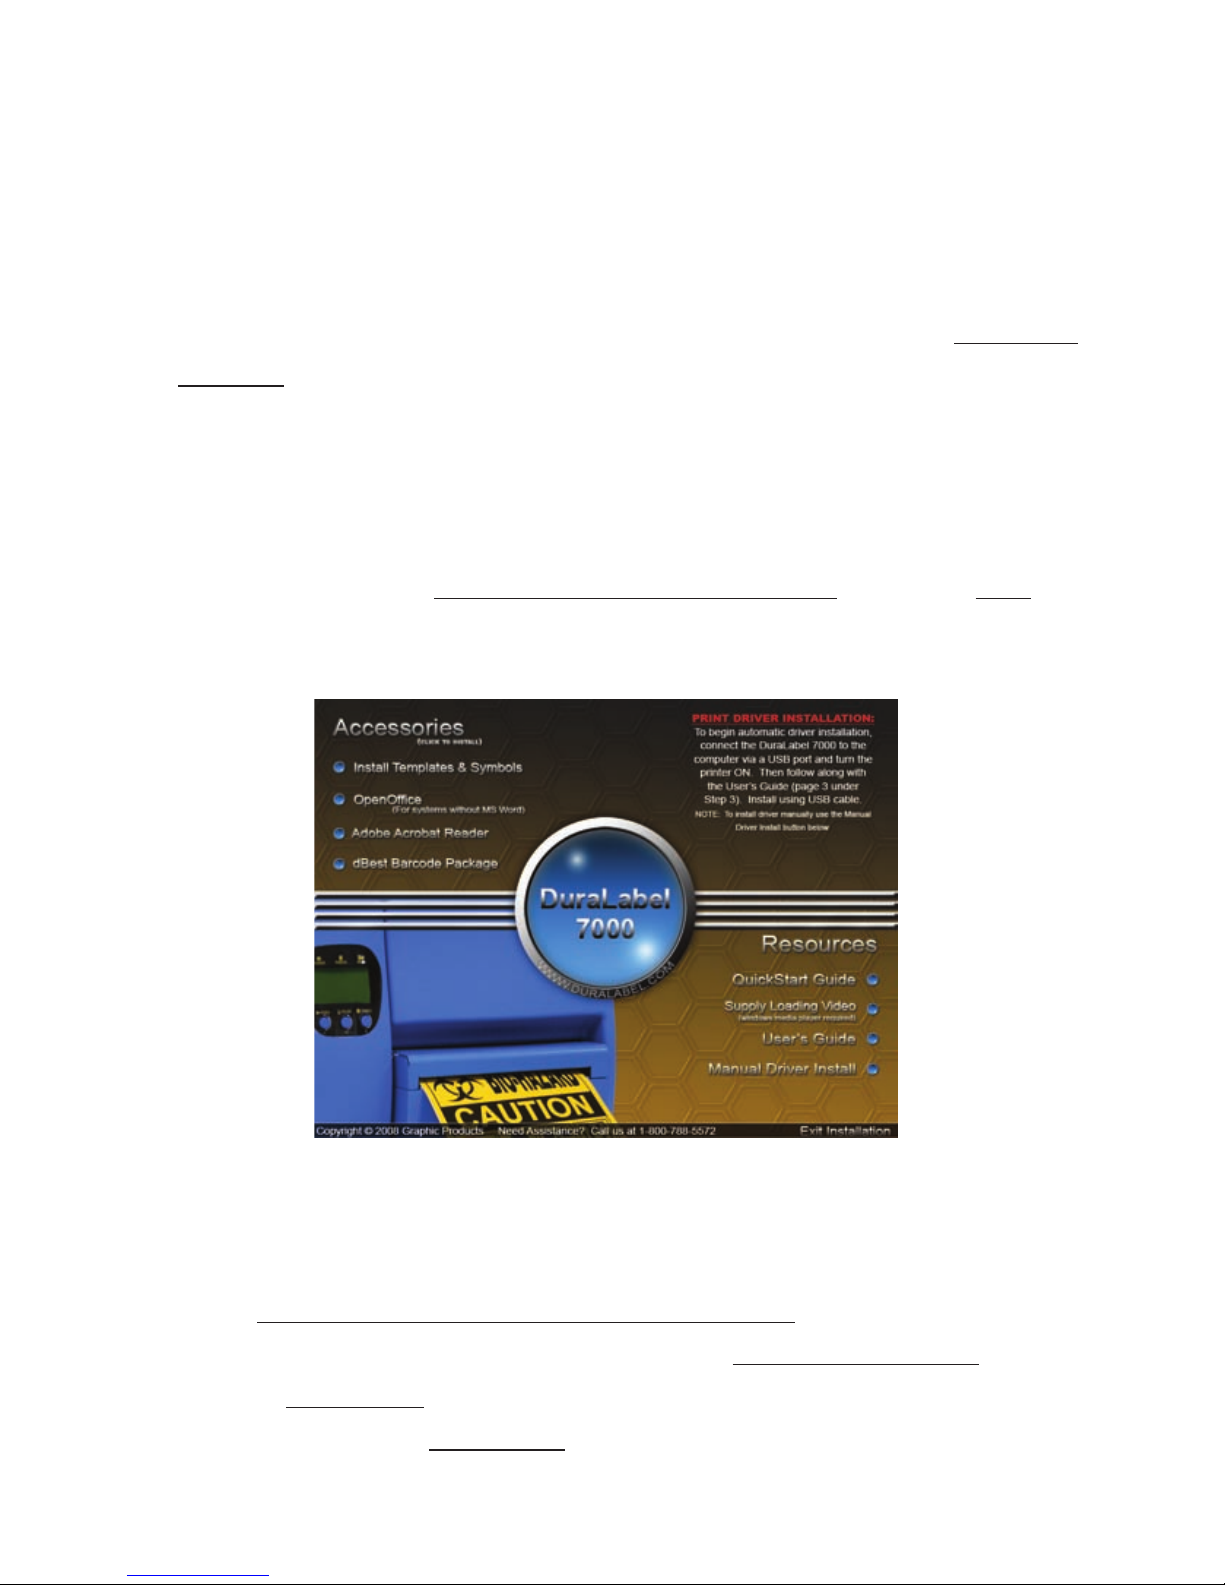
1. Insert the DuraLabel 7000 CD into the CD-ROM drive.
2. At the prompt, select “Install the software automatically” and click “Next.”
3. Follow the on-screen prompts to install drivers.
Confi gure Driver
1. Go to “Start >> Control Panel >> Printers and Faxes.”
2. Right-click on the DuraLabel 7000 and choose “Printing Preferences.”
3. Click on “Page Setup.”
4. Set Media Setting to “Continuous.”
Page 6
- 4 -
Load Supplies
**IMPORTANT** Always turn OFF the power first!
There is an instructional video on how to properly load supplies into the
DuraLabel 7000 printer located on the installation cd.
1. Ensure that printer is turned OFF before loading supplies.
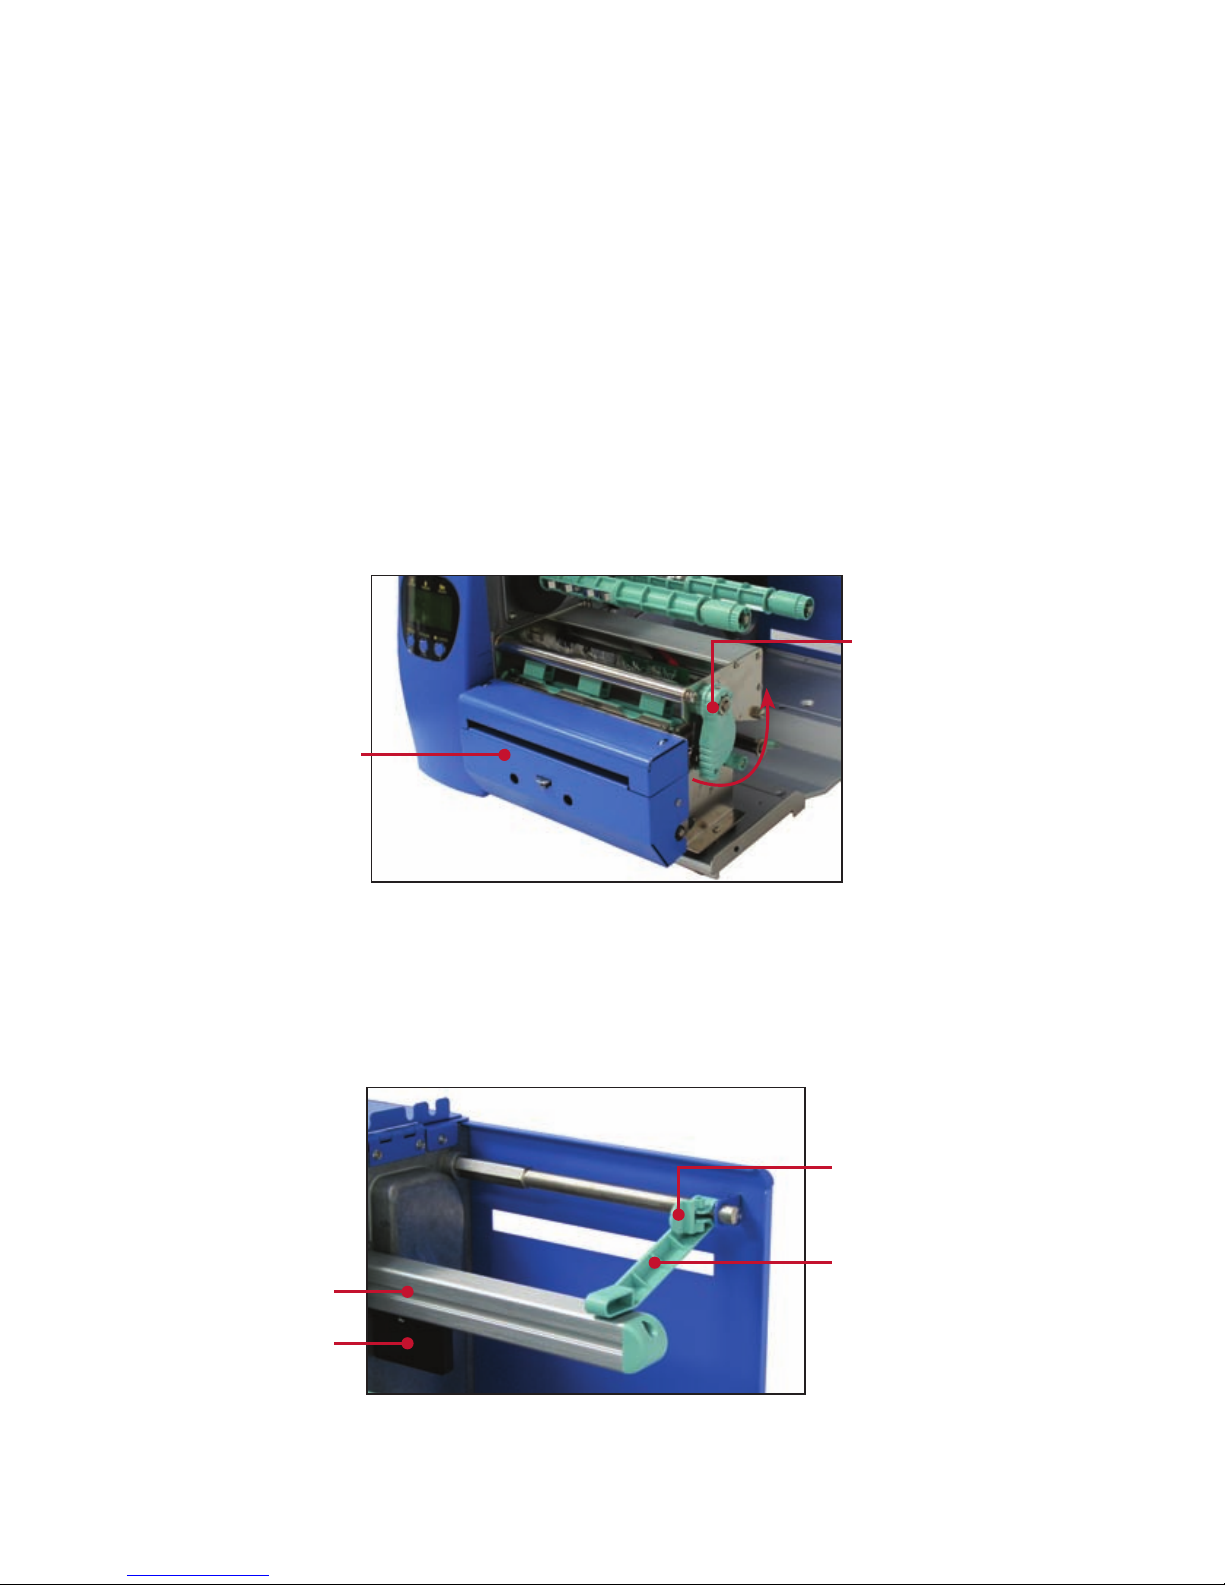
2. Open the printer cover by lifting up on the handle on the right side of the
printer.
3. Open cutter module by pressing down and letting it fall forward.
4. Open ribbon carriage by pulling the print head lever outward and turning it
counterclockwise to a horizontal position.
Load Vinyl Supply
1. Unlock the label alignment guide and pull the label supply guide up and
away from the label roll bar.
Label Alignment Guide
Label Supply Guide
Media Sensor
Label Roll Bar
Figure 2
Figure 1
Print Head Lever
Cutter Module
Page 7
- 5 -
2. Slide a roll of vinyl onto the label roll bar with the vinyl hanging toward the
front of the printer.
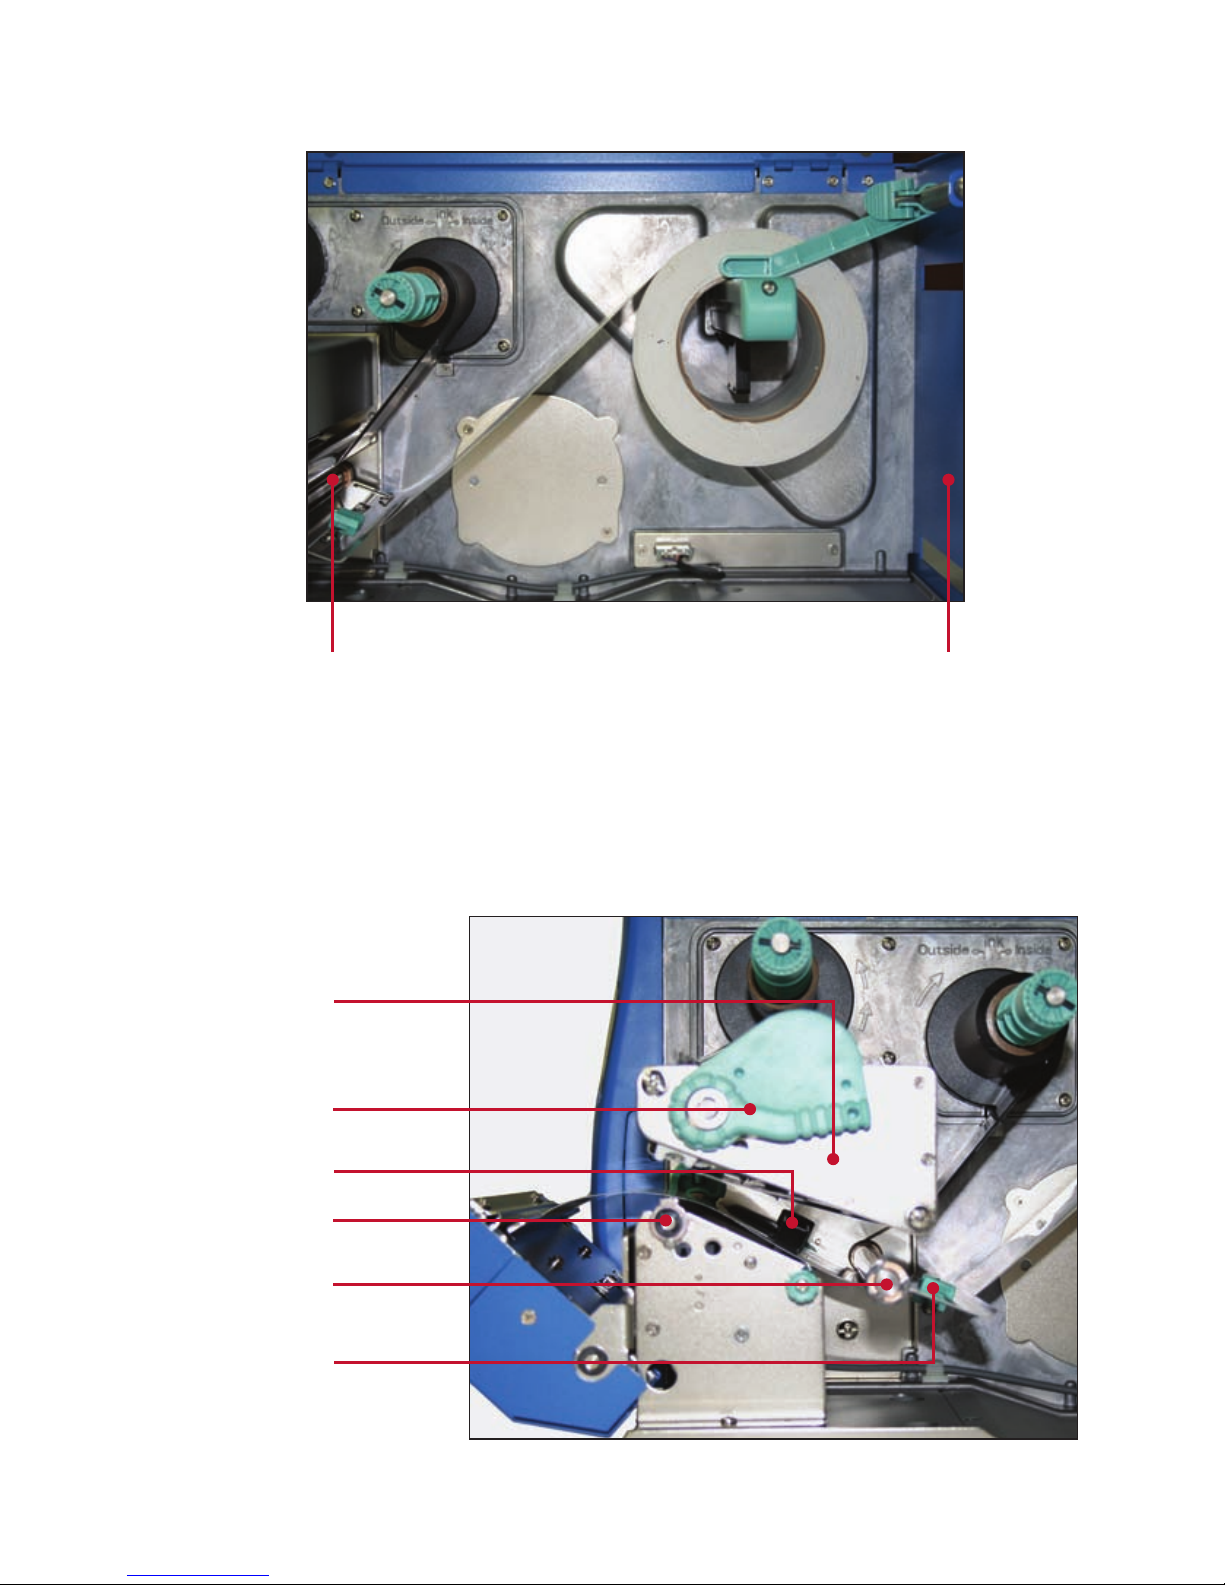
3. Thread the vinyl under the label tension plate and the print head mechanism.
Vinyl should pass over and slightly beyond the platen roller. Vinyl must pass
under the media sensor located under the print head mechanism.
4. Adjust label guide to secure vinyl in place.
Back End of PrinterFront End of Printer
Figure 3
Platen Roller
Print Head Lever
Media Sensor
Print Head
Mechanism
Label Tension
Plate
Label Guide
Figure 4
Page 8
- 6 -
5. Adjust the label supply guide to fi t beside the vinyl, and lock it in place by the
label alignment guide.
Adjust Printer For Different-Sized Vinyl
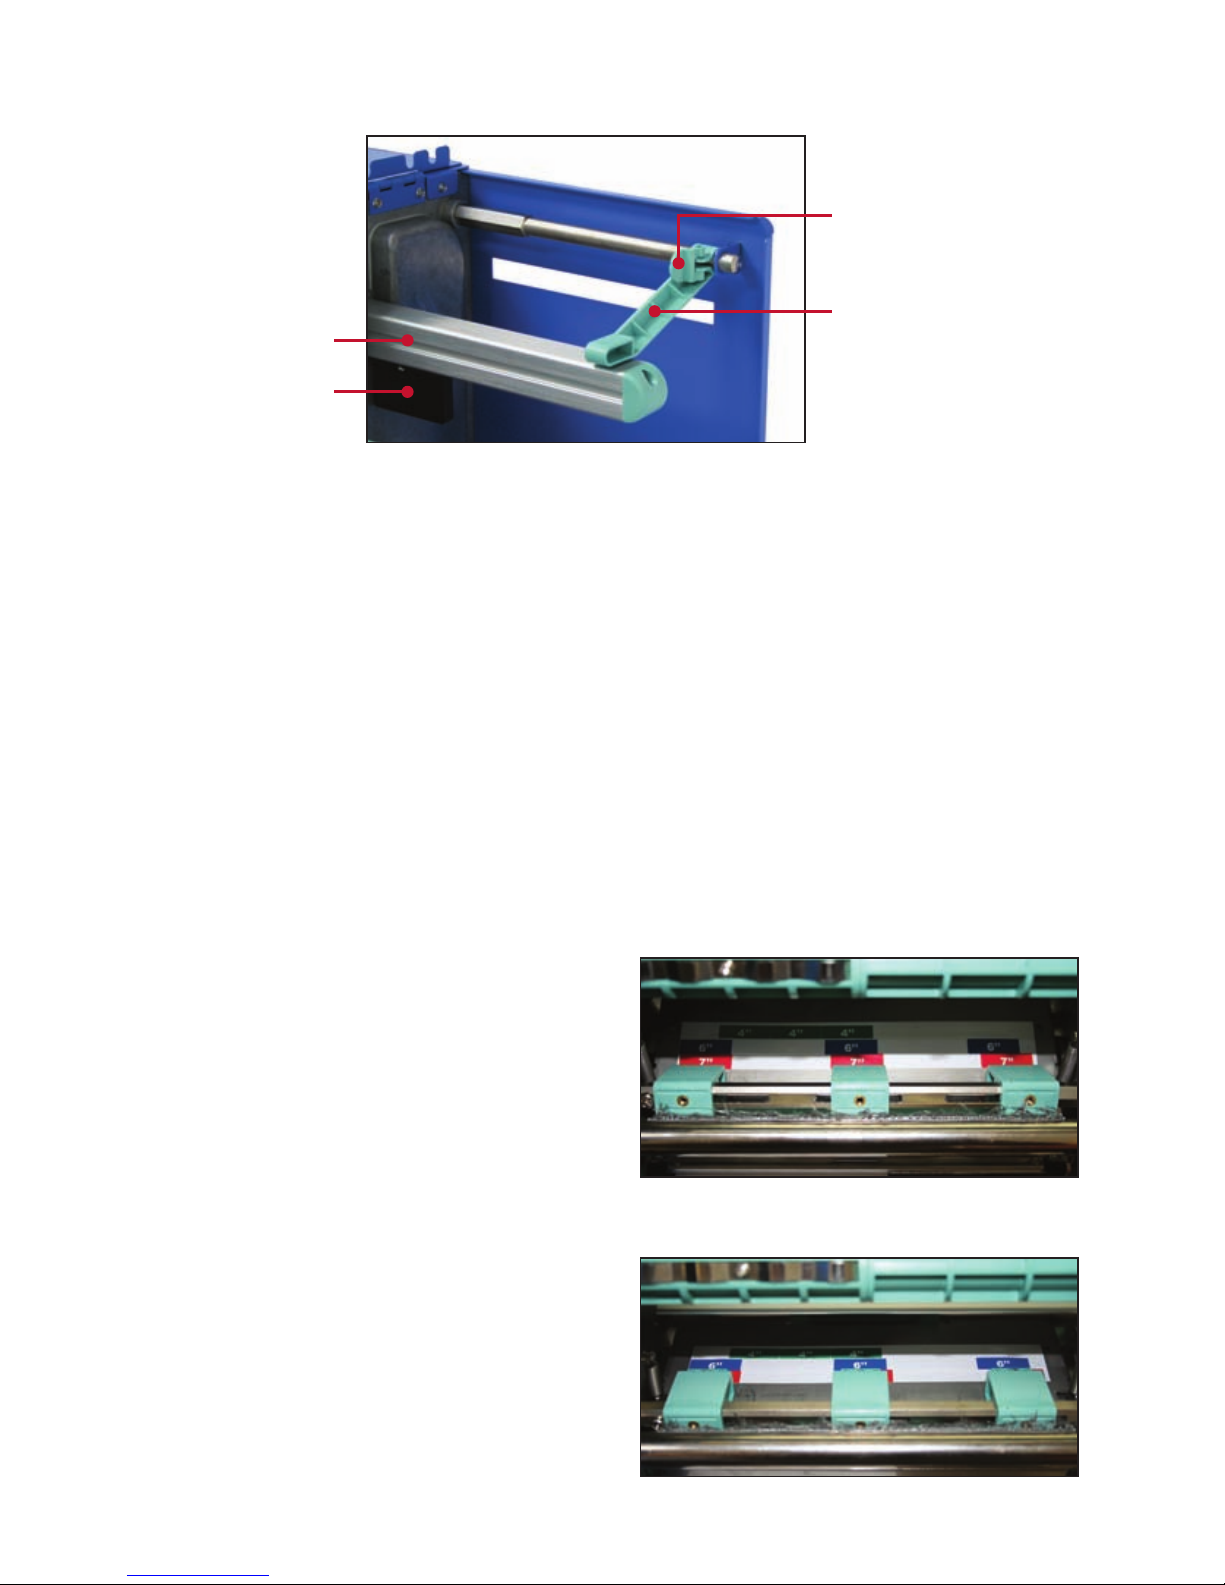
The DuraLabel 7000 uses three tape widths: 4", 6" and 7". For the vinyl to feed
smoothly through the printer the three Print Head Pressure Tabs need to be set
based on the width of the vinyl being used. The Print Head Pressure Tabs are
located on top of the print head, just behind (toward the rear of the printer) the
cutter mechanism. There are three Print Head Pressure Tabs. Each is held in
place by spring pressure. They be moved left and right within a slot in the bar on
which they are mounted.
When Using 7" Vinyl
1. Pull and twist the print head release
lever to open the print area.
2. Adjust the Pressure Tabs to be aligned
with the RED 7’’ box markers, shown
directly behind the Pressure Tabs.
When Using 6" Vinyl
1. Pull and twist the print head release
lever to open the print area.
2. Adjust the Pressure Tabs to be aligned
with the BLUE 6’’ box markers, shown
directly behind the Pressure Tabs.
Figure 5
Label Alignment Guide
Label Supply Guide
Media Sensor
Label Roll Bar
Page 9
- 7 -
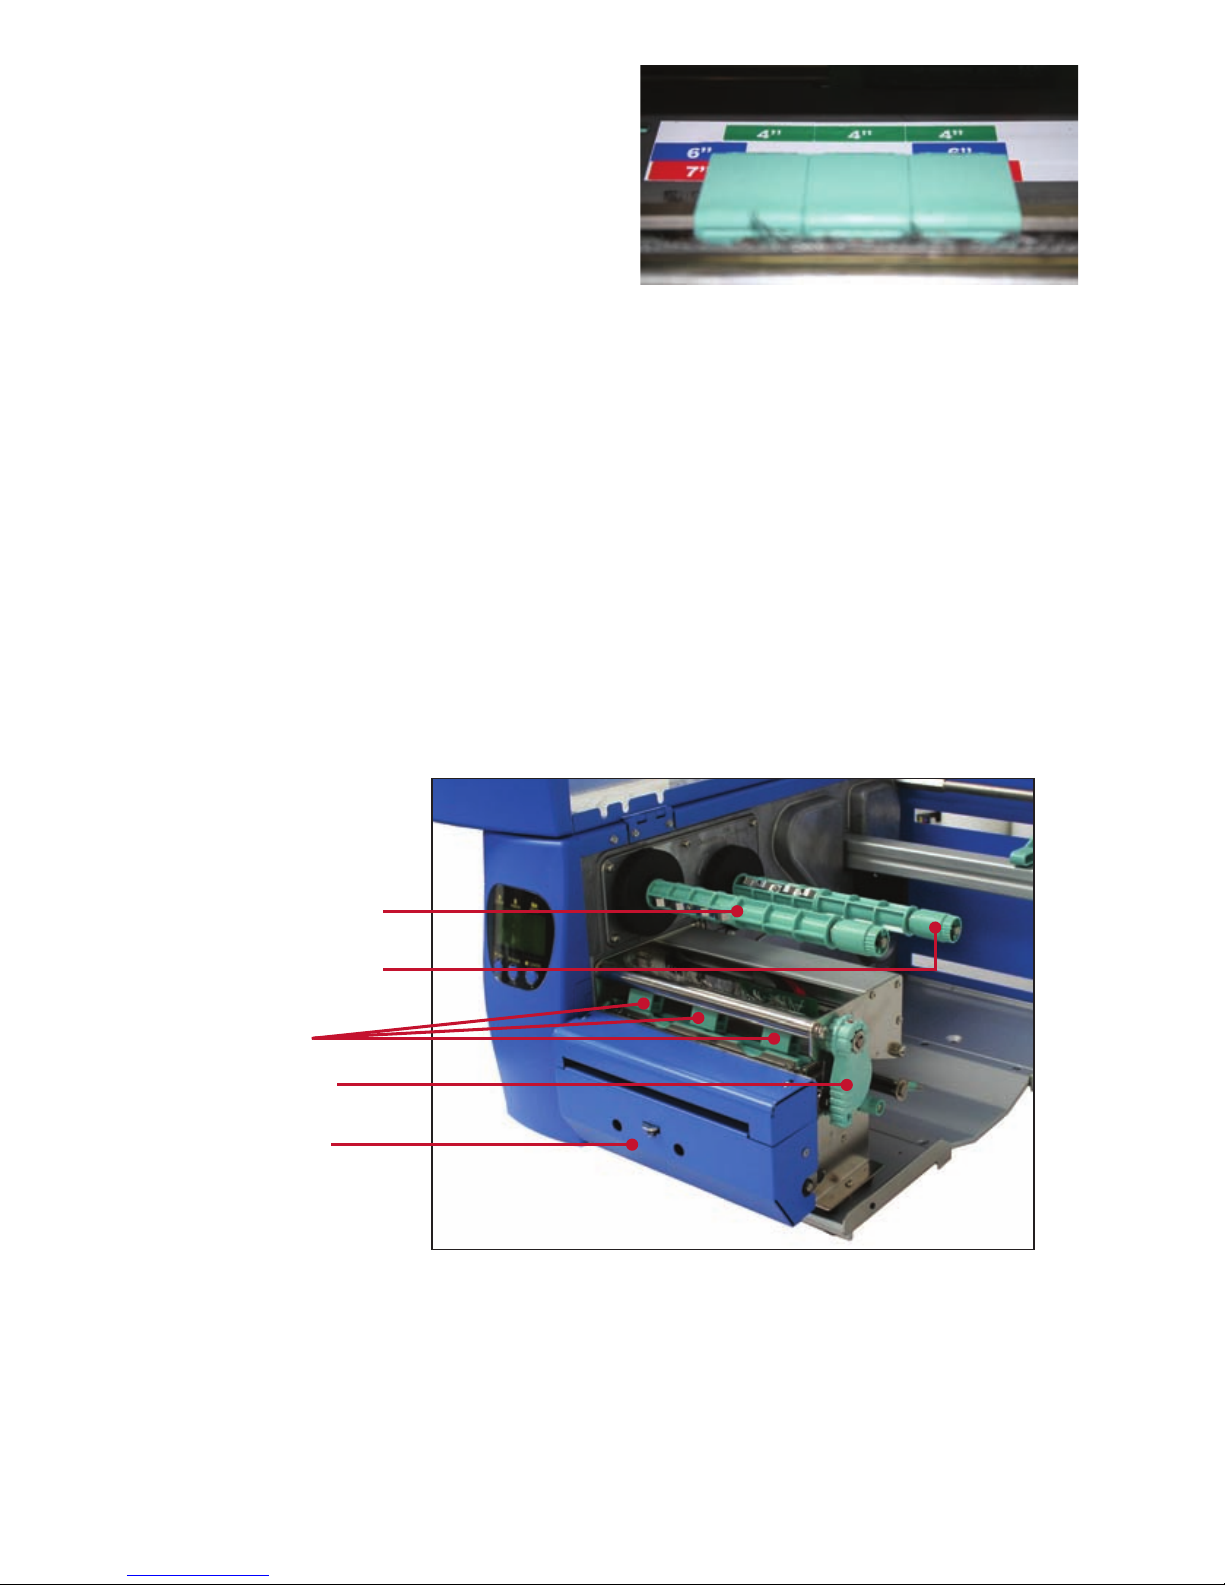
When Using 4" Vinyl
1. Pull and twist the print head release
lever to open the print area.
2. Adjust the Pressure Tabs to be aligned
with the GREEN 4’’ box markers, shown
directly behind the Pressure Tabs.
Load Ribbon Supply
1. Slide an empty supply core onto the ribbon rewind shaft.
2. Slide a roll of printer ribbon onto the ribbon supply shaft, with the end
hanging towards the rear of the printer.
3. Pull the ribbon down and thread it underneath the print head mechanism.
4. Thread ribbon over the front and top of the print head mechanism, and to
the rear of the empty supply core.
5. Tape the ribbon to the empty supply core.
6. Roll the front spindle (ribbon rewind shaft) toward the front of the printer to
tighten ribbon and remove fl aws and fi ngerprints.
7. Close the ribbon carriage by rotating print head lever clockwise while
holding ribbon supply shaft in place, then push the print head lever inward to
lock in place.
Ribbon Rewind Shaft
Ribbon Supply Shaft
Print Head Lever
Print Head
Pressure Tabs
Cutter Module
Figure 6
Page 10

- 8 -
8. Close the cutter module by pushing up and toward the rear of the printer. The
end of the vinyl supply should fi t through the opening in the cutter module.
9. Close the printer cover.
10. Turn the printer ON.
Print a Label
Labels can be created using a variety of common software, including most word
processors. The instructions in the following guide are intended for use with
Microsoft Word
®
and other common word processors. In addition, a variety of
Word templates are included on the DuraLabel 7000 CD, and are automatically
installed at the same time as the printer drivers and other software. These tem-
plates are located in the My Documents/DuraLabel 7000 folder.
1. Open Microsoft Word or another word processor.
2. Select the DuraLabel 7000 as the active printer.
Format Document to Print Label
1. Adjust all margins to 0.
2. Adjust paper size and orientation:
▪ If label width is the width of the supply, set page width to the width of the
supply
, page height to the height of the label, and orientation to Portrait.
▪ If label height is the width of the supply, set page width to the width of the
label, page height t
o the width of the supply, and orientation to
Landscape.
3. Insert a text box into the document.
4. Adjust size and position as desired by clicking and dragging box.
5. Click inside the text box to enter label text.
Page 11

- 9 -
6. Insert any desired graphics.
Note: The DL7000 is a monochrome printer. Colors other than black and
whit
e will interfere with label printing.
7. Print label like a normal document.
Please see pg. 22 of User’s Guide for more information about printing die-cut
labels.
Please see Section 7, pg. 28 of User’s Guide for optimal print settings using the
various ribbon colors and types.
Page 12

www.DuraLabel.com
© 2008, 2009, Graphic Products, Inc. All Rights Reserved
1-800-788-5572
v. 1.0 - 6/10/09
P.O. Box 4030
Beaverton, OR 97076
 Loading...