

Page 1
Instruction Manual
Page 2
Thank you for choosing the Durafly Sidewinder
Exceed 100mph with the ultra-fast Sidewinder. Designed for fast FPV flight, the aircraft arrives
fully-built with pre-installed electronics and navigational lights.
Choose between multiple colored decals, including red, yellow, green and silver. Each of these
colors has a matching tail light to help personalize your wing.
The plug-and-fly aircraft features separate compartments for the motor and ESC to help reduce
electronic interference. Made of EPO foam, the one-piece construction and full-length carbon rods
inside the wing provide a fast stability platform. The Durafly Sidewinder has been designed with an
in-built dummy antenna to balance out the aircraft once your working antenna is attached. The
sidewinder includes differently sized landing skids which can be swapped out depending on the
landing terain.
The Sidewinder is a real speed machine for those willing to chase the thrill.
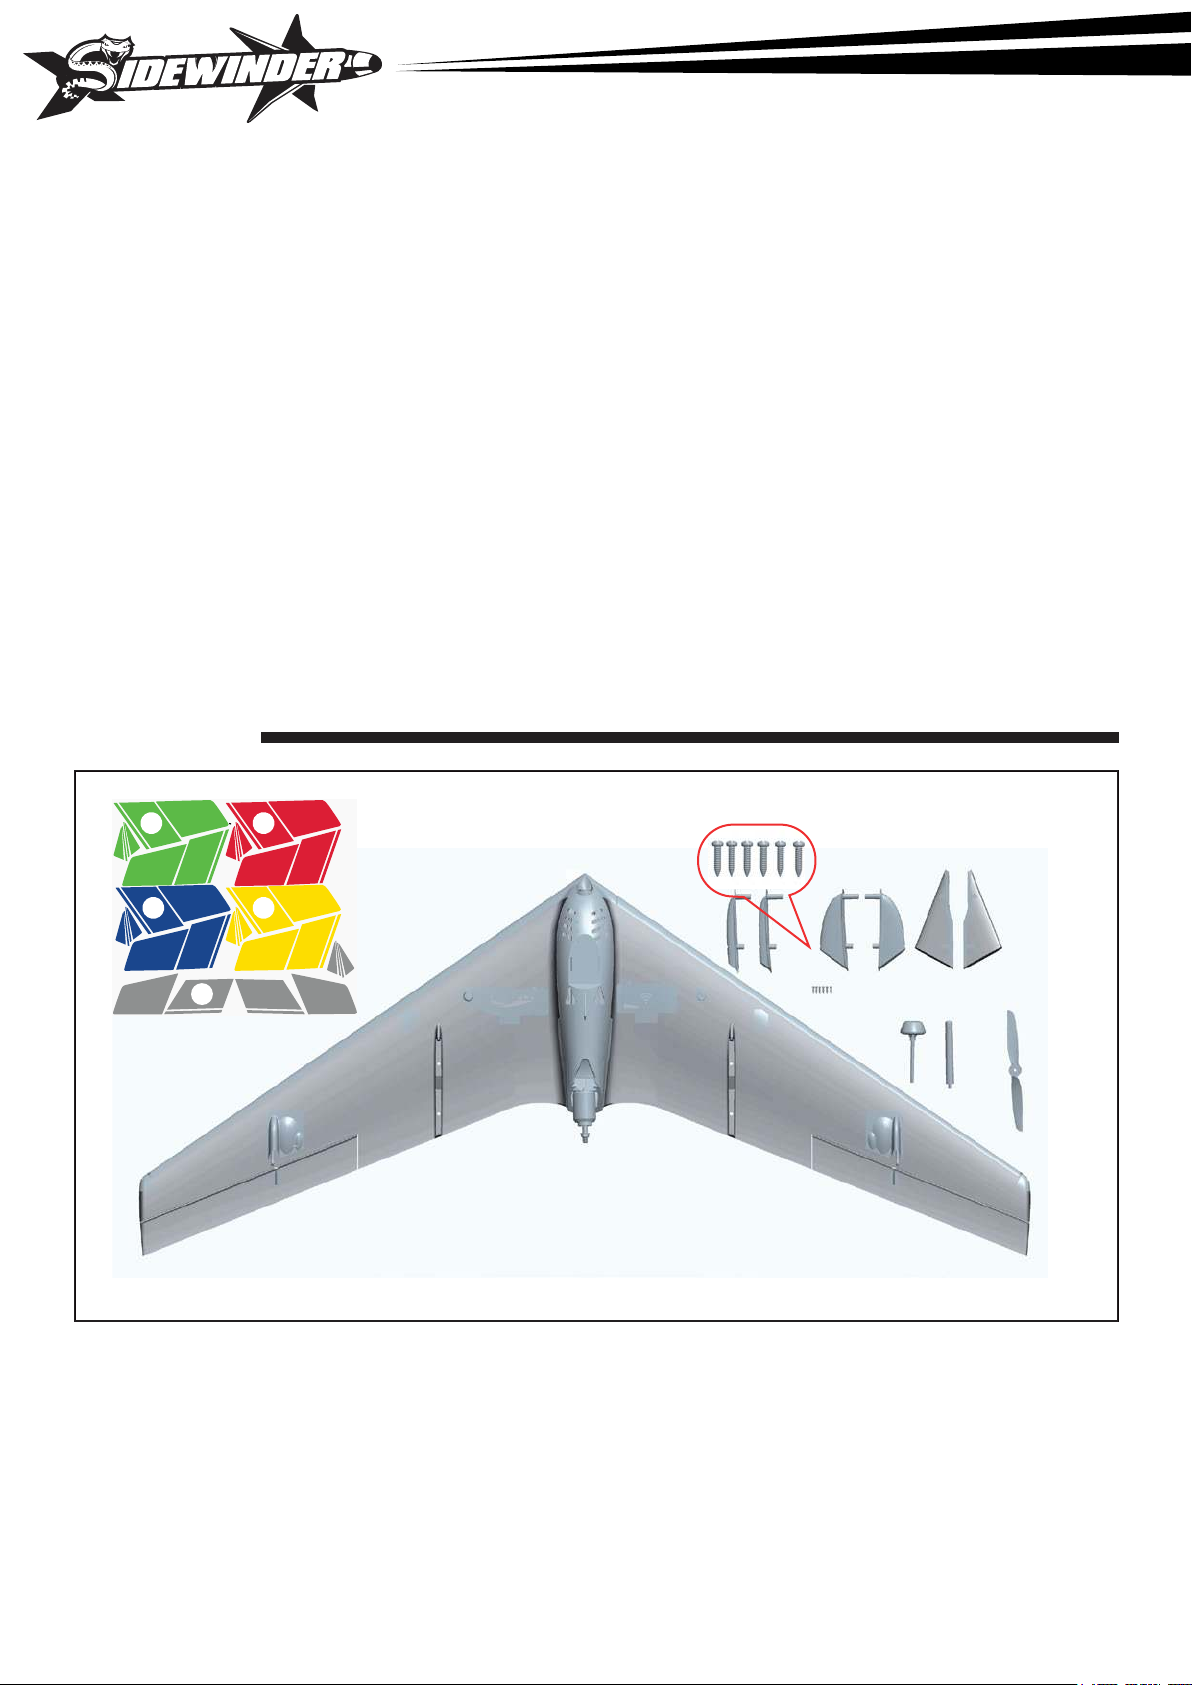
CONTENT :
1. Wing
7
1
8
4
5. Dummy FPV
3
5
2
6
2. Upper vertical stabilizers
3. Landing Skid (1)
4. Landing Skid (2)
1
6. Propeller
7. Sticker pack
8. Hardware
Page 3
REQUIRED TO COMPLETE MODEL :
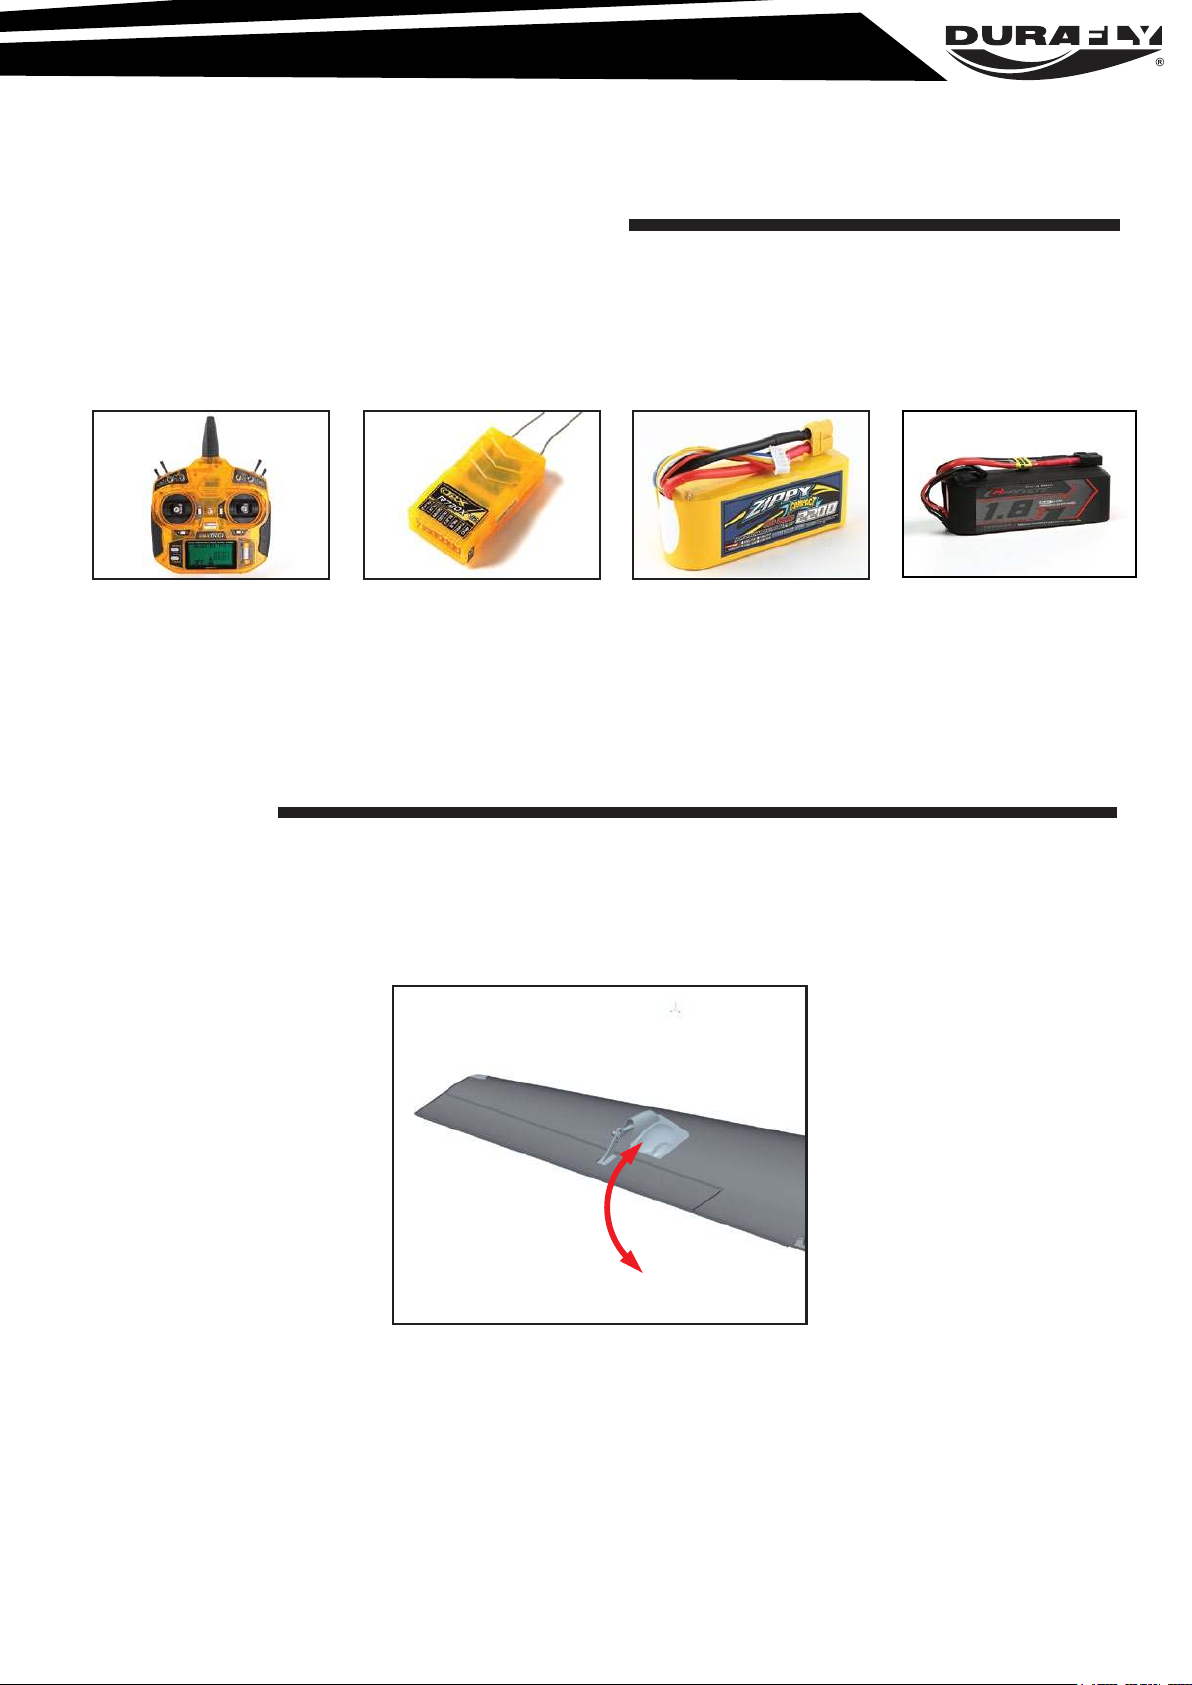
In its ‘Plug n Fly’ format the Durafly Sidewinder will still require some additional electronic
components to get it ‘flight ready’. Durafly recommends the products below for optimum performance and great value. Available at hobbyking.com
OrangeRx Tx6i Full Range
2.4GHz DSM2/DSMX
compatible 6ch Radio System
9171001327-0 (mode 1)
9171001328-0 (mode 2)
OrangeRx R720X V2 7Ch
2.4GHz DSM2/DSMX Comp
Full Range Rx w/Sat, Div Ant,
9171000902-0
Zippy Compact 2200mah
4S 40C Lipo:
Part No. 9067000026-0
Turnigy Graphene 1800mAh
4S 65C LiPo Pack w/ XT60
9067000133-0
ASSEMBLY :
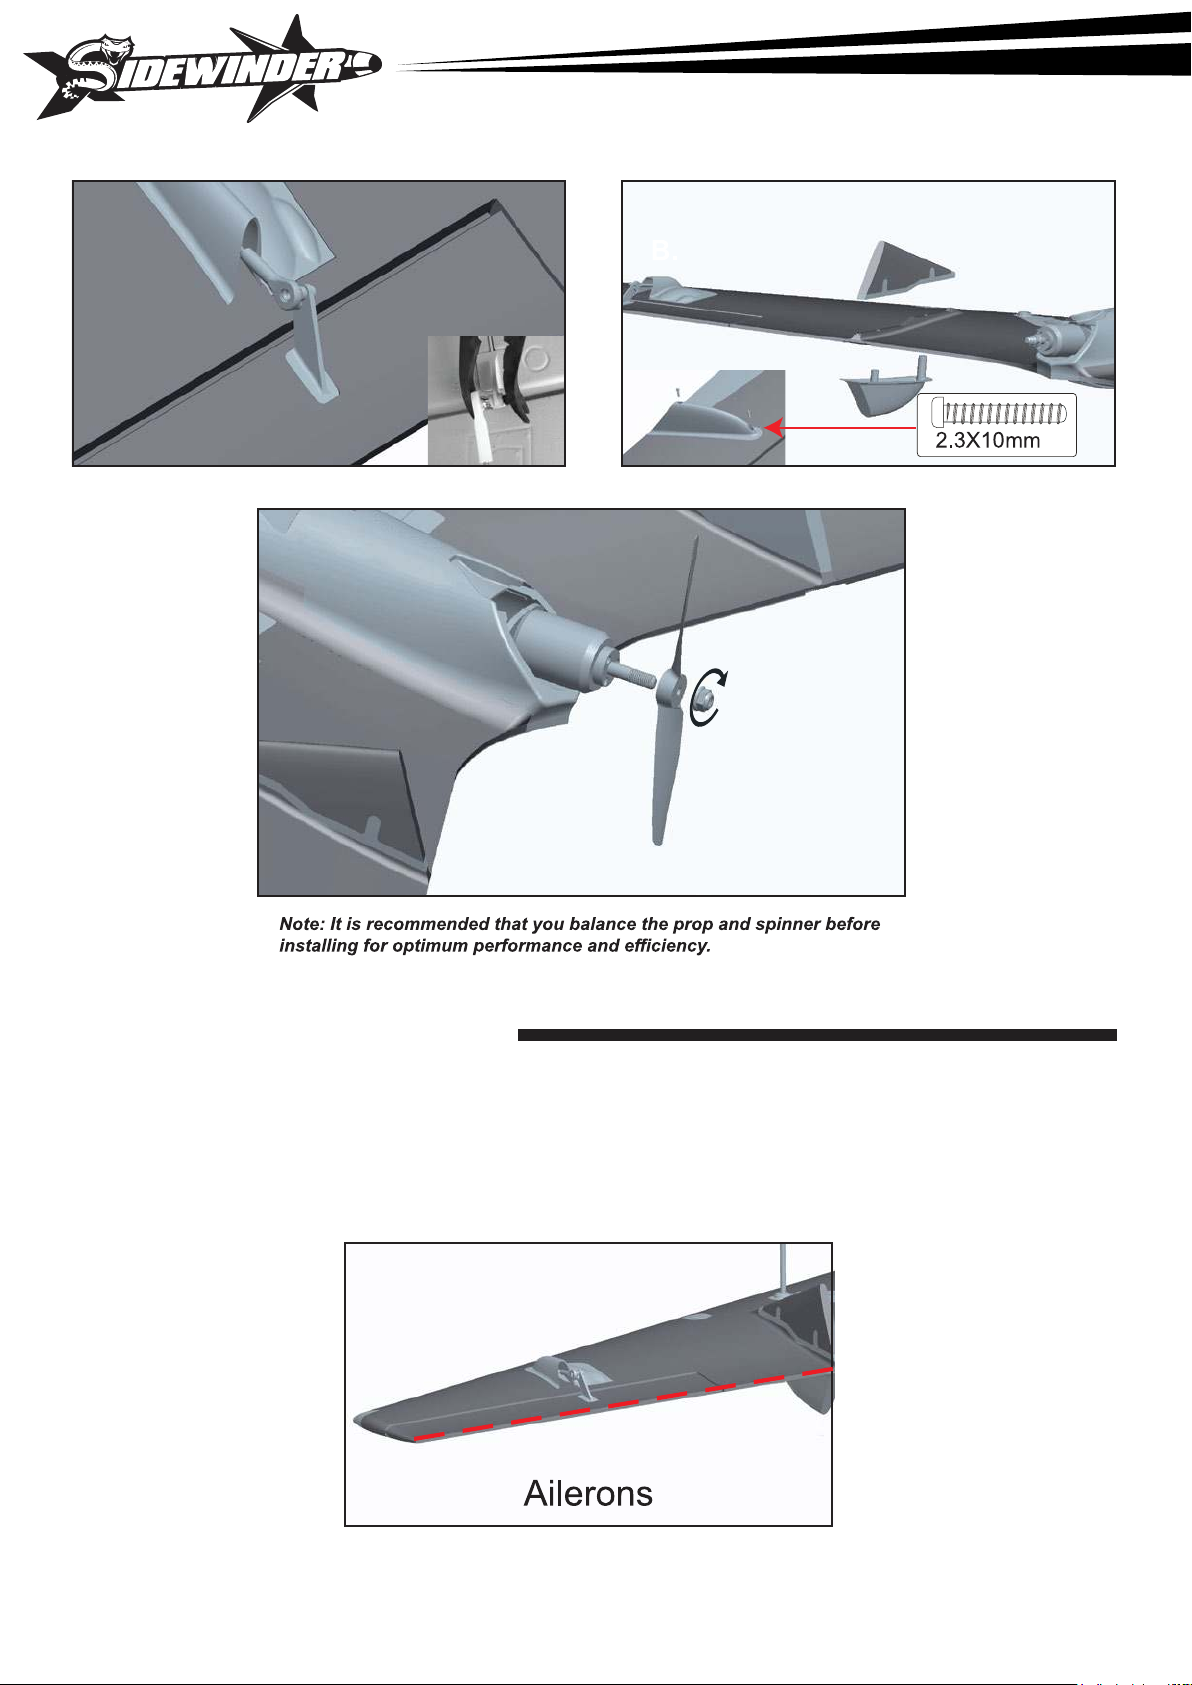
1. Out of the box your Sidewinder comes with reinforced foam hinges. However before assembly
can begin, each hinge line must be flexed back and forth 5-6 times to reduce tension and load on
the servo. Do this for all control surfaces before continuing.
2. With the aileron control horns at 90 degrees to the wing surface (neutral) insert the aileron push
rod into the top hole of the control horn. Secure in place with the plastic keeper and then connect
the ball link to the ball join using pliers.
2
Page 4
SETTING UP YOUR MODEL :
1. With your receiver installed and all servos plugged into their corresponding channels, connect
the flight battery to the ESC to power up the electronics. With the model now armed, ensure all
servos are centered and all control surfaces are level. If not, adjust by turning the control
clevis’s by hand accordingly until the control surfaces are level as shown.
Note: For saftey reasons, it is advised that this is done with the prop removed from the model.
3
Page 5
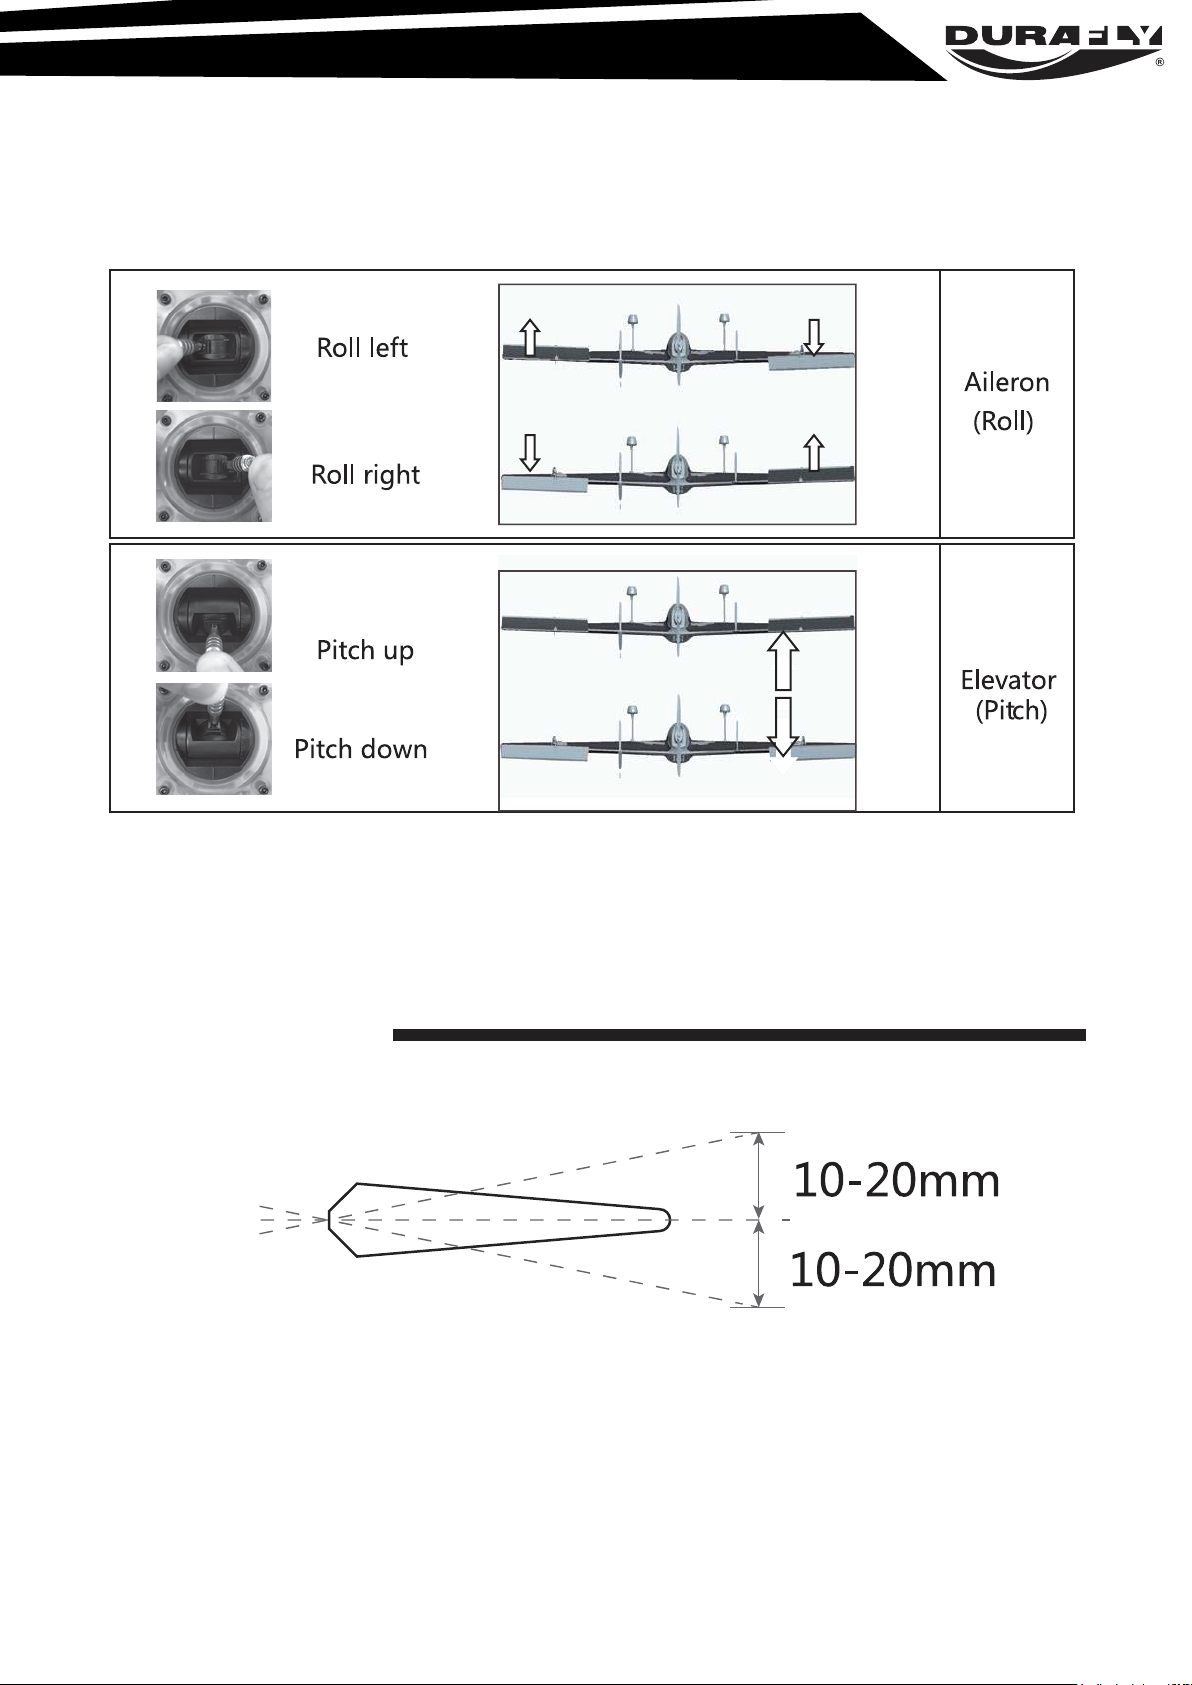
2. Check all control surfaces are moving in the correct direction with the applicable stick input
(see below)
3. The Sidewinder handles very well in flight and that’s not down to good design alone, but a
good pre-flight set-up too. Before you fly your Sidewinder please follow the recommended
settings below for optimum handling and performance.
Control Throws :
Elevon
“Please use this as a guide with the use of 30% expo with your control
throws, after your initial flight then please adjust to suit your flying style”
4
Page 6
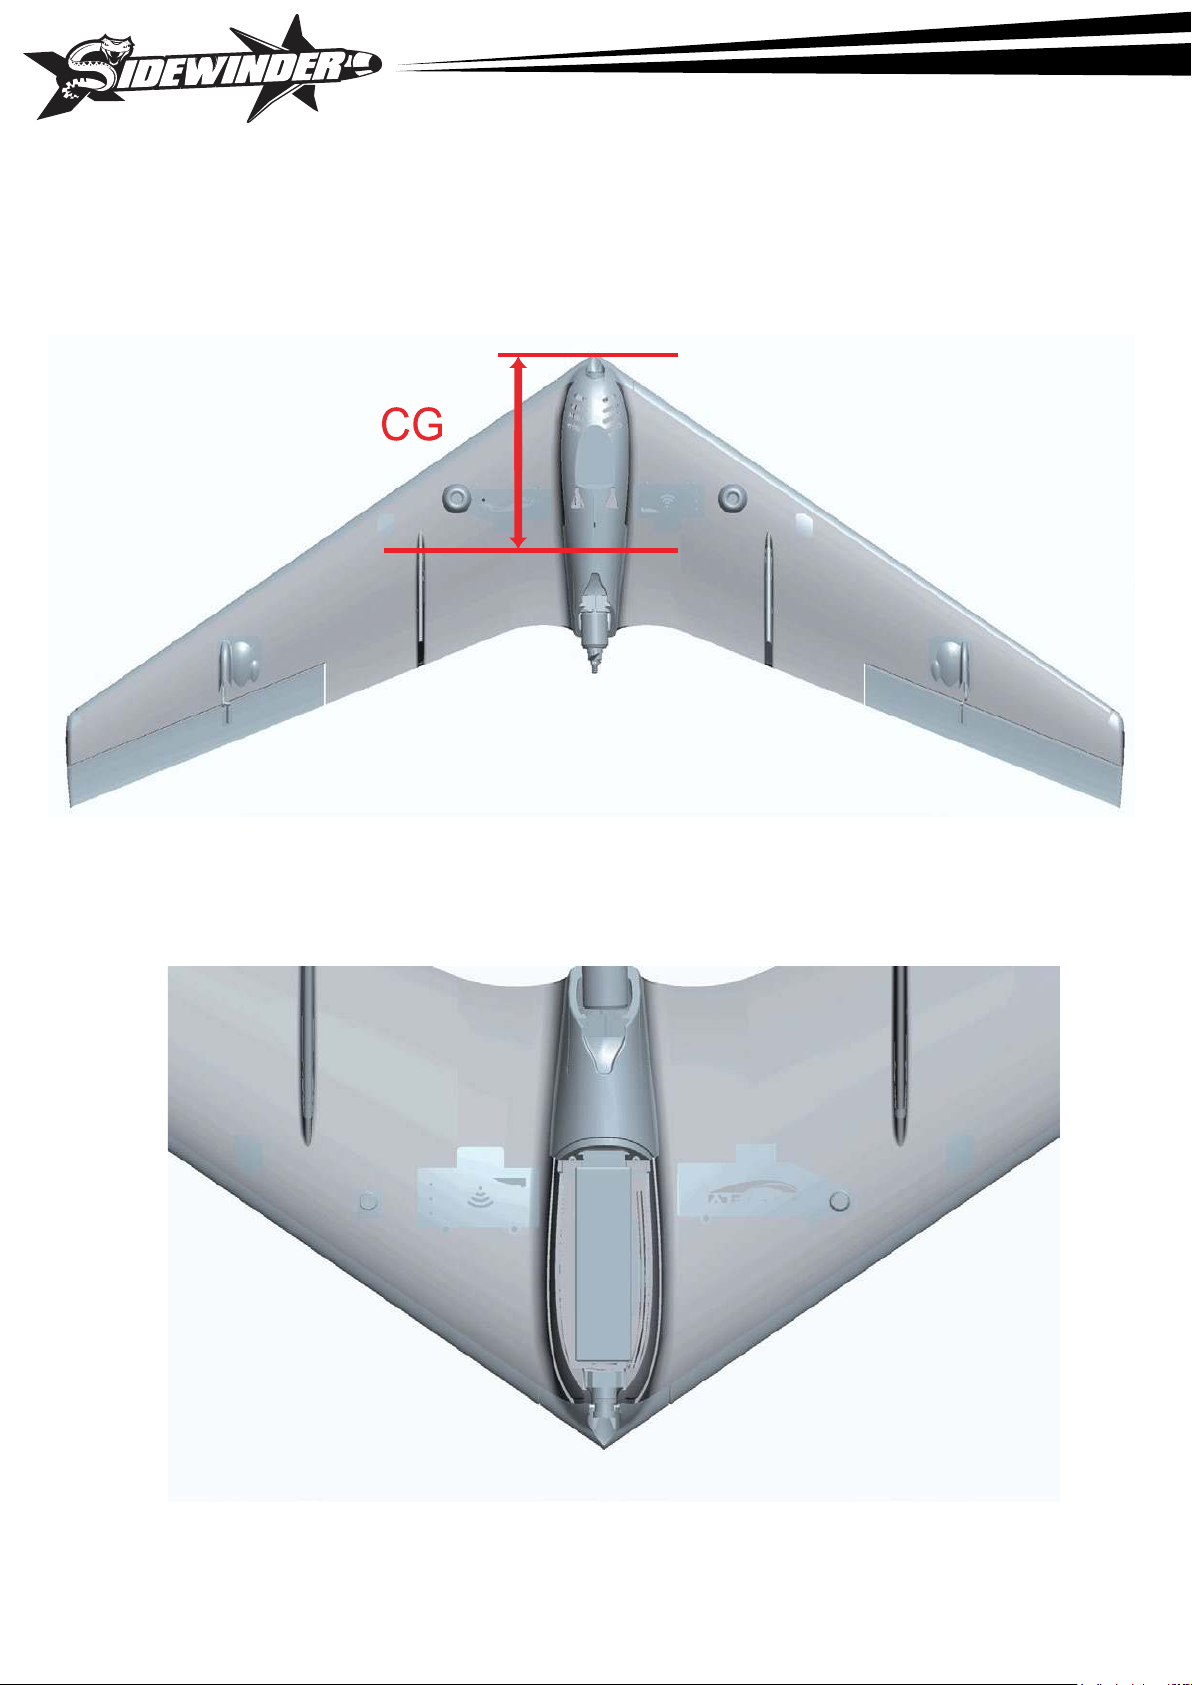
The centre of gravity or CoG is 205-210mm from the nose.
5
Page 7
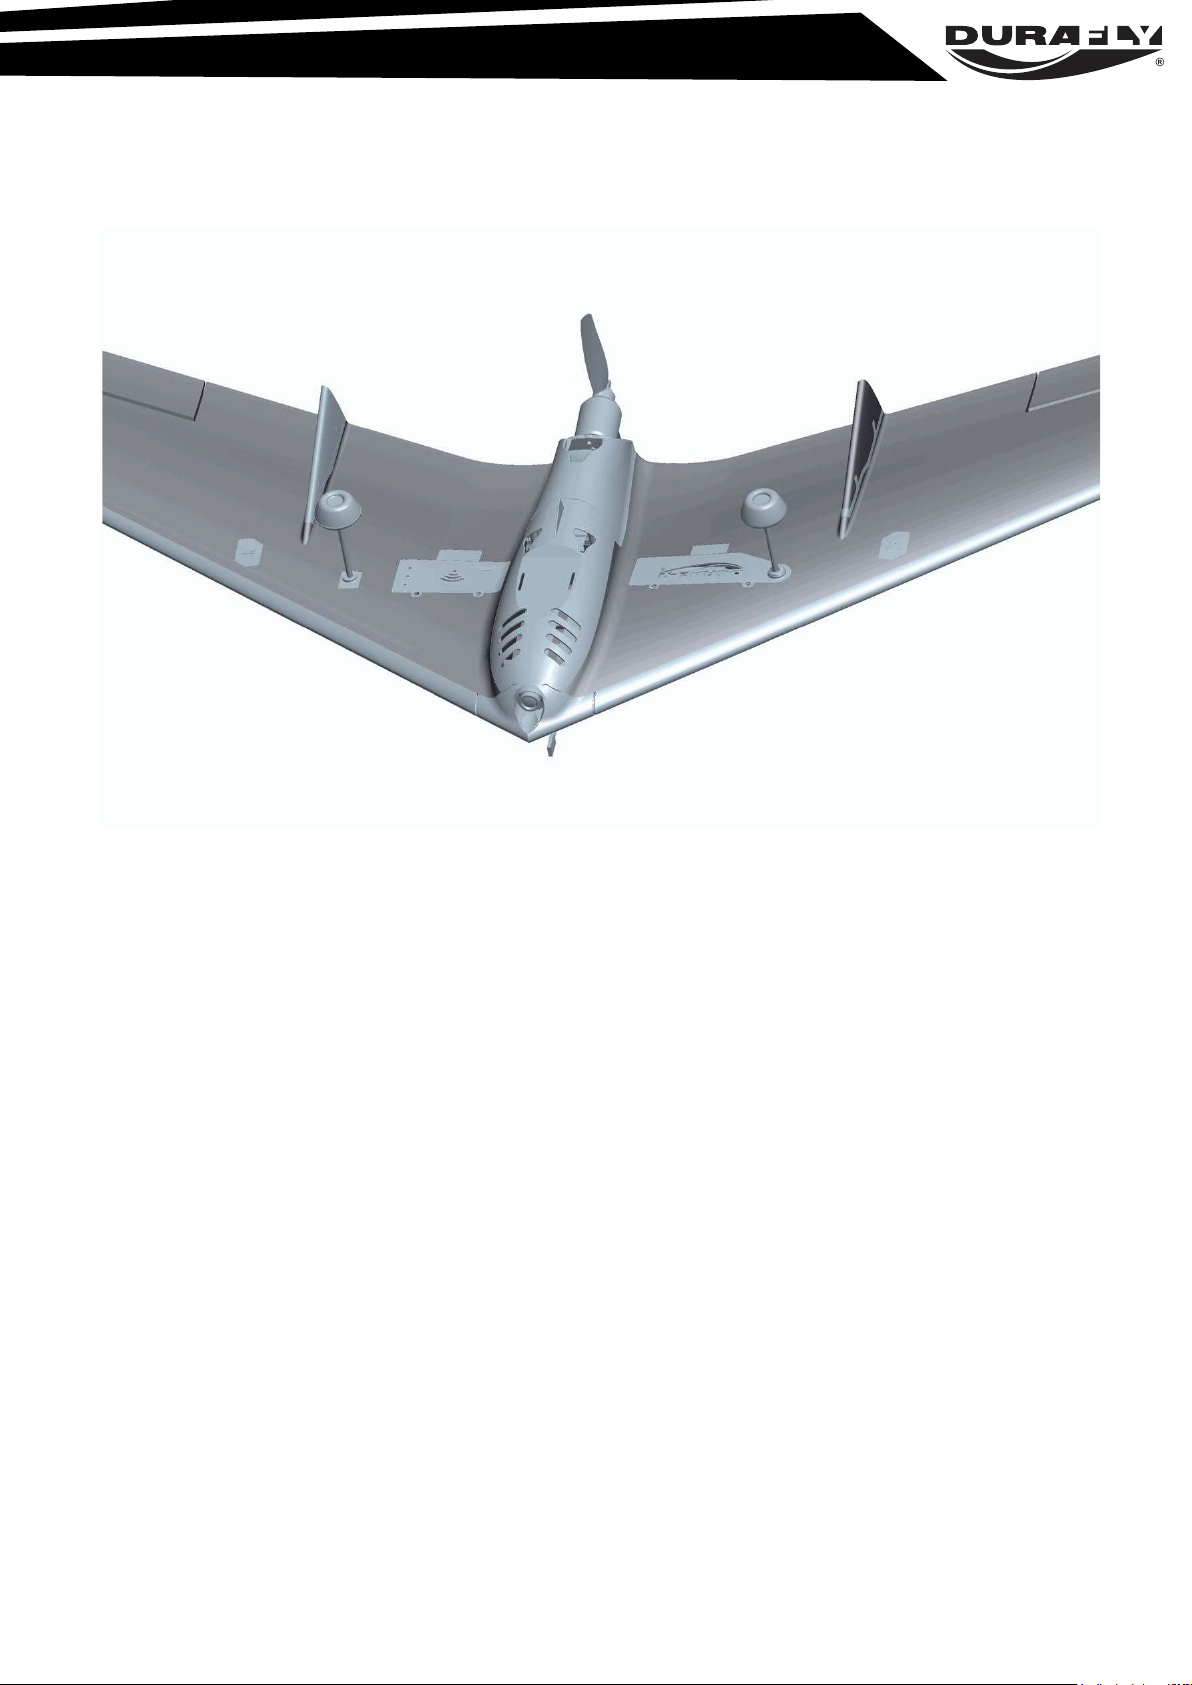
With assembly and set-up now complete, your Sidewinder should now be ready flight.
6
 Loading...