

Duprex MAF350C User Manual
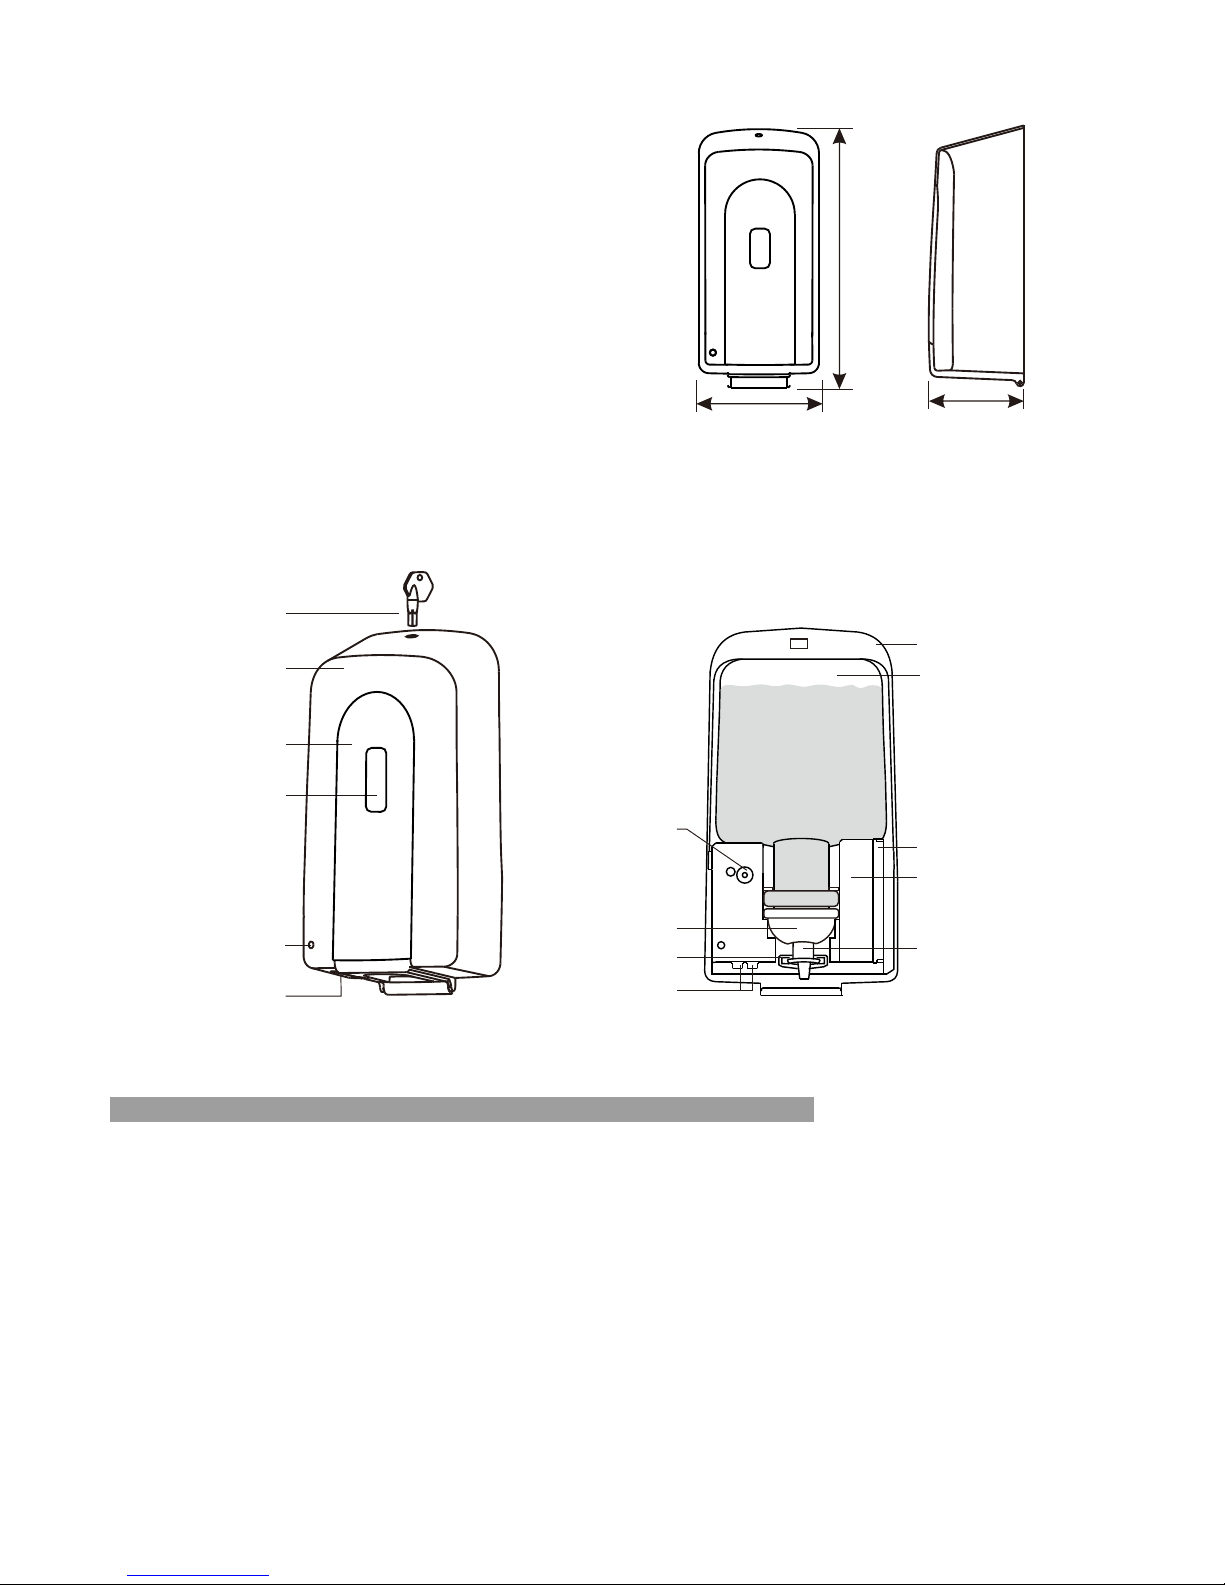
PARTS
Auto Hand Sanizer Dispenser
Model No. : MAF350C
Specificaons
H x W x D
214 x 116 x 85 mm
8.42 x 4.56 x 3.34 inch
Material
ABS
Power Supply Three (3) C-cell Alkaline Baeries
Baery Life 25,000 Hand washes or 1.5 year stand-by
Volume 0.4ml per dispense
Capacity
500ml Disposable/Interchangeable cartridge
Installaon
Wall Mount (Screws / Adhesive)
Foam cartridge
Back plate
Baery Cover
Safety buon
Front cover
Décor Plate
See-through
Window
IR Sensor
LED indicator
(Red / Green)
Key
Pump lever
Pump nozzle
Control Module
116mm
(4.56")
214mm
(8.42" )
85mm
(3.34")
IR Sensor
TROUBLESHOOTING
PROBLEM: dispenser does not operate
1. Check if pump nozzle is in securely posion
2. RED LED lights up
dispenser is not closed properly: Check if cover of dispenser securely closed
3. RED LED blinks
baeries are low: Check if the baeries need to be replaced
4. GREEN LED lights up
sensor is been detected: Check and remove if an object is in the sensing range
PROBLEM: liquid is not dispensed
1. Check if foam soap has run out
2. Check if Pump Nozzle is clogged
/ before calling for repair of Control Module
Pump
MAF350C
2-1
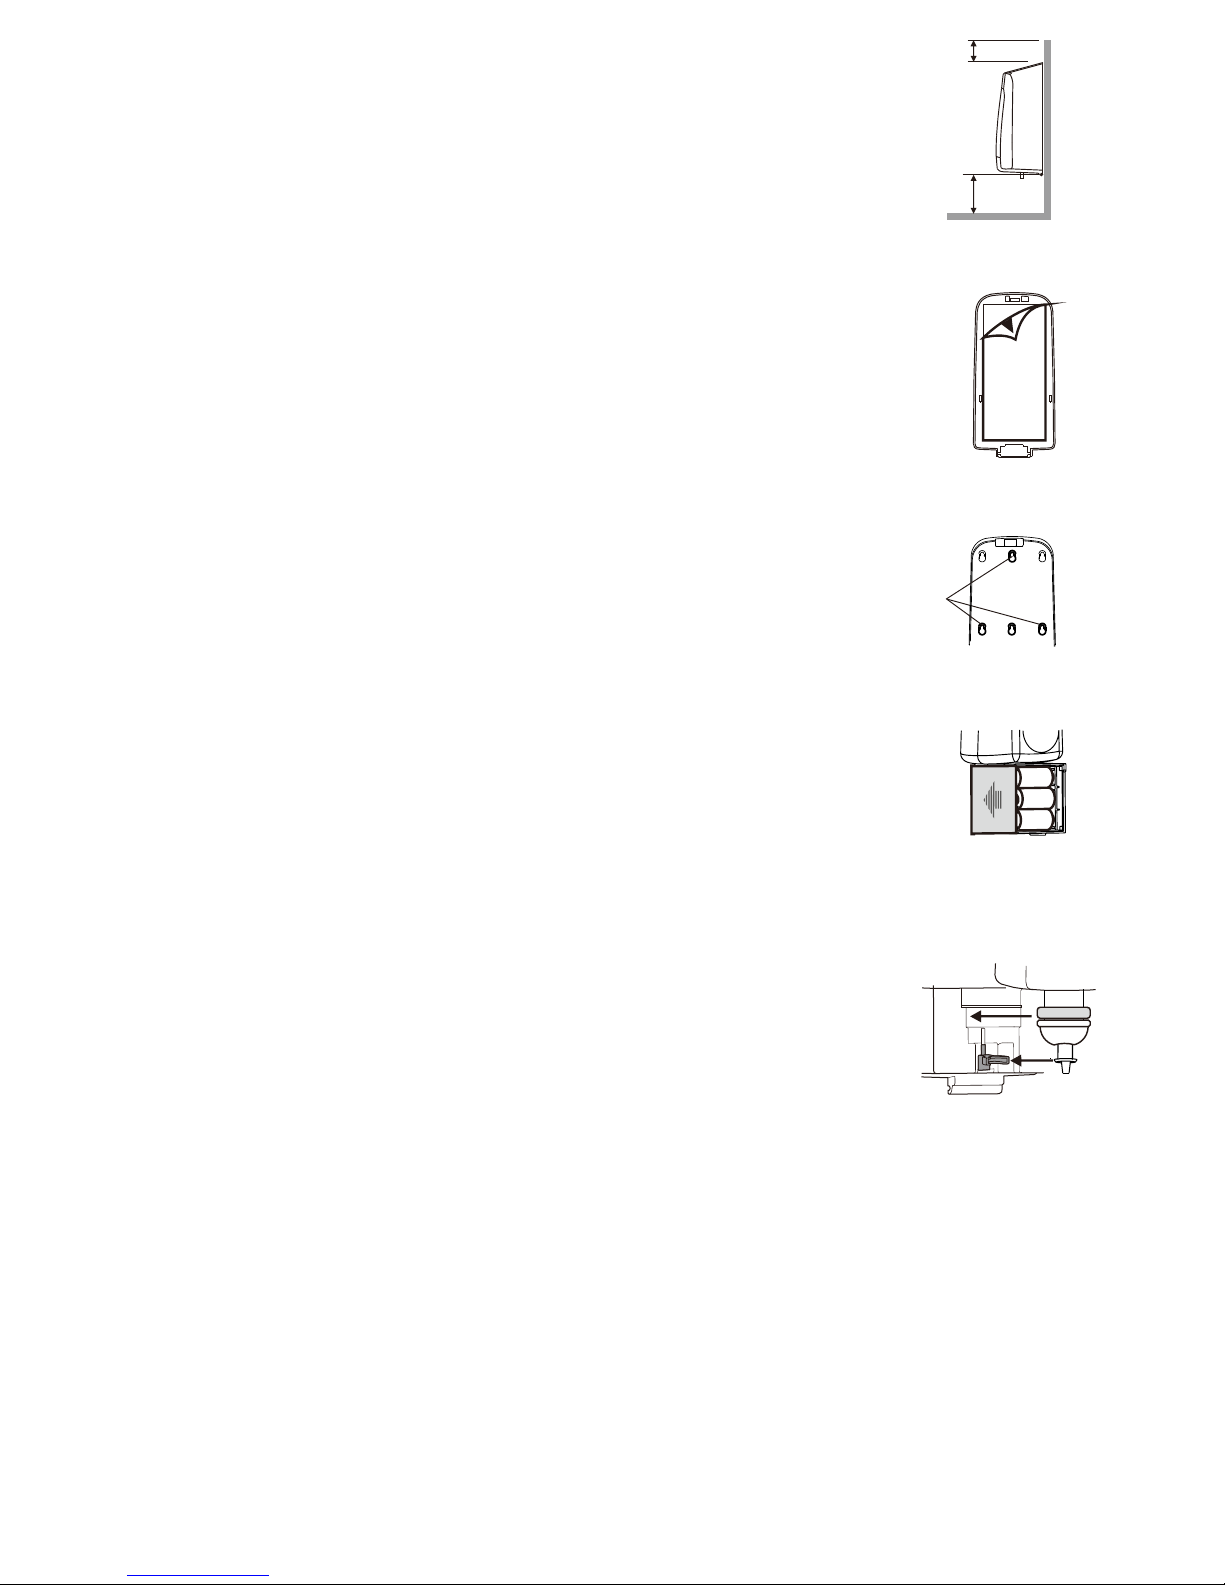
INSTALLATION
Locating Dispenser
Mounted at least 30cm (12”) above the surface. Allow 10cm (4”)
clearance above dispenser to be able to use key to open cover.
Do not install above a mirrored surface or mount under flowing water.
10cm (4")
30cm (12")
W.L
Adhesive tape mounting (Fig.1)
Tape mounting is only recommended for mirrors or similar surface. Make sure
the mounting surface is flat. Clean surface well and dry. Remove protective
backing off from adhesive tape and press dispenser firmly to the wall for
15 seconds. Open cover and press directly on back plate for an additional
15 seconds. Allow 6 hours before using dispenser and installing refill and batteries.
Screws and anchors mounting (Fig. 2)
Drill holes at a proper position on the wall. Install provided anchors and use
screw to secure the dispenser permanently on th
e wall.
Battery Installation (Fig.3)
Use provided key to open dispenser.
Insert three C-cell Alkaline batteries (not included) into battery compartment
on the right side of the unit after removing battery cover.
Cartridge Installation (Fig.4)
Place the cartridge on top of the control module with the pump
facing from and orientated downward. Pump nozzle should be easy to fit into
the groove of Pump Lever on the control module.
Close dispenser cover. GREEN LED blink 3 times. The dispenser is now ready
to be used, GREEN LED indicator comes to flash once every 5 seconds.
Place h
ands beneath the Sensor on the left hand side of the dispenser allow
1-2 seconds, GREEN LED lights and will dispense foaming soap onto your hand.
OPERATIING INSTRUCTIONS
• Power ON after front cover was closed.
GREEN LED blinks 3 times to indicate unit is ready to be used.
GREEN LED will then keep flashing once every 5 seconds.
• Power OFF when front cover was opened.
RED LED indicator will light up.
• Low-Battery the RED LED will blink to indicate the batteries are low,
need replacement.
3 X C-cell battery
+
-
-
+
+
-
Screw
Mounting
Holes
Fig. 1
Fig. 2
Fig. 3
Fig. 4
Pump Lever
2-2
 Loading...