

Page 1

Store this manual so that it can be retrieved whenever needed.
Instruction Manual
DP-22S/22L/24S
Ver.1
Correct operation and periodic maintenance are
essential for ensuring safe use of this machine.
Thoroughly read this manual before using this
machine.
DUPLO CORPORATION
Page 2

1
2
1
○○○○○○○○○○○○○○○○○○○○○○○○○○○○○○○○○○○○○○○○○○○○○○○○○○○○○○○○○○○○○
Thank you for your purchase of the Duprinter DP-22S/22L/24S.
To ensure safe and efficient prolonged use of this machine, read and thoroughly understand this manual before
using this machine. After using this manual, be sure to keep it in a place to handy reference.
Introduction
PLEASE NOTE
In the interest of upgrading our products, specifications and other data given in this manual are subject to
change without notice. If the manual contains anything that you do not understand, contact the manufacturer for clarification.
Page 3

2
○○○○○○○○○○○○○○○○○○○○○○○○○○○○○○○○○○○○○○○○○○○○○○○○○○○○○○○○○○○○○
The following is a quick reference to the functions of the DP-22S/22L/24S printer.
B4 Printout
B5 Printout
A4 Document
Enlargement/Reduction ........
(a P.39)
This function copies a document on one standard paper size to another larger or smaller standard paper size.
94% Reduction .......
(a P.40)
This function slightly reduces the size of a document when printing to the same standard paper size as the document.
A4 Document A4 Printout
(94%)
Function Quick Reference
1%-Step Enlargement and Reduction .........
(a P.42)
This function enlarges or reduces a document in 1% steps between 50% and 200%.
Document
Printout
Page 4

3
2
1
○○○○○○○○○○○○○○○○○○○○○○○○○○○○○○○○○○○○○○○○○○○○○○○○○○○○○○○○○○○○○
Text/Photograph/Text and Photograph Mode .........
(a P.47)
This function selects the optimum print quality to match the document.
ABCDEFGH
ABCDEFGHIJKLNO
PQRSTUVWXYZ
abcdefghijklmnopqrs
tuvwxyz
ABCDEFGHIJKLNO
PQRSTUVWXYZ
abcdefghijklmnopqrs
tuvwxyz
ABCDEFGHIJKLNO
PQRSTUVWXYZ
ABCDEFGH
ABCDEFGHIJKLNO
PQRSTUVWXYZ
abcdefghijklmnopqrs
Text
Text/Photograph
Photograph
Book Shadow Eraser Mode .........
(a P.63)
This function erases the shadows on the center or edges of book or other folded documents when printing the open
spread.
Document
Printout
Printout
With shadow eraser
Without shadow eraser
Printout
Document
2-up Function .........
(a P.58)
This function prints 2 images of a document on one page.
Page 5

4
○○○○○○○○○○○○○○○○○○○○○○○○○○○○○○○○○○○○○○○○○○○○○○○○○○○○○○○○○○○○○
Sectional Printing ........
(a P.67)
You can print the specified number of sets of copies in each set.
1
1
1
1
1
1
1
1
Document
1st set
5 copies x 2 sets
2nd set
3 copies x 4 sets
3rd set
2 copies x 5 sets
1
1 1 1
Changing Print Quantity per Document .........
(a P.71)
This function changes the number of prints made from each document.
2
2
2
3
2
3
3
3
3
1
Documents
1
1
3
1st document
5 copies x 2 sets
2nd document
3 copies x 4 sets
3rd document
2 copies x 5 sets
2
2-in-1 Layout
Available only with ADF installed
.........
(a P.61)
This function prints two different documents on one page.
Documents
Printout
Page 6

5
2
1
○○○○○○○○○○○○○○○○○○○○○○○○○○○○○○○○○○○○○○○○○○○○○○○○○○○○○○○○○○○○○
Contents
Introduction......................................................................................................................... 1
Function Quick Reference ................................................................................................. 2
Notes on Safety (Please Read and Observe) ................................................................... 8
Safety Precautions .............................................................................................. 8
Warning Sticker ........................................................................................................ 11
Positioning the Machine ........................................................................................... 12
Maintenance............................................................................................................. 13
Printing and Duplicating Cautions ............................................................................ 14
Conventions Used in This Manual............................................................................ 15
Chapter 1 Before Using This Machine
System Setup.................................................................................................................... 18
Part Names and Their Functions..................................................................................... 19
Printer Appearance .................................................................................................. 19
Control Panel............................................................................................................ 22
LCD Panel ................................................................................................................ 24
T urning Power ON/OFF .................................................................................................... 25
Turning ON Printer Power......................................................................................... 25
Turning OFF Printer Power....................................................................................... 26
Standard Mode......................................................................................................... 26
Key Card Counter [Available only with Key Card Counter installed]......................... 27
Document/Printing Paper Specification ......................................................................... 28
Acceptable Documents ............................................................................................ 28
Acceptable Printing Paper ........................................................................................ 28
How Platemaking and Printing is Performed ................................................................. 29
Platemaking.............................................................................................................. 29
Printing ..................................................................................................................... 29
Chapter 2 Printing Using Basic Functions
Basic Printmaking ............................................................................................................ 32
Loading and Replacing Paper ......................................................................................... 34
Loading Paper .......................................................................................................... 34
Adjusting Paper Feed Pressure................................................................................ 35
Loading Documents ......................................................................................................... 36
Positioning the Document......................................................................................... 36
Loading Document on Document Glass Plate ......................................................... 37
Loading Document in ADF [Available only when ADF installed] .............................. 38
Enlargement and Reduction............................................................................................ 39
Enlarging/Reducing from Standard-Size Document to Standard-Size Paper .......... 39
94% Reduction ......................................................................................................... 40
1% - Step Enlargement and Reduction .................................................................... 42
Selecting Printing Paper Size .......................................................................................... 44
Text/Photograph/Text and Photograph Mode ................................................................ 47
Print Output....................................................................................................................... 49
Installing Print Tray ................................................................................................... 49
Truing up Printed Pages........................................................................................... 51
Page 7

6
○○○○○○○○○○○○○○○○○○○○○○○○○○○○○○○○○○○○○○○○○○○○○○○○○○○○○○○○○○○○○
Contents
Chapter 3 Printing With V arious Function
Saving Settings................................................................................................................. 54
Saving Settings ........................................................................................................ 54
Retrieving Settings ................................................................................................... 56
Multiple Printing on One Page......................................................................................... 58
2-up Function ........................................................................................................... 58
2-in-1 Layout [Available only when ADF installed].................................................... 61
Book Shadow Eraser Mode ............................................................................................. 63
Adjusting Plate Darkness ................................................................................................ 65
Sectional Printing ............................................................................................................. 67
Sectional Printing ..................................................................................................... 67
Sectional Printing (changing print quantity per document)....................................... 71
Dividing Sections with Tape [Available only with Tape Cluster Device]..................... 74
Chapter 4 Miscellaneous Functions
Confidential Safeguard Function .................................................................................... 78
Total Counter Display Function....................................................................................... 79
Print Speed Adjustment Function................................................................................... 80
Printing Position Adjustment Function.......................................................................... 81
On-Line Print Function [Available Only With Interface Kit Installed]........................... 82
Chapter 5 Replacing Consumables
Replacing the Ink Pack..................................................................................................... 84
Replacing the Master Roll................................................................................................ 87
Replacing the Master Ejection Core ............................................................................... 90
Replacing the Drum Unit.................................................................................................. 92
Removing the Drum Unit .......................................................................................... 92
Installing the Drum Unit ............................................................................................ 94
Chapter 6 Troubleshooting
Countermeasures to Troubles......................................................................................... 98
Power Does Not Turn ON......................................................................................... 98
Platemaking/Printing is Not Possible........................................................................ 98
Error Messages................................................................................................................. 99
Supplying or Changing Paper While Printing.............................................................. 103
If Paper Runs Out During Printing.......................................................................... 103
Adding Paper While Printing .................................................................................. 103
Changing Paper Selection While Printing .............................................................. 105
Paper Jams ..................................................................................................................... 107
When “PAPER LEFT JAM” is Displayed (Feed Tray)............................................. 107
When “PAPER RIGHT JAM” is Displayed (Print Tray) ........................................... 108
When “MAST. EJECT ERROR” is Displayed.................................................................111
When “MASTER SET MISS” is Displayed .................................................................... 114
Page 8

7
2
1
○○○○○○○○○○○○○○○○○○○○○○○○○○○○○○○○○○○○○○○○○○○○○○○○○○○○○○○○○○○○○
Contents
Chapter 7 Specifications and Maintenance
Specifications ................................................................................................................. 118
Appendix
Index ................................................................................................................................ 122
Quick Operation Guide .................................................................................................. 124
Page 9

8
○○○○○○○○○○○○○○○○○○○○○○○○○○○○○○○○○○○○○○○○○○○○○○○○○○○○○○○○○○○○○
Notes on Safety (Please Read and Observe)
Safety Precautions
Various symbols and pictures are used in this manual and on the stickers affixed to the machine. These symbols and
pictures provide warnings and instructions to prevent danger to you or other personnel, and to prevent damage to office
property. The meanings of these symbols and pictures are explained below.
WARNING
Indicates a high degree of potential danger. If the warning is ignored, death or serious
injury may result.
CAUTION
Indicates a medium degree of potential danger. If the caution is ignored, medium injury or
damage to property may result.
[Examples of Pictorial Symbols]
A circle with a line through it indicates a prohibited action. The particular act prohib-
ited is indicated by a picture inside the circle. (In the example shown here, the prohibited
act is disassembly.)
A black disc indicates an instruction, or sometimes a prohibited action. T he instruction
itself is indicated by pictorial symbols drawn in white on the disc. (In the example shown
here, the instruction is “Remove the plug from the outlet.”)
• These are particularly important safety points and should always be observed.
W ARNING
If the machine is used after foreign matter (metal fragments, water, or liquid) has entered the
machine, this may result in fire or electric shock.
• Turn the main unit’s power switch OFF, and then remove the power plug from the outlet. Contact
the sales distributor.
If the machine is used after heat, smoke, strange smell, or other abnormality is detected, this may
result in fire or electric shock.
• Turn the main unit’s power switch OFF, and then remove the power plug from the outlet. Contact
the sales distributor.
Use only the power cord that is provided among the accessories.
Page 10

9
2
1
○○○○○○○○○○○○○○○○○○○○○○○○○○○○○○○○○○○○○○○○○○○○○○○○○○○○○○○○○○○○○
Notes on Safety (Please Read and Observe)
WARNING
Do not modify the machine.
• Doing so may result in fire or electric shock.
Do not remove the rear lid, cabinet, or covers from the machine.
• The inside of the machine contains high-voltage parts, which may cause electric shock.
Do not remove or insert the power plug with wet hands.
• Doing so may result in electric shock.
Do not damage, break, or modify the power cord.
• Do not place heavy objects on, tug, or unnecessarily bend the power cord. Doing so may result in
fire or electric shock.
Do not insert or drop metal, flammable material, or other matter through the ventilation holes into
the machine interior.
• Doing so may result in fire or electric shock.
Do not place flower vases, flowerpots, cups, or water containers (including metal containers) on top
of the machine.
• Fire or electric shock may result if liquid spills inside the machine.
Do not use a source voltage other than that specified. Do not connect two or more loads to a single
outlet.
• Doing so may result in fire or electric shock.
Do not place the machine in a humid or dusty area.
• Doing so may result in fire or electric shock.
Page 11

10
○○○○○○○○○○○○○○○○○○○○○○○○○○○○○○○○○○○○○○○○○○○○○○○○○○○○○○○○○○○○○
Notes on Safety (Please Read and Observe)
CAUTION
Before moving the machine, remove the power plug from the outlet.
• If the cord is damaged, this may result in fire or electric shock.
Remove the power plug itself, not the cord.
• Tugging the cord may damage it (expose conductors, or cause disconnections, etc.), resulting in
fire or electric shock.
Do not place the machine in an unstable position, such as on an unsteady support or sloping area.
• If the machine is dropped or falls over, this could result in personal injury.
Once the machine is in position, secure in place using the casters.
• If the machine falls over, this could result in personal injury.
Page 12

11
2
1
○○○○○○○○○○○○○○○○○○○○○○○○○○○○○○○○○○○○○○○○○○○○○○○○○○○○○○○○○○○○○
L5-T3020
Do NOT touch the drum or rollers
when you operate the jog switch.
Do NOT put hands Inside
machine while it is operatung.
Hands could get caught up
or crushed.
WARNING
Notes on Safety (Please Read and Observe)
Warning Sticker
Keep the WARNING stickers clean at all times. If stickers become damaged or come off, replace them with new ones.
No. Parts No. Name Q’ty
q L1-T3060 Warning Sticker 1 1
w L5-T3020 Warning Sticker 2 1
L1-T3060
WARNING
● Do not remove this cover. The inside of the printer contains movable cutting instruments,
contact with which could result in injury.
Page 13

12
○○○○○○○○○○○○○○○○○○○○○○○○○○○○○○○○○○○○○○○○○○○○○○○○○○○○○○○○○○○○○
Positioning the Machine
Installing the machine on a flat, stable surface.
Avoid installing the machine in a dusty area.
Avoid installing the machine in the direct sunlight or heat,
such as near a stove. Ink may deteriorate and may cause
bad prints, while the machine may indicate errors due to
overheating caused by sunlight. Also avoid hot, cold, or
humid areas since paper may absorb moisture, causing
paper jams or wrinkles.
Notes on Safety (Please Read and Observe)
,
Page 14

13
2
1
○○○○○○○○○○○○○○○○○○○○○○○○○○○○○○○○○○○○○○○○○○○○○○○○○○○○○○○○○○○○○
Maintenance
Clean the exterior of the machine as described below.
Tightly wring a soft cloth that has been moistened with
water or neutral detergent, and wipe dirt from the machine’s surface.
Never use alcohol or organic solvents. Doing so may
discolor or damage the machine exterior.
Dust and clean the machine at least once a week to avoid
breakdowns.
Before cleaning, turn the power switch OFF, and then
remove the power plug from the outlet.
To clean the reader glass, use a dry, soft cloth and lightly
wipe off any dirt.
WARNING
• Before cleaning, remove the power plug from the outlet.
Doing so may result in fire or electric shock.
• Prevent water and neutral cleansers from getting inside the machine. If liquids spill inside the machine, contact your agent immediately. Using the machine with water spilled inside may result in fire or
electric shock.
Notes on Safety (Please Read and Observe)
Page 15

14
○○○○○○○○○○○○○○○○○○○○○○○○○○○○○○○○○○○○○○○○○○○○○○○○○○○○○○○○○○○○○
Notes on Safety (Please Read and Observe)
Printing and Duplicating Cautions
There are restrictions on what you may print on this printer. Please be aware that there are some printed materials that
are illegal even to possess.
1. Printed Matter Banned by Law
• Paper money, currency, government bonds and national and local bonds cannot be duplicated, even if they are
stamped with the “sample” seal.
• Paper money, currency and bonds, etc. that are valid in a foreign country cannot be duplicated.
• Unused postage stamps and postcards cannot be duplicated without government consent.
• Government-issued papers pertaining to stamps, liquor and sales tax laws cannot be duplicated.
2. Printed Matter that Require Caution
• Printed-issued securities (stocks, bills and checks, etc.), passes and tickets require caution in duplicating unless a
business is duplicating them for required number for their own business needs.
• Government-issued passports, public- and private-issued driver’s licenses, permits, IDs, passes, food stamps, etc.
require caution in duplicating.
3. Copyrighted Materials
Books, music, artwork, prints, maps, diagrams, movies, photography, etc. are banned from duplicating outside the
limits of private home use and their related non-sale usage.
Page 16

15
2
1
○○○○○○○○○○○○○○○○○○○○○○○○○○○○○○○○○○○○○○○○○○○○○○○○○○○○○○○○○○○○○
39
212
Printing Using Basic Functions
A5 Document
A4 Printout
A4 Printout
A3 Document
<DP-24S>
B5 → B4 / A5 → A4 .. 141%
A4 → B4 / A5 → B5 .. 122%
B5 → A4 .................... 115%
<DP-24S>
A3 → B4 / A4→ B5 .....86%
B4 → A4 / B5 → A5 .... 81%
A3 → A4 / B4 → B5 .... 70%
STD STD
1:1
1
4
7
Enlargement and Reduction
Enlarging/Reducing from Standard-Size Document to Standard-Size Paper
You can enlarge or reduce a standard-size document onto standard-size printing paper.
The following zoom ratios are available when enlarging or reducing a standard-size document onto standard-size
printing paper.
■ Enlargements
You can enlarge a standard-size document onto standard-size paper using the following zoom ratios:
● European paper sizes
<DP-22S>
A5 → A4 .................... 141%
A5 → B5 .................... 122%
B5 → A4 .................... 115%
● U.S. paper sizes
<DP-22L>
141%
ST → LTR.................. 129%
121%
■ Reductions
You can reduce a standard-size document onto standard-size paper using the following zoom ratios:
● European paper sizes
<DP-22S>
A4 → B5 ...................... 86%
B4 → A4 / B5 → A5 .... 81%
A3 → A4 / B4 → B5 .... 70%
● U.S. paper sizes
<DP-22L>
LGL→ LTR.................. 77%
LDG→ LGL.................74%
LDG→ LTR ................. 64%
IMPORTANT
• Set the desired zoom ratio before starting the platemaking process.
○○○○○○○○○○○○○○○○○○○○○○○○○○○○○○○○
Press
(ENLARGEMENT) key or
(RE-
DUCTION) key.
○○○○○○○○○○○○○○○○○○○○○○○○○○○○○○○○○○○○○○○○○○○○○○○○○○○○○○○○○○○○○
Notes on Safety (Please Read and Observe)
Conventions Used in This Manual
Each page of descriptions in this manual of how to operate the DP-22S/22L/24S is set up as follows.
■ Pictorial Symbols and Other Notations Used in This Manual
IMPORTANT : Introduces instructions for correct operation of the machine. If these instructions are ignored,
the machine may not be able to operate at optimum performance or may break down.
Tip : Introduces information that is useful for operation and maintenance of the machine, or
information about the machine’s performance, etc.
Continue Page
•••
: Indicates that the description of the operating sequence is continued on the next page.
(a P.00 “xxxx”) : Indicates the page number and item containing related information.
In the text of this manual, keys are indicated as follows:
: (PLATE MAKING) key
Title (Function)
Description of function and
example of printing
The illustration is designed to
indicate the result of using the
selected function.
Description of operational steps
Each step is described in detail.
Illustrations
The illustrations provide a visual
reference to which keys to operate
and other related conditions.
Page 17

Page 18

Before Using This Machine
1
Chapter 1
Before Using This Machine
This chapter contains essential information such as the names of the machine parts, the
names and functions of keys, etc., on the control panel, and the sizes of documents and
printing papers that you can use. Please be sure to read this chapter carefully before
attempting to use the printer.
○○○○○○○○○○○○○○○○○○○○○○○○○○○○○○○○○○○○○○○○○○○○○○
System Setup ..................................................................................................... 18
Part Names and Their Functions ...................................................................... 19
Printer Appearance...................................................................................... 19
Control Panel ............................................................................................... 22
LCD Panel.................................................................................................... 24
T urning Power ON/OFF...................................................................................... 25
Turning ON Printer Power............................................................................ 25
Turning OFF Printer Power .......................................................................... 26
Standard Mode ............................................................................................ 26
Key Card Counter [Available only with Key Card Counter installed] ............ 27
Document/Printing Paper Specification .......................................................... 28
Acceptable Documents................................................................................ 28
Acceptable Printing Paper ........................................................................... 28
How Platemaking and Printing is Performed .................................................. 29
Platemaking ................................................................................................. 29
Printing......................................................................................................... 29
○○○○○○○○○○○○○○○○○○○○○○○○○○○○○○○○○○○○○○○○○○○○○○
Page 19

18
System Setup
The machine and its optional equipment are set up as follows:
Personal computer
Key card counter
Duplo Direct Print System
Documents prepared on a
personal computer can be
printed on this machine.
PC interface kit is required
to connect this machine to
a personal computer.
ADF
Cabinet
Tape cluster
Drum unit
: Option
Page 20

19
3
2
1
Before Using This Machine
1
Part Names and Their Functions
Printer Appearance
q
!1
w
e
r
t
y
u
i
!0
o
No. Name Function
q Document cover Keeps the document in contact with the document glass plate.
w Feed tray descend switch Press to lower the feed tray.
e Feed pressure adjuster lever Use to adjust the paper feed pressure.
r Side guides Slide to match the width of the paper.
t Feed tray Load paper in this tray.
y Support tray Pull out when using large paper sizes.
u Power switch Press to switch the power on and off.
i Cabinet (Option) Place the printer on this stand.
o Castor locks Lock the printer in position on the floor. Always lock the castor
locks when installing the printer.
!0 Front cover Open to replace ink pack and drum unit, etc.
!1 Control panel Displays operations and statuses, and sets functions.
Reference
page
32, 38,
103
35
34
34
34
25, 26
—
—
84, 92
22
Page 21

20
Part Names and Their Functions
Front cover
Drum handle
Drum unit
Ink pack
Scanner unit
Lever
This lever releases the ink
pack holder.
Master set lever
When the master set lever is pushed,
the master is pulled in and set.
Lever
This lever is locks or
unlocks the drum.
Master roll
Master cover
Master cover
release lever
Page 22

21
3
2
1
Before Using This Machine
1
Part Names and Their Functions
No. Name Function
!2
Plate ejection box release lever
Press to open the master ejection box.
!3 JOG switch Press and hold to rotate the drum for a set time. Use to remove
paper jams, etc..
!4 Print tray Holds the printed paper.
!5 Paper stopper Slide to match the size of printed paper.
!6 Paper stacker guides Slide to match the size of printed paper.
!7 Master ejection box Open to replace the master ejection core, etc..
!8
Plate ejection box lid release lever
Press to open the top of the master ejection core box. Use when
replacing the master ejection core, etc..
Reference
page
—
—
49
50
49
90
90
Master ejection
core
!2
!3
!4
!7
!5
!6
!8
Page 23

22
Control Panel
Part Names and Their Functions
No. Name Function
q “OK” monitor Flashes to display the content of the trouble and lights to indicated
the part that caused the trouble in the machine.
w “ENLARGEMENT” key Press to set the enlargement ratio.
“100%” key Press to reset the ration to 100%.
“REDUCTION” key Press to set the reduction ratio.
100% lamp Lights when the 100% ratio is selected.
e “DOCUMENT MODE Press to switch between the text mode, text/photograph mode and
photograph mode. Each press of this key moves the position of the
lit lamp that indicates the selected document mode.
Document mode indicator lamps
The lamp of the selected mode lights.
r LCD panel Displays the number of printed paper.
Also displays an error message when an error occurs.
t
“FUNCTION SWITCH” key
Press to toggle between the normal mode and the function select
mode.
“SELECT” key Press to select a function.
y “TEST PRINT” key Press to print only one piece of paper for checking the print dark-
ness or printed position.
u “PLATEMAKING” key Press to start platemaking.
Reference
page
99
39
40
39
40
48
48
24, 99
54
54
33
SWITCH” key
STD STD
1:1
q w e
!4!5!7 !6
Page 24

23
3
2
1
Before Using This Machine
1
Part Names and Their Functions
No. Name Function
i “STOP” key Press to stop printing on the way.
If this key is pressed while the machine is stopped,
the total number of prints and plates will be displayed
on the LCD panel.
o “PRINT” key Starts printing. This will not start platemaking.
Platemaking will start automatically after the end of
printing if there is a document on the ADF (Option).
!0 “ALL CLEAR” key Returns the control panel settings to the “Standard
Mode” settings. Press and hold for at least 0.5
seconds.
!1
X
=
key Press to enter the number of prints and number of sets
for sectional prints.
!2 Key pad Use to enter the number of prints.
!3 “CLEAR” key Press to reset the displayed number of prints to “0”.
Only the number of prints is cleared.
!4 Printing speed indicator lamp The lamp of the specified printing speed lights.
!5
“PRINTING SPEED ADJUSTMENT” keys
Press to adjust the printing speed.
!6
“PRINTING POSITION ADJUSTMENT” keys
Press to adjust the printing position.
!7 Printing position indicator lamp The lamp of the specified printing speed lights.
Reference
page
79
33
71
80
80
81
81
1
4
7
0
2
5
8
C
3
6
9
X
=
T
y ur t
i
o!0!1!2!3
Page 25

24
No. Name Function
q Print count Displays the number of prints to be made.
w Sets Displays the number of sets to be printed.
Reference
page
33
69
0sht 1set
q w
LCD Panel
Part Names and Their Functions
Page 26

25
3
2
1
Before Using This Machine
1
This section describes the operating sequence from turning ON the power switch until the printer is ready to make
prints, and how to turn OFF the printer power.
Turning ON Printer Power
○○○○○○○○○○○○○○○○○○○○○○○○○○○○○○○○○
Connect the power cable to the printer and a
wall outlet.
○○○○○○○○○○○○○○○○○○○○○○○○○○○○○○○○○
Switch the power switch to the “
” position.
The power turns ON.
The message “SET PRINT PAPER” is displayed on the LCD
panel.
The printer functions are now set in “Standard Mode”
(a page 26).
When paper is loaded in the feed tray, the screen shown at
right is displayed.
When the screen shown at right is displayed, insert a key
card. (a See page 27, “Key Card Counter”.)
○○○○○○○○○○○○○○○○○○○○○○○○○○○○○○○○○○○○○○○○○○○○○○○○○○○○○○○○○○○○○
Turning Power ON/OFF
SET PRINT PAPER
0sht 1set
SET KEYCARD
Page 27

26
Turning OFF Printer Power
○○○○○○○○○○○○○○○○○○○○○○○○○○○○○○○○○
Switch the power switch to the “ ” position.
The power turns OFF and the display lamps on the control
panel turn OFF.
○○○○○○○○○○○○○○○○○○○○○○○○○○○○○○○○○○○○○○○○○○○○○○○○○○○○○○○○○○○○○
Standard Mode
When the printer power is first turned ON or (ALL CLEAR) key is pressed, the functions are reset to
standard mode. The standard mode settings are as follows:
• Print quantity : 0
• Print position : Standard lit
• Print speed : Standard lit
• Zoom : 100% lights
• Document mode : Standard lit
• 2 IN 1 : OFF
Turning Power ON/OFF
• PLATE SIZE : DP-22S/A4, DP-24S/B4
• PLA TE DARKNESS : NORMAL
• ✕94% : OFF
• 2 - up : OFF : ADF 2IN1
• SHADOW ERASER : OFF
• MANUAL ZOOM : OFF
Page 28

27
3
2
1
Before Using This Machine
1
Key Card Counter
Available only with Key Card Counter installed
With the key card counter installed, you can control the platemaking and print quantities per person or per
department, etc. See the Instruction Manual for the Key Card Counter for details.
■ Inserting a key card
When you turn on the power, the icon shown at right is
displayed if no key card has been inserted in the key card
counter.
○○○○○○○○○○○○○○○○○○○○○○○○○○○○○○○○○
Insert a key card in the key card counter.
The printer can now be operated as normal.
○○○○○○○○○○○○○○○○○○○○○○○○○○○○○○○○○○○○○○○○○○○○○○○○○○○○○○○○○○○○○
■ Handling key cards
Turning Power ON/OFF
Do not bend or soil a key card. Do not insert any objects other than
key cards into the key card slot.
Keep your key card well away from
magnetic fields.
SET KEYCARD
Page 29

28
Document/Printing Paper Specification
Acceptable Documents
■ Document glass plate
• Weight : Sheet documents, books, etc, not exceeding 10kg.
• Size : 297mm X 432mm
■ ADF
• Document thickness : 64g/m2 to 128g/m
2
• Document size : A3 to A5 size
ST to 11x17-in. (ST size in landscape mode: STR cannot be used.)
• Stacking capacity in document tray : 100 sheets (64g/m2)
IMPORT ANT
The following types of document cannot be used:
• Documents with large file-binding holes, tears, or missing parts
• Documents with staples or paper clips attached
• Documents with markedly curling ends/sides, or marked folds
• Carbon-backed documents
• Sticky documents
• Highly transparent documents such as OHP film
When ADF is installed:
• To make a new plate from a document from which a plate has already been made, remove
and then reload the document.
• Always use documents of the same size.
• If you load documents of different lengths, the printer may not operate correctly.
Acceptable Printing Paper
DP-22S DP-22L DP-24S
Paper thickness
Paper stacking capacity
Paper size
* With paper larger than 297 x 432 → 60sheets/min. DP-24S-standard, DP-22S/L-optional.
DP-22S DP-22L DP-24S
Printing area 204mm X 288mm 210mm X 355mm 250mm X 355mm
IMPORTANT
The following types of paper cannot be used.
• Paper with large file-binding holes
• Paper with staples or paper clips attached
• Paper with markedly curling ends/sides, or marked folds
• Carbon-backed paper
• Paper with smaller pieces of glued paper
45g/m2 to 210g/m2 (40kg ~ 180kg)
Feed tray : 1300 sheets (64g/m2 top-grade paper)
Print tray : When a cabinet is used:1300 sheets (64g/m2 top-grade paper)
When the printer is used on a table: 900 sheets (64g/m2 top-grade paper)
Max. 271mm X 382mm Max. 271mm X 382mm Max. 271mm X 382mm
(297mm X 432mm)* (297mm X 432mm)* (297mm X 432mm)*
Min. 100mm X 150 mm Min. 100mm X 150 mm Min. 100mm X 150 mm
Page 30

29
3
2
1
Before Using This Machine
1
How Platemaking and Printing is Performed
The machine performs two processes: platemaking and printing.
Platemaking
In the “platemaking” process, the old master on the drum is removed while the thermal head creates the
scanned image on the new master and transfers it onto the drum.
Printing
In the “printing” process, paper separated from the stack by the feeder roller and paper separator unit is
pressed against the drum unit by the press roller. There are small holes over only the image area of the master
that is attached to the drum, and ink that seeps from these holes is transferred to the paper. The paper is then
peeled from the master by the paper stripper finger. The paper is directed onto the paper ejection belt by a fan
unit and discharged from the machine.
Master roll
Thermal head
Drum
unit
Master ejection box
Drum unit
Paper stripper finger
Press roller
Paper separator unit
Fan unit
Paper ejection belt
Feeder roller
Paper
Ink
Page 31

30
Page 32

2
Printing Using Basic Functions
Chapter 2
Printing Using Basic Functions
This chapter describes how to make prints using the basic functions, including how to load
the document, set zoom ratio, etc.
○○○○○○○○○○○○○○○○○○○○○○○○○○○○○○○○○○○○○○○○○○○○○○
Basic Printmaking.............................................................................................. 32
Loading and Replacing Paper .......................................................................... 34
Loading Paper.............................................................................................. 34
Adjusting Paper Feed Pressure ................................................................... 35
Loading Documents .......................................................................................... 36
Positioning the Document ............................................................................ 36
Loading Document on Document Glass Plate............................................. 37
Loading Document in ADF [Available only when ADF installed].................. 38
Enlargement and Reduction ............................................................................. 39
Enlarging/Reducing from Standard-Size Document to Standard-Size Paper
.... 39
94% Reduction ............................................................................................ 40
1% - Step Enlargement and Reducation ..................................................... 42
Selecting Printing Paper Size ........................................................................... 44
Text/Photograph/Text and Photograph Mode ................................................. 47
Print Output ........................................................................................................ 49
Installing Print Tray....................................................................................... 49
Truing up Printed Pages .............................................................................. 51
○○○○○○○○○○○○○○○○○○○○○○○○○○○○○○○○○○○○○○○○○○○○○○
Page 33
32
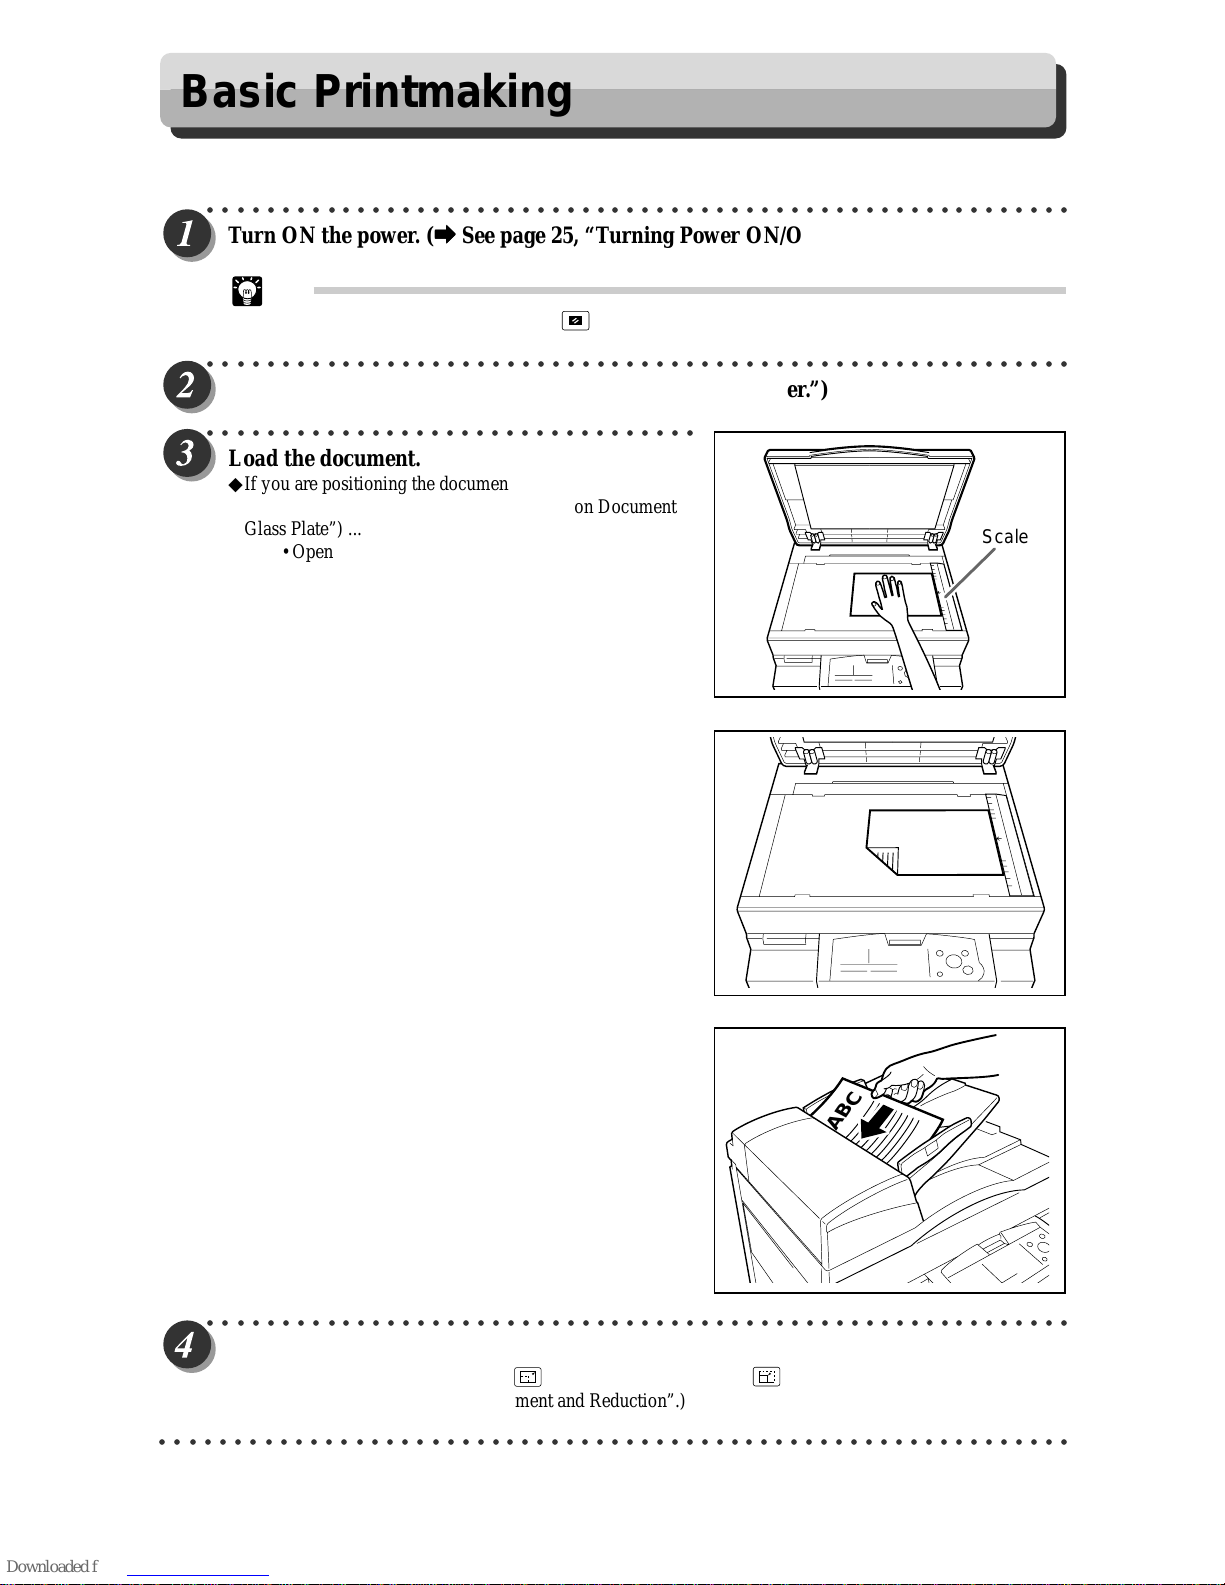
This section describes how to make prints using the basic functions.
○○○○○○○○○○○○○○○○○○○○○○○○○○○○○○○○○○○○○○○○○○○○○○○○○○○○○○○○○○
Turn ON the power. (
aa
aa
a See page 25, “Turning Power ON/OFF”)
Tip
• If the power is already ON, press (ALL CLEAR) key.
○○○○○○○○○○○○○○○○○○○○○○○○○○○○○○○○○○○○○○○○○○○○○○○○○○○○○○○○○○
Load paper. (
aa
aa
a See page 34, “Loading and Replacing Paper.”)
○○○○○○○○○○○○○○○○○○○○○○○○○○○○○○○○○
Load the document.
◆If you are positioning the document on the document glass
plate (a See page 37, “Loading Document on Document
Glass Plate”) ...
• Open the document cover.
• Place the document face down on the document
glass plate aligned with the scale.
• Close the document cover.
◆If you are loading the document in the optional ADF
(a See page 38, “Loading Document in ADF”) ...
• Adjust the slide guide to the marks for the size of the
document.
• Place the document face up in the document tray.
○○○○○○○○○○○○○○○○○○○○○○○○○○○○○○○○○○○○○○○○○○○○○○○○○○○○○○○○○○
Select the zoom ratio.
The zoom ratio is set to 100%. Press (ENLARGEMENT)key or
(REDUCTION)key to set a desired
zoom ratio. (a See page 39, “Enlargement and Reduction”.)
○○○○○○○○○○○○○○○○○○○○○○○○○○○○○○○○○○○○○○○○○○○○○○○○○○○○○○○○○○○○○
Basic Printmaking
ABC
Scale
Page 34

33
2
1
2
Printing Using Basic Functions
Basic Printmaking
○○○○○○○○○○○○○○○○○○○○○○○○○○○○○○○○○
Press (PLATE MAKING) key.
When the plate has been made, one test print is automatically
made.
IMPORT ANT
• The test print is for verification purposes only
and may be fainter than the final print.
Tip
• You can enter the number of desired prints
before pressing (PLATE MAKING) key to
immediately print the required number of copies.
○○○○○○○○○○○○○○○○○○○○○○○○○○○○○○○○○
Use the keypad to specify the number of prints
to make.
Tips
• You can specify up to 9999 prints.
• If you make a mistake entering the number of
prints, press
C
(CLEAR) key then enter the
correct number.
○○○○○○○○○○○○○○○○○○○○○○○○○○○○○○○○○
Press (PRINT) key.
The feed tray raises up to the upper limit and printing starts.
The count displayed on the LCD panel is decremented by
one for each print made.
The printed pages are output to the print tray. (a See page
49, “Print Output”.)
Tip
• To stop a print run, press (STOP) key. To
restart the print run, press (PRINT) key
again.
○○○○○○○○○○○○○○○○○○○○○○○○○○○○○○○○○○○○○○○○○○○○○○○○○○○○○○○○○○
Repeat steps 3 to 7 to print multiple documents.
○○○○○○○○○○○○○○○○○○○○○○○○○○○○○○○○○○○○○○○○○○○○○○○○○○○○○○○○○○○○○
1
4
7
C
2
5
8
0
3
6
9
X
=
T
Key pad
100sht 1set
T
T
Page 35

34
Loading and Replacing Paper
Loading Paper
This section describes how to load the printer with paper. You can load approximately 1,300 sheets in this
printer.
○○○○○○○○○○○○○○○○○○○○○○○○○○○○○○○○○
Open the support tray.
○○○○○○○○○○○○○○○○○○○○○○○○○○○○○○○○○
Hold the lever and adjust the side guides to the
paper size.
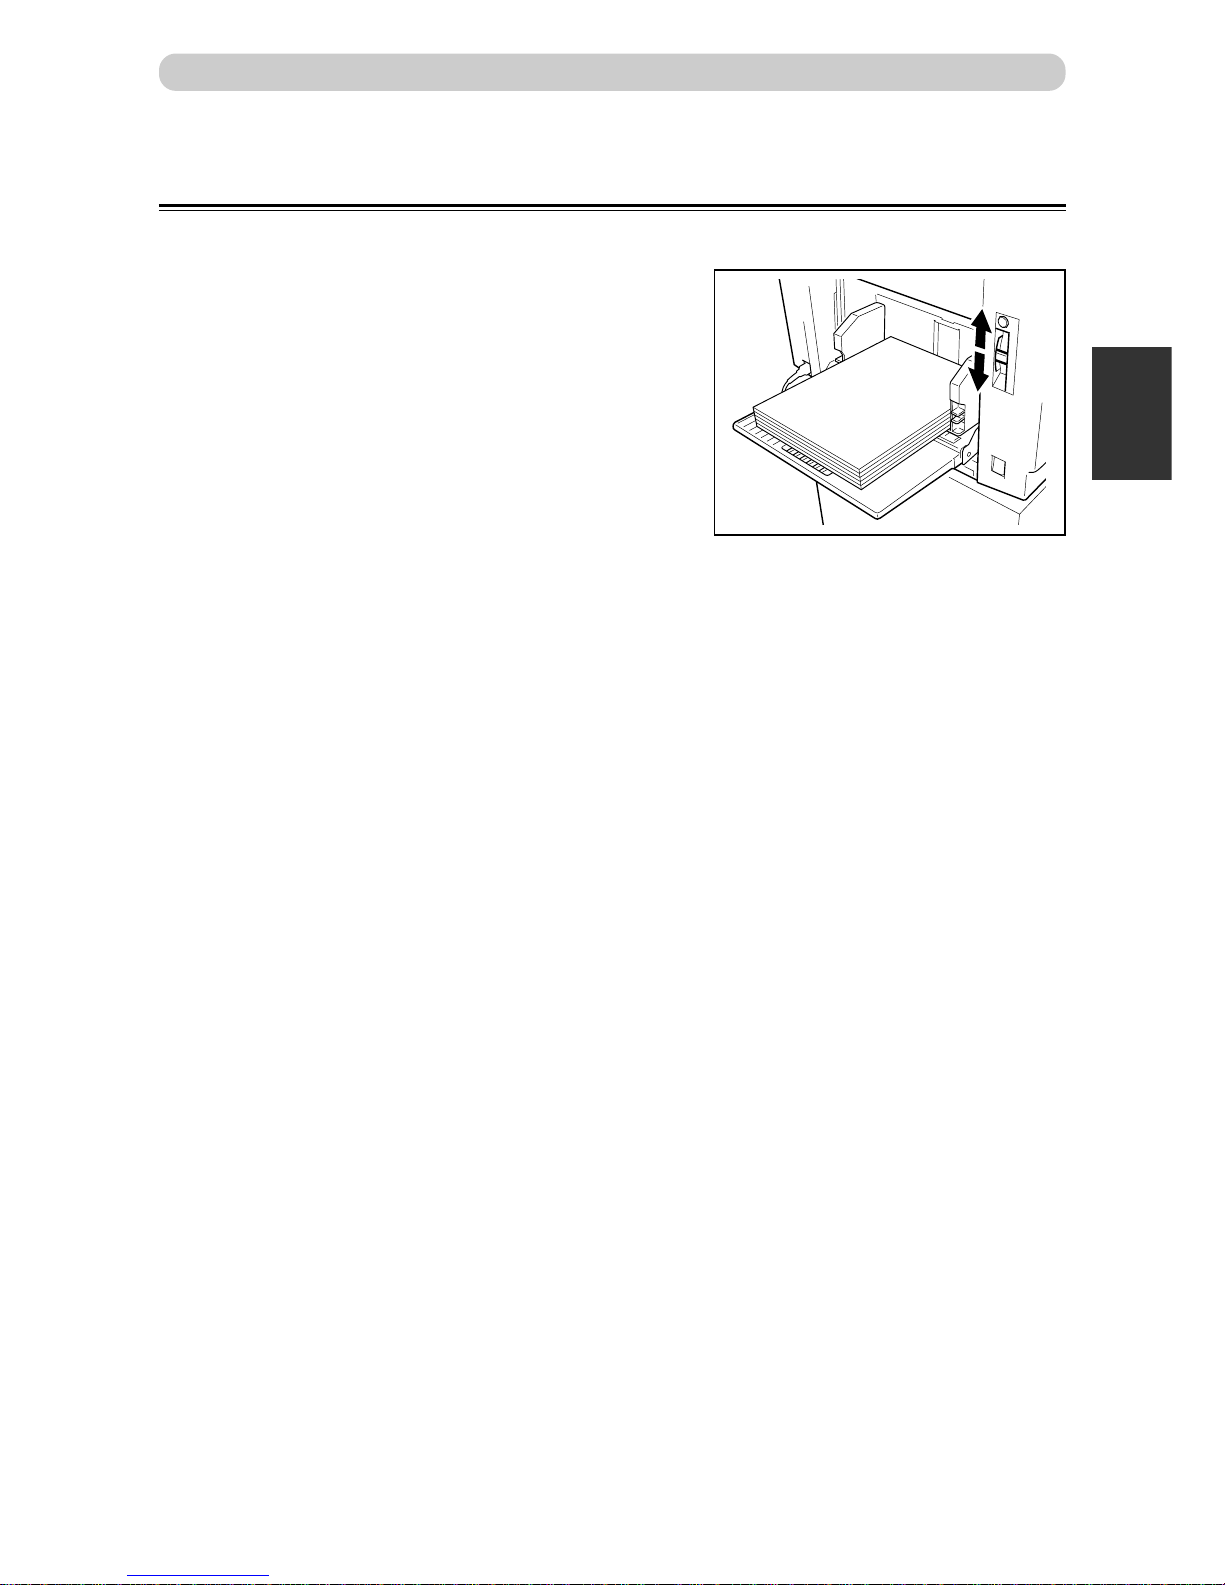
○○○○○○○○○○○○○○○○○○○○○○○○○○○○○○○○○
Load a stack of aligned sheets between the
paper guides and press the stack lightly toward
the machine.
IMPORTANT
• You can load the feed tray with approximately
1,300 sheets of 55gsm high-grade paper.
○○○○○○○○○○○○○○○○○○○○○○○○○○○○○○○○○○○○○○○○○○○○○○○○○○○○○○○○○○○○○
Page 36
35
2
1
2
Printing Using Basic Functions
Adjusting Paper Feed Pressure
Adjust the paper feed pressure if an feeding error occurs when using thick or thin paper.
■ When no thick paper is fed
Adjust the paper feed pressure adjuster lever to “HIGH”.
■When two pieces of thin paper are fed
Adjust the paper feed pressure adjuster lever to “LOW”.
Loading and Replacing Paper
Page 37

36
ABC
ABC
Portrait (Vertical) Placement Landscape (Lateral) Placement
Portrait (Vertical) Placement Landscape (Lateral) Placement
◆ Document Glass Plate
◆ ADF
Positioning the Document
The document can be loaded in the “portrait” or “landscape” position.
IMPORT ANT
• A4 and B5-size documents can be loaded in the “portrait” or “landscape” position.
• Use the landscape position when enlarging or reducing from standard-size documents to
standard-size paper, such as A5 to A4.
• A3 and B4 documents can only be loaded in the landscape position.
Loading Documents
Page 38

37
2
1
2
Printing Using Basic Functions
Scale
Loading Documents
Loading Document on Document Glass Plate
Use the platen glass when copying from books, thick documents, or thin documents.
○○○○○○○○○○○○○○○○○○○○○○○○○○○○○○○○○
Gently open the document cover.
○○○○○○○○○○○○○○○○○○○○○○○○○○○○○○○○○
Position the document on the document glass
plate.
Place the document face down on the document glass plate,
aligned with the guide.
IMPORTANT
• When you load a non standard-size docu-
ment, place it with the center of the document
aligned with the arrow on the guide.
○○○○○○○○○○○○○○○○○○○○○○○○○○○○○○○○○
Gently close the document cover.
IMPORTANT
• When you place a thick document such as a
book on the document glass plate, take care
not to force the document cover as this may
damage the document glass plate with a risk
of personal injury.
○○○○○○○○○○○○○○○○○○○○○○○○○○○○○○○○○○○○○○○○○○○○○○○○○○○○○○○○○○○○○
Page 39

38
Document Guide
Loading Document in ADF
Available only when ADF installed
Load documents that consist of a series of sheets to be printed in the ADF. When one or more documents are
loaded in the ADF, platemaking and printing are automatically repeated until the document tray is empty.
IMPORTANT
• ADF mode is automatically selected when a document is loaded in the ADF. The ADF then
takes priority over the document glass plate in the platemaking process.
○○○○○○○○○○○○○○○○○○○○○○○○○○○○○○○○○
Align the document guide with the marks for
the size of document to be loaded in the ADF.
○○○○○○○○○○○○○○○○○○○○○○○○○○○○○○○○○
Place the document face-up in the document
tray.
Platemaking starts with the top document in the tray.
IMPORTANT
• Do not attempt to remove or add to the
documents in the document tray while
platemaking and printing are in progress.
○○○○○○○○○○○○○○○○○○○○○○○○○○○○○○○○○○○○○○○○○○○○○○○○○○○○○○○○○○○○○
Loading Documents
ABC
Page 40

39
2
1
2
Printing Using Basic Functions
A5 Document
A4 Printout
A4 Printout
A3 Document
<DP-24S>
B5 → B4 / A5 → A4 .. 141%
A4 → B4 / A5 → B5 .. 122%
B5 → A4 .................... 115%
<DP-24S>
A3 → B4 / A4→ B5 .....86%
B4 → A4 / B5 → A5 ....81%
A3 → A4 / B4 → B5 ....70%
STD STD
1:1
1
4
7
Enlargement and Reduction
Enlarging/Reducing from Standard-Size Document to Standard-Size Paper
You can enlarge or reduce a standard-size document onto standard-size printing paper.
The following zoom ratios are available when enlarging or reducing a standard-size document onto standard-size
printing paper.
■ Enlargements
You can enlarge a standard-size document onto standard-size paper using the following zoom ratios:
● European paper sizes
<DP-22S>
A5 → A4 .................... 141%
A5 → B5 .................... 122%
B5 → A4 .................... 115%
● U.S. paper sizes
<DP-22L>
141%
ST → L TR..................129%
121%
■ Reductions
You can reduce a standard-size document onto standard-size paper using the following zoom ratios:
● European paper sizes
<DP-22S>
A4 → B5 ......................86%
B4 → A4 / B5 → A5 ....81%
A3 → A4 / B4 → B5 ....70%
● U.S. paper sizes
<DP-22L>
LGL→ LTR..................77%
LDG→ LGL.................74%
LDG→ LTR .................64%
IMPORT ANT
• Set the desired zoom ratio before starting the platemaking process.
○○○○○○○○○○○○○○○○○○○○○○○○○○○○○○○○
Press
(ENLARGEMENT) key or
(RE-
DUCTION) key.
○○○○○○○○○○○○○○○○○○○○○○○○○○○○○○○○○○○○○○○○○○○○○○○○○○○○○○○○○○○○○
Page 41

40
○○○○○○○○○○○○○○○○○○○○○○○○○○○○○○○○○○○○○○○○○○○○○○○○○○○○○○○○○○
Press
(ENLARGEMENT) key or
(REDUCTION) key several times to display
the desired zoom ratio.
In about 3 seconds, the screen changes to the number display screen and the zoom ratio is selected.
• Each time
(ENLARGEMENT) key is pressed, the LCD panel display changes as follows: “115%” →
“122%” → “141%” → “115%”...
• Each time (REDUCTION) key is pressed, the LCD panel display changes as follows: “94%” → “86%” →
“81%” → “70%” → “94%”...
Tip
To return to “100%”, use one of the following two methods:
• Press
1:1
(100%) key. The 100% indicator lamp lights.
• Press (ALL CLEAR) key. In this case, all settings are reset to standard mode
(a page 26).
○○○○○○○○○○○○○○○○○○○○○○○○○○○○○○○○○○○○○○○○○○○○○○○○○○○○○○○○○○○○○
94% Reduction
In this mode, the copy is printed at 94% the size of the document. When it is not possible to print the edges of
the document image, this mode allows you to make a minor reduciton so that the edges of the image are
included.
IMPORTANT
• Select “94% Reduction” before platemaking.
○○○○○○○○○○○○○○○○○○○○○○○○○○○○○○○○○
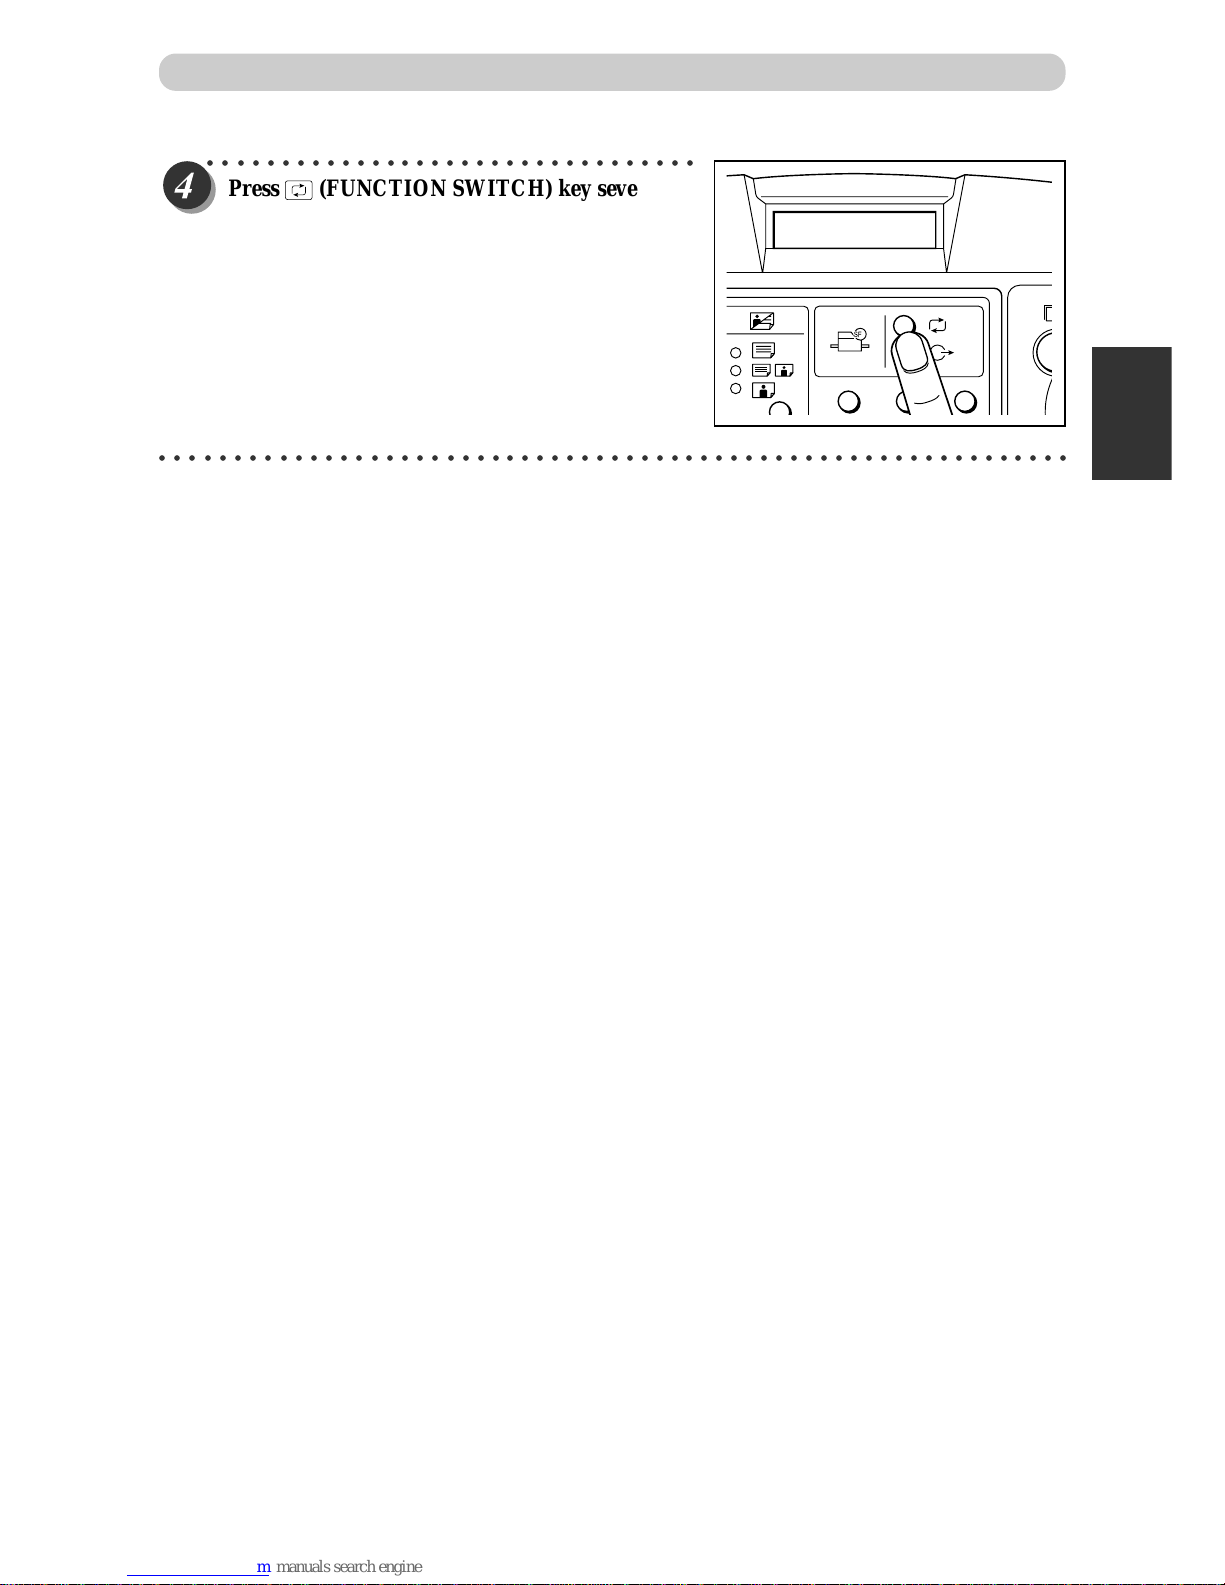
Press (FUNCTION SWITCH) key several
times to show the screen at right.
○○○○○○○○○○○○○○○○○○○○○○○○○○○○○○○○○○○○○○○○○○○○○○○○○○○○○○○○○○○○○
[European paper sizes] [U.S. paper sizes]
A5➝A4 141%
0sht 1set 141%
ST➝LTR 129%
0sht 1set 129%
Enlargement and Reduction
3.X94%
1 2 3
Page 42
41
2
1
22
Printing Using Basic Functions
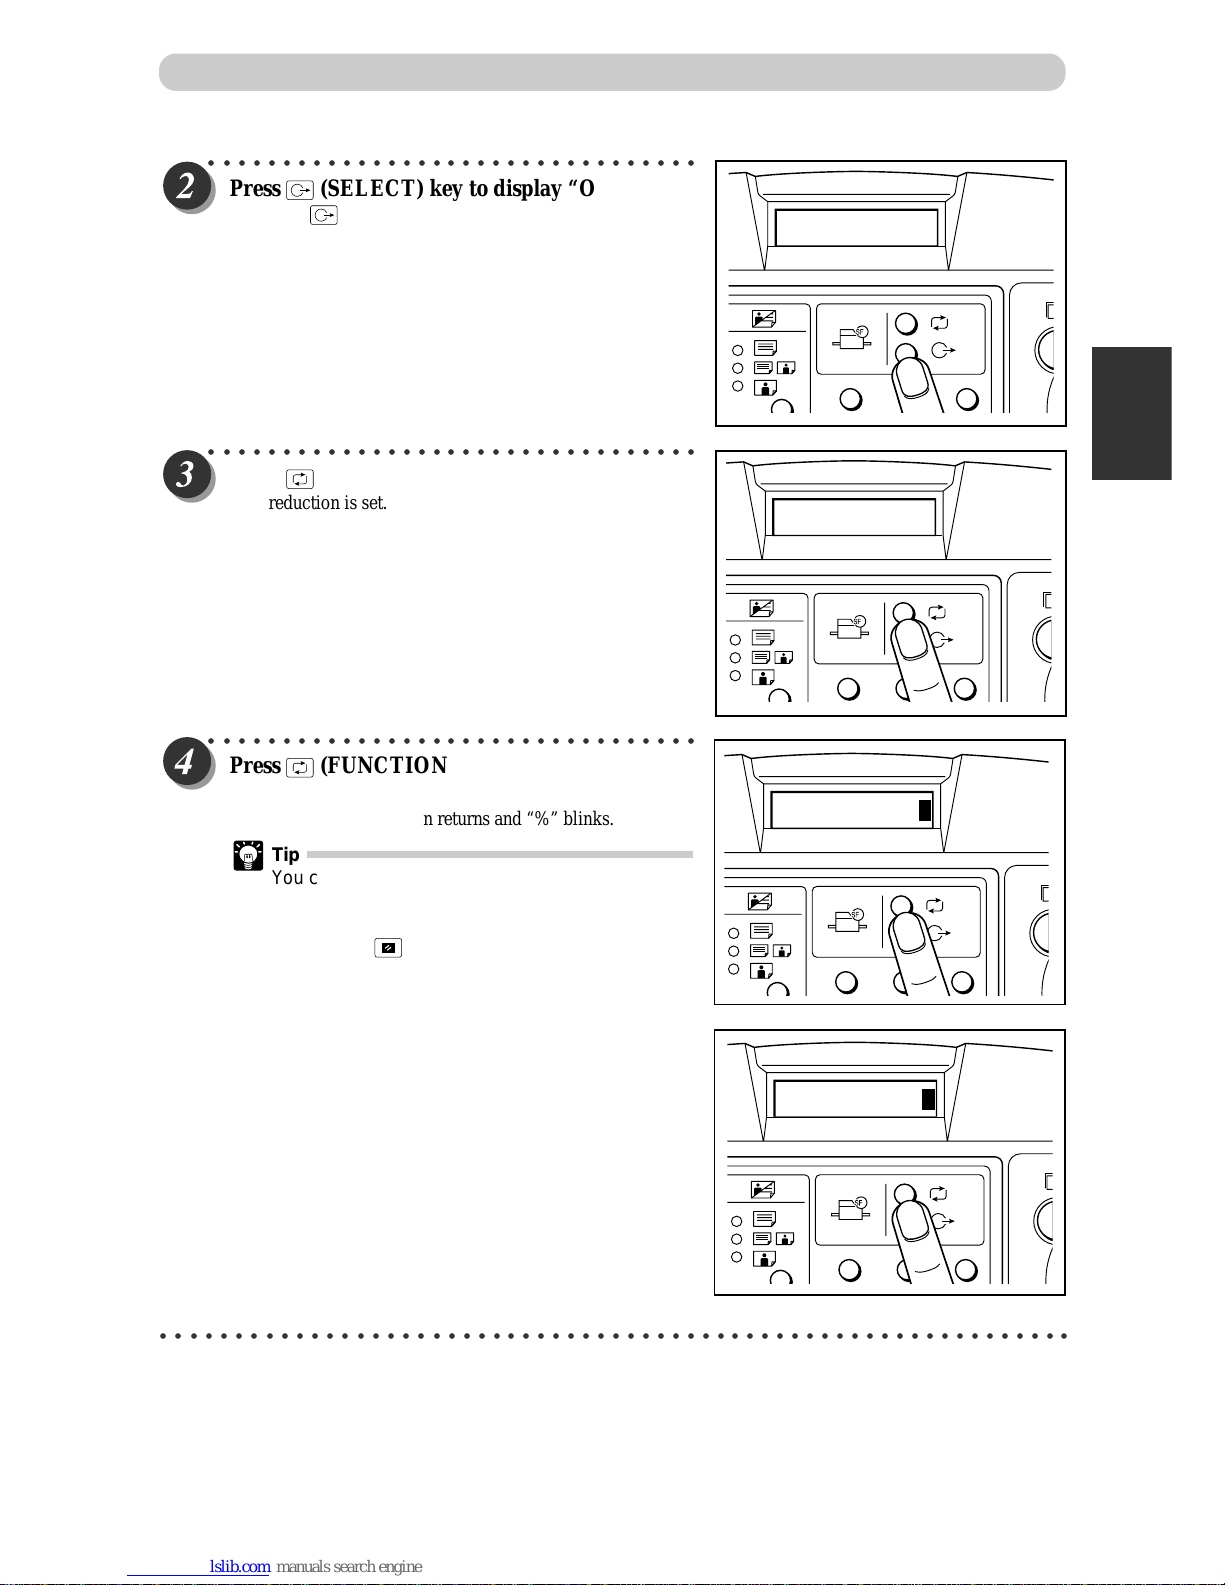
○○○○○○○○○○○○○○○○○○○○○○○○○○○○○○○○○
Press (SELECT) key to display “ON”.
Each time
(SELECT) key is pressed, the display of the
LCD panel changes as follows.
“OFF” → “ON” → “OFF”...
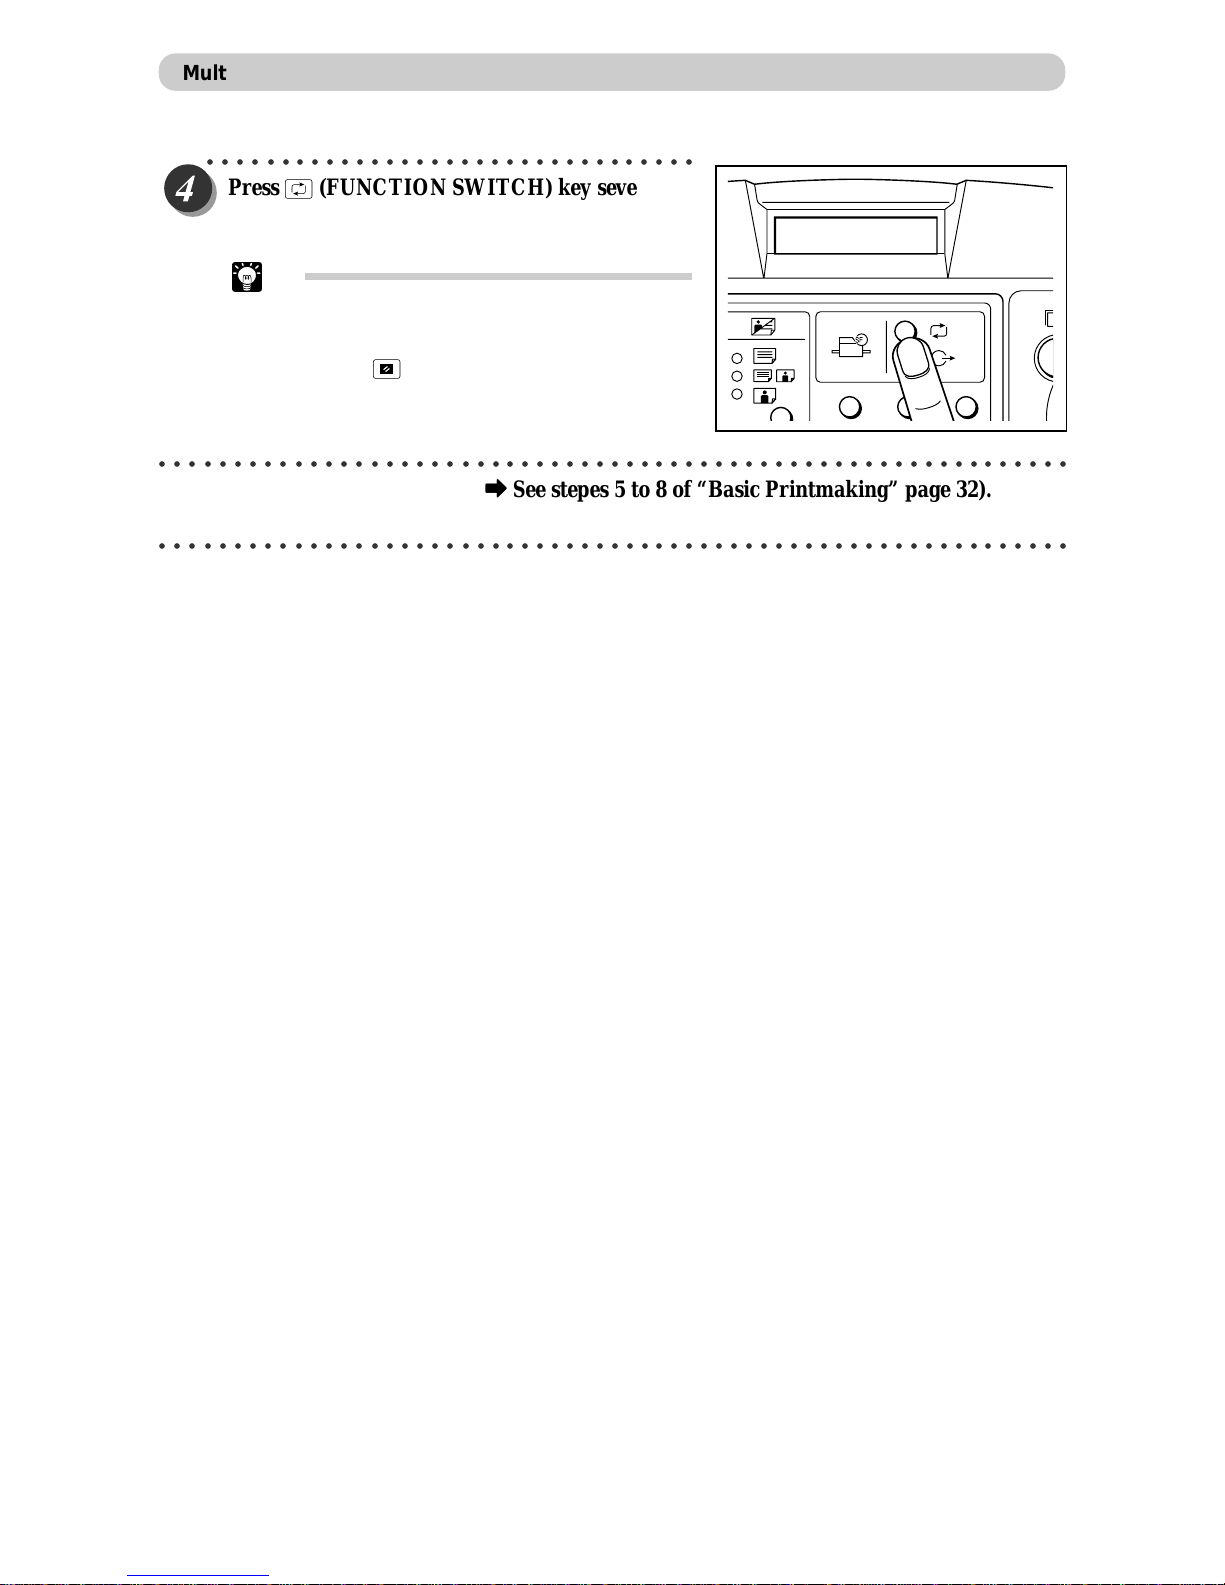
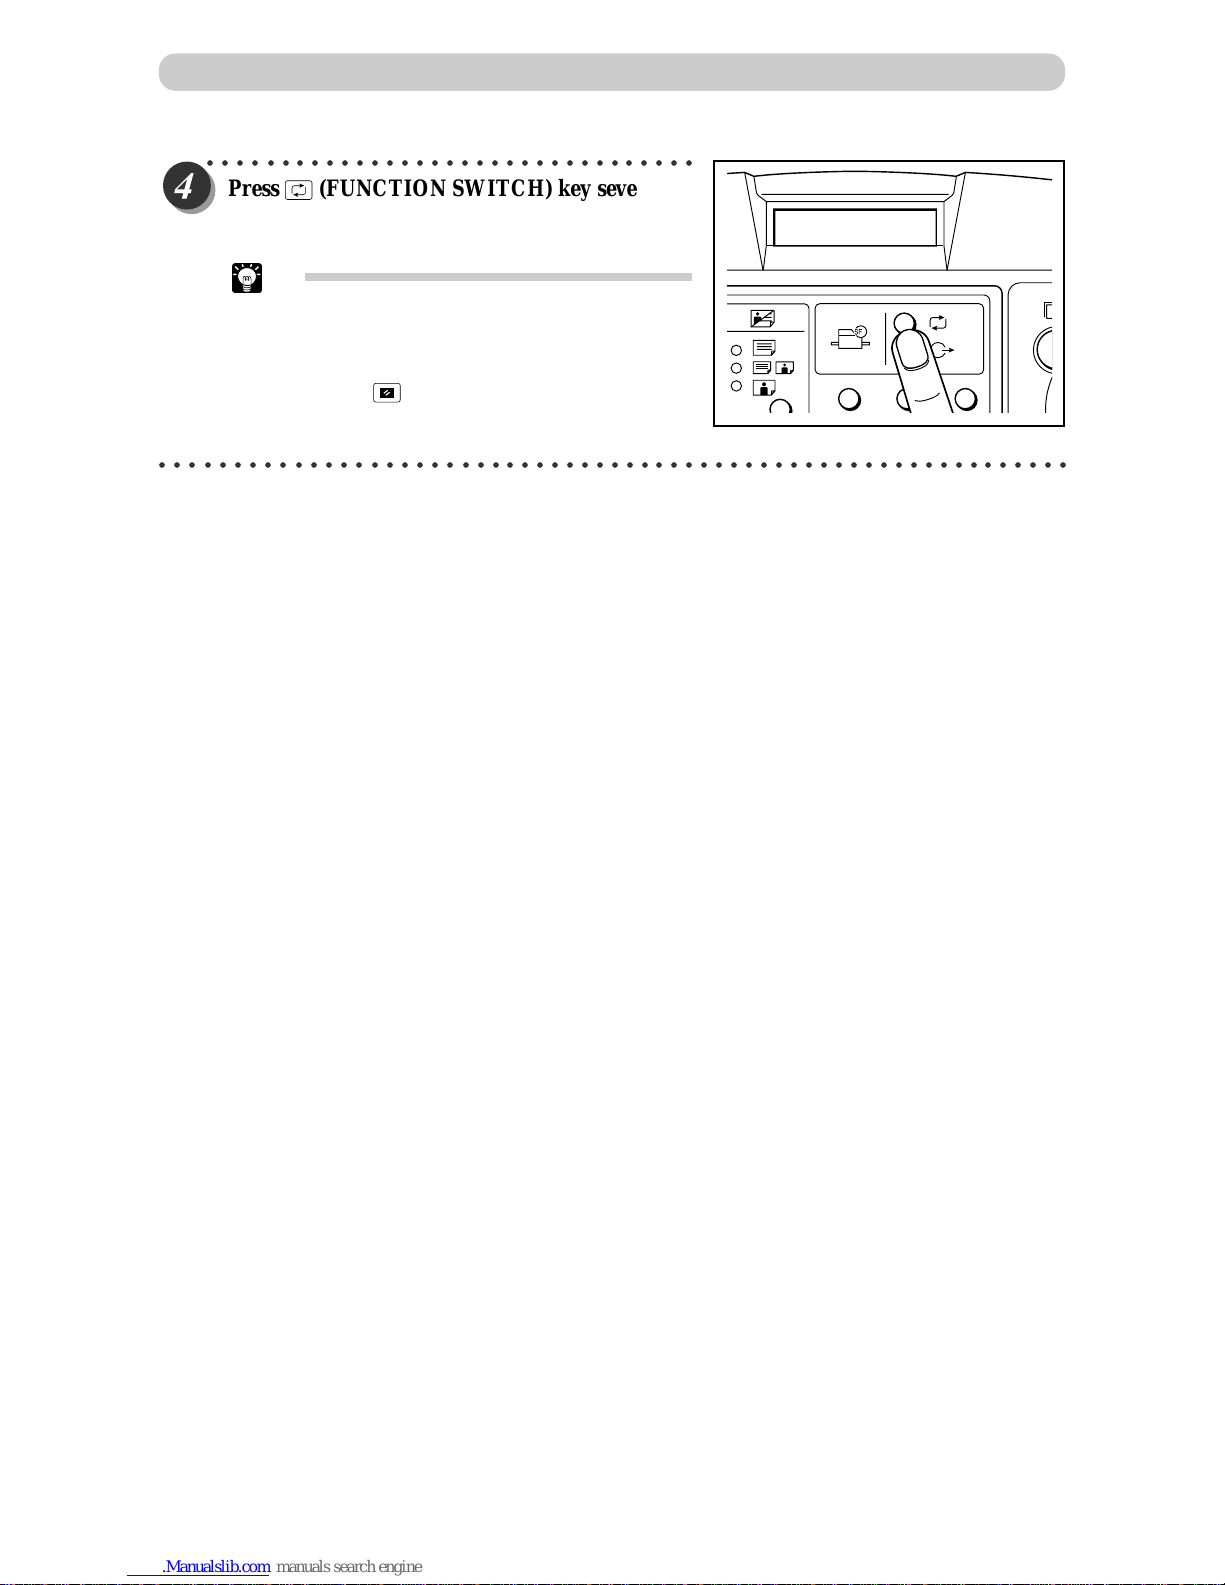
○○○○○○○○○○○○○○○○○○○○○○○○○○○○○○○○○
Press (FUNCTION SWITCH) key.
94% reduction is set.
○○○○○○○○○○○○○○○○○○○○○○○○○○○○○○○○○
Press
(FUNCTION SWITCH) key several
times.
The number display screen returns and “%” blinks.
Tip
You can cancel 94% reduction using one of the
following two methods.
• Set to “OFF” in the same procedure.
• Press
(ALL CLEAR) key. In this case, all
settings are reset to standard mode
(a page 26).
You can select 94% reduction even when you have selected
other than “100%”. In this case, the zoom ratio will be the
zoom ratio shown on the LCD✕94%.
○○○○○○○○○○○○○○○○○○○○○○○○○○○○○○○○○○○○○○○○○○○○○○○○○○○○○○○○○○○○○
Enlargement and Reduction
1 2 3
ON
1 2 3
0sht 1set 141%
1 2 3
0sht 1set %
3.X94%
1 2 3
Page 43

42
1%-Step Enlargement and Reduction
You can set a zoom ratio between 50% and 200% in 1% steps.
IMPORT ANT
• Select “1%-Step Enlargement and Reduction” before starting platemaking.
• You cannot select “94% Reduction” at the same time as “1%-Step Enlargement and Reduction”.
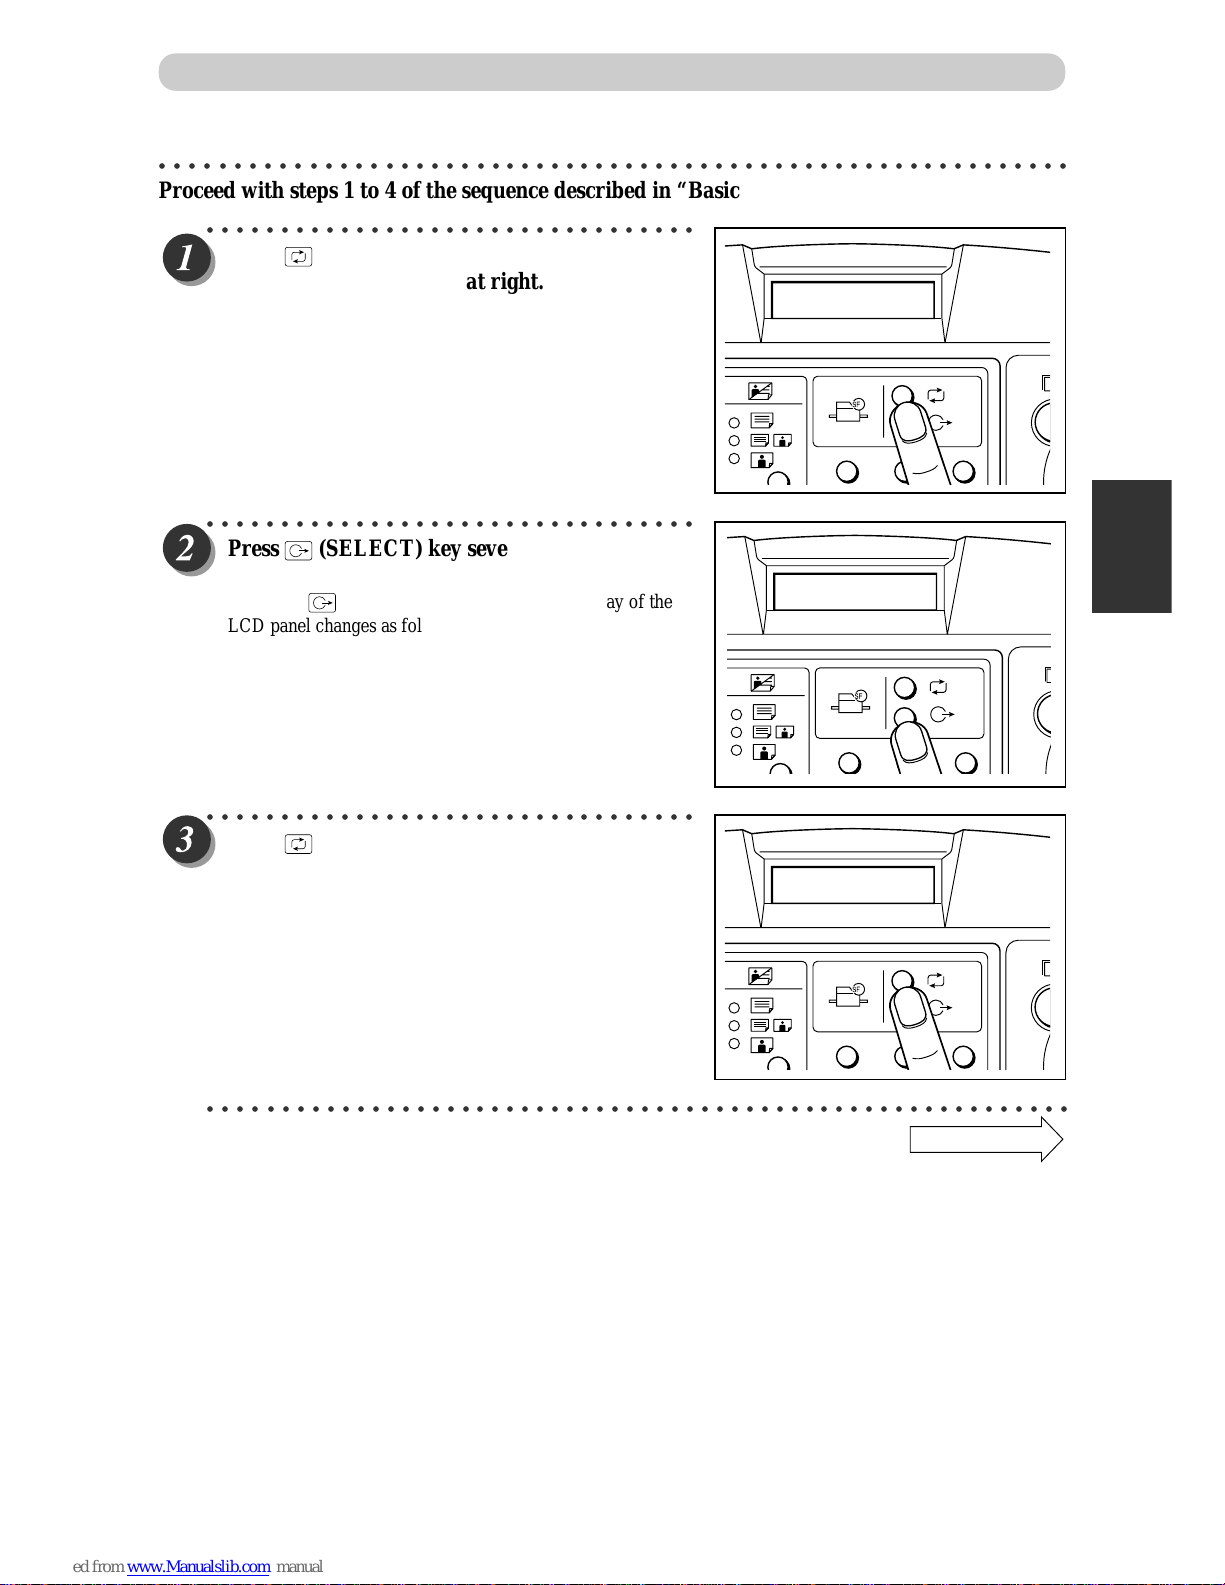
○○○○○○○○○○○○○○○○○○○○○○○○○○○○○○○○○○○○○○○○○○○○○○○○○○○○○○○○○○○○○
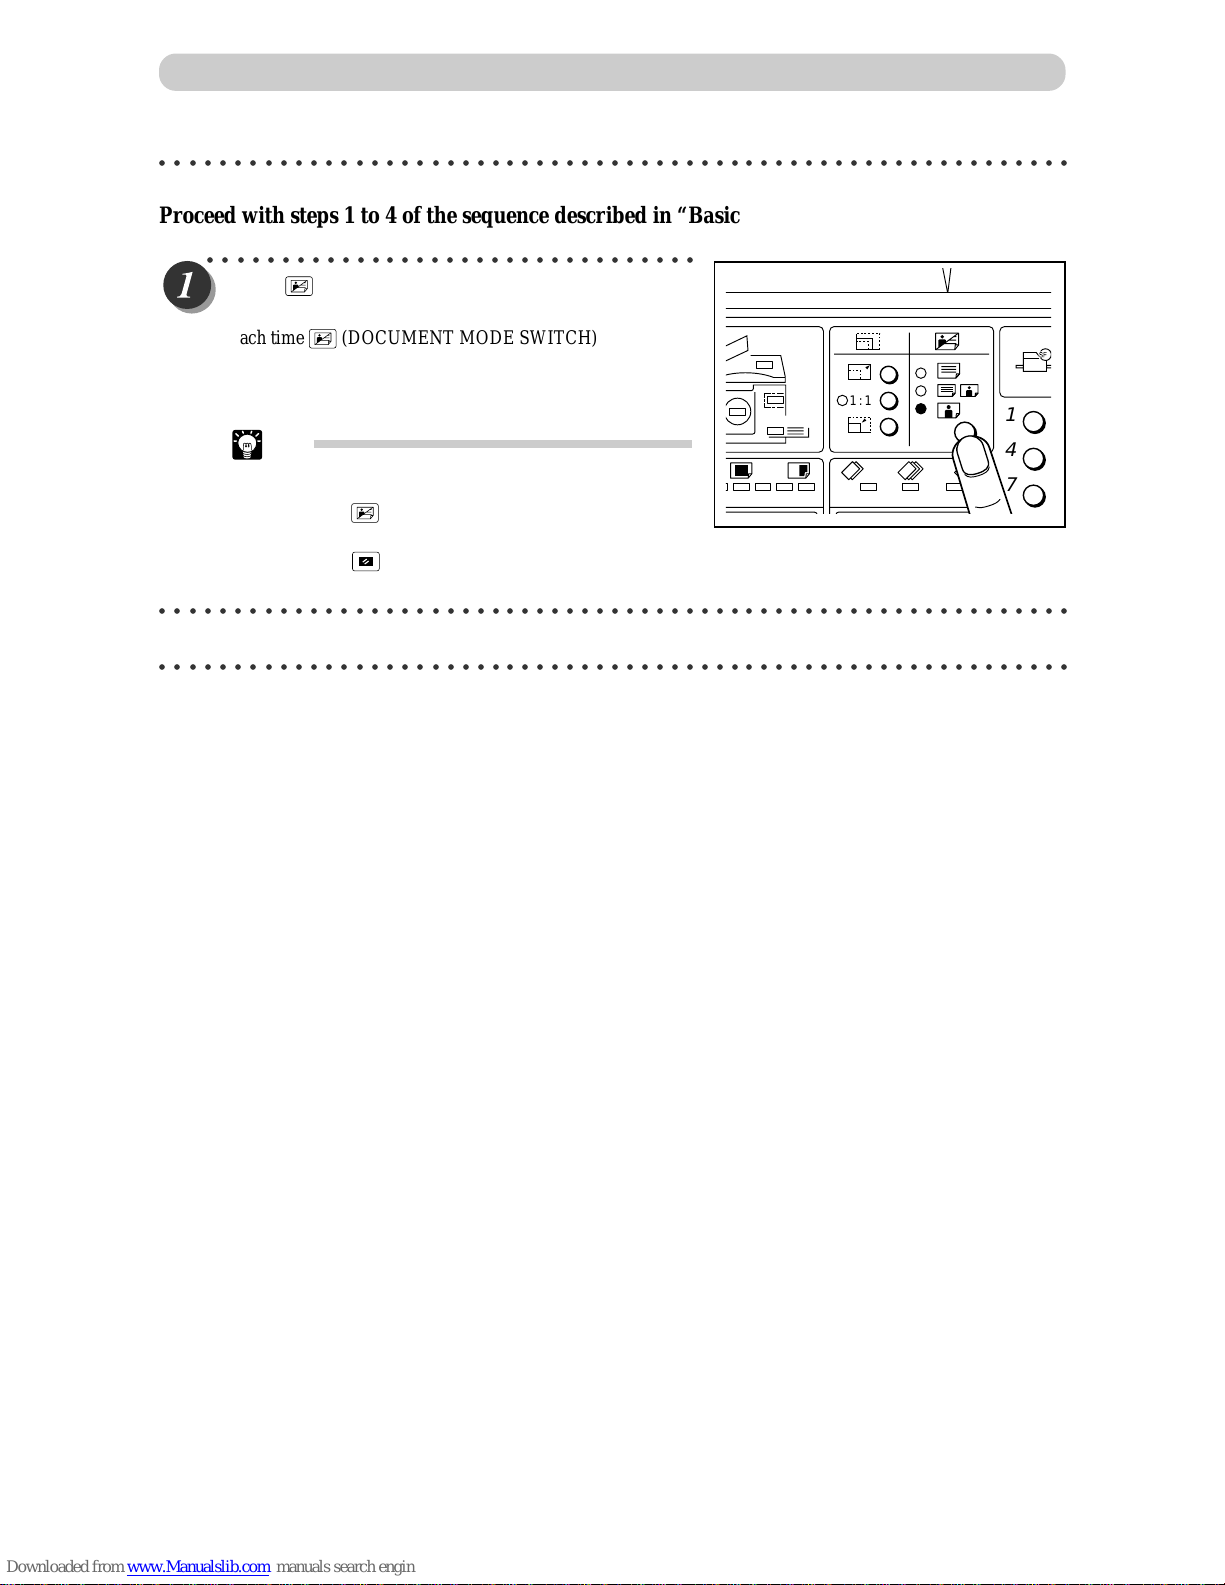
Proceed with steps 1 to 4 of the sequence described in “ Basic Printmaking” (
aa
aa
a page 32).
Enlargement and Reduction
○○○○○○○○○○○○○○○○○○○○○○○○○○○○○○○○○
Press (FUNCTION SWITCH) key several
times to show the screen at right.
○○○○○○○○○○○○○○○○○○○○○○○○○○○○○○○○○
Press (SELECT) key several times to display
actual zoom ratio.
Each time (SELECT) key is pressed, the display of the
LCD panel changes as follows.
“OFF” → actual zoom ratio → “OFF” ...
○○○○○○○○○○○○○○○○○○○○○○○○○○○○○○○○○
Use the keypad to enter the scaling ratio.
Example:70%
Tip
• You can enter a value for the scaling ratio within
the range 50 to 200%. If you enter a value
smaller than 50%, "50%" will automatically be
selected and displayed, and if you enter a value
larger than 200%, "200%" will automatically be
selected and displayed.
○○○○○○○○○○○○○○○○○○○○○○○○○○○○○○○○○○○○○○○○○○○○○○○○○○○○○○○○○○
1 2 3
100%
70%
1
4
7
C
2
5
8
0
3
6
9
X
=
T
Key pad
7.MANUAL ZOOM
1 2 3
Page 44

43
2
1
22
Printing Using Basic Functions
Enlargement and Reduction
1
4
7
C
2
5
8
0
3
6
9
X
=
○○○○○○○○○○○○○○○○○○○○○○○○○○○○○○○○○
Press
X
=
key .
The scaling ratio is set, and the 100% lamp goes out.
Tip
• To return to "100%", press C (CLEAR) key .
○○○○○○○○○○○○○○○○○○○○○○○○○○○○○○○○○○○○○○○○○○○○○○○○○○○○○○○○○○○○○
Stare platemaking and printing. (
aa
aa
a See steps 5 to 8 of “ Basic Printmaking” (
aa
aa
a page 32).
○○○○○○○○○○○○○○○○○○○○○○○○○○○○○○○○○○○○○○○○○○○○○○○○○○○○○○○○○○○○○
Page 45
44
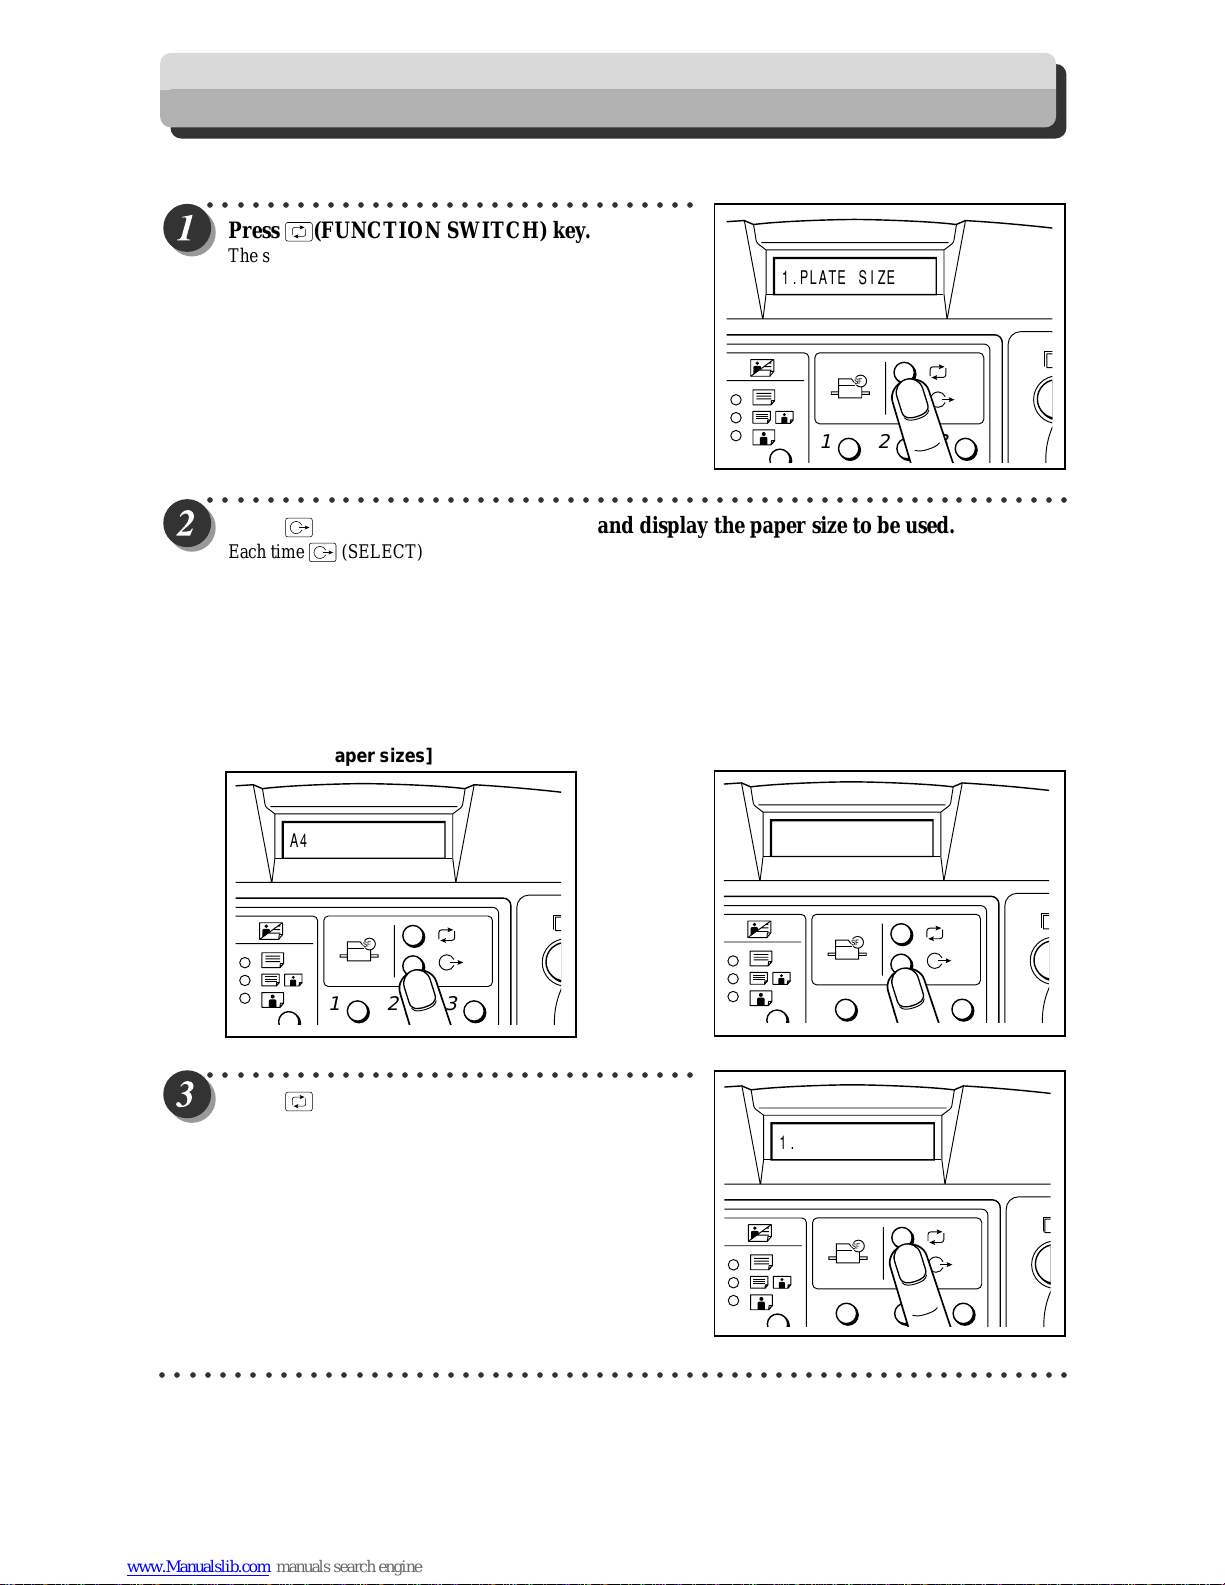
Select a paper size.
○○○○○○○○○○○○○○○○○○○○○○○○○○○○○○○○○
Press (FUNCTION SWITCH) key.
The screen at right appears on the LCD panel.
○○○○○○○○○○○○○○○○○○○○○○○○○○○○○○○○○○○○○○○○○○○○○○○○○○○○○○○○○○
Press (SELECT) key several times and display the paper size to be used.
Each time (SELECT) key is pressed, the display of the LCD panel changes as follows.
◆ European paper sizes ◆ U.S. paper sizes
• FOR DP-22S • FOR DP-22L
“A4” → “B5” → “A5” → “POST ” → “A4”... “LG” → “LT” → “ST ” → “MAX” →
• FOR DP-24S
“POST”→“LG”...
“B4” → “A4” → “B5” → “A5” → “POST ” → “B4”...
○○○○○○○○○○○○○○○○○○○○○○○○○○○○○○○○○
Press (FUNCTION SWITCH) key.
The paper size is set.
○○○○○○○○○○○○○○○○○○○○○○○○○○○○○○○○○○○○○○○○○○○○○○○○○○○○○○○○○○○○○
Selecting Printing Paper Size
[European paper sizes]
1 2 3
A4
1.PLATE SIZE
1 2 3
1.PLATE SIZE
1 2 3
1 2 3
LT
[U.S. paper sizes]
Page 46
45
2
1
2
Printing Using Basic Functions
Selecting Printing Paper Size
1 2 3
0sht 1set
○○○○○○○○○○○○○○○○○○○○○○○○○○○○○○○○○
Press (FUNCTION SWITCH) key several
times.
The number display screen returns.
○○○○○○○○○○○○○○○○○○○○○○○○○○○○○○○○○○○○○○○○○○○○○○○○○○○○○○○○○○○○○
Page 47

46
8.PAPER SIZE
1 2 3
8.PAPER SIZE
1 2 3
Selecting Printing Paper Size
■ When paper of B4 or larger size is used with DP-24S
○○○○○○○○○○○○○○○○○○○○○○○○○○○○○○○○○
Press (FUNCTION SWITCH) key several
times to show the screen at right.
○○○○○○○○○○○○○○○○○○○○○○○○○○○○○○○○○
Press (SELECT) key several times to display
“LG”.
Each time (SELECT) key is pressed, the display of the
LCD panel changes as follows.
“NORMAL” → “LG” → “NORMAL” ...
○○○○○○○○○○○○○○○○○○○○○○○○○○○○○○○○○
Press (FUNCTION SWITCH) key.
The paper size is set. (The speed is fixed to 1st and the
printing speed indicator lamp blinks.)
Tip
• The printing speed cannot be changed.
○○○○○○○○○○○○○○○○○○○○○○○○○○○○○○○○○
Press (FUNCTION SWITCH) key several
times.
The number display screen returns.
○○○○○○○○○○○○○○○○○○○○○○○○○○○○○○○○○○○○○○○○○○○○○○○○○○○○○○○○○○○○○
1 2 3
0sht 1set
1 2 3
LG
Page 48

47
2
1
2
Printing Using Basic Functions
Text
Text/Photograph Photograph
ABCDEFGHIJKLNO
PQRSTUVWXYZ
abcdefghijklmnopqrs
tuvwxyz
ABCDEFGHIJKLNO
PQRSTUVWXYZ
abcdefghijklmnopqrs
tuvwxyz
ABCDEFGHIJKLNO
PQRSTUVWXYZ
ABCDEFGH ABCDEFGH
ABCDEFGHIJKLNO
PQRSTUVWXYZ
abcdefghijklmnopqrs
ABCDEFGHIJKLNO
PQRSTUVWXYZ
abcdefghijklmnopqrs
Text/Photograph/Text and Photograph Mode
This function includes three modes for enhancing text and photographic documents.
■ Text/Photograph/Text and Photograph Mode
In this mode, the print quality is adjusted to match the document.
Text mode: Enhances the printing of text documents
Documents suited for text mode:
• Text documents
• Documents that include black and white photos that have already been screen
processed.
Text/Photograph mode: Enhances the printing of documents with both text and photographs.
Documents suited for text/photograph mode:
• Documents with both text and photographs.
Photo mode: Enhances the printing of the subtle gradations of photographs and light images from
color documents.
Document suited for photo mode:
• Light-colored color documents
• Color photographs
• Documents with non-screened black and white photographs
IMPORTANT
• Select “Text/Photograph/Text and Photograph Mode” before starting platemaking.
○○○○○○○○○○○○○○○○○○○○○○○○○○○○○○○○○○○○○○○○○○○○○○○○○○○○○○○○○○○○○
Page 49
48
Text/Photograph/Txt and Photograph Mode
○○○○○○○○○○○○○○○○○○○○○○○○○○○○○○○○○○○○○○○○○○○○○○○○○○○○○○○○○○○○○
Proceed with steps 1 to 4 of the sequence described in “Basic Printmaking” (
aa
aa
a page 32).
○○○○○○○○○○○○○○○○○○○○○○○○○○○○○○○○○
Press
(DOCUMENT MODE SWITCH) key
to select the desired mode.
Each time
(DOCUMENT MODE SWITCH) key is
pressed, the lit document mode indicator lamp changes as
follows.
“Text” → “Text/Photograph” → “Photograph” → “Text”...
Tip
To return to “Text mode” use one of the following
two methods:
• Press
(DOCUMENT MODE SWITCH) key
to select “Text”.
• Press
(ALL CLEAR) key. In this case, all
settings are reset to standard mode (a page 26).
○○○○○○○○○○○○○○○○○○○○○○○○○○○○○○○○○○○○○○○○○○○○○○○○○○○○○○○○○○○○○
Start platemaking and printing. (
aa
aa
a See steps 5 to 8 of “Basic Printmaking” page 32.)
○○○○○○○○○○○○○○○○○○○○○○○○○○○○○○○○○○○○○○○○○○○○○○○○○○○○○○○○○○○○○
STD STD
1:1
1
4
7
Page 50

49
2
1
2
Printing Using Basic Functions
This section describes how to install the print tray and remove printed pages from the print tray.
Installing Print Tray
○○○○○○○○○○○○○○○○○○○○○○○○○○○○○○○○○
Remove the print tray.
○○○○○○○○○○○○○○○○○○○○○○○○○○○○○○○○○
Install the print tray.
• When you use the printer on a table, install the print tray
into the upper fitting.
(Stacking capacity; 900 sheets, 55 kg, high-grade paper)
• When you use a cabinet (option), install the print tray into
the lower fitting.
(Stacking capacity; 1300 sheets, 55 kg, high-grade paper)
○○○○○○○○○○○○○○○○○○○○○○○○○○○○○○○○○
Open out the paper stacker guides.
○○○○○○○○○○○○○○○○○○○○○○○○○○○○○○○○○○○○○○○○○○○○○○○○○○○○○○○○○○○○○
Print Output
When the printer is used
on a table.
When a cabinet is used.
Page 51

50
○○○○○○○○○○○○○○○○○○○○○○○○○○○○○○○○○
Open out the paper stopper.
○○○○○○○○○○○○○○○○○○○○○○○○○○○○○○○○○
Adjust the paper stacker guides and paper
stopper to the size of the printing paper.
○○○○○○○○○○○○○○○○○○○○○○○○○○○○○○○○○○○○○○○○○○○○○○○○○○○○○○○○○○○○○
Print Output
Page 52

51
2
1
2
Printing Using Basic Functions
Truing up Printed Pages
Available only when sorter is installed
Adjust when the edges of the printed pages are not trued up.
■ Adjusting jump plate
Adjust the plate according to the paper size.
Ex: Expand the guides fully when using paper with B4
or larger size.
■ Truing up printed pages
When using thinner paper, turn the lever up.
When using thicker paper, turn the lever down.
Print Output
Page 53

Page 54
3
Printing With Various Functions
Chapter 3
Printing With Various Function
This chapter describes how to make prints using the various printer functions.
○○○○○○○○○○○○○○○○○○○○○○○○○○○○○○○○○○○○○○○○○○○○○○
Saving Settings .................................................................................................. 54
Saving Settings............................................................................................ 54
Retrieving Settings....................................................................................... 56
Multiple Printing on One Page.......................................................................... 58
2-up Function............................................................................................... 58
2-in-1 Layout [Available only with ADF installed] ......................................... 61
Book Shadow Eraser Mode............................................................................... 63
Adjusting Plate Darkness.................................................................................. 65
Sectional Printing .............................................................................................. 67
Sectional Printing......................................................................................... 67
Sectional Printing (changing print quantity per document) .......................... 71
Dividing Sections with Tape [Available only with Tape Cluster Device] ........ 74
○○○○○○○○○○○○○○○○○○○○○○○○○○○○○○○○○○○○○○○○○○○○○○
Page 55

54
Saving Settings
You can save and retrieve nine sets of settings for platemaking and printing. The settings are stored in memory even
when the power is turned OFF.
Tips
The following settings are saved:
• Number of prints (including sets) • Zoom ratio (Fixed zoom ratios only)
• Plate size • 94% reduction
• Platemaking darkness • Printing speed
• Text/Photo • Printing position
Saving Settings
○○○○○○○○○○○○○○○○○○○○○○○○○○○○○○○○○○○○○○○○○○○○○○○○○○○○○○○○○○
Confirm that the LCD panel displays the settings you want to store.
○○○○○○○○○○○○○○○○○○○○○○○○○○○○○○○○○
Press (FUNCTION SWITCH) key several
times to show the screen at right.
○○○○○○○○○○○○○○○○○○○○○○○○○○○○○○○○○
Press (SELECT) key several times to display
“SAVE”.
Each time (SELECT) key is pressed, the display of the
LCD panel changes as follows.
“RETRIEVE” → “SAVE” → “CANCEL” →
“RETRIEVE”...
○○○○○○○○○○○○○○○○○○○○○○○○○○○○○○○○○○○○○○○○○○○○○○○○○○○○○○○○○○○○○
5.MEMORY MODE
1 2 3
1 2 3
SAVE
Page 56
55
3
2
1
Printing With Various Functions
1
4
7
C
2
5
8
0
3
6
9
X
=
T
Key pad
Saving Settings
1
4
7
C
2
5
8
0
3
6
9
X
=
123456789C
1 2 3
○○○○○○○○○○○○○○○○○○○○○○○○○○○○○○○○○
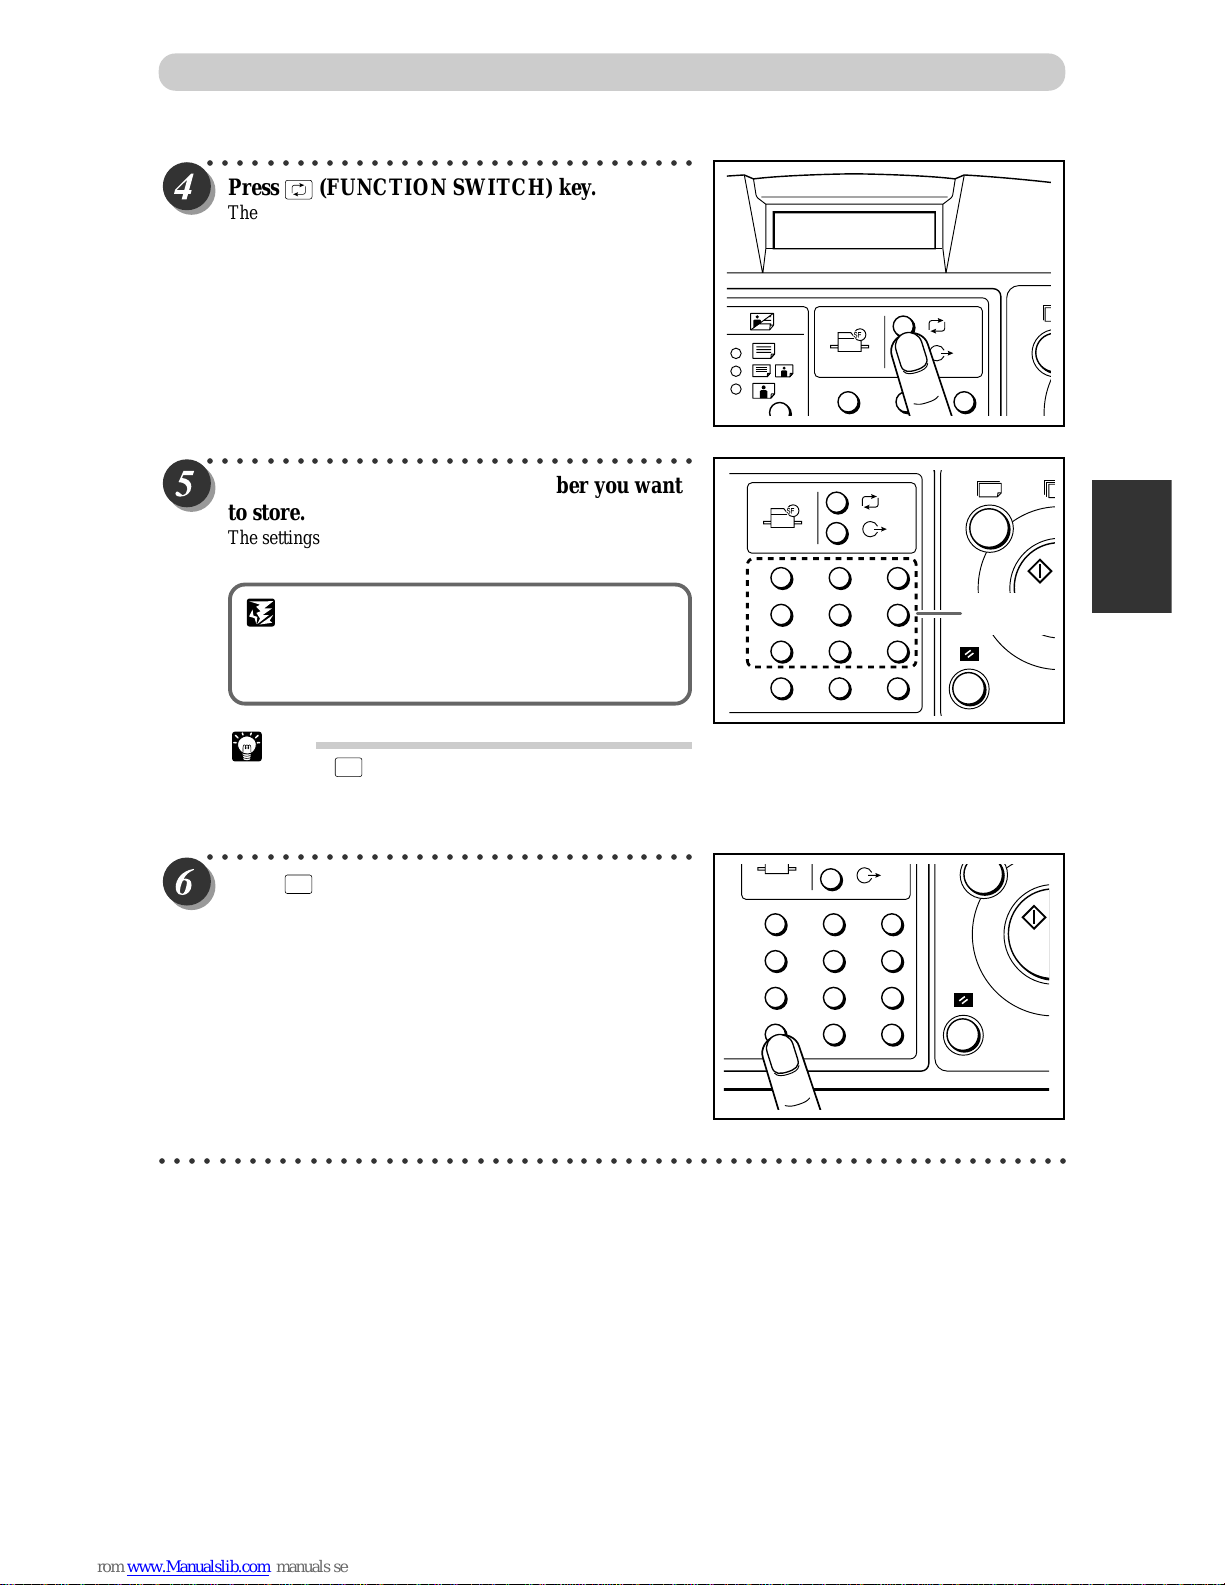
Press (FUNCTION SWITCH) key.
The screen at right appears on the LCD panel.
○○○○○○○○○○○○○○○○○○○○○○○○○○○○○○○○○
Use the keypad to specify the number you want
to store.
The settings are stored and the screen in step 3 returns.
IMPORTANT
• Any previous settings stored in the memory
channel will be deleted when you save new
settings.
Tips
• Press C (CLEAR) key to cancel. The screen in
step 3 returns.
• The numbers already stored are displayed
flashing.
○○○○○○○○○○○○○○○○○○○○○○○○○○○○○○○○○
Press
C
(CLEAR) key.
The number display screen returns.
○○○○○○○○○○○○○○○○○○○○○○○○○○○○○○○○○○○○○○○○○○○○○○○○○○○○○○○○○○○○○
Page 57
56
1
4
7
C
2
5
8
0
3
6
9
X
=
T
Key pad
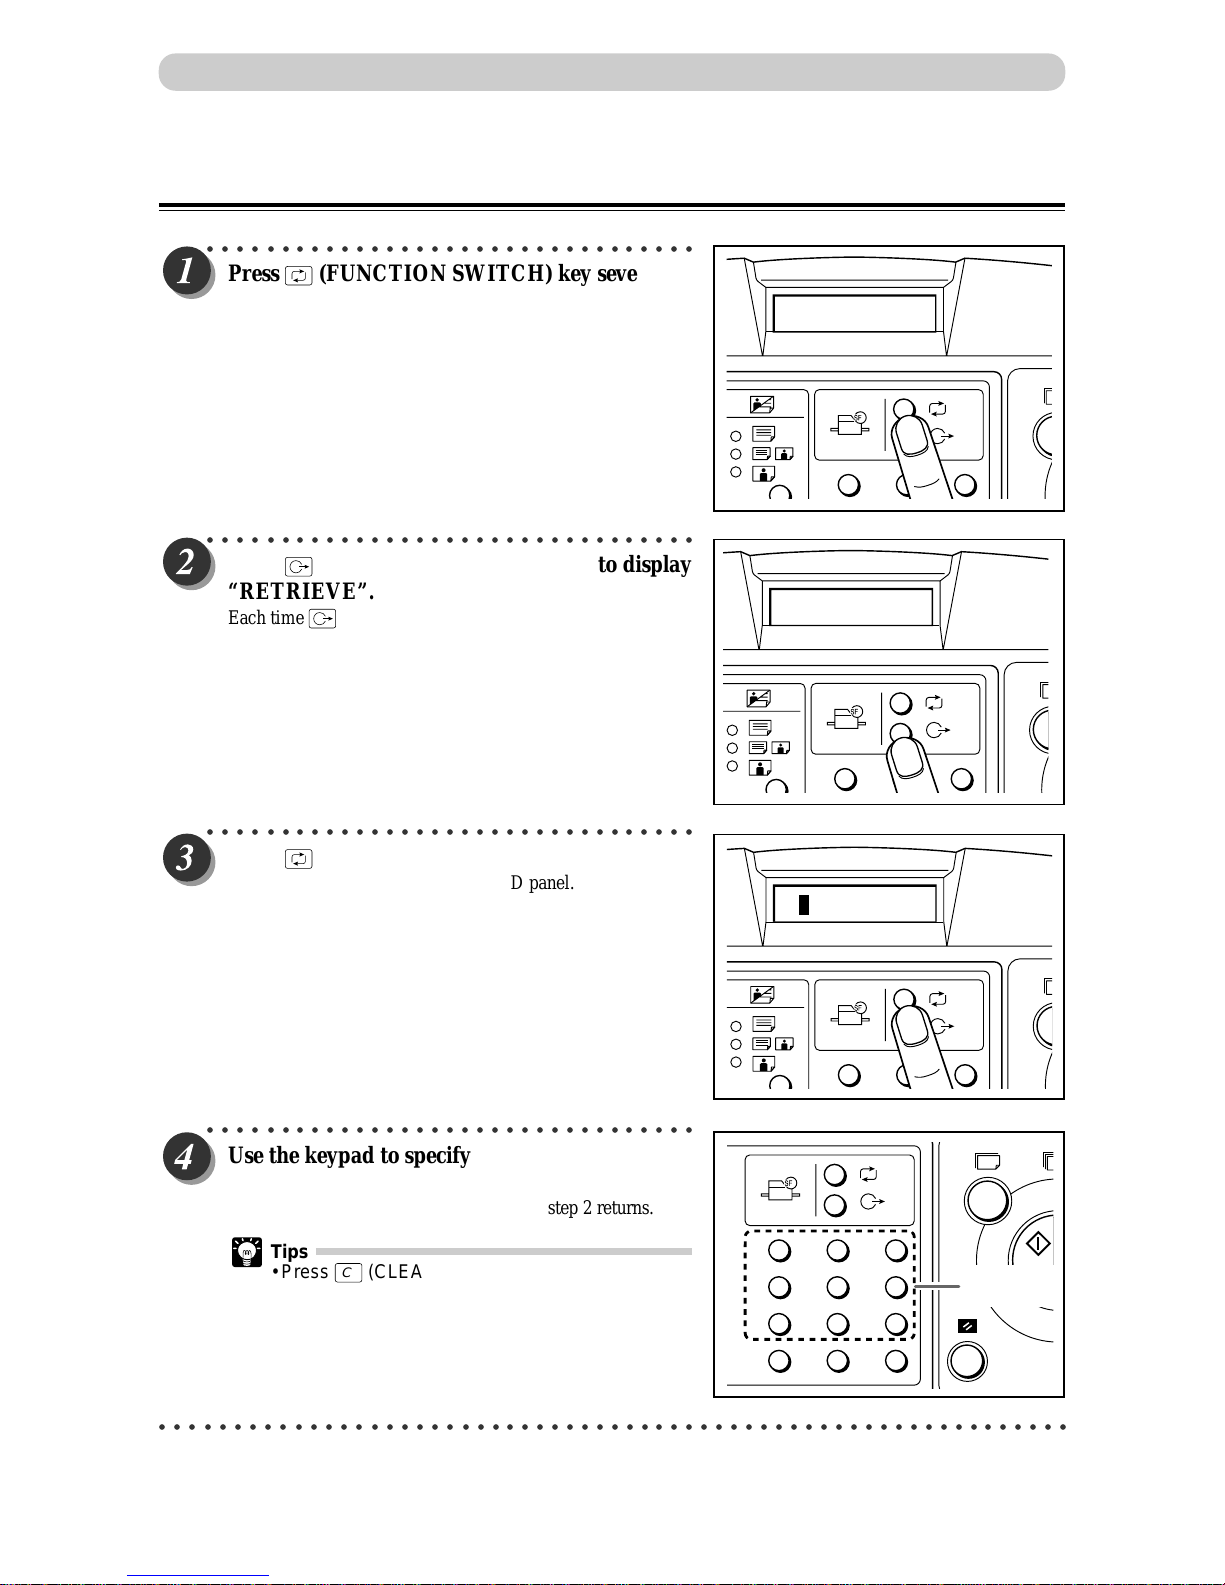
Retrieving Settings
○○○○○○○○○○○○○○○○○○○○○○○○○○○○○○○○○
Press (FUNCTION SWITCH) key several
times to show the screen at right.
○○○○○○○○○○○○○○○○○○○○○○○○○○○○○○○○○
Press (SELECT) key several times to display
“RETRIEVE”.
Each time (SELECT) key is pressed, the display of the
LCD panel changes as follows.
“RETRIEVE” → “SAVE” → “CANCEL” →
“RETRIEVE”...
○○○○○○○○○○○○○○○○○○○○○○○○○○○○○○○○○
Press (FUNCTION SWITCH) key.
The screen at right appears on the LCD panel.
○○○○○○○○○○○○○○○○○○○○○○○○○○○○○○○○○
Use the keypad to specify the number you want
to recall.
The settings are recalled and the screen in step 2 returns.
Tips
• Press C (CLEAR) key to cancel. The screen in
step 2 returns.
• You can recall only the numbers flashing.
○○○○○○○○○○○○○○○○○○○○○○○○○○○○○○○○○○○○○○○○○○○○○○○○○○○○○○○○○○○○○
Saving Settings
5.MEMORY MODE
1 2 3
1 2 3
RETRIEVE
1 2 3
123456789C
Page 58

57
3
2
1
Printing With Various Functions
○○○○○○○○○○○○○○○○○○○○○○○○○○○○○○○○○
Press
C
(CLEAR) key.
The number display screen returns.
○○○○○○○○○○○○○○○○○○○○○○○○○○○○○○○○○○○○○○○○○○○○○○○○○○○○○○○○○○○○○
Saving Settings
1
4
7
C
2
5
8
0
3
6
9
X
=
Page 59

58
Multiple Printing on One Page
Documents
Printout
Document Printout
This mode allows you to print 2 copies of the document on one page.
■ 2-up Function (
aa
aa
a page 58)
This mode prints 2 copies of the document on one page.
■ 2-in-1 Layout (
aa
aa
a page 61)
This mode prints two different document pages on one page.
2-up Function
Available only with ADF installed
This mode prints multiple copies of the document on one page.
• Copying A4 to A3 (2 prints on one page)
A3, LDG
A4
LT
A4
LT
A4
LT
Zoom ratio:
100%
Portrait Placement
IMPORT ANT
• Select “2-up Function” before starting platemaking.
• The printable range is slightly smaller than the printing paper.
• You cannot obtain the correct layout if you select the wrong paper size.
Available only with ADF installed
Page 60
59
3
2
1
Printing With Various Functions
○○○○○○○○○○○○○○○○○○○○○○○○○○○○○○○○○○○○○○○○○○○○○○○○○○○○○○○○○○○○○
Proceed with steps 1 to 4 of the sequence described in “Basic Printmaking” (
aa
aa
a page 32).
○○○○○○○○○○○○○○○○○○○○○○○○○○○○○○○○○
Press (FUNCTION SWITCH) key several
times to show the screen at right.
○○○○○○○○○○○○○○○○○○○○○○○○○○○○○○○○○
Press (SELECT) key several times to display
“ON”.
Each time (SELECT) key is pressed, the display of the
LCD panel changes as follows.
"ON" → "OFF" → "ON"...
○○○○○○○○○○○○○○○○○○○○○○○○○○○○○○○○○
Press (FUNCTION SWITCH) key.
2-up Function is set.
○○○○○○○○○○○○○○○○○○○○○○○○○○○○○○○○○○○○○○○○○○○○○○○○○○○○○○○○○○
Continue Page
•••
Multiple Printing on One Page
4.2-UP
1 2 3
1 2 3
ON
4.2-UP
1 2 3
Page 61
60
1 2 3
0sht 1set
○○○○○○○○○○○○○○○○○○○○○○○○○○○○○○○○○
Press (FUNCTION SWITCH) key several
times.
The number display screen returns.
Tip
You can cancel 2-up Function using one of the
following two methods.
• Set to “OFF” in the same procedure.
• Press
(ALL CLEAR) key. In this case, all
settings are reset to standard mode
(a page 26).
○○○○○○○○○○○○○○○○○○○○○○○○○○○○○○○○○○○○○○○○○○○○○○○○○○○○○○○○○○○○○
Start platemaking and printing. (
aa
aa
a See stepes 5 to 8 of “Basic Printmaking” page 32).
○○○○○○○○○○○○○○○○○○○○○○○○○○○○○○○○○○○○○○○○○○○○○○○○○○○○○○○○○○○○○
Multiple Printing on One Page
Page 62

61
3
2
1
Printing With Various Functions
○○○○○○○○○○○○○○○○○○○○○○○○○○○○○○○○
Press (FUNCTION SWITCH) key several
times to show the screen at right.
○○○○○○○○○○○○○○○○○○○○○○○○○○○○○○○○○○○○○○○○○○○○○○○○○○○○○○○○○
Continue Page
•••
2-in-1 Layout
Available only with ADF installed
Two-in-one (2-in-1) mode allows you to print two small documents on one page and also easily print for
creating booklets that will be saddle stitched.
When you use 2-in-1 mode, the layout is as follows:
IMPORT ANT
• Select “2-in-1 Layout” before starting platemaking.
• You cannot use 2-in-1 mode unless the optional ADF is installed.
• Always load the documents in the ADF.
• If you are printing the documents at 100%, select a printing paper that is the size of the two
documents.
• When you enlarge or reduce two documents size by side, select a zoom ratio so that the
documents fit exactly on one page.
• Note the following when using 2-in-1 layout mode:
• You must load the document in the ADF in portrait orientation.
• You must select a paper size and zoom ratio that will accommodate two documents.
• Correct layout may not be obtainable with other than standard size papers.
1
2
3
4
Documents (even number)
1
2
3
4
5
Documents (odd number)
Printout1
21
Printout2
43
Printout3
5
Printout1
21
Printout2
43
Multiple Printing on One Page
4.2-UP
1 2 3
Page 63

62
○○○○○○○○○○○○○○○○○○○○○○○○○○○○○○○○○
Press (SELECT) key several times to display
“ON :: ADF 2IN1”.
Each time (SELECT) key is pressed, the display of the
LCD panel changes as follows.
“OFF :: ADF 2IN1” → “ON :: ADF 2IN1” → “OFF :: ADF
2IN1”...
○○○○○○○○○○○○○○○○○○○○○○○○○○○○○○○○○
Press (FUNCTION SWITCH) key.
2 IN 1 Function is set.
○○○○○○○○○○○○○○○○○○○○○○○○○○○○○○○○○
Press (FUNCTION SWITCH) key several
times.
The number display screen returns.
Tip
You can cancel 2 IN 1 Function using one of the
following two methods.
• Set to “OFF :: ADF 2IN1” in the same procedure.
• Press
(ALL CLEAR) key. In this case, all
settings are reset to standard mode
(a page 26).
○○○○○○○○○○○○○○○○○○○○○○○○○○○○○○○○○○○○○○○○○○○○○○○○○○○○○○○○○○○○○
1 2 3
ON : ADF 2IN1
Multiple Printing on One Page
1 2 3
0sht 1set
4.2-UP
1 2 3
Page 64

63
3
2
1
Printing With Various Functions
15mm
6mm
6mm
6mm
6mm
Book Shadow Eraser Mode
■ Prints book documents without shadows
This mode erases the shadows caused by the book binding when printing an open spread from a book or other
folded document. It also erases the shadow around the periphery of the document.
IMPORT ANT
• Select “Book Shadow Eraser Mode” before starting platemaking.
• When you select “No shadow erase”, the shadow is erased from approximately 3mm
around the periphery of the document.
• When you select “Shadow erase”, the machine reproduces the document as follows.
○○○○○○○○○○○○○○○○○○○○○○○○○○○○○○○○○○○○○○○○○○○○○○○○○○○○○○○○○○○○○
Proceed with steps 1 to 4 of the sequence described in “Basic Printmaking” (
aa
aa
a page 32.)
Place the document on the platen glass.
○○○○○○○○○○○○○○○○○○○○○○○○○○○○○○○○○
Press (FUNCTION SWITCH) key several
times to show the screen at right.
○○○○○○○○○○○○○○○○○○○○○○○○○○○○○○○○○○○○○○○○○○○○○○○○○○○○○○○○○○○○○
Document
Printout
Printout
With shadow eraser
Without shadow erase
6.SHADOW ERASER
1 2 3
Continue Page
•••
Page 65

64
Book Shadow Eraser Mode
○○○○○○○○○○○○○○○○○○○○○○○○○○○○○○○○○
Press (SELECT) key several times and
display the document size to be used.
Each time (SELECT) key is pressed, the display of the
LCD panel changes as follows.
<DP-22S/24S>
"OFF" → "A3" → "B4" → "A4" → "B5" → "A5" →
"POST" → "OFF"...
<DP-22L>
"OFF" → "WLT" → "10X14" → "LG" → "LT" → "ST" →
"POST" → "OFF"...
1 2 3
POST
6.SHADOW ERASER
1 2 3
○○○○○○○○○○○○○○○○○○○○○○○○○○○○○○○○○
Press (FUNCTION SWITCH) key.
Book Shadow Eraser Mode is set.
1 2 3
0sht 1set
○○○○○○○○○○○○○○○○○○○○○○○○○○○○○○○○○
Press (FUNCTION SWITCH) key several
times.
The number display screen returns.
Tip
You can cancel Book Shadow Eraser Mode using
one of the following two methods.
• Set to “OFF” in the same procedure.
• Press
(ALL CLEAR) key. In this case, all
settings are reset to standard mode
(a page 26).
○○○○○○○○○○○○○○○○○○○○○○○○○○○○○○○○○○○○○○○○○○○○○○○○○○○○○○○○○○○○○
Start platemaking and printing. (
aa
aa
a See stepes 5 to 8 of “Basic Printmaking” page 32).
○○○○○○○○○○○○○○○○○○○○○○○○○○○○○○○○○○○○○○○○○○○○○○○○○○○○○○○○○○○○○
Page 66

65
3
2
1
Printing With Various Functions
Adjusting Plate Darkness
The plate darkness (the level at which black and white are differentiated) can be adjusted in 3 steps.
Make the plate more “dark” if the document is light, or “light” if the document is dark.
IMPORTANT
• Set the “Plate Darkness” before making the plate.
• If you adjust the plate darkness, you must repeat the platemaking process before making
prints.
○○○○○○○○○○○○○○○○○○○○○○○○○○○○○○○○○
Press (FUNCTION SWITCH) key several
times to show the screen at right.
○○○○○○○○○○○○○○○○○○○○○○○○○○○○○○○○○
Press (SELECT) key several times to display
the desired plate darkness.
Each time (SELECT) key is pressed, the display of the
LCD panel changes as follows.
“NORMAL” → “DARK” → “LIGHT” → “NORMAL”...
○○○○○○○○○○○○○○○○○○○○○○○○○○○○○○○○○
Press (FUNCTION SWITCH) key.
The plate darkness is selected.
○○○○○○○○○○○○○○○○○○○○○○○○○○○○○○○○○○○○○○○○○○○○○○○○○○○○○○○○○○○○○
1 2 3
DARK
2.PLATE DARKNESS
1 2 3
2.PLATE DARKNESS
1 2 3
Page 67
66
Adjusting Plate Darkness
○○○○○○○○○○○○○○○○○○○○○○○○○○○○○○○○○
Press (FUNCTION SWITCH) key several
times.
The number display screen returns.
Tip
There are two ways to return the darkness to
“NORMAL” as follows.
• Set the darkness to “NORMAL” in the same
procedure.
• Press
(ALL CLEAR) key. In this case, all
settings are reset to standard mode
(a page 26).
○○○○○○○○○○○○○○○○○○○○○○○○○○○○○○○○○○○○○○○○○○○○○○○○○○○○○○○○○○○○○
1 2 3
0sht 1set
Page 68

67
3
2
1
Printing With Various Functions
Sectional Printing
You can print the specified number of sets of prints in each set.
■ Sectional Printing (
aa
aa
a page 67)
The machine stops after each set of prints.
■ Changing Print Quantity per Document (
aa
aa
a page 71)
This function changes the number of prints made from each document.
Sectional Printing
In this mode, each set comprises the specified number of prints and the machine prints the specified number of
sets, stopping after each set.
You can enter up to 15 groups of the specified number of prints x number of sets.
IMPORTANT
• Select “Sectional Printing” after platemaking.
1
1
1
1
1
1
1
1
Document
1st set
5 copies x 2 sets
2nd set
3 copies x 4 sets
3rd set
2 copies x 5 sets
1
1 1 1
2
2
2
3
2
3
3
3
3
1
Documents
1
1
3
1st document
5 copies x 2 sets
2nd document
3 copies x 4 sets
3rd document
2 copies x 5 sets
2
Page 69

68
○○○○○○○○○○○○○○○○○○○○○○○○○○○○○○○○○○○○○○○○○○○○○○○○○○○○○○○○○○○○○
Proceed with steps 1 to 5 of the sequence described in “Basic Printmaking” (
aa
aa
a page 32).
○○○○○○○○○○○○○○○○○○○○○○○○○○○○○○○○○
Press
C
(CLEAR) key to clear the number
display.
○○○○○○○○○○○○○○○○○○○○○○○○○○○○○○○○○
Use the keypad to enter the number of prints.
Example: 25
Tip
• If you make a mistake, start over again by press
C
(CLEAR) key and start from the beginning.
When you press
C
(CLEAR) key, both the
number of prints and the number of sets are
cancelled.
○○○○○○○○○○○○○○○○○○○○○○○○○○○○○○○○○○○○○○○○○○○○○○○○○○○○○○○○○○○○○
Sectional Printing
1
4
7
C
2
5
8
0
3
6
9
X
=
1
4
7
C
2
5
8
0
3
6
9
X
=
T
Key pad
0sht 1set
25sht 1set
Page 70

69
3
2
1
Printing With Various Functions
○○○○○○○○○○○○○○○○○○○○○○○○○○○○○○○○○
Press
X
=
key.
The number of prints is set.
○○○○○○○○○○○○○○○○○○○○○○○○○○○○○○○○○
Use the keypad to enter the number of sets.
Example: 3 sets
Tip
• If you make a mistake, start over again by press
C
(CLEAR) key and start from the beginning.
When you press
C
(CLEAR) key, both the
number of prints and the number of sets are
cancelled.
○○○○○○○○○○○○○○○○○○○○○○○○○○○○○○○○○
Press
X
=
key .
○○○○○○○○○○○○○○○○○○○○○○○○○○○○○○○○○○○○○○○○○○○○○○○○○○○○○○○○○○
Repeat steps 2 to 5.
○○○○○○○○○○○○○○○○○○○○○○○○○○○○○○○○○○○○○○○○○○○○○○○○○○○○○○○○○○○○○
Sectional Printing
1
4
7
C
2
5
8
0
3
6
9
X
=
1
4
7
C
2
5
8
0
3
6
9
X
=
25sht 0set
25sht 3set
Continue Page
•••
Page 71
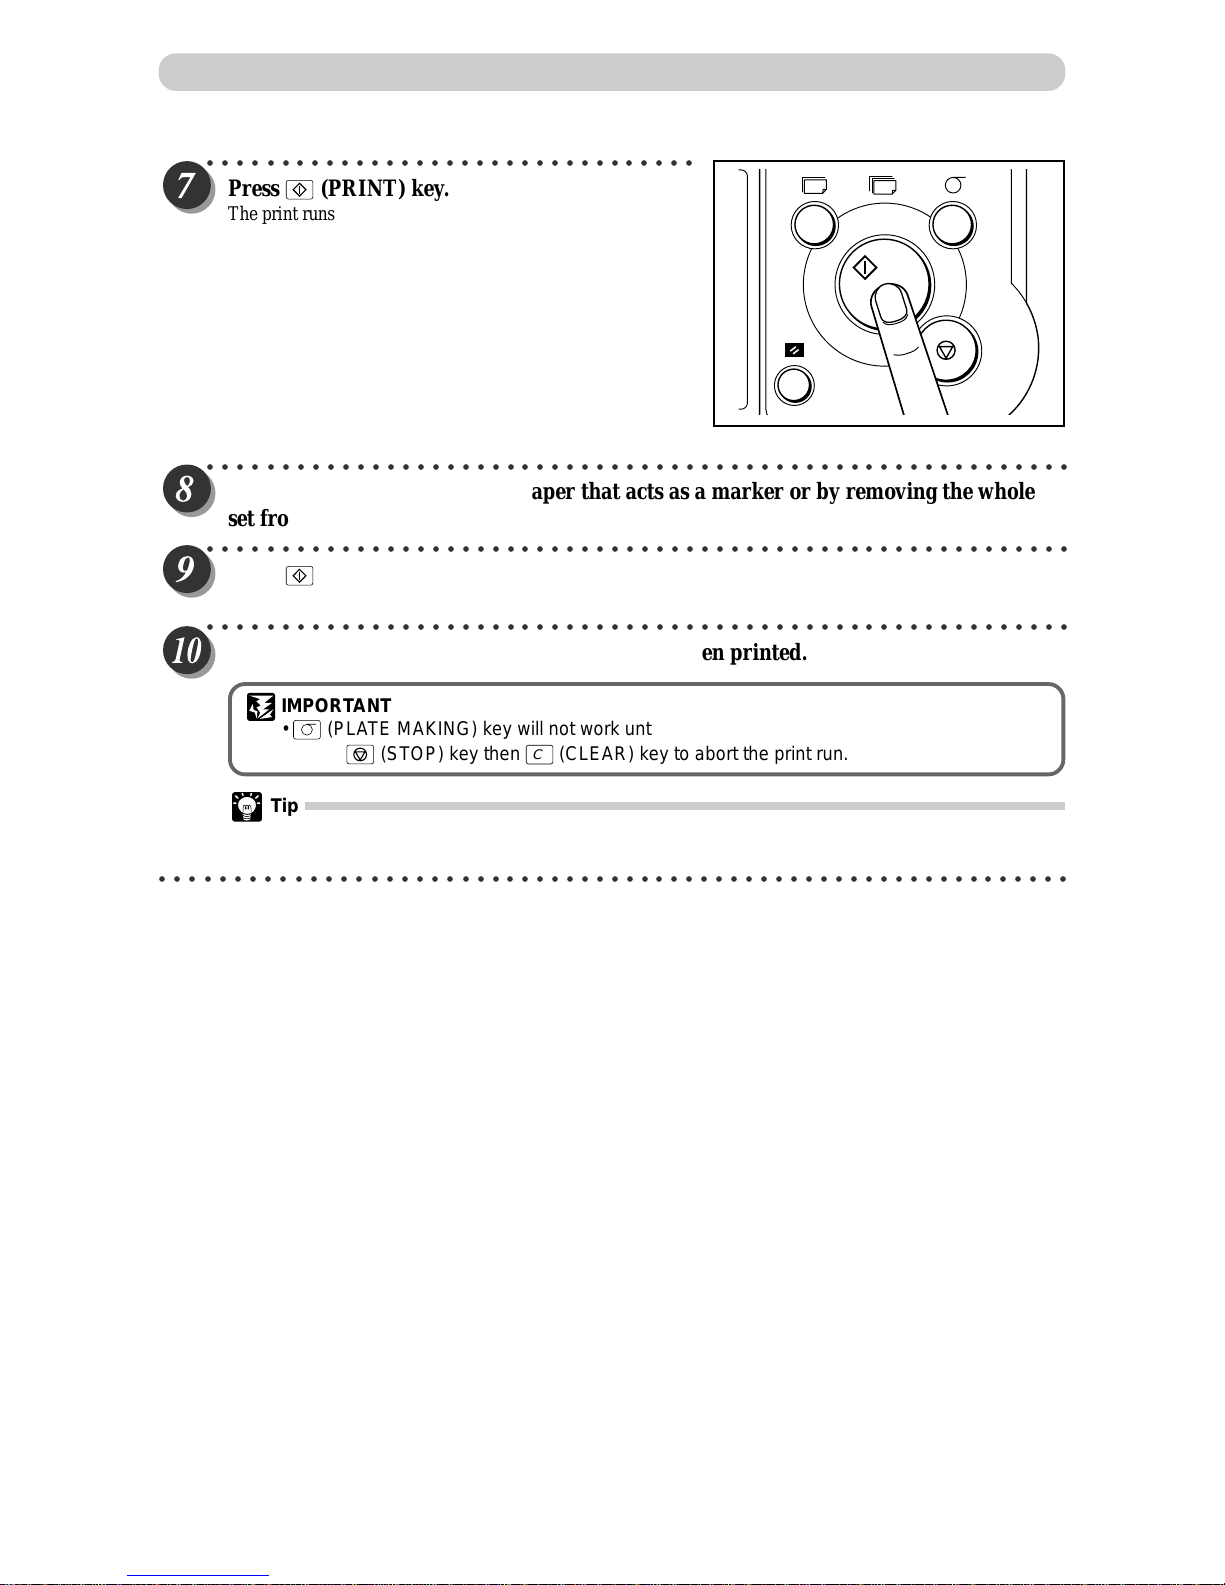
70
○○○○○○○○○○○○○○○○○○○○○○○○○○○○○○○○○
Press
(PRINT) key.
The print runs starts from the last-entered set, and stops after
the first set of printouts.
○○○○○○○○○○○○○○○○○○○○○○○○○○○○○○○○○○○○○○○○○○○○○○○○○○○○○○○○○○
Collate by inserting a piece of paper that acts as a marker or by removing the whole
set from the machine.
○○○○○○○○○○○○○○○○○○○○○○○○○○○○○○○○○○○○○○○○○○○○○○○○○○○○○○○○○○
Press (PRINT) key.
The print run starts.
○○○○○○○○○○○○○○○○○○○○○○○○○○○○○○○○○○○○○○○○○○○○○○○○○○○○○○○○○○
Repeat steps 8 and 9 until all entered sets have been printed.
IMPORTANT
•
(PLATE MAKING) key will not work until all the sets have been printed.
• Press (STOP) key then
C
(CLEAR) key to abort the print run.
Tip
• When two or more documents are loaded in the ADF, platemaking of the following documents
and printing will automatically start after the entire printing is completed.
○○○○○○○○○○○○○○○○○○○○○○○○○○○○○○○○○○○○○○○○○○○○○○○○○○○○○○○○○○○○○
Sectional Printing
T
Page 72
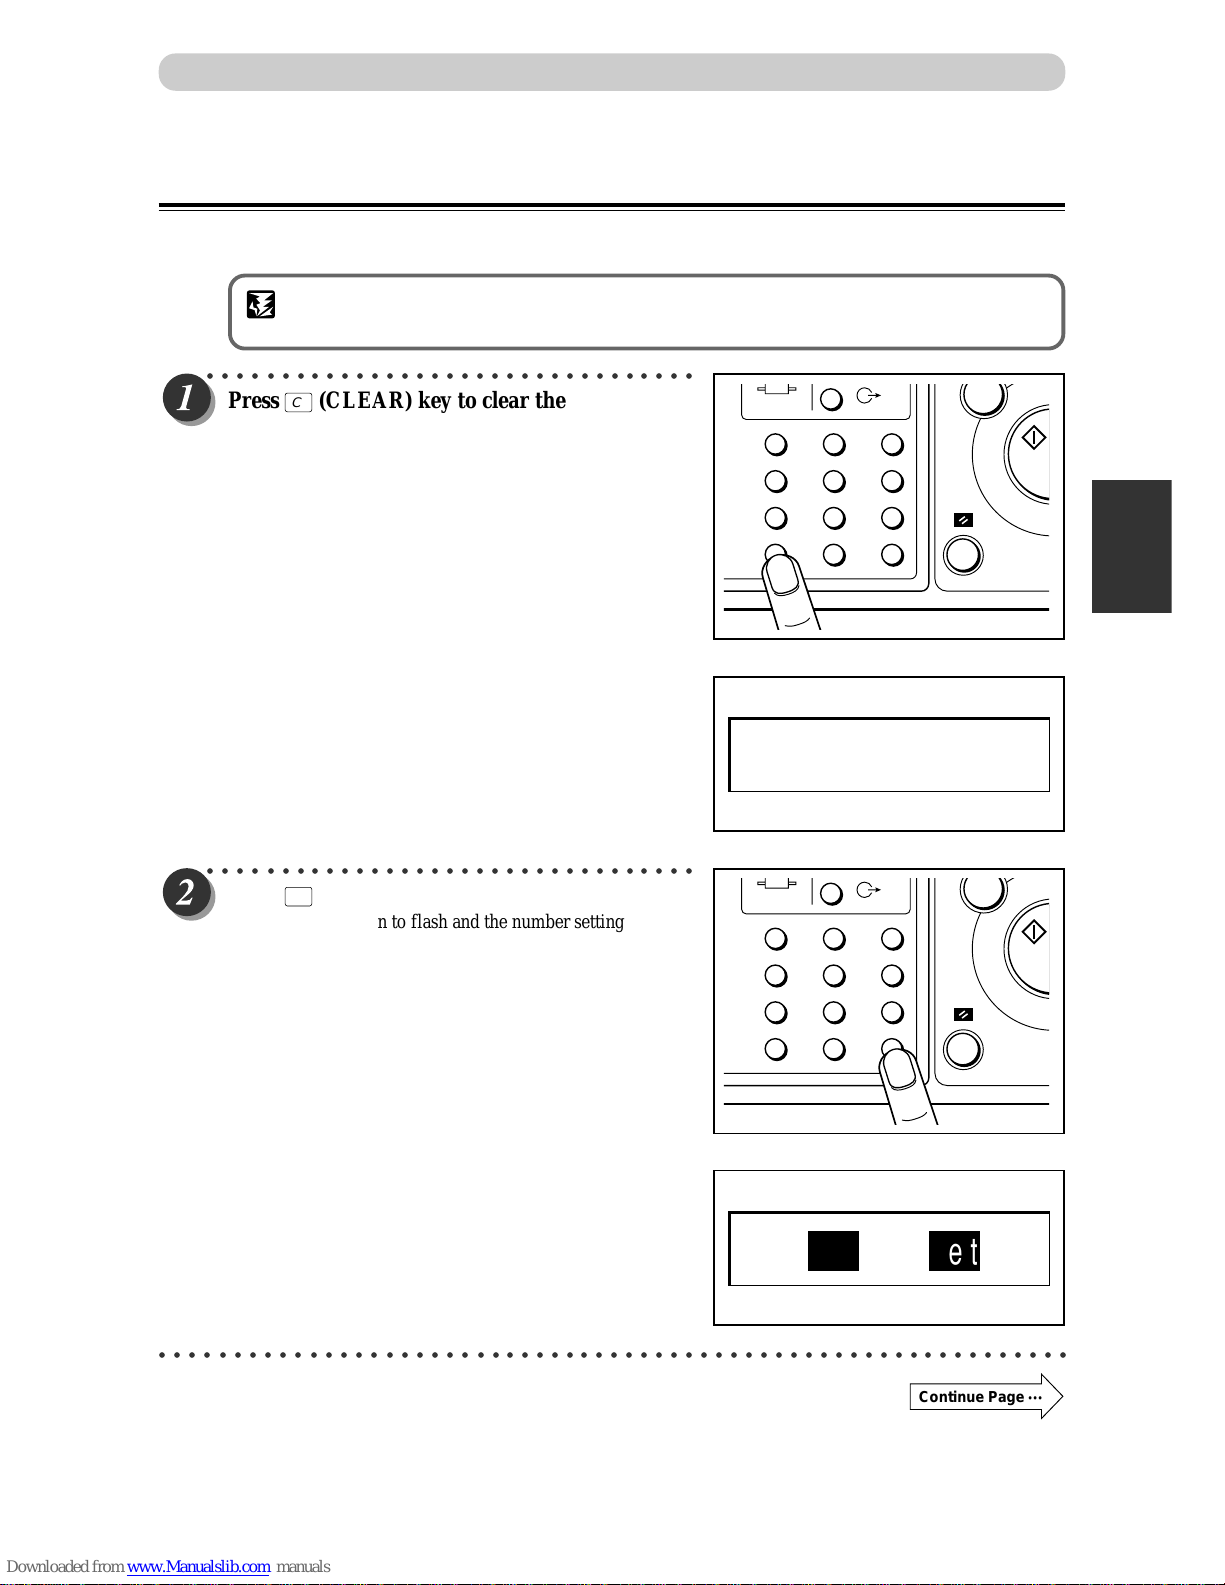
71
3
2
1
Printing With Various Functions
Sectional Printing (changing print quantity per document)
You can change the number of prints made from each document. You can separate the number of prints for up
to 15 documents.
IMPORTANT
• Select “Sectional Printing” before starting platemaking.
○○○○○○○○○○○○○○○○○○○○○○○○○○○○○○○○○
Press
C
(CLEAR) key to clear the number
display.
○○○○○○○○○○○○○○○○○○○○○○○○○○○○○○○○○
Press
X
=
key .
“sht” and “set” begin to flash and the number setting by
document mode returns.
○○○○○○○○○○○○○○○○○○○○○○○○○○○○○○○○○○○○○○○○○○○○○○○○○○○○○○○○○○○○○
Sectional Printing
1
4
7
C
2
5
8
0
3
6
9
X
=
1
4
7
C
2
5
8
0
3
6
9
X
=
0sht 1set
0sht 1set
Continue Page
•••
Page 73
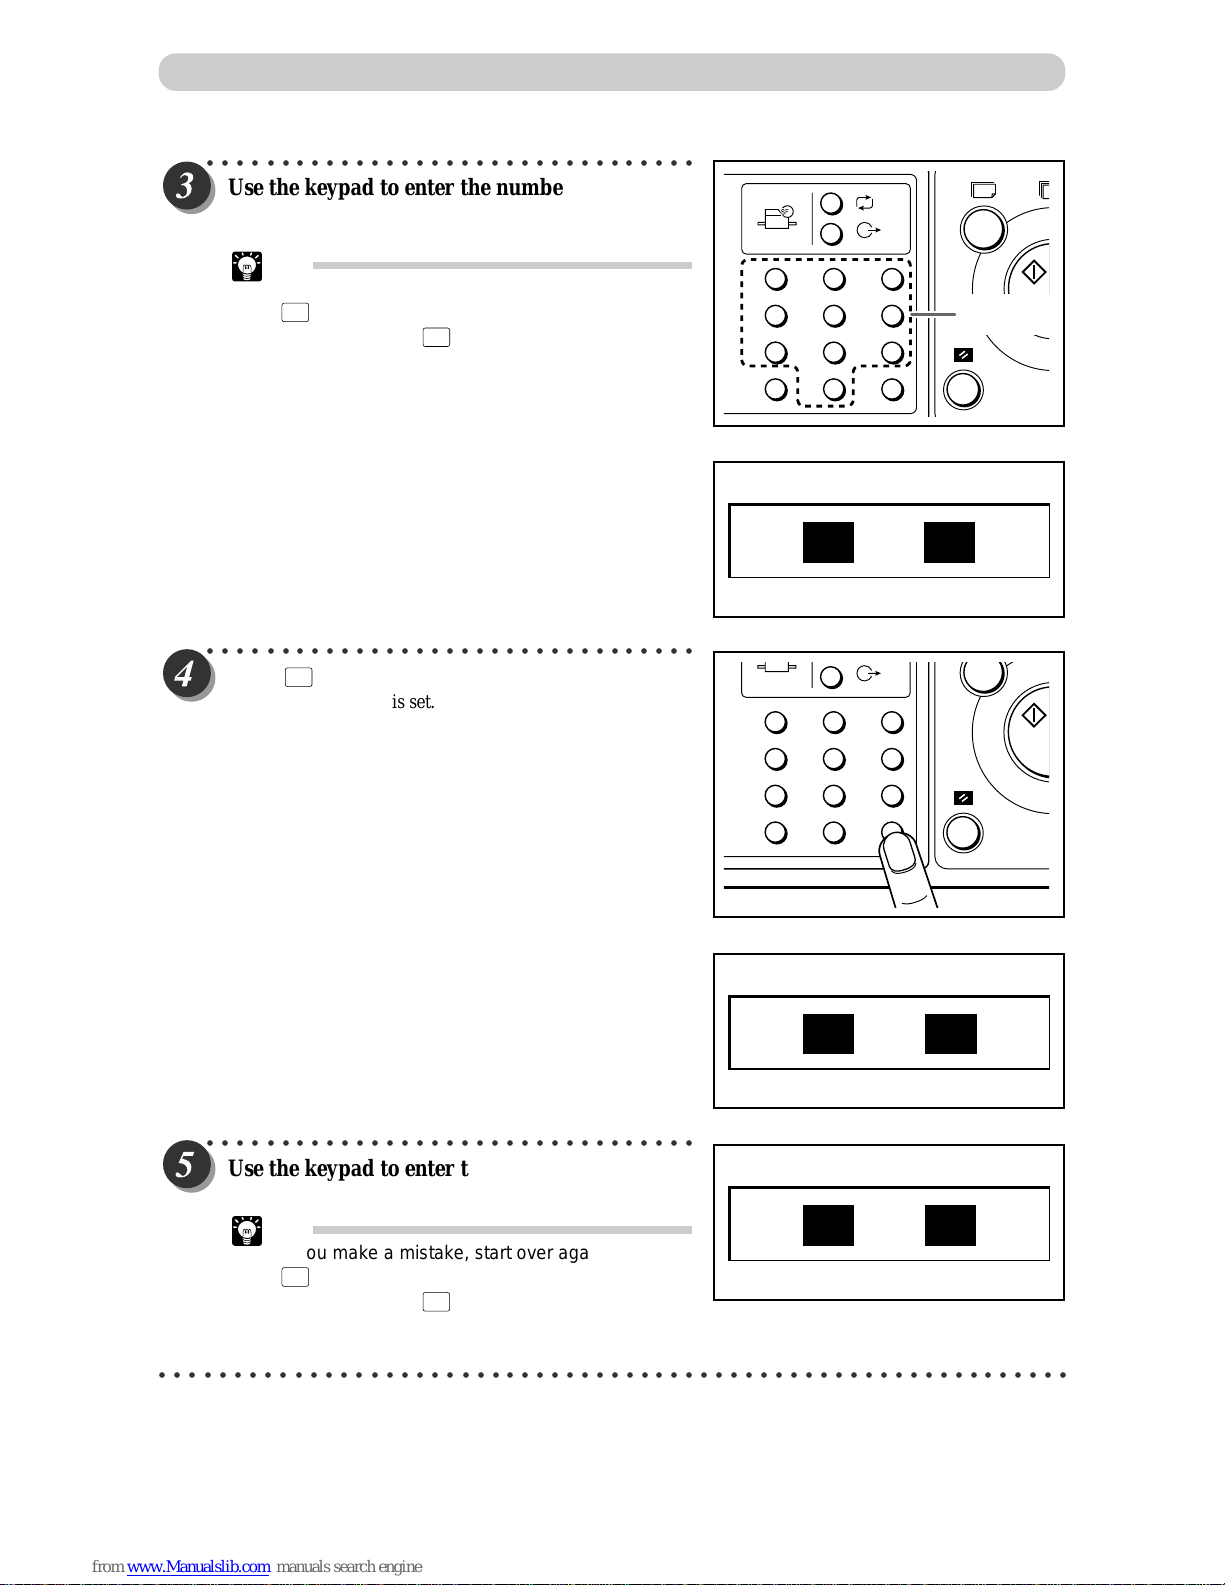
72
○○○○○○○○○○○○○○○○○○○○○○○○○○○○○○○○○
Use the keypad to enter the number of prints.
Example: 25
Tip
• If you make a mistake, start over again by press
C
(CLEAR) key and start from the beginning.
When you press
C
(CLEAR) key, both the
number of prints and the number of sets are
cancelled.
○○○○○○○○○○○○○○○○○○○○○○○○○○○○○○○○○
Press
X
=
key.
The number of prints is set.
○○○○○○○○○○○○○○○○○○○○○○○○○○○○○○○○○
Use the keypad to enter the number of sets.
Example: 3 sets
Tip
• If you make a mistake, start over again by press
C
(CLEAR) key and start from the beginning.
When you press
C
(CLEAR) key, both the
number of prints and the number of sets are
cancelled.
○○○○○○○○○○○○○○○○○○○○○○○○○○○○○○○○○○○○○○○○○○○○○○○○○○○○○○○○○○○○○
Sectional Printing
1
4
7
C
2
5
8
0
3
6
9
X
=
T
Key pad
1
4
7
C
2
5
8
0
3
6
9
X
=
25sht 1set
25sht 0set
25sht 3set
Page 74

73
3
2
1
Printing With Various Functions
○○○○○○○○○○○○○○○○○○○○○○○○○○○○○○○○○
Press
X
=
key .
○○○○○○○○○○○○○○○○○○○○○○○○○○○○○○○○○○○○○○○○○○○○○○○○○○○○○○○○○○
Repeat steps 2 to 6.
○○○○○○○○○○○○○○○○○○○○○○○○○○○○○○○○○○○○○○○○○○○○○○○○○○○○○○○○○○
Proceed with steps 2 and 4 of the sequence described in “Basic Printmaking”
(
aa
aa
a page 32).
IMPORTANT
• When loading document, load the document for the first-entered number of prints and sets
uppermost and the document for the last-entered number of prints and sets at the bottom.
○○○○○○○○○○○○○○○○○○○○○○○○○○○○○○○○○
Press (PLATE MAKING) key.
Platemaking starts.
IMPORTANT
• Plate making and printing starts from the last-
entered print and set quantities.
○○○○○○○○○○○○○○○○○○○○○○○○○○○○○○○○○○○○○○○○○○○○○○○○○○○○○○○○○○
After the first document is printed, platemaking of the next document and printing
will automatically start.
Tip
• Using the optional tape cluster you can successively perform the platemaking and collating of
prints of multiple documents.
○○○○○○○○○○○○○○○○○○○○○○○○○○○○○○○○○○○○○○○○○○○○○○○○○○○○○○○○○○○○○
Sectional Printing
1
4
7
C
2
5
8
0
3
6
9
X
=
T
Page 75

74
Dividing Sections with Tape
Available only with Tape Cluster Device
Only the specified number of sets is printed with the specified number of prints taken as one set. Paper tape is
inserted when printing of each set is completed.
You can enter up to 15 groups of number of prints x number of sets.
IMPORTANT
• The optional tape cluster is required for dividing sections with tape.
• You can select “Sectional Printing” after platemaking.
• When the optional tape cluster is installed, you cannot stop printing after each section.
Tip
• The length of the paper tape separating groups is longer than the paper tape separating sets.
○○○○○○○○○○○○○○○○○○○○○○○○○○○○○○○○○
Open the tape cluster cover.
○○○○○○○○○○○○○○○○○○○○○○○○○○○○○○○○○○○○○○○○○○○○○○○○○○○○○○○○○○
Insert the tape while checking for the direction of the tape roll.
○○○○○○○○○○○○○○○○○○○○○○○○○○○○○○○○○
Insert the tape while lifting the two levers up.
○○○○○○○○○○○○○○○○○○○○○○○○○○○○○○○○○○○○○○○○○○○○○○○○○○○○○○○○○○○○○
Cover
Levers
Sectional Printing
Page 76
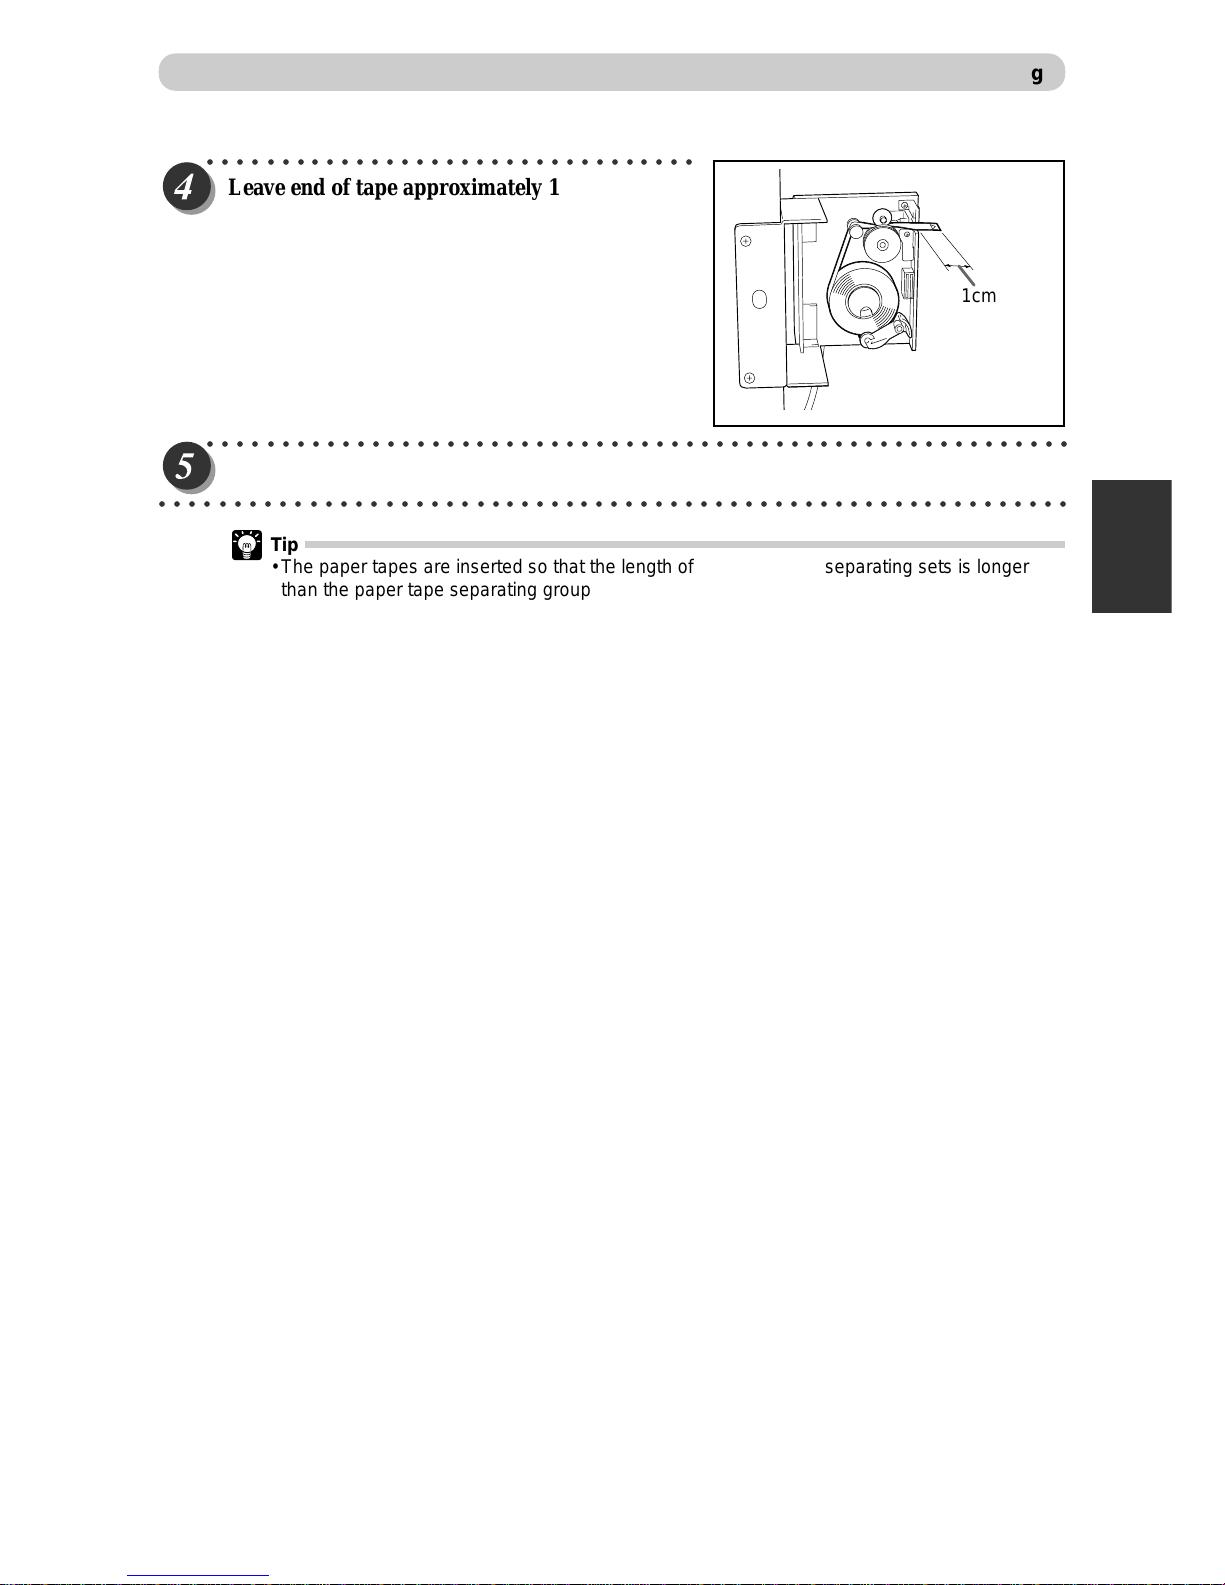
75
3
2
1
Printing With Various Functions
○○○○○○○○○○○○○○○○○○○○○○○○○○○○○○○○○
Leave end of tape approximately 1 cm out.
○○○○○○○○○○○○○○○○○○○○○○○○○○○○○○○○○○○○○○○○○○○○○○○○○○○○○○○○○○
Close the cover.
○○○○○○○○○○○○○○○○○○○○○○○○○○○○○○○○○○○○○○○○○○○○○○○○○○○○○○○○○○○○○
Sectional Printing
1cm
Tip
• The paper tapes are inserted so that the length of the paper tape separating sets is longer
than the paper tape separating groups.
Page 77

Page 78
4
Miscellaneous Functions
Chapter 4
Miscellaneous Functions
This chapter describes miscellaneous functions such as the confidential safeguard function,
and the print speed and print position adjustments.
○○○○○○○○○○○○○○○○○○○○○○○○○○○○○○○○○○○○○○○○○○○○○○
Confidential Safeguard Function ..................................................................... 78
Total Counter Display Function ........................................................................ 79
Print Speed Adjustment Function .................................................................... 80
Printing Position Adjustment Function ........................................................... 81
On-Line Print Function [Available Only With Interface Kit Installed] ............ 82
○○○○○○○○○○○○○○○○○○○○○○○○○○○○○○○○○○○○○○○○○○○○○○
Page 79

78
The confidential safeguard function, which prevents printing unless platemaking has been completed, is a simple means
of prohibiting others from printing sensitive documents.
IMPORTANT
• When the Confidential Safeguard function is ON, printing cannot be performed with
(PRINT) or
T
(TEST PRINT) keys. Other operations can be performed as normal.
• Turning the power OFF does not turn the Confidential Safeguard function OFF.
• Once platemaking is carried out, the Confidential Safeguard function is cleared.
• Platemaking still functions even if the Confidential Safeguard function in ON.
○○○○○○○○○○○○○○○○○○○○○○○○○○○○○○○○○
Press
(STOP) key while also pressing
C
(CLEAR) key.
The machine beeps and the Confidential Safeguard function
is activated.
○○○○○○○○○○○○○○○○○○○○○○○○○○○○○○○○○○○○○○○○○○○○○○○○○○○○○○○○○○
Press (PRINT) key or
T
(TEST PRINT) key to check that no print is made.
Tips
• The message “PLS PLATE MAKING” is displayed on the LCD panel and the machine will
not print when you press
(PRINT) or
T
(TEST PRINT) key while the Confidential
Safeguard function is ON.
• To cancel the Confidential Safeguard function,
press
(PLATE MAKING) key to start
platemaking.
○○○○○○○○○○○○○○○○○○○○○○○○○○○○○○○○○○○○○○○○○○○○○○○○○○○○○○○○○○○○○
Confidential Safeguard Function
1
4
7
C
2
5
8
0
3
6
9
X
=
T
PLS PLATE MAKING
Page 80
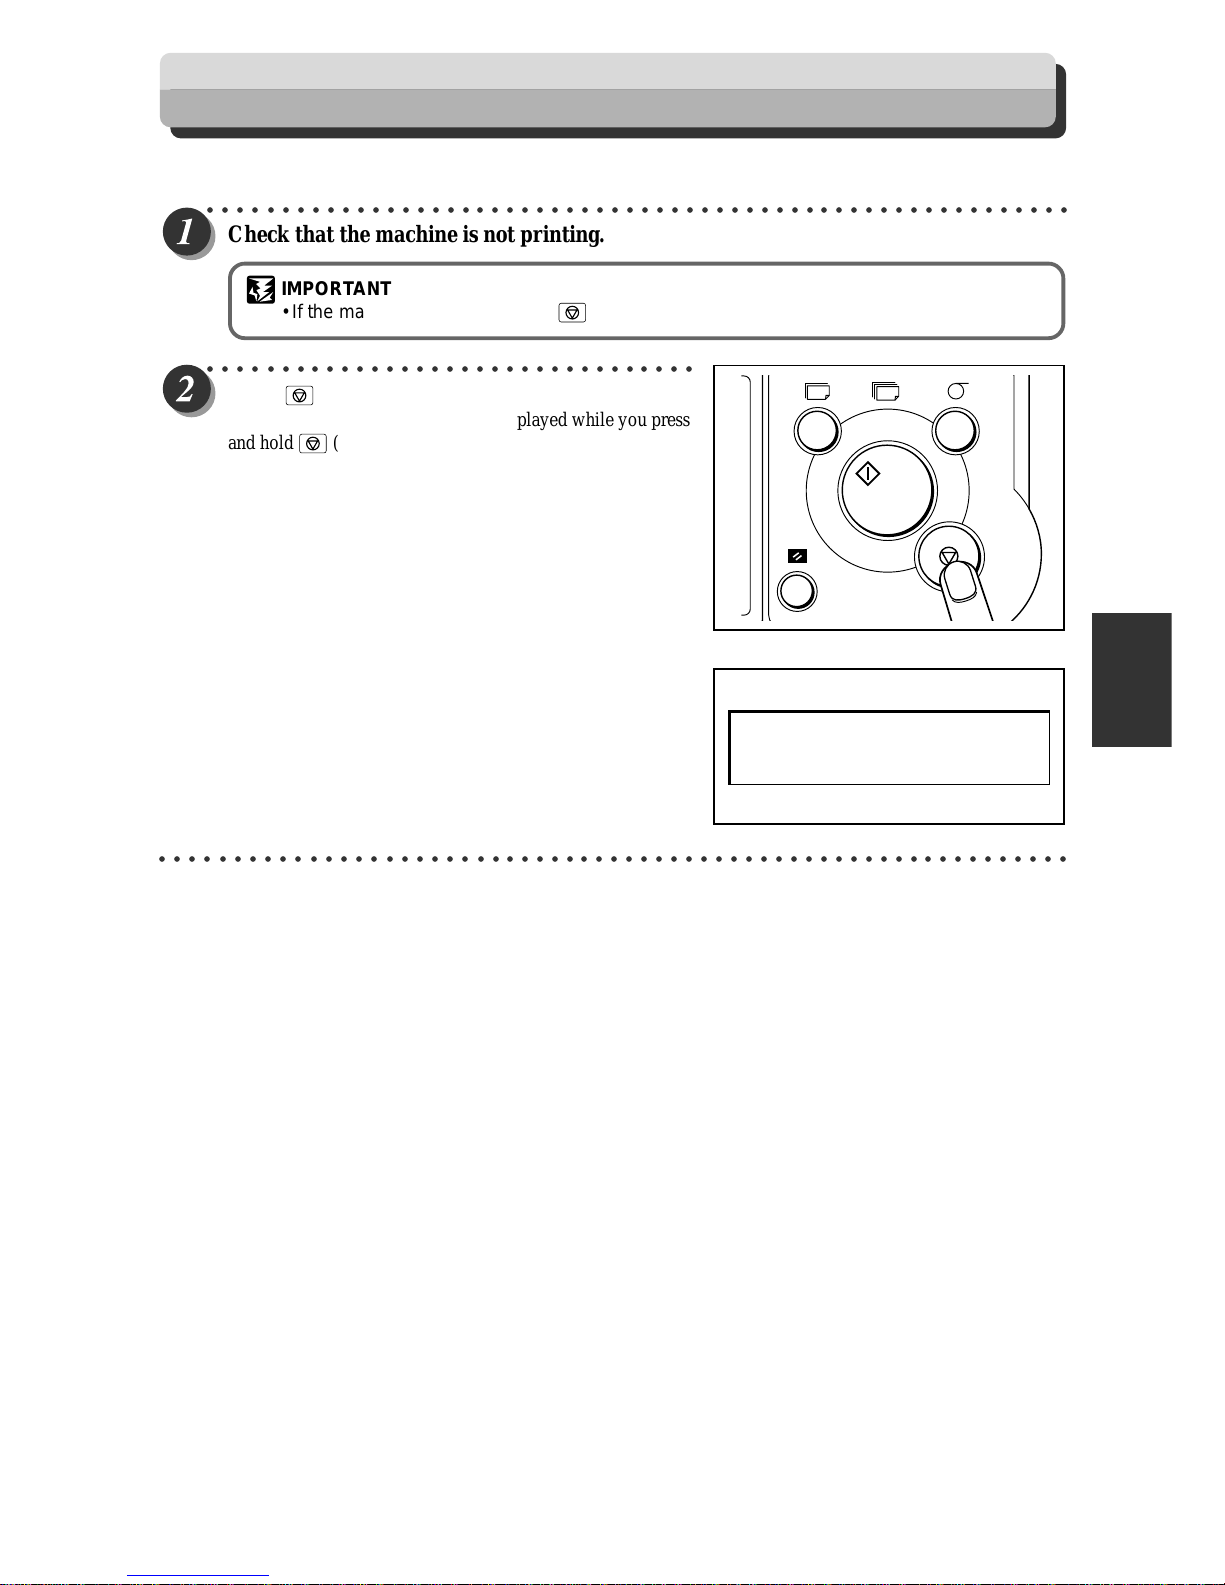
79
4
2
1
Miscellaneous Functions
Total Counter Display Function
This function displays the total numbers of prints and plates on the LCD panel.
○○○○○○○○○○○○○○○○○○○○○○○○○○○○○○○○○○○○○○○○○○○○○○○○○○○○○○○○○○
Check that the machine is not printing.
IMPORTANT
• If the machine is printing, press
(STOP) key to stop the print run.
○○○○○○○○○○○○○○○○○○○○○○○○○○○○○○○○○
Press
(STOP) key.
The total print and plate counts are displayed while you press
and hold
(STOP) key.
The number of prints is displayed on the left side and the
number of plates on the right side of the LCD panel.
Example:In this example, the total number of prints is
455132, and the total number of plates is 245.
○○○○○○○○○○○○○○○○○○○○○○○○○○○○○○○○○○○○○○○○○○○○○○○○○○○○○○○○○○○○○
T
P 455132 F 245
Page 81

80
Print Speed Adjustment Function
The printing speed can be selected from among 60 pages per minute, 80 pages per minute and 120 pages per minute.
The default setting when the power is turned ON is about 80 pages per minute.
Tips
• Paper jams may become more frequent and the paper stacking deteriorate at high and low
speeds with certain types of paper and with certain images. Satisfactory performance of
printing can be obtained by adjusting the printing speed.
• The prints may be slightly lighter at high printing speeds and slightly darker at slow printing
speeds.
• You can adjust the printing speed while the machine is printing.
○○○○○○○○○○○○○○○○○○○○○○○○○○○○○○○○○
Press or keys to adjust the speed.
Press key to decelerate printing. The printing speed
indicator lamp moves to the left.
Press key to accelerate printing. The printing speed
indicator lamp moves to the right.
Tip
To return to the default setting (about 80 pages
per minute), use one of the following two methods:
• Press orr key repeatedly until the center
speed lamp is lit.
• Press (ALL CLEAR) key. In this case, all
settings are reset to standard mode (a page
26). Do not press (ALL CLEAR) key while
the machine is printing.
○○○○○○○○○○○○○○○○○○○○○○○○○○○○○○○○○○○○○○○○○○○○○○○○○○○○○○○○○○○○○
“PRINTING SPEED
ADJUSTMENT key”
STD STD
1:1
Page 82

81
4
2
1
Miscellaneous Functions
After platemaking has finished, you can fine-tune the position of the image (in the horizontal direction) within ±10mm.
Tip
• You can adjust the printing position while the machine is printing.
○○○○○○○○○○○○○○○○○○○○○○○○○○○○○○○○○
Press or “PRINTING POSITION ADJUSTMENT” keys to adjust the printing position.
Pressing and holding or (PRINTING POSITION
ADJUSTMENT) keys continuously adjusts the printing
position.
The printing position indicator lamps change for each
approximately 3mm change in the printing position.
●To move the printing position to the left, press key.
The printing position indicator lamp moves to the left.
●To move the printing position to the right, press key.
The printing position indicator lamp moves to the right.
Tip
To return to the default settings, use one of the
following two methods:
• Press or key repeatedly until the
center printing position indicator lamp is lit.
• Press (ALL CLEAR) key. In this case, all
settings are reset to standard mode (a page
26). Do not press (ALL CLEAR) key
while the machine is printing.
○○○○○○○○○○○○○○○○○○○○○○○○○○○○○○○○○○○○○○○○○○○○○○○○○○○○○○○○○○○○○
Printing Position Adjustment Function
Paper
Image
Direction of paper
movement
Paper
Image
Direction of paper
movement
STD STD
1:1
STD STD
1:1
Page 83
82
On-Line Print Function
Available Only With Interface Kit Installed
This function allows you to make prints of documents directly from on-line data from personal computers.
IMPORTANT
• PC interface kit is required to connect this machine to a personal computer.
• Please contact your service person on information regarding installation and settings.
○○○○○○○○○○○○○○○○○○○○○○○○○○○○○○○○○○○○○○○○○○○○○○○○○○○○○○○○○○
Check that the top menu is displayed.
○○○○○○○○○○○○○○○○○○○○○○○○○○○○○○○○○○○○○○○○○○○○○○○○○○○○○○○○○○
Set the size of the printing paper. (
aa
aa
a See page 44, “Selecting Printing Paper Size”.)
○○○○○○○○○○○○○○○○○○○○○○○○○○○○○○○○○○○○○○○○○○○○○○○○○○○○○○○○○○
Use the print command of the computer applications according to the manual.
Platemaking and printing start automatically.
Tip
When platemaking ends and printing starts, you can again use the keys on the control panel.
○○○○○○○○○○○○○○○○○○○○○○○○○○○○○○○○○○○○○○○○○○○○○○○○○○○○○○○○○○○○○
Page 84

5
Replacing Consumables
Chapter 5
Replacing Consumables
This chapter describes how to supply paper, ink pack, and other consumables.
○○○○○○○○○○○○○○○○○○○○○○○○○○○○○○○○○○○○○○○○○○○○○○
Replacing the Ink Pack ...................................................................................... 84
Replacing the Master Roll ................................................................................. 87
Replacing the Master Ejection Core................................................................. 90
Replacing the Drum Unit ................................................................................... 92
Removing the Drum Unit ............................................................................. 92
Installing the Drum Unit ............................................................................... 94
○○○○○○○○○○○○○○○○○○○○○○○○○○○○○○○○○○○○○○○○○○○○○○
Page 85

84
Ink pack
Lever
Replacing the Ink Pack
The message “EXCHANGE INK” is displayed on the LCD panel when the remaining ink is low. Replace the ink pack
using the following procedure.
IMPORT ANT
• Only use ink packs designed for this machine.
○○○○○○○○○○○○○○○○○○○○○○○○○○○○○○○○○
Open the front cover.
○○○○○○○○○○○○○○○○○○○○○○○○○○○○○○○○○
Grasp the lever and pull it toward you.
○○○○○○○○○○○○○○○○○○○○○○○○○○○○○○○○○
Lift out the empty ink pack.
○○○○○○○○○○○○○○○○○○○○○○○○○○○○○○○○○○○○○○○○○○○○○○○○○○○○○○○○○○○○○
Front cover
EXCHANGE INK
Ink pack
Page 86
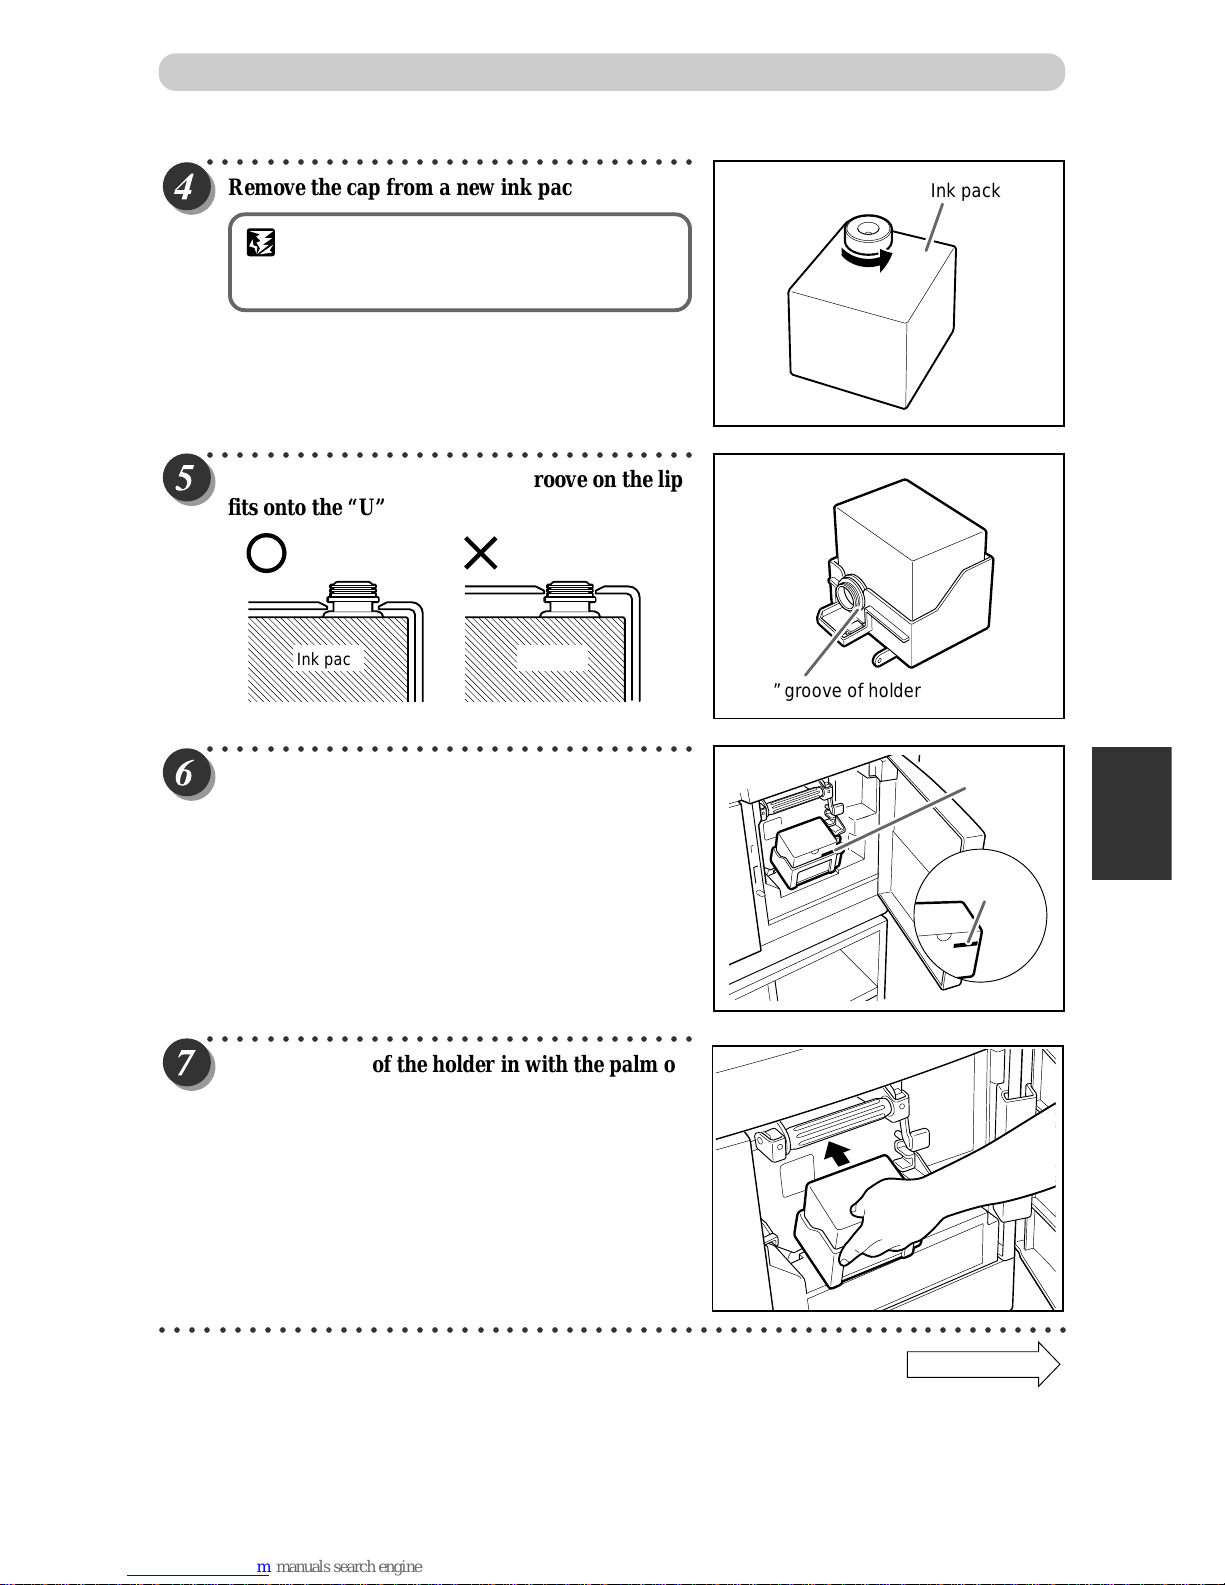
85
5
2
1
Replacing Consumables
○○○○○○○○○○○○○○○○○○○○○○○○○○○○○○○○○
Remove the cap from a new ink pack.
IMPORTANT
• Do not leave an ink pack uncapped for longer
than necessary.
○○○○○○○○○○○○○○○○○○○○○○○○○○○○○○○○○
Insert the ink pack so that the groove on the lip
fits onto the “U” groove of the holder.
○○○○○○○○○○○○○○○○○○○○○○○○○○○○○○○○○
Push the ink pack in to the set line on the ink
pack.
○○○○○○○○○○○○○○○○○○○○○○○○○○○○○○○○○
Press the back of the holder in with the palm of
your hand.
○○○○○○○○○○○○○○○○○○○○○○○○○○○○○○○○○○○○○○○○○○○○○○○○○○○○○○○○○○○○○
Continue Page
•••
Replacing the Ink Pack
“U” groove of holder
Ink pack
Ink pack Ink pack
Set line
Set line
Page 87

86
○○○○○○○○○○○○○○○○○○○○○○○○○○○○○○○○○
Close the front cover.
○○○○○○○○○○○○○○○○○○○○○○○○○○○○○○○○○○○○○○○○○○○○○○○○○○○○○○○○○○○○○
Replacing the Ink Pack
Front cover
Page 88

87
5
2
1
Replacing Consumables
Replacing the Master Roll
The message “ROLL-MASTER END” is displayed on the LCD panel when the master roll is used up. Replace the
master roll using the following procedure.
IMPORTANT
• Only use a master roll designed for use in this machine.
○○○○○○○○○○○○○○○○○○○○○○○○○○○○○○○○○
Slide the scanner unit.
IMPORTANT
• Do not touch the heat generator of thermal
head. Doing so may cause damages, leading
to a malfunction of plate making.
○○○○○○○○○○○○○○○○○○○○○○○○○○○○○○○○○
Press the master cover ralease lever.
The master cover will open up.
○○○○○○○○○○○○○○○○○○○○○○○○○○○○○○○○○
Lift out the master roll.
○○○○○○○○○○○○○○○○○○○○○○○○○○○○○○○○○○○○○○○○○○○○○○○○○○○○○○○○○○○○○
Continue Page
•••
ROLL-MASTER END
Master roll
Master cover
Master cover
release lever
Scanner unit
Page 89

88
Master
set lever
Master cover
Replacing the Master Roll
○○○○○○○○○○○○○○○○○○○○○○○○○○○○○○○○○○○○○○○○○○○○○○○○○○○○○○○○○○
Take out a new master roll from the bag.
○○○○○○○○○○○○○○○○○○○○○○○○○○○○○○○○○
Set the master roll in the direction as shown in
the illustration at right.
○○○○○○○○○○○○○○○○○○○○○○○○○○○○○○○○○
Pull out the master , and insert the master
aligned with the loading line under the guide
panel until it contacts the roller.
○○○○○○○○○○○○○○○○○○○○○○○○○○○○○○○○○
Close the master cover.
○○○○○○○○○○○○○○○○○○○○○○○○○○○○○○○○○
Push the master set lever.
The master is pulled in.
IMPORTANT
• If the master is not pulled in open the master
cover, and gently press in as far as possible
to set again.
○○○○○○○○○○○○○○○○○○○○○○○○○○○○○○○○○○○○○○○○○○○○○○○○○○○○○○○○○○○○○
Page 90

89
5
2
1
Replacing Consumables
○○○○○○○○○○○○○○○○○○○○○○○○○○○○○○○○○
Make sure that the leading edge of the master is
protruding from the inner side of the master
cover.
IMPORT ANT
• If the master cannot be set correctly, its
leading edge will not be visible. Open the
master cover, and set again.
○○○○○○○○○○○○○○○○○○○○○○○○○○○○○○○○○
Slide the scanner unit and return it to the original position.
WARNING
•
Do not remove the cover affixed with Warning
Label 1.
• Personnel may be injured by the movable
cutter inside the machine.
○○○○○○○○○○○○○○○○○○○○○○○○○○○○○○○○○○○○○○○○○○○○○○○○○○○○○○○○○○○○○
Replacing the Master Roll
Page 91

90
Plate ejection box release lever
Replacing the Master Ejection Core
The message “EXCHG. EJECT-CORE” is displayed on the LCD panel when the master ejection core is full.
Remove the master ejection core using the following procedure:
IMPORT ANT
• Use only a master ejection core designed for use in this machine.
○○○○○○○○○○○○○○○○○○○○○○○○○○○○○○○○○
Press the plate ejection box release lever to open
the master ejection box.
○○○○○○○○○○○○○○○○○○○○○○○○○○○○○○○○○
Open the master ejection box until it stops.
○○○○○○○○○○○○○○○○○○○○○○○○○○○○○○○○○
Open the cover while pressing and holding the
plate ejection box lid release lever.
○○○○○○○○○○○○○○○○○○○○○○○○○○○○○○○○○○○○○○○○○○○○○○○○○○○○○○○○○○○○○
Plate ejection box
lid release lever
EXCHG.EJECT-CORE
Page 92
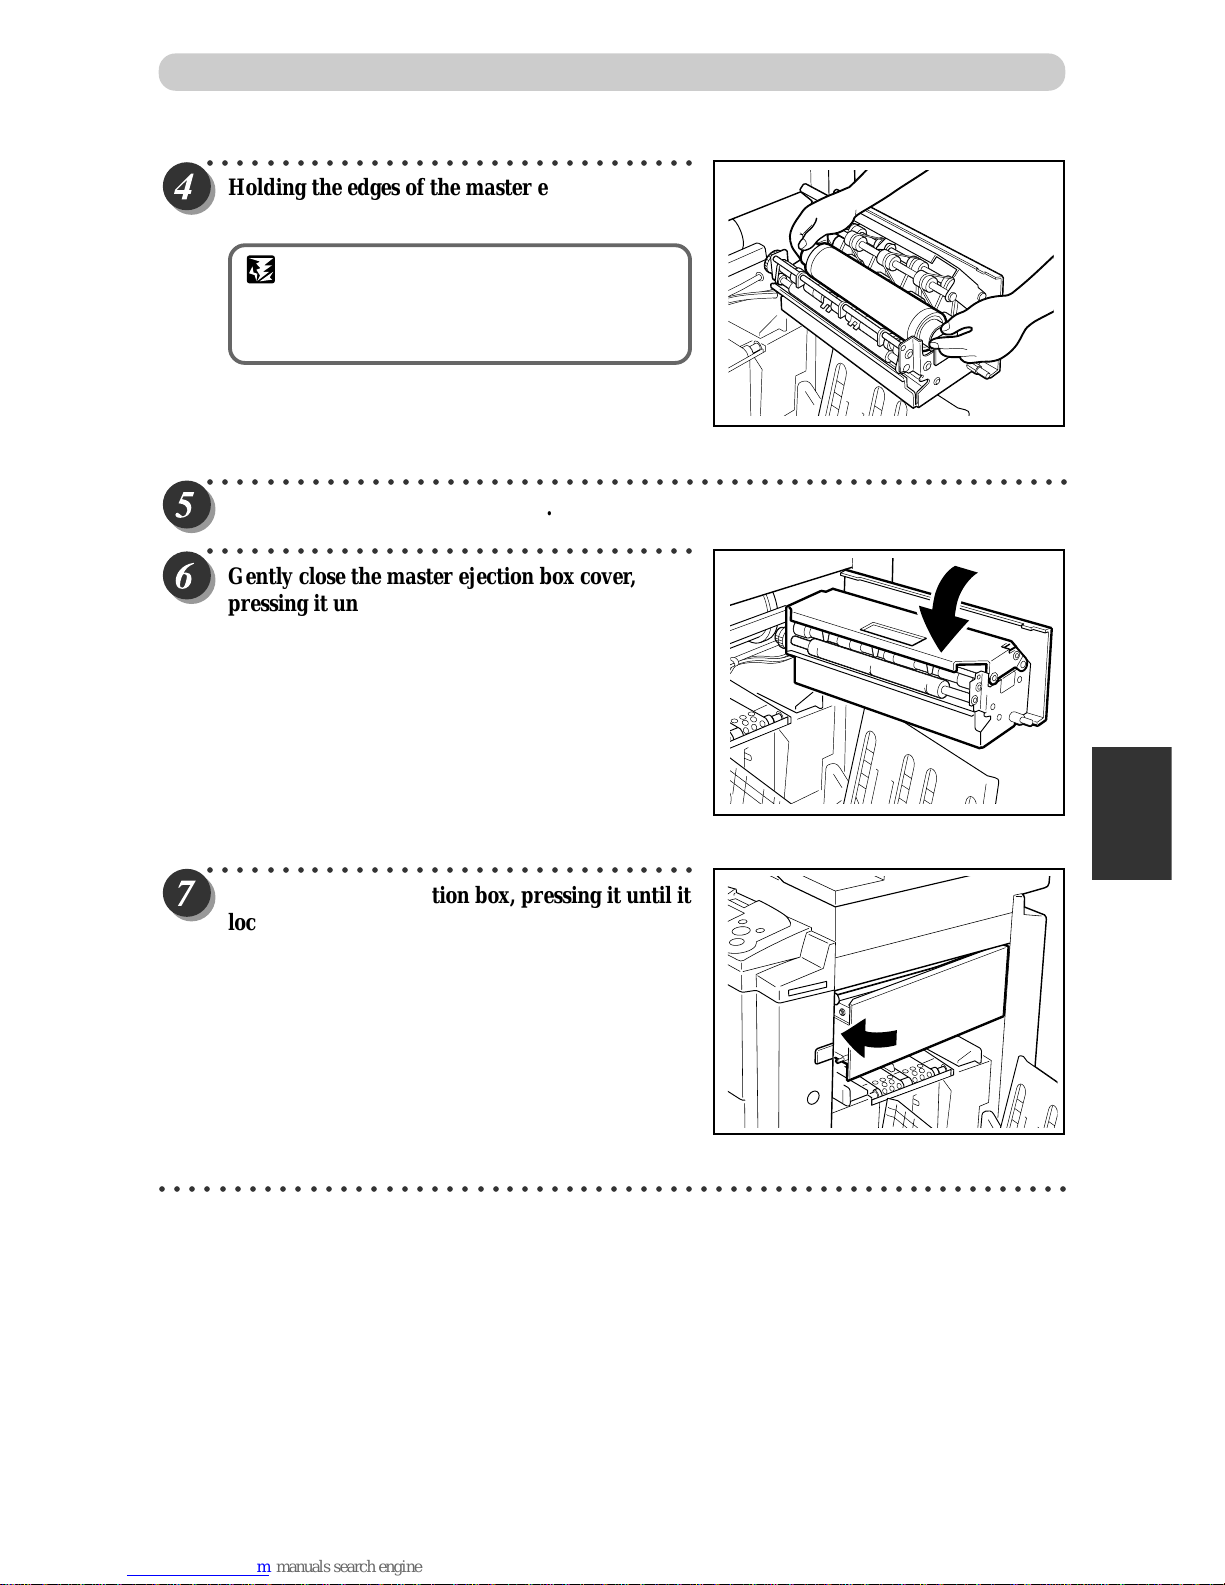
91
5
2
1
Replacing Consumables
○○○○○○○○○○○○○○○○○○○○○○○○○○○○○○○○○
Holding the edges of the master ejection core,
pull out the core and discard it.
IMPORT ANT
• Ink adheres to the master ejection core. Take
care to prevent ink from getting onto your
clothing.
○○○○○○○○○○○○○○○○○○○○○○○○○○○○○○○○○○○○○○○○○○○○○○○○○○○○○○○○○○
Insert a new master ejection core.
○○○○○○○○○○○○○○○○○○○○○○○○○○○○○○○○○
Gently close the master ejection box cover,
pressing it until it locks.
○○○○○○○○○○○○○○○○○○○○○○○○○○○○○○○○○
Close the master ejection box, pressing it until it
locks.
○○○○○○○○○○○○○○○○○○○○○○○○○○○○○○○○○○○○○○○○○○○○○○○○○○○○○○○○○○○○○
Replacing the Master Ejection Core
Page 93
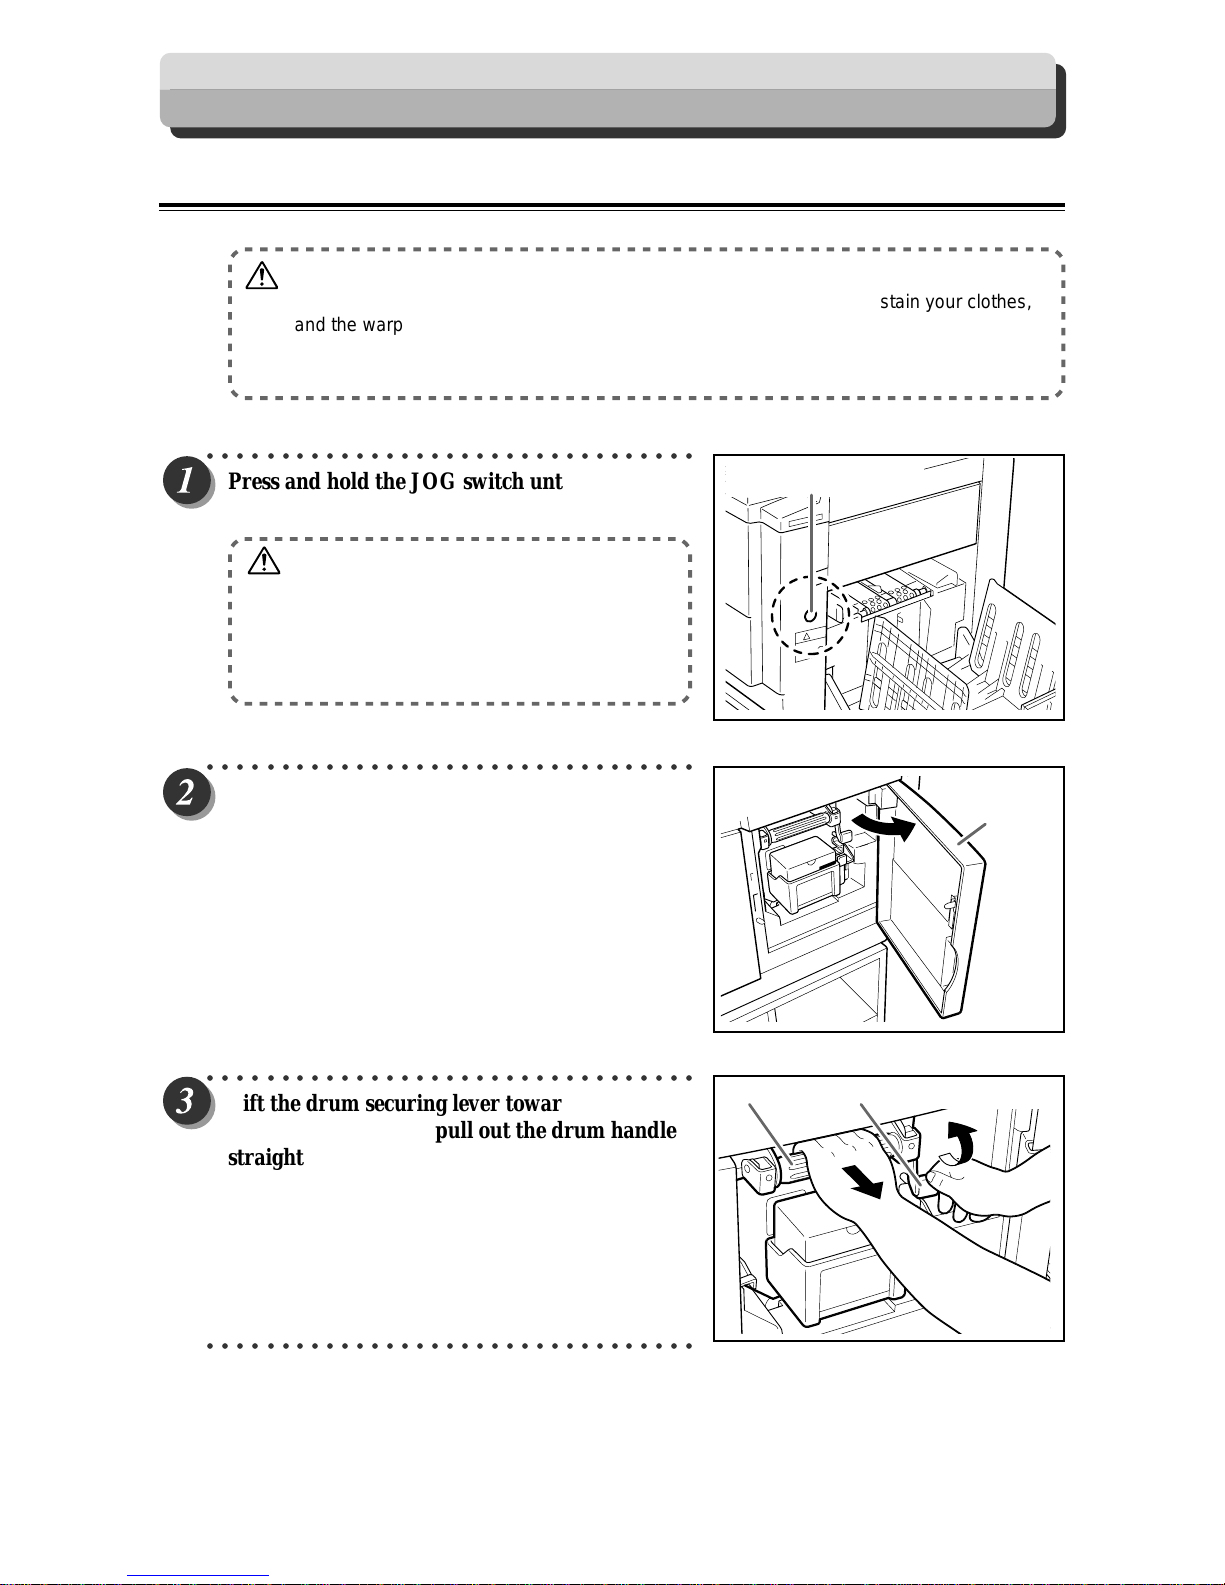
92
Replacing the Drum Unit
○○○○○○○○○○○○○○○○○○○○○○○○○○○○○○○○○
Press and hold the JOG switch until the drum
comes to a stop with a beep.
WARNING
•Do not touch the drum or rollers when you
operate the JOG switch.
•Do not put your hands or fingers inside the
machine while it is operating. Your hands may
be pulled in or nipped.
○○○○○○○○○○○○○○○○○○○○○○○○○○○○○○○○○
Open the front cover toward you.
○○○○○○○○○○○○○○○○○○○○○○○○○○○○○○○○○
Lift the drum securing lever toward you and,
holding it there, then pull out the drum handle
straight toward you until it stops.
○○○○○○○○○○○○○○○○○○○○○○○○○○○○○○○○○
Removing the Drum Unit
WARNING
•Avoid pressing and damaging the drum surface with fingers etc. It can stain your clothes,
and the warp in the drum surface may cause bad prints.
•Always place the drum unit on flat and stable surface. Otherwise, the drum surface may
be damaged or warped and may cause bad prints.
Drum securing leverDrum handle
Front cover
JOG switch
Page 94

93
5
2
1
Replacing Consumables
Handle for end
of drum
○○○○○○○○○○○○○○○○○○○○○○○○○○○○○○○○○
Hold the handle on the far end of the drum, and
lift the front end of the drum slightly to pull the
drum toward you.
IMPORT ANT
• Do not touch the drum surface. Ink may
transfer to your clothes.
• Hold the drum level and place it on a flat,
solid surface.
○○○○○○○○○○○○○○○○○○○○○○○○○○○○○○○○○○○○○○○○○○○○○○○○○○○○○○○○○○○○○
Replacing the Drum Unit
Page 95

94
Replacing the Drum Unit
Roller
Rail
Lever
Installing the Drum Unit
○○○○○○○○○○○○○○○○○○○○○○○○○○○○○○○○○
Hold the drum level and place the drum guide
roller onto the rail in the machine.
○○○○○○○○○○○○○○○○○○○○○○○○○○○○○○○○○
Release the handle at the far end of the drum
and press the drum in about 10cm while lifting
up the front end slightly.
○○○○○○○○○○○○○○○○○○○○○○○○○○○○○○○○○○○○○○○○○○○○○○○○○○○○○○○○○○
Hold the drum level and press it in gently until it comes to a stop.
○○○○○○○○○○○○○○○○○○○○○○○○○○○○○○○○○
Lift the drum securing lever toward you while
pressing the drum in.
○○○○○○○○○○○○○○○○○○○○○○○○○○○○○○○○○○○○○○○○○○○○○○○○○○○○○○○○○○○○○
Continue Page
•••
Page 96
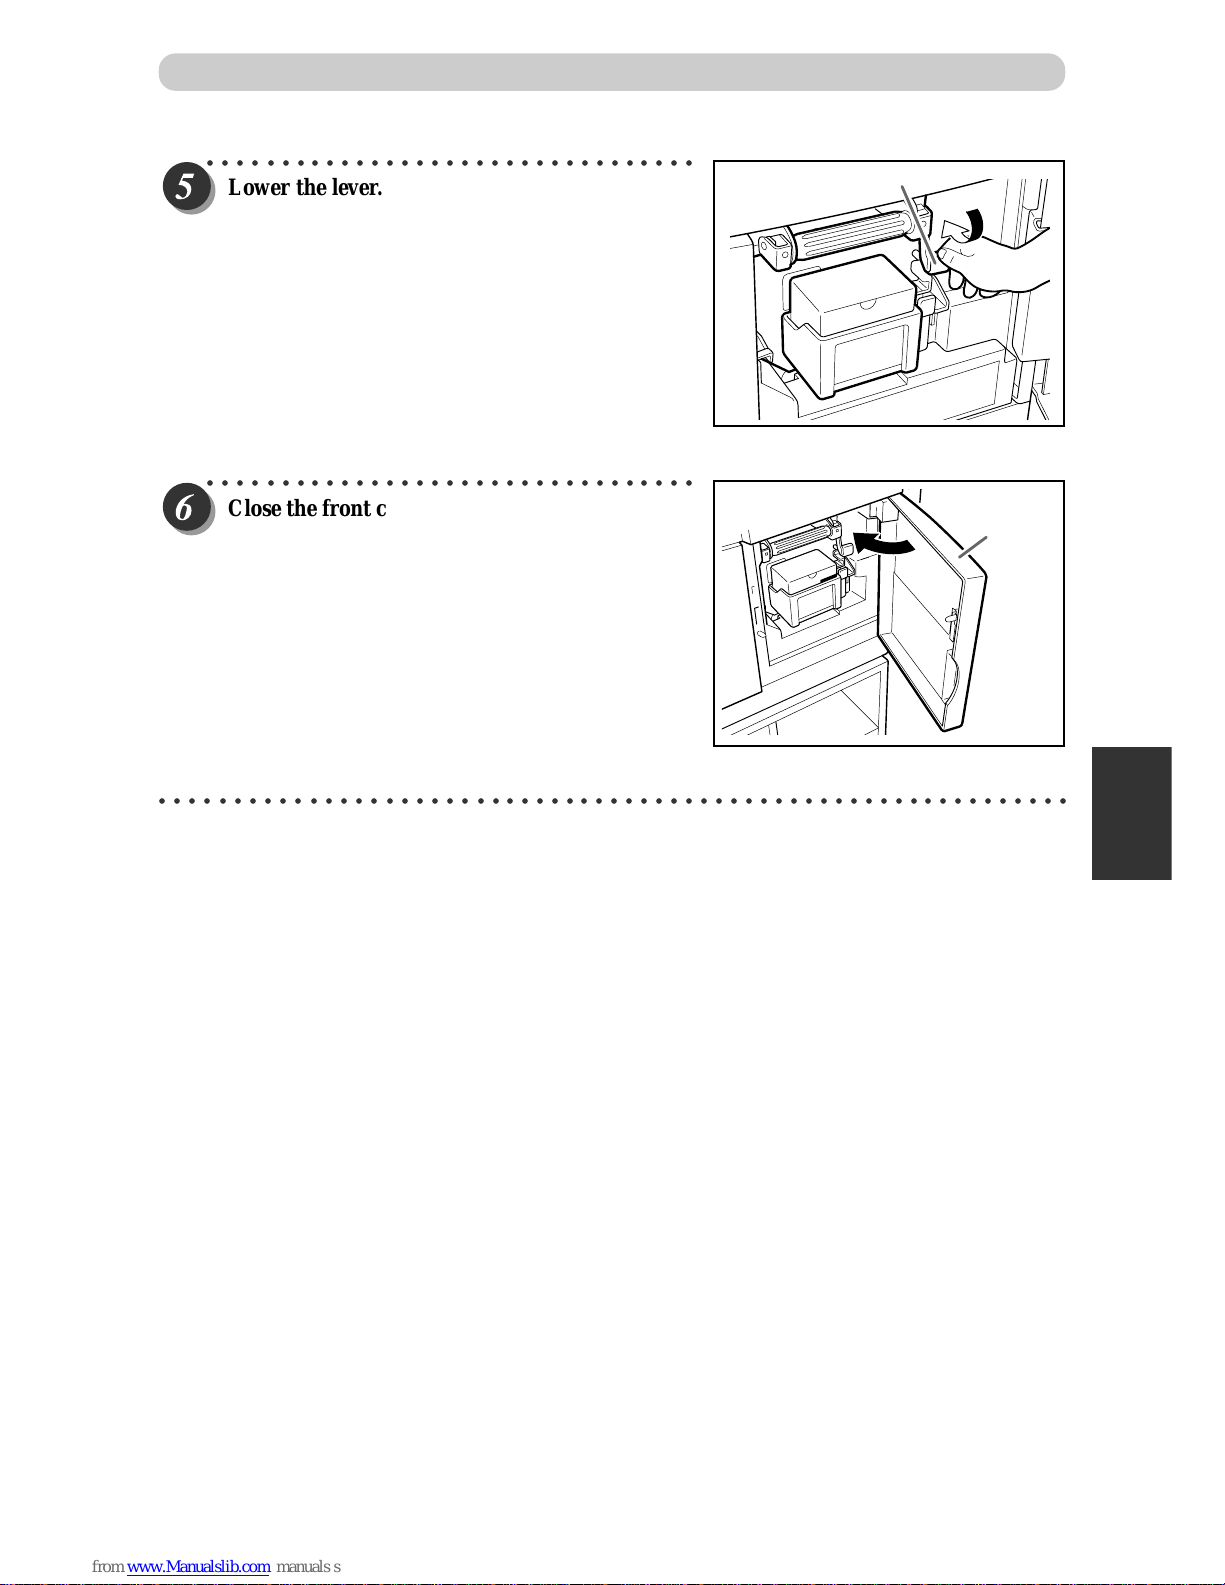
95
5
2
1
Replacing Consumables
Replacing the Drum Unit
Lever
Front cover
○○○○○○○○○○○○○○○○○○○○○○○○○○○○○○○○○
Lower the lever.
○○○○○○○○○○○○○○○○○○○○○○○○○○○○○○○○○
Close the front cover.
○○○○○○○○○○○○○○○○○○○○○○○○○○○○○○○○○○○○○○○○○○○○○○○○○○○○○○○○○○○○○
Page 97

Page 98
6
Troubleshooting
Chapter 6
Troubleshooting
This chapter describes how to remove paper jams and what to do when error messages are
displayed.
○○○○○○○○○○○○○○○○○○○○○○○○○○○○○○○○○○○○○○○○○○○○○○
Countermeasures to Troubles.......................................................................... 98
Power Does Not Turn ON............................................................................ 98
Platemaking/Printing is Not Possible ........................................................... 98
Error Messages .................................................................................................. 99
Supplying or Changing Paper While Printing ............................................... 103
If Paper Runs Out During Printing ............................................................. 103
Adding Paper While Printing...................................................................... 103
Changing Paper Selection While Printing.................................................. 105
Paper Jams....................................................................................................... 107
When “PAPER LEFT JAM” is Displayed (Feed Tray)................................ 107
When “PAPER RIGHT JAM” is Displayed (Print Tray)............................... 108
When “MAST.EJECT ERROR” is Displayed ................................................... 111
When “MASTER SET MISS” is Displayed.......................................................114
○○○○○○○○○○○○○○○○○○○○○○○○○○○○○○○○○○○○○○○○○○○○○○
Page 99
98
Power Does Not Turn ON
If the power does not turn ON, check the following.
IS POWER PLUG INSERTED?
THE MACHINE DOESN'T TURN ON.
IS POWER SWITCH ON?
Insert the power
plug securely.
Turn the power switch ON.
Please contact your service person.
NOYES
NOYES
Platemaking/Printing is Not Possible
If platemaking/printing is not possible, check the following.
IS THERE A MESSAGE DISPLAYED
ON ERROR DISPLAY PANEL?
See "Error Messages" on page 99.
Please contact your service person.
YES
NO
Countermeasures to Troubles
Page 100

99
6
2
1
Troubleshooting
Error Messages
There is no paper in the feed tray.
Load the feed tray with printing paper.
There is no ink.
Replace the old ink pack with a new one.
(a For details, see page 84, “Replacing the Ink Pack”.)
There is no master.
Replace the master roll with a new one.
(a For details, see page 87, “Replacing the Master Roll”.)
The master ejection core is full.
Replace the core with a new one. (a For details, see page 90,
“Replacing the Master Ejection Core”.)
There is no drum.
Install a drum in the machine. (a For details, see page 92,
“Replacing the Drum Unit”.)
The front cover is open.
Close the front cover.
The upper cover is open.
Close the upper cover.
Message Countermeasure
SET PRINT PAPER
EXCHANGE INK
ROLL-MASTER END
EXCHG.EJECT-CORE
DRUM NOT SET
FRONT COVER OPEN
DOC.TRAY OPEN
 Loading...