

Page 1
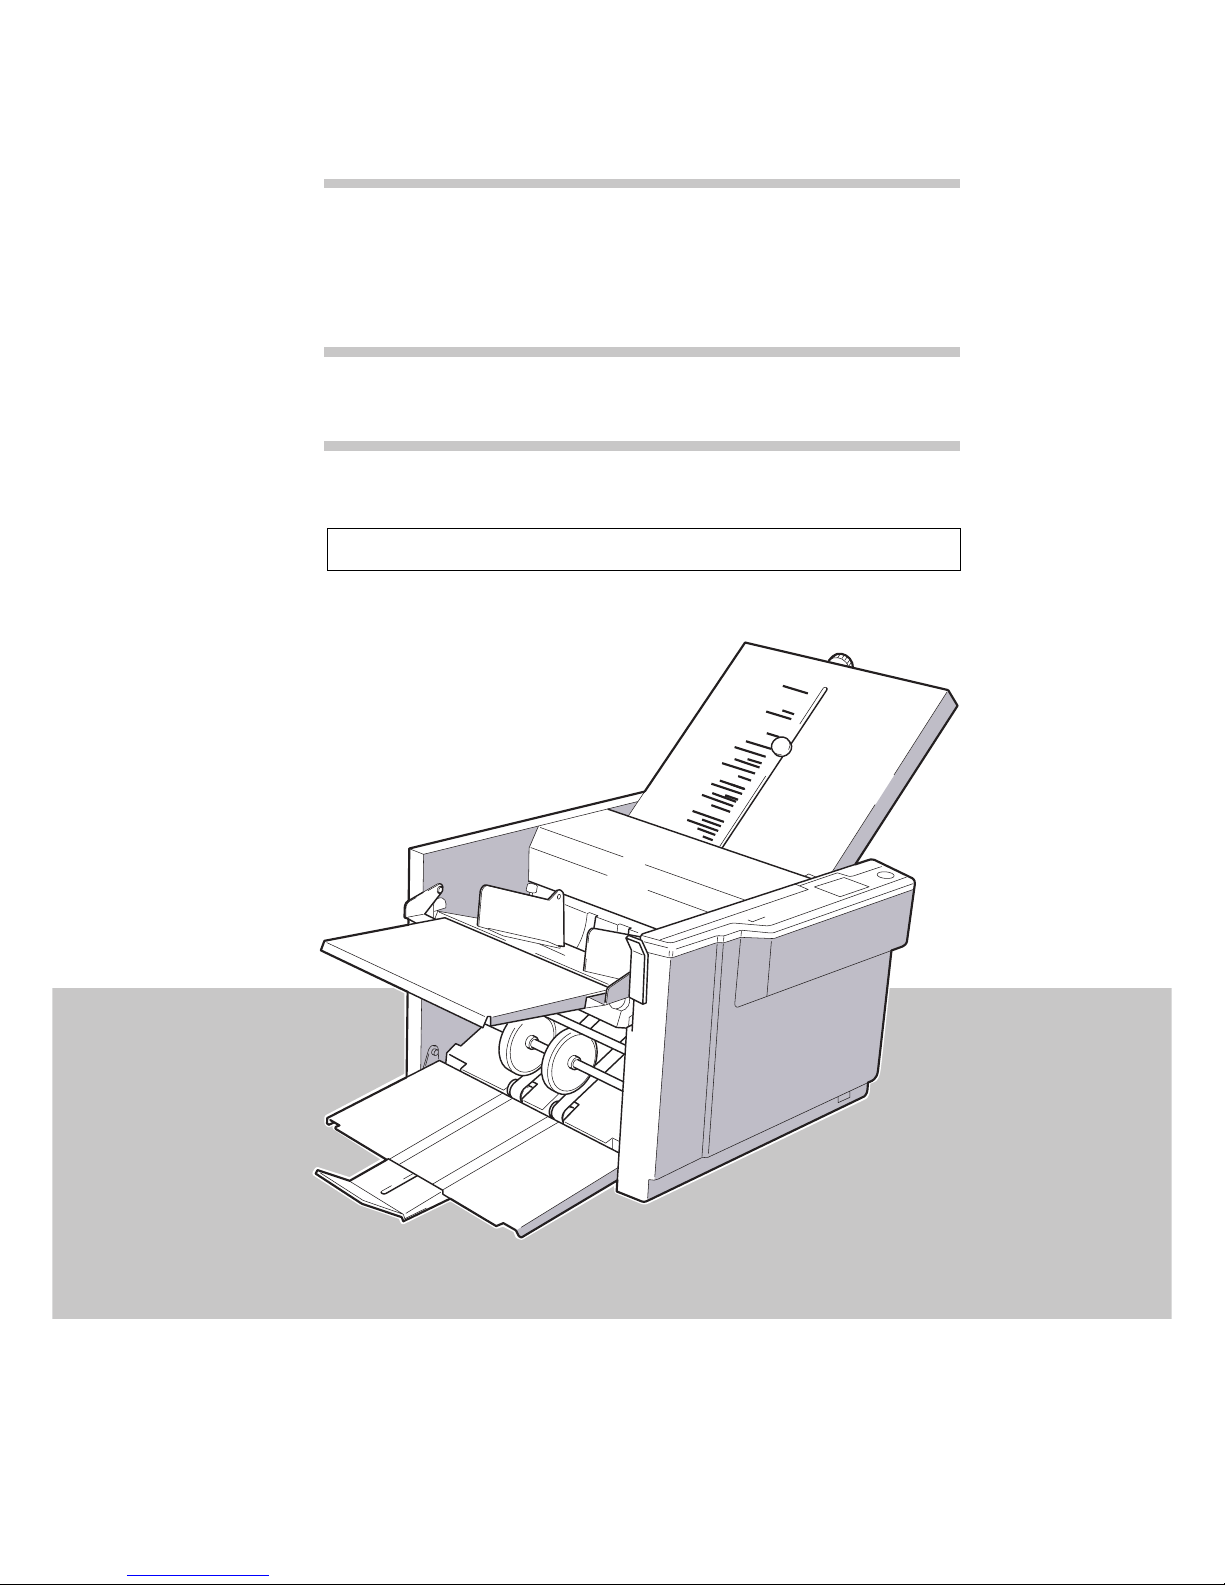
Duplo Folder
DF-505N
Instruction Manual
DUPLO CORPORATION
[120V]
Please let our service people install the machine.
Page 2

This page is a blank page.
Page 3

1
CONTENTS
1. Safety Precautions............................... 2
2. Usage Precautions............................... 4
2-1. Power Supply............................................. 4
2-2. Operating Environment.............................. 4
2-3. Storage Conditions .................................... 4
2-4. Maintenance .............................................. 4
3. Installing the Unit................................. 5
3-1. Removing the Press Release Lever .......... 5
3-2. Component Parts....................................... 6
3-3. Bearing support levers............................... 6
3-4. Attaching the Parts .................................... 7
4. Names of the Parts .............................. 8
5. Names and Functions of the
Control Panel Parts.............................. 9
6. Precautions before Use..................... 10
6-1. Paper to Be Used .................................... 10
6-2. Precautions for Stacking Paper ............... 10
7. Operation Procedures ....................... 12
7-1. Fixed Folding of Fixed Paper................... 12
7-2. Single-Folding Paper Neatly .................... 17
7-3. Single-Folding Hard Paper Neatly ........... 19
7-4. Double Folding Thick Paper .................... 20
7-5. Folding 5 (W) x 7 (L) Medium
Thickness Paper (Below 81.4 g/m2)......... 23
7-6. Specil Folding of Fixed Paper.................. 26
8. Folding Adjustments ......................... 29
8-1. Adjusting the Folding Slippage in the
Vertical Direction...................................... 29
8-2. Adjusting the Folding Slippage in the
Horizontal Direction ................................. 31
9. Using Non-Fixed Paper...................... 32
9-1. Fixed Folding Procedures........................ 32
10.Cross Folding ..................................... 34
10-1. Precautions upon Use ............................. 34
10-2. Cross Folding of Fixed Paper .................. 34
10-3. Cross Folding of Non-Fixed Paper .......... 37
11.Troubleshooting................................. 42
11-1. Paper has Jammed near the Paper
Feed Ring ................................................ 42
11-2. Paper has Slipped near the Paper Feed
Section..................................................... 42
11-3. Paper has Coiled around the Rubber Roll
inside the Unit .......................................... 43
11-4. Paper has Jammed at the First Folding
Plate.........................................................43
11-5. Paper has Jammed at the
Second Folding Plate...............................44
11-6. Paper has Jammed near the Stacker ...... 45
12.Emergency Stops............................... 46
13.Troubleshooting Guide...................... 47
14.Cleaning the Unit................................ 50
14-1. Cleaning the Rubber Roll......................... 50
14-2. Cleaning the Paper Feed Ring ................ 51
15.Specifications..................................... 52
INTRODUCTION
Thank you for your purchase. To ensure correct usage, please read this instruction manual
thoroughly, especially the section Safety Precautions. After reading, please store this instruction
manual in a safe place for future reference.
Page 4

2
1. SAFETY PRECAUTIONS
WARNING:
Do not place metal objects or vessels containing liquids on top of the unit. The entry of
any metal object or liquid could result in fire or electrical shock.
Do not insert any metal or easily-combustible object inside this unit. This could result in
fire or electrical shock.
Do not touch or insert foreign objects into any rotating part during operation. This could
result in injury.
Do not remove the cover or back panel. This unit contains high-voltage components that
could cause electrical shock.
Do not disassemble, modify or repair this unit. There is a danger of fire, electrical shock
or injury. Contact your dealer when repairs are necessary.
Use only the power supply voltage specified on the main nameplate. Using other
voltages could result in fire or electrical shock.
Keep this unit and the power cord away from heaters and heater vents. Excessive heat
could melt the cover or power cord covering, and result in fire or electrical shock.
Always observe the cautions and warnings given below to prevent personal injury or property
damage.
The degree of danger and damage that could occur is indicated on two levels by the
following marks.
WARNING: Ignoring this mark could result in the possibility of serious injury
or even death.
CAUTION: Ignoring this mark could result in the possibility of injury or
physical damage.
The following graphic symbols indicate the various types of action to be performed
or avoided.
This graphic symbol indicates a forbidden action.
means “Do not disassemble.”
means “Do not touch.”
This graphic symbol indicates actions that must be performed.
means “Disconnect the power plug.”
This graphic symbol indicates a “Caution” that must be observed.
means “Caution: high temperature.”
Page 5

3
Do not use flammable sprays inside or near the unit (e.g. when cleaning the unit).
Such flammable gas may ignite and cause a fire or combustion.
Make sure that the combined power consumption of the appliances to be connected
does not exceed the capacity rating of the power outlets or plug receptacles. Exceeding
the capacity rating could cause the power outlets, plug receptacles, or power extension
cords to overheat and catch fire.
Remove any dust that accumulates on the power plug prongs and the surface of the plug
from which the prongs extend. Accumulated dust can result in fire.
If any foreign object such as metal or liquid should enter this unit, immediately turn the
unit off at the power switch and disconnect the power plug from the power outlet. Failure
to do so could result in fire or electrical shock. Contact your dealer immediately.
Do not damage the power cord or power plug. (Do not scratch, alter, bend, twist, pull or
place heavy objects on the power cord or power plug.)
This could result in damage, fire or electrical shock.
Always grip the plug when disconnecting the power plug from the power outlet. Pulling
on the power cord could cause damage, resulting in fire or electrical shock.
Do not handle the power plug with wet hands. This could result in electrical shock.
Before cleaning this unit, turn the unit off at the power switch and disconnect the power
plug from the power outlet. Accidental operation of the unit during cleaning could result
in injury.
CAUTION:
Always disconnect the power plug from the power outlet when the unit is not to be used
for an extended period. Failure to do so could result in fire due to leakage current if the
insulation should deteriorate.
Install this unit on a level, stable stand or floor, with sufficient space around it. Failure to
do so could result in the unit overturning and causing injury.
Do not install this unit in a location where there is excessive humidity or where contact
with water is possible. Poor choice of location could result in deterioration of the
insulation, fire or electrical shock.
Disconnect the power plug from the power outlet before attempting to move this unit.
Failure to do so could result in power cord damage, fire or electrical shock.
1. Safety Precautions
Page 6

4
2. USAGE PRECAUTIONS
2-1. Power supply
• This equipment shall be installed near the socket-outlet where the plug on the power supply
cord is easily accessible.
• Make sure the power supply used is always within the following range.
120V AC, 60Hz
• When you power other appliances from the same AC outlet, make sure that the combined
power consumption does not exceed the power supply capacity.
Rated power of this equipment : 1.5A
2-2. Operating environment
Operate this unit in the following environment:
• where the temperature range is between
5 and 35°C,
• where the humidity range is between 20
and 85%RH (no dew condensation),
• which is not subject to direct sunlight,
• which is subject to little or no vibration,
2-3. Storage conditions
Store this unit in the following environment:
• where the temperature range is between
–10 and 50°C, (no dew condensation)
• where the humidity range is between 10
and 90%RH (no dew condensation),
• which is not subject to direct sunlight,
• which is subject to little or no vibration,
2-4. Maintenance
To protect the special features of this unit, the customer should never apply oil or grease to
the parts (except when the customer is specifically requested to do so in this instruction
manual).
Please contact your dealer in case of any problem.
• where there are no harmful chemicals,
• which is reasonably free from dust,
• which is free from air-borne salt, and
• where the equipment will not be exposed
to water.
• where there are no harmful chemicals,
• which is reasonably free from dust,
• which is free from air-borne salt, and
• where the equipment will not be exposed
to water.
Page 7

5
3. INSTALLING THE UNIT
3-1. REMOVING THE PRESS RELEASE LEVE
This press release level is attached to the unit at shipment to prevent the rubber roll from
becoming distorted.
Be sure to remove it when installing the unit.
Take note that the unit will be damaged if it is used without removing the lever.
Remember to remove it in the following order when installing the unit.
1 Two press release levers are inserted in the left and right shaft edges of the rubber
roll.
2 First remove press release lever(A).
• To remove, push inwards and pull out the press release lever (A), as shown in the figure.
Also remove that of the operating side in the same way.
• Next, pull out press release lever(B) as shown in the figure.
Also remove that of the operating side in the same way.
Press release lever (A)
Press release lever (B)
Press release lever (A)
Press release lever (B)
Press release lever (A)
Press release lever (A)
Press release lever (B)
Press release lever (B)
<Operating side>
<Non-operating side>
Page 8

6
3. INSTALLING THE UNIT
After checking that you have following parts, attach them to the unit.
3-2. COMPONENT PARTS
No.
Name
Qty. No.
Name
Qty.
First folding plate
Second folding plate
Cross folding lever
Instruction Manual
Guide plate unit
1
2
3
4
5
1
1
1
1
1
12
3
54
3-3. BEARING SUPPORT LEVERS
Bearing support lever
Bearing support lever
Support the bearing with the two bearing support levers.
• Rotate the lever in the arrow direction and support the bearing.
<Operating side>
<Non-operating side>
Page 9

7
3. INSTALLING THE UNIT
1 First, attach the second folding plate.
• Before starting, push the lock lever at the side of
the folding plate to “UNLOCK”.
• Next, insert the folding plate into the unit.
• After inserting it properly, push the lock lever to
“LOCK”.
2 Attach the first folding plate in the
same way.
* As the first folding plate is not provided with a lock
lever, it only needs to be inserted into the unit.
* If paper jams inside the folding plate, turn off the
power, push the lock lever to "UNLOCK", and
remove the folding plate. (Only for second folding
plate.)
3-4. ATTACHING THE PARTS
3 Attach the cross folding lever at its
proper place.
<Parts Used>
Cross folding lever .................................................. 1
Second folding plate
First folding plate
Cross folding lever
Page 10

8
4. NAMES OF THE PARTS
First folding plate
Control panel
Second folding plate
Power switch
Paper set lever
Paper receiving tray
Paper receiving
stopper
Stacker roller
Auxiliary paper
feed plate
Paper feed table
Guide
Top cover
Rubber roll
Paper feed ring
(For moving)
Paper feed ring
Paper feed pressure
adjusting knob
Slant correction
paper feed knob
Page 11

9
1
2
3
4
5
6
5. NAMES AND FUNCTIONS OF THE
CONTROL PANEL PARTS
Reset button
Counter
Table of Stacker
Roller Positions
Start button
START
Stop button
STOP
Power supply
lamp
The counter is reset to "0" when the reset button is pressed.
Counts and shows the number of sheets that have been folded.
The stacker rollers of the paper discharge section are positioned differently according
to the paper size and folding style.
Refer to this table for the appropriate positions.
When this button is pressed, the unit starts-up and folding operations can be carried out.
When this button is pressed, the unit stops.
Lights up when the power switch is ON.
No.
Name Function
Page 12

10
6. PRECAUTIONS BEFORE USE
• Straighten folded or curled paper before use.
• Make sure that the ink on the paper has dried up properly
before use.
If the ink has not dried properly, it may dirty the
machine, and cause other problems such as dirtying the
folded surface with ink.
• If curled paper is used, depending on the environmental
condition(temperature, humidity), paper quantity, paper
type, paper couch condition, folding speed, etc. it may
not flow smoothly into the folding plate or may not be
folded properly.
• Should such problems occur, reduce the folding speed or
straighten the paper before continuing use.
6-1. PAPER TO BE USED
6-2. PRECAUTIONS FOR STACKING PAPER
• Problems such as folding slippage and paper jam etc.
will ariseif the paper is not stacked neatly on the paper
feed table. Therefore, be sure to stack the paper neatly.
Page 13

11
6. PRECAUTIONS BEFORE USE
• If the paper is not stacked properly lengthwise, mis-feed
or chain feed may occur.
• When stacking just a few sheets of paper on the paper
feed table, lower the paper set lever while pressing the
back edge of the paper.
• Adjust so that the front part of the paper touches the
paper feed ring in front lightly.(Arrow)
• The paper will be folded as shown in the figure if placed
with the printed surface up on the paper feed table.
• For “accordion fold” and “irregular accordion fold”, the
printed surface of some paper will be folded outwards.
Paper
Guide plate
Paper set lever
Paper
Paper feed rings
Single fold Double fold Letter fold Brochure foldIrregular accordion fold Accordion fold
Page 14

12
Start the various fixed folding operations for fixed paper as follows.
7. OPERATION PROCEDURES
7-1. FIXED FOLDING OF FIXED PAPER
1 Insert the power cord in the electrical
outlet and turn on the power.
• Press “ I ” to turn on the power.
• Press “O” to turn off the power.
2 Raise the paper set lever and place
some paper on the paper feed table.
• Loosen the fixing screws of the guide, and move
the guide slightly with a space lift between the
guide and the paper.
• Loosen the paper and stack them neatly at the
center of the paper feed table.
• Insert the paper until its front part touches the front
guide plate lightly.
3 After pressing the guide to the side of
the paper lightly, tighten the screws
to secure the guide.
Paper can be stacked to a height of
approximately 2 inch at one time. Do not stack
too many sheets of paper.
4 Lower the paper set lever.
Power switch
Paper set lever
Paper
Guide
Fixing screw
Fixing
screw
Guide
Guide
Fixing screw
Fixing screw
Paper set lever
Page 15

13
5 Adjust the rough adjustment knob of
the folding plates to the mark of any
folding mode.
• Adjust the rough adjustment knobs of first and
second folding plates to the desired marks
according to the style in which the paper is to be
folded.
• The rough adjustment knob can be moved freely
by pulling it up.
Although the rough adjustment knob can be
moved up and down, it cannot be rotated.
• After adjusting the position of this knob, be sure to
rotate the fine adjustment knob several times.
6 Set the paper feed pressure adjusting
knob to “thin paper”.
* If the paper slips, and no paper is conveyed, raise
the paper feed pressure from “thin paper” to “thick
paper”.
7. OPERATION PROCEDURES
Rough adjustment knob Rough adjustment knob
Second folding plate First folding plate
Rough adjustment knob
Rough adjustment knob
Fine adjustment knobFine adjustment knob
Second folding plate First folding plate
Paper feed pressure adjusting knob
Page 16
14
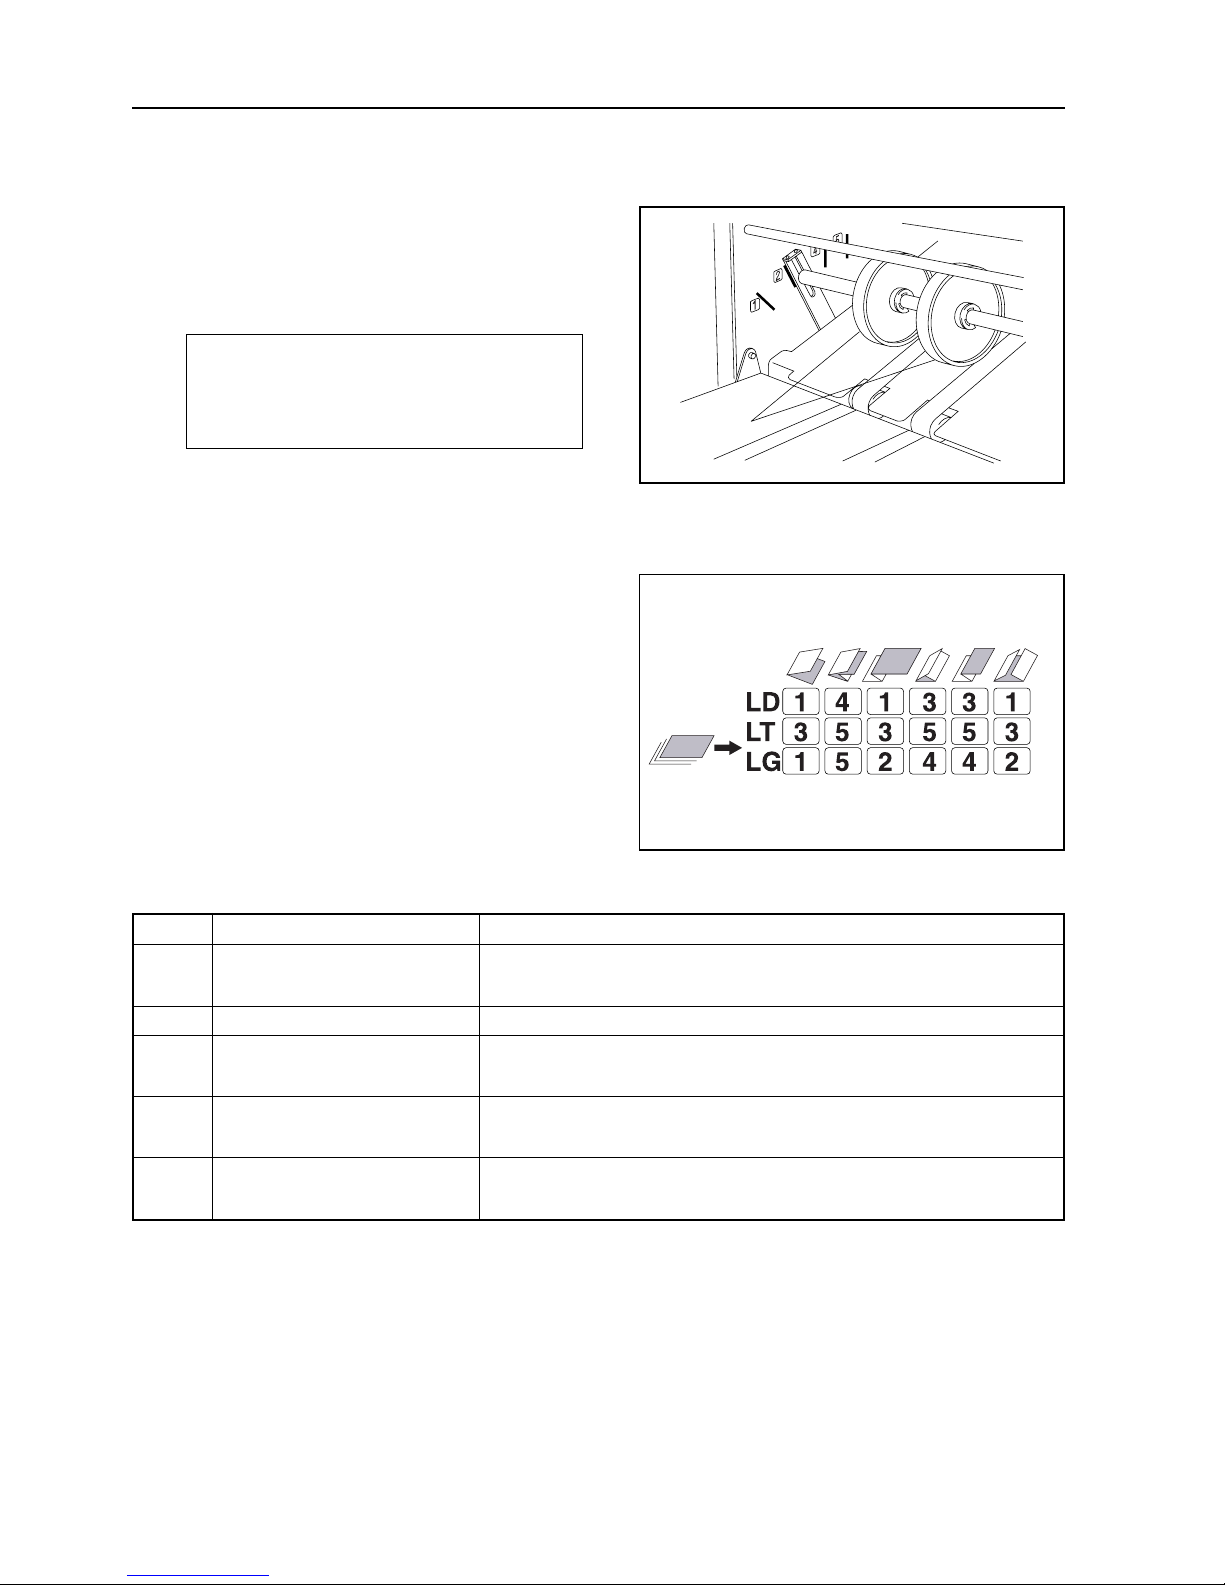
7 Set the position of the stacker rollers.
• Referring to the table of stacker roller positions,
position the stacker rollers.
As the figures in this table of stacker roller
positions are approximations, select the best
position taking into consideration the folding
speed and paper quality.
7. OPERATION PROCEDURES
Table of Stacker Rollers Positions
Length of Paper Fold
7 — 8-1/2 inch
6 — 7 inch
5 — 6 inch
4 — 5 inch
1-5/8 — 4 inch
Folding Mode
LD : Single Fold, Irregular Accordion Fold, Brochure Fold
Single fold of paper bigger than LD.
LG : Irregular Accordion Fold, Brochure Fold
LT : Single Fold, Irregular Accordion Fold, Brochure Fold
LD : Letter Fold, Accordion Fold
LG : Letter Fold, Accordion Fold
LD : Double Fold
LT : Double Fold, Letter Fold, Accordion Fold
LG : Double Fold
Number
1
2
3
4
5
Stacker rollers
Page 17

15
7. OPERATION PROCEDURES
8 Press the start button to test the
folding.
Set the paper on the paper feed table, and with the
paper set lever raised, press the start button. The
paper feed ring slips and the machine stops. Press
the start button after lowering the paper set lever.
• The paper will be folded properly if it is folded after
it has reached the stopper inside the folding plate.
• In some cases, the paper flowing into the folding
plate may be folded before it reaches the stopper due
to conditions such as environmental conditions
(temperature, humidity), its quantity, its type, paper
couch conditions, folding speed, etc., and therefore
not be folded properly.
• In some cases, the paper may also coil around the
rubber roll and cause problems.
• This phenomenon may occur when different paper
quantity, type, and couch conditions are used.
• Check that the paper has been folded properly.
Check from the second piece of paper folded.
<The paper will be folded properly>
<The paper not be folded properly>
Paper for testing folding
Page 18

16
• If the sheets of paper have not been folded
satisfactorily, refer to the following steps.
1 If there is folding slippage in the vertical direction,
rotate the fine adjustment knob and correct the
folding slippage.
Refer to “8-1. Adjusting the folding slippage in the
vertical direction”.
2 If the folding has slipped in the horizontal
direction:
Rotate the “slant correction knob” and adjust the
folding slippage.
Refer to “8-2. Adjusting the folding slippage in the
horizontal direction”.
Check the folding slippage in the horizontal
direction with the second sheet of test fold
sample.
9 After completing all preparations,
start operation.
• Press the start button.
10 The unit stops automatically when
there is no more paper on the paper
feed table.
7. OPERATION PROCEDURES
Fine adjustment knobFine adjustment knob
Second folding plate First folding plate
Slant correction knob
Page 19

17
7. OPERATION PROCEDURES
11 To interrupt or to stop operation,
press the stop button.
1 While looking at the scale, roughly adjust the stopper of first folding plate to the
paper size.
1 Slide the rough adjustment knob of first folding plate while lifting it up, move the stopper to the single-folding
position for the paper size, and set the stopper.
2 After adjusting the position of the rough adjustment knob, be sure to rotate the fine adjustment knob to the left and
right several times and make sure that they are engaged properly.
7-2. SINGLE-FOLDING PAPER NEATLY
In DF-505N, paper is single-folded by folding plate 1. The rough adjustment knob of
folding plate 2 must therefore be set to ''Press" position as shown in the figure.
To single-fold paper, perform the following procedure.
Rough adjustment knob
Fine adjustment knob
Page 20

18
7. OPERATION PROCEDURES
2 Adjust the stopper of second folding plate.
1 While lifting the rough adjustment knob of second folding plate, slide it to the ''Press" position shown in the figure
and set it there.
2 Rotate the fine adjustment knob to the left until the rough adjustment knob presses against it lightly but completely.
Note : Rotating the fine adjustment knob excessively will result in paper jamming, improper folding, and other
mechanical malfunctions.
3 Start folding operations hereafter using the normal procedure.
If the above problem occurs, it means that the stopping position of the stopper is too apart. Rotate the fine adjustment knob to
the left until the folding stopper lightly but completely presses against it.
WHAT TO DO WHEN :
When single-folding paper, if the folding stopper (rough adjustment knob) of second folding plate is not at the correct
position, the following problems may occur according to the type of paper used (thickness, paper quality, etc.)
If the paper is thin (no hardness) ........ A crease about 0.59 inch from the folded line of the paper parallel to it will be formed.
Rough adjustment knob
Fine adjustment knob
Second folding plate
0.59inch
Page 21

19
7. OPERATION PROCEDURES
When single-folding drawing paper or fine
quality thick paper (127g/m2), the edge of
the folding line of the paper or a part near
the center may bend due to environmental
conditions (temperature, humidity), paper
size, paper jamming, paper size, paper
fiber direction, etc. and not because the
unit has malfunctioned.
In such cases, perform the following
procedure.
7-3. SINGLE-FOLDING HARD PAPER NEATLY
1 The stopping position of the stopper
is too close. Rotate the fine
adjustment knob of folding plate 2 to
the right by 1/4 turn so that the
stopper is appropriately apart from it.
2 Press the START button and start
folding operations.
If folding problems occur again
during operations, press the STOP
button to stop the unit. Once the unit
has stopped completely, rotate the
fine adjustment knob of second
folding plate to the right by 1/4 turn so
that the stopper is appropriately apart
from it. Resume operations again.
Bent at edge
Bent near center
Fine adjustment knob
Second folding plate
Page 22

20
7. OPERATION PROCEDURES
3 After completing the single-folding
operations for hard paper, rotate the
fine adjustment knob to the left until
the
stopper presses against it lightly but
completely.
Note :
If thin paper is single-folded with the folding stopper
of second folding plate moved to the position for thick
paper, the thin paper will not be folded neatly,
Therefore, after completing single-folding operations
for thick paper, be sure to move the stopper back to its
original normal position.
7-4. DOUBLE FOLDING THICK PAPER
• When thick paper(above 104.7g/m2)
such as fine quality paper, etc. is
folded into fours, its thickness may
cause its folding section to open
when ejected to the stacker, which
consequently will prevent it from
being able to pass through the
stacker rollers and result in paper
jam.
Do not use thick paper (127.9/m2) folded into
fours as paper ejection problems may occur.
• In such cases, proceed in the
following steps.
1 Place the paper on the paper feed
table, lower the paper set lever, and
raise the paper feed table.
Fine adjustment knob
Folding plate 2
Lever
Stacker rollers
Stacker lever
Lever
Belts
Paper
Paper set lever
Page 23

21
2 Adjust the stacker rollers to “5”.
3 Next, while lifting up the stacker
rollers with your hand, pull the levers
(left and right) attached to the stacker
lever in the direction of the arrow, and
adjust so that the stacker rollers are
above the belt.
4 Press the start button and test the
folding.
• Check if the paper is ejected smoothly.
5 If the paper is not ejected smoothly,
change the position of the stacker
rollers.
7. OPERATION PROCEDURES
Stacker rollers
Stacker roller
Lever
Belt
Stacker lever
Stacker rollers
Page 24

22
7. OPERATION PROCEDURES
6 If folding slippage occurs, rotate the
fine adjustment knob of the folding
plate 1 or 2 and correct the folding
slippage.
7 After completing all adjustments,
press the “reset button” of the
counter.
8 Press the start button and begin
operations.
9 After the operations have completed,
be sure to lower the left and right
levers attached to the stacker lever in
the direction of the arrow.
• If the stacker rollers are left lifted up, problems
will occur when the normal paper size is used.
Fine adjustment knob
<Second folding plate>
Fine adjustment knob
<First folding plate>
Reset button Counter
Stacker rollers
Lever
Belts
Stacker lever
Page 25

23
7. OPERATION PROCEDURES
7-5. FOLDING 5(W) X 7 (L) MEDIUM THICKNESS PAPER (BELOW 81.4 g/m
2
)
Paper jam may occur when folding 5(W) X
7(L) size medium thickness paper such as
fine paper (below 81.4g/m2) into fours. If
this occurs, attach the guide plate unit
provided.
1. Attach the guide plate unit at the
innermost center of the two belts of
the paper ejection plate.
2. Set the stacker roller at “4”.
3. Press the start button and test-fold
the paper.
* Check if the paper can be ejected smoothly.
Paper ejection
plate
Belt
Guide plate unit
Guide plate unit Stacker roller
Stacker rollers
Page 26

24
4. If the paper is not ejected out
smoothly, change the position of the
stacker roller.
5. If the paper slips when folded, rotate
the fine adjustment knob of the first
folding plate or second folding plate,
and adjust the folding slippage.
6. After all adjustments, press the
“Reset” button of the counter.
7. Press the start button to start
operations.
7. OPERATION PROCEDURES
Stacker rollers
Fine adjustment knob
<Second folding plate>
Fine adjustment knob
<First folding plate>
Reset button Counter
Page 27

25
8. After completing the work, be sure to
remove the guide plate unit.
* Take note that leaving the guide plate unit
attached may result in problems when other types
of paper are used.
Note : When folding 52.3 g/m2 paper in fours, do not use
the guide plate unit.
9
.
Store the guide plate unit removed in
the DF-505N as shown in the figure.
7. OPERATION PROCEDURES
Guide plate unit
Page 28

26
7. OPERATION PROCEDURES
7-6. SPECIAL FOLDING OF FIXED PAPER
1 Stack some paper on the paper feed
table.
2 Fold the paper as desired and
measure the folded paper. Adjust the
setting position of the rough
adjustment knob of the folding plate
accordingly.
3 Adjust the rough adjustment knob of
the first folding plate to the mark
corresponding to measurement A.
• The rough adjustment knob can be moved freely
by pulling it up.
Although the rough adjustment knob can be
moved up and down, it cannot be rotated.
• After adjusting the position of this knob, be sure to
rotate the fine adjustment knob several times.
Paper
Accordion fold
Rough adjustment knob
Fine adjustment knob
Page 29

27
4 Adjust the rough adjustment knob of
the second folding plate to the mark
corresponding to measurement B.
• When carrying out special folding, folding sizes
should be within the following ranges.
Folding range (A) for the first folding plate:
1-5/8 to 12-7/8 inch
Folding range (B) for the second folding plate:
1-5/8 to 8-1/2 inch
Max. paper length (C) when folded:
8-1/2 inch
5 Adjust the position of the stacker
rollers.
• Referring to the table of stacke roller positions,
position the stacker rollers.
As the figures in this table of stacker roller
positions are approximations, select the best
position taking into consideration the folding
speed and paper quality.
7. OPERATION PROCEDURES
Length of Paper Fold
7 — 8-1/2 inch
6 — 7 inch
5 — 6 inch
4 — 5 inch
1-5/8 — 4 inch
Folding Mode
LD : Single Fold, Irregular Accordion Fold, Brochure Fold
Single fold of paper bigger than LD.
LG : Irregular Accordion Fold, Brochure Fold
LT : Single Fold, Irregular Accordion Fold, Brochure Fold
LD : Letter Fold, Accordion Fold
LG : Letter Fold, Accordion Fold
LD : Double Fold
LT : Double Fold, Letter Fold, Accordion Fold
LG : Double Fold
Number
1
2
3
4
5
Rough adjustment knob
Stacker rollers
Page 30

28
6 Press the start button to test the
folding.
• Check that the paper has been folded properly.
Check the second piece of paper folded first.
• If the sheets of paper have not been folded
satisfactorily, refer to the following steps.
1 If there is folding slippage in the vertical direction,
rotate the fine adjustment knob and correct the
folding slippage.
Refer to “8-1. Adjusting the folding slippage in the
vertical direction”.
2 If the folding has slipped in the horizontal
direction:
Rotate the “slant correction knob” and adjust the
folding slippage.
Refer to “8-2. Adjusting the folding slippage in the
horizontal direction”.
Check the folding slippage in the horizontal
direction with the second sheet of test fold
sample.
7. OPERATION PROCEDURES
Paper for testing folding
Fine adjustment knob
<Second folding plate>
Fine adjustment knob
<First folding plate>
Slant correction knob
Page 31

29
8. FOLDING ADJUSTMENTS
8-1. ADJUSTING THE FOLDING SLIPPAGE IN THE VERTICAL DIRECTION
To adjust the folding slippage in the vertical direction, rotate the fine adjustment knob of
first folding plate.
Folding Style
Fold Surface A Adjustment
First Folding Plate
Fine Adjustment Knob
Single Fold
Double Fold
Letter Fold
Accordion Fold
Brochure Fold
Irregular
Accordion Fold
When A
is longer
When A
is shorter
When A
is longer
When A
is shorter
When A
is longer
When A
is shorter
When A
is longer
When A
is shorter
When A
is longer
When A
is shorter
When A
is longer
When A
is shorter
Rotate the fine adjustment
knob counterclockwise
Rotate the fine adjustment
knob clockwise.
Rotate the fine adjustment
knob counterclockwise
Rotate the fine adjustment
knob clockwise.
Rotate the fine adjustment
knob clockwise.
Rotate the fine adjustment
knob counterclockwise
Rotate the fine adjustment
knob counterclockwise
Rotate the fine adjustment
knob counterclockwise
Rotate the fine adjustment
knob counterclockwise
Rotate the fine adjustment
knob clockwise.
Rotate the fine adjustment
knob clockwise.
Rotate the fine adjustment
knob clockwise.
Page 32

30
Folding Style
Fold Surface B Adjustment
Second Folding Plate
Fine Adjustment Knob
Double Fold
Letter Fold
Accordion Fold
Brochure Fold
Irregular
Accordion Fold
When B
is longer
When B
is shorter
When B
is longer
When B
is shorter
When B
is longer
When B
is shorter
When B
is longer
When B
is shorter
When B
is longer
When B
is shorter
8. FOLDING ADJUSTMENTS
Rotate the fine adjustment
knob counterclockwise
Rotate the fine adjustment
knob clockwise.
Rotate the fine adjustment
knob counterclockwise
Rotate the fine adjustment
knob clockwise.
Rotate the fine adjustment
knob clockwise.
Rotate the fine adjustment
knob counterclockwise
Rotate the fine adjustment
knob clockwise.
Rotate the fine adjustment
knob counterclockwise
Rotate the fine adjustment
knob clockwise.
Rotate the fine adjustment
knob counterclockwise
Page 33

31
8-2. ADJUSTING THE FOLDING SLIPPAGE IN THE HORIZONTAL DIRECTION
• If folding slips as shown in the figure because the
paper is not cut straight, rotate the “slant
correction” knob to adjust the folding slippage.
1 Rotate the “slant correction” knob to
adjust the folding slippage.
• If folding slippage is as shown in Fig. A, rotate the
knob in the direction of the arrow.
• If folding slippage is as shown in Fig. B, rotate the
knob in the direction of the arrow.
2 After adjustment, be sure to rotate the
“slant correction” knob to adjust the
round holes of the paper feed table to
the pin.
• The position at which the round hole meets the pin
is the standard position.
8. FOLDING ADJUSTMENTS
Slant correction knob
Slant correction knob
Slant correction knob
Round hole
Pin
Slant correction knob
Page 34

32
9. USING NON-FIXED PAPER
9-1. FIXED FOLDING PROCEDURES
Start fixed folding operations for non-fixed paper according to the following procedures.
The procedures are described by taking an example of folding a sheet of 12 inch paper.
1 Measure the length of the paper.
• Use measuring instruments that are in 1 inch
2 Refer to the table of rough adjustment
knob positions and position the
rough adjustment knobs of first and
second folding plates.
• Calculating from the table, the position of the knob
of first folding plate should be set at 6 inch.
12÷2=6 inch
• Adjust the rough adjustment knob of the second
folding plate to “End”.
Folding Style Single Fold Double Fold Irregular Letter Fold Accordion Fold Brochure Fold
Accordion Fold
First Folding Plate L/2 L/2 3L/4 L/3 2L/3 L/4
Second Folding Plate END L/4 L/4 L/3 L/3 L/2
L= Length of paper
Rough adjustment knob
Rough adjustment knob
Page 35

33
3 Adjust the position of the stacker
rollers.
• As the length of the paper fold is 6 inch, adjust the
position of the stacker rollers to “2”.
Reference: Refer to “Table of Stacker Roller
Positions”.
4 Place the paper on the paper feed
table.
• Refer to “7. Operation Procedures” and begin
operations.
9. USING NON-FIXED PAPER
To fold the paper in styles (special folding) other than fixed-folding, carry out the procedures in “7-6. Special
Folding of Fixed Paper”.
Stacker rollers
Paper
Paper set lever
Page 36

34
• As shown in the figure, cross folding
means folding single folded paper
again.
• Paper can be cross folded into various
shapes depending on use.
10-1. PRECAUTIONS UPON USE
(1) The maximum paper thickness is 104.7g/m2. However, this thickness may differ slightly
according to various conditions such as environmental conditions (temperature,
humidity), paper size, type of paper, paper couch conditions, and printed surface
conditions.
10-2. CROSS FOLDING OF FIXED PAPER
• The following describes the cross
folding shown in the figure and the
procedures for it.
• Start cross folding according to the
following procedures.
1 First, adjust the rough adjustment
knob of first folding plate to the mark
for single fold.
• After adjusting the position of this knob, be sure to
rotate the fine adjustment knob several times.
Although the rough adjustment knob can be
moved up and down, it cannot be rotated.
2 Next, adjust the rough adjustment
knob of the second folding plate to
“End”.
(2) When the paper is cross folded, Σ shape
folding, folding slippage in the
horizontal direction may occur due to
conditions such as environmental
conditions (temperature, humidity),
paper thickness, paper size, type of
paper, paper couch conditions.
Therefore do not suspect a fault.
Folded
Cross single
folding
Cross letter
folding
shape folding
Rough adjustment knob
Rough adjustment knob
10. CROSS FOLDING
Page 37

35
3 Adjust the position of the stacker
rollers.
• Referring to the table of stacker roller positions,
position the stacker rollers.
As the figures in this table of stacker roller
positions are approximations, select the best
position taking into consideration the folding
speed and paper quality.
4 Set the paper feed pressure adjusting
knob to “thin paper”.
• If the paper slips, and no paper is conveyed, raise
the paper feed pressure from "thin paper" to "thick
paper".
5 Press the start button to test the
folding.
• Check that the paper is folded properly.
Check the second piece of paper folded first.
6 To prevent the paper from slipping in
the horizontal direction when folded
and bending of the paper, press the
folded line of the paper folded into
twos.
10. CROSS FOLDING (Optional-Cross Folding kit is required)
Stacker rollers
Paper feed pressure adjusting knob
Page 38

36
7 Set the single fold paper on the paper
feed table.
Place the paper with the folded edge
to the back of the unit as shown in the
figure.
• To prevent folding slippage in the horizontal
direction and misfeeding, press the folded edge of
the paper with your hand firmly.
The amount of paper that can be folded is
approximately 2/3 (approx. 1-1/2 inch) of the
height of the guide at the folded side.
8 Open the top cover and move the
paper feed ring at the far end to the
folded edge of the paper.
• Loosen the set screw and move the paper feed ring.
• After moving the paper feed ring, tighten the set
screw properly.
9 Close the top cover and adjust the
cross folding lever to the guide.
• Place the weight rollers at the tip of the lever on top
of the folded edge.
10 Set the paper feed pressure adjusting
knob to “thin paper”.
• If the paper slips, and no paper is conveyed, set the
paper feed pressure to “thick paper”.
10. CROSS FOLDING (Optional-Cross Folding kit is required)
Paper
Set knob
Paper feed ring (For moving)
Top cover
Cross folding lever
Weight roller
Paper feed pressure adjusting knob
Page 39

37
11 From here, refer to “7. Operation
Procedures”.
• When replenishing paper, raise the cross folding
lever as shown in the figure first.
Cross folding consists of not only the single
folding of LD, double folding of LT, but the
letter folding of LT.
12 After use, store the cross folding
lever as shown in the figure.
10-3. CROSS FOLDING OF NON-FIXED PAPER
• The following describes the
procedures for single cross folding.
• Start single cross folding of non-fixed
paper according to the following
procedure.
1 Adjust the rough adjustment knob of
first folding plate to the mark which
has a value half of this length.
• Adjust the rough adjustment knob of the second
folding plate to “End”.
Cross folding lever
Cross folding lever
Rough adjustment knob Rough adjustment knob
Second folding plate First folding plate
10. CROSS FOLDING (Optional-Cross Folding kit is required)
Page 40

38
2 Set the paper feed pressure adjusting
knob to “thin paper”.
• If the paper slips, and no paper is conveyed, raise
the paper feed pressure from “thin paper” to “thick
paper”.
3 Adjust the position of the stacker
rollers.
Reference: Refer to “7. Operation Procedures”.
4 Press the start button to test the
folding.
• Check that the paper is folded properly.
• Check the second piece of paper folded first.
If the paper has not been folded properly,
correct the problem first before proceeding
onto the next step.
5 Press the start button to begin
operations.
Paper feed pressure adjusting knob
Stacker rollers
Paper for testing folding
10. CROSS FOLDING (Optional-Cross Folding kit is required)
Page 41

39
6 Adjust the rough adjustment knob of
first folding plate to the mark which
has a value half of this length.
• Adjust the rough adjustment knob of the second
folding plate to “End”.
7 To prevent folding slippage in the
horizontal direction and misfeeding,
press the folded edge of the paper
with your hand firmly.
8
Set the single fold paper on the paper
feed table.
Place the paper with the folded edge
to the back of the unit as shown in the
figure.
The amount of paper that can be folded is
approximately 2/3 (approx. 1-1/2 inch) of the
height of the guide at the folded side.
9 Open the top cover and move the
paper feed ring at the far end to the
folded edge of the paper.
• Loosen the set screw and move the paper feed ring.
• After moving the paper feed ring, tighten the set
screw properly.
Rough adjustment knob Rough adjustment knob
Second folding plate First folding plate
Paper
Set knob
Paper feed ring (For moving)
10. CROSS FOLDING (Optional-Cross Folding kit is required)
Page 42

40
10 Lower the paper set lever.
While pressing the back edges of the
paper.
• Adjust so that the front part of the paper touches
the paper feed ring in front lightly.
11 Close the top cover and adjust the
cross folding lever to the guide.
• Place the weight rollers at the tip of the lever on top
of the folded edge.
12 Set the paper feed pressure adjusting
knob to “thin paper”.
• If the paper slips, and no paper is conveyed, raise
the paper feed pressure from “thin paper” to “thick
paper”.
13 Press the start button to test the
folding.
• Check that the paper is folded properly.
• Check the second piece of paper folded first.
If the paper has not been folded properly,
correct the problem first before proceeding
onto the next step.
Paper
Paper set lever
Top cover
Cross folding lever
Weight roller
Paper feed pressure adjusting knob
Paper for test folding
10. CROSS FOLDING (Optional-Cross Folding kit is required)
Page 43

41
14 Press the start button to begin
operations.
15 When replenishing paper, raise the
cross folding lever as shown in the
figure first.
Cross folding consists of not only the single
folding of LD, double folding of LT, but the
letter folding of LT.
• From here, refer to “7. Operation Procedures”.
16 After use, store the cross folding
lever at the place shown in the figure.
Cross folding lever
Cross folding lever
10. CROSS FOLDING (Optional-Cross Folding kit is required)
Page 44

42
11. TROUBLESHOOTING
11-1. PAPER HAS JAMMED NEAR THE PAPER FEED RING
1 If paper has jammed near the paper
feed ring, raise the paper set lever
and lower the paper feed table
downwards.
2 Pull the jammed paper towards you.
11-2. PAPER HAS SLIPPED NEAR THE PAPER FEED SECTION
• If the paper stops at the paper feed
section when thick paper is used
(127.9 g/m2) and no paper is fed, set
the paper feed pressure to “thick
paper”.
Note : Move the lever as shown in the right figure until
the lever stops.
Paper feed table
Paper
Paper set lever
Paper feed pressure adjusting knob
Page 45

43
11. TROUBLESHOOTING
11-3. PAPER HAS COILED AROUND THE RUBBER ROLL INSIDE THE UNIT
11-4. PAPER HAS JAMMED AT THE FIRST FOLDING PLATE
1 Remove first folding plate from the
unit.
2 Open the top cover and pull the
jammed paper towards you to
remove.
• Open the top cover, pull the wound
paper towards you and remove it.
• If the paper does not come out easily,
insert a ruler,etc. at the tip of the
paper wound around the lower rubber
roll from the gap between the rubber
rolls and remove the paper.
Turn off the power switch first before
performing the above.
Remove the first folding plate from the unit.
Paper
Rubber roll
First folding plate
Page 46

44
3 After removing the paper, return the
folding plate and top cover to their
original positions.
Check that the folding plate has been set
correctly.
Always remove and return folding plates with
both hands.
11. TROUBLESHOOTING
11-5. PAPER HAS JAMMED AT THE SECOND FOLDING PLATE
1 Release the lock of the second
folding plate and remove this plate
from the unit.
2 Pull the jammed paper towards you to
remove.
3 After removing the paper, slide the
folding plate down the slider, return it
to the unit, and lock the lock lever.
Make sure that the folding plate has been set
correctly.
Always remove and return folding plates with
both hands.
First folding plate
Second folding plate
Slider
Page 47

45
11. TROUBLESHOOTING
• Remove the paper stuck in the
stacker section towards you.
11-6. PAPER HAS JAMMED NEAR THE STACKER
Paper
Page 48

46
12. EMERGENCY STOPS
An emergency stop device to ensure safety has been installed to the top cover of this
unit. Take note that this emergency stop device will function as follows.
(1) If the top cover is open while the unit
is operating, the unit will stop
promptly.
(2) If the “start” button is pressed with
the top cover open, the unit will not
start.
(3) The emergency stop condition will be
released when the top cover is
closed.
Top cover
Page 49

47
(2) When the start button is
pressed, the paper feed ring
rotates but no paper is fed.
13. TROUBLESHOOTING GUIDE
Problem
Check
Correct
(1)The unit does not start when
the start button is pressed.
• Insert the power cord properly
into the outlet.
1 Is the power cord
disconnected ?
3 Is there paper on the paper
feed plate?
• Load some sheets of paper.
2 Is the power switch on ?
• Turn on the switch.
• Set the paper properly.
4 Is the paper on the paper feed
table set properly on the
paper switch?
5 Is the paper stuck? • Remove the paper.
6 Is the top cover open?
• Close the top cover.
• Contact your serviceman.
7 Has a problem occurred
inside the unit?
* The motor will continue to rotate for about five seconds after the paper stacked
on the paper feed table has run out before.
1 Is the paper feed plate
lowered?
• Lower the paper set lever and
raise the paper feed plate.
(3)The main motor does not
rotate.
1 Is the top cover open?
• Close the top cover.
2 Has a problem occurred
inside the unit?
• Contact your serviceman.
(4)The paper is not folded at the
proper folding position.
1 Is the folding plate set
properly?
• Position the folding plate
properly.
2 Environmental conditions
such as static electricity, etc.
may be the cause.
• Change the paper type.
‰
‰
‰
‰
‰
‰
‰
‰
‰
‰
‰
‰
‰
‰
‰
‰
‰
‰
‰
‰
‰
‰
‰
‰
Page 50

48
‰
1 Is the paper feed pressure too
high?
(5)Double feed occurs frequently.
• Lower the paper feed pressure
gradually until the optimum
pressure is obtained.
13. TROUBLESHOOTING GUIDE
Problem
Check
Correct
‰
2 Is the paper separator dirty?
• Clean with neutral detergent or
alcohol.
• Loosen the paper properly and
load on the paper feed table.
‰
3 Are the sheets of paper stuck to
each other and cannot be
separated?
‰
4 Is paper outside the specified
sizes used?
• Do not use such a kind of paper
as they will cause problems.
5 Has a problem occurred inside
the unit?
• Contact your serviceman.
(6)Paper slips frequently.
1 Is the paper feed pressure too
low?
• Raise the separator pressure
gradually until the optimum
pressure is obtained.
2 Is the paper feed ring dirty?
• Clean with neutral detergent or
alcohol.
3 Are the sheets of paper sticking
to each other and cannot be
separated.
• Loosen the paper properly and
load on the paper feed table.
4 Is paper outside the specified
sizes used?
• Do not use such paper as they
will cause problems.
5 Has a problem occurred inside
the unit?
• Contact your serviceman.
1 Is the rubber roll dirty?
• Clean with neutral detergent or
alcohol.
(7)Paper jams frequently.
• Check inside the unit and
remove any paper shreds.
2 Are paper shreds stuck inside
the paper conveyance
passage?
3 The stacker roller position is not
correct.
• Re-set the position of the
stacker roller.
4 Is the paper curled?
• Straighten the curl before use.
5 Is the guide plate unit left
attached to the paper ejection
plate?
6 Due to static electricity.
• Use an anti-static electricity
spray available on the market.
• Remove the guide plate unit.
‰
‰
‰
‰
‰
‰
‰
‰
‰
‰
‰
‰
‰
‰
‰
‰
‰
‰
‰
‰
‰
‰
‰
‰
‰
‰
‰
‰
Page 51

49
Problem
Check
(8)When paper slips in the
vertical direction.
• Adjust each folding stopper
finely.
13. TROUBLESHOOTING GUIDE
Correct
1 Was the paper type (quality,
amount) changed halfway?
• Adjust each folding stopper
finely again.
(9)When paper slips in the
horizontal direction when
folded.
1 Is the paper stacked
unevenly?
• Stack the paper neatly on the
paper feed table.
• Adjust the guide firmly against
the paper.
2 Is there space between the
paper and guide?
• Rotate the slant correction
knob and correct the folding
slippage.
(10) Paper jam at the rubber roll
when thick paper or cross
folded thick paper is folded
into two.
1 Is paper outside the specified
sizes used?
• Do not use such paper as they
will cause problems.
2 Is the space inside the internal
paper conveyance passage
narrow?
• Rotate the fine adjustment
knob of second folding plate
to the right one round and
move the folding stopper.
(11)
Small paper is fed continuously.
(Chain-feed).
1 Is small paper outside the
specified sizes used?
• Do not use such a paper as
they will cause problems.
2 Is the paper feed pressure
too high?
• Set the paper feed pressure
from “thick paper” to “thin
paper”.
‰
‰
‰
‰
‰
‰
‰
‰
‰
‰
‰
‰
‰
‰
‰
‰
Page 52

50
14. CLEANING THE UNIT
• As paper shreds, ink of printed paper on the rubber roll and paper feed ring will cause
problems, clean these parts according to the following procedures.
• To ensure safety, always turn off the power of the unit first before cleaning.
14-1. CLEANING THE RUBBER ROLL
1 Open the top cover.
2 Remove the first and second folding
plates completely as shown in the
figure.
3 Rotate the rubber roll, and clean off
the dirt with a cloth moistened with
neutral detergent or alcohol.
Top cover
Second folding plate
First folding plate
Rubber roll
Page 53

51
14. CLEANING THE UNIT
14-2. CLEANING THE PAPER FEED RING
1 Open the top cover.
2 While rotating the paper feed ring
with your hand in the direction of the
arrow, clean it with a cloth moistened
with neutral detergent or alcohol.
Take note that the paper feed ring can only be
rotated in one direction.
Top cover
Paper feed ring
Page 54

52
15. SPECIFICATIONS
Model
Type
Paper size that can be
folded
Max.
Min.
Paper quality
Folding mode
Paper thickness
Processing speed
Paper feed method
Office use, desktop
11 (W) x 17 (L) inch
5 (W) x 7 (L) inch
Rough paper, fine quality paper, stencil paper, recycled paper,
drawing paper.
Single fold, double fold, irregular accordion fold, letter fold,
accordion fold, brochure fold, special cross fold (paper thickness:
52.3 to 127 g/m 2), other special folds
Loading capacity of paper feed table
120 sheets/min. (For single folding 64 g/m 2 of fine quality LG
paper)
3 rings, automatic paper separation method, slant correction
device
52.3 to 127 g/m
2
However, 127 g/m 2 cannot be double folded.
500 sheets (Fine quality paper, 64 g/m 2)
Moving the stacker roller
Manual setting (5 steps)
Counter
4-figure adding counter display
Moving the folding stopper Manual setting
Power
Dimensions
In storage
In use
Weight
120V 60Hz
31 (W) x 19-5/16 (D) x 20-11/16 (H) inch
36-3/16 (W) x 19-5/16 (D) x 20-11/16 (H) inch (MAX)
Other detections
Top cover open/close detection.
70.77 lb
Specifications and dimensions are subject to change without prior notice.
DF-505N
Page 55

This page is a blank page.
Page 56

96V-94370-01040050S-0This manual is printed on recycled paper to help protect the environment.
 Loading...