

Page 1
Projector
8116A/8117A/8118WA/8119WA
C
User's Manual (detailed)
Operating Guide
Thank you for purchasing this projector.
WARNING
product. Be sure to read “Safety Guide” rst. After reading them, store them in a
safe place for future reference.
►Before using this product, please read all manuals for this
About this manual
Various symbols are used in this manual. The meanings of these symbols are
described below.
WARNING
CAUTION
NOTICE This entry notices of fear of causing trouble.
NOTE
• The illustrations in this manual are for illustrative purposes. They may differ
slightly from your projector.
• The manufacturer assumes no responsibility for any errors that may appear in
this manual.
• The reproduction, transfer or copy of all or any part of this document is not
permitted without express written consent.
• The information in this manual is subject to change without notice.
This symbol indicates information that, if ignored, could possibly
result in personal injury or even death due to incorrect handling.
This symbol indicates information that, if ignored, could possibly
result in personal injury or physical damage due to incorrect
handling.
Please refer to the pages written following this symbol.
Note: The Dukane models described in this document are manufactured
by Hitachi and use the same rmware, software programs, control code,
and accessory parts. The equivalent Dukane to Hitachi models are; 8116A
(CP-AX2505), 8117A (CP-AX3505), 8118WA (CP-AW2505), and 8119W
A(CP-AW3005).
430-8116A-8117A-8118WA-8119WA-General-00
1
Page 2

Contents
Introduction ...............3
Features ...................... 3
Checking the contents of package
Part names ....................4
Setting up .................7
Arrangement ...................7
Connecting with your devices
Connecting to a power supply
......9
.....15
Using the security bar and slot ....15
Using the cable cover ...........16
Remote control ............17
Installing the batteries ...........17
About the remote control signal ...18
Changing the frequency of remote control signal
Using as a simple PC mouse & keyboard
. . 18
. . 19
Power on/off ..............20
Operating ................23
Adjusting the volume ............23
Temporarily muting the screen and
audio output ..................23
Selecting an input signal .........24
Selecting an aspect ratio .........24
Adjusting the projector's elevator . . 25
Adjusting the zoom and focus .....25
Using the automatic adjustment feature
...26
Using the TEMPLATE feature .....27
Other buttons .................27
Adjusting the position ........... 28
Correcting the keystone/perfect t
distortions
....................28
Using the magnify feature ........29
Temporarily freezing the screen ...30
Using the menu function ........31
EASY MENU. . . . . . . . . . . . . . . 33
Aspect,
perfect fit
nstAllAtion, reset, filter time, lAnguAge,
i
A
D-zoom,
, picture moDe,
DvAnceD menu, exit
Keystone, Keystone,
eco moDe,
PICTURE menu ............36
Brightness, contrAst, hDcr,
AccentuAlizer, gAmmA, color temp,
color, tint, shArpness, Active iris, my memory
IMAGE menu ..............40
Aspect, over scAn, v position, h position,
h phAse, h size, Auto ADjust execute
INPUT menu ..............43
...3
SETUP menu ..............47
AUDIO menu ..............53
SCREEN menu .............54
OPTION menu .............60
NETWORK menu ...........74
SECURITY menu ...........75
Presentation tools .........80
Maintenance ..............98
Troubleshooting ..........105
Specications ............116
progressive, viDeo nr, color spAce,
viDeo formAt, hDmi formAt, hDmi rAnge,
c
omputer in, frAme locK, resolution
D-zoom, D-shift, picture position / pict.posit.h,
Keystone, Keystone, perfect fit
lAmp & filter, imAge optimizer, instAllAtion
stAnDBy moDe
volume, speAKer, AuDio source,
mic volume
lAnguAge, menu position, BlAnK,
Auto BlAnK, stArt up,
M
yScreen Lock
templAte, c.c.
Auto seArch, Direct power on,
Auto power off, my Button, scheDule,
s
ervice
security pAssworD chAnge,
M
yScreen
my text pAssworD, my text DisplAy,
my text writing, cloning locK
, messAge, source nAme,
pAssworD, pin locK,
PC-LESS Presentation
M
yScreen
...........80
USB Display (Windows computer)
USB Display (Mac computer)
,
,
,
...90
.......94
Replacing the lamp .............98
Cleaning and replacing the air lter . 100
Caring for the projection window
Replacing the internal clock battery
...102
...
103
Other care ...................104
Related messages ............105
Regarding the indicator lamps ...107
Resetting all settings ........... 110
Phenomena that may be easy to
be mistaken for machine defects
. . 110
2
Page 3
Introduction
Introduction
Features
The projector provides you with the broad use by the following features.
ü The unique optics system produces a large projected image in a short
distance, which provides you with various ways of use.
ü This projector has a variety of I/O ports that supposedly cover for any
business scene.
ü The HDMI port can support various image equipment which have digital
interface to get clearer pictures on a screen.
ü Has an HDCR and an ACCENTUALIZER features which are Dukane's original
image stabilizer for a clearer image.
ü Has a DICOM
mode.This mode simulates the DICOM standard, which is a standard
applicable to digital communications in medicine.
ü This projector can be controlled and monitored via LAN connection.
Furthermore, you can use the designated USB wireless adapter (optional) to
establish wireless LAN connection.
ü The built-in 16W speaker can deliver sufcient sound volume in a large
space like a classroom without external speakers.
ü This projector's network supports the PJLink™ standard.PJLink™ is a unied
standard for operating and controlling data projectors.For specications of
PJLink™, see the web site of the PJLink™.
ü Equipped with IMAGE OPTIMIZER which is Dukane's original function to
maintain visibility by automatic image correction in accordance with lamp
deterioration.
®
("Digital Imaging and Communication in Medicine") simulation
Checking the contents of package
Please see the Contents of package section in the User’s Manual (concise)
which is a book. Your projector should come with the items shown there. Require
of your dealer immediately if any items are missing.
NOTE
to use the original packing materials when moving the projector. Use special
caution for the lens.
• Keep the original packing materials, for future reshipment. Be sure
3
Page 4
Introduction
Part names
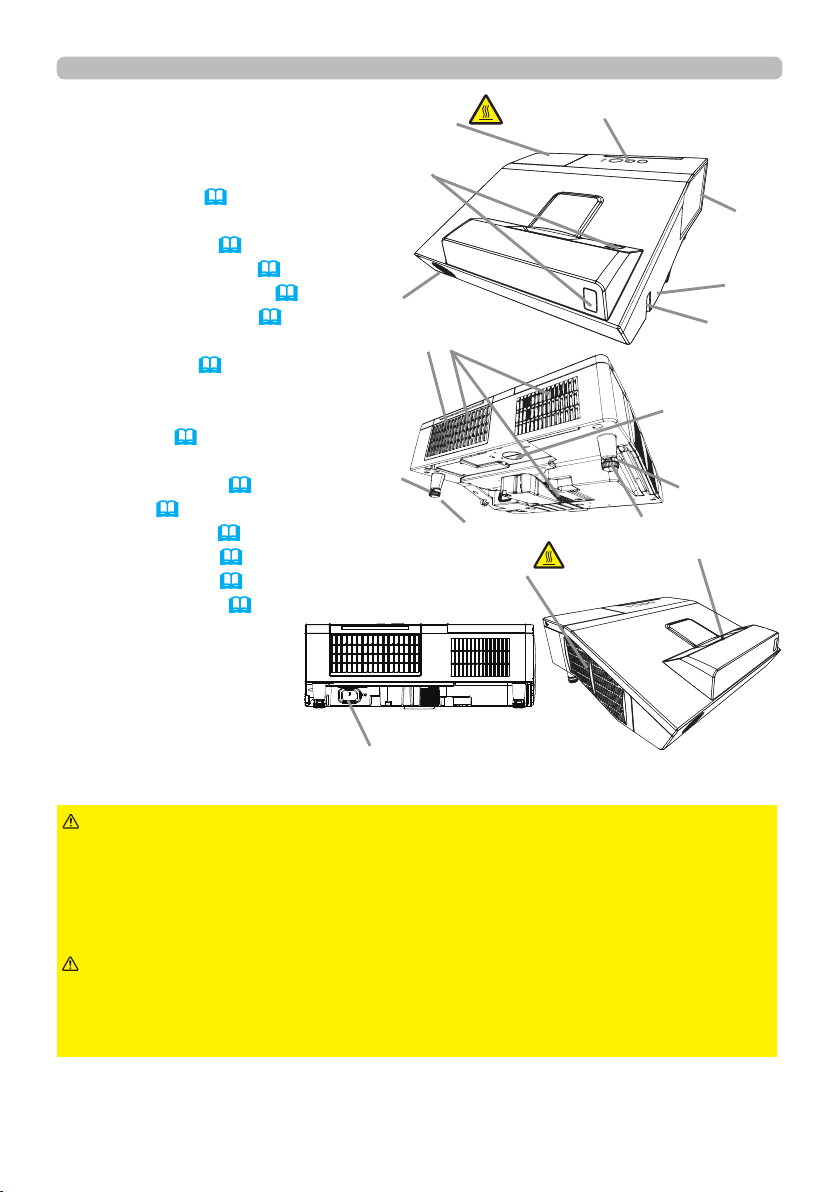
Projector
(1) Lamp cover (98)
The lamp unit is inside.
(2) Control panel (5)
(3) Elevator feet (x 2) (25)
(4) Remote sensor (x 2)(18)
(5) projection window (102)
(6) Intake vents
(7) Filter cover (100)
The air lter and intake vent
are inside.
(8) Speaker (12, 23, 53)
(9) Exhaust vent
(10) AC (AC inlet) (15)
(11) Ports (5)
(12) Security bar (15)
(13) Security slot (15)
(14) Spacer (x 2) (25)
(15) Battery cover (103)
(8)
(14)
(4)
(7)
(1)
(6)
(3)
HOT!
(9)
HOT!
(2)
(11)
(13)
(12)
(15)
(14)
(3)
(5)
(10)
WARNING
►HOT! : Do not touch around the lamp cover and the exhaust
vents during use or just after use, since it is too hot.
►Never look into the projection window while the projection lamp lights, since
the projection lamp ray may cause a trouble on your eyes.
►Do not use the security bar and slot to prevent the projector from falling down,
since it is not designed for it.
CAUTION
►Maintain normal ventilation to prevent the projector from
heating up. Do not cover, block or plug up the vents. Do not place anything that
can stick or be sucked to the vents, around the intake vents. Clean the air lter
periodically.
4
Page 5
Introduction
Part names (continued)
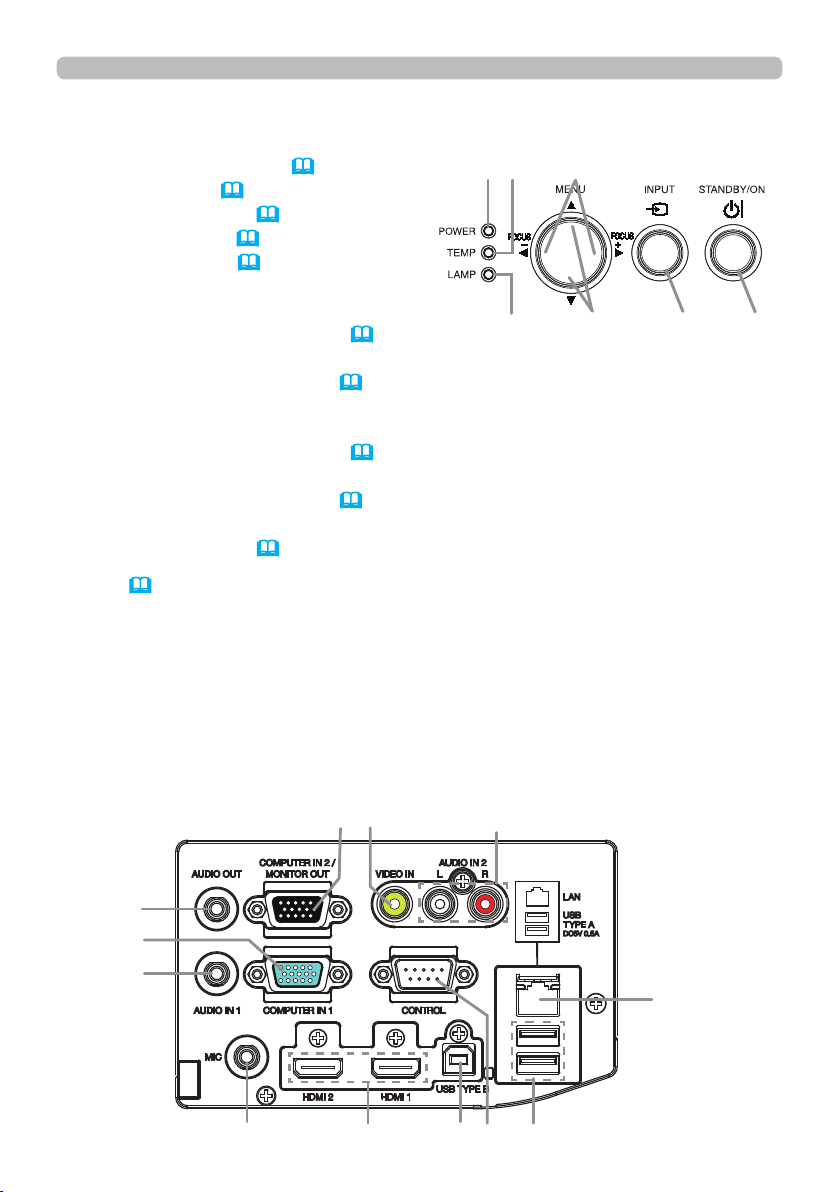
Control panel
(1) STANDBY/ON button (
20)
(3)
(4)
(6)
(2) INPUT button (24)
(3) POWER indicator (20, 107)
(4) TEMP indicator (107)
(5) LAMP indicator (107)
Buttons ◄/►/▲/▼
(6) FOCUS +/- buttons
when no menu is displayed (26), or
(5)
(7)
(2)
(1)
Cursor ◄/► buttons
when a menu is displayed (31). FOCUS +/- function is invalid when the
USB TYPE A port is selected as the input source.
(7) MENU buttons
when no menu is displayed (31), or
Cursor ▲/▼ buttons
when a menu is displayed (31).
The ◄/►/▲/▼ buttons on the projector work only as the cursor buttons while the
template is displayed (58).
Ports (
9 ~ 14)
(1) USB TYPE A port (x2)
(2) LAN port
(3) USB TYPE B port
(4) HDMI port (x2)
(5) MIC port
(6) AUDIO IN1 port
(7) AUDIO IN2(L,R) ports
(8) AUDIO OUT port
(8)
(9)
(6)
(5)
(10)
(9) COMPUTER IN1 port
(10) COMPUTER IN2 / MONITOR OUT port
(11) VIDEO IN port
(12) CONTROL port
(11)
(4)
(3)
(7)
(12)
(2)
(1)
5
Page 6
Introduction
Part names (continued)
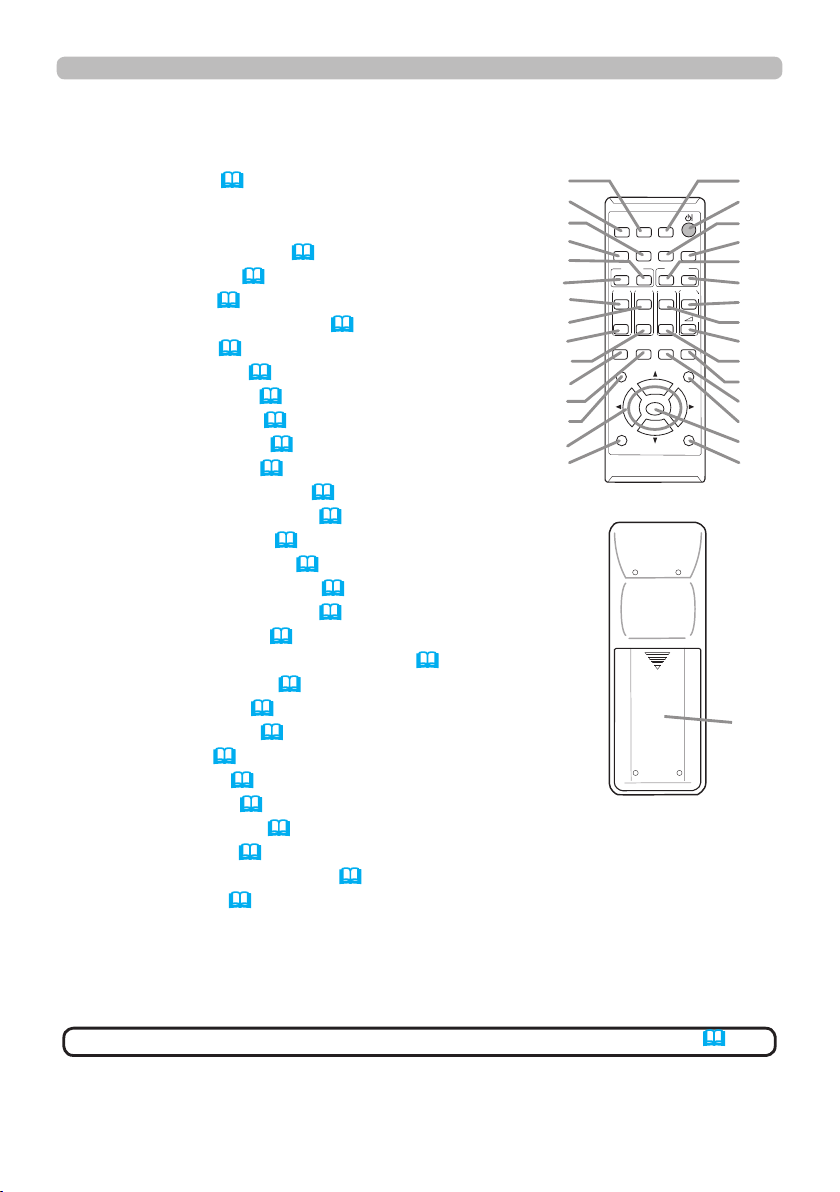
Remote control
(1) INPUT button (
24)
(2) IWB button *
(3) CALIBRATION button *
(4) STANDBY/ON button (20)
(5) ASPECT button (24)
(6) AUTO button (26)
(7) ACCENTUALIZER button (27)
(8) HDCR button (27)
(9) FOCUS - button (26)
(10) FOCUS + button (26)
(11) D-ZOOM - button (25)
(12) D-ZOOM + button (25)
(13) PAGE UP button (19)
(14) MAGNIFY - ON button (29)
(15) MY BUTTON - 1 button (62)
(16) VOLUME + button (23)
(17) PAGE DOWN button (19)
(18) MAGNIFY - OFF button (29)
(19) MY BUTTON - 2 button (62)
(20) VOLUME - button (23)
(21) KEYSTONE/PERFECT FIT button (28)
(22) TEMPLATE button (27)
(23) FREEZE button (30)
(24) AV MUTE button (23)
(25) ESC button (31)
(26) MENU button (31, 32)
(27) ENTER button (31, 32)
(28) POSITION button (28, 32)
(29) RESET button (31)
(30) ▲/▼/◄/► cursor buttons (31)
(31) Battery cover (17)
(2)
(1)
(6)
(5)
INPUT
ASPECT
(10)
(9)
(13)
(14)
(17)
(18)
PAGE
KEYSTONE/
PERFECT FIT
ESC MENU
(21)
(22)
(25)
(30)
POSITION
(28)
the remote control
IWB
CALIBRATION
AUTO
ACCENTUALIZER
D-ZOOM
FOCUS
-
+
-
MAGNIFY
MYBUTTON
UP
1
2
DOWNONOFF
FREEZE
TEMPLATE
ENTER
Back of
HDCR
VOLUME
AV MUTE
RESET
(3)
(4)
(7)
(8)
(11)
+
(12)
+
(16)
ー
(15)
(20)
(19)
(24)
(23)
(26)
(27)
(29)
(31)
• Any button marked with “*” is not supported on this projector (106).NOTE
6
Page 7

Setting up
Setting up
Install the projector according to the environment and manner the projector will be
used in.
Arrangement
Refer to table T-1 or T-2 and gures F-1 and F-2 at the end of User’s Manual (concise) to
determine the screen size and projection distance.
The values shown in the table are calculated for a full size screen.
a
Screen size (diagonal)
• For the case of installation in special conditions such as on the wall or ceiling, the
specied mounting accessories and service may be required. Tabletop use must be
setup with the designated optional accessories. Before installing the projector, consult
your dealer about your installation.
The screen position may shift after installation if the projector is mounted on locations
•
such as the wall or ceiling, due to the exibility of the plastic projector body. If readjustment
is necessary, consult with your dealer or service personnel.
• The projected image position and/or focus may change during warm-up (approx. 30
minutes after the lamp is turned on) or when the ambient conditions change. Readjust
the image position and/or focus as necessary.
• Since the projector features an ultra short throw, be aware that it is required to select a
screen carefully to have better performance.
- A soft screen such as a pull-down screen may cause serious distortion of a projected
image. A hard screen such as a board screen is recommended for use with this
projector.
- A high-gain screen such as a bead screen that has narrow viewing angle is not suitable
for this projector. A low-gain screen (around 1.0) such as a matte screen that has wide
viewing angle is recommended for use with this projector.
-
A screen with a weave pattern may cause moiré on the projected image, which is not a
failure of the projector. A screen that has less moiré effects is recommended for use with this
projector.
b1 , b2
Projection distance (±8%)
c1 , c2 Screen height (±8%)
►
WARNING
Place the projector in a stable horizontal position. If the
projector falls or is knocked over, it could cause injury and/or damage to the
projector. Using a damaged projector could then result in re and/or electric shock.
• Do not place the projector on an unstable, slanted or vibrational surface such
as a wobbly or inclined stand.
• Do not place the projector on its side or front position. To place the projector
on its rear position for the table top use, it is required to use the designated
optional parts. Consult with your dealer.
• Consult with your dealer before a special installation such as on the wall or
ceiling.
(continued on next page)
7
Page 8

Setting up
Arrangement (continued)
WARNING
►Place the projector in a cool place, and ensure that there is
sufcient ventilation. The high temperature of the projector could cause re,
burns and/or malfunction of the projector.
• Do not stop-up, block or otherwise cover the projector's vents.
• Keep a space of 30 cm or more between the sides of the projector and other
objects such as walls.
• Do not place or attach anything that would block the projection window or vent
holes.
• Do not place the projector on metallic thing or anything weak in heat.
• Do not place the projector on carpet, cushions or bedding.
• Do not place the projector in direct sunlight or near hot objects such as heaters.
Do not place the projector where the air from an air conditioner or similar unit
will blow on it directly.
•
Do not place anything near the projection window or vents, or on top of the
projector.It causes high temperature and could result in re or smoke.
•
Do not place anything that may be sucked into or stick to the vents on the
bottom of the projector. This projector has some intake vents also on the bottom.
►Do not place the projector anyplace where it may get wet. Getting the projector
wet or inserting liquid into the projector could cause re, electric shock and/or
malfunction of the projector.
• Do not place the projector in a bathroom or the outdoors.
• Do not place anything containing liquid near the projector.
•
Do not place the projector where any oils, such as cooking or machine oil, are used.
►
Use only the mounting accessories the manufacturer specied, and leave installing
and removing the projector with the mounting accessories to the service personnel.
• Read and keep the user’s manual of the mounting accessories used.
CAUTION
►Avoid placing the projector in smoky, humid or dusty place.
Placing the projector in such places could cause re, electric shock and/or
malfunction of the projector.
• Do not place the projector near humidiers, smoking spaces or a kitchen. Also
do not use an ultrasonic humidier near the projector. Otherwise chlorine and
minerals contained in tap water are atomized and could be deposited in the
projector causing image degradation or other problems.
►
Position the projector to prevent light from directly hitting the projector's remote sensor.
►Do not place the product in a place where radio interference may be caused.
►Do not place this product in a magnetic eld.
►
If the projector is used at an altitude of about 1600 m or higher, set ALTITUDE
of the SERVICE item in the OPTION menu to HIGH
(66). Otherwise, set it to
NORMAL.
If the projector is used with a wrong setting, it may cause damage to the projector
itself or the parts inside.
(continued on next page)
8
Page 9

Arrangement (continued)
Setting up
NOTE
• The projector may make a rattling sound when tilted, moved or
shaken, since a ap to control the air ow inside of the projector has moved. Be
aware that this is not a failure or malfunction.
• The incoming light to the screen from the projector has a large angle. While
the white image is on the screen, you may see it with colors, but this is because
of the type of the screen used or the angles viewed, and it is not a malfunction.
• When the ambient temperature is around 35 to 40°C, the brightness of lamp
is reduced automatically.
Connecting with your devices
Before connecting the projector to a device, consult the manual of the device to
conrm that the device is suitable for connecting with this projector and prepare
the required accessories, such as a cable in accord with the signal of the device.
Consult your dealer when the required accessory did not come with the product or
the accessory is damaged.
After making sure that the device and projector are turned off, connect them
following the instructions below.
►
WARNING
a re or damage to the device and the projector.
- Use only the accessories specified or recommended by the projector’s
manufacturer. Consult your dealer when the required accessory did not come
with the product or the accessory is damaged. It may be regulated under some
standard.
- For a cable with a core at only one end, connect the end with the core to the
projector. That may be required by EMI regulations.
- Neither disassemble nor modify the projector and the accessories.
- Do not use the damaged accessory. Be careful not to damage the accessories.
Route a cable so that it is neither stepped on nor pinched out.
CAUTION
in operation, unless that is directed in the manual of the device. Otherwise it may
cause malfunction in the device or projector.
►Be careful not to mistakenly connect a connector to a wrong port. Otherwise it
may cause malfunction in the device or projector.
- When connecting a connector to a port, make sure that the shape of the
connector ts the port.
- Tighten the screws to connect a connector equipped with screws to a port.
- Use the cables with straight plugs, not L-shaped ones, as the input ports of the
projector are recessed.
Use only the appropriate accessories. Otherwise it could cause
►Do not turn on or off the projector while connected to a device
(continued on next page)
9
Page 10
Setting up
Connecting with your devices (continued)
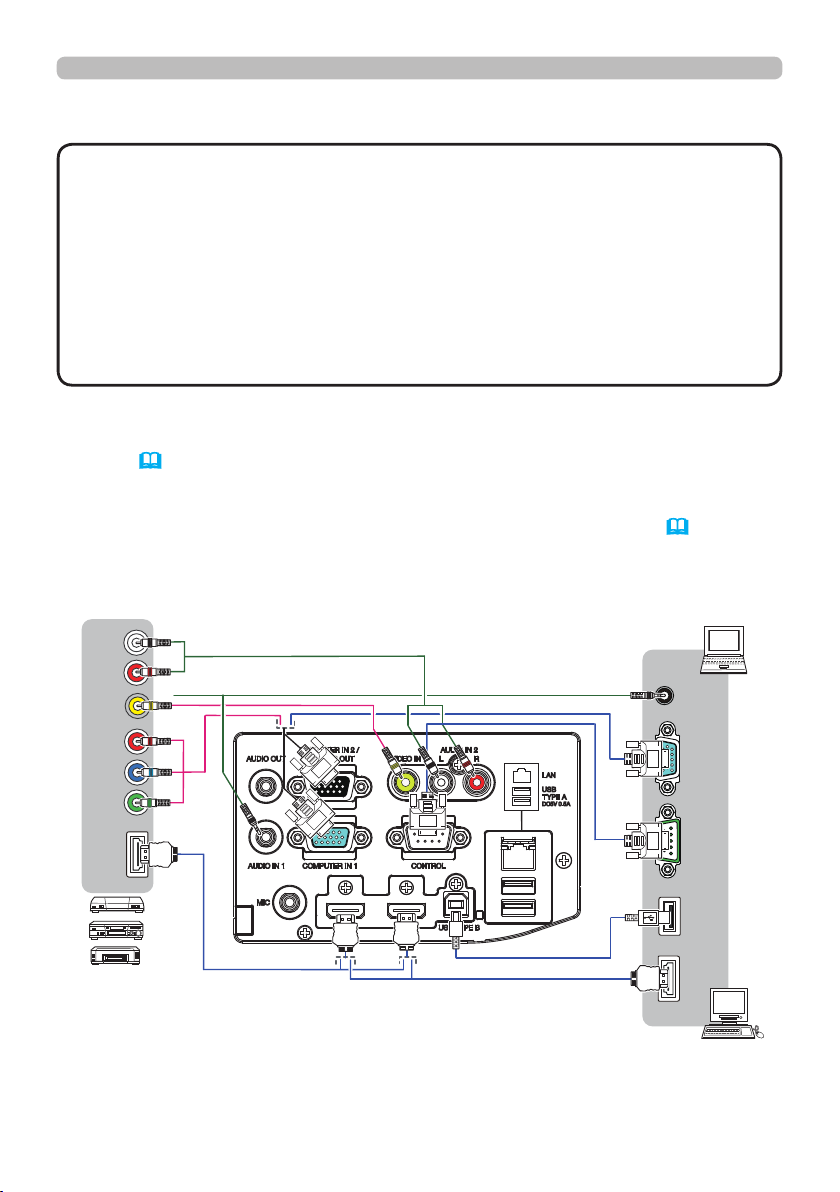
About Plug-and-Play capability
• Plug-and-Play is a system composed of a computer, its operating system
and peripheral equipment (i.e. display devices). This projector is VESA DDC
2B compatible. Plug-and-Play can be used by connecting this projector to a
computer that is VESA DDC (display data channel) compatible.
- Take advantage of this feature by connecting a computer cable to the
COMPUTER IN1 port (DDC 2B compatible). Plug-and-Play may not work
properly if any other type of connection is attempted.
-
Please use the standard drivers in your computer as this projector is a Plug-and-
Play monitor.
• When AUTO is selected for the COMPUTER IN1 or COMPUTER IN2 port in
COMPUTER IN of the INPUT menu, that port will accept component video
signals (
•
When the USB TYPE B port and the computer's type A USB port are connected,
45).
you can use the USB TYPE B port as a picture input port from the computer, or use
the remote control as a simple mouse and keyboard of the computer. (19).
Computer
L
OUT
AUDIO
R
OUT
AUDIO
VIDEO
Cr/Pr
Cb/Pb
Y
COMPONENT
HDMI
VCR/DVD/Blu-ray Disc
player
(continued on next page)
10
DISPLAY
RS-232C
USB
(A)
HDMI
Page 11

Connecting with your devices (continued)
Setting up
NOTE
• Before connecting the projector to a computer, consult the computer’s
manual and check the compatibility of the signal level, the synchronization
methods and the display resolution output to the projector.
- Some signal may need an adapter to input this projector.
- Some computers have multiple screen display modes that may include some
signals which are not supported by this projector.
- Although the projector can display signals with resolution up to UXGA
(1600X1200), the signal will be converted to the projector’s panel resolution
before being displayed. The best display performance will be achieved if the
resolutions of the input signal and the projector panel are identical.
• If you connect this projector and a notebook computer, you need output the
display to an external monitor, or output simultaneously to the internal display
and an external monitor. Consult the computer's manual for the setting.
• Depending on the input signal, the automatic adjustment function of this
projector may take some time and not function correctly.
- Note that a composite sync signal or sync-on-green signal may confuse the
automatic adjustment function of this projector (45).
- If the automatic adjustment function does not work correctly, you may not see
the dialog to set the display resolution. In such a case, use an external display
device. You may be able to see the dialog and set an appropriate display
resolution.
(continued on next page)
11
Page 12
Setting up
Connecting with your devices (continued)
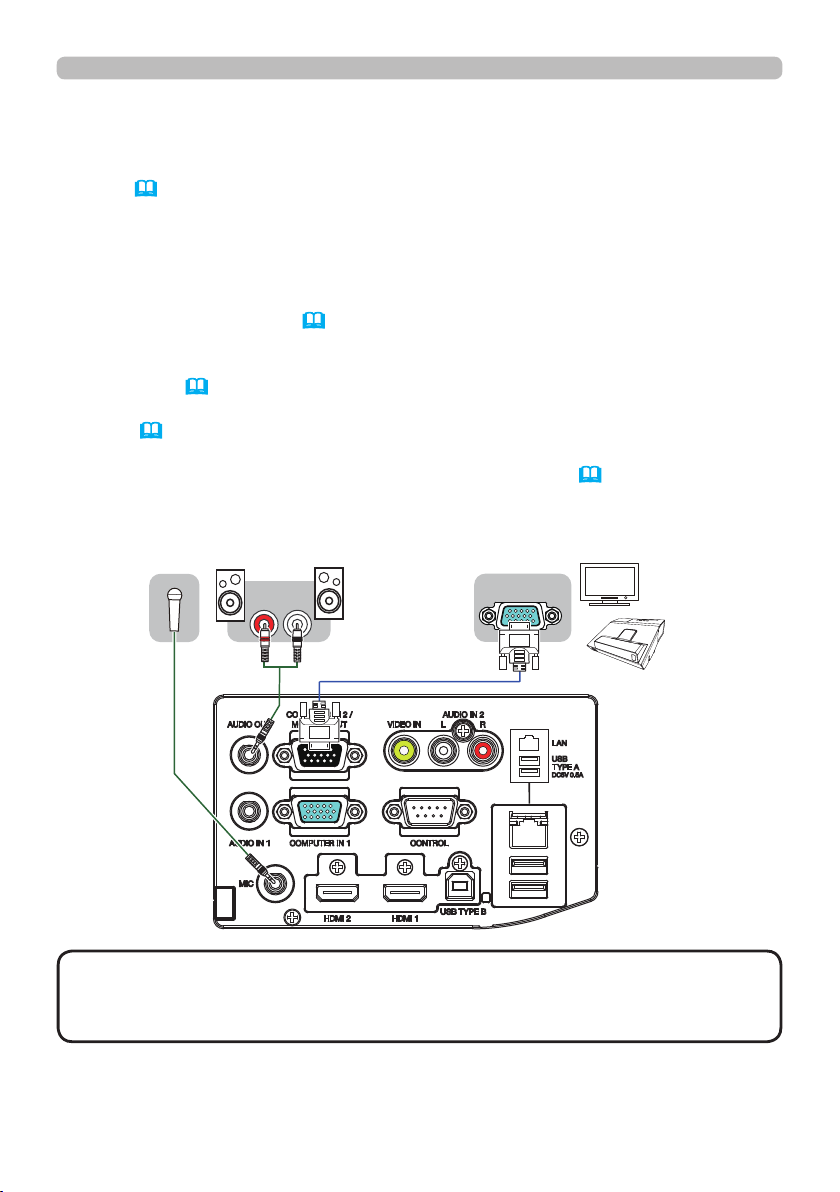
• If you insert a USB storage device, such as a USB memory, into the USB TYPE
A port and select the port as the input source, you can view images stored in the
device (80).
• You can connect a dynamic microphone to the MIC port with a 3.5 mm mini-plug.
In that case, the built-in speaker outputs the sound from the microphone, even
while the sound from the projector is output. You can input line level signal to the
MIC port from equipment such as wireless microphone. In the normal mode, the
volume of the microphone can be adjusted separately from the volume of the
projector using the menu. (53)
In the standby mode, the volume of the microphone is adjustable with the
VOLUME +/- buttons on the remote control, in synchronization with the volume of
the projector. (23)
Even when the sound of projector is set to mute mode by the AUDIO SOURCE
function (53), the volume of the microphone is adjustable.
In both modes (standby or normal), the AV MUTE button on the remote control
works on the sounds of the microphone and the projector. (23)
Microphone
system
NOTE
• If a loud feedback noise is produced from the speaker, move the
Speakers
(with an amplier)
R
L
RGB IN
Monitor
microphone away from the speaker.
• This projector doesn't support plug-in power for the microphone.
(continued on next page)
12
Page 13

Setting up
Connecting with your devices (continued)
To use network functions of the projector, connect the LAN port with the
computer's LAN port, or with an access point that is connected to the computer
with wireless LAN, using a LAN cable. To use NETWORK BRIDGE function,
also connect the CONTROL port and an RS-232C port of the external device to
communicate as a network terminal. See the User's Manual - Network Guide for
details of the network functions.
CAUTION
Computer
RS-232C
USB TYPE A
LAN
►Before connecting the projector to a network system be sure
Access point
USB
wireless
adapter
(optional)
USB storage
device
to obtain the consent of the administrator of the network.
►
Do not connect the LAN port to any network that might have the excessive voltage.
►The designated USB wireless adapter that is sold as an option is required to
use the wireless network function of this projector.
►Before removing the USB storage device from the port of the projector, be
sure to use the REMOVE USB function on the thumbnail screen to secure your
data (83).
►Do not use any extension cable or device when connecting the adapter to
the projector. Before you insert or pull out the USB wireless adapter from the
projector, turn off the power of the projector and pull out the power cord’s plug
from the outlet. Do not touch the USB wireless adapter while the projector is
receiving AC power.
►To connect both the LAN cable and USB device to the projector, use a LAN
cable that is at on the side where the plug’s wire is visible. Otherwise, both of
them cannot be connected correctly, or the wire may break (malfunction).
(continued on next page)
13
Page 14

Setting up
Connecting with your devices (continued)
NOTE
• If an oversized USB storage device blocks the LAN port, use a USB
extension cable to connect the USB storage device.
• The HDMI port of this model is compatible with HDCP (High-bandwidth Digital
Content Protection) and therefore capable of displaying a video signal from
HDCP compatible DVD players or the like.
- The HDMI supports the following signals.
Video signal : 480i@60, 480p@60, 576i@50, 576p@50, 720p@50/60,
1080i@50/60, 1080p@50/60
Audio signal : Format Linear PCM
Sampling frequency 48kHz / 44.1kHz / 32kHz
- This projector can be connected with another equipment that has HDMI
TM
connector, but with some equipment the projector may not work properly,
something like no video.
- Be sure to use an HDMITM cable that has the HDMITM logo.
- Use a Category 2-certied HDMITM cable to input 1080p@50/60 signal to the
projector.
- When the projector is connected with a device having DVI connector, use a
DVI to HDMITM cable to connect with the HDMI input.
• Up to one USB wireless adapter (optional) can be connected to a projector.
14
Page 15
Connecting to a power supply
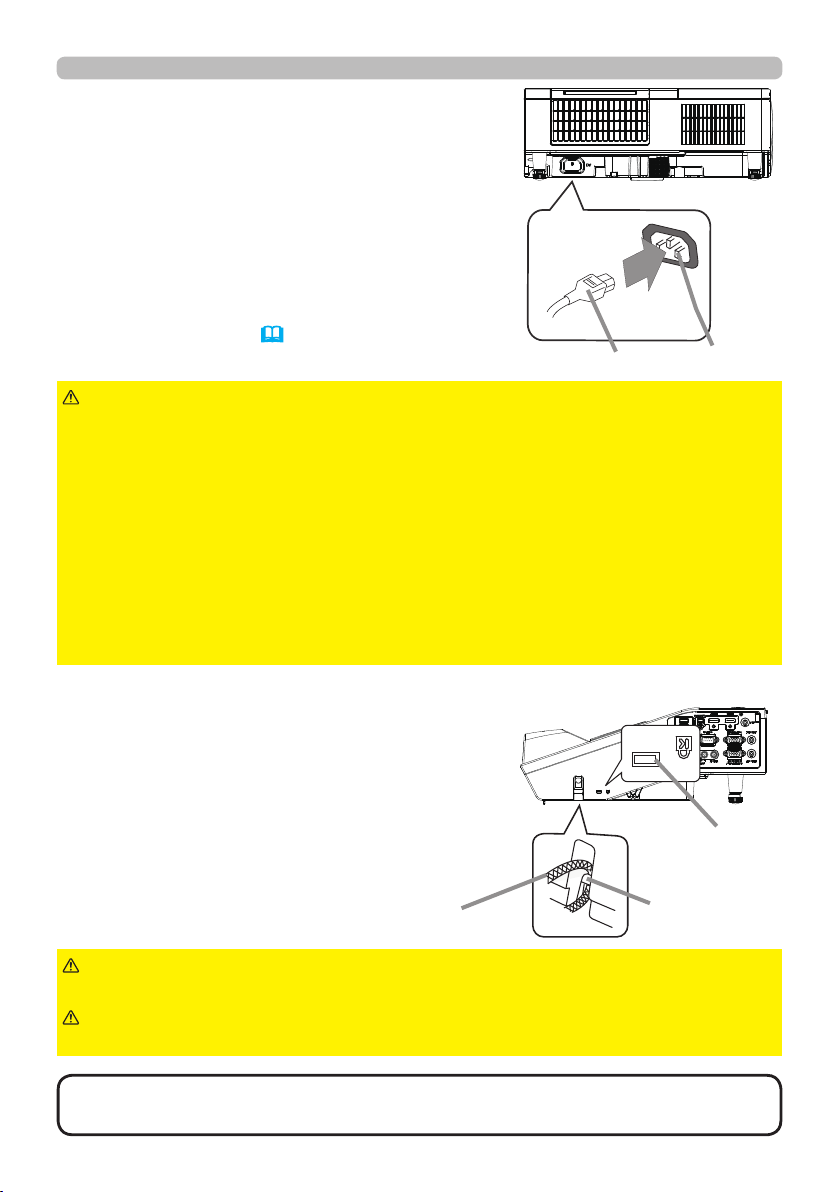
Put the connector of the power cord into the
1.
AC (AC inlet) of the projector.
Firmly plug the power cord’s plug into the
2.
outlet. In a couple of seconds after the
power supply connection, the POWER
indicator will light up in steady orange.
Please remember that when the DIRECT POWER
ON function activated (
power supply make the projector turn on.
60), the connection of the
Power cord
Setting up
AC
WARNING
incorrect or faulty connections may result in re and/or electrical shock.
• Do not touch the power cord with a wet hand.
• Only use the power cord that came with the projector. If it is damaged, consult
your dealer to get a new one. Never modify the power cord.
• Only plug the power cord into an outlet whose voltage is matched to the power
cord. The power outlet should be close to the projector and easily accessible.
Remove the power cord for complete separation.
• Do not distribute the power supply to multiple devices. Doing so may overload
the outlet and connectors, loosen the connection, or result in re, electric shock
or other accidents.
• Do not press the main body of projector on the power cord.
►Please use extra caution when connecting the power cord, as
Using the security bar and slot
A commercial anti-theft chain or wire up to
10 mm in diameter can be attached to the
security bar on the projector.
Also this product has the security slot for
the Kensington lock.
For details, see the manual of the security
tool.
Anti-theft chain or wire
WARNING
from falling down, since it is not designed for it.
CAUTION
It may become too hot.
►Do not use the security bar and slot to prevent the projector
►Do not place anti-theft chain or wire near the exhaust vents.
Security slot
Security bar
NOTE
measures. It is intended to be used as supplemental theft prevention measure.
• The security bar and slot is not comprehensive theft prevention
15
Page 16
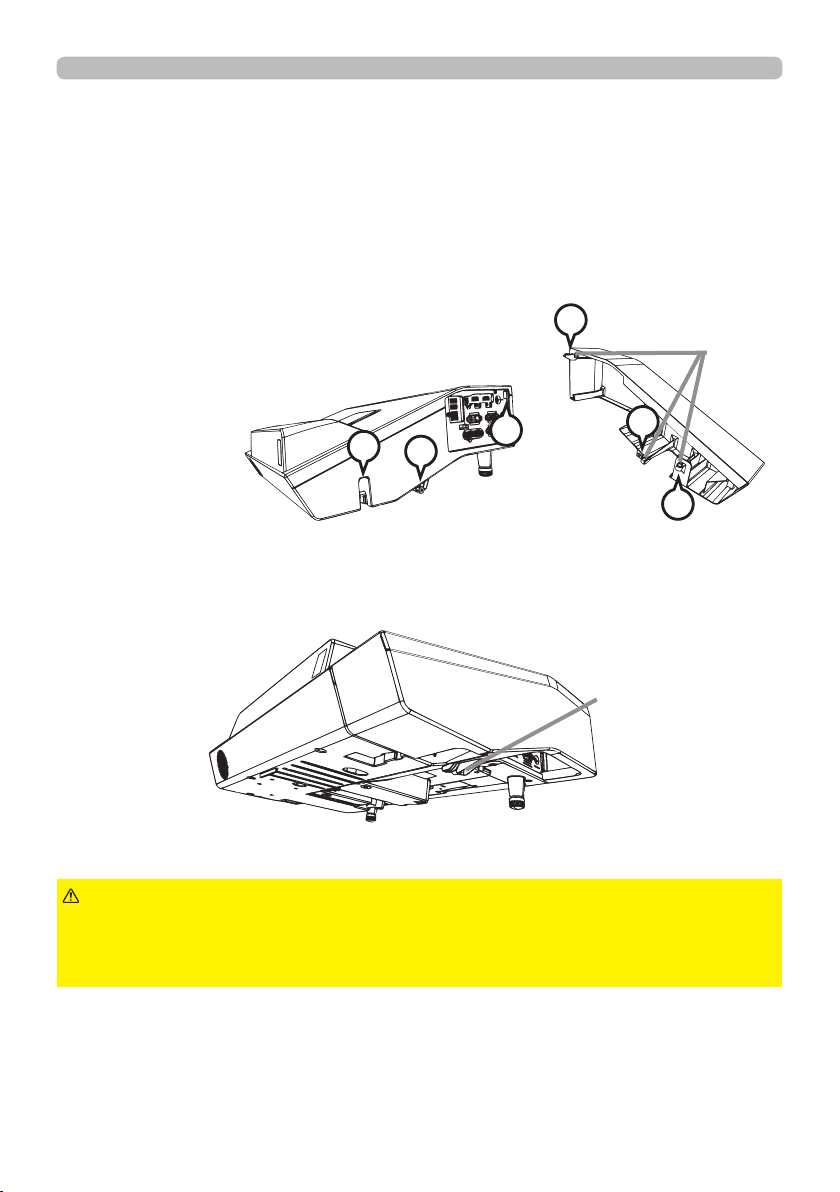
Setting up
Using the cable cover
Utilize the cable cover as the guard and blind for the connecting parts.
Connect the signal cables and the power cord to the projector rst.
1.
Insert the three knobs on the cable cover into the
2.
three holes on the projector as shown in the gure.
Pass the cables through the holes on the bottom of
the cable cover.
1
knobs
2
3
Fix the cover's screw.
3
.
CAUTION
prevent damage to the cables.
► Use the cable cover that is supplied with the projector. Do not attempt any
modications to the cable cover.
► Be careful not to pinch the cables in the cable cover, to
1
3
2
screw
16
Page 17
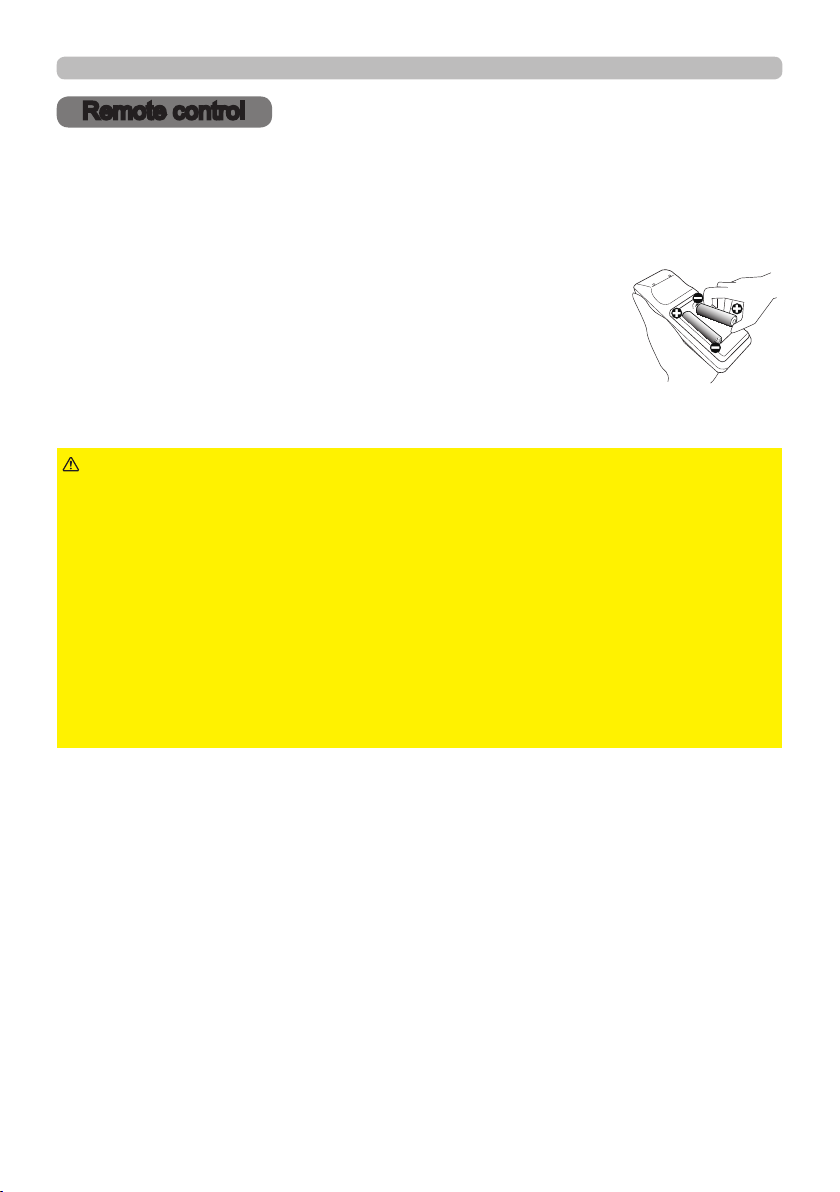
Remote control
Remote control
Installing the batteries
Please insert the batteries into the remote control before using it. If the remote control
starts to malfunction, try to replace the batteries. If you will not use the remote control for
long period, remove the batteries from the remote control and store them in a safe place.
Remove the battery cover.
1.
Align and insert the two AA batteries (HITACHI MAXELL ,
2.
Part No.LR6 or R6P) according to their plus and minus
terminals as indicated in the remote control.
Put the battery cover back to the former state.
3.
WARNING
directed. Improper use may result in battery explosion, cracking or leakage,
which could result in re, injury and/or pollution of the surrounding environment.
• Be sure to use only the batteries specied. Do not use batteries of different
types at the same time. Do not mix a new battery with used one.
•
Make sure the plus and minus terminals are correctly aligned when loading a battery.
• Keep a battery away from children and pets.
• Do not recharge, short circuit, solder or disassemble a battery.
•
Do not place a battery in a re or water. Keep batteries in a dark, cool and dry place.
• If you observe battery leakage, wipe out the leakage and then replace a battery.
If the leakage adheres to your body or clothes, rinse well with water immediately.
• Obey the local laws on disposing the battery.
►Always handle the batteries with care and use them only as
17
Page 18
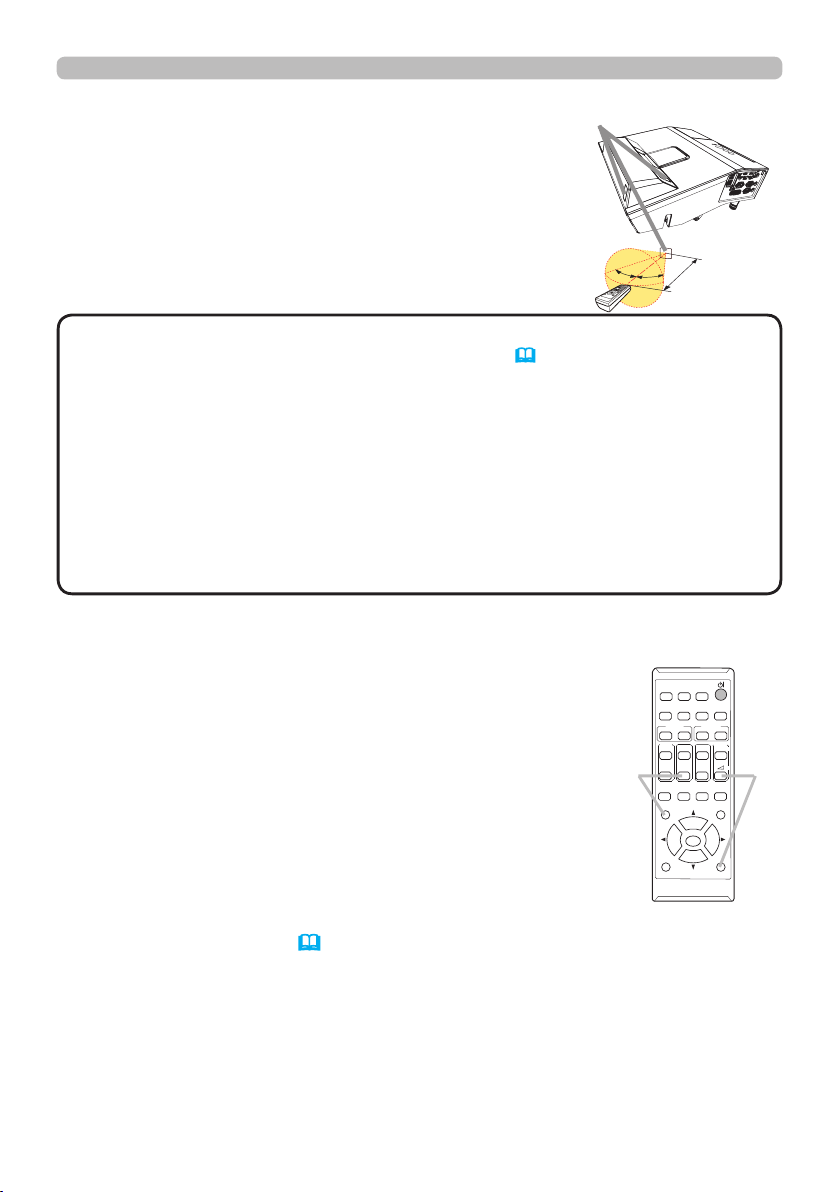
Remote control
About the remote control signal
Remote
sensor
The remote control works with the projector’s remote
sensor. This projector has a remote sensor on the front.
The sensor senses the signal within the following range
when the sensor is active:
60 degrees (30 degrees to the left and right of the sensor)
within 3 meters about.
NOTE
• You can deactivate one of the sensors using the REMOTE RECEIV.
30º
30º
Approx.
3 m
item in the SERVICE menu of the OPTION menu (67) .
•
The remote control signal reected in the screen or the like may be available. If it is
difcult to send the signal to the sensor directly, attempt to make the signal reect.
• The remote control uses infrared light to send signals to the projector (Class 1
LED), so be sure to use the remote control in an area free from obstacles that
could block the remote control’s signal to the projector.
•
The remote control may not work correctly if strong light (such as direct sun
light) or light from an extremely close range (such as from an inverter uorescent
lamp) shines on the remote sensor of the projector. Adjust the position of
projector avoiding those lights.
Changing the frequency of remote control signal
The accessory remote control has the two choices on signal
frequency Mode 1:NORMAL and Mode 2:HIGH. If the remote
control does not function properly, attempt to change the
signal frequency.
In order to set the Mode, please keep pressing the
combination of two buttons listed below simultaneously for
about 3 seconds.
(1) Set to Mode 1:NORMAL... VOLUME - and RESET buttons
(2) Set to Mode 2:HIGH... MAGNIFY OFF and ESC buttons
IWB
INPUT
CALIBRATION
ASPECT
AUTO
ACCENTUALIZER
FOCUS
-
+
-
PAGE
MAGNIFY
MYBUTTON
UP
1
2
DOWNONOFF
KEYSTONE/
FREEZE
PERFECT FIT
TEMPLATE
ESC MENU
ENTER
POSITION
HDCR
D-ZOOM
+
VOLUME
+
ー
AV MUTE
RESET
(1)(2)
Please remember that the REMOTE FREQ. in the SERVICE
item of the OPTION menu
(68)
of the projector to be
controlled should be set to the same mode as the remote
control.
18
Page 19
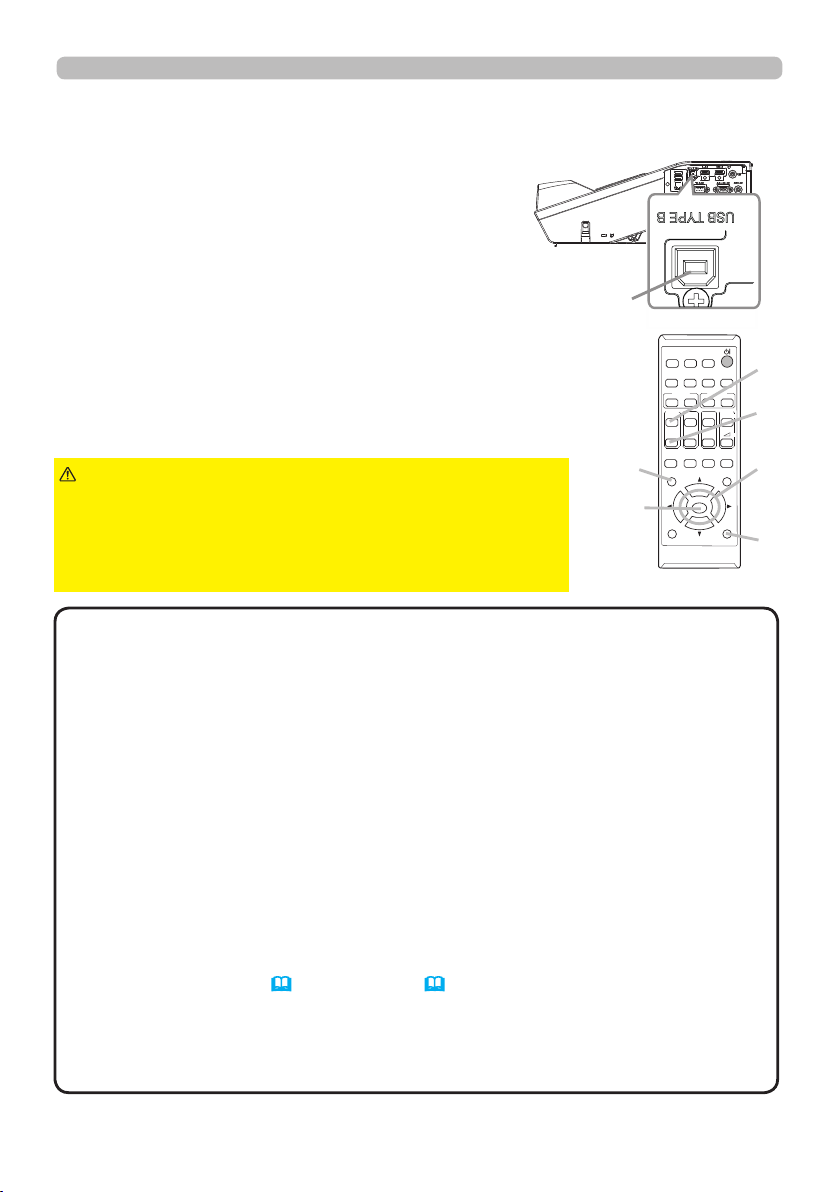
Remote control
Using as a simple PC mouse & keyboard
The accessory remote control works as a simple mouse
and keyboard of the computer, when the projector’s USB
TYPE B port and the computer’s type A USB port are
connected.
USB TYPE B
(1) PAGE UP key: Press PAGE UP button.
(2) PAGE DOWN key: Press PAGE DOWN button.
(3) Mouse left button: Press ENTER button.
(4) Move pointer: Use the cursor buttons ▲, ▼, ◄ and ►.
(5) ESC key: Press ESC button.
(6) Mouse right button: Press RESET button.
NOTICE
function could damage your equipment. While using this
function, please connect this product only to a computer. Be
sure to check your computer’s manuals before connecting this
product to the computer.
►Improper use of the simple mouse & keyboard
port
(5)
(3)
IWB
INPUT
CALIBRATION
ASPECT
AUTO
ACCENTUALIZER
FOCUS
-
+
-
PAGE
MAGNIFY
MYBUTTON
UP
1
2
DOWNONOFF
KEYSTONE/
FREEZE
PERFECT FIT
TEMPLATE
ESC MENU
ENTER
POSITION
(1)
HDCR
D-ZOOM
+
VOLUME
+
(2)
ー
AV MUTE
(4)
RESET
(6)
NOTE
When the simple mouse & keyboard function of this product does not work
correctly, please check the following.
• When a USB cable connects this projector with a computer having a built-in pointing
device (e.g. track ball) like a laptop PC, open BIOS setup menu, then select the external
mouse and disable the built-in pointing device, because the built-in pointing device may
have priority to this function.
•
Windows XP SP3 or higher is required for this function. And also this function may not work
depending on the computer’s congurations and mouse drivers. This function can work with the
computer which can operate general USB mouse or keyboard.
• You cannot do things like press two buttons at once (for instance, pressing two buttons
at the same time to move the mouse pointer diagonally).
•
This function is activated only when the projector is working properly. This function is not
available in any of the following cases:
- While the lamp is warming up. (The POWER indicator blinks in green.)
- When either USB TYPE A or USB TYPE B port is selected.
- While displaying BLANK
(23)
, TEMPLATE
(58)
or MY IMAGE screen.
- When any menu is displayed on the screen.
-
While using the cursor buttons to operate the sound or screen functions such as adjusting the
sound volume, correcting the keystone, correcting the picture position and magnifying the screen.
19
Page 20
Power on/off
Power on/off
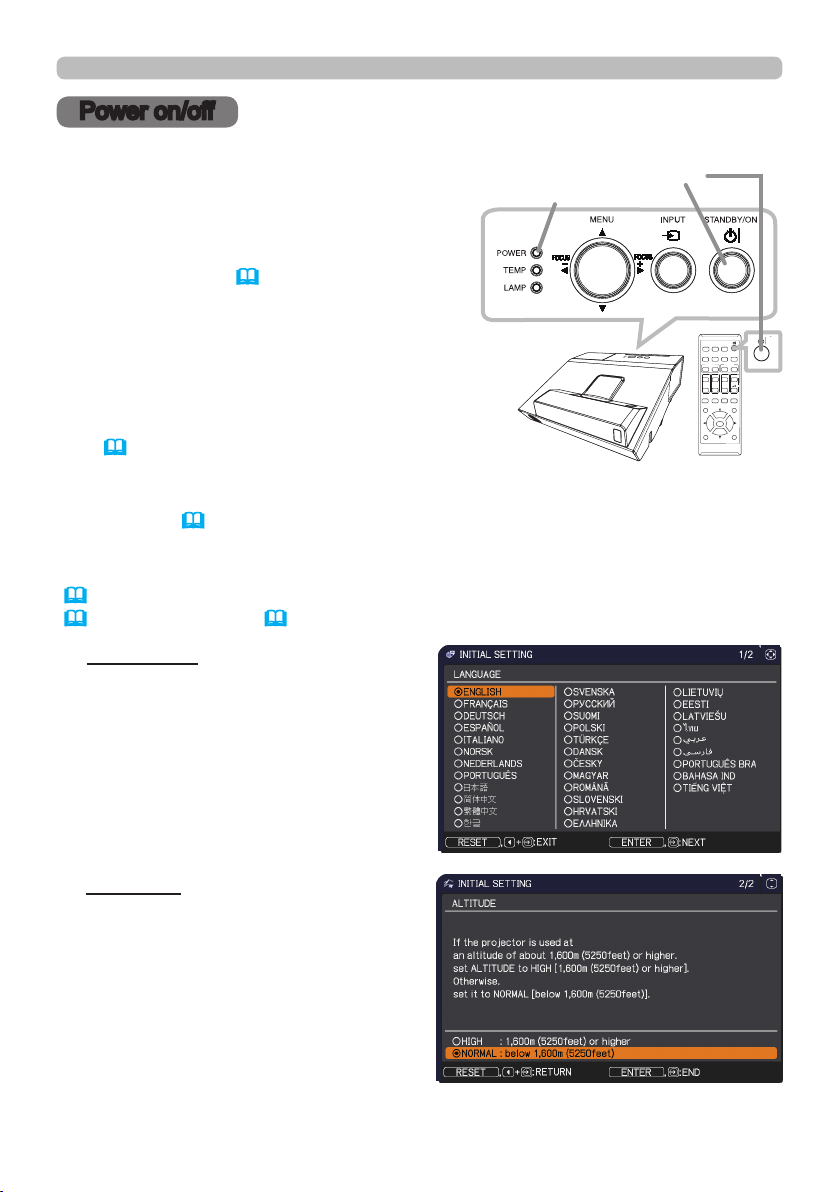
Turning on the power
Make sure that the power cord is rmly
1.
and correctly connected to the projector
and the outlet.
Make sure that the POWER indicator is
2.
steady orange (107).
Press STANDBY/ON button on the
3.
projector or the remote control. The
projection lamp lights up, and the POWER
indicator begins to blink green. When the
power is completely on, the indicator will
stop blinking and light in steady green
(107).
To display the picture, select an input signal according to the section Selecting an
input signal (
24).
The INITIAL SETTING Menu will be displayed by factory default upon startup.
Once the INITIAL SETTING Menu is set, it will not appear until FACTORY RESET
73) is executed. If you wish to change the settings, refer to the LANGUAGE
(
(54) and ALTITUDE (66) menu.
STANDBY/ON button
POWER indicator
IWB
INPUT
ASPECT
AUTO
FOCUS
+
-
PAGE
MAGNIFY
UP
DOWNONOFF
KEYSTONE/
PERFECT FIT
TEMPLATE
ESC MENU
ENTER
POSITION
CALIBRATION
ACCENTUALIZER
HDCR
D-ZOOM
+
-
VOLUME
MYBUTTON
1
+
ー
2
FREEZE
AV MUTE
RESET
(1) LANGUAGE: Use the ▲/▼/◄/►
buttons to select the desired language
and press the ENTER button of the
remote control or the INPUT button of
the projector to execute.
(2) ALTITUDE: Use the ▲/▼ buttons to
select NORMAL for altitude below 1600
m (5250 feet), otherwise select HIGH
and press the ENTER button of the
remote control or the INPUT button of
the projector to execute.
(continued on next page)
20
Page 21
Power on/off
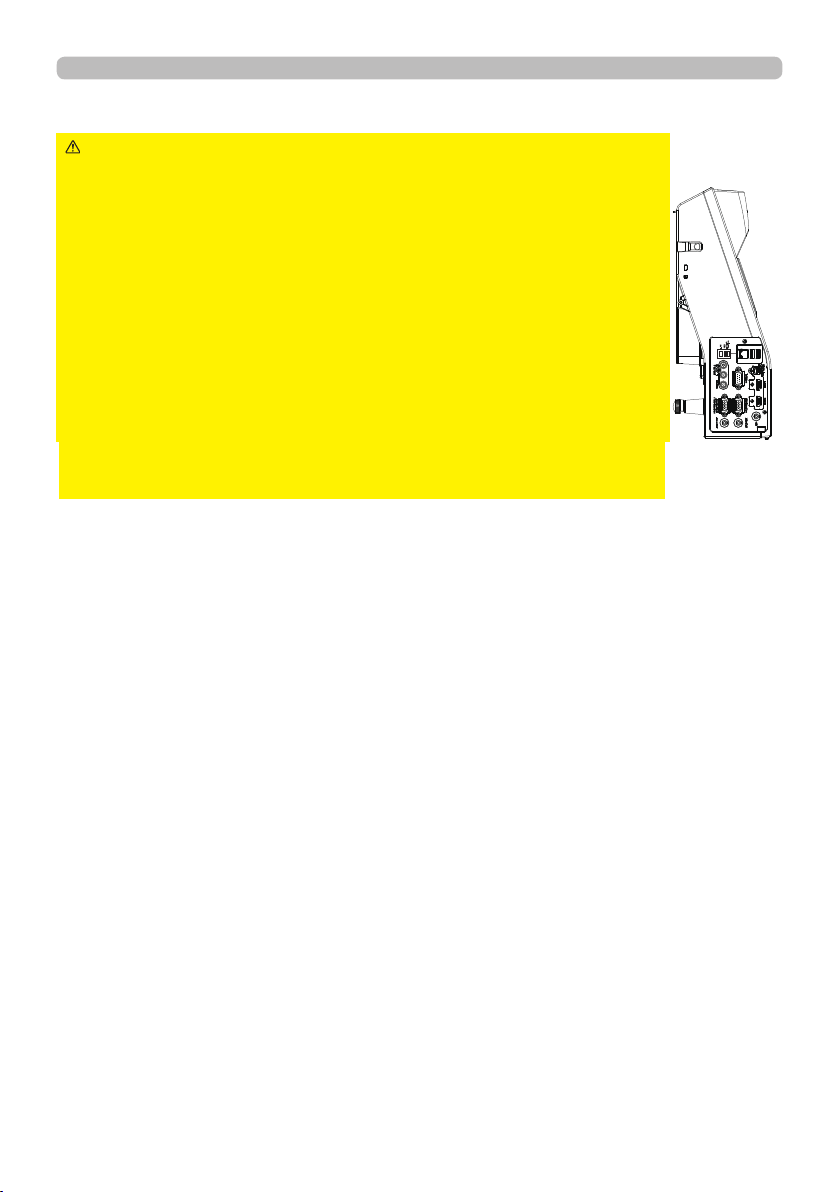
WARNING ►Never look into the projection window while the
projection lamp lights, since the projection lamp ray may cause a
trouble on your eyes.
►Do not place the projector vertically as shown in the gure on
the right. It could cause malfunction or injury. Tabletop use must be
setup with the designated optional accessories.
►The projection window of this machine is made of glass. It can be
damaged by excessive force or an impact. Read the following
important warnings carefully, and follow them for your own safety.
• Do not apply excessive force on or allow impact to the projection
window.
• Keep the projector out of the reach of children.
• If the projection window is broken, the projected image will be
distorted. Never touch a broken projection window, and contact your
dealer.
21
Page 22
Power on/off
Turning off the power
Press the STANDBY/ON button on the projector or the remote control.
1.
The message “Power off?” will appear on the screen for about 5 seconds.
Press the STANDBY/ON button again while the message appears.
2.
The projector lamp will go off, and the POWER indicator will begin blinking in
orange. Then POWER indicator will stop blinking and light in steady orange
when the lamp cooling is complete (107).
Do not turn the projector on for about 10 minutes or more after turning it off.
Also, do not turn the projector off shortly after turning it on. Such operations might
cause the lamp to malfunction or shorten the lifetime of some parts including the lamp.
WARNING
during use or just after use, since it is too hot.
►Remove the power cord for complete separation. The power outlet should be
close to the projector and easily accessible.
NOTE
prior to the connected devices.
•
This projector has the function that can make the projector automatically turn on/
off. Please refer to the DIRECT POWER ON
items of the OPTION menu.
• Turn the power on/off in right order. Please power on the projector
►Do not touch around the lamp cover and the exhaust vents
(60)
and AUTO POWER OFF
(61)
22
Page 23
Operating
Operating
Adjusting the volume
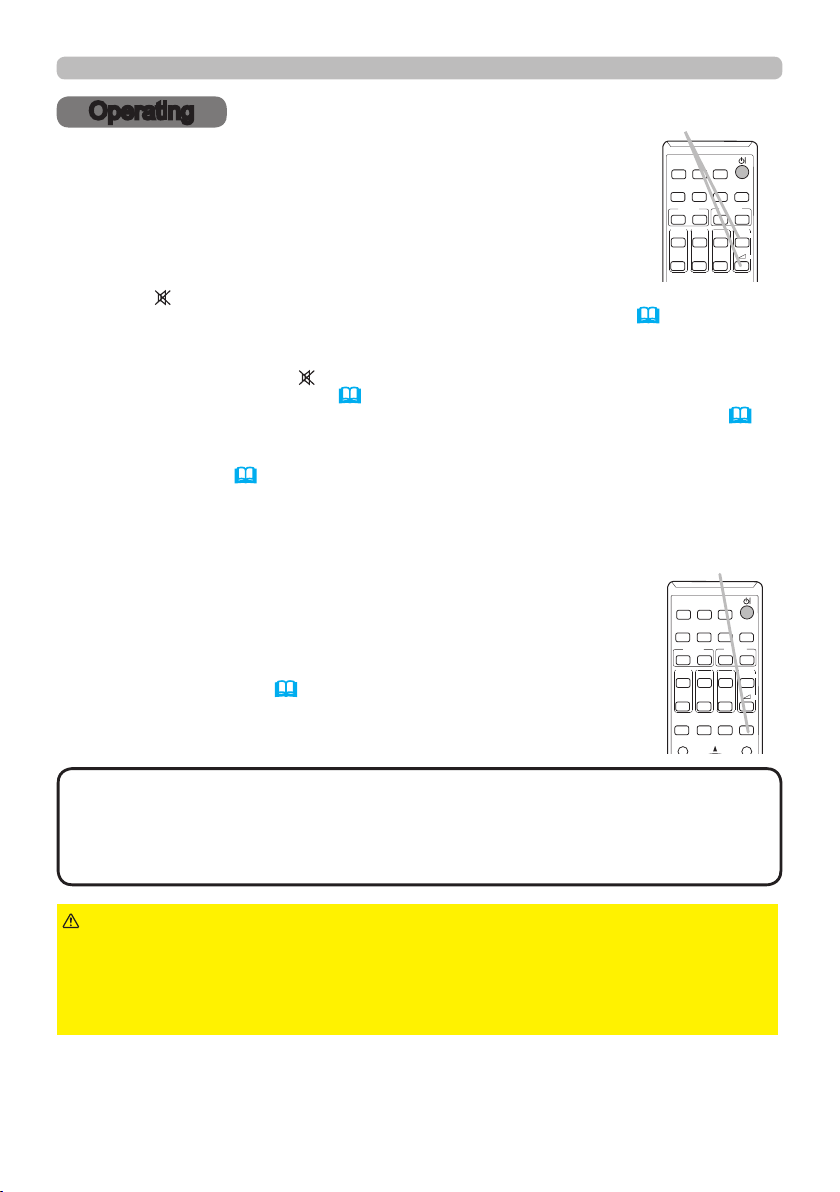
Use the VOLUME +/VOLUME - buttons to adjust the volume.
1.
A dialog will appear on the screen to aid you in adjusting the
volume. If you do not do anything, the dialog will automatically
disappear after about ten seconds.
● When
is selected for current picture input port, the volume adjustment is
VOLUME +/- button
IWB
INPUT
ASPECT
AUTO
FOCUS
+
-
PAGE
MAGNIFY
UP
DOWNONOFF
KEYSTONE/
disabled. Please see AUDIO SOURCE item of AUDIO menu (53).
● Even if the projector is in the standby mode, the volume is adjustable when
both of the following conditions are true:
- An option other than is selected for STANDBY in the AUDIO SOURCE
item of the AUDIO menu (53).
-
NORMAL is selected in the STANDBY MODE item of the SETUP menu
● In the standby mode, the volume of the microphone is adjustable with the
VOLUME +/- buttons on the remote control, in synchronization with the volume
of the projector (12).
Temporarily muting the screen and audio output
AV MUTE button
Press AV MUTE button on the remote control.
1.
The BLANK screen will be displayed instead of the screen of
input signals and the sound from the AUDIO OUT port will be
muted. Please refer to the BLANK item in SCREEN menu about
the BLANK screen (54).
To exit from the AV MUTE mode and restore the screen and
audio, press AV MUTE button again.
INPUT
ASPECT
AUTO
FOCUS
-
PAGE
MAGNIFY
UP
DOWNONOFF
KEYSTONE/
PERFECT FIT
TEMPLATE
ESC MENU
CALIBRATION
ACCENTUALIZER
D-ZOOM
-
MYBUTTON
1
2
(52).
IWB
CALIBRATION
ACCENTUALIZER
-
+
MYBUTTON
1
2
FREEZE
D-ZOOM
HDCR
VOLUME
+
HDCR
VOLUME
AV MUTE
+
ー
+
+
ー
NOTE
• The projector automatically exits from the AV MUTE mode
when some control buttons are pressed.
•
The audio is output from the external audio system connected to
the AUDIO OUT port.
WARNING
is on, use the AV MUTE function above .
Taking any other action may cause the damage on the projector.
Blocking the beam by something causes high temperature and could result in
re or smoke.
►If you wish to have a blank screen while the projector's lamp
23
Page 24
Operating
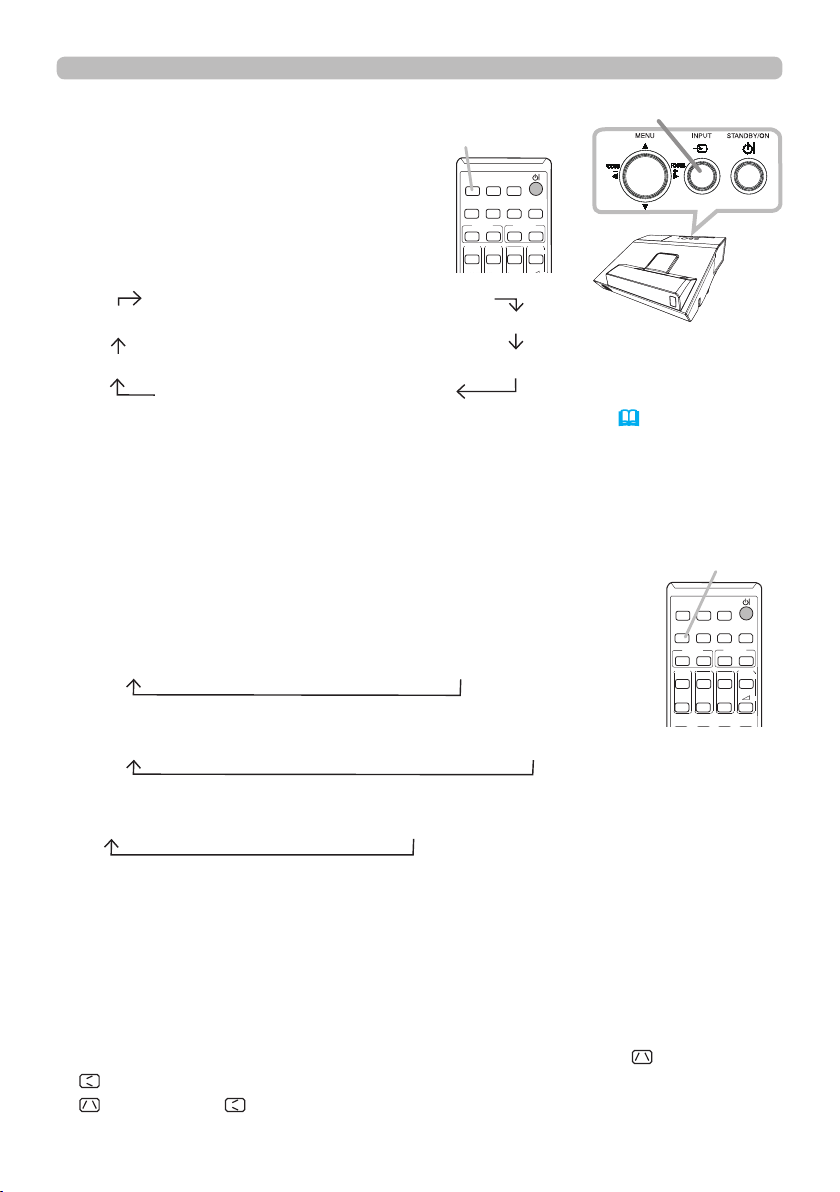
Selecting an input signal
Press INPUT button on the projector.
1.
Each time you press the button, the
projector switches its input port from
the current port as below.
COMPUTER IN1 COMPUTER IN2
INPUT button
IWB
INPUT
CALIBRATION
ASPECT
AUTO
ACCENTUALIZER
D-ZOOM
FOCUS
-
+
-
PAGE
VOLUME
MAGNIFY
MYBUTTON
ON
UP
1
HDCR
+
INPUT button
+
VIDEO LAN
HDMI
2 USB TYPE A
●
While ON is selected for AUTO SEARCH item in OPTION menu (60), the projector
HDMI 1 USB TYPE B
will keep checking the ports in above order repeatedly till an input signal is detected.
●
It may take several seconds to project the images from the USB TYPE B port.
Selecting an aspect ratio
Press ASPECT button on the remote control.
1.
Each time you press the button, the projector switches the
mode for aspect ratio in turn.
For a computer signal
NORMAL 4:3 16:9 16:10 NATIVE
For an HDMI
TM
signal
NORMAL 4:3 16:9 16:10 14:9 NATIVE
For a video signal or component video signal
4:3 16:9 16:10 14:9 NATIVE
For an input signal from the LAN, USB TYPE A or USB TYPE B port, or
if there is no signal
8116A, 8117A: 4:3 (xed)
8118WA, 8119WA: 16:10 (xed)
ASPECT button
IWB
INPUT
CALIBRATION
ASPECT
AUTO
ACCENTUALIZER
FOCUS
+
-
PAGE
MAGNIFY
UP
DOWNONOFF
KEYSTONE/
PERFECT FIT
TEMPLATE
-
MYBUTTON
1
2
FREEZE
D-ZOOM
HDCR
VOLUME
AV MUTE
+
+
ー
● ASPECT button does not work when no proper signal is inputted.
● NORMAL mode keeps the original aspect ratio setting.
● The on-screen menu might be displayed outside of the image display area
depending on the adjustment value of the ASPECT, D-ZOOM, KEYSTONE,
KEYSTONE and PERFECT FIT. Changing the values of ASPECT, D-ZOOM,
KEYSTONE, KEYSTONE and PERFECT FIT may x the symptom.
24
Page 25
Operating
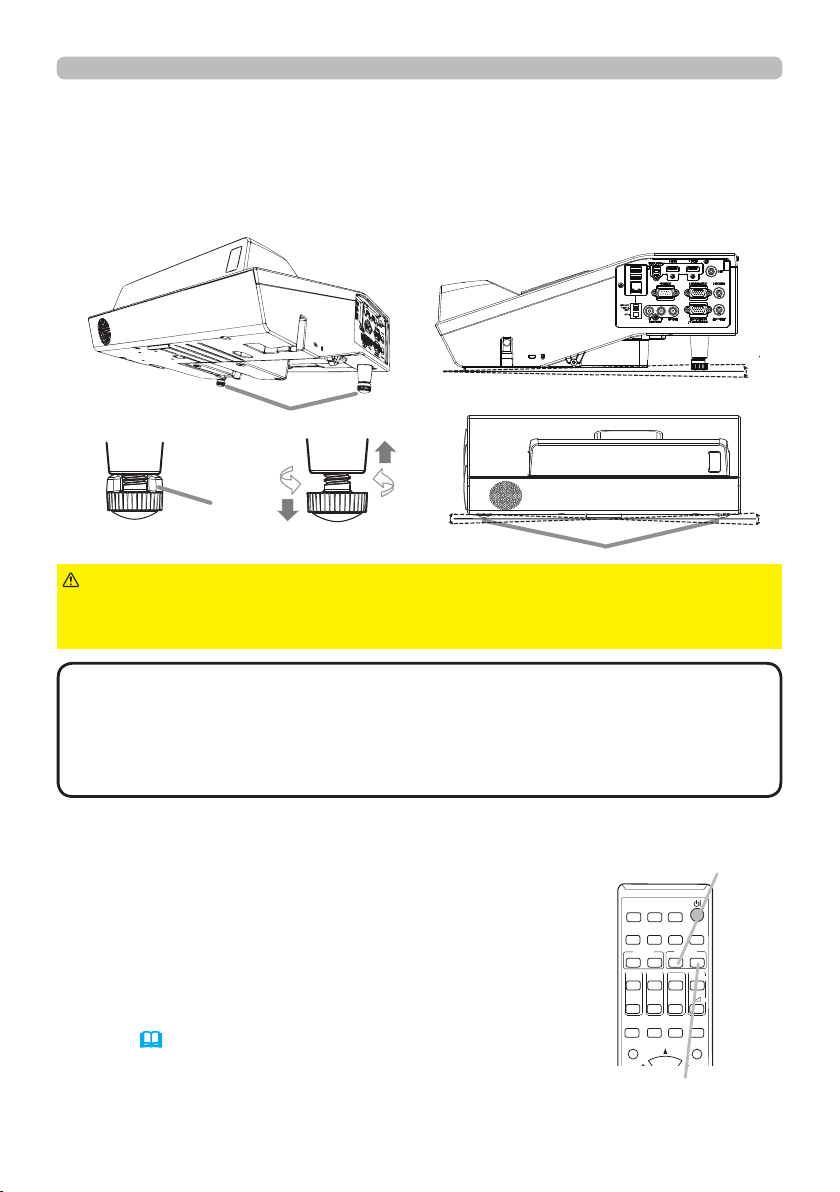
Adjusting the projector's elevator
The projector has 2pcs Rear foot for horizontals and inclinations. Spacers on
the each elevator foot are installed at the time of shipment, and projector is in a
condition to be able to just project. If necessary, detach the spacer, and the elevator
feet can be manually twisted to make more precise adjustments.
-1~1°
Rear foot
Spacer
Rear foot
WARNING
►Keep the spacers away from children and pets. Be careful not
to let them swallow the spacers. If swallowed, consult a physician immediately
for emergency treatment.
-1~1°
NOTE
• The adjustment angle can be adjusted up to plus or minus 1° each of
foot.
•
After the foot is adjusted, it is possible to return it to the state of the shipment with a spacer.
If change the setting place of the projector, it will recommend keep and reuse the
spacers.
Adjusting the zoom and focus
Press the D-ZOOM + or D-ZOOM - button on the remote
control to display D-ZOOM dialog on screen.
Use the D-ZOOM + and D-ZOOM - buttons to adjust the
picture size.
To nish the operation, do not touch these buttons for about
ten seconds until the dialog is disappeared.
● If you want to expand a part of the image, use the magnify
function (29).
(continued on next page)
D-ZOOM - button
IWB
INPUT
CALIBRATION
ASPECT
AUTO
ACCENTUALIZER
HDCR
D-ZOOM
FOCUS
+
-
+
-
PAGE
KEYSTONE/
PERFECT FIT
ESC MENU
UP
DOWNONOFF
MAGNIFY
TEMPLATE
MYBUTTON
1
2
FREEZE
VOLUME
AV MUTE
+
ー
D-ZOOM + button
25
Page 26
Operating
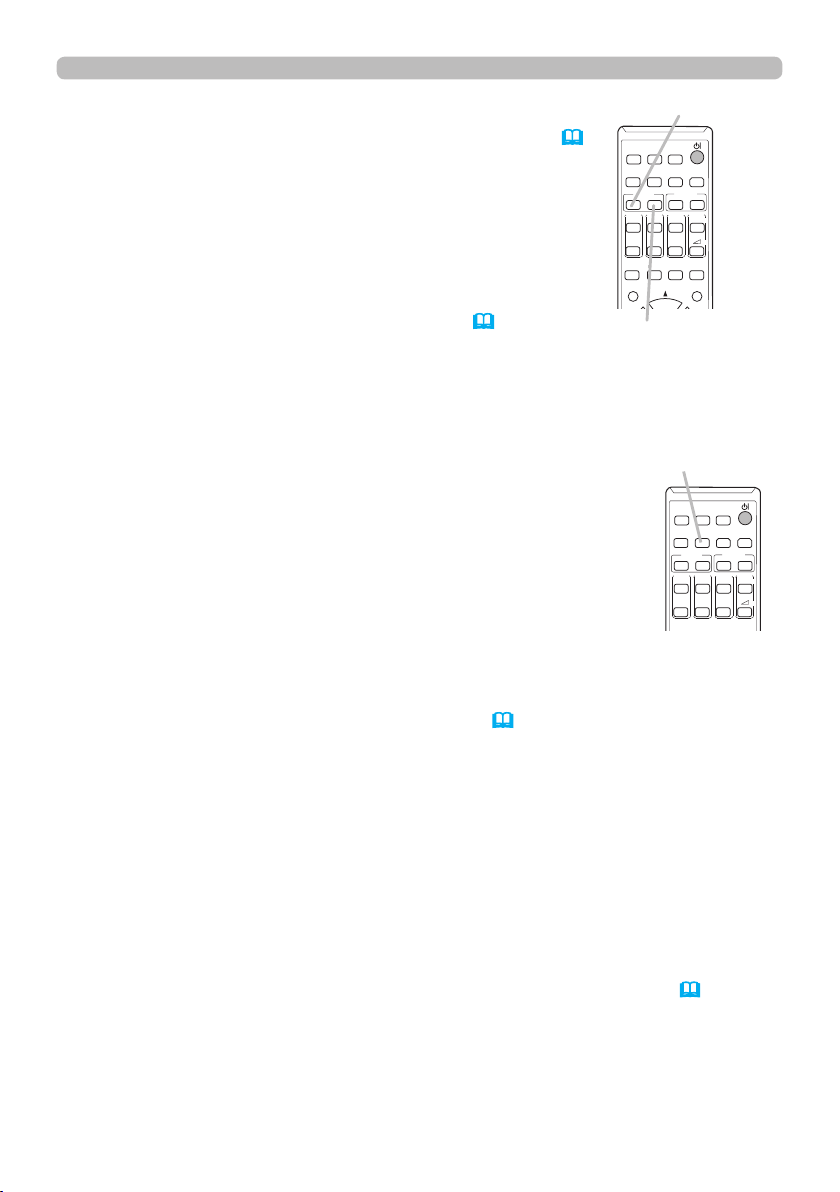
Press the FOCUS + or FOCUS - button on the remote
control, or FOCUS + or FOCUS - button on the projector (5)
while no menu is on screen, to display the FOCUS box on
screen. Use the FOCUS + and FOCUS - buttons to adjust
the screen focus. After the focus adjustment, wait for a while
until the FOCUS box is disappeared, if you want to display
any other menu on screen by pushing the MENU button on
the projector.
● The ◄/►/▲/▼ buttons on the projector work only as the
cursor buttons while the template is displayed (58).
FOCUS - button
IWB
INPUT
CALIBRATION
ASPECT
AUTO
ACCENTUALIZER
HDCR
D-ZOOM
FOCUS
+
-
+
-
PAGE
KEYSTONE/
PERFECT FIT
ESC MENU
UP
DOWNONOFF
MAGNIFY
TEMPLATE
MYBUTTON
1
2
FREEZE
VOLUME
AV MUTE
+
ー
FOCUS + button
Using the automatic adjustment feature
Press AUTO button on the remote control.
1.
Pressing this button performs the following.
For a computer signal
The vertical position, the horizontal position and the horizontal
phase will be automatically adjusted.
Make sure that the application window is set to its maximum size
prior to attempting to use this feature. A dark picture may still be
incorrectly adjusted. Use a bright picture when adjusting.
For a video signal
The video format best suited for the respective input signal will be selected
automatically. This function is available only when the AUTO is selected for
44).
the VIDEO FORMAT item in the INPUT menu (
The vertical position and
horizontal position will be automatically set to the default.
For a component video signal
The vertical position and horizontal position will be automatically set to the default.
The horizontal phase will be automatically adjusted.
● The automatic adjustment operation requires approx. 10 seconds. Also please
note that it may not function correctly with some input.
● When this function is performed for a video signal, a certain extra such as a line
may appear outside a picture.
● When this function is performed for a computer signal, a black frame may be
displayed on the edge of the screen, depending on the PC model.
The items adjusted by this function may vary when the FINE or DISABLE is selected
●
for the AUTO ADJUST item of the SERVICE item in the OPTION menu (
AUTO button
IWB
INPUT
ASPECT
AUTO
FOCUS
+
-
PAGE
MAGNIFY
UP
DOWNONOFF
KEYSTONE/
PERFECT FIT
TEMPLATE
66).
CALIBRATION
ACCENTUALIZER
D-ZOOM
-
MYBUTTON
1
2
FREEZE
HDCR
VOLUME
AV MUTE
+
+
ー
26
Page 27
Operating
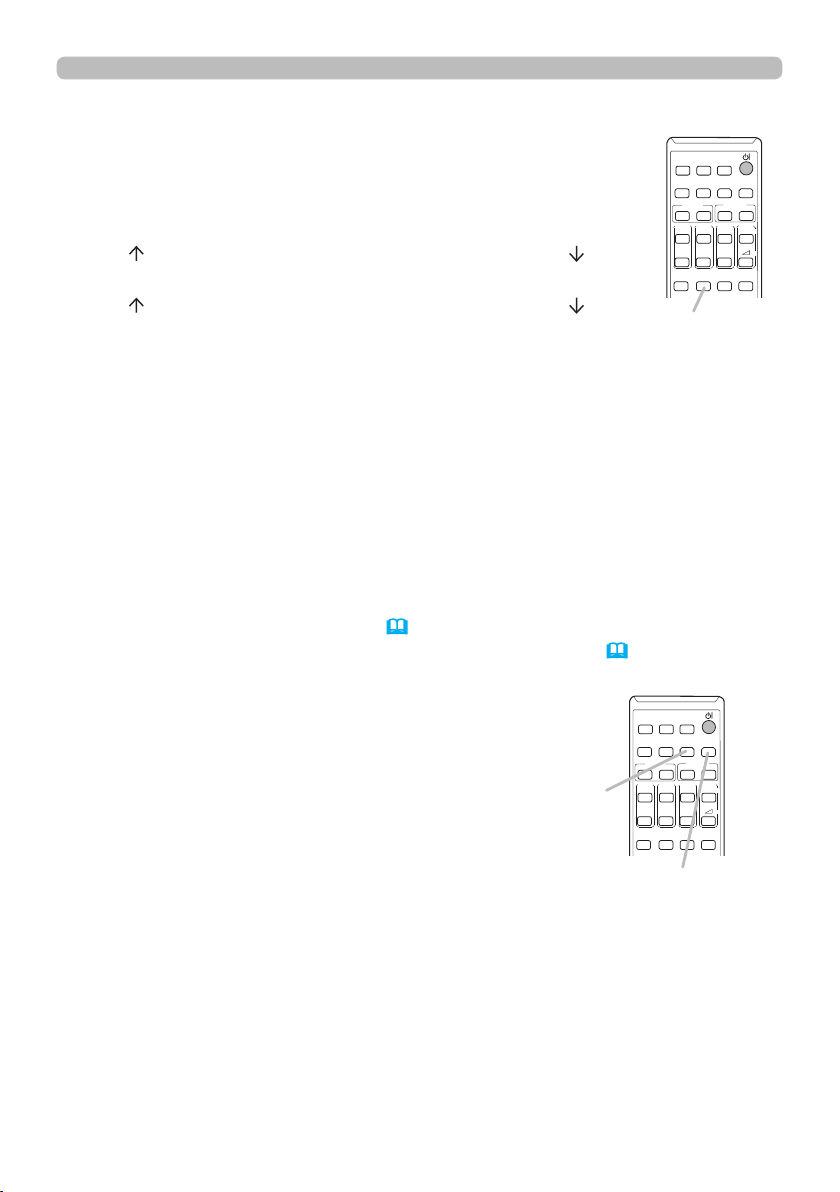
Using the TEMPLATE feature
Press TEMPLATE button on the remote control.
1.
Each time you press the button, the projector switches the
mode for TEMPLATE in turn.
TEST PATTERN DOT-LINE1 DOT-LINE2 DOT-LINE3
HAS-WM05 DOT-LINE4
HAS-WM03
MAP2 MAP1 CIRCLE2 CIRCLE1
TEMPLATE button
● TEMPLATE button does not work when no proper signal is inputted.
Other buttons
HDCR: Displays the HDCR menu (36).
ACCENTUALIZER: Displays the ACCENTUALIZER menu (36).
INPUT
ASPECT
PAGE
ACCENTUALIZER
button
KEYSTONE/
PERFECT FIT
FOCUS
-
UP
DOWNONOFF
IWB
AUTO
+
MAGNIFY
TEMPLATE
INPUT
ASPECT
FOCUS
-
PAGE
UP
DOWNONOFF
KEYSTONE/
PERFECT FIT
CALIBRATION
ACCENTUALIZER
-
MYBUTTON
1
2
FREEZE
D-ZOOM
IWB
AUTO
+
MAGNIFY
TEMPLATE
VOLUME
AV MUTE
ACCENTUALIZER
HDCR
+
CALIBRATION
-
MYBUTTON
1
2
FREEZE
+
ー
D-ZOOM
HDCR
VOLUME
AV MUTE
+
+
ー
HDCR button
27
Page 28

CALIBRATION
KEYSTONE/
ASPECT
ACCENTUALIZER
HDCR
AV MUTE
IWB
AUTO
PAGE
DOWNONOFF
FREEZE
UP
1
2
FOCUS
-
+
D-ZOOM
-
+
+
ー
VOLUME
MAGNIFY
MYBUTTON
INPUT
PERFECT FIT
TEMPLATE
Adjusting the position
Press the POSITION button on the remote control while no menu
1.
is on screen, to display the D-SHIFT
Use the ▲, ▼, ◄ and ► buttons to adjust the picture position.
2.
Press the POSITION button again to nish this operation.
(47)
dialog on screen.
● This is a function to shift the position of the shrunken picture by the D-ZOOM
function.
● When an OSD (On Screen Display) menu is displayed, this operation moves the
position of the OSD menu, but not the position of the picture
● The D-SHIFT adjustment values are not valid when the D-ZOOM is set to 256 (full
screen). (8116A, 8117A)
● The D-SHIFT adjustment values are not valid when the D-ZOOM is set to 320 (full
screen). (8117WA, 8119WA)
Correcting the keystone/perfect t distortions
Press KEYSTONE/PERFECT FIT button
1.
on the remote control. A dialog will appear
on the screen to aid you in correcting the
distortion.
Use the ▲/▼ cursor buttons to select MANUAL or PERFECT
2.
FIT operation, and press the ► button to perform the following.
(1) MANUAL displays a dialog for keystone correction.
Use the ▲/▼ buttons to select KEYSTONE /
KEYSTONE, then use the ◄/► buttons for
adjustment.
(2) PERFECT FIT displays a dialog for adjusting the shape
of the projected image in each of the corners and sides.
To close the dialog and complete this operation, press
KEYSTONE/PERFECT FIT button again. Even if you do not do
anything, the dialog will automatically disappear after about ten
seconds.
● The adjustable range of this function will vary among inputs. For some input,
this function may not work well.
Operating
ESC MENU
POSITION
POSITION button
(32)
.
KEYSTONE/
PERFECT FIT
button
INPUT
ASPECT
AUTO
FOCUS
-
PAGE
MAGNIFY
UP
DOWNONOFF
KEYSTONE/
PERFECT FIT
TEMPLATE
ENTER
IWB
+
(47)
CALIBRATION
ACCENTUALIZER
D-ZOOM
-
MYBUTTON
1
2
FREEZE
RESET
HDCR
VOLUME
AV MUTE
+
+
ー
28
Page 29
Operating
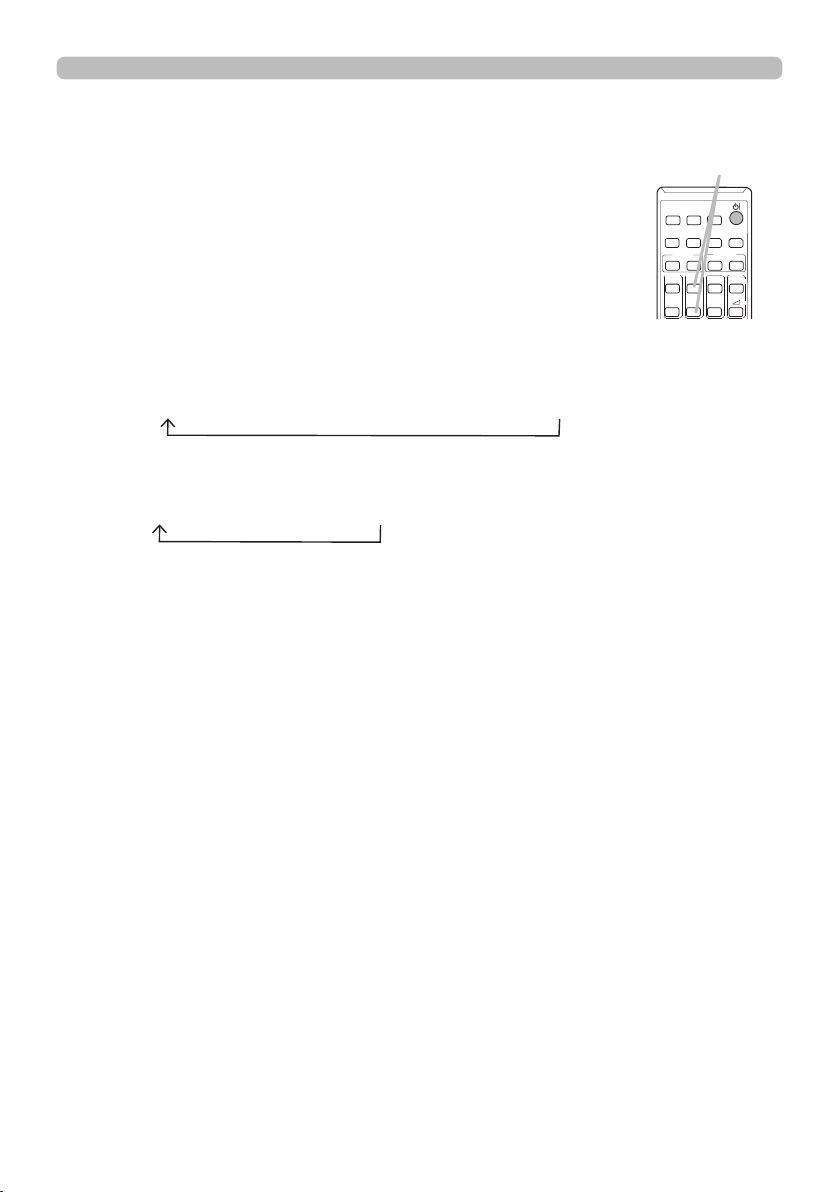
Using the magnify feature
Press the MAGNIFY ON button on the remote control.
1.
The picture will be magnied, and the MAGNIFY dialog will
appear on the screen. When the MAGNIFY ON button is
pressed for the rst time after the projector is turned on, the
picture will be zoomed by 1.5 times. On the dialog, triangle
marks to show each direction will be displayed.
The display magnication of the projector switches in order
2.
with every press of the MAGNIFY ON button.
For computer signals, HDMI
TM
(RGB) signals, input signals from the
MAGNIFY
ON/OFF button
IWB
INPUT
CALIBRATION
ASPECT
AUTO
ACCENTUALIZER
D-ZOOM
FOCUS
-
+
-
PAGE
MAGNIFY
MYBUTTON
UP
1
2
DOWNONOFF
LAN, USB TYPE A or USB TYPE B port
1.5 times 2 times 3 times 4 times 1 time
For video signals, component video signals or HDMITM (Component)
signals
1.5 times 2 times 1 time
While the triangles are displayed on the dialog, use the ▲/▼/◄/► cursor
3.
buttons to shift the magnifying area.
Press the MAGNIFY OFF button on the remote control to exit magnication.
4.
● The MAGNIFY dialog will automatically disappear in several seconds with no
operation. The dialog will appear again if the MAGNIFY ON button is pressed
when the dialog has automatically disappeared.
● The magnication is automatically disabled when the displaying signal or its
display condition is changed.
● While the magnication is active, the keystone distortion condition may vary.
It will be restored when the magnication is disabled.
● Some horizontal stripes might be visible on the image while magnication is
active.
● This function is not available in the following cases:
- A sync signal in the range not supported is input.
- There is no input signal.
VOLUME
HDCR
+
+
ー
29
Page 30
Operating
Temporarily freezing the screen
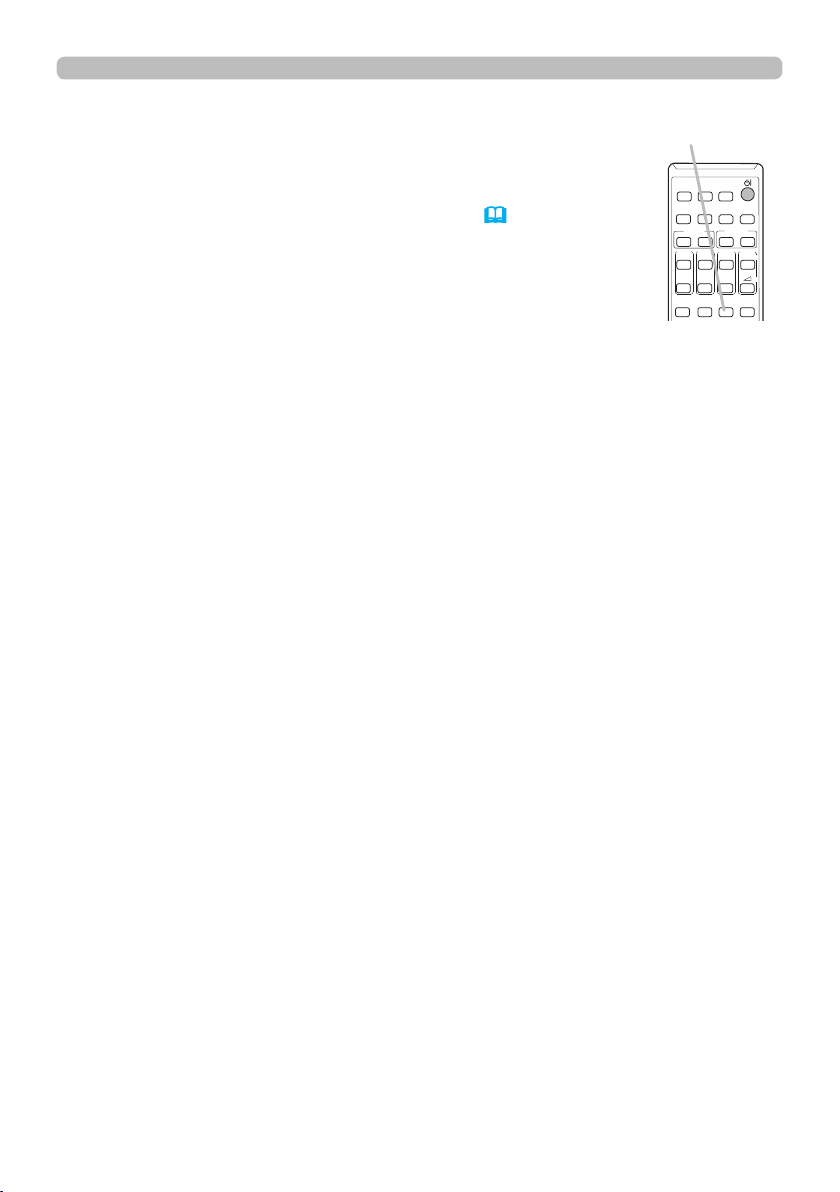
Press the FREEZE button on the remote control.
1.
The “FREEZE” indication will appear on the screen (however,
the indication will not appear when the OFF is selected for
the MESSAGE item in the SCREEN menu (56)), and the
projector will go into the FREEZE mode, which the picture is
frozen.
To exit the FREEZE mode and restore the screen to normal,
press the FREEZE button again.
● The projector automatically exits from the FREEZE mode when some control
buttons are pressed.
● If the projector continues projecting a still image for a long time, the LCD
panel might possibly be burned in. Do not leave the projector in the FREEZE
mode for too long.
● Images might appear degraded when this function is operated, but it is not a
malfunction.
FREEZE button
IWB
INPUT
CALIBRATION
ASPECT
AUTO
ACCENTUALIZER
FOCUS
+
-
PAGE
MAGNIFY
MYBUTTON
UP
1
2
DOWNONOFF
KEYSTONE/
FREEZE
PERFECT FIT
TEMPLATE
HDCR
D-ZOOM
+
-
VOLUME
+
ー
AV MUTE
30
Page 31
CALIBRATION
KEYSTONE/
ASPECT
ACCENTUALIZER
HDCR
AV MUTE
IWB
AUTO
PAGE
DOWNONOFF
FREEZE
UP
1
2
FOCUS
-
+
D-ZOOM
-
+
+
ー
VOLUME
MAGNIFY
MYBUTTON
INPUT
PERFECT FIT
TEMPLATE
Operating
Using the menu function
This projector has the following menus:
PICTURE, IMAGE, INPUT, SETUP, AUDIO, SCREEN, OPTION, NETWORK,
SECURITY and EASY MENU.
EASY MENU consists of functions often used, and the other menus are classied
into each purpose and brought together as the ADVANCED MENU.
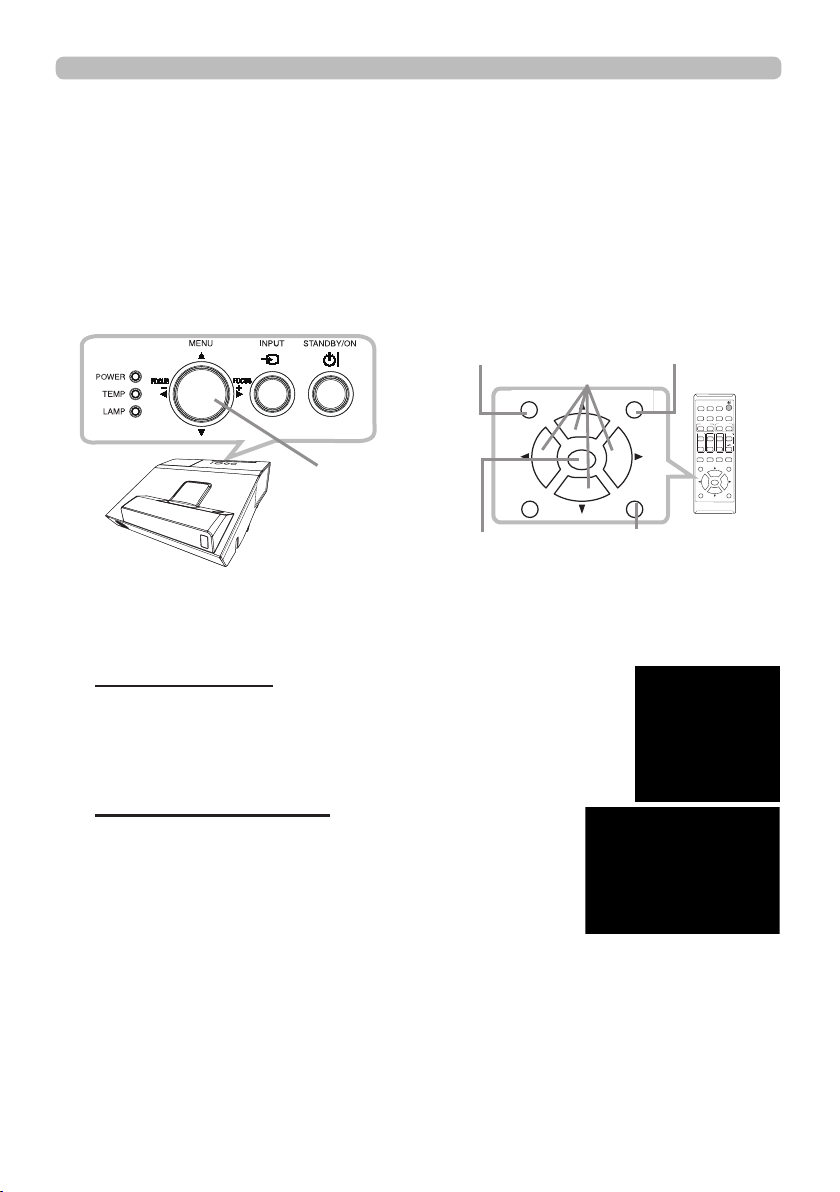
Each of these menus is operated using the same methods. While the projector
is displaying any menu, the MENU button on the projector works as the cursor
buttons. The basic operations of these menus are as follows.
ESC button
MENU button
Cursor buttons
ESC MENU
ENTER
MENU button
(Cursor buttons)
ENTER button
To start the MENU, press the MENU button. The MENU you last used (EASY
1.
or ADVANCED) will appear. EASY MENU has priority to appear just after
POSITION
RESET
RESET button
powered on.
In the EASY MENU
2.
(1) Use the ▲/▼ cursor buttons to select an item to
operate. If you want to change it to the ADVANCED
MENU, select the ADVANCED MENU.
(2) Use the ◄/► cursor buttons to operate the item.
In the ADVANCED MENU
(1) Use the ▲/▼ cursor buttons to select a menu.
If you want to change it to the EASY MENU, select
the EASY MENU.
The items in the menu appear on the right side.
(2) Press the ► cursor button or ENTER button to
move the cursor to the right side. Then use the
▲/▼ cursor buttons to select an item to operate and press the ► cursor
button or ENTER button to progress. The operation menu or dialog of the
selected item will appear.
(3) Use the buttons as instructed in the OSD to operate the item.
IWB
INPUT
ASPECT
AUTO
FOCUS
+
-
PAGE
MAGNIFY
UP
DOWNONOFF
KEYSTONE/
PERFECT FIT
TEMPLATE
ESC MENU
POSITION
CALIBRATION
ACCENTUALIZER
HDCR
D-ZOOM
+
-
VOLUME
MYBUTTON
1
+
ー
2
FREEZE
AV MUTE
ENTER
RESET
(continued on next page)
31
Page 32
Operating
Using the menu function (continued)
To close the MENU, press the MENU button again or select EXIT and press
3.
the ◄ cursor button or ENTER button. Even if you do not do anything, the
dialog will automatically disappear after about 30 seconds.
●
If you want to move the menu position, use the cursor buttons after pressing the
POSITION button.
● Some functions cannot be performed when a certain input port is selected, or
when a certain input signal is displayed.
● When you want to reset the operation, press RESET button on the remote
control during the operation. Note that some items (ex. LANGUAGE, VOLUME)
cannot be reset.
● In the ADVANCED MENU, when you want to return to the previous display,
press the ◄ cursor button or ESC button on the remote control.
Indication in OSD (On Screen Display)
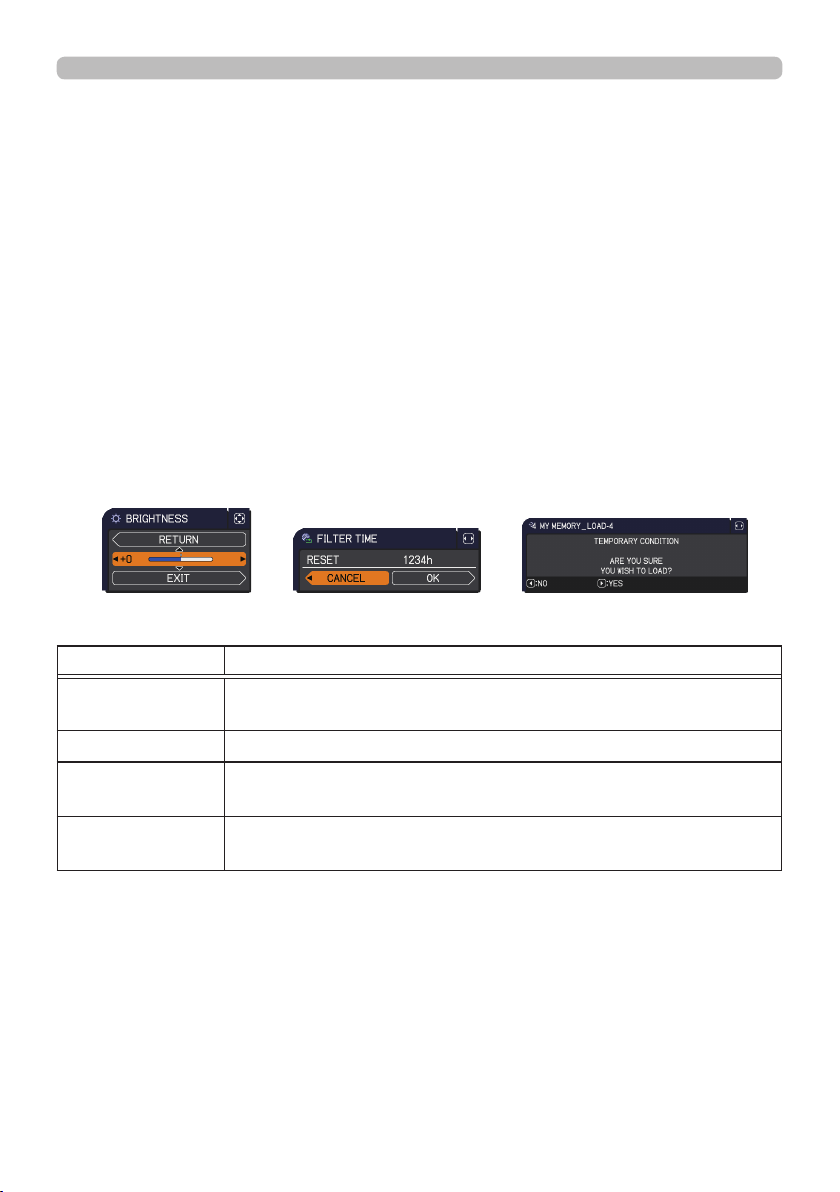
The meanings of the general words on the OSD are as follows.
Indication Meaning
EXIT
RETURN Selecting this word returns the menu to the previous menu.
CANCEL or NO
OK or YES
32
Selecting this word nishes the OSD menu. It's the same as
pressing the MENU button.
Selecting this word cancels the operation in the present
menu and returns to the previous menu.
Selecting this word executes the prepared function or shifts
the menu to the next menu.
Page 33
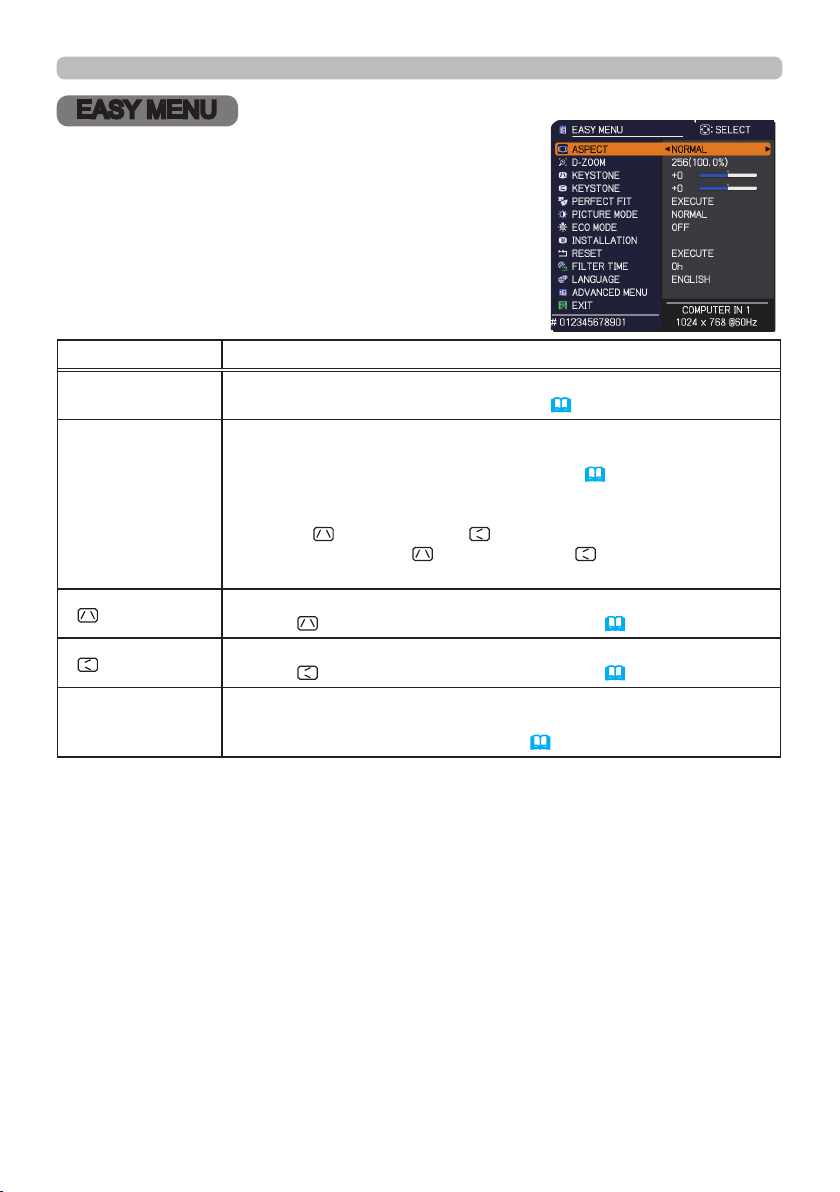
EASY MENU
From the EASY MENU, items shown in the table
below can be performed.
Select an item using the ▲/▼ cursor buttons. Then
perform it according to the following table.
Item Description
ASPECT
D-ZOOM
KEYSTONE
KEYSTONE
PERFECT FIT
Using the ◄/► buttons switches the mode for aspect ratio.
See the ASPECT item in IMAGE menu (
Using the ◄/► cursor buttons adjusts the magnication ratio.
Small ó Large
See the D-ZOOM item in the SETUP menu (
• The on-screen menu might be displayed outside of the image
display area depending on the adjustment value of the ASPECT,
D-ZOOM,
of ASPECT, D-ZOOM,
the symptom.
Using the ◄/► buttons corrects the vertical keystone distortion.
See the
Using the ◄/► buttons corrects the horizontal keystone distortion.
See the
Pressing the ► button displays the dialog for adjusting the shape
of the projected image in each of the corners and sides. See the
PERFECT FIT item in SETUP menu (
KEYSTON and KEYSTONE. Changing the values
KEYSTONE and KEYSTONE may x
KEYSTONE item in SETUP menu (
KEYSTONE item in SETUP Menu (
49).
40).
47).
EASY MENU
48).
48).
(continued on next page)
33
Page 34
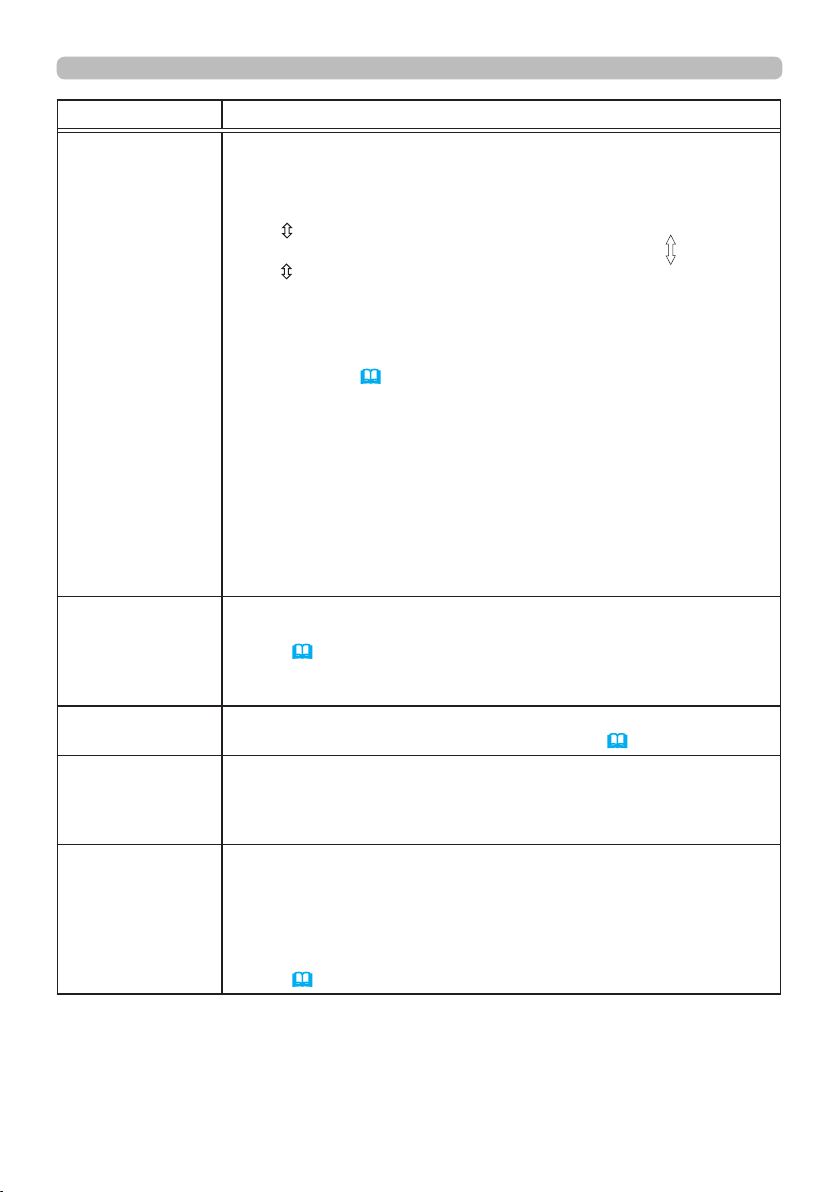
EASY MENU
Item Description
Using the ◄/► buttons switches the picture mode.
The picture modes are combinations of GAMMA and COLOR TEMP
settings. Choose a suitable mode according to the projected source.
NORMAL ó CINEMA ó DYNAMIC ó BOARD(BLACK)
PICTURE MODE
ECO MODE
INSTALLATION
RESET
FILTER TIME
DICOM SIM.
PHOTO ó DAYTIME ó WHITEBOARD ó BOARD(GREEN)
• When the combination of GAMMA and COLOR TEMP differs
from pre-assigned modes above, the display on the menu for the
PICTURE MODE is “CUSTOM”. Please refer to the GAMMA and
COLOR TEMP (
37, 38) items in PICTURE menu.
• Lines or other noise might appear on the screen when this function
is operated, but it is not a malfunction.
• DICOM SIM. is the projector's DICOM
®
("Digital Imaging and
Communication in Medicine") simulation mode. This mode
simulates the DICOM standard, which is a standard applicable to
digital communications in medicine, and can be useful for displaying
medical images, such as X-rays photos. This projector is not a
medical device and is not compliant to the DICOM standard, and
neither the projector nor the DICOM SIM. mode should be used for
medical diagnosis.
Using the ◄/► buttons changes the eco mode setting.
See the ECO MODE item of the LAMP & FILTER item in SETUP
menu. (
50)
• When the ambient temperature is around 35 to 40°C, the
brightness of lamp is reduced automatically.
Pressing the ► button displays the INSTALLATION dialog.
See the INSTALLATION item in SETUP menu (
52).
Performing this item resets all of the EASY MENU items except the
FILTER TIME and LANGUAGE.
A dialog is displayed for conrmation. Selecting the OK using the ►
button performs resetting.
The usage time of the air lter is shown in the menu.
Performing this item resets the lter time which counts usage time
of the air lter.
A dialog is displayed for conrmation. Selecting the OK using the ►
button performs resetting.
See the FILTER TIME item of the LAMP & FILTER item in SETUP
menu. (
51)
(continued on next page)
34
Page 35
Item Description
LANGUAGE
Using the ◄/► buttons changes the display language.
See the LANGUAGE item in SCREEN menu (
Press the ► or ENTER button to use the menu of PICTURE,
ADVANCED MENU
IMAGE, INPUT, SETUP, AUDIO, SCREEN, OPTION, NETWORK or
SECURITY.
EXIT Press the ◄ or ENTER button to nish the OSD menu.
EASY MENU
54).
35
Page 36
PICTURE menu
PICTURE menu
From the PICTURE menu, items shown in the table
below can be performed.
Select an item using the ▲/▼ cursor buttons, and press
the ► cursor button or ENTER button to execute the
item. Then perform it according to the following table.
Item Description
◄/►
BRIGHTNESS
CONTRAST
HDCR
ACCENTUALIZER
(continued on next page)
Using the
Using the
A function to show a clear picture in a bright room.
Using the◄/► buttons adjusts the contrast.
• This function may not work properly when IMAGE OPTIMIZER is
enabled.
ACCENTUALIZER is a function to improve the legibility.
Using the ◄/► buttons adjusts the sharpness.
Weak ó Strong
• There may be some noise and/or the screen may icker for a
moment when an adjustment is made. This is not a malfunction.
• This function may not work properly when IMAGE OPTIMIZER is
enabled.
Dark ó Light
Weak ó Strong
buttons adjusts the brightness.
◄/►
buttons adjusts the contrast.
36
Page 37
Item Description
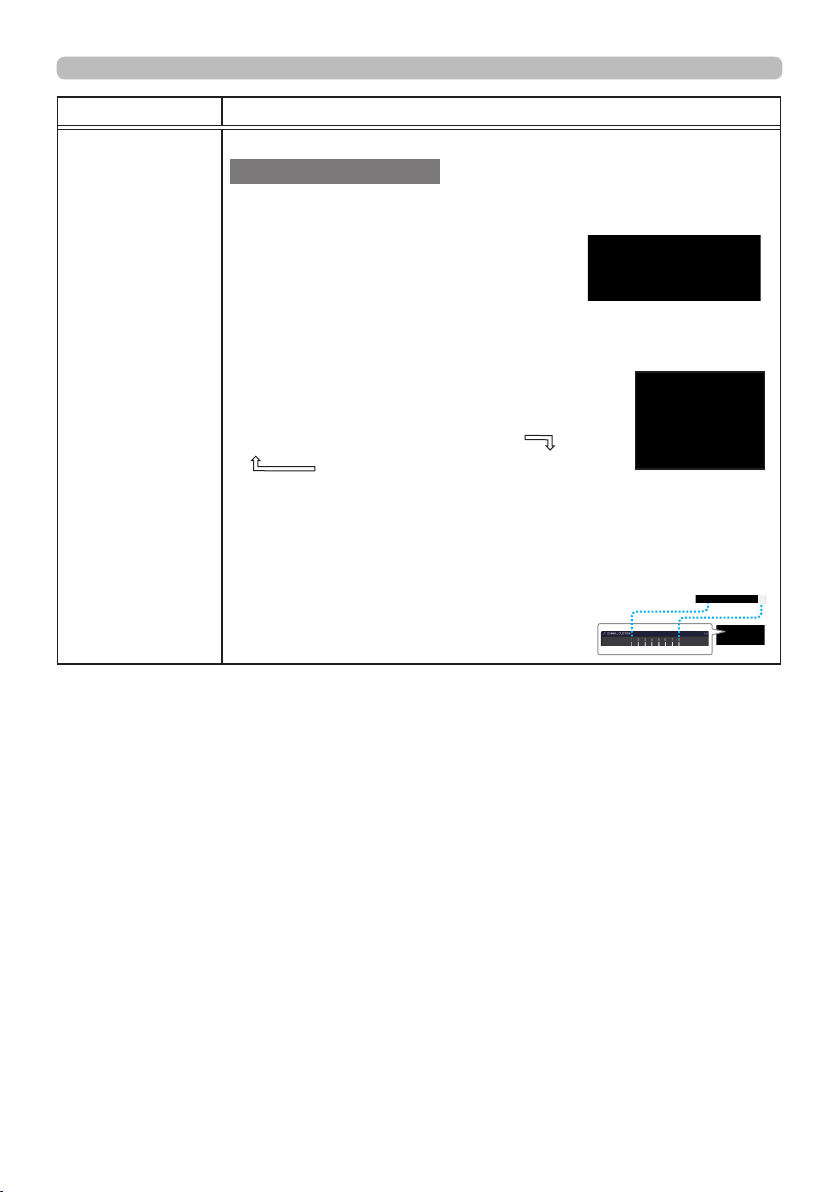
Using the ▲/▼ buttons switches the gamma mode.
To adjust CUSTOM
Selecting a mode whose name includes CUSTOM and then
pressing the ► button or the ENTER button displays
a dialog to aid you in adjusting the mode.
This function is useful when you want to
change the brightness of particular tones.
Choose an item using the ◄/► buttons,
and adjust the level using the ▲/▼ buttons.
You can display a test pattern for checking the effect of your
adjustment by pressing the ENTER button.
GAMMA
Each time you press the ENTER button, the
pattern changes as below.
No pattern ð Gray scale of 9 steps
Ramp Gray scale of 15 steps
The eight equalizing bars correspond to eight tone levels of the test
pattern (Gray scale of 9 steps) except the darkest in the left end. If you
want to adjust the 2nd tone from left end on the test pattern, use the
equalizing adjustment bar “1”. The darkest tone at the left end of the
test pattern cannot be controlled with any of equalizing adjustment bar.
• Lines or other noise might appear on the
screen when this function is operated, but it
is not a malfunction.
PICTURE menu
(continued on next page)
37
Page 38
PICTURE menu
Item Description
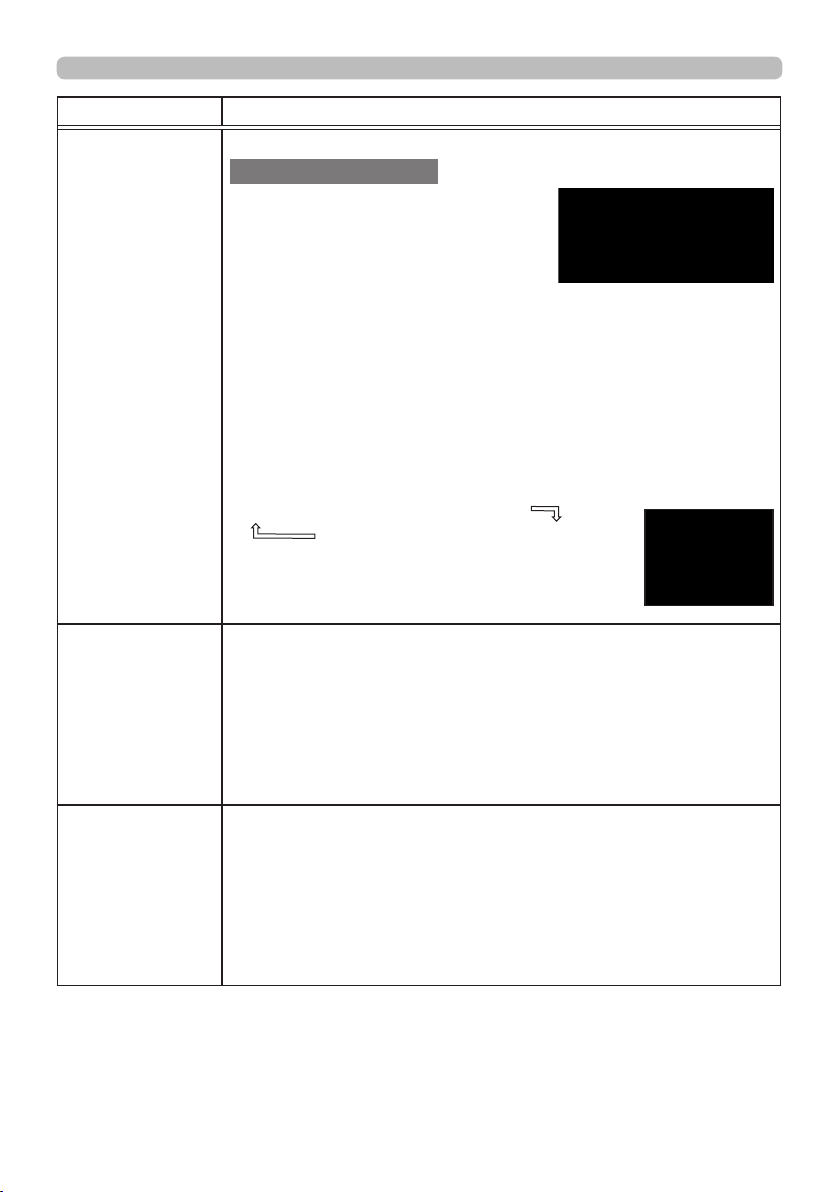
Using the ▲/▼ buttons switches the color temperature mode.
To adjust CUSTOM
Selecting a mode whose name includes
CUSTOM and then pressing the ► button
or the ENTER button displays a dialog
to aid you in adjusting the OFFSET and
GAIN of the selected mode.
OFFSET adjustments change the color intensity on the whole tones
of the test pattern.
GAIN adjustments mainly affect color intensity on the brighter tones
COLOR TEMP
COLOR
TINT
of the test pattern.
Choose an item using the ◄/► buttons, and adjust the level using
the ▲/▼ buttons.
You can display a test pattern for checking the effect of your
adjustment by pressing the ENTER button.
Each time you press the ENTER button, the pattern changes as below.
No pattern ð Gray scale of 9 steps
• Lines or other noise might appear on the screen
when this function is operated, but it is not a
malfunction.
Using the ◄/► buttons adjusts the strength of whole color.
Weak ó Strong
• This item can be selected only for a video and component video
signal.
For an HDMITM signal, this item can also be selected if either (1) or (2) applies.
•
(1) HDMI FORMAT item in the INPUT menu is set to VIDEO.
(2) HDMI FORMAT item in the INPUT menu is set to AUTO, and the
projector recognizes that it receives video signals.
Using the ◄/► buttons adjusts the tint.
Reddish ó Greenish
• This item can be selected only for a video and component video
signal.
•
For an HDMITM signal, this item can also be selected if either (1) or (2) applies.
(1) HDMI FORMAT item in the INPUT menu is set to VIDEO.
(2) HDMI FORMAT item in the INPUT menu is set to AUTO, and the
projector recognizes that it receives video signals.
Ramp Gray scale of 15 steps
(continued on next page)
38
Page 39
Item Description
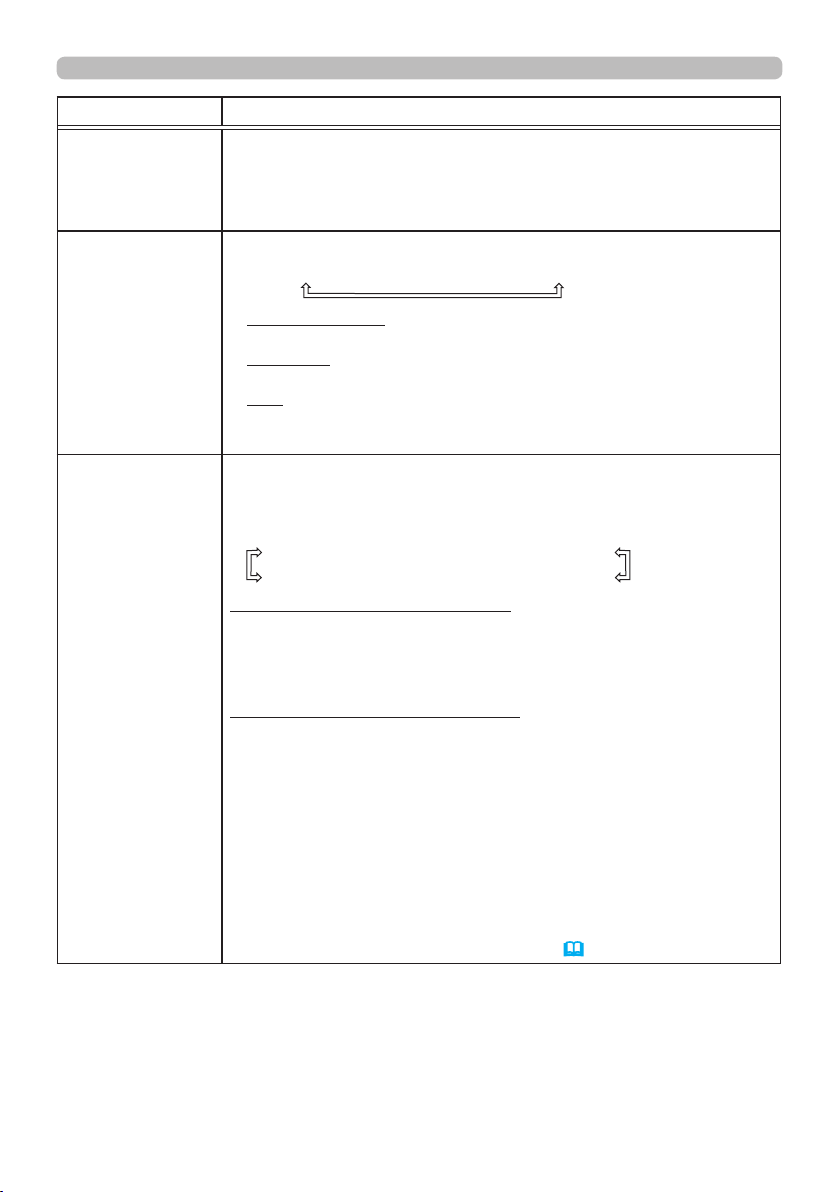
Using the ◄/► buttons adjusts the sharpness.
SHARPNESS
Weak ó Strong
• There may be some noise and/or the screen may icker for a
moment when an adjustment is made. This is not a malfunction.
Using the ▲/▼ cursor buttons changes the active iris control mode.
PRESENTATION ó THEATER ó OFF
PRESENTATION : The active iris displays the best presentation
ACTIVE IRIS
THEATER : The active iris displays the best theater image for
image for both bright and dark scenes.
both bright and dark scenes.
OFF : The active iris is always open.
• The screen may icker when the PRESENTATION or THEATER
modes are selected. If this occurs select OFF.
This projector has 4 memories for adjustment data (for all the items
of the PICTURE menu).
Selecting a function using the ▲/▼ buttons and pressing the ► or
ENTER button performs each function.
SAVE-1 ó SAVE-2 ó SAVE-3 ó SAVE-4
LOAD-4 óLOAD-3 ó LOAD-2 ó LOAD-1
SAVE-1, SAVE-2, SAVE-3, SAVE-4
Performing a SAVE function saves the current adjustment data into
the memory linked in the number included in the function’s name.
• Remember that the current data being stored of a memory will be
lost by saving new data into the memory.
MY MEMORY
LOAD-1, LOAD-2, LOAD-3, LOAD-4
Performing a LOAD function loads the data from the memory linked
in the number included in the function’s name, and adjusts the
picture automatically depending on the data.
• The LOAD functions whose linked memory has no data are
skipped.
• Remember that the current adjusted condition will be lost by
loading data. If you want to keep the current adjustment, please
save it before performing a LOAD function.
• There may be some noise and the screen may icker for a
moment when loading data. This is not malfunction.
• You can perform the LOAD function using MY BUTTON. Please
see MY BUTTON item in OPTION menu (
PICTURE menu
62).
39
Page 40
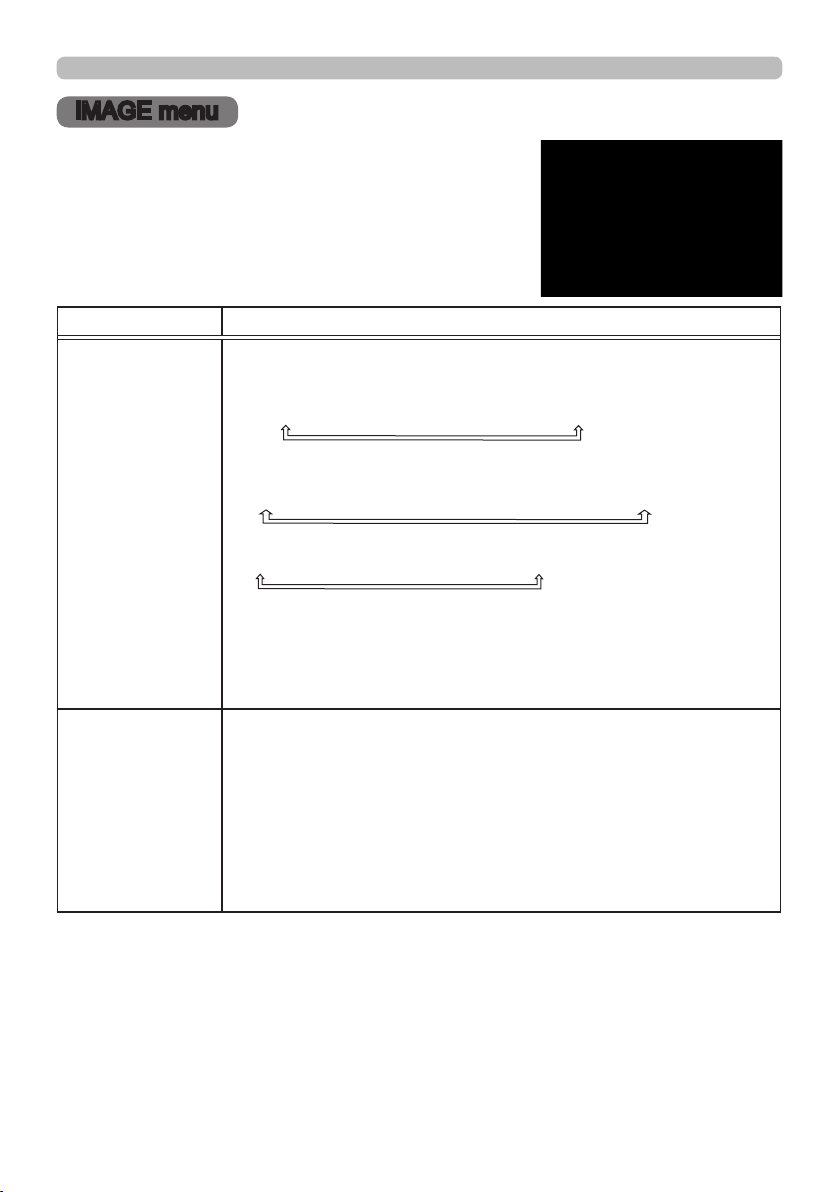
IMAGE menu
IMAGE menu
From the IMAGE menu, items shown in the table
below can be performed.
Select an item using the ▲/▼ cursor buttons, and
press the ► cursor button or ENTER button to
execute the item. Then perform it according to the
following table.
Item Description
Using the ▲/▼ buttons switches the mode for aspect ratio.
For a computer signal
NORMAL ó 4:3 ó 16:9 ó 16:10 ó NATIVE
For an HDMITM signal
ó
ASPECT
OVER SCAN
NORMAL
4:3
ó
For a video signal or component video signal
4:3 ó 16:9 ó 16:10 ó 14:9 ó NATIVE
For an input signal from the LAN, USB TYPE A or USB TYPE B
port, or if there is no signal
8116A, 8117A: 4:3 (xed)
8118WA, 8119WA: 16:10 (xed)
• The NORMAL mode keeps the original aspect ratio of the signal.
Using the ◄/► buttons adjusts the over-scan ratio.
Small (It magnies picture) ó Large (It reduces picture)
• This item can be selected only for a video and component video
signal.
• For an HDMI
(2) applies.
(1) HDMI FORMAT item in the INPUT menu is set to VIDEO.
(2) HDMI FORMAT item in the INPUT menu is set to AUTO, and the
projector recognizes that it receives video signals.
TM
signal, this item can also be selected if either (1) or
16:9
ó
16:10
ó
ó NATIVE
14:9
(continued on next page)
40
Page 41
Item Description
Using the ◄/► buttons adjusts the vertical position.
• Over-adjusting the vertical position may cause noise to appear on
the screen. If this occurs, please reset the vertical position to the
V POSITION
H POSITION
(continued on next page)
default setting. Pressing the RESET button when the V POSITION
is selected will reset the V POSITION to the default setting.
• When this function is performed on a video signal, the range of
this adjustment depends on OVER SCAN (
possible to adjust when OVER SCAN is set to 10.
•
This function is unavailable for a signal from the LAN, USB TYPE A,
USB TYPE B or HDMI 1/2 port.
Using the ◄/► buttons adjusts the horizontal position.
•
the screen. If this occurs, please reset the horizontal position to the
default setting. Pressing the RESET button when the H POSITION is
selected will reset the H POSITION to the default setting.
• When this function is performed on a video signal, the range of
this adjustment depends on OVER SCAN (
possible to adjust when OVER SCAN is set to 10.
•
USB TYPE B or HDMI 1/2 por
IMAGE menu
Down ó Up
38) setting. It is not
Right ó Left
Over-adjusting the horizontal position may cause noise to appear on
40) setting. It is not
This function is unavailable for a signal from the LAN, USB TYPE A,
t.
41
Page 42

IMAGE menu
Item Description
H PHASE
H SIZE
AUTO ADJUST
EXECUTE
Using the
• This item can be selected only for a computer signal or a
component video signal. This function is unavailable for a signal
from the LAN, USB TYPE A, USB TYPE B or HDMI 1/2 port.
Using the ◄/► buttons adjusts the horizontal size.
• This item can be selected only for a computer signal. This function
is unavailable for a signal from the LAN, USB TYPE A, USB TYPE
B or HDMI 1/2 port.
• When this adjustment is excessive, the picture may not be
displayed correctly. In such a case, please reset the adjustment
by pressing the RESET button on the remote control during this
operation.
• Images might appear degraded when this function is operated, but
it is not a malfunction.
Selecting this item performs the automatic adjustment feature.
For a computer signal
The vertical position, the horizontal position and the horizontal
phase will be automatically adjusted.
Make sure that the application window is set to its maximum size
prior to attempting to use this feature. A dark picture may still be
incorrectly adjusted. Use a bright picture when adjusting.
For a video signal
The video format best suited for the respective input signal will
be selected automatically. This function is available only when
the AUTO is selected for the VIDEO FORMAT item in the INPUT
menu (
automatically set to the default.
For a component video signal
The vertical position and horizontal position will be automatically
◄/►
buttons adjusts the horizontal phase to eliminate icker.
Right ó Left
Small ó Large
44).
The vertical position and horizontal position will be
set to the default. The horizontal phase will be automatically
adjusted.
• The automatic adjustment operation requires approx. 10 seconds.
Also please note that it may not function correctly with some input.
• When this function is performed for a video signal, a certain extra
such as a line may appear outside a picture.
• When this function is performed for a computer signal, a black
frame may be displayed on the edge of the screen, depending on
the PC model.
• The items adjusted by this function may vary when the FINE or
DISABLE is selected for the AUTO ADJUST item of the SERVICE
item in the OPTION menu (
66).
42
Page 43
INPUT menu
From the INPUT menu, items shown in the table
below can be performed.
Select an item using the ▲/▼ cursor buttons, and
press the ► cursor button or ENTER button to
execute the item. Then perform it according to the
following table.
Item Description
Using the ▲/▼ buttons switches the progress mode.
TV ó FILM ó OFF
•
This function works only for a video signal, component video signal
PROGRESSIVE
VIDEO NR
COLOR SPACE
(of 480i@60 or 576i@50 or 1080i@50/60) and an HDMI
480i@60 or 576i@50 or 1080i@50/60)
• When TV or FILM is selected, the screen image will be sharp.
FILM adapts to the 2-3 Pull-Down conversion system. But these
may cause a certain defect (for example, jagged line) of the picture
for a quick moving object. In such a case, please select OFF, even
though the screen image may lose sharpness.
Using the ▲/▼ buttons switches the noise reduction mode.
HIGH ó MID ó LOW
• This function works only for a video signal, component video signal
(of 480i@60 or 576i@50 or 1080i@50/60) and an HDMI
480i@60 or 576i@50 or 1080i@50/60).
Using the ▲/▼ buttons switches the mode for color space.
AUTO ó RGB ó SMPTE240 ó REC709 ó REC601
• This item can be selected only for a computer signal, component
video signal(except for signals from the LAN, USB TYPE A and
USB TYPE B ports) or an HDMI™ signal.
• The AUTO mode automatically selects the optimum mode.
• The AUTO operation may not work well at some signals. In such a
case, it might be good to select a suitable mode except AUTO.
INPUT menu
TM
signal (of
.
TM
signal (of
(continued on next page)
43
Page 44
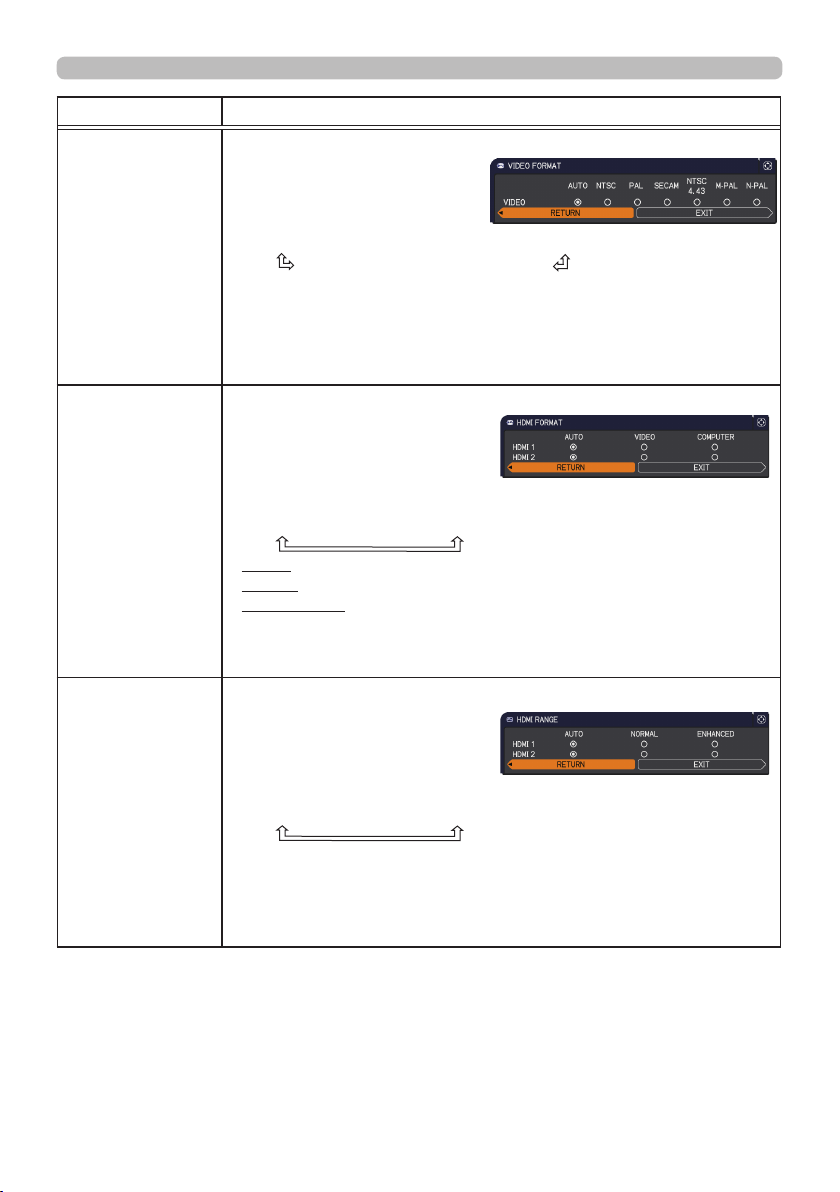
INPUT menu
Item Description
The video format for VIDEO IN port can be set.
Using the ◄/► buttons switches
the mode for video
format.
VIDEO FORMAT
HDMI FORMAT
HDMI RANGE
AUTO ó NTSC ó PAL ó SECAM
N-PAL ó M-PAL ó NTSC4.43
•
This item is performed only for a video signal from the VIDEO IN port.
• The AUTO mode automatically selects the optimum mode.
• The AUTO operation may not work well for some signals. If the
picture becomes unstable (e.g. an irregular picture, lack of color),
please select the mode according to the input signal.
The video format of HDMITM input signals from the HDMI 1 and 2
ports can be set.
(1) Use the ▲/▼ buttons to
select the HDMI port to be
set.
(2) Use the ◄/►buttons to select the video format.
AUTO ó VIDEO ó COMPUTER
AUTO: automatically sets the optimum mode.
VIDEO: sets the suitable mode for DVD signals.
COMPUTER: sets the suitable mode for computer signals.
• When the COMPUTER is selected, the functions COLOR
(PICTURE menu), TINT (PICTURE menu) and OVER SCAN
(IMAGE menu) are unavailable.
The digital range of HDMI
TM
input signals from the HDMI 1 and 2
ports can be set.
(1) Use the ▲/▼ buttons to
select the HDMI port to be
set.
(2) Use the ◄/►buttons to select the digital range.
AUTO ó NORMAL ó ENHANCED
AUTO: automatically sets the optimum mode.
NORMAL: sets the suitable mode for DVD signals. (16-235)
ENHANCED: sets the suitable mode for computer signals. (0-255)
• If the contrast of the screen image is too strong or too weak, try
finding a more suitable mode.
(continued on next page)
44
Page 45
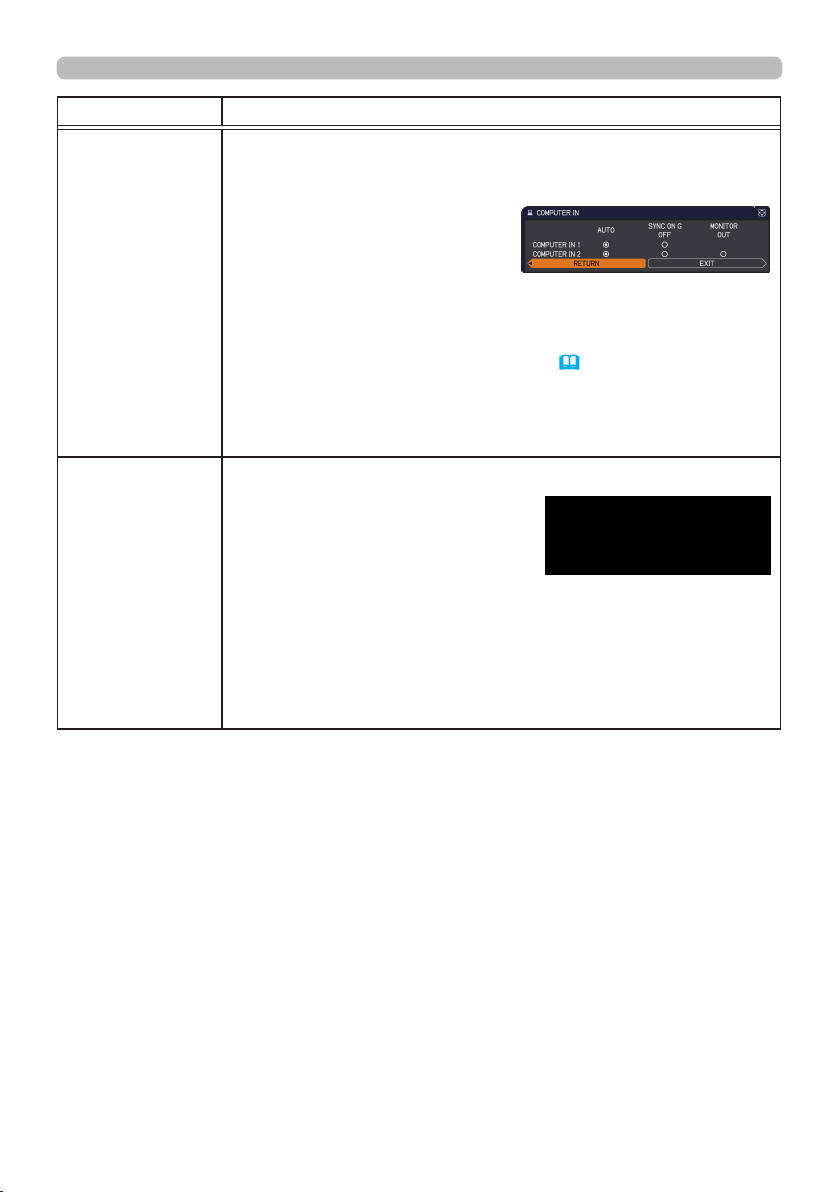
Item Description
The computer input signal type for COMPUTER IN1 and IN2 ports
can be set.
(1) Use the ▲/▼ buttons to select the COMPUTER IN port to be
set.
(2) Use the ◄/► buttons to select
COMPUTER IN
• Selecting the AUTO mode allows you to input a sync on G signal
or component video signal from the port (
• In the AUTO mode, the picture may be distorted with certain
input signals. In such a case, remove the signal connector so that
no signal is received and select the SYNC ON G OFF, and then
reconnect the signal.
Set the frame lock function on/off for each port.
(1) Use the ▲/▼ buttons to select
(2) Use the ◄/► buttons to turn the
FRAME LOCK
• This item can be performed only on a signal with a vertical
frequency of 49 to 51Hz, 59 to 61 Hz.
• When ON is selected, moving pictures are displayed more
smoothly.
• This function is unavailable for a signal from the HDMI (of
480i@60 or 576i@50 or 1080i@50/60) port.
(continued on next page)
the computer input signal type.
(COMPUTER IN1)
AUTO ó SYNC ON G OFF
(COMPUTER IN2)
AUTO ó SYNC ON G OFF ó MONITOR OUT
12).
the input ports.
frame lock function on/off .
ON ó OFF
INPUT menu
45
Page 46
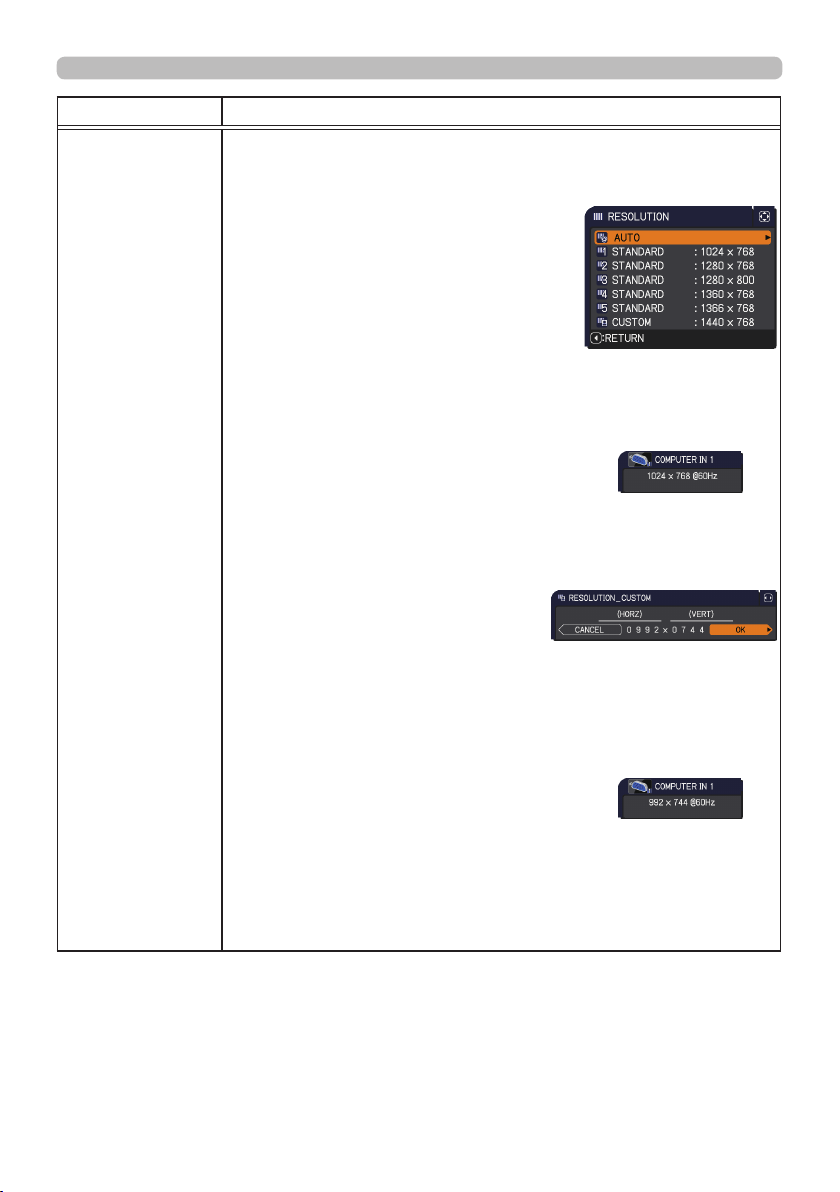
INPUT menu
Item Description
The resolution for the COMPUTER IN1 and COMPUTER IN2 input
signals can be set on this projector.
(1) In the INPUT menu select the RESOLUTION using the ▲/▼
buttons and press the ► button.
The RESOLUTION menu will be
displayed.
(2) In the RESOLUTION menu select the
resolution you wish to display using
the ▲/▼ buttons.
Selecting AUTO will set a resolution
appropriate to the input signal.
(3) Pressing the ► or ENTER button when
selecting a STANDARD resolution will
automatically adjust the horizontal and
vertical positions, clock phase and
horizontal size.
The INPUT_INFORMATION dialog will be
displayed.
(4) To set a custom resolution use the ▲/▼ buttons to select
RESOLUTION
the CUSTOM and the RESOLUTION_CUSTOM box will be
displayed.
Set the horizontal (HORZ) and
vertical (VERT) resolutions using
the ▲/▼/◄/► buttons.
This function may not support all
resolutions.
(5) Move the cursor to OK on screen and press the ► or ENTER
button. The message "ARE YOU SURE YOU WISH TO
CHANGE RESOLUTION?" appears. To save the setting, press
the ► button.
The horizontal and vertical positions, clock phase and horizontal
size will be automatically adjusted.
The INPUT_INFORMATION dialog
will be displayed.
(6) To revert back to the previous resolution without saving changes,
move the cursor to CANCEL on screen and press the ◄ or
ENTER button.
The screen will then return to the RESOLUTION menu displaying
the previous resolution.
• For some pictures, this function may not work well.
STANDARD
↓
CUSTOM
↓
46
Page 47
SETUP menu
From the SETUP menu, items shown in the table
below can be performed.
Select an item using the ▲/▼ cursor buttons, and
press the ► cursor button or ENTER button to
execute the item. Then perform it according to the
following table.
Item Description
Using the ◄/► cursor buttons adjusts the magnication ratio.
Small ó Large
D-ZOOM
D-SHIFT
PICTURE POSITION
(8116A, 8117A)
C
C
• The on-screen menu might be displayed outside of the image
display area depending on the adjustment value of the ASPECT,
D-ZOOM,
of ASPECT, D-ZOOM,
the symptom.
Using the ◄/►/▲/▼ cursor buttons adjusts the picture position.
• The D-SHIFT adjustment values are not valid when the D-ZOOM
is set to 256 (full screen). (8116A, 8117A)
• The D-SHIFT adjustment values are not valid when the D-ZOOM
is set to 320 (full screen). (8118WA, 8119WA)
Using the ▲/▼ cursor buttons selects the vertical picture position.
TOP ó MID ó BOTTOM
The PICTURE POSITION is not changed if any of the following
cases apply.
• The ASPECT is set to 4:3.
• The input signal has an aspect ratio of 4:3 or vertically larger than
4:3, while the ASPECT is set to NORMAL.
• Vertical size of the displayed image is full on the effective display
area, while the ASPECT is set to NATIVE.
• One of the following messages is displayed on the screen:
"NO INPUT IS DETECTED"
"SYNC IS OUT OF RANGE"
"INVALID SCAN FREQ."
• The BLANK or TEMPLATE function is selected.
KEYSTONE and KEYSTONE. Changing the values
KEYSTONE and KEYSTONE may x
SETUP menu
(continued on next page)
47
Page 48
SETUP menu
Item Description
Using the ▲/▼ cursor buttons selects the horizontal picture
position.
LEFT ó MID ó RIGHT
The PICT. POSIT. H is not changed if any of the following cases
apply.
• The ASPECT is set to 16:9 or 16:10.
PICT. POSIT. H
(8118WA,
8119WA)
• The input signal has an aspect ratio of 16:9, 16:10 or verticallly
smaller than 16:10, while ASPECT is set to NORMAL.
• Horizontal size of the displayed image is full on the effective
display area, while the ASPECT is set to NATIVE.
• One of the following messages is displayed on the screen:
"NO INPUT IS DETECTED"
"SYNC IS OUT OF RANGE"
"INVALID SCAN FREQ."
• The BLANK or TEMPLATE function is selected.
Using the ◄/► buttons corrects the vertical keystone distortion.
Shrink the bottom of the image ó Shrink the top of the image
KEYSTONE
• The adjustable range of this function will vary among inputs. For
some input, this function may not work well.
• This function will be unavailable when the PERFECT FIT (
adjusted.
Using the ◄/► buttons corrects the horizontal keystone distortion.
Shrink the right of the image ó Shrink the left of the image
KEYSTONE
• The adjustable range of this function will vary among inputs. For
some input, this function may not work well.
• This function will be unavailable when the PERFECT FIT (
adjusted.
49) is
49) is
(continued on next page)
48
Page 49
Item Description
This item allows you to adjust the shape of the projected image in
each of the corners and sides.
(1) Choose a corner or side to adjust
using the ▲/▼/◄/► buttons and press
the ENTER or INPUT button.
(2) Adjust the distortion as below. Use
the ▲/▼/◄/► buttons to adjust the
position of the corner. Use the ▲/▼
buttons to adjust the distortion of the
top or bottom side, after dening the
adjusting position with the ◄/► buttons.
Use the ◄/► buttons to adjust the distortion of the left or right side,
after dening the adjusting position with the ▲/▼ buttons.
(3) To adjust another corner or side, follow the same procedure
from (1) above. To reset the adjustment of all the corners and sides,
select RESET with the ▲/▼/◄/► buttons and press the ENTER or
INPUT button.
PERFECT FIT
(4) This projector is equipped with a memory feature for PERFECT
FIT adjustment. Up to 3 sets of adjustments can be stored.
• SAVE:
To store the current PERFECT FIT adjustment, select one of the
SAVE icons
numbered 1 to 3 (number of the memory) with the
◄ /▲/▼ buttons and press the ENTER or INPUT button.
Remember that the current data being stored of a memory will be
lost by saving new data into the memory.
• LOAD:
To recall stored adjustments, select one of the LOAD icons
numbered 1 to 3 (number of the memory) with the ◄ /▲/▼ buttons
and press the ENTER or INPUT button.
Remember that the current adjusted condition will be lost by
loading data. If you want to keep the current adjustment, please
save it before performing a LOAD function.
- The LOAD functions whose linked memory has no data are
skipped.
- There may be some noise and the screen may icker for a
moment when loading data. This is not malfunction.
SETUP menu
(continued on next page)
49
Page 50
SETUP menu
Item Description
• While the distortion is adjusted with the PERFECT FIT function,
keystone adjustment feature is unavailable. To correct the keystone
distortion, reset the adjustment of all the corners and sides.
• The adjustable range of this correction will vary among inputs. For
PERFECT FIT
(continued)
some input, this function may not work well.
• One adjustment position common to the top and bottom sides can
be set. Also, another adjustment position common to the left and
right sides can be set.
• The distortion of the top and bottom sides can be adjusted only in
the same direction, pincushion or barrel. The adjustment for the left
and right sides is carried out in the same manner.
Using the ▲/▼ buttons turns on/off the AUTO ECO MODE.
AUTO
ECO
MODE
• When ON is selected, the projector will always be set to ECO-2
at start-up regardless of the ECO MODE (
message “AUTO ECO MODE” will be displayed for tens of seconds
when the projector starts with this function activated.
Using the ▲/▼ buttons switches the ECO MODE.
OFF ó ECO-1 ó ECO-2 ó INTELLIGENT ECO ó SAVER
• When the ECO-1/2 is selected, acoustic noise and screen
brightness are reduced.
• When INTELLIGENT ECO is selected, the brightness of the
LAMP &
FILTER
lamp changes according to the level of the input signal. The lamp
becomes brighter when the input signal level is high and darker
when the level is low. If dark images are projected continuously, the
ECO
MODE
brightness of the lamp may increase to maintain its performance.
• When SAVER is selected, you can select the time within 1 to 30
min. for SAVER MODE using the ► button. If the image signal level
doesn’t change more than the period set, the lamp brightness is
reduced and electric power consumption decreased. If the image
signal level changes or any buttons are operated, the lamp will
brighten again. If dark images are projected continuously, the
brightness of the lamp may increase to maintain its performance.
• When AUTO ECO MODE (
always be set to ECO-2 at start-up regardless this setting.
• When the ambient temperature is around 35 to 40°C, the
brightness of lamp is reduced automatically.
(continued on next page)
ON ó OFF
50) setting. An OSD
above) is set to ON, the projector will
50
Page 51
Item Description
The lamp time is the usage time of the lamp, counted after the last
resetting. It is shown in the OPTION menu.
Pressing the RESET button on the remote control or the ► button
of the projector displays a dialog.
To reset the lamp time, select the OK using the ► button.
LAMP
TIME
CANCEL ð OK
• Please reset the lamp time only when you have replaced the lamp,
for a suitable indication about the lamp.
• For the lamp replacement, see the section "Replacing the lamp"
(
98).
• The IMAGE OPTIMIZER function does not work properly unless
LAMP TIME is initialized when replacing a lamp.
The lter time is the usage time of the air lter, counted after the last
resetting. It is shown in the OPTION menu.
Pressing the RESET button on the remote control or the ► button
of the projector displays a dialog.
To reset the lter time, select the OK using the ► button.
CANCEL
ð
OK
• Please reset the lter time only when you have cleaned or
LAMP &
FILTER
FILTER
TIME
replaced the air lter, for a suitable indication about the air lter.
• For the air lter cleaning, see the section “Cleaning and replacing
the air lter” (
100).
Use the ▲/▼ button to set the timer for notifying by the message
when to replace the lter unit
100h ó • • • ó 5000h ó OFF
After choosing an item except OFF, the message “REMINDER ***
HRS PASSED ....” will appear after the timer reaches the interval
time set by this feature (
FILTER
MESSAGE
When the OFF is chosen, the message will not appear. Utilize this
feature to keep the air lter clean, setting the suitable time according
to your environment of this projector.
• Please take care of the lter unit periodically, even if there is
no message. If the air lter becomes to be blocked by dust or
other matter, the internal temperature will rise, which could cause
malfunction, or reduce the lifetime of the projector.
• Please be careful with the operating environment of the projector
and the condition of the lter unit.
When this function is enabled, automatic image correction
is performed to maintain visibility in accordance with lamp
IMAGE
OPTIMIZER
deterioration.
• This function may not work properly when HDCR/
ACCENTUALIZER is set to other than 0.
• This function does not work properly unless LAMP TIME is
initialized when replacing a lamp.
SETUP menu
106).
(continued on next page)
51
Page 52
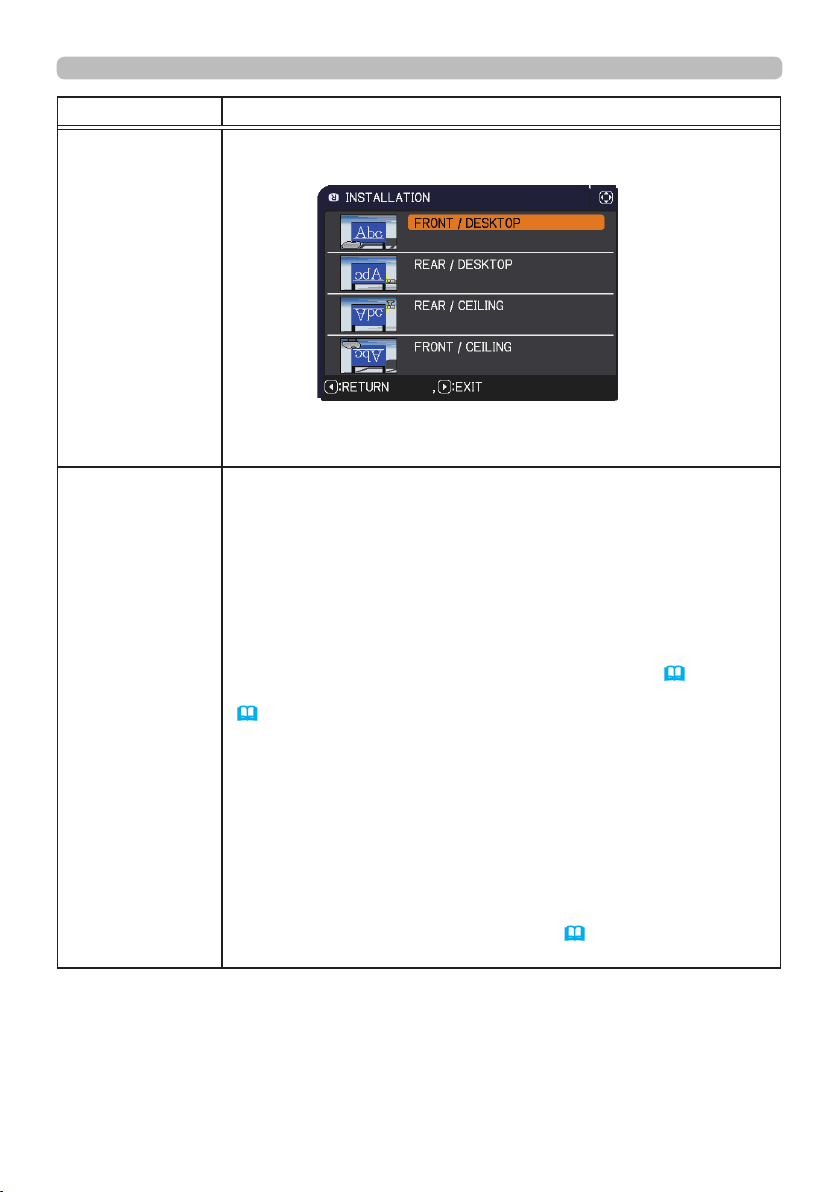
SETUP menu
Item Description
Pressing the ►button displays the dialog for changing the
INSTALLATION setting.
INSTALLATION
Use the ▲/▼ buttons to select the desired setting on the
INSTALLATION dialog.
Using ▲/▼ buttons switches the standby mode setting between
NORMAL and SAVING.
NORMAL ó SAVING
When SAVING is selected, the power consumption in the standby
mode is lowered with some functional restriction as below:
• When SAVING is selected, the RS-232C communication control
except to turn the projector on and the network function are disabled
while the projector is in the standby mode. If the COMMUNICATION
TYPE in the COMMUNICATION menu is set to NETWORK
BRIDGE, all of the RS-232C commands are disabled (
• When SAVING is selected, STANDBY setting of AUDIO SOURCE
(
53) is invalid, no signal is output from AUDIO OUT port and no
STANDBY MODE
sound from a built-in speaker.
• When SAVING is selected, STANDBY setting of MONITOR OUT
is invalid, and no signal is output from MONITOR OUT port in the
standby mode.
• The USB connection is disabled while the projector is in standby
mode if the STANDBY MODE item in the SETUP menu of the
projector is set to SAVING.
• When SAVING is selected, CLONING load function is invalid while
in STANDBY MODE.
• This function will be unavailable when NETWORK BRIDGE
is selected for COMMUNICATION TYPE.(
SERVICE > COMMUNICATION)
OPTION menu >
69).
52
Page 53
AUDIO menu
AUDIO menu
From the AUDIO menu, items shown in the table below
can be performed. Select an item using the ▲/▼ cursor
buttons, and press the ► cursor button or the ENTER
button to execute the item. Then perform it according to
the following table.
Item Description
VOLUME
SPEAKER
AUDIO SOURCE
MIC VOLUME
Using the ◄/► buttons adjusts the volume.
Low ó High
Using the ▲/▼ buttons turns on/off the built-in speaker.
ON ó OFF
When OFF is selected, the built-in speaker does not work.
While the image signal from the input port chosen in step (1) is
projected, the audio signal from the input port selected in step
(2) is output to both the AUDIO OUT port and built-in speaker of
this projector. However, the built-in speaker does not work when
SPEAKER is set to OFF.
(1) Choose a picture input port using the
▲/▼ buttons.
Choose STANDBY to select the sound
output in the standby mode.
(2) Select an audio input port or the mute
icon using the ◄/► buttons.
The icons indicate the following;
No.1: AUDIO IN1 port No.2: AUDIO IN2 port
No.3: LAN port No.4: USB TYPE A port
No.5: USB TYPE B port No.6: HDMI 1 port
No.7: HDMI 2 port : mutes the sound
• Audio input from port nos 4 to 7 can only be selected by each of
the picture input ports.
• Even if the projector is in the standby mode, cooling fans may work
and make noises when the built-in speaker is in operation.
• C.C. (Closed Caption) is automatically activated when
and an input signal containing C.C. is received. This function is
available only when the signal is NTSC for VIDEO or 480i@60 for
COMPUTER IN1 or COMPUTER IN2, and when AUTO is selected
for DISPLAY in the C.C. menu under the SCREEN menu (
Using the ◄/► buttons adjusts the volume of the microphone
connected to the MIC port.
Low ó High
is selected
59).
53
Page 54
SCREEN menu
SCREEN menu
From the SCREEN menu, items shown in the table
below can be performed.
Select an item using the ▲/▼ cursor buttons, and
press the ► cursor button or ENTER button to
execute the item. Then perform it according to the
following table.
Item Description
Using the ▲/▼/◄/► buttons switches the OSD (On Screen
Display) language.
LANGUAGE
MENU POSITION
BLANK
AUTO BLANK
ENGLISH ó FRANÇAIS ó DEUTSCH ó ESPAÑOL
(shown in the LANGUAGE dialog)
Press the ENTER or INPUT button to save the language setting.
Using the ▲/▼/◄/► buttons adjusts the menu position.
To quit the operation, press the MENU button on the remote control
or keep no operation for about 10 seconds.
Using the ▲/▼ buttons switches the mode for the blank screen.
The blank screen is a screen for the temporarily blanking feature
23). It is displayed by pressing the AV MUTE button on the
(
remote control.
MyScreen ó ORIGINAL ó BLUE ó WHITE ó BLACK
MyScreen :
ORIGINAL : Screen preset as the standard screen.
BLUE, WHITE, BLACK : Plain screens in each color.
• To avoid remaining as an afterimage, the MyScreen or ORIGINAL
screen will change to the plain black screen after several minutes.
Using the ▲/▼ buttons switches the mode for the AUTO BLANK
screen.
BLUE ó WHITE ó BLACK
• To avoid remaining as an afterimage, displayed image will change
to the designated blank color screen by AUTO BLANK after several
minutes at the following conditions.
- When MyScreen or ORIGINAL is displayed as BLANK screen.
- When start-up screen is displayed.
Screen can be registered by the MyScreen item (
55).
(continued on next page)
54
Page 55
Item Description
Using the ▲/▼ buttons switches the mode for the start-up screen.
The start-up screen is a screen displayed when no signal or an
unsuitable signal is detected.
MyScreen ó ORIGINAL ó OFF
START UP
MyScreen :
ORIGINAL : Screen preset as the standard screen.
OFF : Plain black screen.
Screen can be registered by the MyScreen item (
• To avoid remaining as an afterimage, the MyScreen or ORIGINAL
screen will change to the BLANK screen (
minutes. If also the BLANK screen is the MyScreen or ORIGINAL,
the plain black screen is instead used.
• When the ON is selected to the MyScreen PASSWORD item in
the SECURITY menu (
76), the START UP is fixed to MyScreen.
This item allows you to capture an image for use as a MyScreen
image which can be used as the BLANK screen and START UP
screen. Display the image you want to capture before executing the
following procedure.
Selecting this item displays a dialog
titled “MyScreen”. It will ask you if
you start capturing an image from the
current screen.
Please wait for the target image to be displayed, and press the
ENTER or INPUT button to start registration.
To restore the screen and return to the previous dialog, press the
MyScreen
RESET button on the remote control.
Registration may take several minutes.
When the registration is completed, the registered screen and the
following message is displayed for several seconds:
“MyScreen registration is nished.”
If the registration failed, the following message is displayed:
“A capturing error has occurred. Please try again.”
• This function cannot be selected when the ON is selected to the
MyScreen Lock item (
56).
• This function cannot be selected when the ON is selected to the
MyScreen PASSWORD item in SECURITY menu (
•
This function is unavailable for a signal from the LAN, USB TYPE A,
USB TYPE B or HDMI 1/2 port.
54
) after several
SCREEN menu
76).
55).
(continued on next page)
55
Page 56

SCREEN menu
Item Description
Using the ▲/▼ buttons turns on/off the MyScreen lock function.
ON ó OFF
MyScreen Lock
When the ON is selected, the item MyScreen is locked. Use this
function for protecting the current MyScreen.
• This function cannot be selected when the ON is selected to the
MyScreen PASSWORD item in SECURITY menu (
Using the ▲/▼ buttons turns on/off the message function.
ON ó OFF
When the ON is selected, the following message function works.
“AUTO IN PROGRESS” while automatically adjusting
“NO INPUT IS DETECTED”
“SYNC IS OUT OF RANGE”
“INVALID SCAN FREQ.”
“NOT AVAILABLE”
“Searching….” while searching for the input
“Detecting….” while an input signal is detected
“AUTO ECO MODE” while starting up with AUTO ECO MODE
MESSAGE
The indication of the input signal displayed by changing
The indication of the aspect ratio displayed by changing
The indication of the PICTURE MODE displayed by changing
The indication of the ACTIVE IRIS displayed by changing
The indication of the MY MEMORY displayed by changing
The indication of “FREEZE” and “II” while freezing the screen by
pressing the FREEZE button.
The indication of the TEMPLATE displayed by changing.
The indication of the ECO MODE displayed by changing.
The indication of "+++ FOCUS +++" displayed by changing
The D-ZOOM dialog displayed by changing
• When the OFF is selected, please remember if the picture is
frozen. Do not mistake freezing for a malfunction (
76).
30).
(continued on next page)
56
Page 57
Item Description
Each input port for this projector can have a name applied to it.
(1) Use the ▲/▼ buttons on the SCREEN menu to select SOURCE
NAME and press the ► or ENTER button.
The SOURCE NAME menu will be displayed.
(2) Use the ▲/▼ buttons on the SOURCE
NAME menu to select the port to be
named and press the ► button. The
SOURCE NAME dialog will be displayed.
Right side of the menu is blank until a
name is specied.
(3) Select an icon you would like to assign to
SOURCE NAME
the port in the SOURCE NAME dialog.
The name assigned to the port will also be
automatically switched according to your
icon selection. Press the ENTER or INPUT
button to determine your icon selection.
(4) Select a number you would like to assign
to the port along with the icon. You can
select the number either from blank
(no number assigned), 1, 2, 3, or 4. Then
press the ENTER or INPUT button.
(5) If you would like to modify the name assigned
to the port, select CUSTOM NAME and
press the ENTER or INPUT button.
SCREEN menu
(continued on next page)
57
Page 58

SCREEN menu
Item Description
(6) The current name will be displayed on
SOURCE NAME
(Continued)
(7) To change an already inserted character,
(8) To nish entering text, move the cursor to the OK on screen and
Using the ▲/▼ cursor buttons switches the mode for the template
screen.
Press the ► cursor (or the ENTER) button to display the selected
template, and press the ◄ cursor button to close the displayed
screen.
TEMPLATE
You can turn a map upside down and scroll it horizontally when
MAP1 or MAP2 is selected. To invert or scroll the map, display
the guidance by pressing the RESET button on the remote three
seconds or more when MAP1 or MAP2 appears.
(continued on next page)
the rst line. Use the ▲/▼/◄/► buttons
and the ENTER or INPUT button to
select and enter characters. To erase 1
character at one time, press the RESET
button or press the ◄ and INPUT button
at the same time. Also if you move the
cursor to DELETE or ALL CLEAR on
screen and press the ENTER or INPUT
button, 1 character or all characters will
be erased. The name can be a maximum
of 16 characters.
press the ▲ button to move the cursor to
the rst line, and use the ◄/► buttons to
move the cursor on the character to be
changed.
After pressing the ENTER or INPUT button, the character is
selected. Then, follow the same procedure as described at the
item (6) above.
press the ►, ENTER or INPUT button. To revert to the previous
name without saving changes, move the cursor to the CANCEL
on screen and press the ◄, ENTER or INPUT button.
TEST PATTERN ó DOT-LINE1 ó DOT-LINE2 ó DOT-LINE3
HAS-WM05 DOT-LINE4
HAS-WM03 ó MAP2 ó MAP1 ó CIRCLE2 ó CIRCLE1
58
Page 59
Item Description
The C.C. is the function that displays a
transcript or dialog of the audio portion of
a video, les or other presentation or other
relevant sounds. It is required to have NTSC
format video or 480i@60 format component
video source supporting C.C. feature to
utilize this function.
It may not work properly, depending on equipment or signal source.
In this case, please turn off the Closed Caption.
DISPLAY
Select Closed Caption DISPLAY setting from following options using
▲/▼ buttons.
AUTO ó ON ó OFF
AUTO : Closed Caption automatically appears when the input
signal (C.C. compatible) from the port with the mute icon
set at AUDIO SOURCE is selected.
ON : Closed Caption is on.
OFF : Closed Caption is off.
• The caption is not displayed when the OSD menu is active.
• The Closed Caption is the function to display the dialogue,
C.C.
(Closed Caption)
narration, and / or sound effects of a television program or other
video sources. The Closed Caption availability is depending upon
broadcaster and/or content.
MODE
Select Closed Caption MODE setting from following options using
▲/▼ buttons.
CAPTIONS ó TEXT
CAPTIONS : Display Closed Caption.
TEXT : Display Text data, which is for additional information such
as news reports or a TV program guide. The information
covers the entire screen. Not all of the C.C. program has
Text information.
CHANNEL
Select Closed Caption CHANNEL from following options using ▲/▼
buttons.
1 ó 2 ó 3 ó 4
SCREEN menu
1: Channel 1, primary channel / language
2: Channel 2
3: Channel 3
4: Channel 4
The channel data may vary, depending on the content. Some
channel might be used for secondary language or empty.
59
Page 60
OPTION menu
OPTION menu
From the OPTION menu, items shown in the table
below can be performed.
Select an item using the ▲/▼ cursor buttons, and
press the ► cursor button or ENTER button to execute
the item. Then perform it according to the following
table.
Item Description
Using the ▲/▼ buttons turns on/off the automatic signal search
function.
ON ó OFF
When the ON is selected, detecting no signal automatically cycles
AUTO SEARCH
DIRECT POWER
ON
through input ports in the following order. The search is started from
the current port. Then when an input is found, the projector will stop
searching and display the image.
COMPUTER IN1 ð COMPUTER IN2 ð LAN ð USB TYPE A
VIDEO HDMI 2 HDMI 1 USB TYPE B
• It may take several seconds to project the images from the
USB TYPE B port.
Using the ▲/▼ buttons turns on/off the DIRECT POWER ON
function.
ON ó OFF
When set to the ON, the lamp in projector will be automatically turned
on without the usual procedure (
supplied with the power after the power was cut while the lamp was on.
• This function does not work as long as the power has been
supplied to the projector while the lamp is off.
•
After turning the lamp on by the DIRECT
if neither input nor operation is detected for about 30 minutes, the
projector is turned off, even though the AUTO
61) is disabled.
(
20), only when the projector is
POWER
POWER
ON function,
OFF function
(continued on next page)
60
Page 61
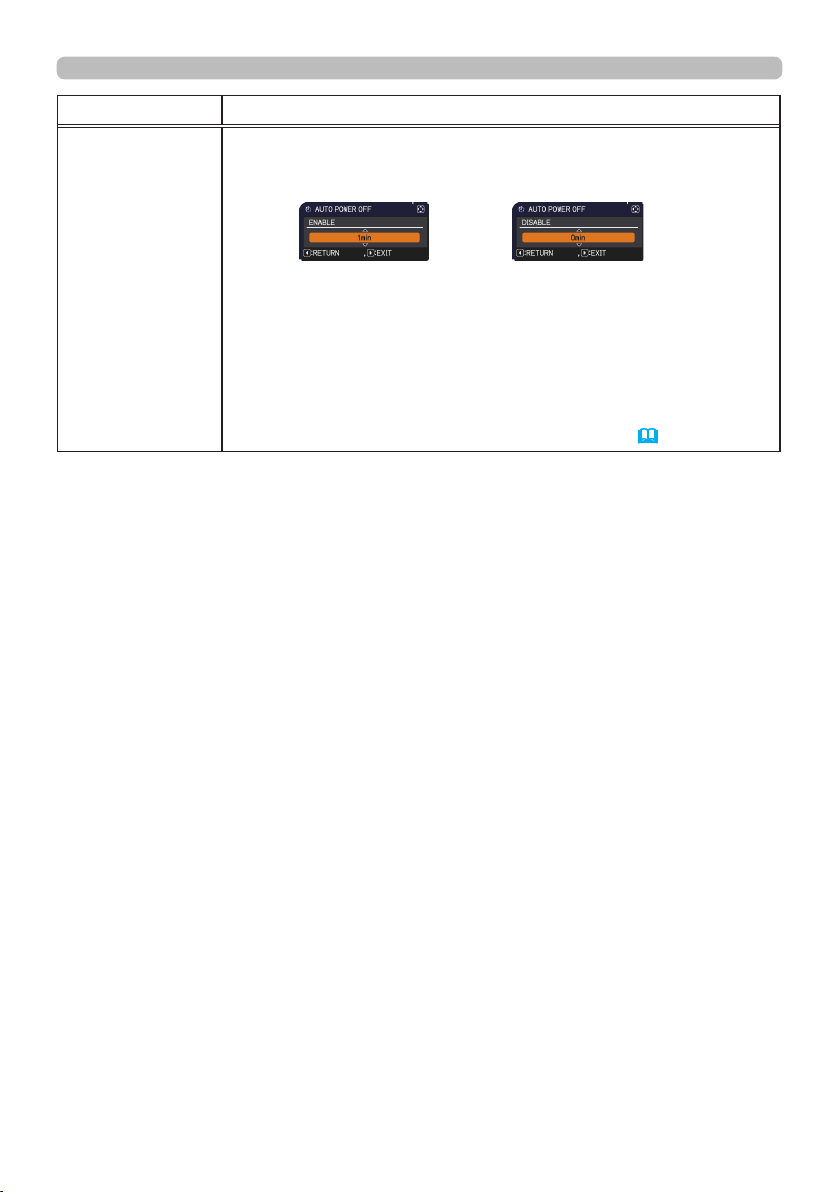
Item Description
Using the ▲/▼ buttons adjusts the time to count down to
automatically turn the projector off.
Long (max. 99 minutes) ó Short (min. 0 minute = DISABLE)
OPTION menu
AUTO POWER
OFF
(continued on next page)
When the time is set to 0, the projector is not turned off automatically.
When the time is set to 1 to 99, and when the passed time with nosignal or an unsuitable signal reaches at the set time, the projector
lamp will be turned off.
If one of the projector's buttons or the remote control buttons
is pressed or one of the commands (except get commands) is
transmitted to the CONTROL port during the corresponding time,
projector will not be turned off.
Please refer to the section “Turning off the power”
22).
(
61
Page 62
OPTION menu
Item Description
This item is to assign one of the following functions to MY BUTTON
1/2 on the remote control (
(1) Use the ▲/▼ buttons on the MY BUTTON menu to select a MY
(2) Then using the ▲/▼/◄/► buttons sets one of the following
• COMPUTER IN1: Selects the input from COMPUTER IN1 port.
• COMPUTER IN2: Selects the input from COMPUTER IN2 port.
• LAN: Selects input from LAN port.
• USB TYPE A: Selects input from USB TYPE A port.
• USB TYPE B: Selects input from USB TYPE B port.
• HDMI1: Selects input from HDMI 1 port.
• HDMI2: Selects input from HDMI 2 port.
• VIDEO: Selects the input from VIDEO IN port.
• SLIDESHOW: Selects the input from USB TYPE A port, and starts
a Slideshow.
MY BUTTON
• MY IMAGE: Displays the MY IMAGE menu.
• MESSENGER:
(
When there is no transferred text data to display, the message ”NO
MESSENGER DATA" appears.
• INFORMATION: Displays SYSTEM_INFORMATION,
INPUT_INFORMATION (
WIRED INFORMATION or nothing.
• MY MEMORY: Loads one of adjustment data stored (
When more than one data are saved, the adjustment
changes every time the MY BUTTON is pressed.
(continued on next page)
6).
BUTTON - (1/2) and press the ► or ENTER button to display the
MY BUTTON setup dialog.
functions to the chosen button. Press the ENTER or INPUT
button to save the setting.
Turns the messenger text displayed on the screen on/off
Messenger Function in the User's Manual - Network Guide
73), WIRELESS INFORMATION,
).
39).
When no data is saved in memory, the
dialog "No saved data" appears.
When the current adjustment is not
saved to memory, the dialog as shown in
the right appears.
If you want to keep the current adjustment, please press
the ► button to exit. Otherwise loading a data will overwrite the
current adjusted condition.
62
Page 63
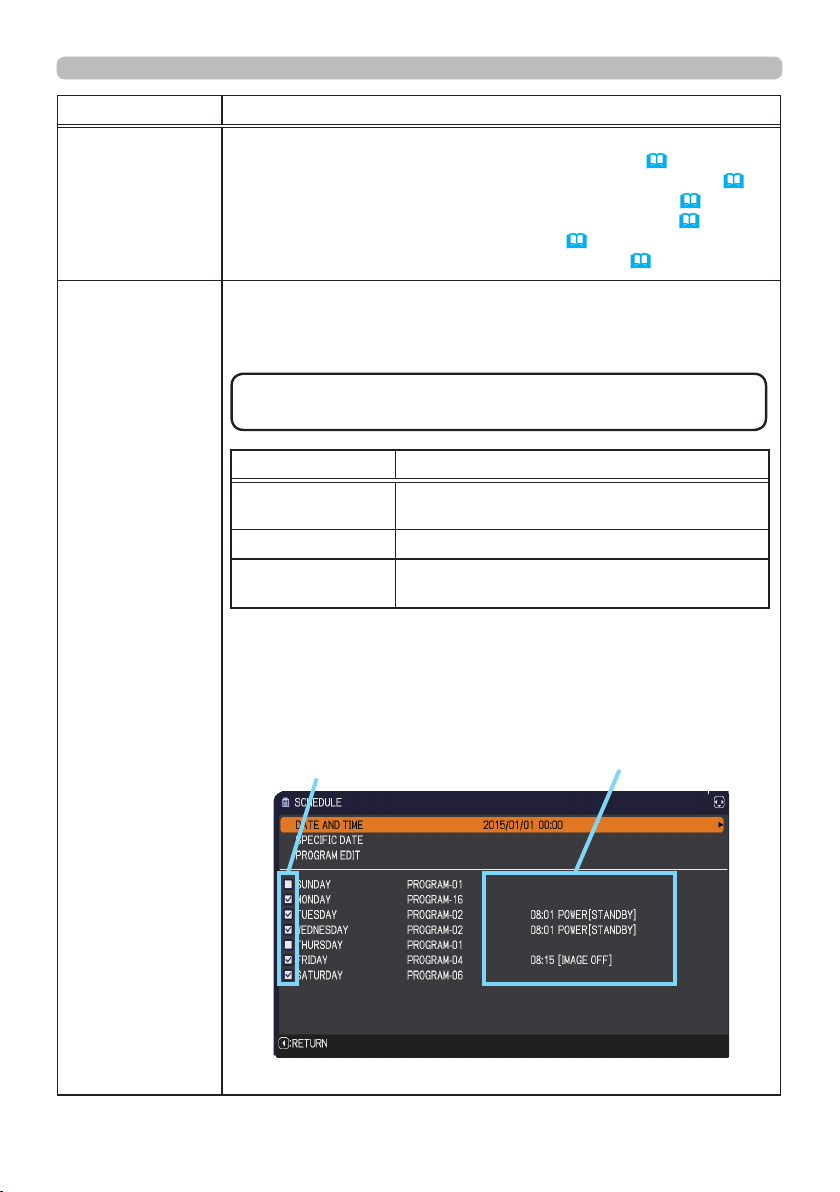
Item Description
• ACTIVE IRIS: Changes the active iris mode.
• PICTURE MODE: Changes the PICTURE MODE (
•
MY BUTTON
(Continued)
FILTER RESET: Displays the lter time reset conrmation dialogue
• RESOLUTION: Turns on/off the RESOLUTION dialog (
• MIC VOLUME: Turns on/off the MIC VOLUME dialog (
• ECO MODE: Changes the ECO MODE (
• SAVER MODE: Turns on/off the SAVER MODE (
■ How to setup the item
1. Use the ▲/▼/◄/► cursor buttons to select or adjust.
2 Select OK to nish the settings.
NOTE
•
for appropriate operation.
DATE AND TIME
SPECIFIC DATE
PROGRAM EDIT
Please refer to the actual on-screen display(OSD)
Item Description
Set the DATE(Year/Month/Date) and Time(24hour scale).
Set specic date from 1 to 10.
The TIME and EVENT for Program 1 to 16
can be editted.
50).
OPTION menu
34).
50).
(
46).
53).
51).
■ How to activate(DATE AND TIME /
SCHEDULE
(continued on next page)
Place a check mark in the box.
1/2 page (Set the DATE(Year/Month/Date) and Time(24-hour scale).)
Check mark
in the box
SPECIFIC DATE
Date and rst setup
info could be seen
with the check mark.
)
63
Page 64
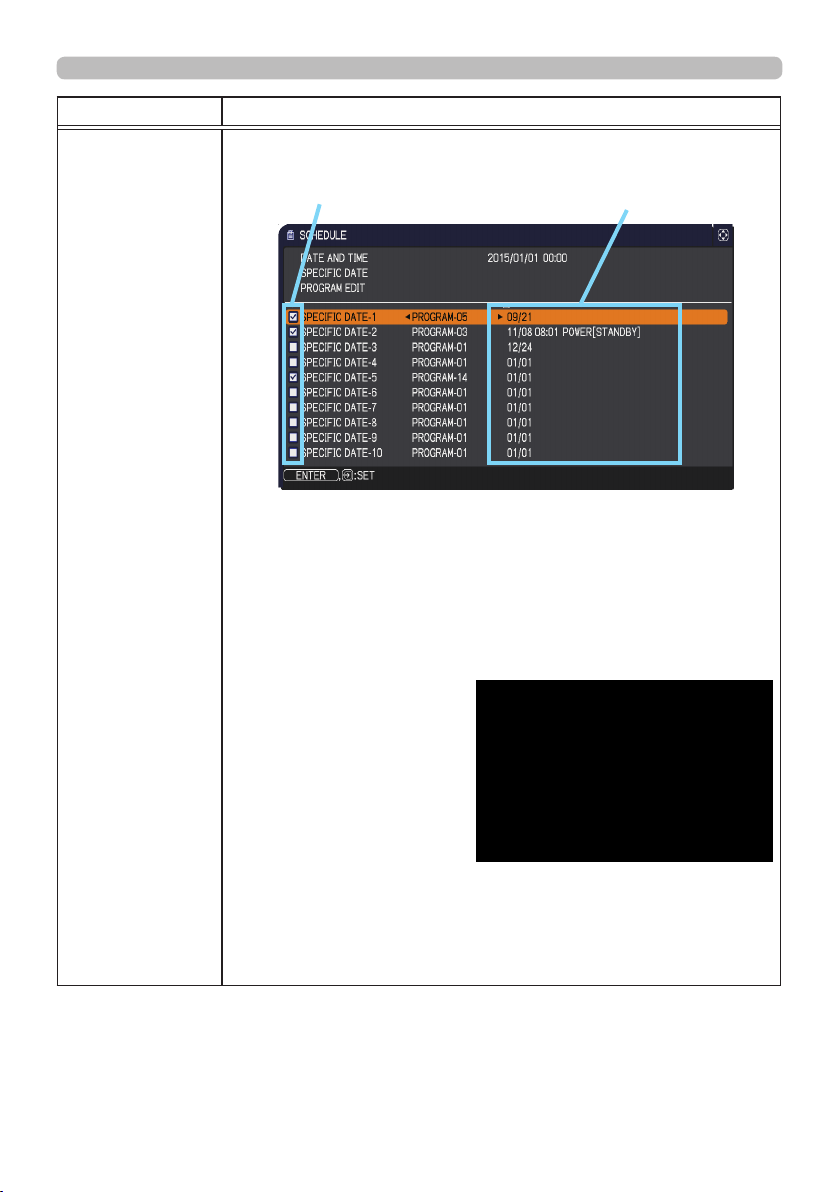
OPTION menu
Item Description
SCHEDULE
(Continued)
Check mark
in the box
2/2 page (Set specic date from 1 to 10.)
Press the ▼ cursor button to move from 1/2 page to 2/2 page with
the state of selecting "SATURDAY".
Date and rst setup
info could be seen
with the check mark.
■ PROGRAM EDIT
The TIME and EVENT for Program 1 to 16 can be editted.
• RETURN
Select this to go back
to the top menu of the
SCHEDULE.
• SELECT
Select from PROGRAM-01
to 16 to edit.
Each PROGRAM can be
setup up to 20 settings
• COPY TO
The selected program (with the settings of TIME and EVENT)
can be copied to other program.
• APPLY
Select this to apply and save all adjustments and settings.
(continued on next page)
64
Page 65

Item Description
■ How to edit the selected PROGRAM
1. Select from 1 to 20 events.
Use the ▲/▼ cursor buttons to select.
Press ► cursor button to set the TIME and EVENT.
2. Use the ◄/► cursor
buttons to select.
3. Use the ◄/► cursor
buttons to adjust.
EVENT can be selected as listed below.
◦ POWER − ON, STANDBY
◦ INPUT SOURCE − "input source"channel
◦ MY IMAGE − IMAGE-1 to 4, IMAGE OFF
◦ MESSENGER − TEXT-1 to 12, TEXT OFF
SCHEDULE
(Continued)
◦
ECO MODE − OFF, ECO-1, ECO-2, INTELLIGENT ECO,
SAVER
◦ BLANK − ON, OFF
◦ SLIDESHOW - START, STOP
OPTION menu
4. Press ► cursor button to finish the settings.
5. Select APPLY to save the settings.
(continued on next page)
NOTE
•
for appropriate operation.
Please refer to the actual on-screen display(OSD)
65
Page 66
OPTION menu
Item Description
Selecting this item displays the SERVICE
menu.
Select an item using the ▲/▼ buttons, and
press the ► button or the ENTER button
on the remote control to execute the item.
ALTITUDE
Using the ▲/▼ buttons switches the rotation speed of the cooling
fans. If the projector is used at an altitude of about 1600 m or higher,
select HIGH. Otherwise, select NORMAL. Note that the projector is
noisier when the HIGH is selected.
HIGH ó NORMAL
AUTO ADJUST
SERVICE
Using the ▲/▼ buttons to select one of the mode. When the
DISABLE is selected, the automatic adjustment feature is disabled.
FINE ó FAST ó DISABLE
FINE: Finer tuning including H.SIZE adjustment.
FAST: Faster tuning, setting H.SIZE to prearranged data for the
input signal.
• Depending on conditions, such as input image, signal cable to
the projector, environment around the projector, etc., the automatic
adjustment may not work correctly. In such a case, please
choose DISABLE to disable the automatic adjustment, and make
adjustment manually.
GHOST
Adjust the settings using the ▲/▼ buttons to eliminate ghosting.
(continued on next page)
66
Page 67
Item Description
KEY LOCK
(1) Use the ▲/▼ buttons to select CONTROL PANEL or REMOTE
(2) Use the ◄/► buttons to turn the key lock function on/off.
When ON is selected, all buttons on the projector or remote control
except the STANDBY/ON button are locked.
• Please use this function to prevent tampering or accidental
SERVICE
(continued)
operation.
• It is not possible to set both CONTROL PANEL and REMOTE
CONTROL to ON.
REMOTE RECEIV.
(1) Select a remote sensor using the ▲/▼ button.
(2) Switch it using the ◄/► button.
• When one sensor is turned off, the other cannot be turned off too.
(continued on next page)
OPTION menu
CONTROL.
FRONT ó TOP
ON ó OFF
67
Page 68
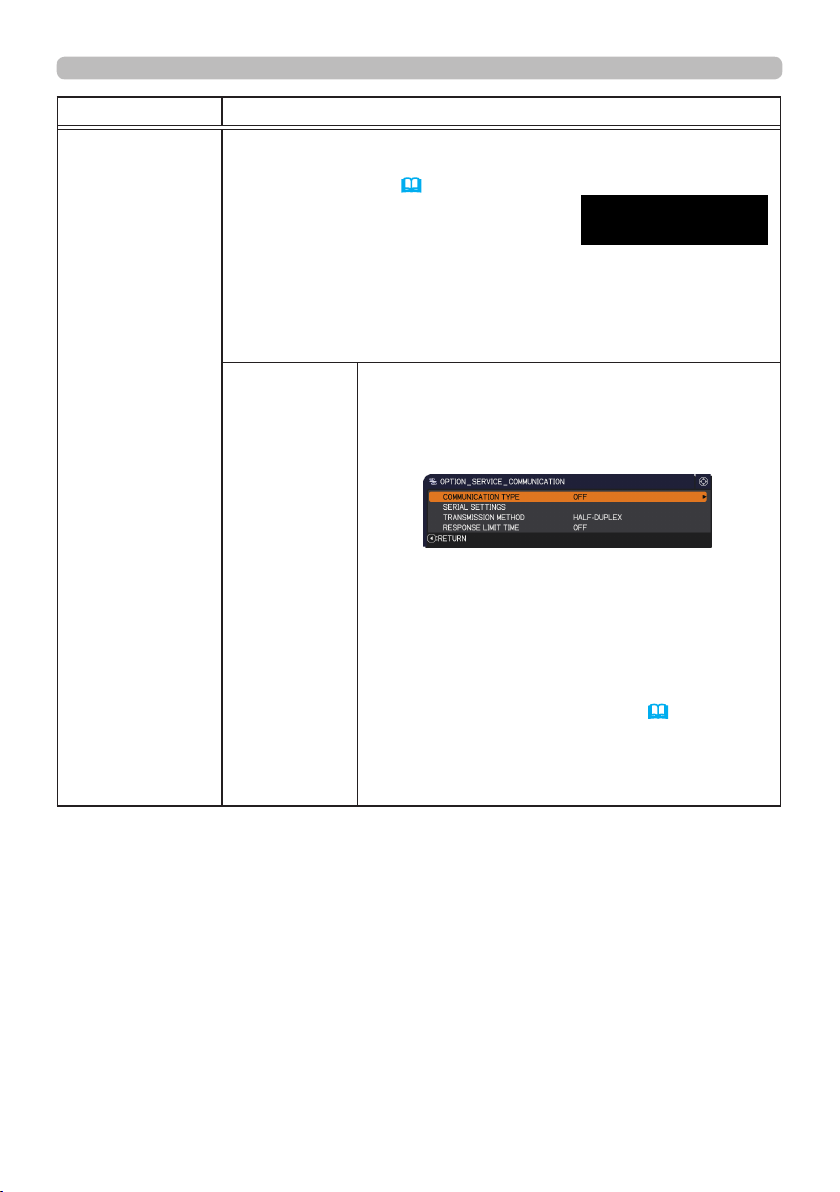
OPTION menu
Item Description
REMOTE FREQ.
(1) Use the ▲/▼ button to change the projector's remote sensor
frequency setting (
1:NORMAL ó 2:HIGH
(2) Use the ◄/► button to change the
projector's remote sensor on or off.
ON ó OFF
If the remote control does not function correctly, disable either of
them.
It's not possible to disable both options at the same time.
Selecting this item displays COMMUNICATION
menu.
In this menu, you can congure the serial
communication settings of the projector using the
SERVICE
CONTROL port.
(continued)
18).
COMMUNICATION
(continued on next page)
68
• Select an item using the cursor buttons ▲/▼.
Then pressing the ► button opens the submenu
for the setting item you selected. Or, pressing
the ◄ button instead of the ► button makes the
menu back to the previous one without changing
the setup. Each submenu can be operated as
described above.
• When COMMUNICATION TYPE (
69) is set to
OFF, the other items in COMMUNICATION menu
are invalid.
• For the function of serial communication, refer to
the User's Manual - Network Guide.
Page 69
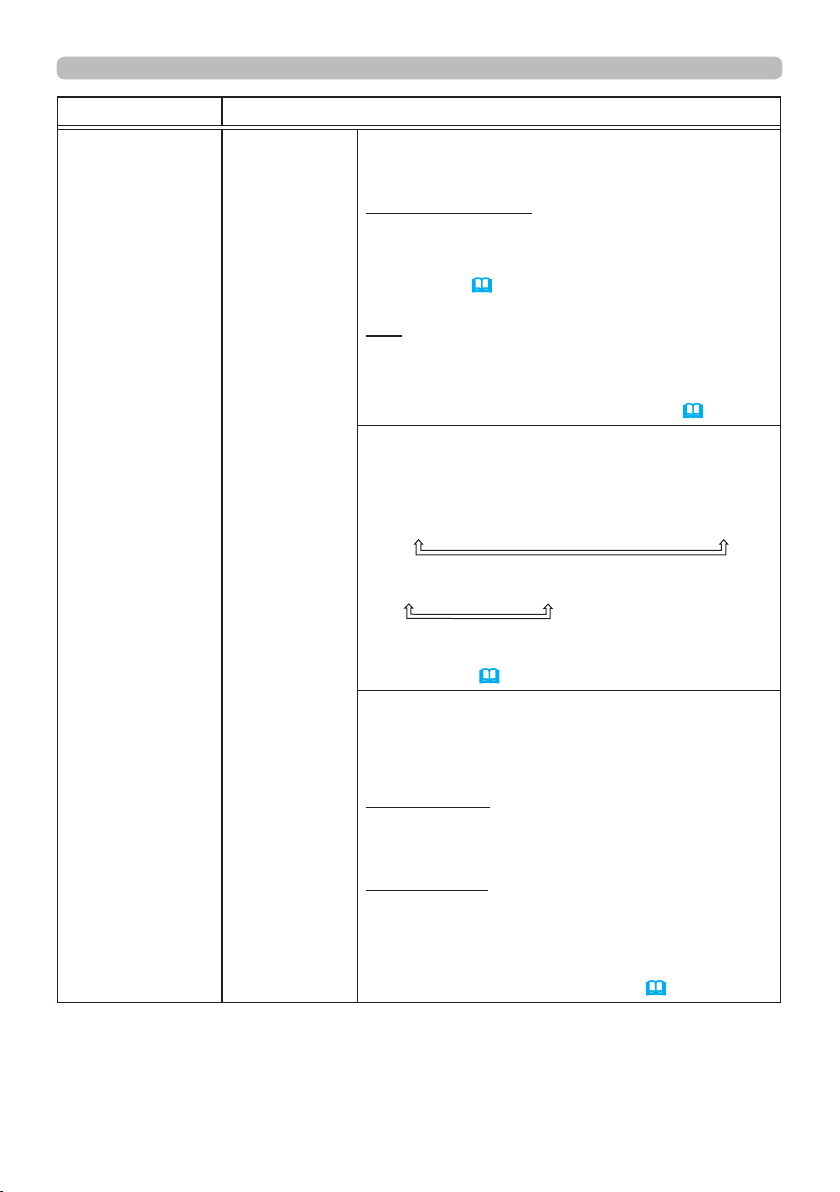
Item Description
SERVICE
COMMUNICATION
(continued)
(continued on next page)
(continued)
OPTION menu
COMMUNICATION TYPE
Select the communication type for transmission via
the CONTROL port.
NETWORK BRIDGE:
Select this type, if it is required
to control an external device as a network terminal,
via this projector from the computer.
The CONTROL port doesn't accept RS-232C
commands (
User’s Manual - Network Guide
Network Bridge Function in the
)
OFF: Select this mode to receive RS-232C
commands using the CONTROL port.
OFF is selected as the default setting.
•
• When you select the NETWORK BRIDGE, check
the item, TRANSMISSTION METHOD (
below).
SERIAL SETTINGS
Select the serial communication condition for the
CONTROL port.
BAUD RATE
4800bps ó 9600bps ó 19200bps ó 38400bps
PARITY
NONE ó ODD ó EVEN
•
The BAUD RATE is xed to 19200bps and PARITY
is xed NONE when the COMMUNICATION TYPE
is set to OFF
(
above).
TRANSMISSION METHOD
Select the transmission method for communication by
the NETWORK BRIDGE from the CONTROL port.
HALF-DUPLEX ó FULL-DUPLEX
HALF-DUPLEX: This method lets the projector
make two way communication, but only one
direction, either transmitting or receiving data, is
allowed at a time.
FULL-DUPLEX: This method lets the projector
make two way communication, transmitting and
receiving data at the same time.
• HALF-DUPLEX is selected as the default setting.
• If you select HALF-DUPLEX, check the setting of
the item RESPONSE LIMIT TIME (
70).
69
Page 70
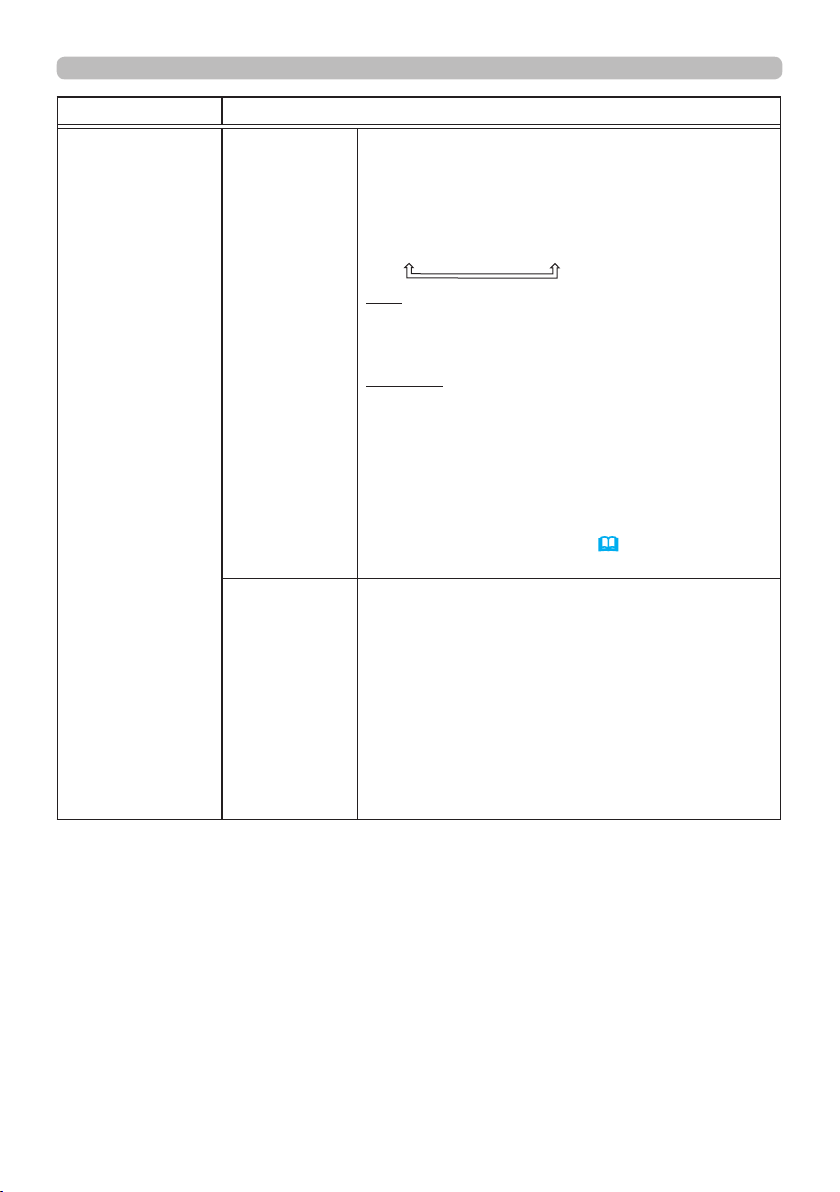
OPTION menu
Item Description
RESPONSE LIMIT TIME
Select the time period to wait for receiving
response data from other device communicating by
the NETWORK BRIDGE and the HALF-DUPLEX
through the CONTROL port.
OFF ó 1s ó 2s ó 3s
OFF: Select this mode if it is not required to check
the responses from the device that the projector
COMMUNICATION
(continued)
sends data to. In this mode, the projector can
send out data from the computer continuously.
1s /2s /3s: Select the time period to keep the
projector waiting for response from the device
that the projector sends data to. While waiting the
response, the projector does not send out any
SERVICE
(continued)
data from the CONTROL port.
• This menu is available only when the NETWORK
BRIDGE is selected for the COMMUNICATION
TYPE and the HALF-DUPLEX is selected for the
TRANSMISSION METHOD (
• OFF is selected as the default setting.
The setttings of the projector can be coppied via USB
memory.
Saves each settings of the projector to USB
SAVE:
memory.
Loads each settings of the projector from
LOAD:
CLONING
USB memory. Message will be displayed
after loading, and power will turn off after ve
min. or by pressing ► button. (A message is
displayed for a few seconds if loading fails.)
After saving / loading, you can remove the USB
storage device.
69).
(continued on next page)
70
Page 71

Item Description
The following items are exempted.
SETUP: LAMP TIME, FILTER TIME
OPTION: SERVICE(GHOST)
NETWORK: WIRELESS AND WIRED SETUP
(IP ADDRESS, SUBNET MASK,
DEFAULT GATEWAY, DATE AND
TIME), MY IMAGE, PRESENTATION,
AMX D.D.
SECURITY: MY TEXT DISPLAY
• Operation is not available if SECURITY_
CLONNING LOCK is turned ON.
• The Screen_MyScreen can only be loaded.
CLONING load function on STANDBY MODE
• While the projector is in STANDBY MODE, push
the INPUT button of control panel together with ►
button, and then press ▲ button to start operating
the CLONING load function.
• During loading process, the three indicators of
control panel (POWER (orange), TEMP, LAMP)
SERVICE
(continued)
CLONING
(continued)
will remain on.
• After the loading process, the three indicators
(POWER (orange), TEMP, LAMP) will turn off.
Then, you can remove the USB storage device.
• If the loading fails, the three indicators (POWER
(orange), TEMP, LAMP) will blink at the same
time.
• CLONING is invalid with the following conditions.
- CLONING LOCK is turned ON.
With this condition, the three indicators (POWER
(orange), TEMP, LAMP) will blink at approximately
three seconds intervals.
- If the STANDBY MODE is set to SAVING.
- If there is no USB memory inserted into USB
TYPE A port.
- If PIN LOCK is not being released.
- If a system error occurs.
• Please operate one of the following after loading.
- Press INPUT button and
panel at the same time.
- Wait at least ve min. after loading.
- Restart the projector after re-plugging the AC
cable.
OPTION menu
◄
button of the control
(continued on next page)
71
Page 72

OPTION menu
Item Description
Load MyScreen data
• Please save the image data as "pj_logo.bmp" or
"pj_logo.gif" into USB memory.
• Please note that the only compatible formats are
as follows.
-File format
Windows BMP bit/pixel: 4/8/16/24/32bit
Compression format :
Without compression/RLE/GIF
-Image size: more than 36x36, less than 1280x800
• If two kinds of le format are saved, "pj_logo.
bmp" will be registered into MyScreen data.
• If MyScreen LOCK or MyScreen PASSWORD
is turned ON, the data of MyScreen cannot be
loaded.
SERVICE
(continued)
CLONING
(continued)
Setting the data
• Operating the SAVE function under CLONING
will name the le as "pj_data.bin" into the USB
memory. Please do not attempt to change the le
name or the folder structure.
• If a le with the same name already exists, it will
be overwritten by operating the SAVE function.
(continued on next page)
72
Loading function
• Please note that saved data from other model
cannot be loaded.
•
Please note that, if any of the following functions:
MyScreen PASSWORD, PIN LOCK, MY TEXT
PASSWORD under SECURITY menu or
MyScreen Lock under SCREEN menu is ON, the
respective saved data cannot be loaded.
Page 73
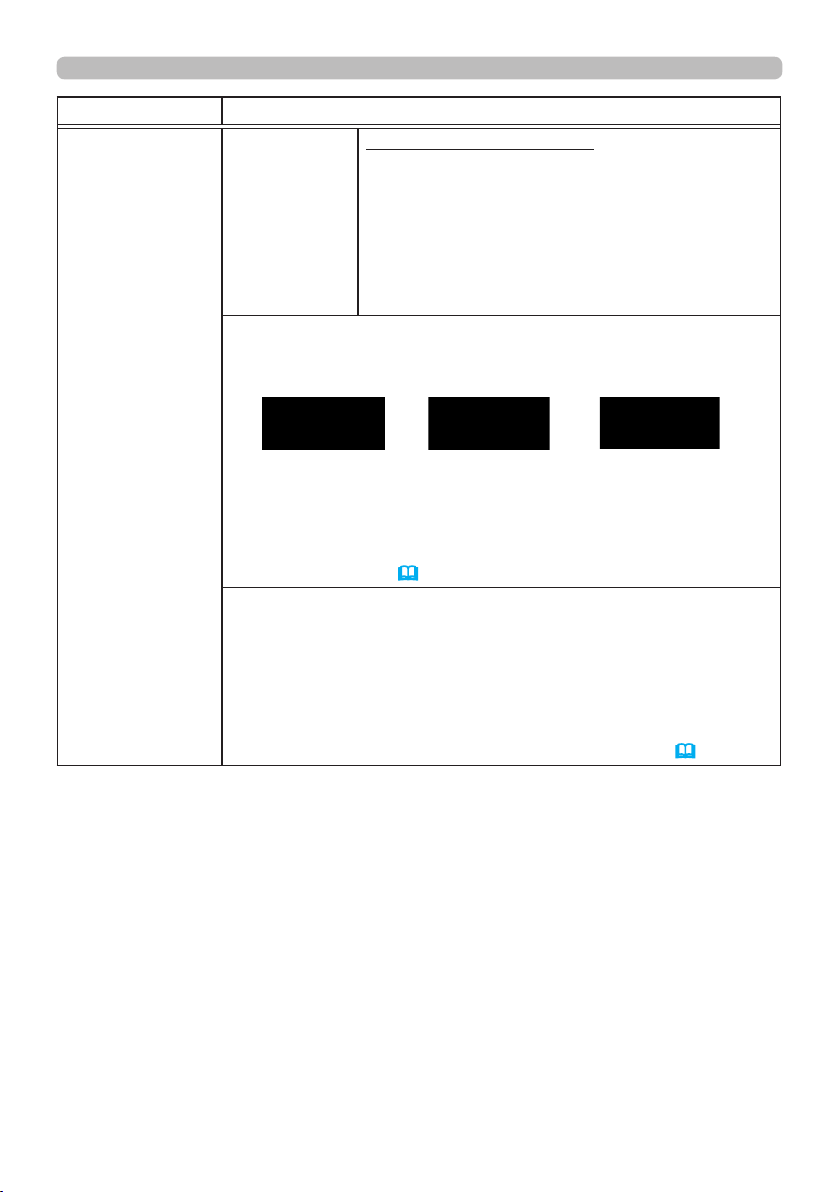
Item Description
Loading function (continued)
•
Please note that the saved data of START UP
CLONING
(continued)
and MyScreen Lock under SCREEN menu cannot
be loaded if MyScreen PASSWORD under
SECURITY menu is ON.
•
Please note that the saved data of MY TEXT
WRITING cannot be loaded if MY TEXT
PASSWORD under SECURITY menu is ON.
INFORMATION
Selecting this item displays a dialog titled “INPUT_INFORMATION”.
It shows the information about the current input.
SERVICE
(continued)
• The “FRAME LOCK” message on the dialog means the frame lock
function is working.
• This item can't be selected for no signal and sync out.
• When the MY TEXT DISPLAY is set to ON, the MY TEXT is
displayed together with the input information in the INPUT_
INFORMATION box (
79).
FACTORY RESET
Selecting OK using the ► button performs this function. By this
function, all the items in all of menus will collectively return to the
initial setting. Note that the items STANDBY MODE, AUTO BLANK,
LAMP TIME, FILTER TIME, LANGUAGE, FILTER MESSAGE,
NETWORK and SECURITY settings are not reset.
CANCEL ð OK
Be sure to set ALTITUDE after resetting all the settings (
OPTION menu
66).
73
Page 74

NETWORK menu
NETWORK menu
See the Network Guide for details of NETWORK operation.
Remember that incorrect network settings on this projector may cause trouble on
the network. Be sure to consult with your network administrator before connecting
to an existing access point on your network.
74
Page 75
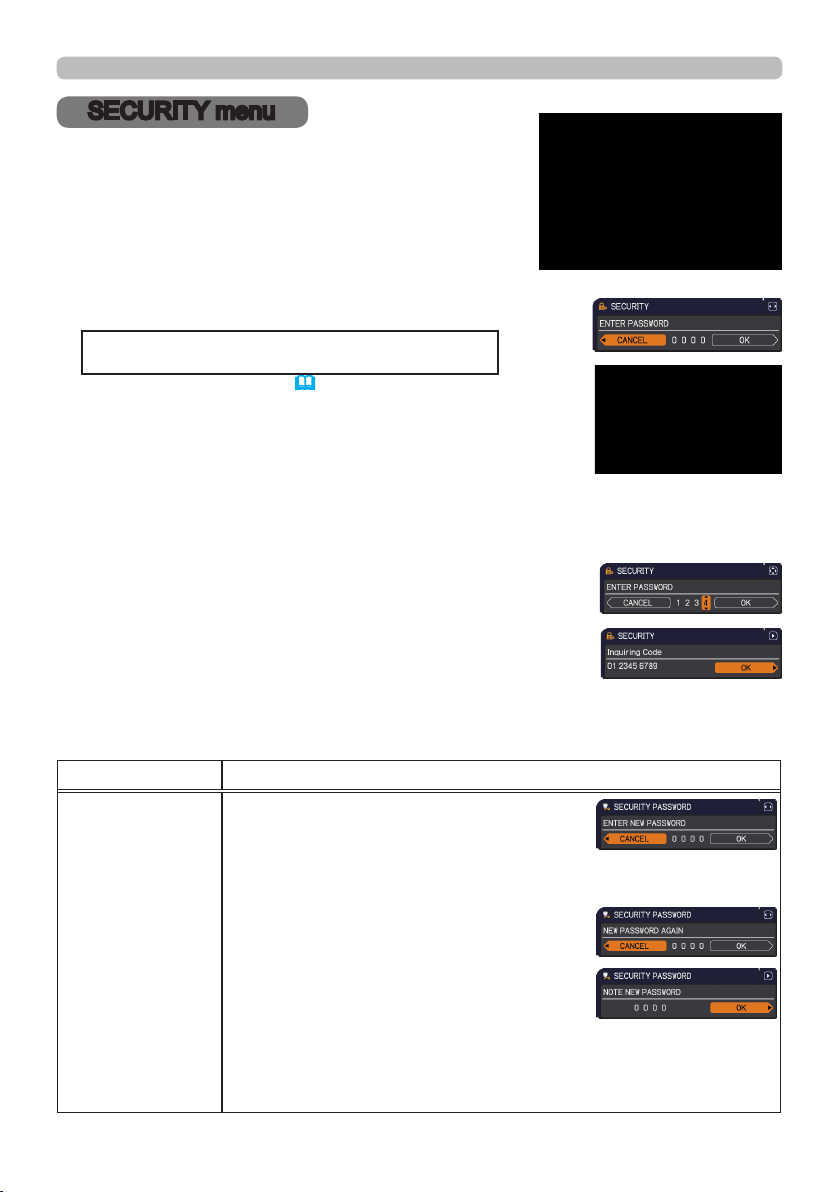
SECURITY menu
SECURITY menu
This projector is equipped with security functions.
From the SECURITY menu, items shown in the table
below can be performed.
To use SECURITY menu: User registration is required
before using the security functions.
Enter to the SECURITY menu
1. Press the ► button. The ENTER PASSWORD box will be displayed.
2. Use the ▲/▼/◄/► buttons to enter the registered password. The
factory default password is as follows.
8116A, 8117A : 1036
8118WA, 8119WA : 9435
This password can be changed
right side of the ENTER PASSWORD box and press the ► button to
display the SECURITY menu.
• It is strongly recommended the factory default password to be
changed as soon as possible.
• If an incorrect password is input, the ENTER PASSWORD box
will be displayed again. If incorrect password is input 3 times, the
projector will turn off. Afterwards the projector will turn off every time
an incorrect password is input.
3. Items shown in the table below can be performed.
(
If you have forgotten your password
(1). While the ENTER PASSWORD box is displayed, press and hold
the RESET button on the remote control for about 3 seconds or
press and hold the INPUT button for 3 seconds while pressing the
► button on the projector.
(2). The 10 digit Inquiring Code will be displayed. Contact your dealer
with the 10 digit Inquiring Code. Your password will be sent after
your user registration information is conrmed.
• If there is no key input for about 55 seconds while the Inquiring Code is displayed, the menu will
close. If necessary, repeat the process from (1).
. Move the cursor to the
below)
Item Description
(1) Use the ▲/▼ buttons on the SECURITY menu
(2) Use the ▲/▼/◄/► buttons to enter the new password.
(3) Move the cursor to the right side of the ENTER
SECURITY
PASSWORD
CHANGE
(4)
• Please do not forget your password.
(continued on next page)
to select SECURITY PASSWORD CHANGE
and press the ► button to display the ENTER
NEW PASSWORD box.
NEW PASSWORD box and press the ► button
to display the NEW PASSWORD AGAIN box,
enter the same password again.
Move the cursor to the right side of the NEW
PASSWORD AGAIN box and press the ►
button and the NOTE NEW PASSWORD box
will be displayed for about 30 seconds, please
make note of the password during this time.
Pressing the ENTER button on the remote control or ► button on the
projector will close the NOTE NEW PASSWORD box.
75
Page 76
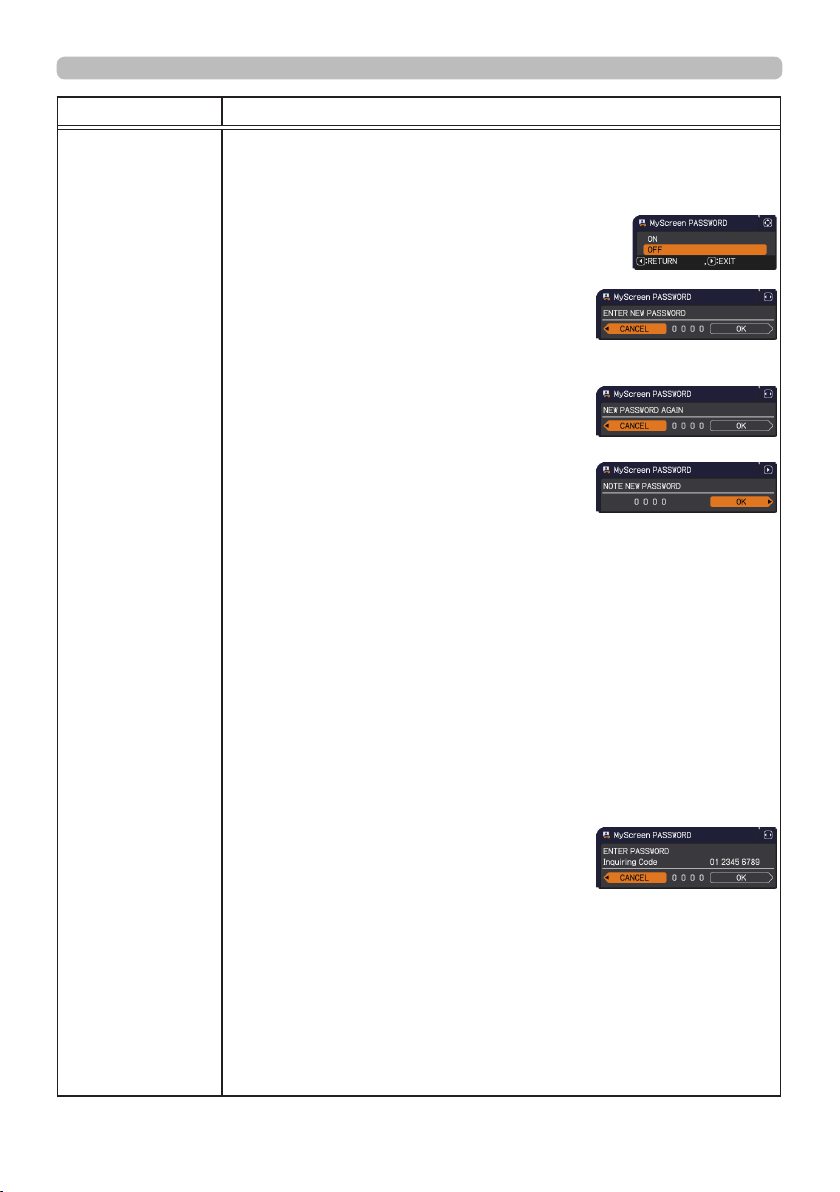
SECURITY menu
Item Description
The MyScreen PASSWORD function can be used to prohibit access to the
MyScreen function and prevent the currently registered MyScreen image
from being overwritten.
1 Turning on the MyScreen PASSWORD
1-1 Use the ▲/▼ buttons on the SECURITY menu to
1-2 Use the ▲/▼ buttons on the MyScreen
1-3 Use the ▲/▼/◄/► buttons to enter the
1-4 Move the cursor to the right side of the
MyScreen
PASSWORD
(continued on next page)
When a password is set for MyScreen:
•
•
•
unavailable).
Turning the MyScreen PASSWORD off will allow normal operation of these
functions.
•
2 Turning off the MyScreen PASSWORD
2-1 Follow the procedure in 1-1 to display the MyScreen PASSWORD on/off
2-2
If an incorrect PASSWORD is input, the menu will
close. If necessary, repeat the process from 2-1.
3 If you have forgotten your password
3-1 Follow the procedure in 1-1 to display the MyScreen PASSWORD on/off
3-2 Select OFF to display the ENTER PASSWORD box (large). The 10 digit
3-3 Contact your dealer with the 10 digit Inquiring Code. Your password will
select MyScreen PASSWORD and press the ►
button to display the MyScreen PASSWORD on/
off menu.
PASSWORD on/off menu to select ON.
The ENTER NEW PASSWORD box (small)
will be displayed.
password. Move the cursor to the right side
of the ENTER NEW PASSWORD box (small)
and press the ► button to display the NEW
PASSWORD AGAIN box, enter the same
PASSWORD again.
NEW PASSWORD AGAIN box and press
the ► button to display the NOTE NEW
PASSWORD box for about 30 seconds,
please make note of the password during
this time.
Pressing the ENTER button on the remote control or ► button on the
projector will return to MyScreen PASSWORD on/off menu.
The MyScreen registration function (and menu) will be unavailable.
The MyScreen Lock menu will be unavailable.
The START UP setting will be locked on MyScreen (and the menu will be
Please do not forget your MyScreen PASSWORD.
menu.
Select OFF to display the ENTER
PASSWORD box (large). Enter the registered
password and the screen will return to the
MyScreen PASSWORD on/off menu.
menu.
Inquiring Code will be displayed inside the box.
be sent after your user registration information is conrmed.
ENTER NEW PASSWORD
box (small)
ENTER PASSWORD box
(large)
76
Page 77
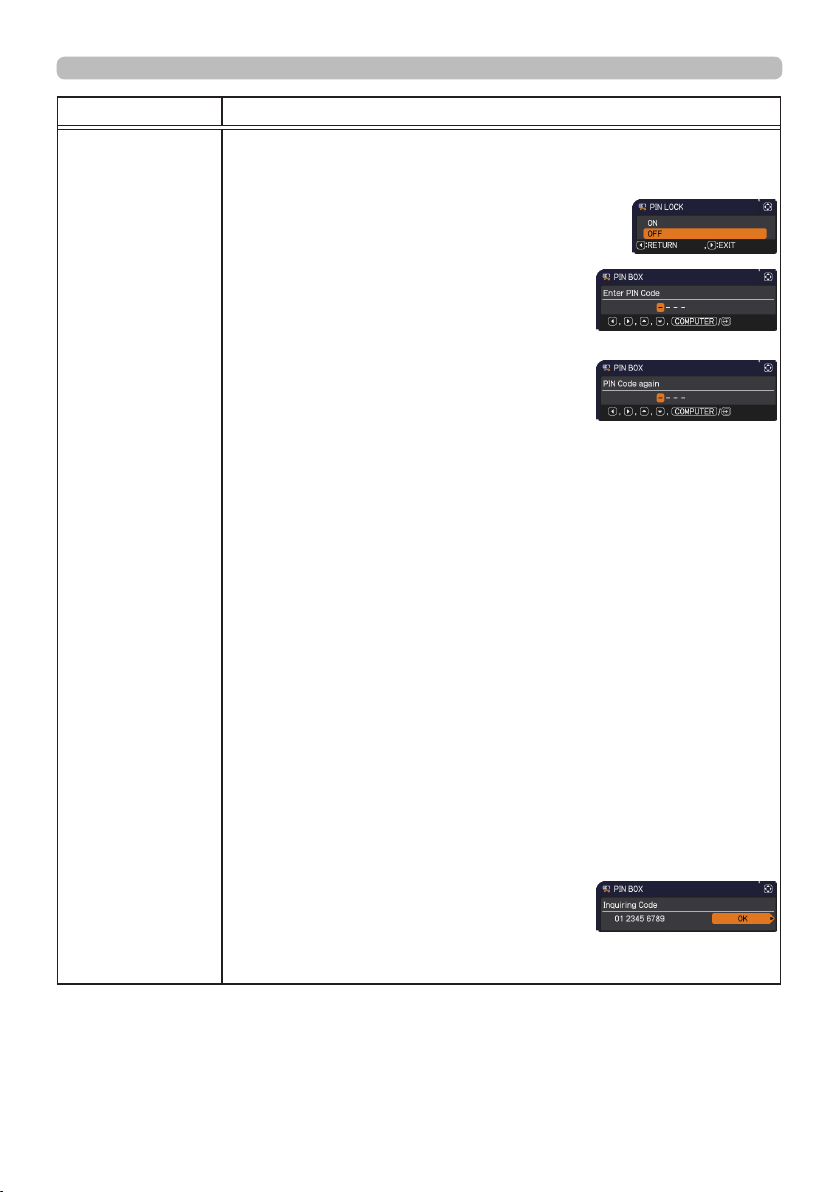
Item Description
PIN LOCK is a function which prevents the projector from being used unless
a registered Code is input.
1 Turning on the PIN LOCK
1-1 Use the ▲/▼ buttons on the SECURITY menu
to select PIN LOCK and press the ► button or
the ENTER button to display the PIN LOCK on/off
menu.
1-2 Use the ▲/▼ buttons on the PIN LOCK on/
off menu to select ON and the Enter PIN
Code box will be displayed.
1-3 Input a 4 part PIN code using the ▲/▼/◄/►,
COMPUTER or INPUT button.
The PIN Code again box will appear.
Reenter the same PIN code. This will complete
the PIN code registration.
If there is no key input for about 55 seconds
•
while the Enter PIN Code box or the PIN Code again box is displayed,
the menu will close. If necessary, repeat the process from 1-1.
Afterwards, anytime the projector is restarted after AC power is turned off
the Enter PIN Code box will be displayed. Enter the registered PIN code.
The projector can be used after entering the registered PIN code. If an
incorrect PIN code is input, the Enter PIN code box will be displayed again.
PIN LOCK
If an incorrect PIN code is input 3 times, the projector will turn off. Afterwards
the projector will turn off every time an incorrect PIN code is input. The
projector will also turn off if there is no key input for about 5 minutes while
the Enter PIN code box is displayed.
This function will activate only when the projector is started after AC power
is turned off.
Please do not forget your PIN code.
•
2 Turning off the PIN LOCK
2-1 Follow the procedure in 1-1 to display the PIN LOCK on/off menu.
2-2 Use the ▲/▼ buttons to select OFF and the Enter PIN Code box will be
displayed.
Enter the registered PIN code to turn the PIN LOCK function off.
If an incorrect PIN code is input 3 times, the projector will turn off.
3 If you have forgotten your PIN code
3-1 While the Enter PIN code box is displayed, press and hold the RESET
button for 3 seconds or press and hold the INPUT button for 3 seconds
while pressing the ► button on the projector.
The 10 digit Inquiring Code will be displayed.
If there is no key input for about 5 minutes
•
while the Inquiring Code is displayed, the
projector will turn off.
3-2 Contact your dealer with the 10 digit Inquiring Code. Your PIN code will
be sent after your user registration information is conrmed.
SECURITY menu
(continued on next page)
77
Page 78
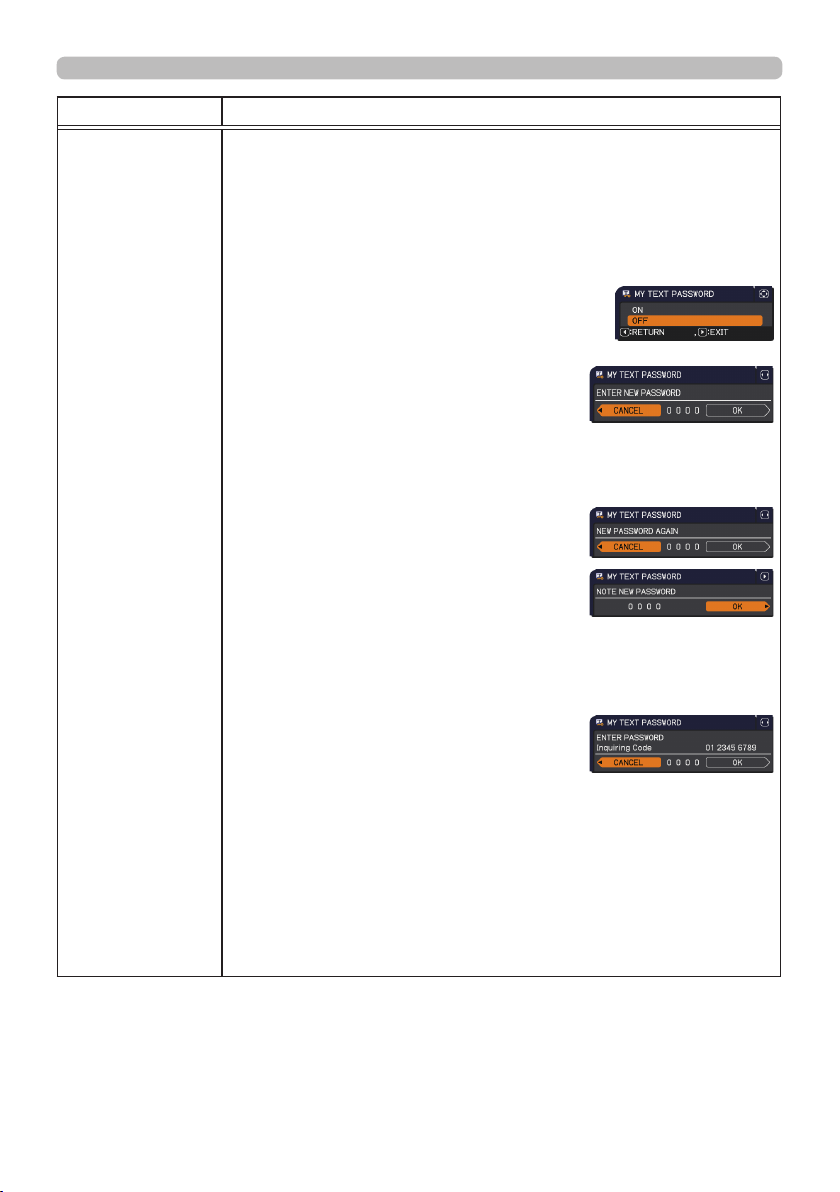
SECURITY menu
Item Description
The MY TEXT PASSWORD function can prevent the MY TEXT from being
overwritten. When the password is set for the MY TEXT;
• The MY TEXT DISPLAY menu will be unavailable, which can prohibit
changing the DISPLAY setting.
• The MY TEXT WRITING menu will be unavailable, which can prevent the
MY TEXT from being overwritten.
1 Turning on the MY TEXT PASSWORD
1-1 Use the ▲/▼ buttons on the SECURITY menu to
1-2 Use the ▲/▼ buttons on the MY TEXT
1-3 Use the ▲/▼/◄/► buttons to enter the
MY TEXT
1-4 Move the cursor to the right side of the NEW
PASSWORD
Pressing the ENTER button on the remote control or ► button on the
projector will return to the MY TEXT PASSWORD on/off menu.
2 Turning off the MY TEXT PASSWORD
2-1 Follow the procedure in 1-1 to display the MY TEXT PASSWORD on/off
2-2 Select OFF to display the ENTER
If an incorrect password is input, the menu will close.
If necessary, repeat the process from 2-1
3 If you have forgotten your password
3-1 Follow the procedure in 1-1 to display the MY TEXT PASSWORD on/off
3-2 Select OFF to display the ENTER PASSWORD box (large). The 10 digit
3-3 Contact your dealer with the 10 digit inquiring code. Your password will
(continued on next page)
select the MY TEXT PASSWORD and press the
► button to display the MY TEXT PASSWORD
on/off menu.
PASSWORD on/off menu to select ON. The
ENTER NEW PASSWORD box (small) will
be displayed.
password. Move the cursor to the right side
of the ENTER NEW PASSWORD box (small)
and press the ► button to display the NEW
PASSWORD AGAIN box, and then enter the
same password again.
PASSWORD AGAIN box and press ► button
to display the NOTE NEW PASSWORD box
for about 30 seconds, then please make note
of the password during this time.
menu.
PASSWORD box (large). Enter the registered
password and the screen will return to the
MY TEXT PASSWORD on/off menu.
menu.
inquiring code will be displayed inside the box.
be sent after your user registration information is conrmed.
ENTER NEW PASSWORD
box (small)
ENTER PASSWORD box
(large)
78
Page 79
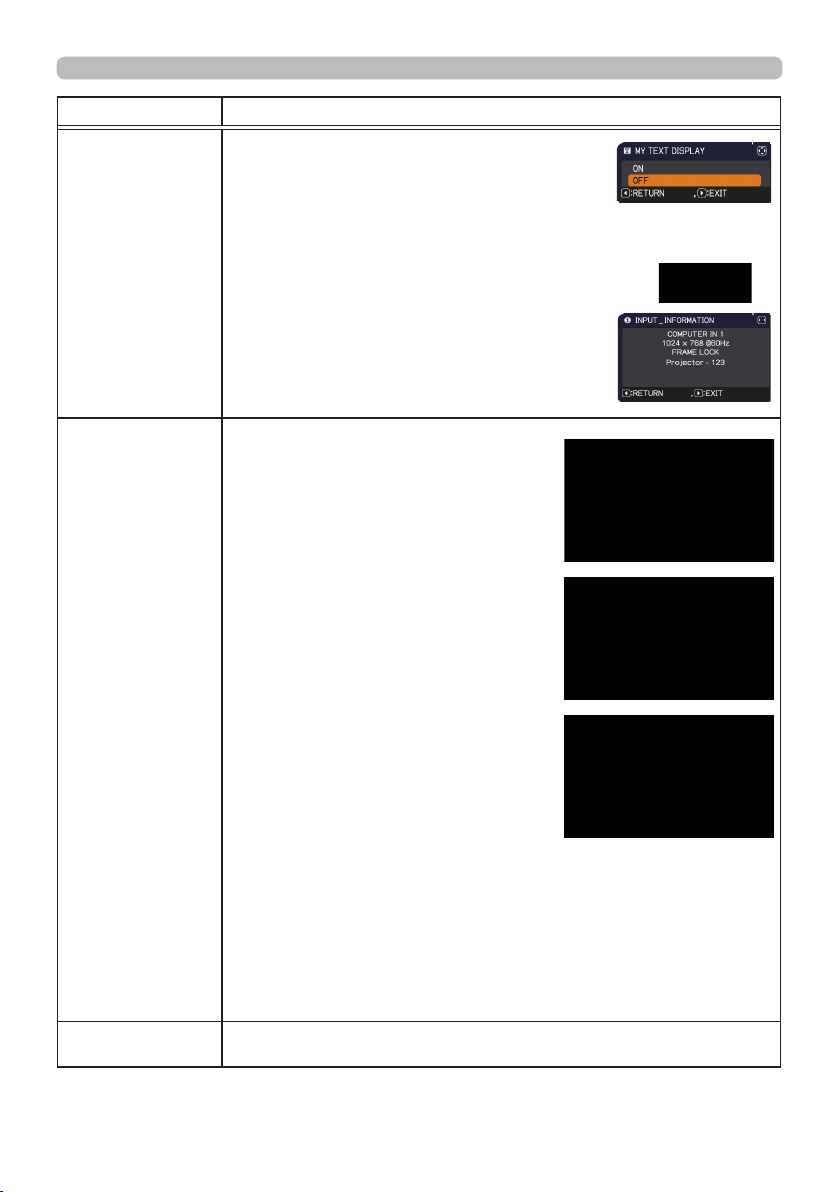
Item Description
(1) Use the ▲/▼ buttons on the SECURITY menu to
select the MY TEXT DISPLAY and press the ► or
ENTER button to display the MY TEXT DISPLAY
on/off menu.
(2) Use the ▲/▼ buttons on the MY TEXT DISPLAY on/off menu to select
on or off.
MY TEXT
DISPLAY
MY TEXT
WRITING
CLONING LOCK
ON ó OFF
When it is set ON, the MY TEXT will be displayed
on the START UP screen and the INPUT_
INFORMATION when the INFORMATION on the
SERVICE menu is chosen.
• This function is available only when the MY TEXT
PASSWORD function is set to the OFF.
(1) Use the ▲/▼ buttons on the
SECURITY menu to select the MY
TEXT WRITING and press the ►
button. The MY TEXT WRITING dialog
will be displayed.
(2) The current MY TEXT will be displayed
on the rst 3 lines. If not yet written, the
lines will be blank.
Use the ▲/▼/◄/► buttons and the
ENTER or INPUT button to select and
enter characters. To erase 1 character
at one time, press the RESET button or
press the ◄ and INPUT button at the
same time. Also if you move the cursor
to DELETE or ALL CLEAR on screen
and press the ENTER or INPUT button,
1 character or all characters will be
erased. The MY TEXT can be input up
to 24 characters on each line.
(3) To change an already inserted
character, press the ▲/▼ button to
move the cursor to one of the rst 3
lines, and use the ◄/► buttons to
move the cursor on the character to be
changed.
After pressing the ENTER or INPUT button, the character is selected.
Then, follow the same procedure as described at the item (2) above.
(4) To nish entering text, move the cursor to the OK on screen and press
the ►, ENTER or INPUT button. To revert to the previous MY TEXT
without saving changes, move the cursor to the CANCEL on screen and
press the ◄, ENTER or INPUT button.
The MY TEXT WRITING function is available only when the MY TEXT
•
PASSWORD function is set to OFF.
The CLONING operation under OPTION_SERVICE menu is not available if
ON is selected.
SECURITY menu
79
Page 80
Presentation toolsPresentation tools
Presentation tools
The projector has the following convenient tools that enable on-screen
presentations easily and quickly:
- PC-LESS Presentation (
- Drawing function
Drawing function enables you to draw on the projector’s screen with
USBmouse or tablets connected to the USB TYPE A ports. For details, refer to
the manual for peripheral equipment.
- USB Display (90, 94)
below)
PC-LESS Presentation
The PC-LESS Presentation reads image and audio data from the storage media
inserted into the USB TYPE A port and displays the image in the following modes.
The PC-LESS Presentation can be started by selecting the USB TYPE A port as
the input source.
This feature allows you to make your presentations without using your computer.
- Thumbnail mode (81)
- Full Screen mode (85)
- Slideshow mode (87)
[Supported storage media]
• USB memory (USB memory type, USB hard disk and USB card reader type)
NOTE
work (if the adapter is acknowledged as multiple devices connected).
• USB devices with security software may not work.
• Be careful when inserting or removing a USB device. (13, 83)
[Supported format]
• FAT12, FAT16 and FAT32
80
• USB readers (adapters) that have more than one USB slot may not
• NTFS is not supported.NOTE
Page 81
Presentation toolsPresentation tools
PC-LESS Presentation (continued)
[Supported le format and its extension]
• JPEG (.jpeg, .jpg) * Progressive is not supported.
• Bitmap (.bmp) * 16bit mode and compressed bitmap is not supported.
• PNG (.png) * Interlace PNG is not supported.
• GIF (.gif)
• Movie (.avi, .mov) *
Supported video format: Motion-JPEG
Supported audio format:
WAV (Linear PCM, Stereo 16bit),
IMA-ADPCM
NOTE
8116A, 8117A : 1024 x 768 (Still), 768 x 576 (Movie)
8118WA, 8119WA : 1280 x 800 (Still), 768 x 576 (Movie)
• Files with a resolution larger than the following are not supported.
(* Some computers may not support 1280 x 800.)
• Files with a resolution smaller than 36 x 36 are not supported.
• Files with a resolution smaller than 100 x 100 may not be displayed.
• Movie images with a frame rate higher than 15 fps cannot be displayed.
• Movie images with a bit rate higher than 20 Mbps cannot be displayed.
• Some supported les may not be displayed.
• Only a frame appears when the content of image data cannot be displayed in
the Thumbnail mode.
• Even with the le format and audio format combinations described above,
playback of some les may fail.
Thumbnail mode
The Thumbnail mode displays the images stored in a USB storage device on the
Thumbnail screen. Maximum 20 images are displayed in a screen.
If you wish, you can jump into the Full Screen mode or Slideshow mode, after you
select some images in the Thumbnail mode.
The Thumbnail mode will be started as the primary function of the PC-LESS
Presentation after selecting the USB TYPE A port as the input source.
Selected image
Thumbnail images
Thumbnail menu
81
Page 82
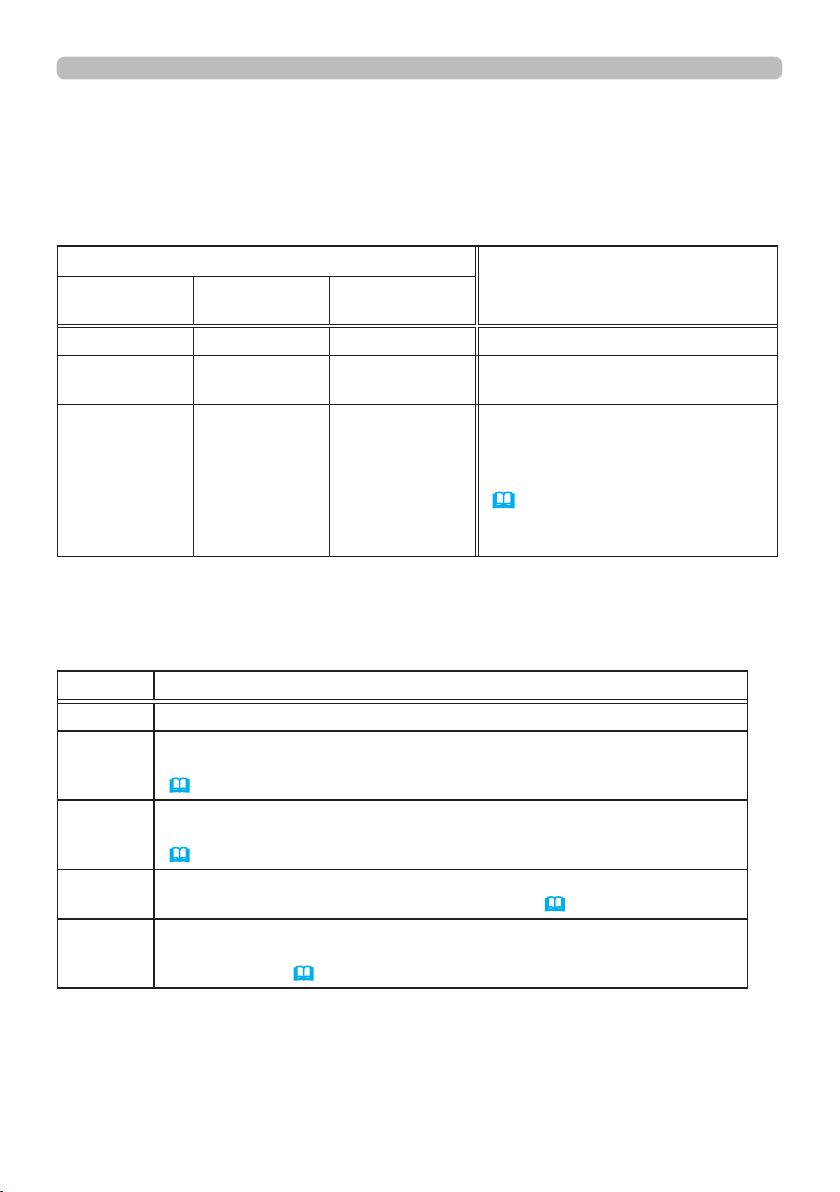
Presentation tools
PC-LESS Presentation (continued)
Operating by buttons or keys
You can control the images on the Thumbnail screen with the remote control,
control panel or Web Remote Control. The following functions can be supported
while the Thumbnail is displayed.
Button operation
The remote
control
▲/▼/◄/► ▲/▼/◄/► [▲]/[▼]/[◄]/[►] Move cursor
PAGE UP
PAGE DOWN
ENTER INPUT [ENTER]
Control panel
-
Web Remote
Control
[PAGE UP]
[PAGE DOWN]
Switches pages
• Displays the selected image
on the Full Screen mode when a
cursor is on a thumbnail image.
• Displays the setup menu
(
below) for the selected image
when a cursor is on a thumbnail
image number.
Functions
The setup menu for the selected image
Use the ◄/► cursor buttons to switch each setting or use the ► cursor button to execute
the functions as follows.
Item Functions
RETURN Press the ► cursor button or ENTER to return to the Thumbnail screen.
START
STOP
SKIP
ROTATE
82
Switch to ON to set the selected image as the rst image in the
Slideshow. This setting information will be saved in the “playlist.txt” le
89).
(
Switch to ON to set the selected image as the last image in the
Slideshow. This setting information will be saved in the “playlist.txt” le
(
89).
Switch to ON to skip the selected image in the Slideshow. This setting
information will be saved in the “playlist.txt” le (
Press the ► cursor or ENTER button to rotate the selected still image
90 degrees clockwise. This setting information will be saved in the
“playlist.txt” le (
89).
89).
Page 83
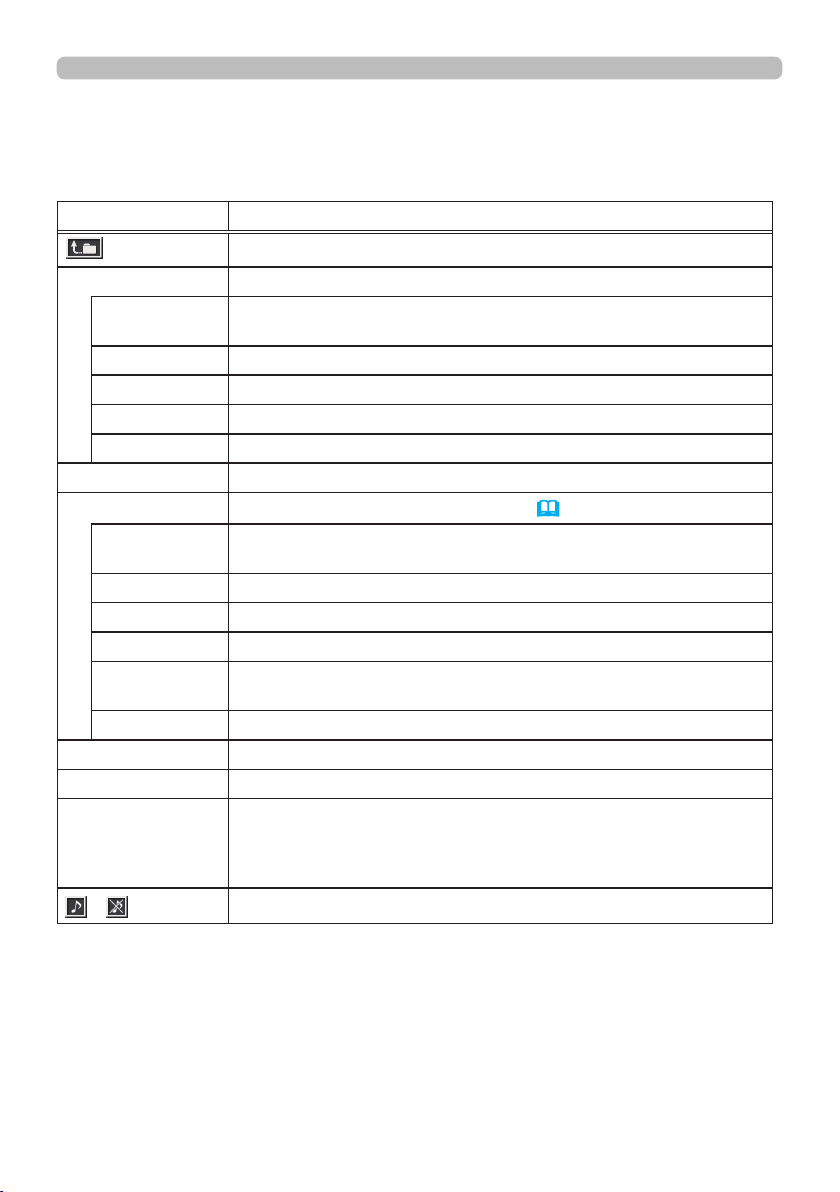
Presentation tools
PC-LESS Presentation (continued)
Operating by the menu on the Thumbnail screen
You can also control the images by using the menu on the Thumbnail screen.
Item Functions
Moves to an upper folder.
SORT Allows you to sort les and folders as following.
RETURN
NAME UP Sorts in ascending order by le name.
NAME DOWN Sorts in descending order by le name.
DATE UP Sorts in ascending order by le date.
DATE DOWN Sorts in descending order.by le date.
▲/▼ Go to previous / next page.
SLIDESHOW Congures and starts the Slideshow (
RETURN
PLAY Press the ► cursor button or ENTER to start the Slideshow.
START Sets the beginning number of the Slideshow.
STOP Sets the end number of the Slideshow.
INTERVAL
PLAY MODE Selects the Slideshow mode.
INPUT Switches the input port.
MENU Displays the menu.
REMOVE USB
/
Press the ► cursor button or ENTER to return to the Thumbnail
screen.
87).
Press the ► cursor button or ENTER to return to the Thumbnail
screen.
Sets the interval time for displaying still images during the
Slideshow.
Be sure to use this function before removing USB storage device
from the projector. After that, the projector will not recognize a
USB storage device until you insert it again into the USB TYPE A
input port.
Turns the sound on/off for les that contain audio data.
83
Page 84
Presentation toolsPresentation tools
PC-LESS Presentation (continued)
•
NOTE
These operations are not accessible while the projector OSD is displayed.
• The Thumbnail mode is able to display up to 20 les in one page.
• It is not possible to change the input port by using the INPUT button when the
Thumbnail screen, Slideshow, or Full Screen is displayed.
• The image quality may deteriorate when playing back audio data included in
a movie. If you want to give priority to the image quality, turn off the sound by
setting ♪ to off.
• If one of the AUDIO IN ports is selected or is selected for USB TYPE A in
AUDIO SOURCE of the AUDIO menu (53), ♪ cannot be operated.
• Some error icons will be displayed in the Thumbnail.
This le seems to be broken or not supported format.
A le that cannot be displayed on the
thumbnail screen is indicated by a le
format icon.
84
Page 85
Presentation tools
PC-LESS Presentation (continued)
Full Screen Mode
The Full Screen mode shows a full display image. To display in Full Screen mode,
select an image in the Thumbnail screen. Then press the ENTER button on the
remote control, the INPUT button on the control panel or click [ENTER] on the
Web Remote Control.
Full screen display
Operations for still images
The following operations are enabled in the Full Screen mode while a still image
is displayed.
Button operation
The remote
control
▼
►
or
PAGE DOWN
▲
◄
or
PAGE UP
ENTER INPUT [ENTER] Displays Thumbnail.
Control panel
▼
or
►
▲
or
◄
Web Remote
Control
[▼]
[►]
or
[PAGE DOWN]
[▲]
[◄]
or
[PAGE UP]
Shows the next le.
Shows the previous le.
Functions
85
Page 86
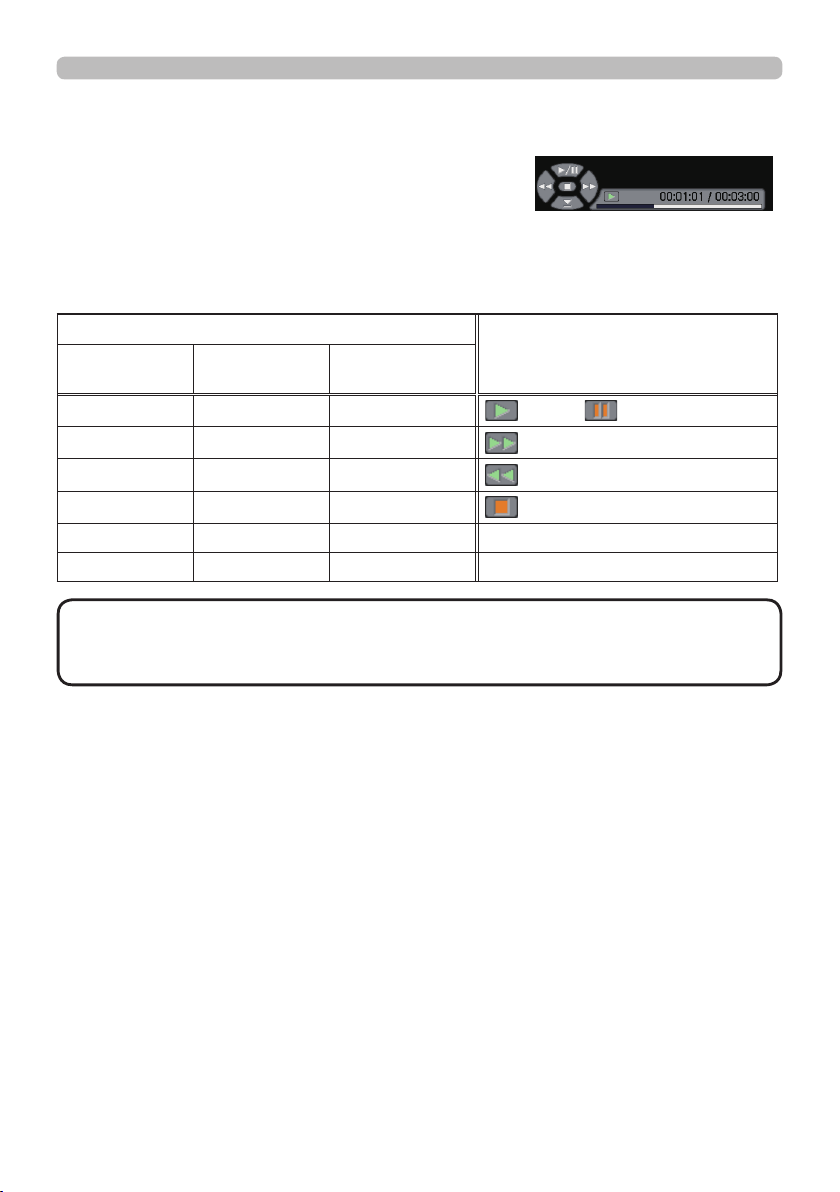
Presentation tools
PC-LESS Presentation (continued)
Operations for movie
A remote control icon and a progress bar are
displayed when one of the cursor buttons, ENTER
button or INPUT button on the remote control, control
panel or Web Remote Control is pressed or clicked while a movie is playing in the
Full Screen mode. The following operations are enabled while the remote control
icon and progress bar are displayed.
Button operation
The remote
control
▲ ▲ [▲]
► ► [►]
◄ ◄ [◄]
ENTER INPUT [ENTER]
PAGE DOWN – [PAGE DOWN]
PAGE UP – [PAGE UP]
NOTE
•
Control panel
These operations are not accessible while the projector OSD is displayed.
Web Remote
Control
(Play) /
(FF) Fast-forward
(REW) Fast-rewind
(Stop), Displays Thumbnail.
Shows the next le.
Shows the previous le.
Functions
(Pause) toggle
• It is not possible to change the input port by using the INPUT button when the
Thumbnail screen, Slideshow, or Full Screen is displayed.
86
Page 87
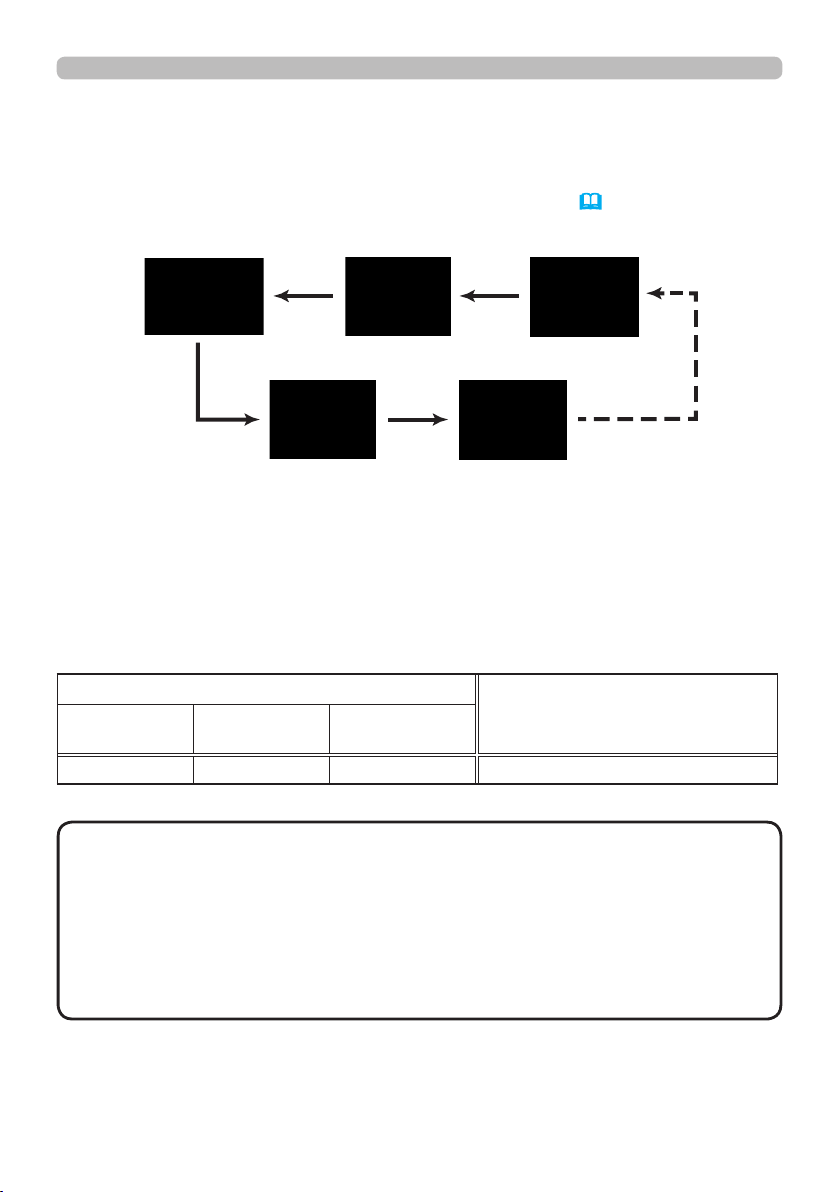
Presentation tools
PC-LESS Presentation (continued)
Slideshow mode
The Slideshow mode displays images in full screen and switches the images at
intervals set in INTERVAL on the Thumbnail screen menu (82).
You can start this function from the Slideshow menu. To display the Slideshow
menu, select the SLIDESHOW button in the Thumbnail mode and press the
ENTER button on the remote control, INPUT button on the control panel, or click
[ENTER] on the Web Remote Control.
While the Slideshow is displayed, the following button operations are enabled
when still images are displayed, and the same button operations in the Full
Screen mode are enabled when movies are displayed.
Button operation
The remote
control
ENTER INPUT [ENTER] Displays thumbnail
NOTE
• These operations are not accessible while the projector OSD is
Control panel
Web Remote
Control
Functions
displayed.
• It is not possible to change the input port by using the INPUT button when the
Thumbnail screen, Slideshow, or Full Screen is displayed.
• When the Slideshow mode is set to ONE TIME and the last le is a still image,
the last slide of the presentation will remain displayed until the ENTER button
on the remote control or Web Remote Control, or the INPUT button on the
control panel is pressed.
87
Page 88

Presentation tools
PC-LESS Presentation (continued)
You can play the Slideshow at your desired conguration.
Congure the Slideshow items in the Thumbnail.
1) RETURN :
Returns to the thumbnail mode.
2) PLAY : Play the Slideshow.
3) START :
Set the beginning number of the
Slideshow.
4) STOP : Set the end number of the Slideshow.
5) INTERVAL : Sets the interval time for displaying still
images during the Slideshow.
It is not recommend to set the interval
time very short something like several
seconds, because it may take more than
several seconds to read and display an
image le if it is stored in very deep layer
directory or if so many les are stored in
the same directory.
6) PLAY MODE : Select the Slideshow mode.
ONE TIME : Play the Slideshow one time.
ENDLESS : Play the Slideshow endless.
NOTE
• The settings of the Slideshow are saved to the “playlist.txt” le
that is stored in the storage media. If the le is not existed, it is generated
automatically.
• The settings for the START, STOP, INTERVAL, and PLAY MODE are saved to
the Playlist.
• If the storage media is under the write protection or the “playlist.txt” is the
read only type le, it is impossible to change the settings of the Slideshow.
88
Page 89

Presentation tools
PC-LESS Presentation (continued)
Playlist
The Playlist is a DOS format text le, which decides the order of displayed still
image les in the Thumbnail or Slideshow.
The playlist le name is “playlist.txt” and it can be edited on a computer.
It is created in the folder that contains the selected image les when the PC-LESS
Presentation is started or the Slideshow is congured.
[Example of “playlist.txt” les]
START setting : STOP setting : INTERVAL setting : PLAY MODE setting :
img001.jpg: : : :
img002.jpg:600: : :
img003.jpg:700:rot1: :
img004.jpg: : :SKIP:
img005.jpg:1000:rot2:SKIP:
The “playlist.txt” le contains the following information.
Each piece of information requires to be separated by “:”, and “:” at the end of each line.
1st line: START, STOP, INTERVAL and PLAY MODE settings (88).
2nd line and after: le name, interval time, rotation setting and skip setting.
interval time:
rotation setting
skip setting: “SKIP” means that the image will not be displayed in the
It can be set from 0 to 999900 (ms) with an increment of 100 (ms).
: “rot1” means a rotation at 90 degrees clockwise; “rot2” and
“rot3” increase another 90 degrees in order.
Slideshow.
•
NOTE
The maximum length in a line on the "playlist.txt" le is 255 characters
including linefeed. If any line exceeds the limit, the "playlist.txt" le becomes invalid.
•
Up to 999 les can be registered to the Playlist. However, if some folders exist in
the same directory the limit number is decreased by the number of folders.
Any les over the limit will not be shown in the Slideshow.
•
If the storage device is protected or does not have sufcient space, the “playlist.txt”
le cannot be created.
• For the Slideshow settings, refer to the section Slideshow mode (87).
89
Page 90
Presentation tools
USB Display(Windows computer)
The projector can display images transferred from a computer via an USB cable (10).
Hardware and software requirement for computer
• OS: One of the following.
Windows Vista
Windows® 7 Starter /Home Basic /Home Premium /Professional / Ultimate /
Enterprise
Windows ® 8/8.1 / Windows ® 8/8.1 Pro / Windows ® 8/8.1 Enterprise
• CPU: Pentium 4 (2.8 GHz or higher)
• Graphic card: 16 bit, XGA or higher
• Memory: 512 MB or higher
• Hard disk space: 30 MB or higher
• USB Port
• USB cable : 1 piece
Starting USB Display
When you connect your computer to the USB TYPE B port on the projector
using a USB cable, the projector will be recognized as a CD-ROM drive on your
computer. Then, the software in the projector, “LiveViewerLiteForUSB.exe”, will
run automatically and the application, “LiveViewer Lite for USB”, will be ready on
your computer for the USB Display. The application, “LiveViewer Lite for USB”, will
close automatically when the USB cable is unplugged. However, it may remain
displayed at times.
®
Home Basic /Home Premium /Business /Ultimate /Enterprise
NOTE
• If the software does not start automatically (this is typically because
CD-ROM autorun is disabled on your OS), follow the instructions below.
(1) Click on the [Start] button on the toolbar and select the “Run”
(2) Enter F:\LiveViewerLiteForUSB.exe and then press the [OK]
If your CD-ROM drive is not drive F on your computer, you will
need to replace F with the correct drive letter assigned to your
CD-ROM drive.
• CD-ROM autorun is disabled while the screen saver is running.
• The image transmission from the computer is suspended while the passwordprotected screen saver is running. To resume the transmission, exit the screen
saver.
•
If "Waiting for connection." remains displayed while the USB cable is connected,
remove the USB cable and reconnect after a while.
• Check our web site for the latest version of the software and its manual.
(User's Manual (concise))
Follow the instructions that can be obtained at the site for updating.
(continued on next page)
90
Page 91

USB Display(Windows computer) (continued)
This application will appear in the Windows
notication area once it starts. You can quit the
application from your computer by selecting “Quit” on
the menu.
Presentation tools
NOTE
• The “LiveViewer” (refer to the
Network Guide) and this application cannot
be used at the same time. If you connect your
computer to the projector by using a USB cable
while the “LiveViewer” is running, the following message will be displayed.
• Depending on the software installed on your computer, images on your
computer cannot be transferred using “LiveViewer Lite for USB”.
• If any application software having the rewall function is installed into your
computer, make the rwall function invalid with following the user's manual.
• Some security software may block image transmission. Please change the
security software setting to allow the use of "LiveViewer Lite for USB".
• When the audio input from USB TYPE B is selected, if the sound level is still
low even after raising the volume level in the projector to the maximum, check
whether your computer outputs audio and raise the volume level accordingly.
• If the computer in use is equipped with HDMI port, the audio setting will be
changed and sound interruption or noise may occur when the HDMI cable is
connected or disconnected during USB Display. Restart USB Display for this
case.
• Image distortion or sound interruption may occur when “LiveViewer” is
connected to LAN (wireless or wired) during USB Display. The above decline in
performance is noticeable especially when multiple computers are connected to
“LiveViewer”.
91
Page 92
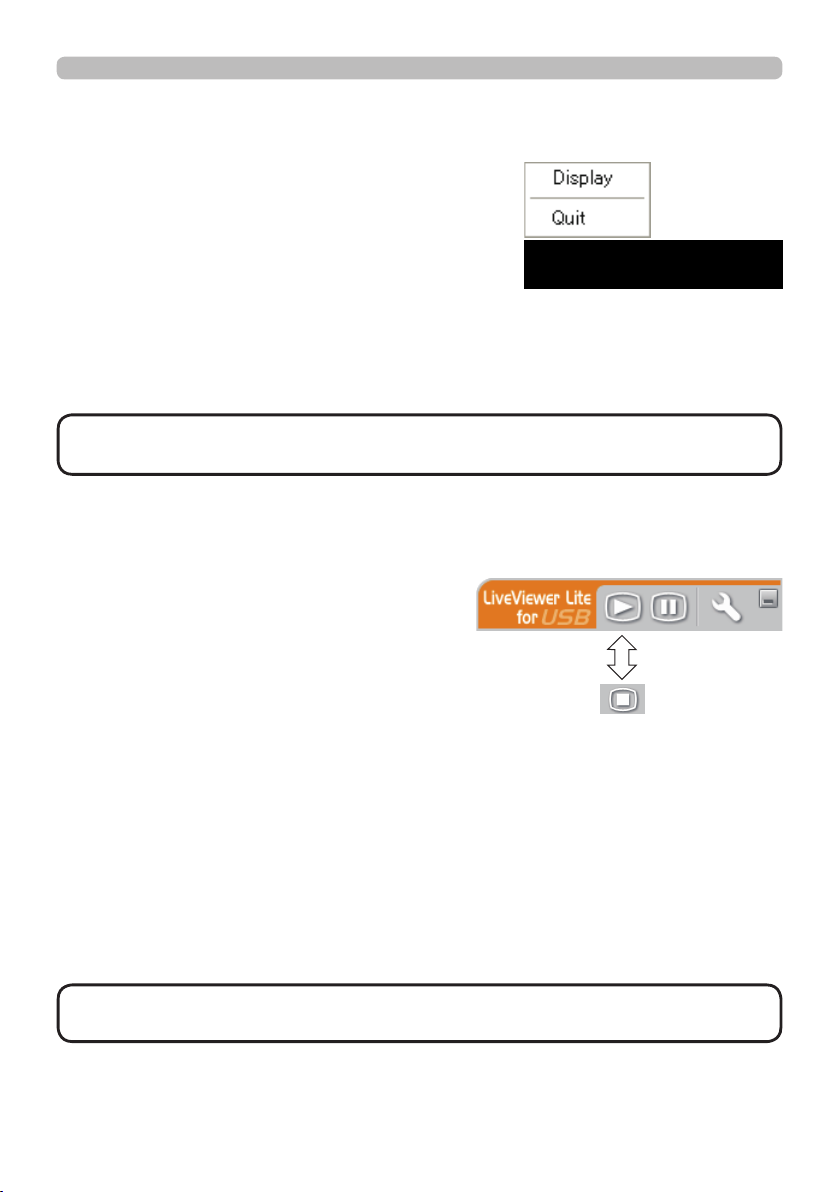
Presentation tools
USB Display(Windows computer) (continued)
Right-Click menu
The menu shown in the right will be displayed
when you right-click the application icon in the
Windows notication area.
Display : The Floating menu is displayed, and the icon disappears from the
Windows notication area.
Quit : The application is closed, and the icon disappears from the Windows
notication area.
NOTE
• If you wish to restart the application, you need to unplug the USB
cable and plug it again.
Floating menu
If you select “Display” on the Right-Click
menu, the Floating menu shown in the right
will appear on your computer screen.
Start capture button
The transmission to the projector is started
and the images will be displayed.
Stop button
The image transmission is stopped.
Hold button
The image on the projector’s screen is temporally frozen. The last image before
the button is clicked is remained on the screen. You can revise the image data
on your computer without showing it on the projector's screen.
Option button
The Options window is displayed.
Minimize button
The Floating menu is closed, and the icon reappears in the Windows notication
area.
NOTE
• If you click the Start capture button and/or Stop button repeatedly,
images may not be displayed on the screen.
92
Page 93
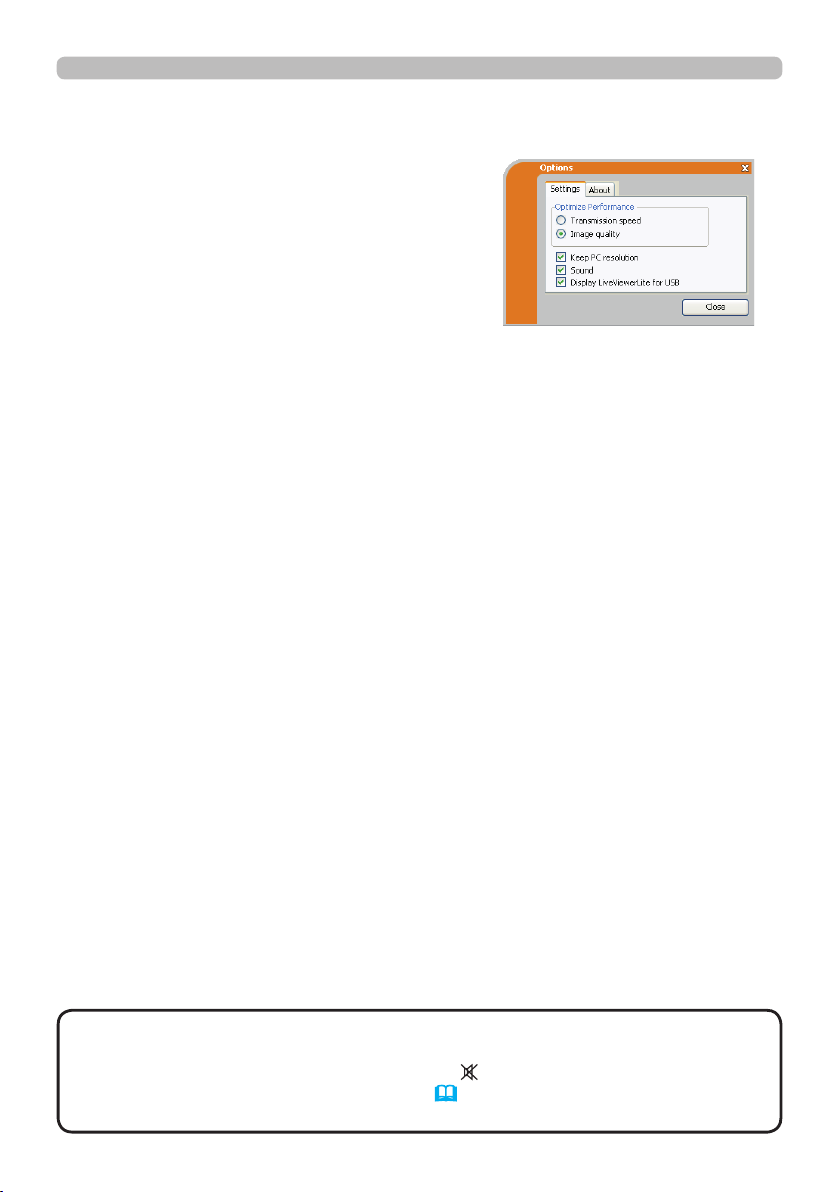
Presentation tools
USB Display(Windows computer) (continued)
Options window
If you select the Option button on the Floating
menu, the Options window is displayed.
Optimize Performance
The “LiveViewer Lite for USB” captures
screenshots in JPEG data and sends them to
the projector. The “LiveViewer Lite for USB” has
two options that have different compression rate
of JPEG data.
Transmission speed
Speed takes priority over Image quality.
It makes JPEG compression rate higher.
The screen on the projector is rewritten quicker because the transferred
data is smaller, but the image quality is worse.
Image quality
Image quality takes priority over Speed.
It makes JPEG compression rate lower.
The screen on the projector is rewritten slower because the transferred
data is larger, but the image quality is better.
Keep PC resolution
If you remove the check mark from the [Keep PC resolution] box, the screen
resolution of your computer will be switched as follows, and the display speed
may be faster.
8116A, 8117A: 1024 x 768 (XGA)
8118WA, 8119WA: 1280 x 800 (WXGA)
If your computer does not support the display resolution specied above, a
smaller resolution that is the largest among the resolutions that are supported by
the computer will be selected.
Sound
Turns the sound on/off. The image quality may deteriorate when you play back
audio data transferred together with the image data. To give priority to the image
quality, turn off the sound by selecting the checkbox.
Display LiveViewer Lite for USB
If you want to display the "LiveViewer Lite for USB" application window on the
screen, please check the box.
About
The version information of the “LiveViewer Lite for USB”.
NOTE
computer desktop screen may be changed.
• If one of the AUDIO IN ports is selected or is selected for USB TYPE B
in AUDIO SOURCE of the AUDIO menu (53), audio sound operation in the
Options window will be disabled.
• When the resolution is changed, the arrangement of icons on
93
Page 94

Presentation tools
USB Display(Mac computer)
The projector can display images transferred from a computer via an USB cable (10).
Hardware and software requirement for computer
• OS: Mac OSX 10.5(Intel)
Mac OSX 10.6(Intel)
Mac OSX 10.7(Intel)
Mac OSX 10.8(Intel)
This application is not compatible with Power PC.
• Graphic card: 16 bit, XGA or higher
• Memory: 512 MB or higher
• Hard disk space: 30 MB or higher
Starting USB Display
When you connect your computer to the USB TYPE B port on the projector
using a USB cable, the projector will be recognized as a CD-ROM drive on your
computer. Double click the CD-ROM, then
double click
"LiveViewerLiteForUSB_MacOS.app.".
The application, “LiveViewer Lite for USB”,
will close automatically when the USB
cable is unplugged. However, it may remain
displayed at times.
NOTE
• The image transmission from the computer is suspended while the
password-protected screen saver is running. To resume the transmission, exit
the screen saver.
•
If "Waiting for connection." remains displayed while the USB cable is connected,
remove the USB cable and reconnect after a while.
• Check our web site for the latest version of the software and its manual.
(User's Manual (concise))
Follow the instructions that can be obtained at the site for updating.
(continued on next page)
94
Page 95

USB Display(Mac computer) (continued)
Presentation tools
NOTE
• The “LiveViewer” (refer to the
Network Guide) and this application cannot be used
at the same time. If you connect your computer
to the projector by using a USB cable while the
“LiveViewer” is running, the following message will
be displayed.
• Depending on the software installed on your computer, images on your
computer cannot be transferred using “LiveViewer Lite for USB”.
• If any application software having the rewall function is installed into your
computer, make the rwall function invalid with following the user's manual.
• Some security software may block image transmission. Please change the
security software setting to allow the use of "LiveViewer Lite for USB".
• When the audio input from USB TYPE B is selected, if the sound level is still
low even after raising the volume level in the projector to the maximum, check
whether your computer outputs audio and raise the volume level accordingly.
• If the computer in use is equipped with HDMI port, the audio setting will be
changed and sound interruption or noise may occur when the HDMI cable is
connected or disconnected during USB Display. Restart USB Display for this
case.
• Image distortion or sound interruption may occur when “LiveViewer” is
connected to LAN (wireless or wired) during USB Display. The above decline in
performance is noticeable especially when multiple computers are connected to
“LiveViewer”.
95
Page 96
Presentation tools
USB Display(Mac computer) (continued)
Menu
If you select “Display” on the Right-Click menu, the Floating menu shown in the
right will appear on your computer screen.
Start capture button
The transmission to the projector is started
and the images will be displayed.
Stop button
The image transmission is stopped.
Hold button
The image on the projector’s screen is temporally frozen. The last image before
the button is clicked is remained on the screen. You can revise the image data
on your computer without showing it on the projector's screen.
Option button
The Options window is displayed.
Minimize button
The Floating menu is closed, and the icon reappears in the Windows notication
area.
Exit button
The Floating menu is closed.
NOTE
• If you click the Start capture button and/or Stop button repeatedly,
images may not be displayed on the screen.
96
Page 97

Presentation tools
USB Display(Mac computer) (continued)
Options window
If you select the Option button on the Floating
menu, the Options window is displayed.
Optimize Performance
The “LiveViewer Lite for USB” captures
screenshots in JPEG data and sends them to
the projector. The “LiveViewer Lite for USB” has
two options that have different compression rate
of JPEG data.
Transmission speed
Speed takes priority over Image quality.
It makes JPEG compression rate higher.
The screen on the projector is rewritten quicker because the transferred
data is smaller, but the image quality is worse.
Image quality
Image quality takes priority over Speed.
It makes JPEG compression rate lower.
The screen on the projector is rewritten slower because the transferred
data is larger, but the image quality is better.
Keep PC resolution
If you remove the check mark from the [Keep PC resolution] box, the screen
resolution of your computer will be switched as follows, and the display speed
may be faster.
8116A, 8117A: 1024 x 768 (XGA)
8118WA, 8119WA: 1280 x 800 (WXGA)
If your computer does not support the display resolution specied above, a
smaller resolution that is the largest among the resolutions that are supported by
the computer will be selected.
Sound
Turns the sound on/off. The image quality may deteriorate when you play back
audio data transferred together with the image data. To give priority to the image
quality, turn off the sound by selecting the checkbox.
About
The version information of the “LiveViewer Lite for USB”.
NOTE
• When the resolution is changed, the arrangement of icons on
computer desktop screen may be changed.
• If one of the AUDIO IN ports is selected or is selected for USB TYPE B
in AUDIO SOURCE of the AUDIO menu (53), audio sound operation in the
Options window will be disabled.
97
Page 98
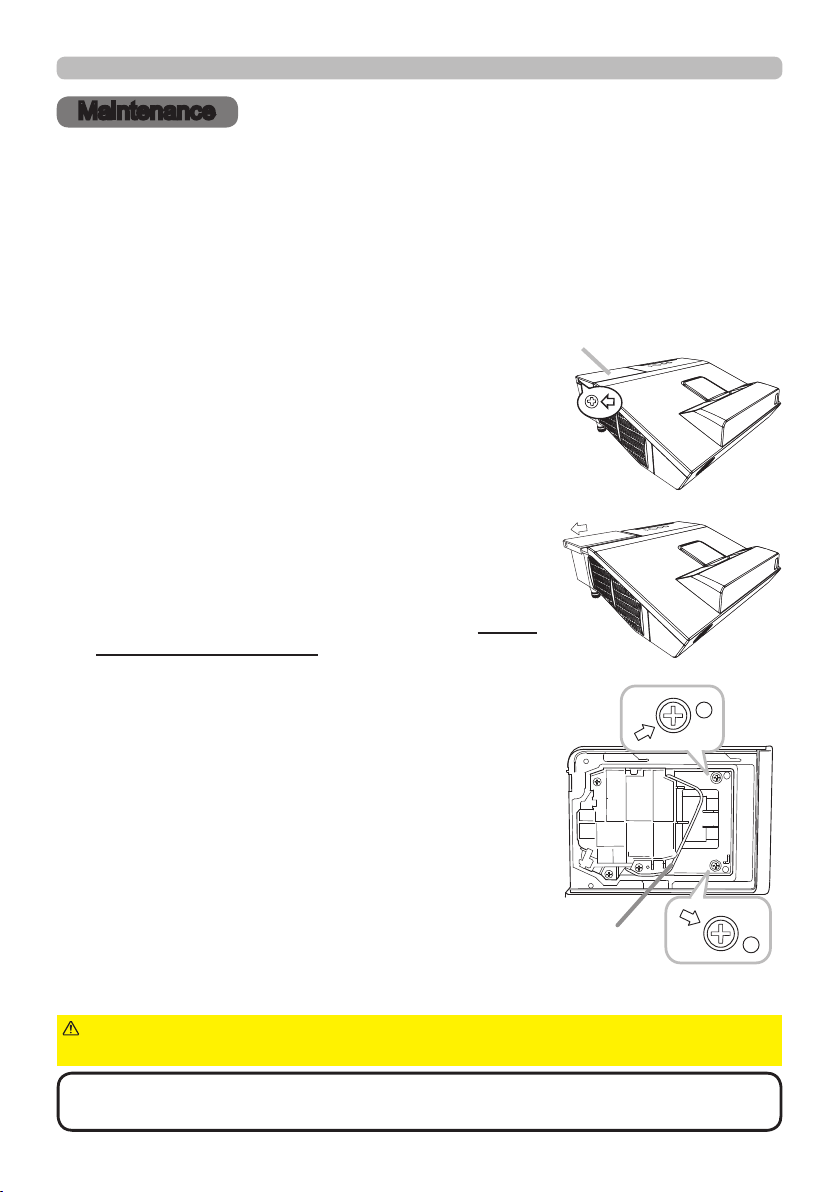
Maintenance
Maintenance
Replacing the lamp
A lamp has nite product life. Using the lamp for long periods of time could cause
the pictures darker or the color tone poor. Note that each lamp has a different
lifetime, and some may burst or burn out soon after you start using them.
Preparation of a new lamp and early replacement are recommended. To prepare
a new lamp, make contact with your dealer and tell the lamp type number.
Type number : <8116A, 8118WA>
Type number :: <8117A, 8119WA>
Replacing the lamp
Turn the projector off, and unplug the power cord.
1.
Allow the projector to cool for at least 45 minutes.
Prepare a new lamp. If the projector is mounted on
2.
a ceiling, or if the lamp has broken, also ask the
dealer to replace the lamp.
In case of replacement by yourself, follow the following procedure.
Loosen the screw (marked by arrow) of the lamp
3.
cover and then slide and lift the lamp cover to the
side to remove it.
Loosen the 2 screws (marked by arrow) of the lamp,
4.
and slowly pick up the lamp by the handle. Never
loosen any other screws.
Insert the new lamp, and retighten rmly the 2
5.
screws of the lamp that are loosened in the previous
process to lock it in place.
While putting the interlocking parts of the lamp cover
6.
and the projector together, slide the lamp cover back in
place. Then rmly fasten the screw of the lamp cover.
Turn the projector on and reset the lamp time using
7.
the LAMP TIME item in the SETUP menu.
(1) Press the MENU button to display a menu.
(2) Point at the ADVANCED MENU in the menu using
the ▼/▲ button, then press the ► button.
(3) Point at the SETUP in the left column of the menu
using the ▼/▲button, then press the ► button.
(4)
Point at the LAMP TIME using the ▼/▲ button, then press the ► button. A dialog will appear.
(5)
Press the ► button to select “OK” on the dialog. It performs resetting the lamp time.
CAUTION
is taken out.
►Do not touch any inner space of the projector, while the lamp
lamp cover
Handle
NOTE
for a suitable indication about the lamp.
98
• Please reset the lamp time only when you have replaced the lamp,
Page 99
Maintenance
Replacing the lamp (continued)
Lamp warning
HIGH VOLTAGE
►
WARNING
The projector uses a high-pressure mercury glass lamp. The lamp
HIGH TEMPERATURE
can break with a loud bang, or burn out, if jolted or scratched, handled while hot, or
worn over time. Note that each lamp has a different lifetime, and some may burst or
burn out soon after you start using them. In addition, if the bulb bursts, it is possible
for shards of glass to y into the lamp housing, and for gas containing mercury and
dust containing ne particles of glass to escape from the projector’s vent holes.
►About disposal of a lamp: This product contains a mercury lamp; do not put
it in a trash. Dispose of it in accordance with environmental laws.
• For lamp recycling, go to www.lamprecycle.org (in the US).
• For product disposal, consult your local government agency
or www.eiae.org (in the US) or www.epsc.ca (in Canada).
For more information, call your dealer.
• If the lamp should break (it will make a loud bang when it does),
unplug the power cord from the outlet, and make sure to request a
replacement lamp from your local dealer. Note that shards of glass
could damage the projector’s internals, or cause injury during handling,
so please do not try to clean the projector or replace the lamp yourself.
•
Disconnect
the plug
from the
power
outlet
If the lamp should break (it will make a loud bang when it does), ventilate the
room well, and make sure not to inhale the gas or ne particles that come out
from the projector's vent holes, and not to get them into your eyes or mouth.
• Before replacing the lamp, turn the projector off and unplug the power
cord, then wait at least 45 minutes for the lamp to cool sufficiently.
Handling the lamp while hot can cause burns, as well as damaging the lamp.
• Never unscrew except the appointed (marked by an arrow) screws.
• Do not open the lamp cover while the projector is mounted on a wall
or ceiling. This is dangerous, since if the lamp’s bulb has broken, the
shards will fall out when the cover is opened. In addition, working in
high places is dangerous, so ask your local dealer to have the lamp
replaced even if the bulb is not broken.
• Do not use the projector with the lamp cover removed. At the lamp
replacing, make sure that the screws are screwed in firmly. Loose
screws could result in damage or injury.
• Use only the lamp of the specified type. Use of a lamp that does not
meet the lamp specications for this model could cause a re, damage or
shorten the life of this product.
• If the lamp breaks soon after the first time it is used, it is possible
that there are electrical problems elsewhere besides the lamp. If this
happens, consult your local dealer or a service representative.
•
Handle with care: jolting or scratching could cause the lamp bulb to burst during use.
•
Using the lamp for long periods of time, could cause it dark, not to light up or to burst.
When the pictures appear dark, or when the color tone is poor, please replace the
lamp as soon as possible. Do not use old (used) lamps; this is a cause of breakage.
HIGH PRESSURE
99
Page 100
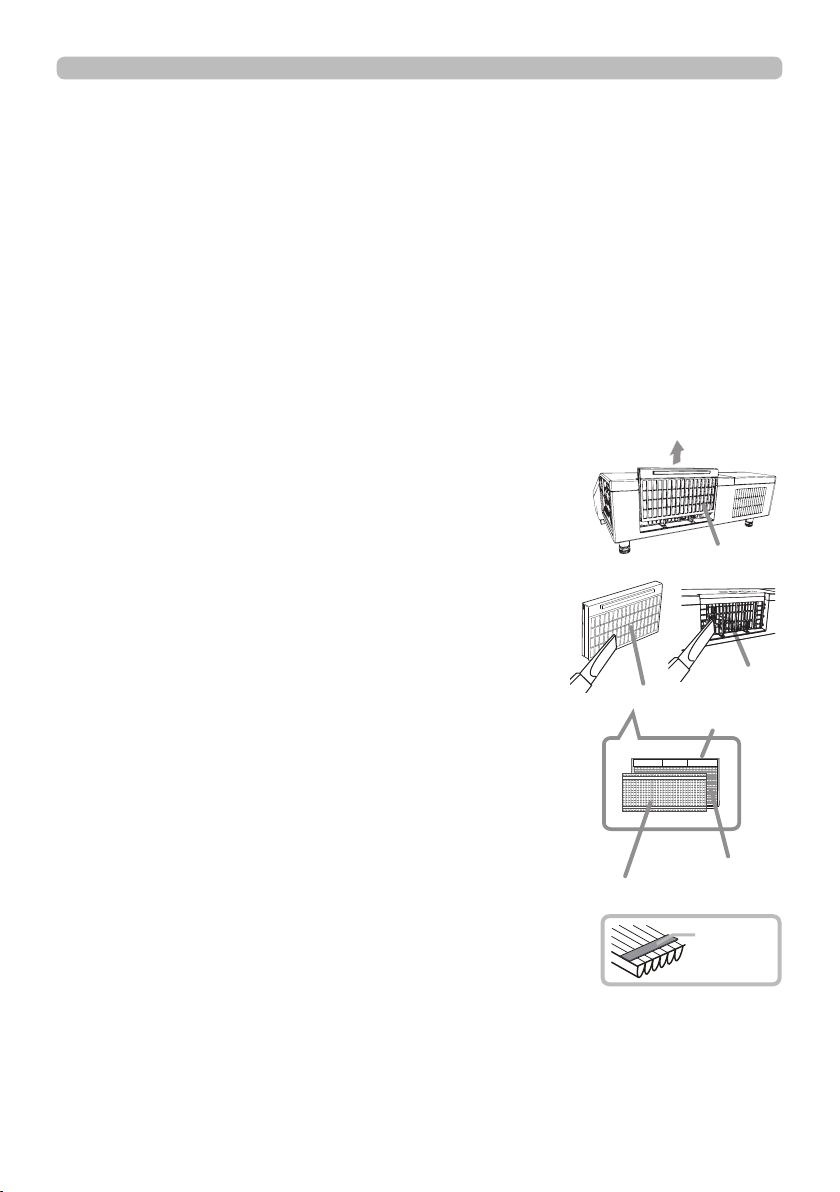
Maintenance
Cleaning and replacing the air lter
The air lter unit of this projector consists of a lter cover, two kinds of lters, and
a lter frame. The new double large lters system is expected to function longer.
However, please check and clean it periodically to keep ventilation needed for
normal operation of the projector.
When the indicators or a message prompts you to clean the air lter, comply with
it as soon as possible. Replace the lters when they are damaged or too soiled.
To prepare new lters, make contact with your dealer and tell the following type
number.
Type number : UX37191 (Filter set)
When you replace the lamp, please replace the air lter. An air lter of specied
type will come together with a replacement lamp for this projector.
Turn the projector off, and unplug the power cord.
1.
Allow the projector to sufciently cool down.
Use a vacuum cleaner on and around the lter cover.
2.
Slide the lter unit upward to take it off from the
3.
projector.
Use a vacuum cleaner for the lter vent of the
4.
projector.
Take the ne meshed lter out while holding the
5.
lter cover. It is recommended to leave the coarse
meshed lter in the lter cover as it is.
Use a vacuum cleaner on both sides of the ne
6.
meshed lter while holding it so it will not be sucked
in. Use a vacuum cleaner for the inside of the lter
cover to clean up the coarse meshed lter. If the
lters are damaged or heavily soiled, replace them
with new ones.
Put the ne meshed lter on the coarse meshed one,
7.
turning its plastic band side up.
Put the lter unit back into the projector.
8.
3.
Filter cover
Filter unit
7.
Filter (ne meshed)
Intake vent
Filter cover
Filter
(coarse meshed)
Plastic
band
(continued on next page)
100
 Loading...