

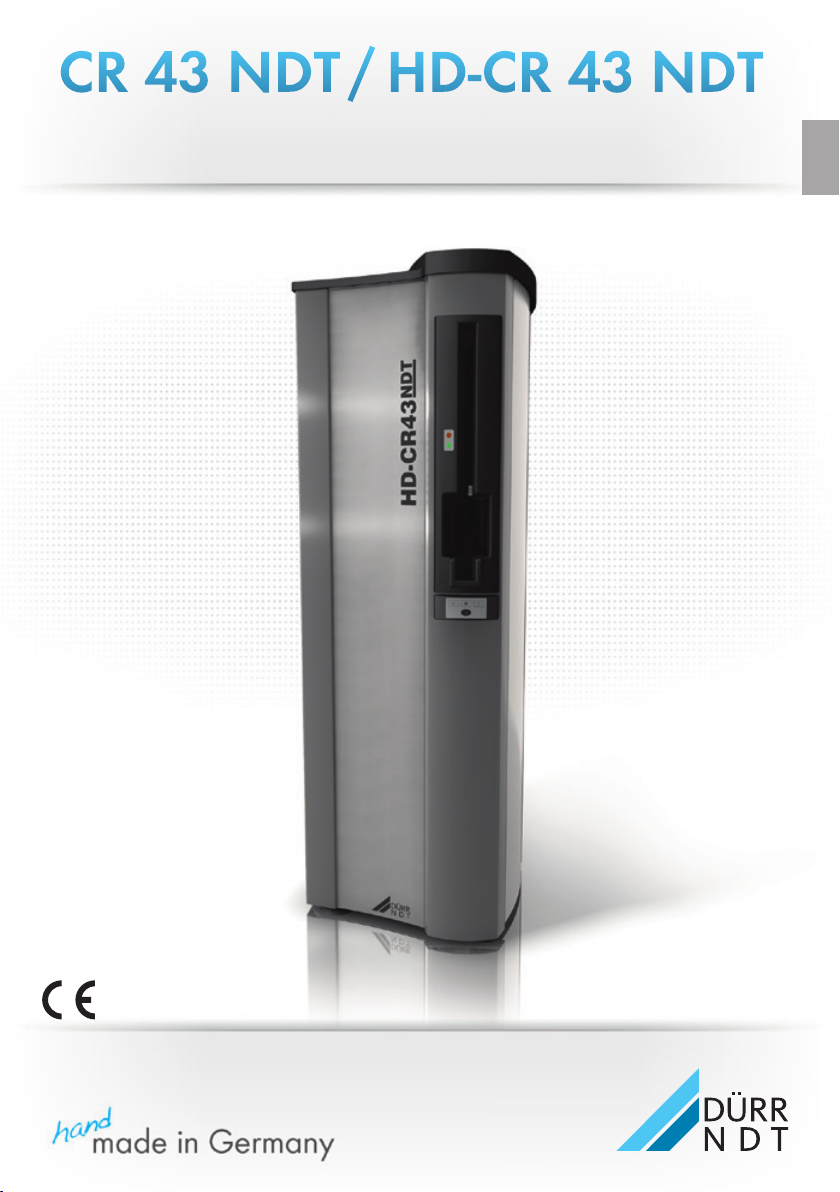
CR 43 NDT / HD-CR 43 NDT
Installation and Operating Instructions
EN
9000-608-21/30

2

Inhalt
Important information
1. General . . . . . . . . . . . . . . . . . . . . . . . . . 4
1.1 Note on conformity . . . . . . . . . . . . . . 4
1.2 General Notes . . . . . . . . . . . . . . . . . 4
1.3 Disposal of appliance . . . . . . . . . . . 5
1.4 Correct Usage . . . . . . . . . . . . . . . . . 5
1.5 Incorrect Usage . . . . . . . . . . . . . . . . 6
1.6 Using Peripheral Devices . . . . . . . . . 6
1.7 Use of cassettes . . . . . . . . . . . . . . . . 6
1.8 Use of software . . . . . . . . . . . . . . . . 6
1.9 Guarantee . . . . . . . . . . . . . . . . . . . . 7
2. Safety . . . . . . . . . . . . . . . . . . . . . . . . . . 7
2.1 General notes on safety . . . . . . . . . . 7
2.2 Electrical safety instructions . . . . . . . 8
3. Warnings and Symbols . . . . . . . . . . . . 9
3.1 Model identification plate . . . . . . . . . 9
4. Delivery contents . . . . . . . . . . . . . . . . 10
4.1 Consumables . . . . . . . . . . . . . . . . . 10
4.2 Special accessories . . . . . . . . . . . . 11
5. System requirements . . . . . . . . . . . . . . 12
5.1 Monitor . . . . . . . . . . . . . . . . . . . . . 12
5.2. Minimum system requirements . . . . 12
6. Technical data . . . . . . . . . . . . . . . . . . 12
6.1 CR 43 NDT / HD-CR 43 NDT . . . . . 12
6.2 Cassettes with integrated
image plates . . . . . . . . . . . . . . . . . . 13
7. Functional layout . . . . . . . . . . . . . . . . 14
7.1 Function of individual components . 15
8. Functional description . . . . . . . . . . . 16
Use
14. Cassettes . . . . . . . . . . . . . . . . . . . . . . . 21
14.1 Identification of the cassettes . . . . 21
14.2 Handling of cassettes . . . . . . . . . . 21
15. X-ray . . . . . . . . . . . . . . . . . . . . . . . . . . . 22
15.1 Preparation for X-raying . . . . . . . . . 22
15.2 X-ray exposure . . . . . . . . . . . . . . . 22
15.3 Preparation for reading out the
image data . . . . . . . . . . . . . . . . . . 22
14.3 Storage of cassettes . . . . . . . . . . . 22
15.4 Reading out the image data . . . . . 23
15.5 Erasing the image data . . . . . . . . . 25
16. Cleaning . . . . . . . . . . . . . . . . . . . . . . . . 26
16.1 CR 43 NDT / HD-CR 43 NDT . . . . 26
16.2. Cassettes . . . . . . . . . . . . . . . . . . . 26
17. Maintenance . . . . . . . . . . . . . . . . . . . . 27
Troubleshooting
18. Tips for Operators and Technicians . . 28
18.1 Unit fault . . . . . . . . . . . . . . . . . . . . 28
18.2 Error messages . . . . . . . . . . . . . . . 31
EN
Mounting
9. Transport and packaging . . . . . . . . . 17
10. Carrying the CR 43 NDT . . . . . . . . . . . 17
11. Set-up . . . . . . . . . . . . . . . . . . . . . . . . . 18
11.1 Installation room . . . . . . . . . . . . . . 18
11.2 Set-up alternatives . . . . . . . . . . . . 18
12. Electrical Connection . . . . . . . . . . . . . 19
13. Initial use and start-up . . . . . . . . . . . . 20
13.1 Remove the transport aids . . . . . . 20
13.2 Setting up the appliance . . . . . . . . 20
13.3 Installation and configuration . . . . . 20
2013/10/21 9000-608-21/30
3

Important information
EN
1. General
1.1 Note on conformity
This equipment has undergone a test of conformity as prescribed under the relevant European Union directive. This equipment conforms
to all requirements.
ETL approval
This Class A digital apparatus complies with
Canadian ICES-003. This equipment has been
tested and found to comply with the limits for a
class A digital device, pursuant to Part 15 of the
FCC rules. These limits are designed to provide
reasonable protection against harmful interference when the equipment is operated in a commercial environment. This equipment generates,
uses, and can radiate radio frequence energy
and, if not installed and used in accordance
with the instruction manual, may cause harmfull
interference to radio communications. Operation
of these equipment in a residential area is likely
to cause harmful interference in which case the
user will be required to correct the interference
at his own expense.
FDA-Registration
Complies with FDA performance standards for
laser products except for deviations pursuant to
Laser Notice No. 50, date (June, 2007).
Classification:
Appliance class I, no application parts, transportable continuous operation. This appliance is
not designed for use in areas where flammable
anesthetic materials are present.
1.2 General Notes
• The Installation and Operating Instructions
constitute part of the appliance. They must
be made available to the operator. Correct
observance of the Installation and Operating
Instructions is a basic requirement for using
the appliance properly and safely, and new
personnel must be instructed accordingly.
These Installation and Operating Instructions
must be handed over to any subsequent
owner or operator of this appliance.
• The safety of the operator and trouble-free
operation of the appliance can only be
ensured where original engineering manufactured parts are used. Furthermore, only the
accessories described in the installation and
operating instructions or approved by Dürr
NDT for use with this appliance may be used.
If accessories are used manufactured by third
parties, then Dürr NDT can no longer provide
any guarantee for safe operation or correction functioning. No liability on the part of the
manufacture will be accepted in the case
that damage arises through the use of nonapproved accessories.
• Dürr NDT cannot be held responsible for the
appliance with regard to safety, reliability and
function where installation, reset, alterations,
extension or repairs were not carried out
either by or for Dürr NDT or by a third party
specifically approved by Dürr NDT, or if the
appliance is not used and operated according
to the instructions laid down in the Installation
and Operating Instructions.
• These Installation and Operating Instructions
accord with the features of the appliance
and the level of engineering at the time of
first introduction of the model. All circuits,
processes, names, software and appliances
quoted are protected under industrial property
rights.
• This translation of the Installation and Operating Instructions has been carried out in good
faith. Liability for incorrect translation will not
be accepted. The accompanying German
version of these Installation and Operating
Instructions are to be used as reference; if you
have any doubt as to the correct interpretation
of the instructions, please consult your dealer.
4
9000-608-21/30 2013/10/21

• Any reproduction of these Installation and
Operating Instructions, or parts thereof, in any
medium whatsoever including electronic is
only permitted with the prior written approval
of Dürr NDT.
• Keep original packing for possible return of
the appliance to the supplier. Ensure that the
packaging is stored away from children.
Only the original packing ensures optimum
protection for the appliance during transport.
If a return is required during the warranty
period, Dürr NDT cannot be held liable for
damages during transport that have been
caused by inadequate packaging!
1.3 Disposal of appliance
Device
EU Directive(s) 2002/96/EG - WEEE (Waste
Electric and Electronic Equipment) of 27th January 2003 and their current application in national
law states that products covered by the above
directive within the European Union must be
disposed of as special waste.
For further questions about the proper disposal
of the products, please contact Dürr NDT or the
specialised trade.
Cassettes and image plates
The image plate contains barium compounds.
• Dispose of the image plate properly in accordance with the locally applicable regulations.
• In Europe, dispose of the image plate in accordance with waste code 090199 "wastes
not otherwise specified". Disposal as domestic waste is not possible.
1.4 Correct Usage
• The appliance is intended exclusively for visual
scanning and processing of image data on an
image plate under industrial conditions.
• The device is only to be used in enclosed, dry
rooms.
• Correct usage of the appliance also involves
observing the Installation and Operating
Instructions and adhering to the instructions
concerning set-up, operating and maintenance.
• Any usage which is not in accordance with
the correct usage above will lead to the
guarantees and warranties becoming null and
void.
• The operator is liable for any damage arising
through incorrect usage.
• Correct usage includes compliance with all
legal provisions applicable at the place of use
with regard work and radiation protection.
• The scanner may only be operated in combination with cassettes from Dürr NDT.
EN
2013/10/21 9000-608-21/30
5

1.5 Incorrect Usage
The appliance is not intended for optical scanning of image plates in human and veterinary
medicine.
Any use of the appliance above and beyond
EN
that laid down here s considered to be improper
use of the equipment. Any resulting damage
thus caused is the sole liability of the user. The
manufacturer cannot be held responsible for
damage caused by improper use.
Cassettes from third-party manufacturers are
not compatible with the system and could damage the appliance.
This appliance must not be used in
operating theatres or similar types
of room, where there is a risk of
inflammable materials catching fire.
1.6 Using Peripheral Devices
Only peripheral devices (computers,
monitors, printers) conforming to standard IEC 60950-1 (EN 60950-1) may be
connected to the appliance.
• Appliances may only be connected together
or connected to other system parts where the
safety of patients, operators and also the environment is ensured.
Where there is any element of doubt concerning the safety of connected equipment,
the user must contact the manufacturers
concerned or ask an expert to determine that
the level of safety required for the operator
and the environment is not impaired by the
intended coupling.
1.8 Use of software
An X-ray software approved by DÜRR NDT
must be used, such as e.g. D-Tect. The use
of third party software requires the express
approval of DÜRR NDT. For further information
refer to our internet site at www.duerr-ndt.de.
See "System requirements for
compu ter systems in combination with
Dürr NDT - CR Systems", Order No.
9000-608-02/01 or on the Internet.
1.7 Use of cassettes
Other cassettes are not compatible with the
system and could damage the appliance.
6
9000-608-21/30 2013/10/21

1.9 Guarantee
Content
The guarantee granted herein applies only to
image plates mounted included in image plate
cassettes for scanner family„HD-CR 43 NDT
/ CR 43 NDT“. The guarantee is granted with
regard to damage-free transport of the image
plate in the scanner and the respective image
plate cassette. This means that we guarantee
that the image plate will not show any scratches
or other mechanical damage on the optical side
of the image plate within the Duration as specified below.
Duration
The guarantee is granted for a period of two
years as of the date of purchase or for 25,000
scan cycles, whatever comes first. Proof needs
to be submitted in the form of a copy of the purchase invoice or other appropriate documents
or through the RFID chip included in the image
plate cassette.
Exclusions
Excluded from guarantee are image plate
cassettes of third-party manufacturers, image
plate cassettes which have had their RFID chip
manipulated and image plate cassettes which
have been subjected to temperatures that could
affect the functionality outside the intended
usage or mechanical damage that could affect
functionality or that have their safe functionality
affected in any way. This guarantee also does
not cover cases of scanner defects caused by
inufficient maintenance or other external factors
of any kind. In addition, the guarantee does not
apply in cases of wear and ear or malfunctioning
caused by increased X-ray or gamma radiation.
2. Safety
2.1 General notes on safety
The appliance has been developed and designed in such a way that dangers are effectively
ruled out if operated in accordance with the
intended use. However, we feel it is important to
describe the following safety measures in order
to remove any likelihood of danger.
• When operating this appliance, all local and
national rules and regulations must be observed!
This appliance must not be converted or
altered in any way. Dürr NDT accepts no
liability claims where an appliance has been
converted or altered in any way. In the
interests of safe usage of the appliance, both
operator and owner are responsible for seeing
that all relevant regulations and provisions are
observed.
• Opening an appliance connected to the main
supply results in danger from Class 3B laser
radiation.
• Installation must be carried out by a specialist
authorised by the manufacturer.
• The operator must carefully check the appliance for safety of function and proper working
condition before every use.
• The operator must be trained in the correct
operation of the appliance.
EN
Rights
In case of breach of the above-defined guarantee, the client has the right to demand delivery
of a new image plate cassette. All other rights
are excluded, in particular the right to request
damages.
Applicable law
This guarantee is governed by German law.
2013/10/21 9000-608-21/30
7

2.2 Electrical safety instructions
• The appliance may only be connected to a
correctly installed electrical socket.
• Connection to a multi-socket power strip is
not permitted.
EN
• Before connecting to the electricity supply, the
appliance must be inspected and checked to
ensure that the supply voltage and the supply
frequency correspond to that of the local
electrical supply.
• Before initial use and start-up, the appliance
and all supply lines must be checked for any
signs of damage. Damaged supply lines and
connections must be replaced immediately.
• Never touch persons and open connectors of
the appliance simultaneously.
• When using the appliance, observe all the
relevant electrical safety procedures.
Before opening the device, unplug at the mains and remove all
power mains plug!
8
9000-608-21/30 2013/10/21
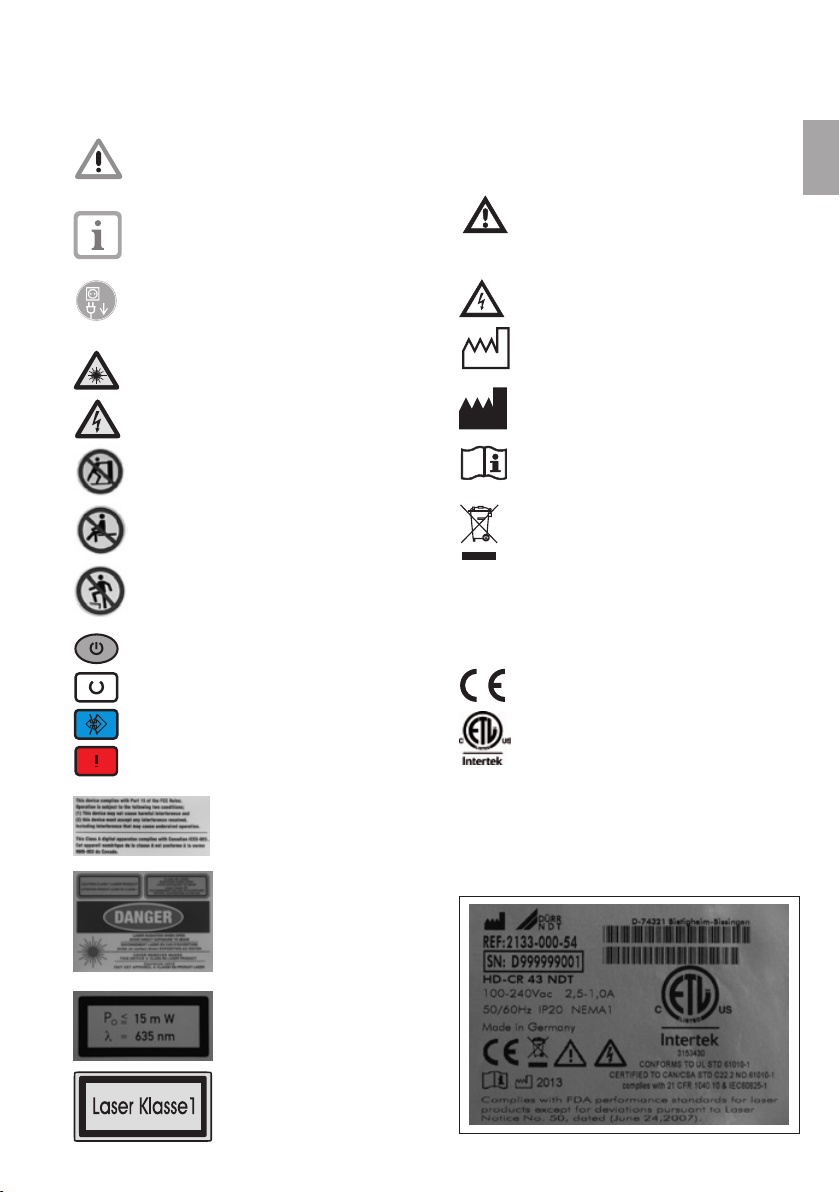
3. Warnings and Symbols
In the operating instructions, the following warnings and symbols have been used:
Information including preventa-
tive measures to protect injury to
persons or damage.
3.1 Model identification plate
The model identification plate is located on the
rear side of the scanner. The following designations or signs exist on the model identification
plate:
EN
Special information regarding the eco-
nomical use of the equipment and other
information
Unplug at the mains and remove all
power
Warning Laser
Warning: Dangerous
voltage
Do not push the appliance.
Do not sit on the appliance
Do not enter the appliance.
ON/OFF button
Ready for operation
Data transmission
Fault
FCC-Approval
Caution, observe accompanying docu-
mentation
Warning: Dangerous
voltage
Date of manufacture
Manufacturer
Observe accompanying documentation
Dispose of properly in accordance with
EU Directive (2002/96/EU - WEEE)
IP20 Type of protection
NEMA 1 Type of protection
REF Order number
SN Serial number
CE label without notified body number
ETL-Certification
CONFORMS TO UL STD 61010-1
CERTIFIED TO CAN/CSA STD C22:2
NO 61010-1
Complies with 21 CFR 1040.10 &
IEC 60825-1
Warning: Laser
Notes on laser source
Laser class1
2013/10/21 9000-608-21/30
9

4. Delivery contents
Please compare the completeness of the delivery with the purchase order.
CR 43 NDT 2133-31
EN
CR 43 NDT . . . . . . . . . . . . . . . . . 2133-000-53
Network cable RJ45 (3 m) . . . . . 9000-119-065
Installation and
Operating Instructions . . . . . . . . 9000-608-21/..
Country-specific:
Mains cable (EUR) . . . . . . . . . . . . 9000-118-17
Mains cable (CH) . . . . . . . . . . . . 9000-119-002
Mains cable (DK) . . . . . . . . . . . . 9000-119-041
Mains cable (GB) . . . . . . . . . . . . . 9000-118-59
Mains cable (AUS) . . . . . . . . . . . 9000-119-037
Mains cable (I) . . . . . . . . . . . . . . 9000-119-036
Mains cable (USA / J) . . . . . . . . 9000-119-039
or
HD-CR 43 NDT 2133-41
HD-CR 43 NDT . . . . . . . . . . . . . . 2133-000-54
Network cable RJ45 (3 m) . . . . . 9000-119-065
Installation and
Operating Instructions . . . . . . . . 9000-608-21/..
4.1 Consumables
Protective sleeves for cassettes
18x24 . . . . . . . . . . . . . . . . . . . . PRSH1824108
24x30 . . . . . . . . . . . . . . . . . . . . PRSH2430108
35x43 . . . . . . . . . . . . . . . . . . . . PRSH3543108
IP-Cleaning Wipes (100 pcs.) . . CCB351A0101
Other cleaning and disinfectants can be
obtained from the company Orochemie
(www.orochemie.de) under the following
names:
Disinfectant wipes B 60
Country-specific:
Mains cable (EUR) . . . . . . . . . . . . 9000-118-17
Mains cable (CH) . . . . . . . . . . . . 9000-119-002
Mains cable (DK) . . . . . . . . . . . . 9000-119-041
Mains cable (GB) . . . . . . . . . . . . . 9000-118-59
Mains cable (AUS) . . . . . . . . . . . 9000-119-037
Mains cable (I) . . . . . . . . . . . . . . 9000-119-036
Mains cable (USA / J) . . . . . . . . 9000-119-039
10
9000-608-21/30 2013/10/21

4.2 Special accessories
The parts listed in the following are not included in the scope of delivery.
Please order as required.
Cassette 18x24
Highly sensitive (G CR), normal solvent (H CR) or highly solvent (X HD)
Order number Name Copper thickness
(mm)
2133-010-70 Dürr NDT G CR Cassette 18x24 cm 0,1
2133-010-71 Dürr NDT H CR Cassette 18x24 cm 0,1
2133-010-72 Dürr NDT X CR Cassette 18x24 cm 0,1
Cassettes 24x30
Highly sensitive (G CR), normal solvent (H CR) or highly solvent (X HD)
Order number Name Copper thickness
(mm)
2133-020-70 Dürr NDT G CR Cassette 24x30 cm 0,1
2133-020-71 Dürr NDT H CR Cassette 24x30 cm 0,1
2133-020-72 Dürr NDT X CR Cassette 24x30 cm 0,1
Cassettes 35x43
Highly sensitive (G CR), normal solvent (H CR) or highly solvent (X HD)
Order number Name Copper thickness
(mm)
2133-040-70 Dürr NDT G CR Cassette 35x43 cm 0,1
2133-040-71 Dürr NDT H CR Cassette 35x43 cm 0,1
2133-040-72 Dürr NDT X CR Cassette 35x43 cm 0,1
EN
2013/10/21 9000-608-21/30
11

5. System requirements
For the operation of the scanner, the following
components and requirements are necessary.
EN
5.1 Monitor
The monitor does not form part of the
scope of supply of the scanner.
Only monitors designed for digital x-ray with
superior light intensity and broader contrast
which conform to standard EN 25580 should be
used. Bright room lighting, direct sunlight and
even reflected light will reduce the diagnostic
usefulness of the x-rays.
5.2. Minimum system requirements
See enclosed information sheet,
order number 9000-608-02
6. Technical data
6.1 CR 43 NDT / HD-CR 43 NDT
Electrical Rated connection data
Voltage (Vac) . . . . . . . . . . . . . . . . . . . 100 - 240
Frequency (Hz) . . . . . . . . . . . . . . . . . . . 50 - 60
Current consumption (A) . . . . . . . . . . . 2.5 - 1.0
Output (VA) . . . . . . . . . . . . . . . . . . . . . . . . . 250
Type of protection . . . . . . . . . . . . . . . . . . . IP20
Type of protection . . . . . . . . . . . . . . . . NEMA 1
Protection class . . . . . . . . . . . . . . . . . . . . . . .1
Transient surge voltage category . . . . . . . . . . . II
Data connections
Network . . . . . . . . . . . . . . . . . LAN 100 Base T
Weight
CR 43 NDT /
HD-CR 43 NDT (kg / lbs) . . . ca. 55 / ca. 121.25
Dimensions
(H/D/W in mm) . . . . . . . . . . . 1130 x 440 x 400
(H/D/W in ) . . . . . . . . . . .44.49 x 17.32 x 15.15
Ambient conditions during storage and
transport
Temperature (°C) . . . . . . . . . . . . . . . -20 to +60
Temperature (°F) . . . . . . . . . . . . . . . -4 to +140
Relative humidity (%) . . . . . . . . . . . . . . . 10 - 80
12
Ambient temperature during operation
Temperature (°C) . . . . . . . . . . . . . . . +10 to +35
Temperature (°F) . . . . . . . . . . . . . . . +50 to +95
Relative humidity (%) . . . . . . . . . . . . . . . 20 - 80
Atmospheric pressure for operation and
storage
Appliance in operation (hPa) . . . . . . 750 - 1060
Sea level (m) . . . . . . . . . . . . . . . . . . . . . .<2000
Sea level (m) . . . . . . . . . . . . . . . . . . . <6 561,67
Storage and transport (hPa) . . . . . . 750 - 1060
Sea level (m) . . . . . . . . . . . . . . . . . . . . . . 16000
Sea level (foot) . . . . . . . . . . . . . . . . . 52 493.43
9000-608-21/30 2013/10/21

General values
Laser protection class
external . . . . . . . . . . . . . . . . . . 1 (EN60825-1)
Laser protection class
internal . . . . . . . . . . . . . . . . . . 3b (EN60825-1)
Wavelength λ 635 nm 15mW
EN 60825-1:2006-04 +
A1:2002-07+A2:2001-03
Heat output (W) . . . . . . . . . . . . . . . . . . . . . 250
Sound level
Stand-by (db(A)) . . . . . . . . . . . . . . . approx. 42
During readout (db(A)) . . . . . . . . . . . approx. 45
Conformity Acceptance Procedure
06/95/EC (Low Voltage Directive)
04/108/EC (EMC Directive)
6.2 Cassettes with integrated image plates
Storage and transport
Temperature (°C) . . . . . . . . . . . . . . . . . . . . .<33
Temperature (°F) . . . . . . . . . . . . . . . . . . . <93.2
Relative humidity (%) . . . . . . . . . . . . . . . . . .<80
Use
Temperature (°C) . . . . . . . . . . . . . . . . . . 18 - 45
Temperature (°F) . . . . . . . . . . . . . . . . .59 - 93.2
Relative humidity (%) . . . . . . . . . . . . . . . . . .<80
EN
Pixel size
HD-CR 43 NDT
can be selected in a range from 12.5 μm to 250
μm
Resolution based on the image plate, theoretically up to max. approx. 40 line pairs/mm (LP/
mm)
CR 43 NDT
can be selected in a range from 30 μm to 250
μm
Resolution based on the image plate, theoretically up to max. approx. 15 line pairs/mm (LP/
mm)
No. of cycles
Cycles/cassette . . . . . . . . . . . . . . . . . . 25,000
A warning message is displayed after
the 25,000 cycles. The cassette can
continue to be used.
After 27,500 cycles, the cassette must
be replaced in order to avoid incorrect
diagnoses or defects.
2013/10/21 9000-608-21/30
13

7. Functional layout
EN
7
5
6
8
1 2 3
4
14
10
9
11
9000-608-21/30 2013/10/21

7.1 Function of individual components
1 LED white
The appliance is ready for operation.
2 LED blue
LED out: Communication to PC established
LED lit: Communication to PC interrupted.
3 LED red
LED lit: Error
Device fault: Urgent need for action by the
operator
• Switch off the CR 43 for approx. 10 seconds.
• Restart the CR 43.
• If the CR 43 does not start, inform the service
technician.
For further information refer to the sec-
tion Troubleshooting.
4 ON/OFF button
Press the button to switch ON and OFF.
5 LED yellow
Lights up during processing of a cassette.
6 LED green
Lights up when the cassette slide is ready.
Flashes when the process has been completed.
7 Cassette slide
The cassette is inserted into the appliance via
the cassette slide.
8 Cassette
The cassette contains the image plate and prevents the deletion of image data by foreign light
and protects the image plate from mechanical
damages.
9 Cassette lock
The cassette is locked via the recesses during
removal of the image plate.
10 Transponder
Information such as cassette size and serial number of the cassette is stored on the
transponder and is read out when the cassette
is inserted.
11 Opening:
The integrated image plate is taken out of the
cassette via the cassette opening for scanning.
EN
2013/10/21 9000-608-21/30
15

8. Functional description
CR 43 NDT / HD-CR 43 NDT converts the image data on the image plate into a digital image.
X-rays
EN
The cassette with the integral image plate is
placed into the X-ray appliance and exposed.
Scanning the image data
The CR 43 NDT is switched on by pressing the
ON/OFF button. The scan mode is then activated (via the interfaced PC and the software).
The cassette with the exposed image plate is
then pushed into the cassette slide as far as
possible. The cassette is automatically drawn in
and locked. In the cassette is a transponder that
transmits the identification data of the cassette
to the scanner when the cassette is pushed
in. This ensures that the scanned image is assigned with the correct evaluation. The image
plate is drawn automatically onto the scanner
slide by the transport mechanism. The scanner slide with the image plate moves past the
scanner unit where the image data are scanned.
The status of the image scanning is displayed
in a window on the monitor of the interfaced
PC. After scanning, the image plate passes
through the erasure unit. There the image plate
is erased. The image plate is then pushed back
automatically into the cassette by the transport
mechanism.
Rotating disc
Pentaprism
Reflection
layer
Laser source
Photomultiplier
Parabolic mirror
Image plate
16
9000-608-21/30 2013/10/21

Mounting
Only qualified specialists or persons
trained by Dürr NDT may install,
connect and commission the
appliance.
9. Transport and packaging
• Transport the appliance only in the original
packaging.
• Check that the delivery contents are complete
and check for any signs of transport damage.
• Carefully remove the packaging. Do not use a
knife in order to avoid damaging the surface
and other delicate parts of the appliance.
• Do not expose the CR 43 NDT to severe
vibrations during transport as delicate components in the appliance could be damaged.
10. Carrying the CR 43 NDT
Carry the appliance only at the
transport aids (13) installed at the
13
factory.
If the appliance is carried in any
other way (e.g. on the base, cover,
cassette slide), there is a risk of
injury or delicate parts could be
damaged.
EN
10
1
2013/10/21 9000-608-21/30
17

11. Set-up
11.1 Installation room
• Install the CR 43 NDT only in a closed, dry
and well ventilated room.
EN
• The room temperature must not drop below +
10 °C / 50 °F in winter or exceed + 35 °C / 95
°F in summer.
Danger of short circuit due to build
up of condensation.
The system can only be put into
operation once the appliance has
warmed up to room temperature
and it is dry.
• Installation in a purpose-built room, e.g. in a
boiler room or in a wet room is not permitted.
• Do not expose the appliance to direct sunlight, e.g. near windows. The ambient light
must be reduced if necessary. The maximum
light intensity is 1500 lux.
• The device is designed for use in laboratory,
test and measurement areas. There must be
no source of interference in the room for setup (e.g. strong magnetic field). Interference
fields may cause malfunctions in the appliance.
• This appliance is not equipped with its own
main power switch. Therefore, the appliance
must be set up in such a way that the socket
outlet is easily accessible in case of a possible
fault and that this is situated within the maximum cable length of 3 m / 118.11 inch.
• Install the appliance is such a way that it does
not cause interference in other appliances
during the scanning process of the and the
RFID system of the CR 43.
• Set up the appliance so that it is not in the
path of the X-rays.
11.2 Set-up alternatives
In order to avoid errors during scanning
of the image data, always install the
appliance horizontally and on a solid
surface where it is not exposed to vibrations.
Table set-up
CR 43 can be set up as a tabletop appliance.
Observe the maximum load-bearing
strength of the table. The table must
have an adequate load-bearing
strength.
The table and appliance must be
set up so that there is no danger of
tipping over.
Mobile use
The appliance can also be installed in a motor
vehicle for mobile use.
The appliance must thereby be
• transported with low vibration level (damped decoupled from the vehicle).
• safely installed in the vehicle (withsuitable
mounting kit)
Level adjustment
The front foot (14) with knurled surface is
adjustable.
See point 13.2 Aligning the appliance.
18
2
9000-608-21/30 2013/10/21
14

12. Electrical Connection
Before start-up, check the mains voltage
against the voltage indicated on the model
identification plate.
The connection ports are located in the recess
on the rear of the appliance.
• Insert the mains cable supplied into the mains
jack on the appliance.
• Plug the mains cable into the mains supply
socket.
EN
2013/10/21 9000-608-21/30
19

EN
20
18
3
4
5
14
This appliance is not equipped with its
own main power switch. Therefore, the
appliance must be set up in such a way
that the socket outlet is easily accessible in case of a possible fault and that
this is situated within the maximum
cable length of 3 m / 118.11 inch.
13. Initial use and start-up
13.1 Remove the transport aids
• When the appliance has been moved to its
intended location, remove the transport aids
by tilting the appliance slightly.
The transport aids should fall out on
their own when the appliance is tilted. If
this is not the case, pull briefly downwards on the cord.
13.2 Setting up the appliance
The front foot (14) of the appliance is adjustable.
5
The adjustment range is ±3mm / 0.12 inch.
• Set up the appliance at its intended location.
4
• Carefully tilt the appliance slightly to the rear.
3
Adjust the foot, if necessary, until the appliance is standing firmly on all four feet.
2
13.3 Installation and configuration
1
Perform the installation and configura-
tion according to the provided operating
instructions "Installation and Configuration CR 43" Order No. 9000-608-61/.. .
Connections and displays
1 Mains connection:
For connection of the appliance to the mains
power supply.
2 Reset button:
By pressing and holding the Reset button for
15 - 20 seconds while switching on, all network settings for the appliance are set back to
factory settings.
3 Status LEDs:
Display of the device status during the service
4 AUX port:
Programming and test interface. For service
purposes only.
5 Network port:
For connection of the appliance to the network.
9000-608-21/30 2013/10/21

Use
14. Cassettes
EN
The scanner may only be operated
in combination with cassettes from
Dürr NDT. Other cassettes are not
compatible with the appliance and
could damage the appliance.
Cassettes
• protect the image plate from light, soiling and
mechanical damage.
6
7
• prevent the erasure of image data on the image plate.
• are positioned at the cassette slide of the appliance.
• Are designed for approx. 25,000 cycles. After
this time the cassettes should be replaced in
order to avoid incorrect diagnoses or defects.
• can be briefly exposed to higher surface
temperatures as the surface is made of aluminium.
14.1 Identification of the cassettes
General identification: The size, order number
and identification number are shown on a label
on the narrow side.
Active side: The active side is not labelled.
Passive side: The passive side is marked
"BACK SIDE".
2013/10/21 9000-608-21/30
14.2 Handling of cassettes
Inspect cassettes for visible damage. Damaged cassettes (e.g. visible scratches that could
impair the diagnosis) must be replaced.
• Do not bend or expose to extreme pressure.
• Do not scratch or soil.
• Do not immerse cassettes in liquids and do
not spray with liquids. We recommend the use
of protective sleeves, Order No. see point 4.1
21

14.3 Storage of cassettes
• Do not store in hot or moist conditions.
• If the cassette is stored for longer than 24
hours, it must be erased again before the next
X-ray exposure.
EN
• If stored in the X-ray room, the cassettes must
be protected against exposure to X-ray radiation.
15. X-ray
15.1 Preparation for X-raying
Image plates are pre-exposed by natu-
ral X-ray radiation and scattered X-ray
radiation.
When the cassette is used for the first time or
after storage for more than 24 hours, the image
plate must be erased again before use. See also
point 16.5 Erasing the image data.
15.2 X-ray exposure
• Position the cassette in the normal way. The
inactive side (marked with "BACK SIDE") must
face away from the X-rays.
Liquids can destroy the image plate
on the inside of the cassette and the
cassette can become contaminated.
Protect cassettes against fluids.
We recommend using protective
glasses (see special accessories).
• Taking the X-ray exposure.
The image data must be read within
30 minutes after the creation.
15.3 Preparation for reading out the
image data
Soiling of the CR 43 NDT:
The cassette must be clean before
reading out the image data. Otherwise there can be a loss of the image data, soiling of the image plate
and the inside of the scanner.
22
• Remove any large debris with a damp cloth.
• Oil or grease should be removed with
a non-aggressive disinfection wipe
(e.g. Orochemie B60).
9000-608-21/30 2013/10/21

10
11
15.4 Reading out the image data
Description of the main control panel
ON/OFF button
EN
Ready for operation
Data transmission
Fault
• Switch on the CR 43 at the ON/OFF button.
• Start the computer.
• Start the software.
The sequence of the read-out pro-
cedure can differ, depending on the
software used. See also the manual of
the software used.
• Select the object type and recording mode.
• Activate the CR 43 in the software.
Observe the LEDs at the cassette slide
of the scanner.
Green LED on the cassette slide is lit:
• Place the cassette into the cassette slide and
push into the appliance straight.
The cassette is automatically locked and the
image plate drawn in for the scanning process. The cassette then moves back slightly,
but remains locked.
This movement closes the light protec-
tion flaps.
2013/10/21 9000-608-21/30
Yellow LED on the cassette slide is lit:
Cassette drawn in and locked. Read-out procedure running.
The appliance must not be exposed
to vibrations during the read-out
procedure.
Green LED on the cassette slide flashes:
• Remove cassette from the cassette slide.
23

Description of the LED on the cassette slide
Cassette slide
Appliance not ready to receive the cassette
EN
Cassette slide enabled, cassette can be pushed in.
Cassette drawn in and locked.
Remove cassette.
Cassette was inserted incorrectly (RFID was not recognised)
Cassette was ejected again or slide refuses to accept the cassette
(no matching order)
or ON Off Flashing
24
9000-608-21/30 2013/10/21

15.5 Erasing the image data
After scanning, the image plate automatically
runs through the erasure unit. There, the image data on the image plate are automatically
erased. The image plate is then transported
back into the cassette.
To erase again:
The image plate in the cassette has to be
erased again if:
• The cassette is stored for longer than 24
hours.
• The image data on the image plate was not
deleted by a fault in the CR 43 NDT.
Proceed as follows:
• Select a mode with low resolution in the software used.
• Click "Scan".
Observe the LEDs on the cassette slide.
Green LED lit:
• Place the cassette into the cassette slide and
push into the appliance straight.
The cassette is automatically locked and the
image plate drawn in for the scanning process.
EN
Yellow LED on the cassette slide is lit:
Cassette drawn in and locked. Erasure process
running.
The appliance must not be exposed
to vibrations during the erasure procedure.
Green LED on the cassette slide flashes:
• Remove cassette from the cassette slide.
2013/10/21 9000-608-21/30
25

EN
12
16. Cleaning
Only cleaning agents authorised by
Dürr NDT must be used. Other cleaning
preparations can damage the device
and accessories.
16.1 CR 43 NDT / HD-CR 43 NDT
Damage to the CR 43 NDT:
Do not spray the appliance with
cleaning preparation!
No liquid must get inside the appliance. This might damage the
appliance.
• Remove any large debris with a damp cloth.
• Oil or grease should be removed with
a non-aggressive disinfection wipe
(e.g. Orochemie B60).
See instructions for use of the
disinfectant and cleaning agent.
16.2. Cassettes
Damage to the cassettes:
Do not spray the cassettes with
a cleaning preparation! The image plate in the cassette will be
destroyed by liquids. Clean only by
wiping.
Visible soiling must be removed
before further use of the cassettes.
26
13
• Remove coarse soiling of the surface with a
damp cloth.
• Oil or grease should be removed with
a non-aggressive disinfection wipe
(e.g. Orochemie B60).
• Before using again, the cassette must be
completely dried.
9000-608-21/30 2013/10/21

17. Maintenance
• Maintenance must be carried out by a
specialist approved by the manufacturer.
Maintenance interval
The appliance must be serviced at regular intervals, but at least once a year.
The scope of the maintenance depends on the
number of operating hours and the degree of
soiling.
EN
2013/10/21 9000-608-21/30
27

Troubleshooting
EN
18. Tips for Operators and Technicians
Any repairs above and beyond routine maintenance must be carried out by suitably qualified
personnel or one of our service technicians.
Before starting repairs or opening the appliance unplug at the mains and remove all
power, remove the mains plug from the plug socket.
18.1 Unit fault
Problem Possible cause Solution
1. CR 43 does not
switch on
2. CR 43 switches
off after a short
period
3. Status or operating LED does not
light up
4. Loud noises during
operation after
switching on
5. Software does not
recognise the CR
43
6. Appliance does
not react
• No supply voltage • Check the mains cable and all
• Switch-on button defective • Inform your service technician
• Mains cable not properly plugged in• Check the mains cable and all
• Hardware defective • Inform your service technician
• Mains supply voltage too low • Check the supply voltage
• LED defective • Inform your service technician
• If the noises persist longer
than 30 seconds, then the
radiation deflector is defective
• CR 43 is not switched on • Switch on CR 43
• Connecting cable between CR43
and network loose
• PC does not recognise connection to CR 43
• Hardware fault • Inform your service technician
• CR 43 has not yet completed
boot procedure
• CR 43 is blocked by the firewall. • Enable the ports for the appliance
connections
• Check the main fuse box to building
connections
• Inform your service technician
• Check the network cable
• Driver not installed or inactive
• Check the network cable
• Check IP addresses
• The appliance takes approx. 2030 seconds to boot after switching on.
Repeat the procedure again after
this time.
in the firewall.
28
9000-608-21/30 2013/10/21

Problem Possible cause Solution
7. Cassette is not
drawn into the
cassette slide
8. X-ray exposure
does not appear
on the screen after
the scanning
9. X-ray too dark/
light
10. X-ray unclear • X-ray dose too low • Check the X-ray parameters
11. Ghosts and shad-
ows on the X-ray
exposure
12. CR 43 does not
appear in the
selection list in
CRConfig
13. Image appears
shadowy on the
scan window
Software cannot
combine data to
make a complete
image
14. When starting
the X-ray module
in D-Tect, a fault
message appears
• Cassette not properly engaged • Position the cassette correctly
• Cassette not pushed in correctly • Position the cassette correctly
• CR 43 is not ready • Activate CR 43
• Image data on the image plate of
the cassette were erased, e.g. by
natural or scattered X-ray radiation
• Problem with the hardware • Inform your service technician
• X-ray device is faulty • Inform your service technician
• No image information on the image plate of the cassette
• Wrong brightness/contrast setting
in the software
• Image data on the image plate in
the cassette were not sufficiently
erased
• Appliance is connected behind a
network router.
• The X-ray dosis on the image
plate was insufficient
• The amplification is set too low
(HV value)
• The selected scan mode is not
suitable
• The setting for the threshold value
is too high
• CR 43 is conflicting with another
device
• Image data on the image plate
must be read out as quickly as
possible after removal
• Expose the image plate
• Set the brightness of the X-ray
image with the software
• Erase the image plate of the cassette again
• Configure the IP address at the
CR 43 without an intermediate
network router.
• Connect the network router again.
• Enter the IP address manually in
CRConfig and register the appliance.
• Increase the X-ray dose
• Increase amplification (HV value)
• Select suitable scan mode
• Reduce setting
• In "CRConfig", set the CR 43 or
the like to "Demo without Scanner".
EN
2013/10/21 9000-608-21/30
29

Problem Possible cause Solution
15. X-ray exposure
has stripes on
image
EN
16. Warning message: "Too much
ambient light"
17. Pale stripes in
scanning window
18. Narrow images
with light and
dark streaks appear in addition
to the correct
image
19. Blue LED out • No connection between CR 43
20. Red LED lit • Device fault:
• Image plate in the cassette was
exposed by natural or scattered
X-ray radiation
• Image plate in the cassette soiled
or scratched
• CR 43 exposed to too much light • Darken the room
• Too much stray light entered during scanning
• Ambient light entered during
scanning
and PC
Urgent need for action by the
operator
• Only use the image plate within
24 hours of data erasure.
• Inform your service technician
• Turn the CR 43 so that the light
does not fall directly onto the
input unit
• Darken the room
• Turn the CR 43 so that the light
does not fall directly onto the
input unit
• Darken the room
• Turn the CR 43 so that the light
does not fall directly onto the
input unit
• Activate the CR 43 via the software
• Switch off the CR 43 for approx.
10 seconds.
• Restart the CR 43.
• If the CR 43 does not start, inform
the service technician.
30
9000-608-21/30 2013/10/21

18.2 Error messages
Problem Possible cause Solution
Fault code -11 Unit is in illegal condition - in
combination with an initialisation
problem
Fault code -1006 RFID Fault
EN
Fault code -1008 Internal communication fault to
sub-assembly
Fault code -1010 Temperature of unit too high • Allow unit to cool down.
Fault code -1020 Non-permissible action • Switch the appliance off and on.
Fault code -1022 Subassembly not initialised • Fault in software, if necessary
Fault code -1026 Scan mode is faulty • Choose alternative scan mode
Fault code -1100 Scanning process has exceeded
allotted time allowance
Fault code -1104 Erasure unit fault • Inform the service technician.
Fault code -1108 Motor blocks on ejecting cassette
Fault code -1117 Position error on insertion or
transport, internal faulty setting
of unit
Fault code -1120 As a result of -1160, motor
blocks on image plate ejection
Fault code -1122 Unit cannot carry out self-adjust • Check self-adjust.
Fault code -1150 Temperature of unit too high • Allow unit to cool down.
Fault code -1153 Subassembly fault • Switch the appliance off and on.
Fault code -1154 Internal data communication fault • Switch the appliance off and on.
Fault code -1160 Final radiation deflector rotation
speed not achieved
• Switch the appliance off and on.
• Check all sub-assemblies.
• Inform the service technician.
up-date the software.
• Inform the service technician.
• Correct scan mode settings
• Inform the service technician.
• Check belt drive.
• Check for blockage, remove
image plate from unit.
• Replace erasure unit.
• Switch the appliance off and on.
• Check insertion mechanism.
• Check image plate detector.
• Inform the service technician.
• Replace the deflector subassembly if problem regularly
occurs.
2013/10/21 9000-608-21/30
31

Problem Possible cause Solution
Fault code -1170 SOL-Sensor Timeout
Fault code -1171 Fault at laser • Send appliance for repair.
EN
Fault code -1172 Deflector assembly or the SOL-
Fault code -2002 Occurs when there are problems
Fault code -2395 Occurs when there are problems
Fault code -2490 Network problem /
Fault code -3000 Internal faulty setting of unit • Move transport slide to upper
Fault code -3001 Motor fault
Fault code -3002 Sensor fault
Fault code -3003 Cassette flap does not open fully • Switch the appliance off and on.
Fault code -3004 Shaft subassembly does not
Fault code -3005 Arm subassembly does not func-
Fault code -3008 Invalid cassette identification • Switch the appliance off and on.
Fault code -3009 No cassette detected, • Switch the appliance off and on.
Fault code -78 Memory card full. • Transmit image data to com-
Fault code -10000 Unit exposed to too much light • Darken room.
Fault code -10017 Unit switches off • Wait until unit has shut down
Firmware not running Firmware update not carried out • Switch the appliance off and on.
Fault at laser or SOL-sensor
sensor defect
with network
with network
faulty connection
Motor has automatically switched
itself off
Arm sensor has not switched on
(potentiometer must be set)
function correctly
Fault with cassette insertion - oc-
curs in combination with network
problems, image not correctly
scanned etc.
tion correctly
Fault in internal communication • Switch the appliance off and on.
• Switch the appliance off and on.
• Inform the service technician.
• Switch the appliance off and on.
• Inform the service technician.
• Replace the deflector assembly.
• See fault code -2490
• See fault code -2490
• Check the network.
position manually.
• Switch the appliance off and on.
• Switch the appliance off and on.
• Switch the appliance off and on.
• Switch the appliance off and on.
puter.
• Insert empty memory card.
• Turn the unit so that no direct
light falls on the entry slot.
completely
32
9000-608-21/30 2013/10/21


EN
34
9000-608-21/30 2013/10/21

EN
2013/10/21 9000-608-21/30
35

DÜRR NDT GmbH & Co. KG
Höpfigheimer Straße 22 · 74321 Bietigheim-Bissingen, Germany
Phone: +49 7142 99381-0 · Fax: +49 7142 99381-299
info@duerr-ndt.de · www.duerr-ndt.de
 Loading...