

Page 1

USER’S MANUAL POGO 3 / POGO 3 2R EDITION 2_07/2019
Page 2
Page 3
Congratulations
Thank you for choosing the Pogo3 harness. We have done our best to present you with a highest quality product, fulfilling all safety
requirements and offering maximum functionality. Please read this manual carefully before using the harness for the first time. This
will help you utilize all features of the Pogo3, maximizing comfort and fun you get out of each flight.
We wish you a lot of safe and enjoyable airtime!
Contents
1. Safety ….........................................................................................................4
2. Description …................................................................................................ 4
3. The Cockpit ….................................................................................................5
4. Frontcontainer (2R version only).................................................................. 6
5. The Pod …........….......................................................................................... 13
6. Speedbar ….................................................................................................. 15
7. Rescue chute installation …........................................................................ 16
8. Harness straps adjustment …...................................................................... 29 `
9. Pockets …..................................................................................................... 32
10. Protector …................................................................................................ 33
11. Harness/paraglider connection …............................................................. 34
12. Harness/tow connection …....................................................................... 34
13. Before the flight …..................................................................................... 35
14. Using rescue chute …................................................................................. 35
15. Landing …................................................................................................... 36
16. Water landing …......................................................................................... 36
17. Tandem flying …......................................................................................... 36
18. Cleaning and storage ….............................................................................. 37
19. Operation and repairs …............................................................................ 38
20. Technical data …..........................................................................................40
Page 4

1. Safety
Paragliding is a potentially hazardous sport. When flying a paraglider you have to accept risks of injury and/or even death.
Incompetent or improper use of the harness may add to those risks. In case of any doubts please ask your dealer or manufacturer.
!
Dudek Paragliders do not bear any responsibility for damages or injuries resulting from paragliding activities.
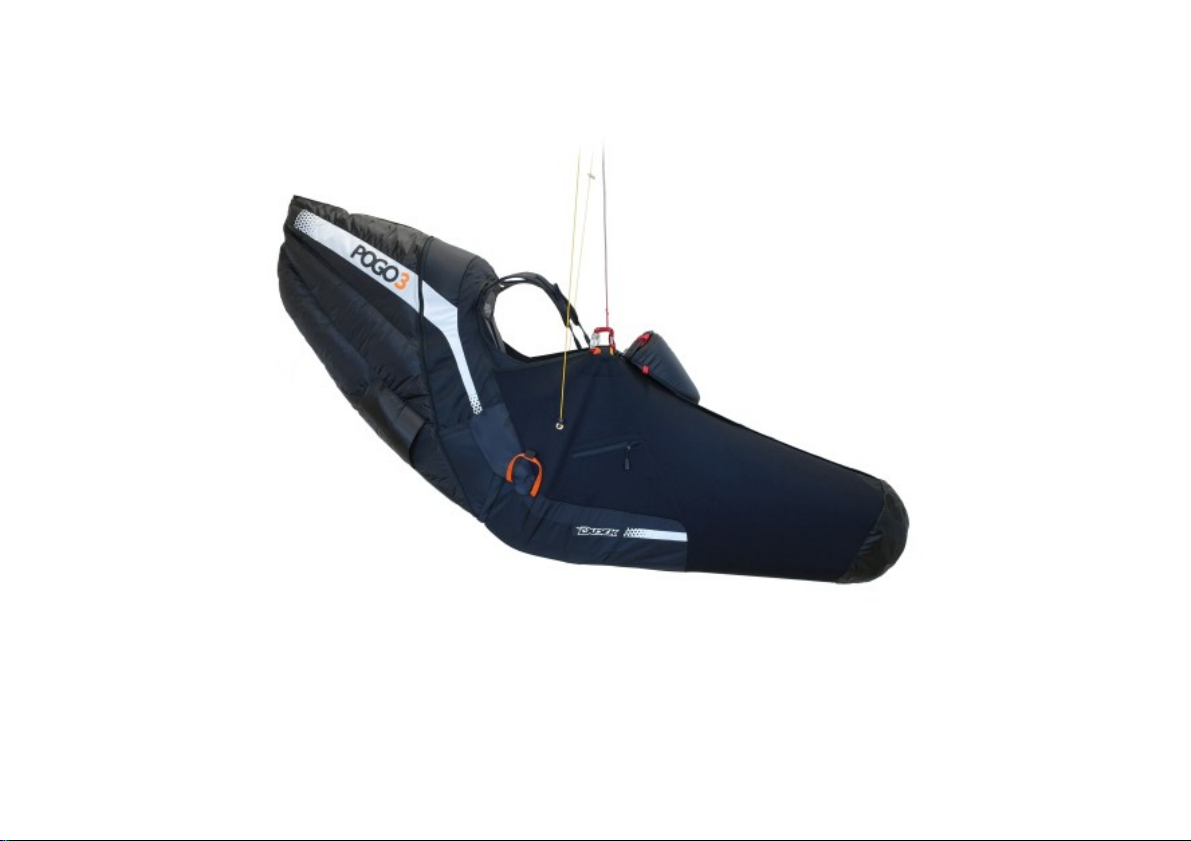
2. Description
The Pogo 3 harness was designed for cross country and competition pilots. Main point on the wishlist were improvement in
ergonomics of use and weight reduction. Due to light, carbon seat board and footrest, as well as other materials the Pogo3 weighs
just 4,3 kg in M size. Comfortable, ventilated backrest and a new, ergonomic seat with a profiled board ensure maximum comfort
during the flight. Large adjustment range make sure every single pilot will be able to find his/her optimum. Redesigned strap scheme
brings great stability and significantly reduces danger of launching with leg/chest straps not clipped in. The harness has been
equipped with a 15 cm thick, certified airfoam protector covered with a polycarbonate plate. Integrated rescue chute container is
located on the back, behind the protector. The release handle is fixed in easily accessible area on the right side of the harness. In the
2R version there is also a frontcontainer present, ready to accept an alternative rescue chute. The pod shields the pilot against cold
and improves aerodynamic qualities. Four-point adjustment of its length allows for stepless adjustment of the footrest too. Complete
with integrated cockpit or frontcontainer (2R version) it is closed in two points only. Both the cockpit and frontcontainer have an
additional, detachable instrument panel, equipped with easily accessible safety knife. Locking scheme of the pod 'reminds' the pilot
to clip in the chest strap as well. Under the seat plate there is a container for a ballast bag, too. The Pogo3 features easily replaceable,
ball-bearing Duroll pulleys, improving the speedsystem operation. Introduction of a self-inflating flow around the back of the harness
has improved aerodynamics and flight stability.
4
Page 5
3. The Cockpit
The cockpit has an instrument panel (vario, GPS etc), ready to accept Velcro-finished cases.
Additionally, the panel is equipped with a safety knife and can be easily detached with the
instruments still fixed to it. Under the shelf there is a pocket, accessible in flight to reach
an energy bar or soft drink. The cockpit is integrated with the pod and does not have any
additional fasteners.
5
Page 6
4. Frontcontainer (Pogo3 2R version only)
Pogo 3 2R has a frontcontainer which can house an alternative rescue chute.
It is equipped with a short V-riser connecting the rescue chute to
the carabiners of the harness. The frontcontainer is – similarly as the cockpit – integrated
with the pod and has an additional instrument panel, featuring safety knife too.
The frontcontainer will best accommodate light rescue chutes, e.g. Globe Light 90 or
Globe Light 110 manufactured by Dudek Paragliders. It is possible to install parachutes of
other brands too, given that their dimensions when packed do not exceed those of the
frontcontainer.
Container capacity:
Max 5700 cm3
Min 4500 cm3
!
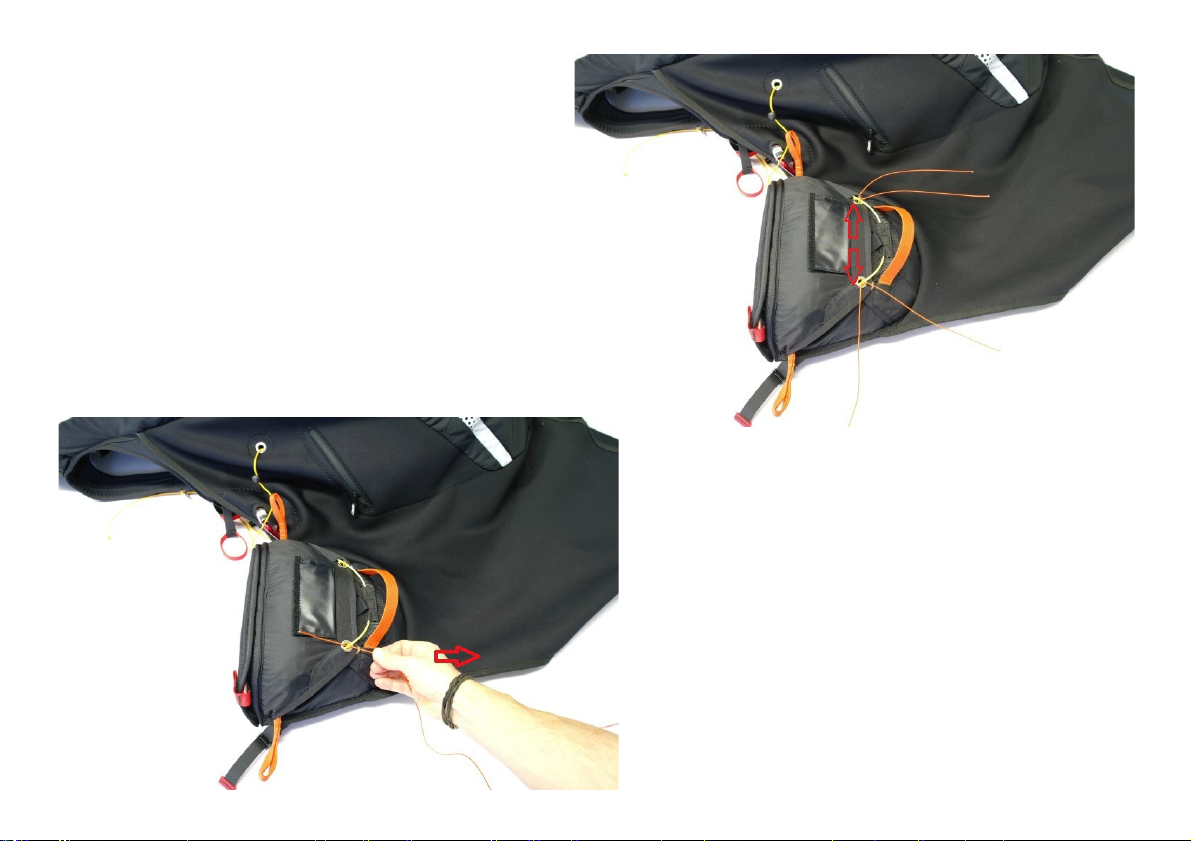
After each installation of a rescue chute in a frontcontainer a compatibility test is necessary.
In order to do that, hang the harness, equipped and packed as for flight. Seat down in the
harness and assume the usual position in flight. Grab the frontcontainer release handle and
pull it to the side in a resolute effort, so that the parachute is completely out of the container.
Still, do not throw it away, so that the bag remains closed. If the trial was successful, put the
rescue back into the frontcontainer.
6
Page 7
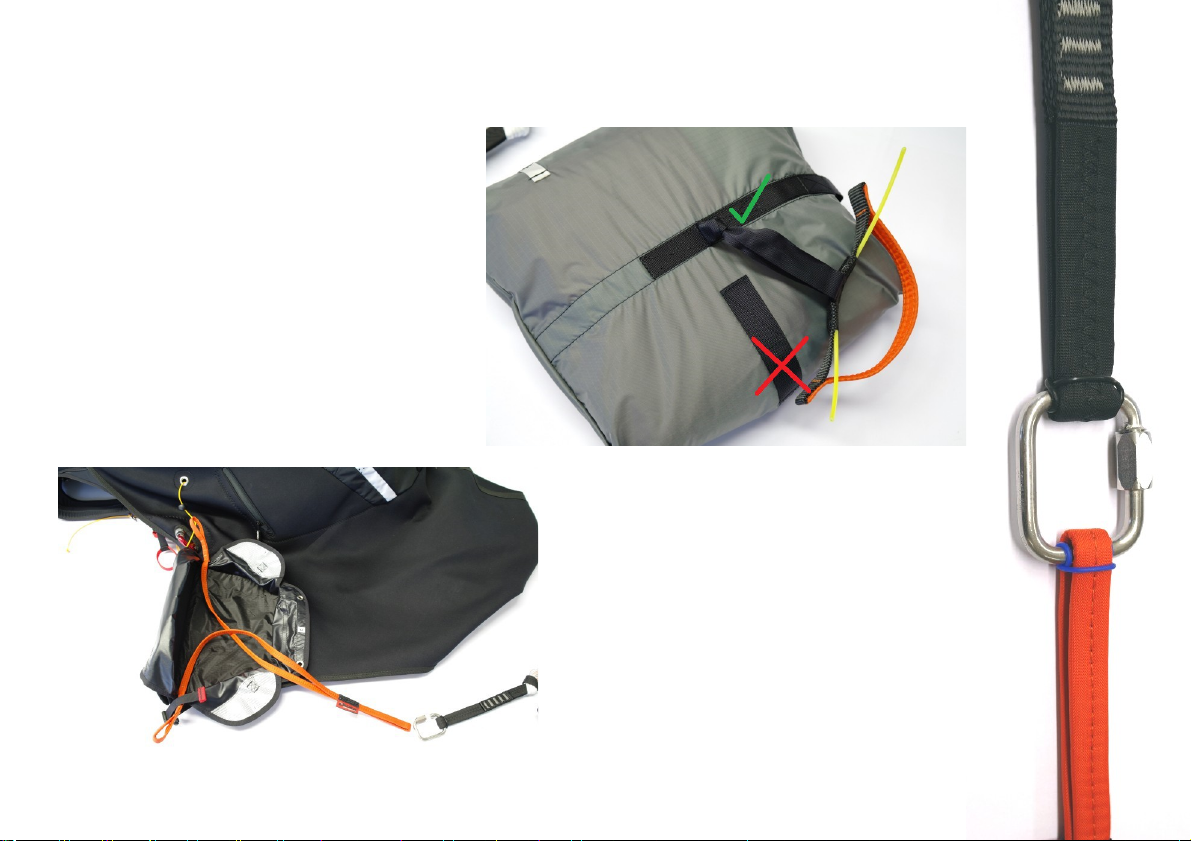
4a. Frontcontainer - rescue chute installation
Connect the release handle to the point in the
middle of the bag.
Connect the V-riser with the riser of the rescue
chute with a locked C6 quicklink.
The V-riser should be fixed with an o-ring
(see picture on the right) and tighten the nut with
a wrench.
7
Page 8
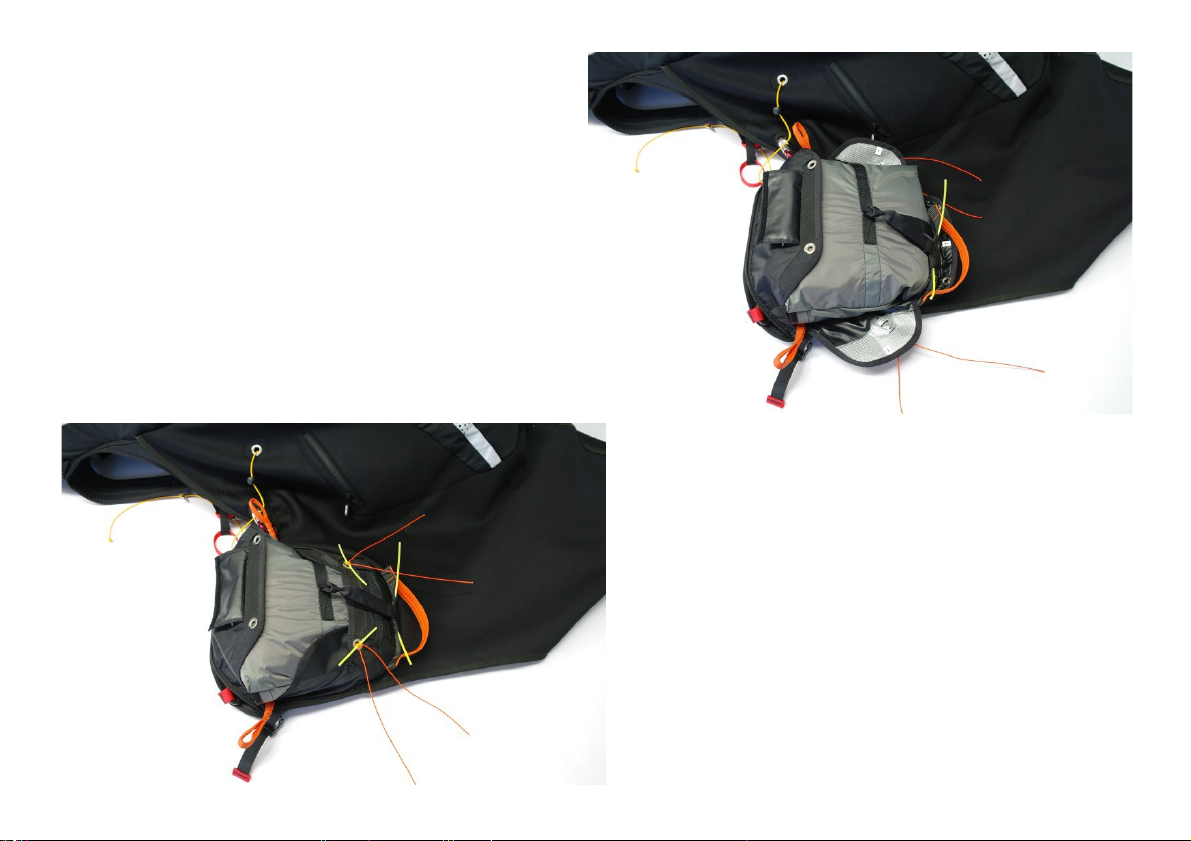
Lead the assist lines through the loops of the #1 flap.
Put the rescue chute in the container with the release handle
up.
Lead the assist lines through the loops of the #2 flap and
lock it with temporary pins.
8
Page 9

Lead the assist lines through the loops of the #3 flap and
lock it with temporary pins.
Fix the release handle on the velcro strap, and put its tips into
pouches on the #2 flap.
9
Page 10
Replace the temporary pins with those of the release handle.
Tips of the pins are to be shoved into pouches on the #3 flap.
Assist lines are to be lead around the pins and pulled out.
10
Page 11
Close the handle cover flap and fix it on the #2 flap Velcro.
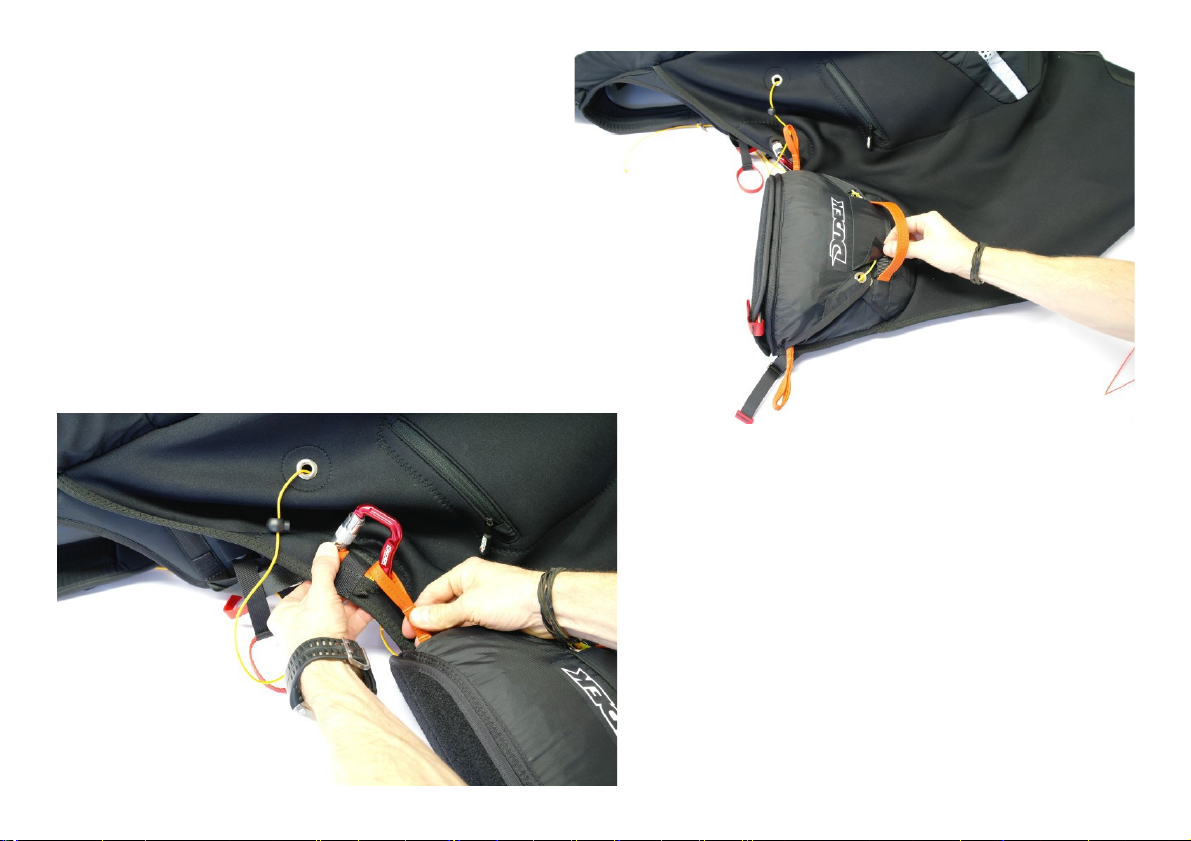
Put the left end of the V-riser into a carabiner.
11
Page 12
The right end of the V-riser must be put into the carabiner
only after the chest strap and the pod are closed an locked.
!
Both ends of the V-riser must be clipped in before the
paraglider risers. In order to get out of the harness it is
necessary to free the right end of the V-riser.
In emergency just cut the riser with your safety knife.
12
Page 13

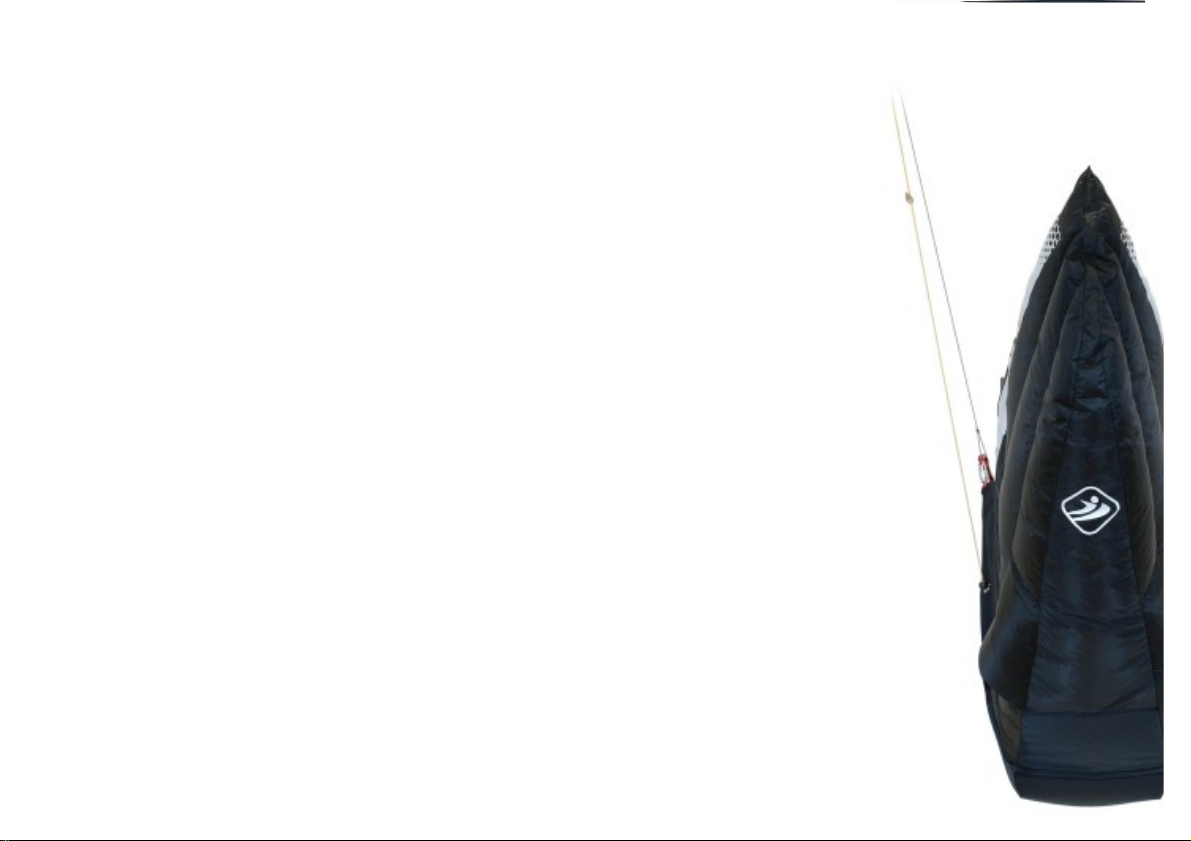
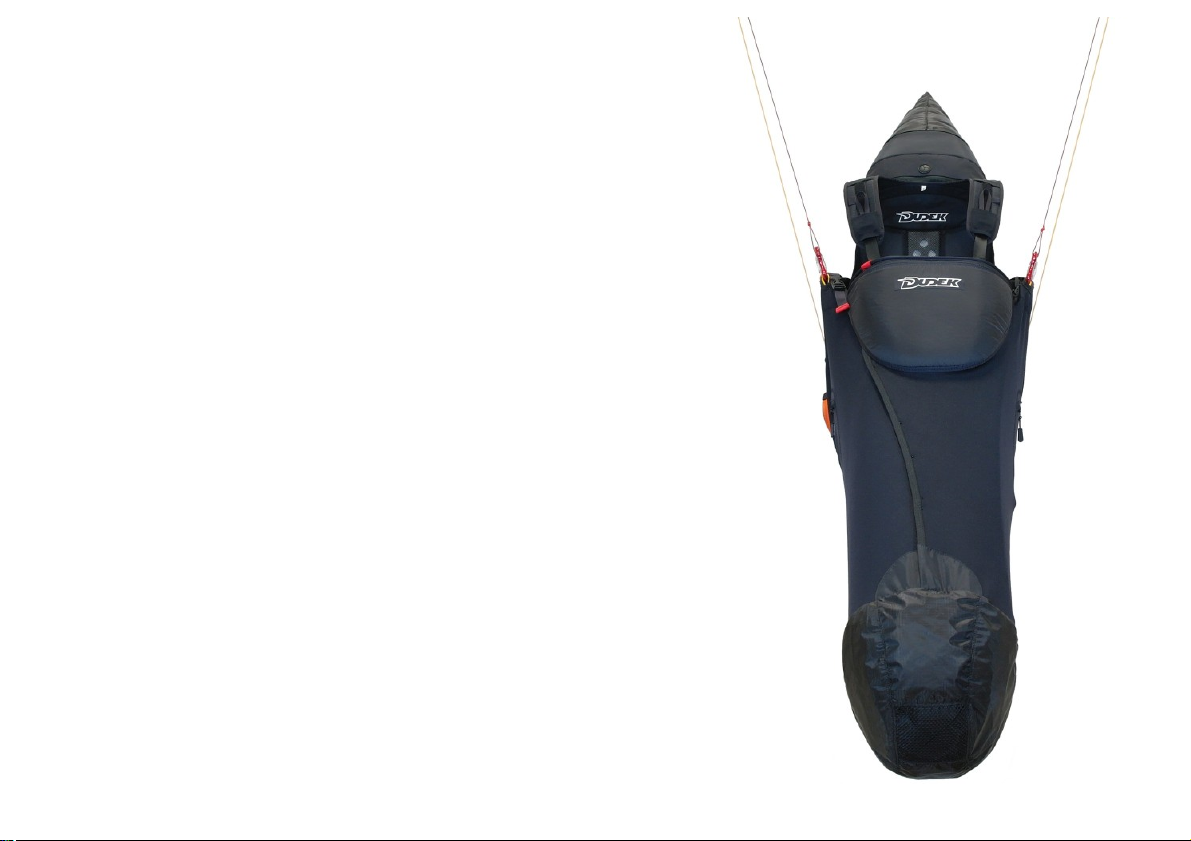
5. The Pod
The pod obviously shields the pilot against cold and improves aerodynamic qualities of the unit. There is an adjusted footrest
(distance/inclination) and a three-step speedbar inside. The pod is permanently fixed to the harness and integrated with
cockpit/frontcontainer (2R version). The pod is closed in two points only. The nose of the pod automatically fills up once in the air,
then after landing you can easily squeeze that air out for packing. The length and inclination of the footrest is adjusted in points 1 and
2.
13
Page 14

The exception is the left upper line, length of which can be adjusted in #3 after earlier adjustment of the right-side closing of the pod.
The right side of the pod is closed by inserting ball #5 and #6 in the loops of the safety strap #7. Tension on this side of the cocoon can
be adjusted by moving #4 ball.
Left side of the pod is closed and adjusted with #8 buckle. This part of the pod is integrated with the cockpit.
i
If the carabiner’s width has been changed, a re-adjustment of the pod closure may be
necessary in points #4 and #8, as well as the length of the left upper line in #3 point.
14
Page 15

6. Speedbar
Lines of the speedbar must be led through respective pulleys (under the seat and on the back support). Then put it through metal
loops in the pod and fix a stoper, accompanied by the speedsystem clip. Connect the speedbar with a rubber band to the pod’s
footrest. Find the best length of the rubber so that the speedbar is easily accessible in flight. In order to adjust the whole system you
have to sit in the harness while it is hanged by the paraglider’s risers. At full speedbar the pulleys on the risers should touch. When
necessary, adjust the lines according to your later experiences in flight.
!
Do not adjust the speedsystem lines while flying.
1 – speedsystem line
2 – three-step speedbar
3 – rubber straps connecting the speedbar
with footrest
15
Page 16

7. Rescue chute installation
Connect the release handle to the point on the
side of the bag.
Connect the V-riser with the riser of the rescue chute
with a locked C6 quicklink.
The V-riser should be fixed with an o-ring
(see picture on the right) and the nut tightened with
a wrench.
16
Page 17

If necessary, put in the container an insert reducing
its capacity.
Put the rescue chute into the container.
17
Page 18

Lead the assist lines through the loops.
18
Page 19

Lead the assist line through the loop of the container flap
(the one closer to release handle) and gently move
the zipper upwards.
Close the right part of the container by moving the zipper
down.
19
Page 20

Lead the assist line through the loop in the zip cover.
Put the shorter pin of the release handle through the loop.
20
Page 21

Fix the release handle to the Velcro strap.
Gently remove the assist line.
21
Page 22

Lead the assist line through the left loop of the container flap
and gently move the zipper upwards.
Close the left part of the container by moving the zipper
down.
22
Page 23

Lead the assist line through the strap loop.
Put the longer pin of the release handle through the loop.
23
Page 24

Put the remainder of the pin into the slit of the Velcro strap.
Gently remove the assist line.
24
Page 25

Close the V-riser tunnel (if opened earlier).
25
Page 26

Close the pin cover and fix the upper part of the handle
(by a magnet).
26
Page 27

Fix the self-inflating part to the lower part of the container.
!
To avoid accidental opening of the rescue system, pins closing
the container must be checked before each flight !
Page 28

The rescue chute must be periodically aired and repacked, according to its manual. The Pogo3 harness will best accommodate light
rescue chutes: Globe Light 90 , Globe Light 110 or Globe Light 135 manufactured by Dudek Paragliders. It is possible to use rescue
parachutes by other manufacturers too, as long as their dimensions when packed do not exceed those of the container.
Container capacity: With a capacity-reducing insert
Max 6250 cm3 Max 5400 cm3
Min 5200 cm3 Min 4500 cm3
!
After each installation of a rescue chute in a container a compatibility test is necessary. In order to do that, hang the harness,
equipped and packed as for flight. Seat down in the harness and assume the usual position in flight. Grab the container release
handle and pull it to the side in a resolute effort, so that the parachute is completely out of the container. Still, do not throw it away,
so that the bag remains closed. If the trial was successful, put the rescue back into the container.
If, however, the parachute could not be released properly, possible reasons are:
- too big a parachute in relation to container’s dimensions (after a repacking the parachute is usually bigger than it originally was)
- you pull the handle not resolutely enough or in wrong direction (i.e. to the front, to the back or upwards).
!
Leaving the sliders in the upper position
(as in the pictures on the right) will make it
impossible to open the container and use
the rescue parachute! Before the flight,
make sure that the container is properly
closed.
28
Page 29

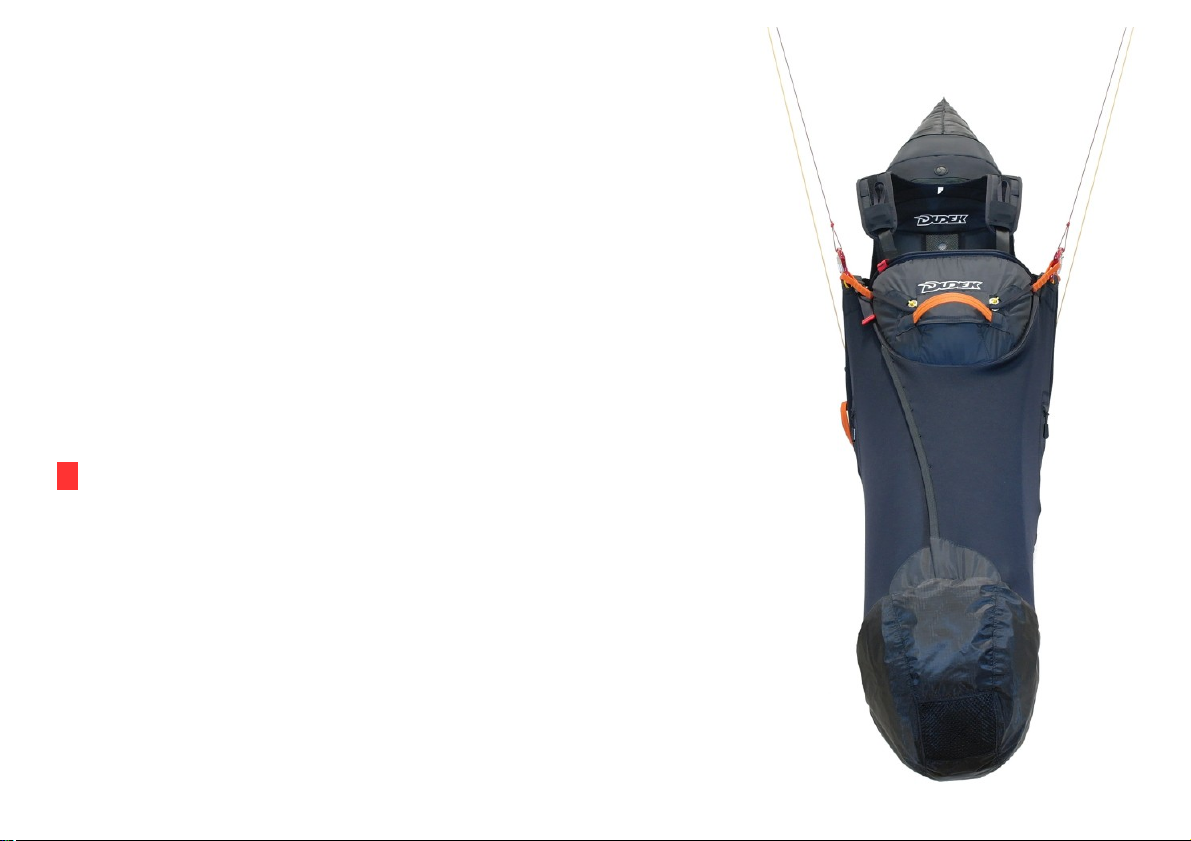
8. Harness straps adjustment
!
Before adjusting the straps please install rescue chute and fill the back pocket as for normal flight. Watch out for symmetry – left and
right side should be adjusted the same. First, test flight should be done in easy weather conditions, with necessary corrections applied
afterwards. Do not adjust the harness while flying.
1 – Shoulder straps 4 – Chest strap
2 – Side straps 5 – Lines of the seat inclination
3 – Leg straps 6 – Lines of the lumbar part
29
Page 30

8.1 Shoulder straps
Thanks to adjustable shoulder straps (1) the Pogo 3 can accommodate pilots of almost any height. They should stay on your shoulders
rather tight, with just a little play. Too short straps will make comfortable seating after launch difficult, and can limit your movement
in flight. A clip on the shoulder traps makes sure they stay in place during launch and flight. Additionally, there is an alarm whistle
fixed to the clip to call for help in danger.
8.2 Side straps
They determine the seat/backrest angle. Initial adjustment should be done before the first flight, with the harness hanged from a
ceiling. In order to increase comfort, the Pogo 3 features an additional adjustment in the lumbar part (6). You can increase the
support of the lumbar spine by shortening the adjustment line, moving the red ball up until enough. All settings are to be verified
during first flight and can be further modified at any time. Bear in mind that when the backrest is reclined too much, there is
increased risk of getting twisted in case of a big deflation.
8.3 Leg straps
The leg straps are the most important safeguard against falling out of the harness. Their adjustment must allow for easy launching
and proper seating in the air. Too short straps can make you uncomfortable and restrain your starting run. Too long straps can make
seating into harness without using your hands impossible. In the Pogo 3 harness both leg straps (3) are joined with the chest strap,
significantly reducing risk of launching without leg straps closed.
In the Pogo 3 strap system the leg straps double as lateral stabilizers of the harness. Shortening of those straps limits the side swings
of the harness.
30
Page 31

8.4 Chest strap
Chest strap controls the distance between carabiners. Increasing that distance makes the harness less stable, improving effectiveness
of the weightshifting and relaying more information from the canopy. Reducing it will stabilize everything and make the paraglider
less receptive to weight steering. Too narrow carabiner base can make recovery from extreme situations very hard or even impossible
(in case of a spiral). If the manufacturer of the paraglider does not give any special instructions, recommended width is 42-48 cm. In
turbulent air you can pull in the strap to feel more comfortable, but always remember that it is more probable to get a twist in
emergency then.
!
In order to avoid falling out of the harness it is imperative to check before each launch if the chest and legs straps are closed. Failure
to close the straps is extremely dangerous and is a known reason of fatal accidents !
8.5 Seat-plate lines
By adjusting the length of those lines the inclination of the seat plate is changed. It can be adjusted to match personal preferences, as
long as symmetry is observed. In order to change the seat plate inclination first you have to loosen the lines, then seat comfortably in
the harness with your feet on the footrest, and finally pick up the slack by moving the ball towards the carabiners.
!
While adjusting any of the shoulder, side and leg straps, as well as seat plate and lumbar lines please observe the symmetry. Left and
right sides must be adjusted identically.
31
Page 32

9. Pockets
The Pogo3 has a spacious back pocket (ca. 23 litres volume) and two little side pockets on the pod. The back pocket can easily hold
the paraglider’s backpack, a camelback and much more. In the upper part, on both sides there are two entries for a Camelbak hose or
a radio antenna. Additionally, there is a pocket under the instrument panel of the cockpit. Both side and cockpit pockets are easily
accessed in flight.
Under the front part of the seat plate there is a small ballast pouch (ca. 3,5l). It can be used for anything else, too.
32
Page 33

10. Protector
The Pogo 3 is equipped with a 15 cm thick airfoam protector. The protector itself has a polycarbonate cover, guarding it against a
puncture and dissipating the force over wider area in case of a fall on uneven terrain. Protector assembly is demonstrated below.
!
The protector does not require special attention as long as there was no hard or water landing. Servicing in such cases is described
under #18 „Cleaning and storage” and #19 „Operation and repairs”
33
Page 34

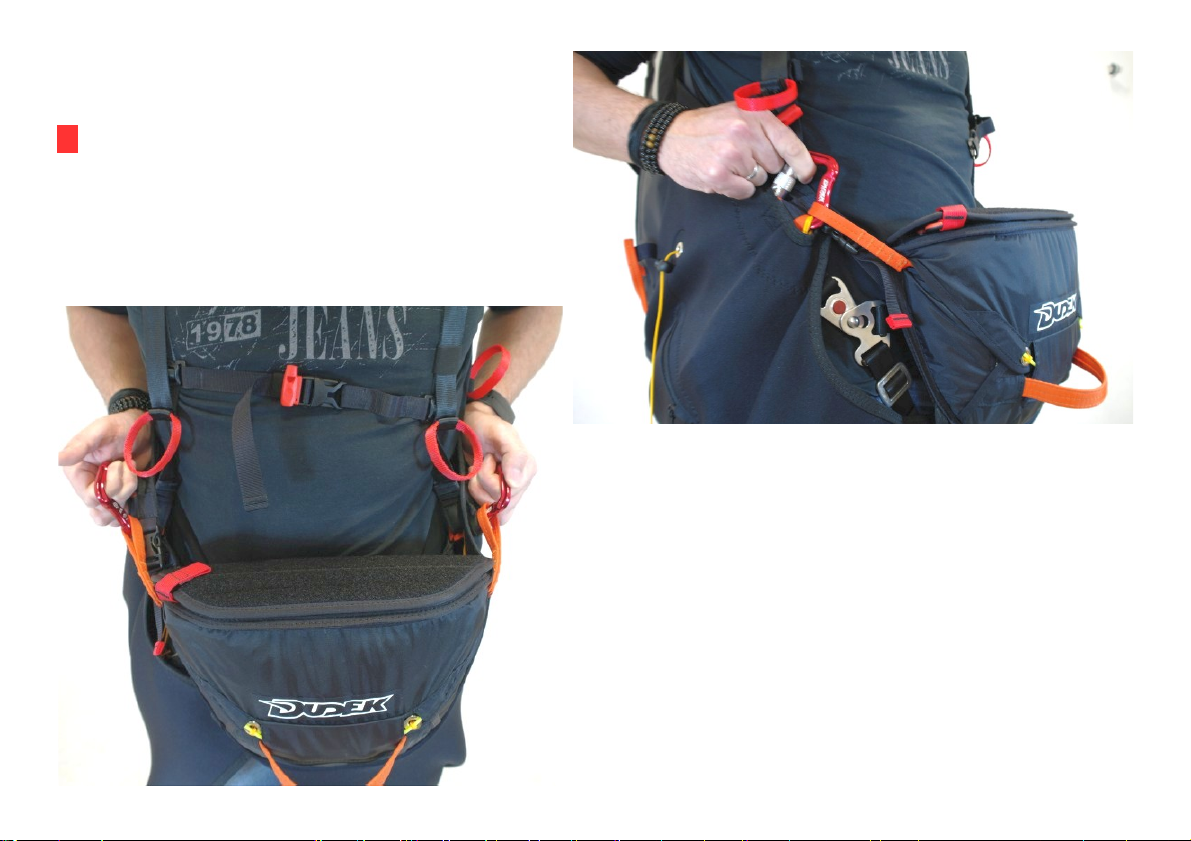
11. Harness/paraglider connection
The Pogo 3 harness is equipped with aluminium Dudek carabiners of 20 kN strength. Use them to connect the harness to the
paraglider’s risers. Another thing to connect before launch are the speedsystem lines of the harness and the speedsystem of the
risers. It is recommended to replace main carabiners with new ones after 300 hrs airtime.
!
Before launch check if the carabiners are locked and guarded against accidental opening.
12. Harness/tow connection
The only safe way of attaching the tow line is a dedicated tow release. The Pogo 3 is not equipped with a dedicated tow release fix
points, therefore it is to be mounted directly on the harness’ carabiners or the canopy risers.
!
If the tow release is fixed to the carabiners, it must be observed that they are mounted with its locks facing back, so that the tow
release is placed on the smooth part of the carabiner.
By far the better method of attaching the tow release is to clip it directly into the riser of the paraglider, using a pair of C5 quicklinks.
34
Page 35

13. Before flight
Before each flight a thorough check of the harness is required. For your own safety make sure that:
- the harness is not damaged in any way
- rescue chute container is correctly closed and locked with pins
- rescue chute release handle is correctly set up and has the right shape (quite often it happens to be malformed in transport, so it’s
important to check if it’s not flattened and hard to grab)
- leg and chest straps are closed
- shoulder and side straps remain correctly adjusted
- all pockets are closed with their zips covered
- main carabiners are closed and locked, without any damage
- the speedbar is clipped to the paraglider.
14. Using rescue chute
The rescue chute should be used in case of emergency, when it’s not possible to recover the paraglider from a hazardous flight state
in any other way. Throwing the chute while in a fast spin is risky. If there is still some altitude to spare, first you should try to slow
down or stop the spin altogether.
To use the chute grab the release handle, with fast and resolute move rip it from its velcro and throw it together with the canopy bag
as far as possible, to the outside of the spiral (if present). After opening deflate your paraglider with its rear risers. Prepare for landing
in a parachute style, keeping your legs together with slightly bent knees.
35
Page 36

15. Landing
While on final approach, get your legs out of the pod and assume upright position. Touchdown when still sitting is unacceptable and
very dangerous, as even despite the protector there is high risk of spine injury. Land always on your feet, with a few steps to bleed off
the speed if necessary. Protector is not a landing aid and was not designed as such.
16. Water landing
Water landing is potentially very dangerous, with imminent risk of drowning. If it is unavoidable, prepare yourself by releasing all the
buckles and straps beforehand. In the last moment get out of the harness to avoid getting tangled in suspension lines or other gear.
The harness does not sink, so you can later grab it and use as a lifebuoy.
!
Water landing while still in harness is extremely dangerous. As the protector does not sink and will always float, it will force your head
under water, rendering breathing very hard or impossible. There is very high risk of getting tangled in lines and drowning.
17. Tandem flying
The Pogo3 harness was not designed - and remains unsuitable - for tandem operations.
36
Page 37

18. Cleaning and storage
All materials for the harness were carefully selected, keeping their quality and durability in mind. With help of your care they will keep
your harness in good condition for a long time. The harness is best cleaned with a wet sponge, possibly a bit of soap. Do not use any
detergents nor solvents. If there is a lot of mud, before wet cleaning first use the brush.
In case of completely soaked harness (e.g. after water landing) dry it in a well aired place, away from direct sun operation.
Soaked back protector must be taken out of the harness and dried with its zip opened. If this will not be enough, remove the airfoam
and dry it separately.
Soaked rescue chute has to be always completely removed from the harness, dried and packed again by a licensed person.
Harness can be stored in a backpack, but if you want to give it best service – keep it de-rigged in a well-ventilated place, away of
sunlight. If the harness is not going to be used for a longer time, it is advised to get it out of the backpack. Unfortunately some
discoloration of individual harness parts is unavoidable over time and this is yet another reason for not exposing it to the sun more
than necessary.
Before packing the harness remove the stiffeners from air intakes of the self-inflating part and the upper area of the back pocket.
Open the cockpit and put the instrument panel inside.
37
Page 38

19. Operation and repairs
Periodic control of the harness condition will keep it in safe operation for a long time. After each hard landing check the back
protector, as the seams or zip quite often get ripped on absorbing impact and damaged protector will be ineffective. If you notice
damage to its cover, send it back to the producer for a repair or buy a new one.
Correspondingly, after each use of rescue chute thoroughly check entire harness for damages, paying particular attention to the
straps and seams.
Aluminium carabiners should be replaced each 5 years or 300 hours airtime. Scratched or damaged carabiners are not serviceable
anymore and have to be replaced at once. Using damaged harness is out of the question. In case of any doubts please contact your
dealer or manufacturer and/or send it to an authorised workshop for closer inspection.
i
The Pogo 3 harness has an airworthiness certificate for 10 years since the date of production.
The AF-15/2018 protector is allowed to remain in operation within 10 years from the date of production.
38
Page 39

Environmental care
Paragliding is an outdoor sport. We believe that our clients share our environmental awareness. Exercising paragliding you can easily
contribute to environment preservation by following some simple rules. Make sure you are not harming nature in places where we
can fly. Keep to marked paths, do not make excessive noise, do not leave any garbage and respect fragile balance of the nature.
Recycling of used gear
Harness is made out of synthetic materials, which need to be properly disposed of when worn out. If you are not able to dispose of
the paraglider properly, DUDEK Paragliders will do that for you.Just send your harness to the address given at the end of the manual,
accompanied by a short note.
39
Page 40

20. Technical data
Size Suspension height Seat width* Seat depth Back support height Max. pilot weight Harness
weight **
(cm) (cm) (cm) (cm) (kg) (kg)
S 43 24 / 31 43 60 100 4,40
M 44 26 / 33 45 63 100 4,49
L 45 27 / 34 47 66 100 4,60
XL 46 27 / 35 50 69 100 4,78
* Seat plate width front/back, ** Weight including the protector, carabiners and speedbar.
Delivery package:
1 Harness eith integrated cocoon
1 Carbon seat plate and foot plate
1 Cockpit (interated into cocoon)
1 Rescue deployment handle
1 V-strap (two-piece)
2 Carabiners Dudek 20 kN
i
Since Dudek Paragliders products are subject to constant improvements, some minor differences are possible between the manual
and actual product. Dudek Paragliders withholds its rights to introduce such changes without individual notice.
40
Page 41

Page 42

DUDEK PARAGLIDERS S.J. UL. CENTRALNA 2U 86-031 OSIELSKO POLAND
PHONE: +48 52 324 17 40 FAX.: +48 52 381 33 58 EXPORT@DUDEK.EU WWW.DUDEK.EU
 Loading...