

duckma PHONOTTO User Manual
Version: 1
User Manual
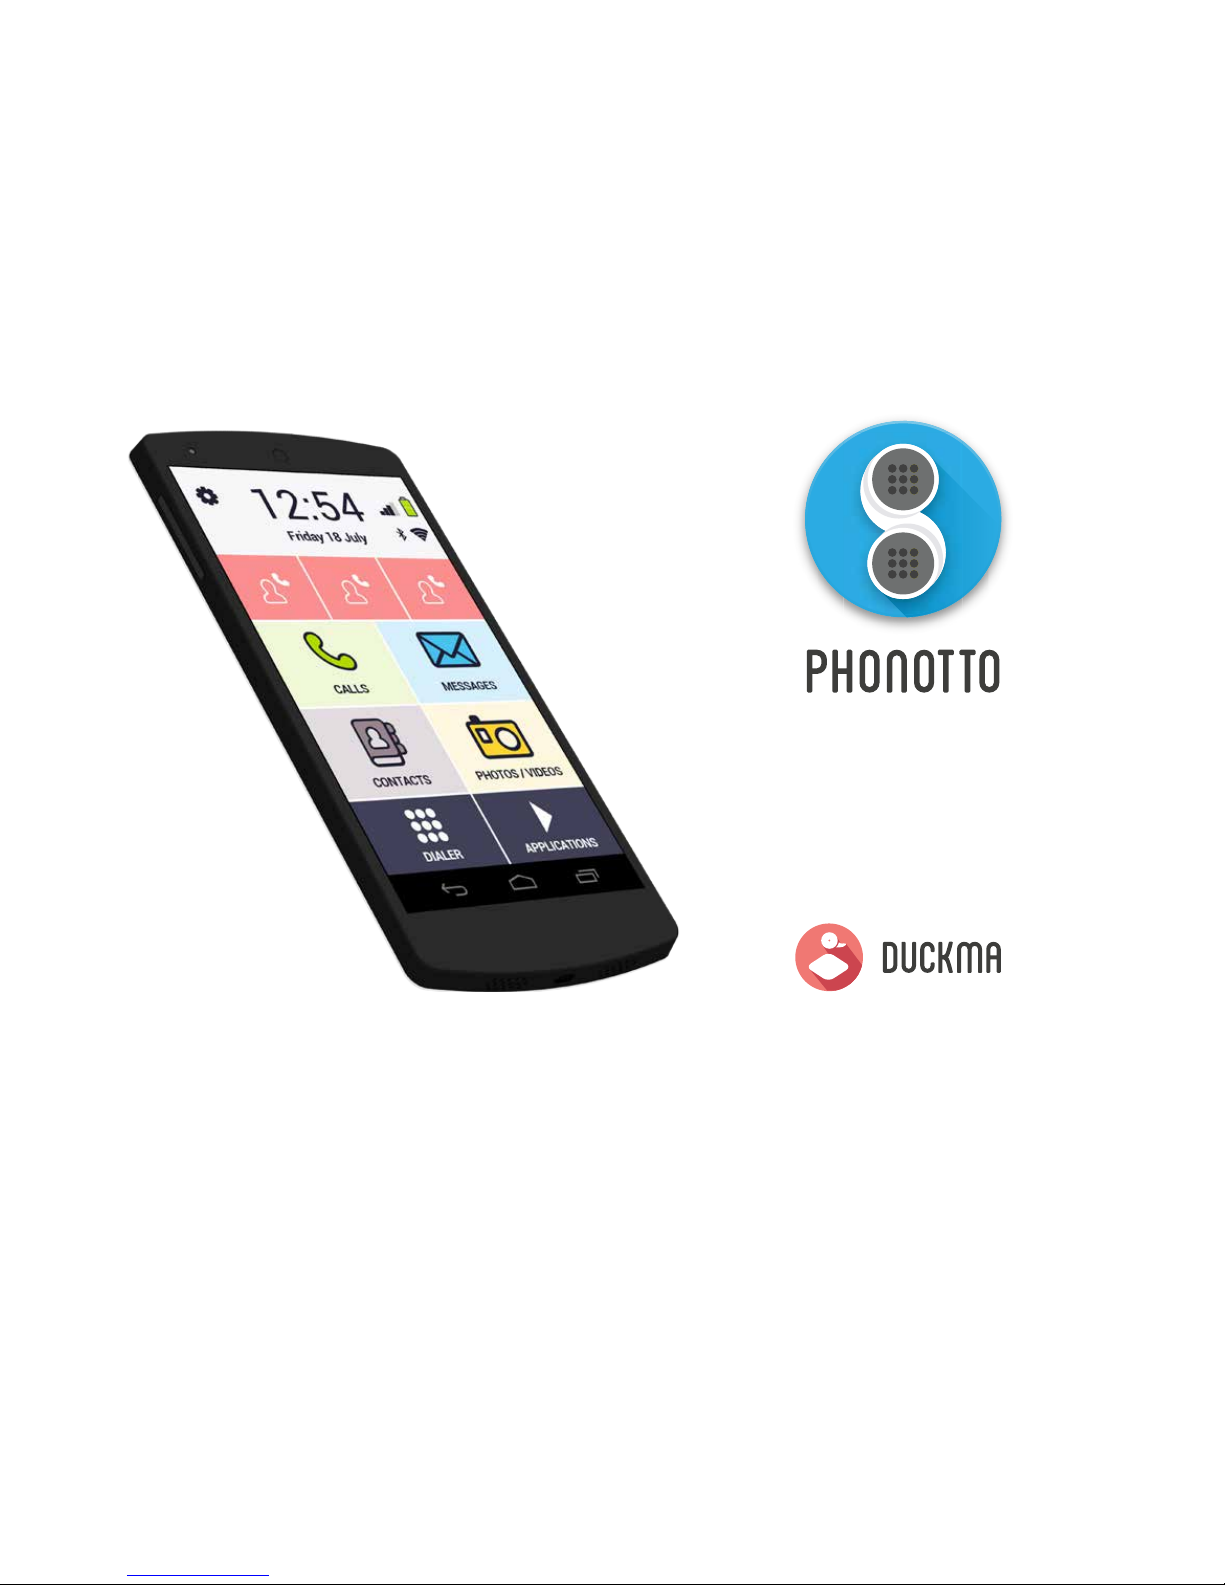
PHONOTTO
duckma.com
SIMPLE PHONE FOR SENIORS
2
© PHONOTTO - USER MANUAL - v 1
PHONOTTO - USER MANUAL
duckma.com
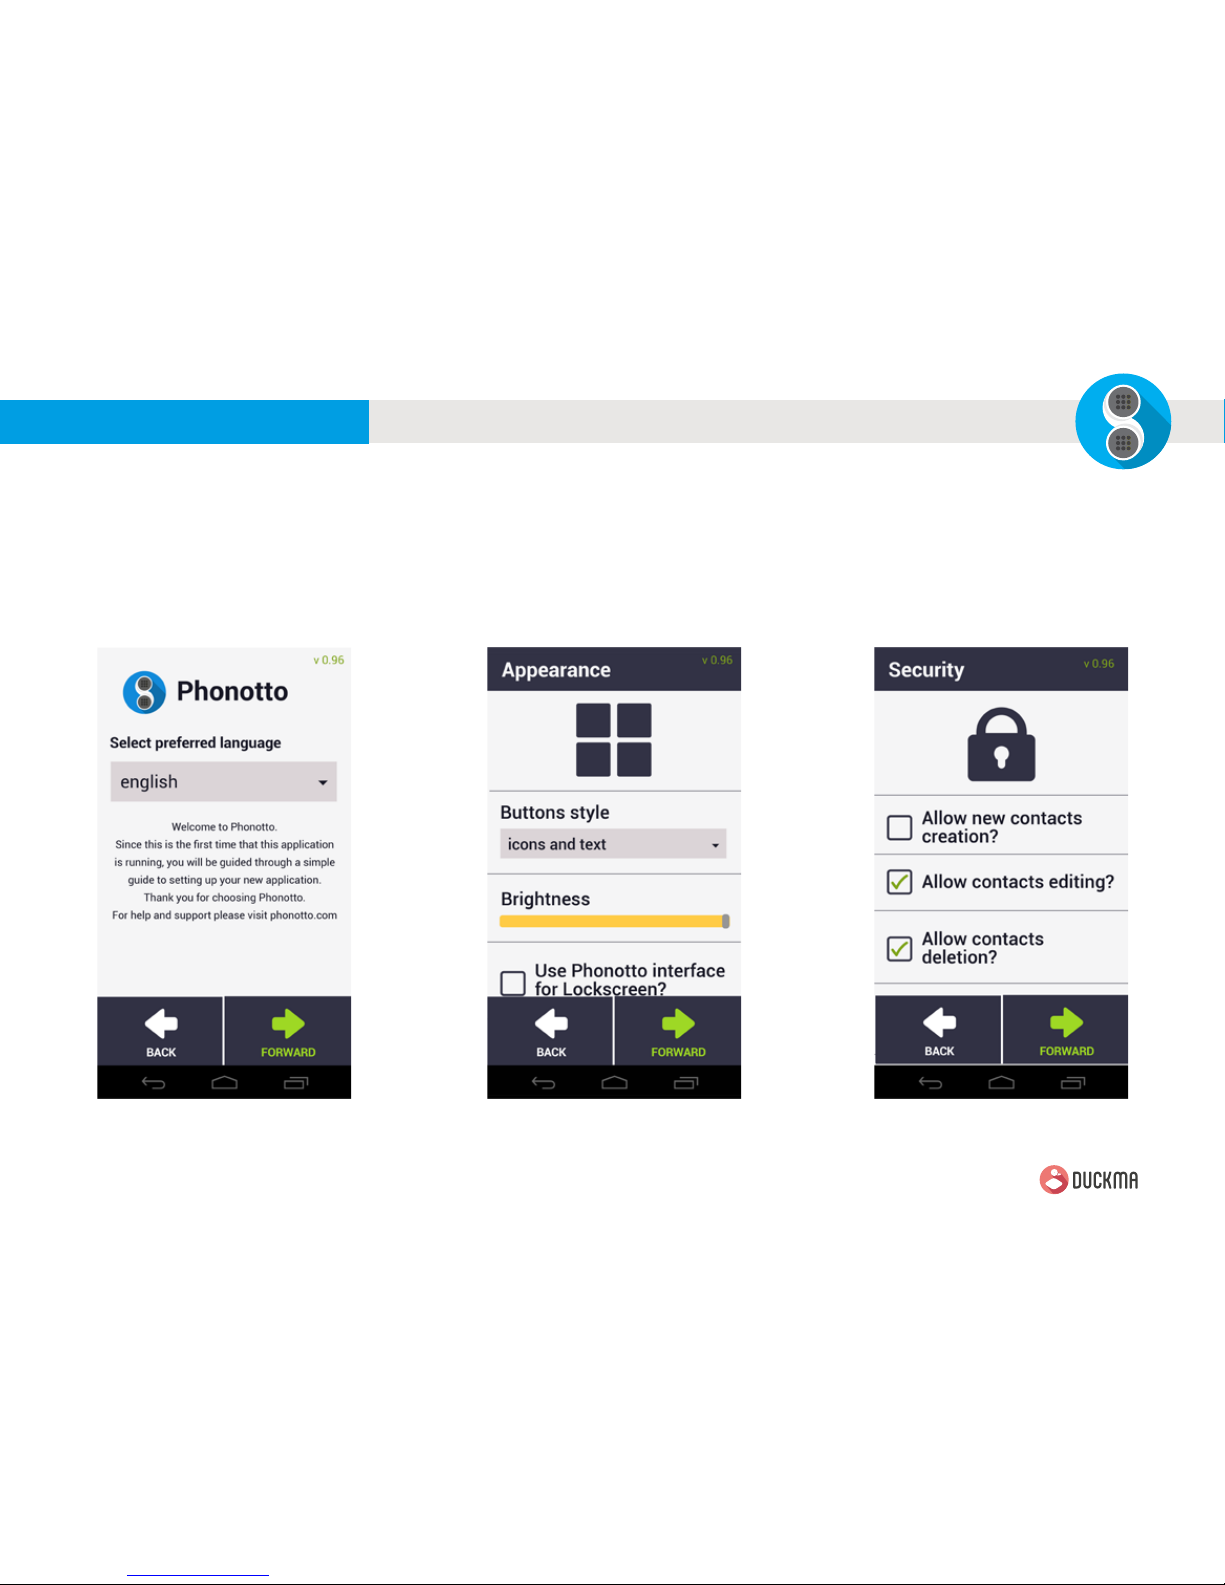
Setup Wizard
Launching the app will start the Setup Wizard,
conguring it to suit your preferences and needs.
The rst screen allows you to immediately select the
desired language.
Running forward with arrows will appear the next steps
of the tutorial.The second step shows the settings for
the appearance of buttons and allows you to adjust
the screen brightness.
The third step shows the settings related to security,
checking the options that you want.
Tutorial > SecurityTutorial > Start Tutorial > Appearance
3
© PHONOTTO - USER MANUAL - v 1
PHONOTTO - USER MANUAL
duckma.com
Setup Wizard
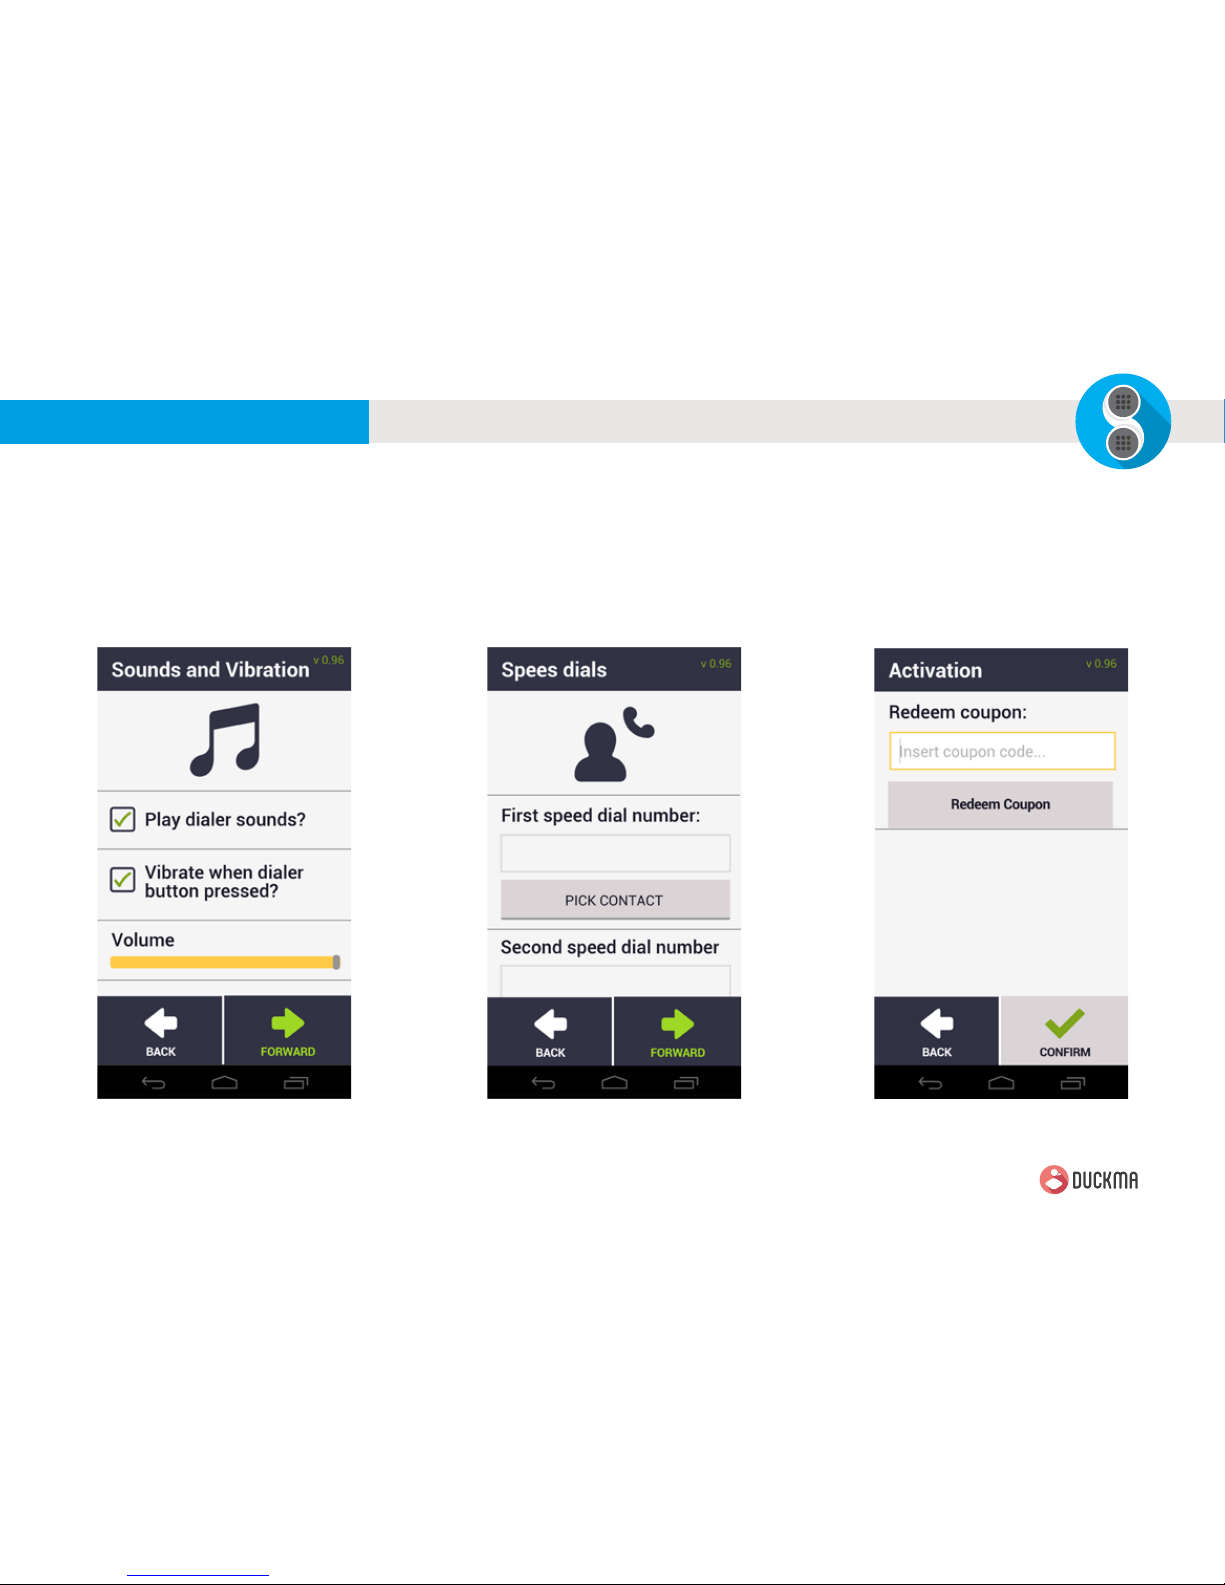
The fourth step shows the settings related to sound
and vibration.
The fth step allows you to set three speed dialing
numbers.
After nishing the setup wizard, you will see the
activation screen, in which you will need to enter your
coupon code in order to use Phonotto. After activation,
you will see the Home screen of Phonotto.
Tutorial > ActivationTutorial > Sound and Vibration Tutorial > Speed dials
4
© PHONOTTO - USER MANUAL - v 1
PHONOTTO - USER MANUAL
duckma.com
Home
Setting
Keyboard
Applications List
Contacts
Photo / Video
Call
Speed dials
Notications
Messages
Date and Time
Network indicator
Battery Indicator
Bluetooth and wi indicator
Hold on this icon will display the settings
screen and set the functionality of Phonotto
according to your preferences.
Tapping this button will display the keyboard
through which you can make a call
This button displays the list of all installed
applications on your device and added in
Phonotto
Tapping on this button will show the
phonebook
Tapping this button will show the screen
containing all the media
This button shows the call log
This button displays the set numbers for
quick dialing
This red dot indicates the number of
notications on your device
Tapping this button will show the messages
screen
This area shows the current time and date
This icon indicates the network signal
This icon indicates the battery charge
These icons show the bluetooth and wi
signal
1
2
7
3
8
10
12
9
4
5
6
11
13
3
9
2
8
5
11
4
10
6
12
13
1
7
5
© PHONOTTO - USER MANUAL - v 1
PHONOTTO - USER MANUAL
duckma.com
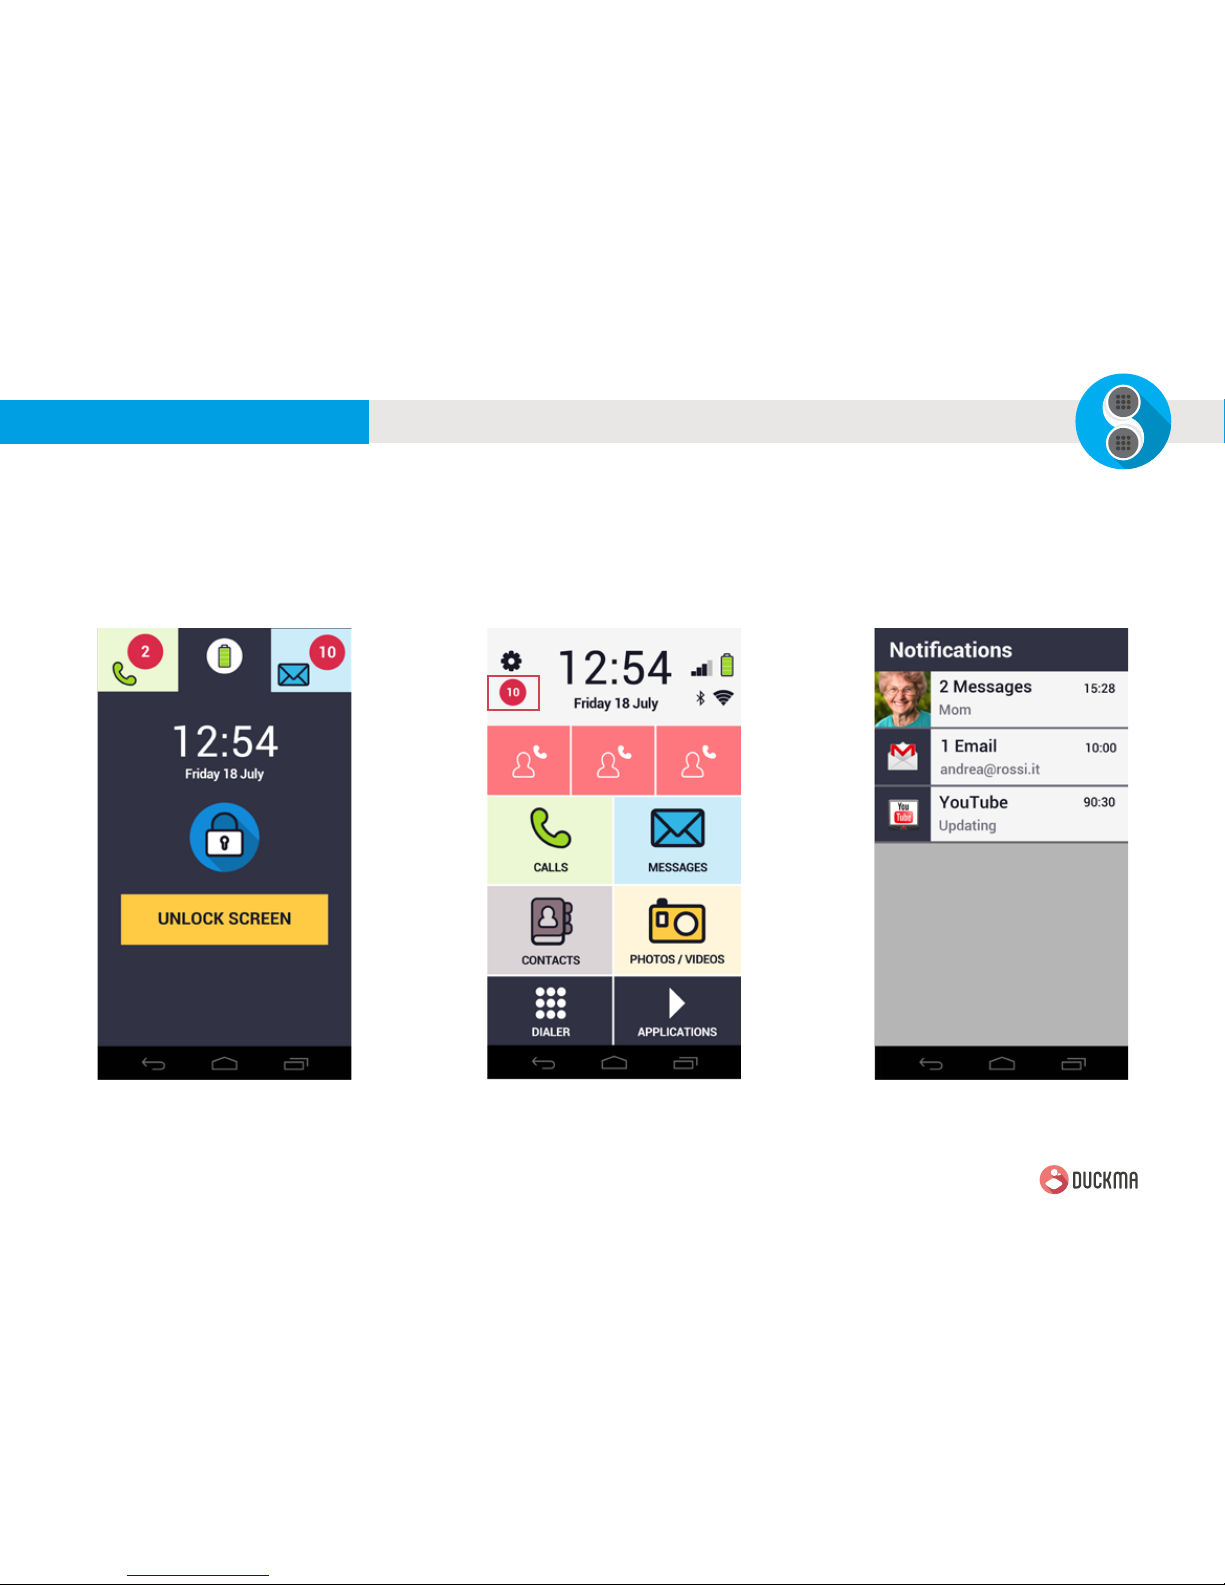
Notications
This screenshot shows the lock screen of the
Phonotto interface, which you can set from the
settings panel.
The red dot, below the settings button, indicates
the number of notications on the device. It will
appear only in the presence of notications.
Touching the red dot, you will open the screen
containing the list of notications.
Notications ListLock Screen Home > Notications
6
© PHONOTTO - USER MANUAL - v 1
PHONOTTO - USER MANUAL
duckma.com
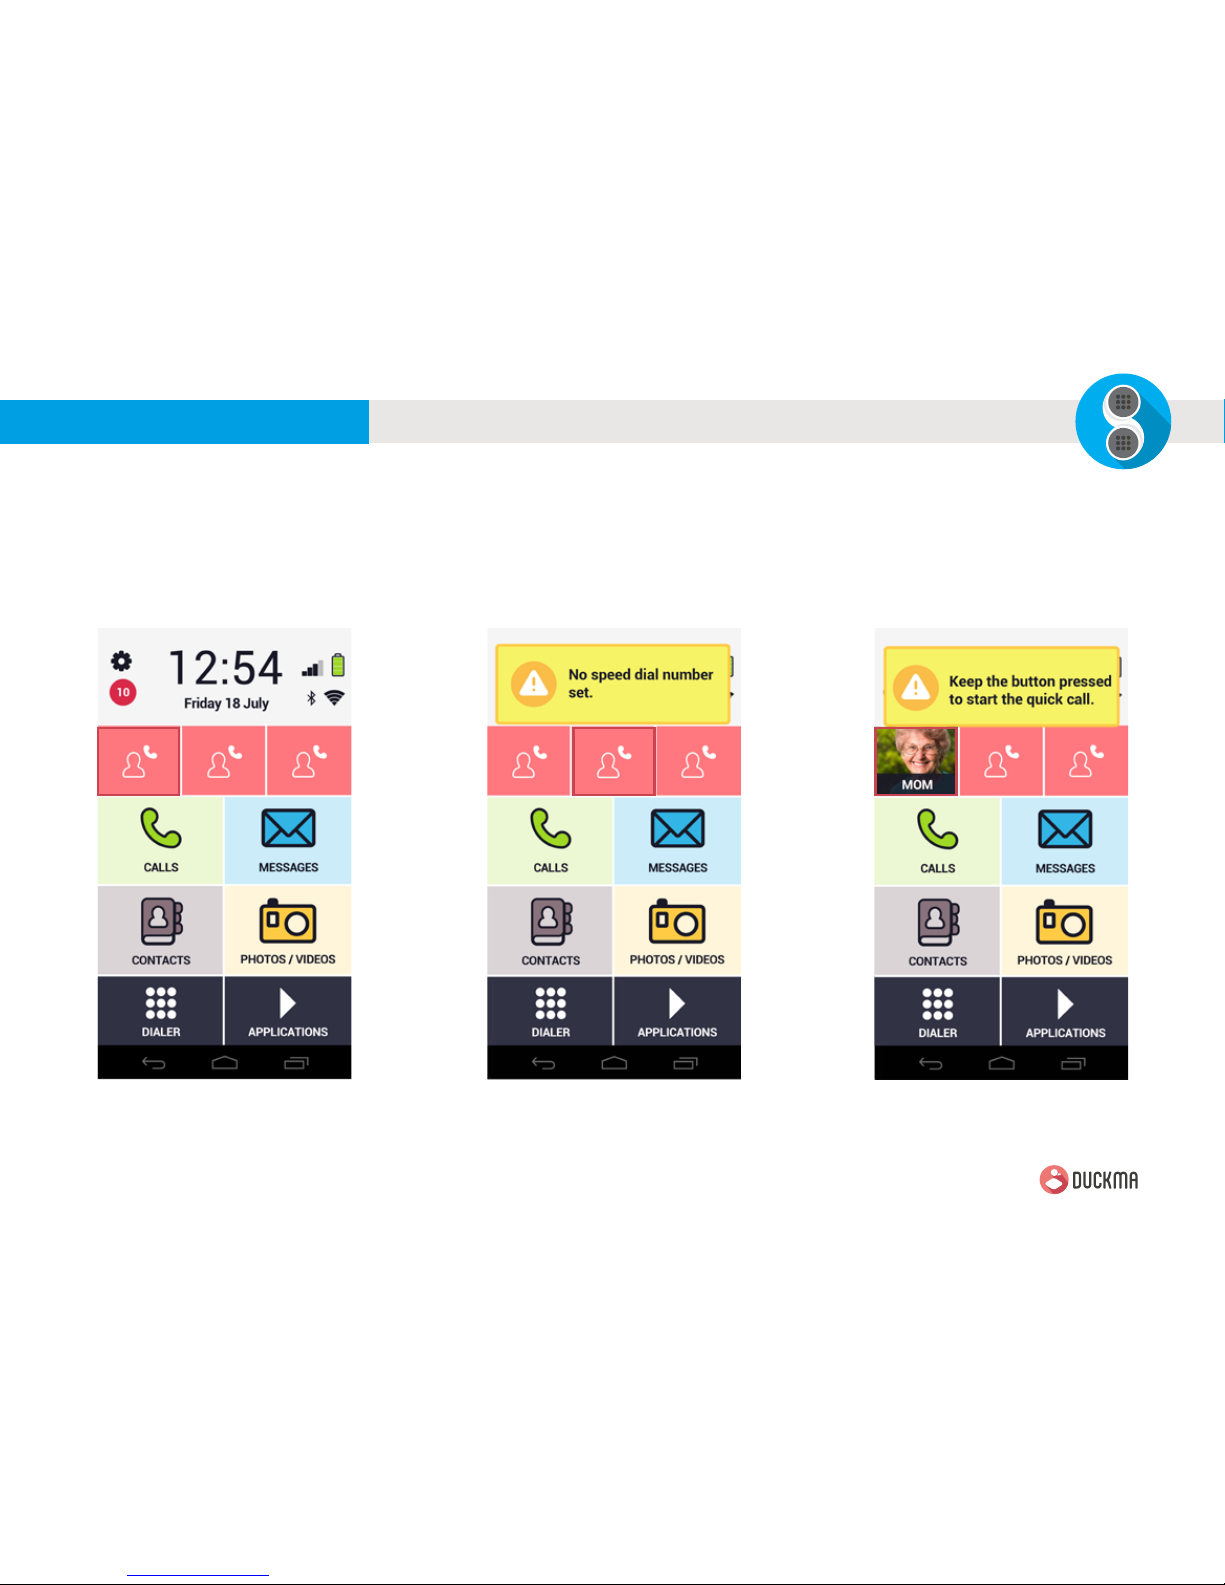
Speed Dials
This button displays the set numbers for quick
dialing. You can add three, directly from the settings.
If you have not set any speed dial number, by tapping
the button you will get this popup.
However, if the setting has been set to a speed dial
number to make a call simply press and hold the
button.
Speed dials > SetHome > Speed dials Speed dials > Not set
7
© PHONOTTO - USER MANUAL - v 1
PHONOTTO - USER MANUAL
duckma.com
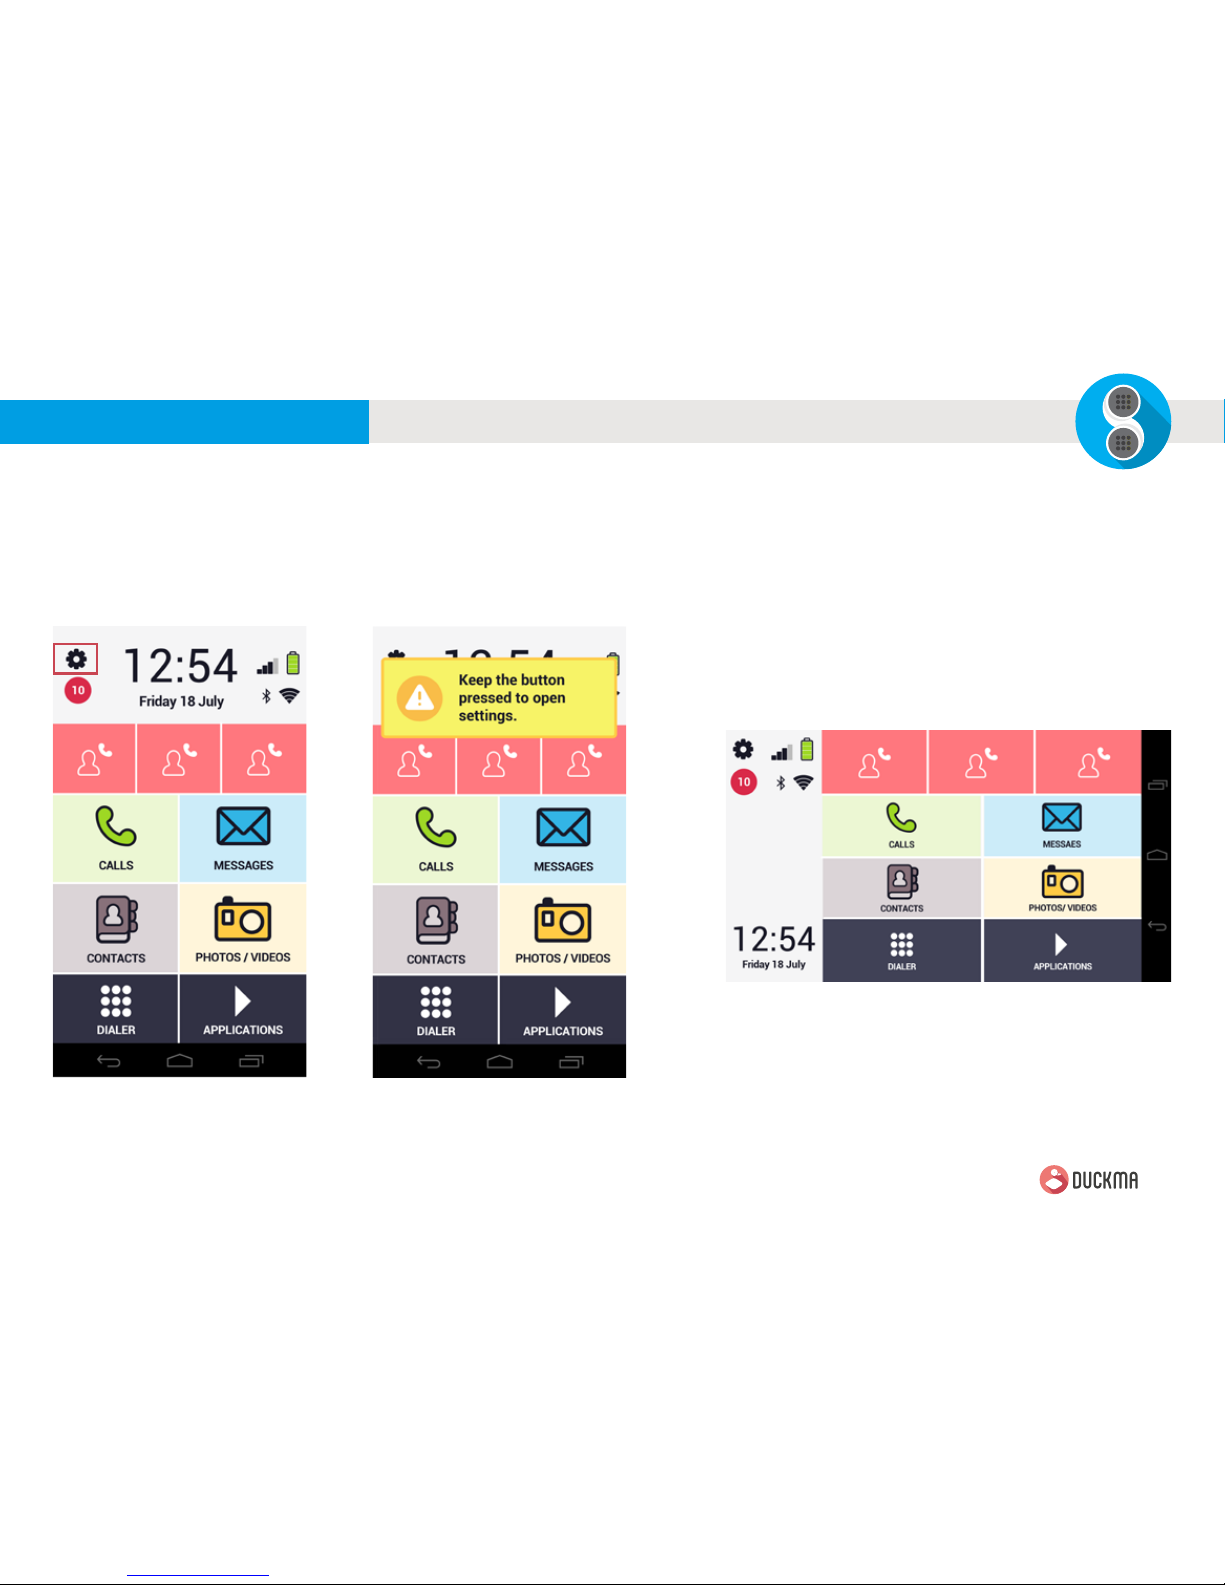
Settings
Through the settings you can congure Phonotto according to your preferences and needs.
To access it, you must press and hold the top left button. Various settings are divided into
sections, which can be reached through the forward and backward arrows.
By default, Phonotto automatically rotates according to the
orientation of the phone.
Home > Settings Home > Popup Settings
Horizontal Layout
8
© PHONOTTO - USER MANUAL - v 1
PHONOTTO - USER MANUAL
duckma.com
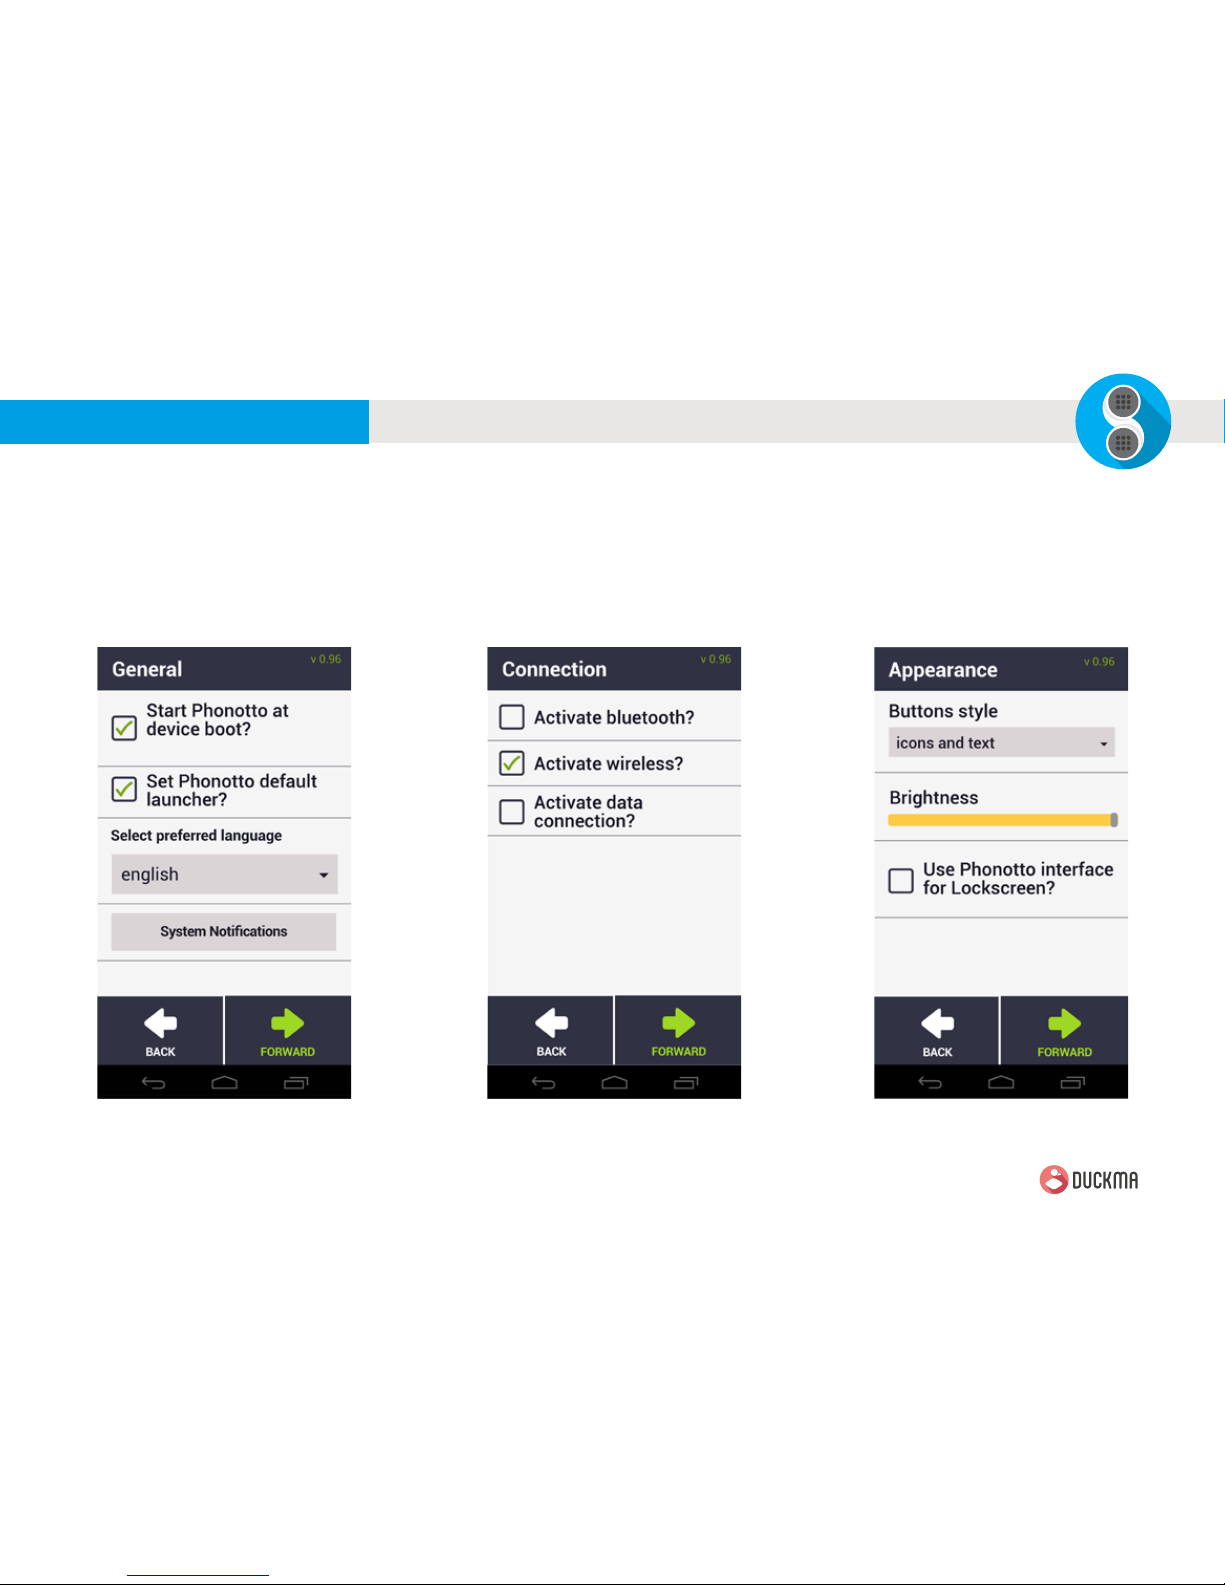
Settings
In this screen will show the general settings, which
can be customized according to your preference.
If you scroll down will be shown the contents of the
entire section. Through the side arrows you can scroll
through all the sections.
In this screen you can customize the connection
settings, checking the ones you want.
This screen will show the settings related to the
appearance of Phonotto. From here you can adjust the
brightness of the screen and choose the style of the
buttons.
Settings > AppearanceSettings > General Settings > Connection
 Loading...