

Page 1
Thank you for selecting a ducduc for nod product.
Please check contents against the components list in
these instructions. Also, please ensure there was no
damage that may have occurred in shipping. If any
components are missing or you find any damage,
please contact The Land of Nod at 800-933-9904
before continuing.
Read all the instructions before use.
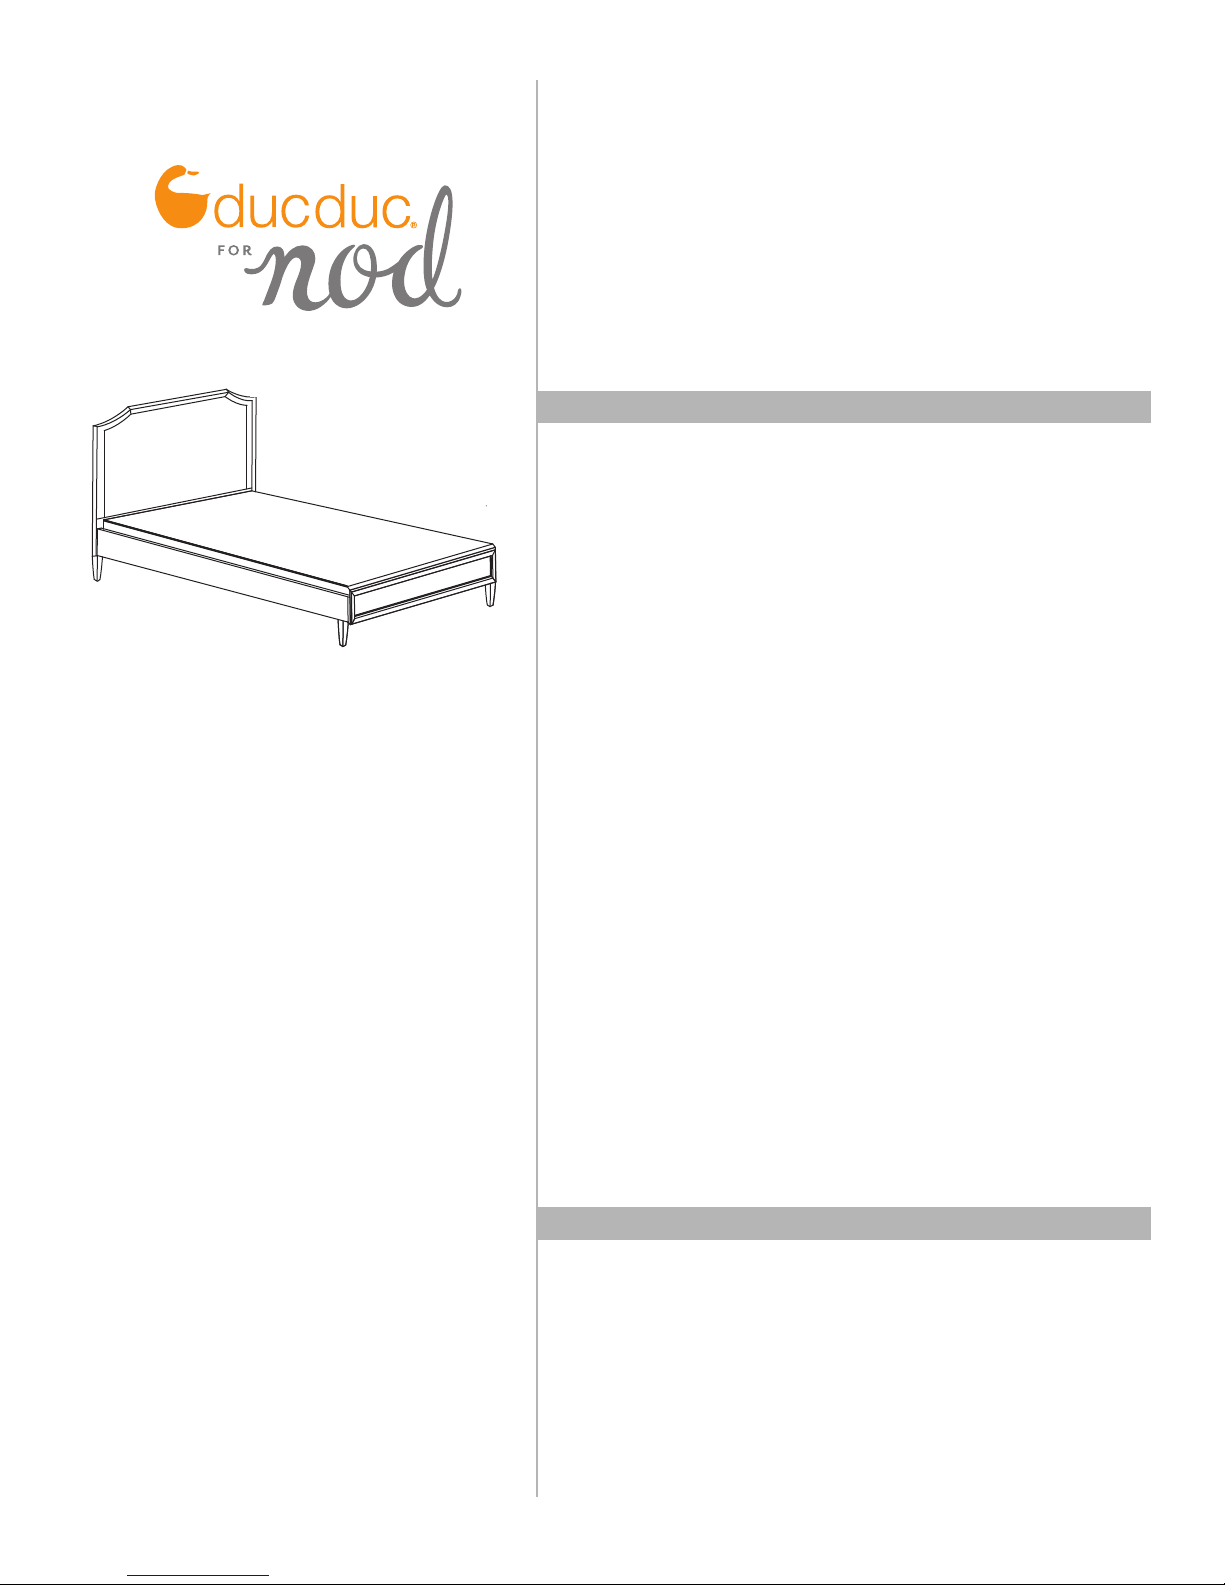
VERONA BED
CONVERSION KIT
PLEASE REMEMBER TO SECURELY TIGHTEN ALL
BOLTS AND FASTENERS AND PERIODICALLY
CHECK TO MAKE SURE EVERY COMPONENT IS
PROPERLY AND SECURELY IN PLACE.
A minimum of two people is required to safely
assemble and move the bed.
DO NOT ATTEMPT TO MOVE THIS BED ALONE DRAGGING OR SLIDING IT ACROSS A FLOOR MAY
CAUSE STRUCTURAL DAMAGE.
USE MATTRESS WHICH IS MAX 75” LONG, AND
53”-54” WIDE.
MINIMUM AGE FOR USE IS 3+ YEARS.
Keep instructions for future use.
Page 2
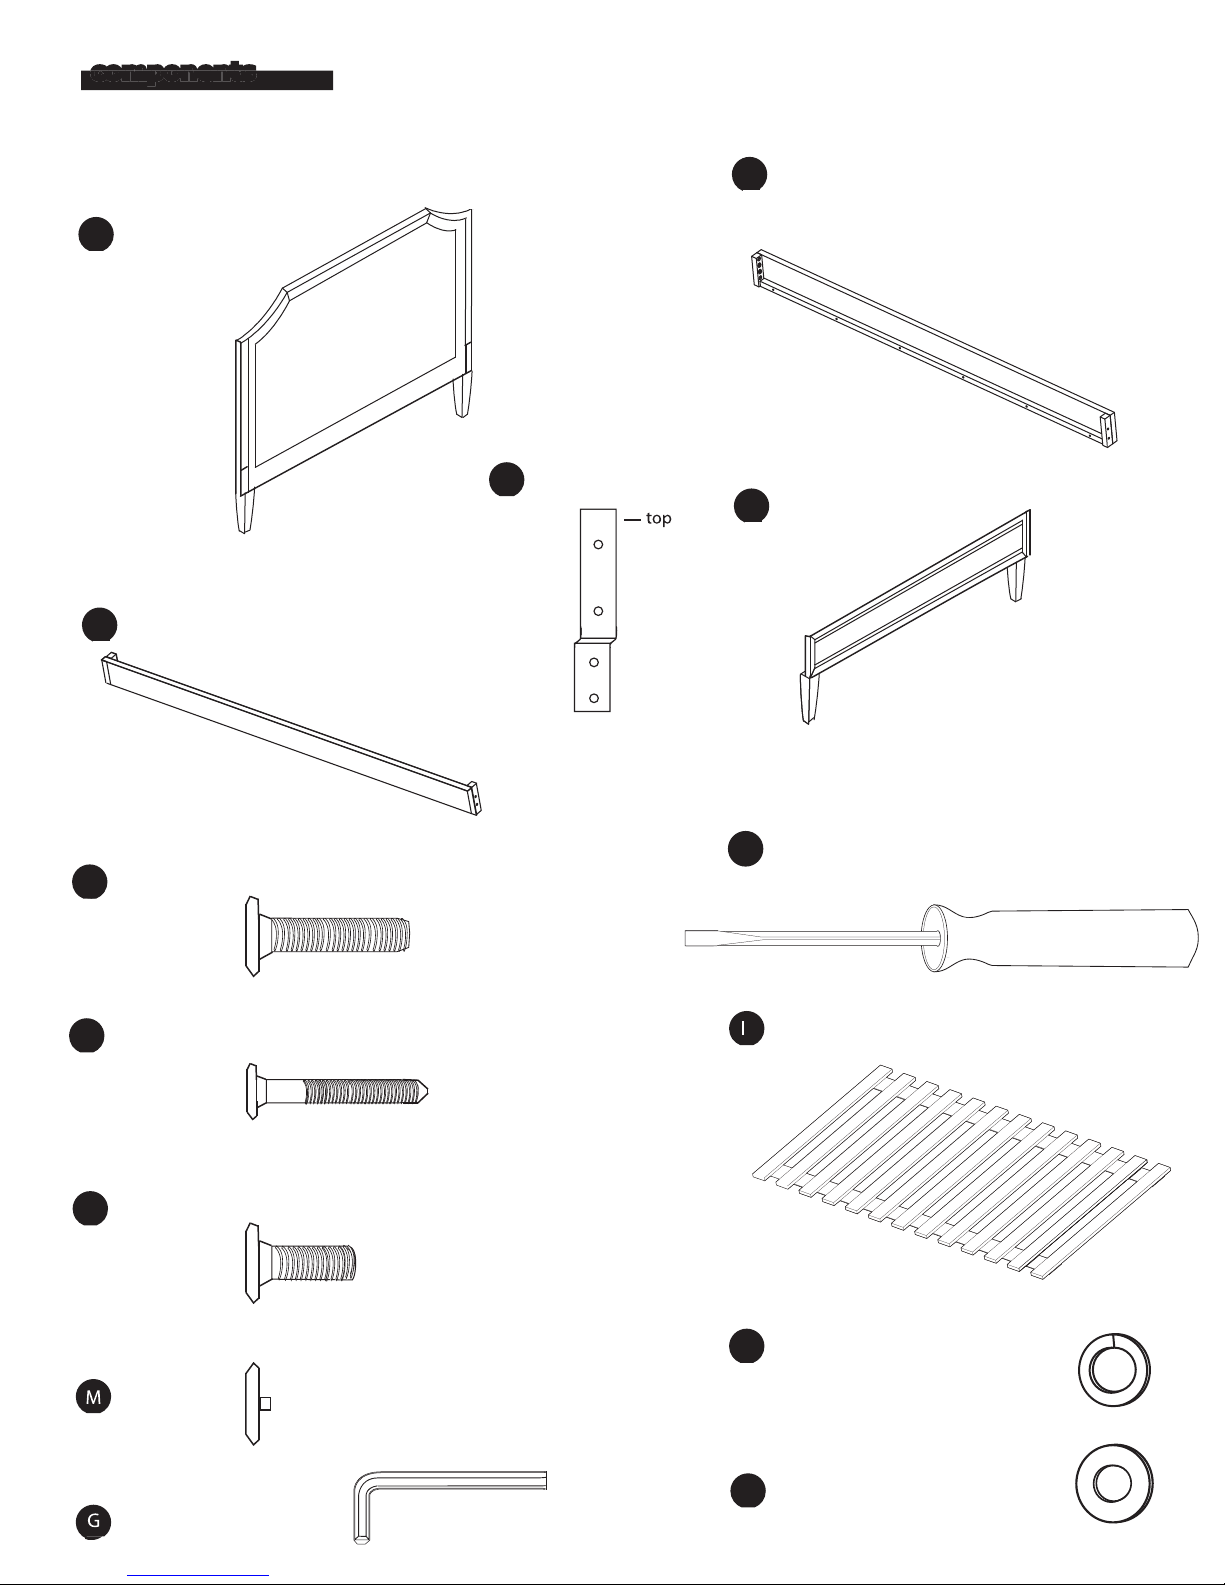
SCREWDRIVER
ALLEN WRENCH
components
pictures are not drawn to scale
MATTRESS SLAT ROLL
MATTRESS RAIL (RIGHT)
B
A
HEADBOARD
(not included)
C
MATTRESS RAIL (LEFT)
C
N
FOOT BRACKET
x4
FOOTBOARD
D
(not included)
E
F
L
H
(not included)(not included)
x8
x4
CAP AND FOOT BRACKET BOLT - (7/16”)
x20
J
CAP
LOCKING WASHER - (1/4”)
x8
x4
K
REGULAR WASHER - 1/4”)
x8
Page 3
assembly
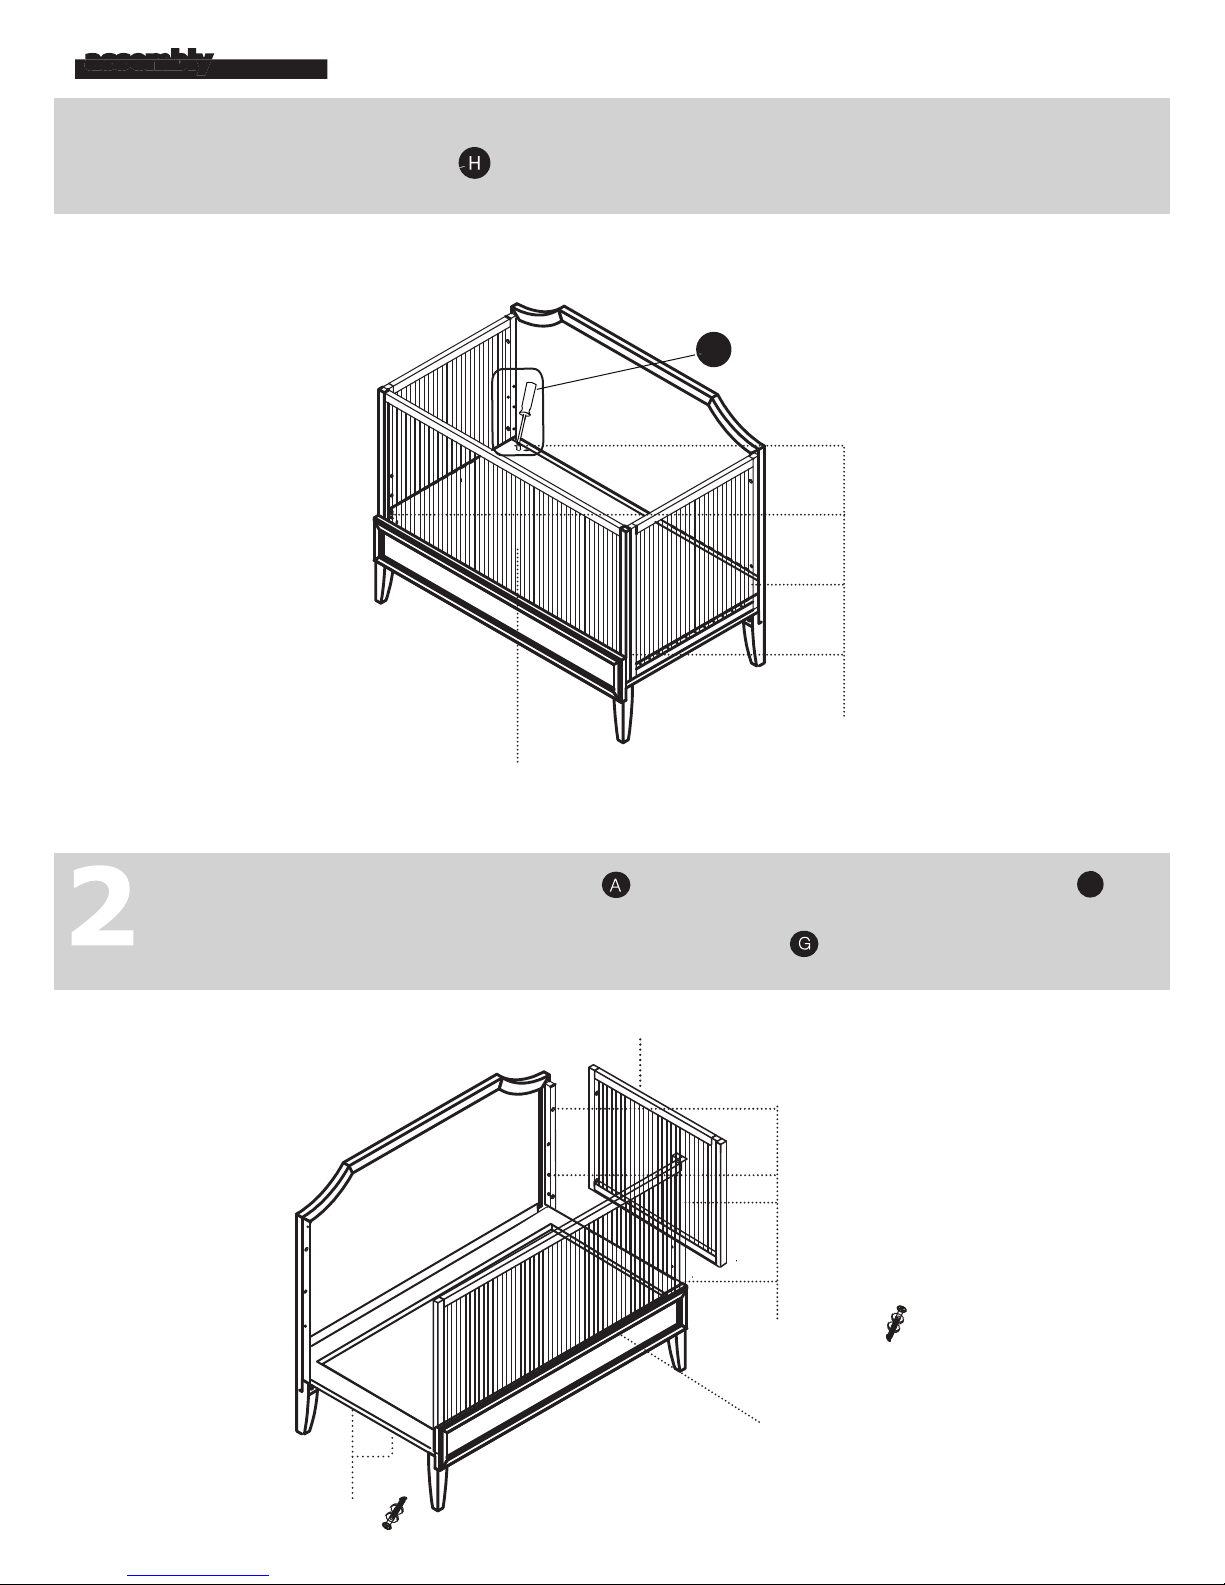
Remove MATTRESS SUPPORT PANEL by unscrewing each of the four MATTRESS SUPPORT
BOLTS w
1
ith SCREWDRIVER .
H
mattress support bolts
mattress support panel
Remove both END RAILS from HEADBOARD by removing four RAIL CONNECTOR BOLTS ,
two BASE CONNECTOR BOLTS, LOCKING WASHERS , and REGULAR WASHERS from the headboard
connector holes and base connector holes with ALLEN WRENCH .
end rails
E
base connector bolts
rail connector bolts
side rails
Page 4
4
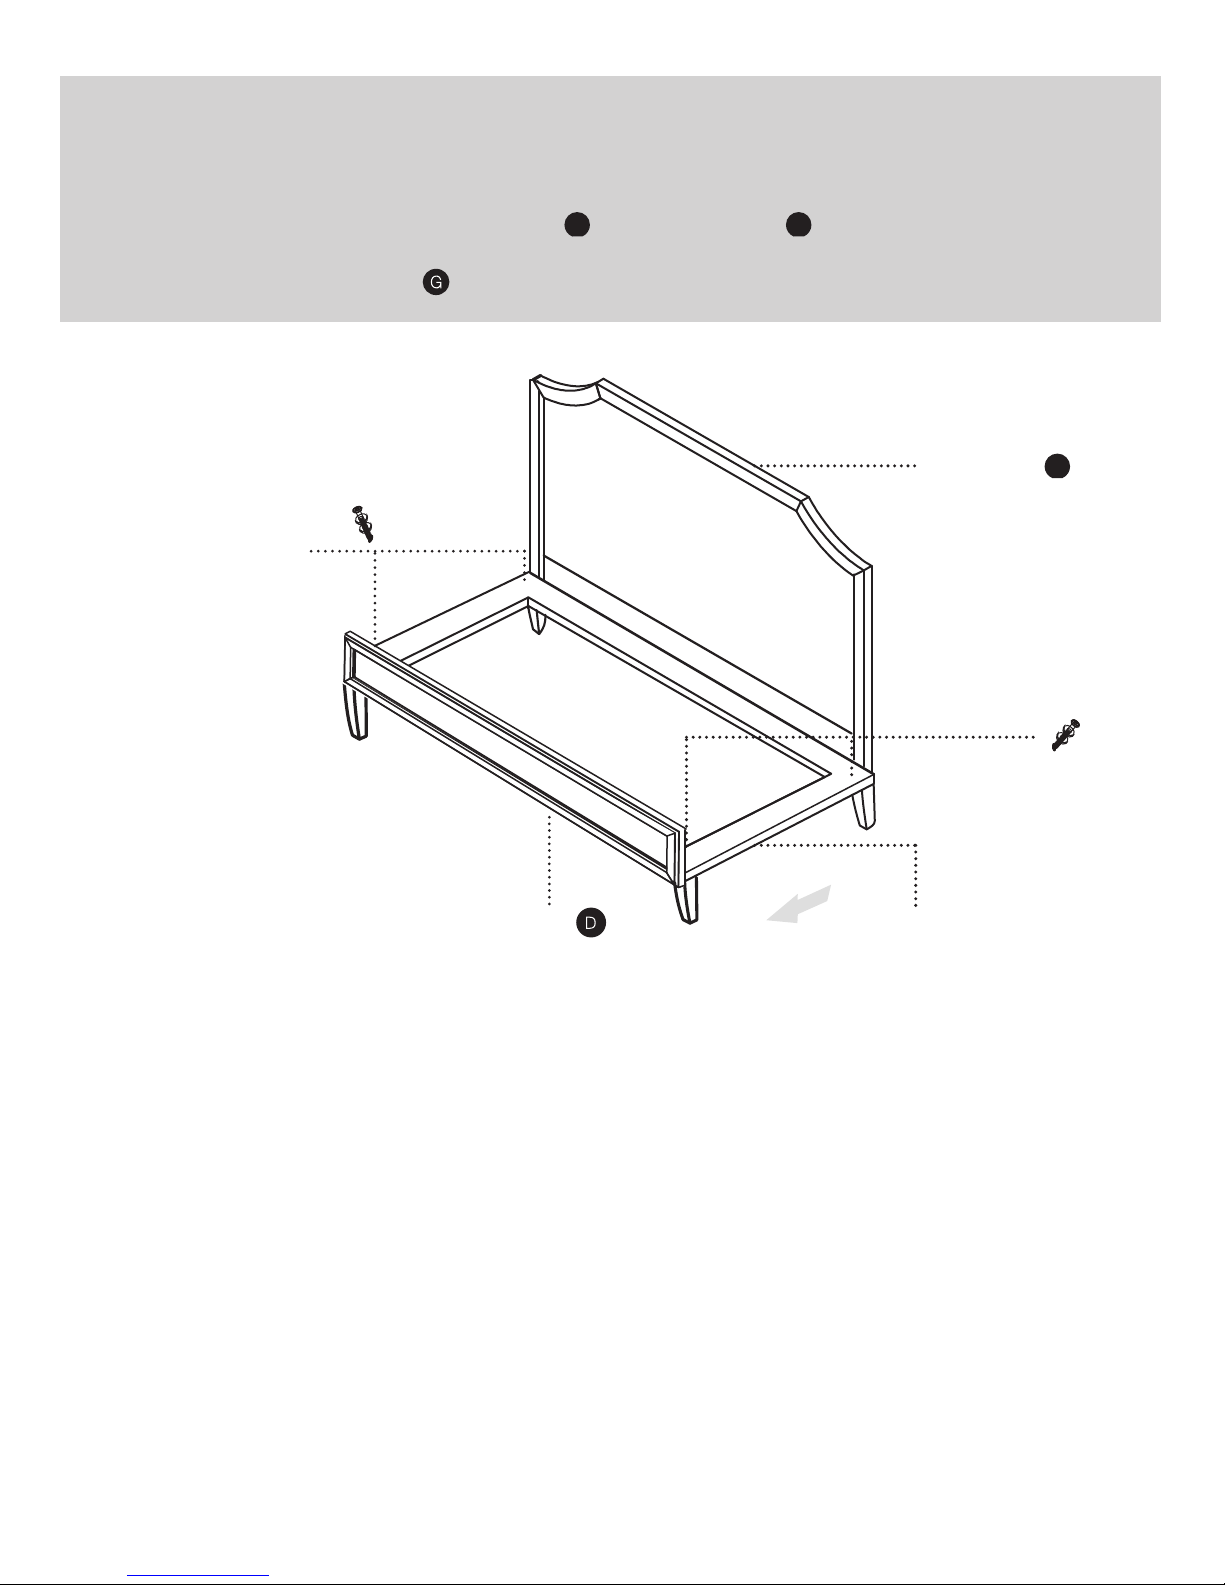
This step includes removing base frame, so have a second person available to hold the crib when these
parts are removed to prevent the crib from falling. Alternatively, perform this step with the crib on its
back.
Remove BASE FRAME from HEAD BOARD and FOOT BOARD by removing the four BASE CONNECTOR BOLTS, LOCKING WASHERS, and REGULAR WASHERS from the accent panel connector
holes with ALLEN WRENCH .
base connector bolts
and washers
A
D
headboard
base connector bolts
and washers
A
footboard base frame
Page 5
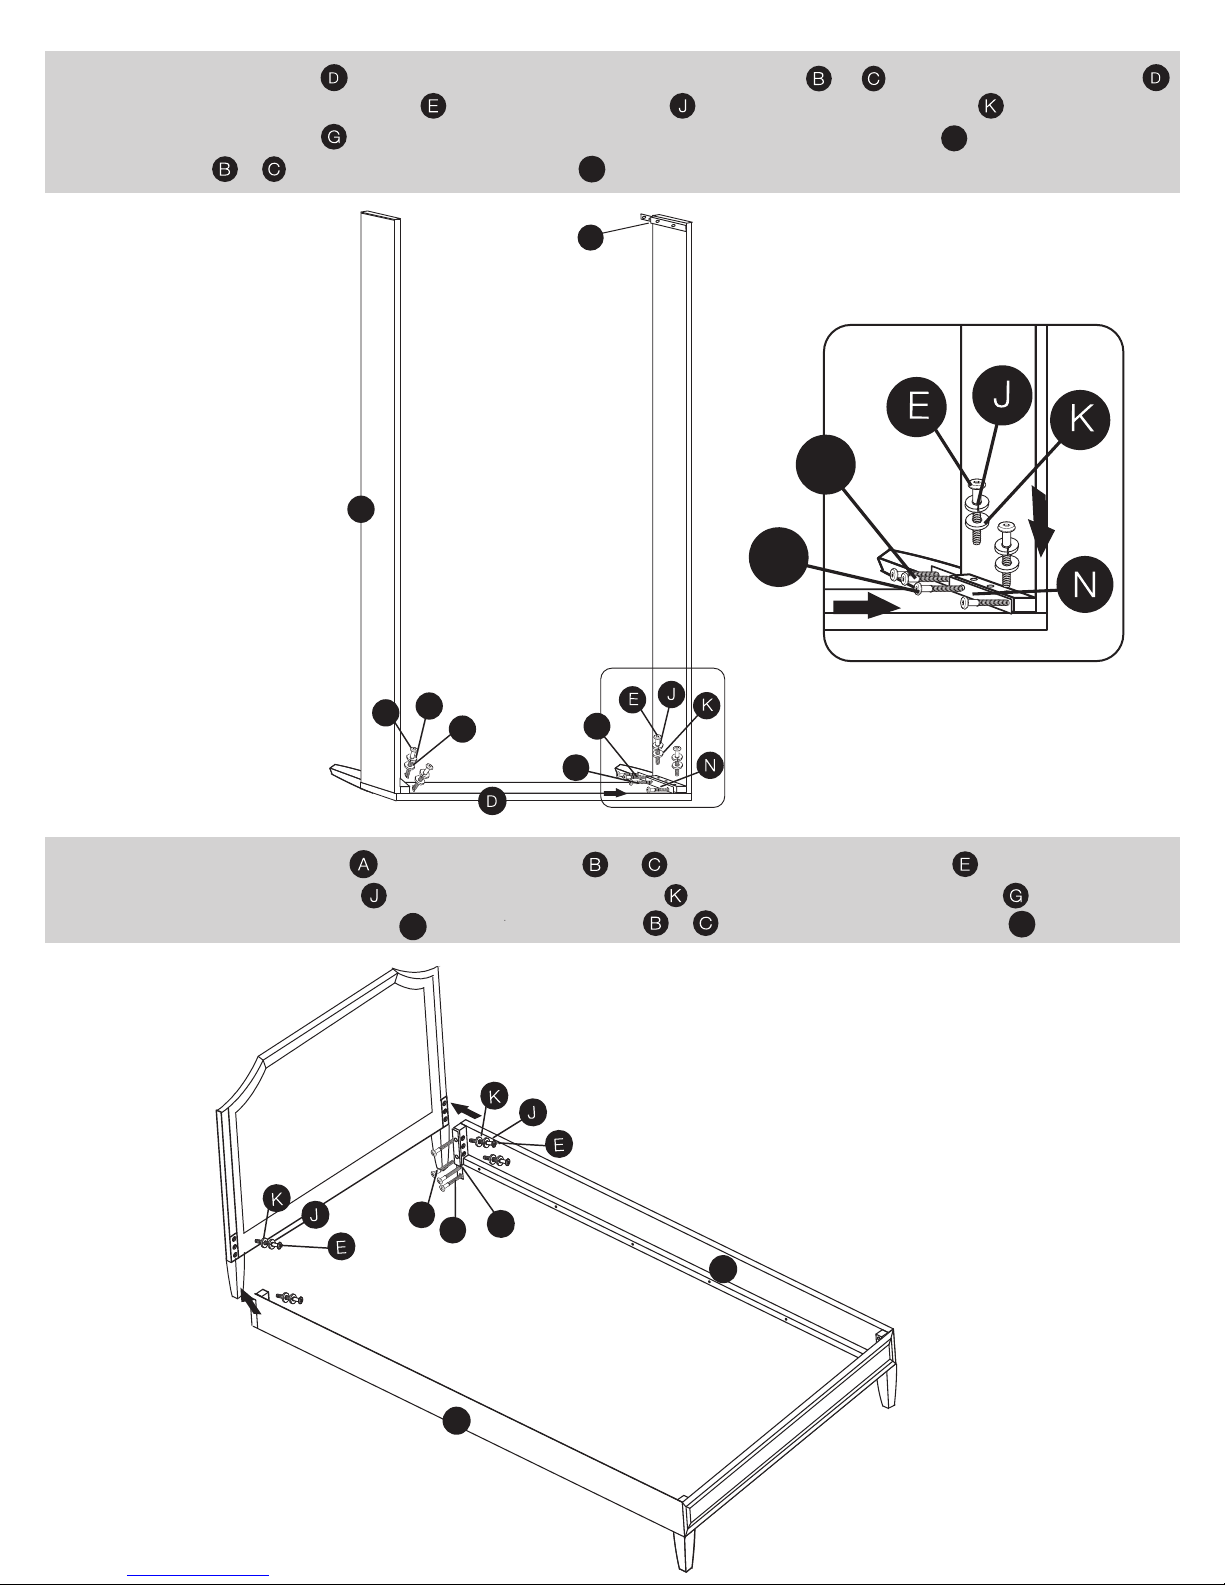
5
Lay FOOTBOARD face down and attach each MATTRESS RAILS & vertically to FOOTBOARD
using four BED RAIL BOLTS , LOCKING WASHERS , and REGULAR WASHERS . Tighten with
ALLEN WRENCH . Return bed to horizontal position. ATTACH FOOT BRACKET to MATTRESS
RAILS & and FOOT using CAP BOLTS .
L
N
N
L
C
L
6
J
E
Attach HEADBOARD to MATTRESS RAIL & using four BED RAIL BOLTS ,
LOCKING WASHERS , and REGULAR WASHERS . Tighten with ALLEN WRENCH .
ATTACH FOOT BRACKET to MATTRESS RAILS & and FOOT using CAP BOLTS .
K
N
L
N
L
L
L
L
B
K
C
Page 6
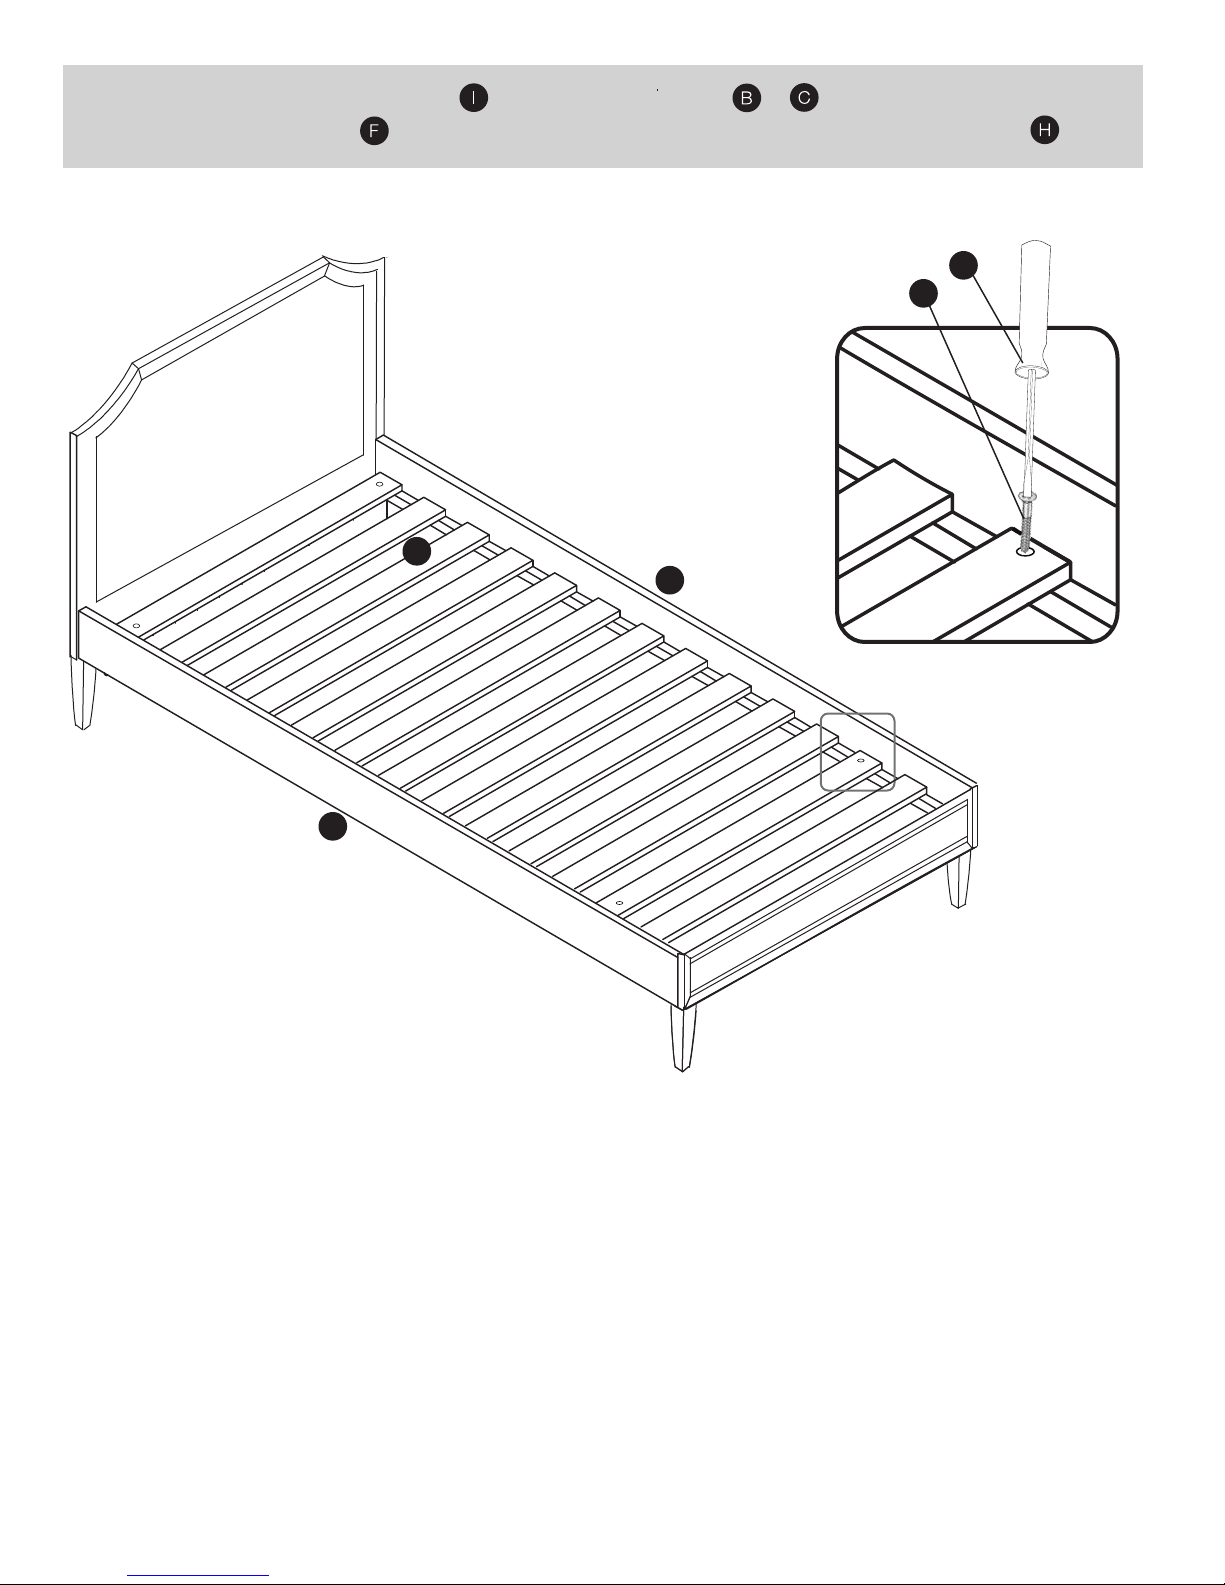
7
Place MATTRESS SLAT ROLL onto MATTRESS RAILS & .
Install four SCREWS into pre-drilled holes in slats. Tighten scews using SCREWDRIVER .
H
F
I
B
C
Page 7
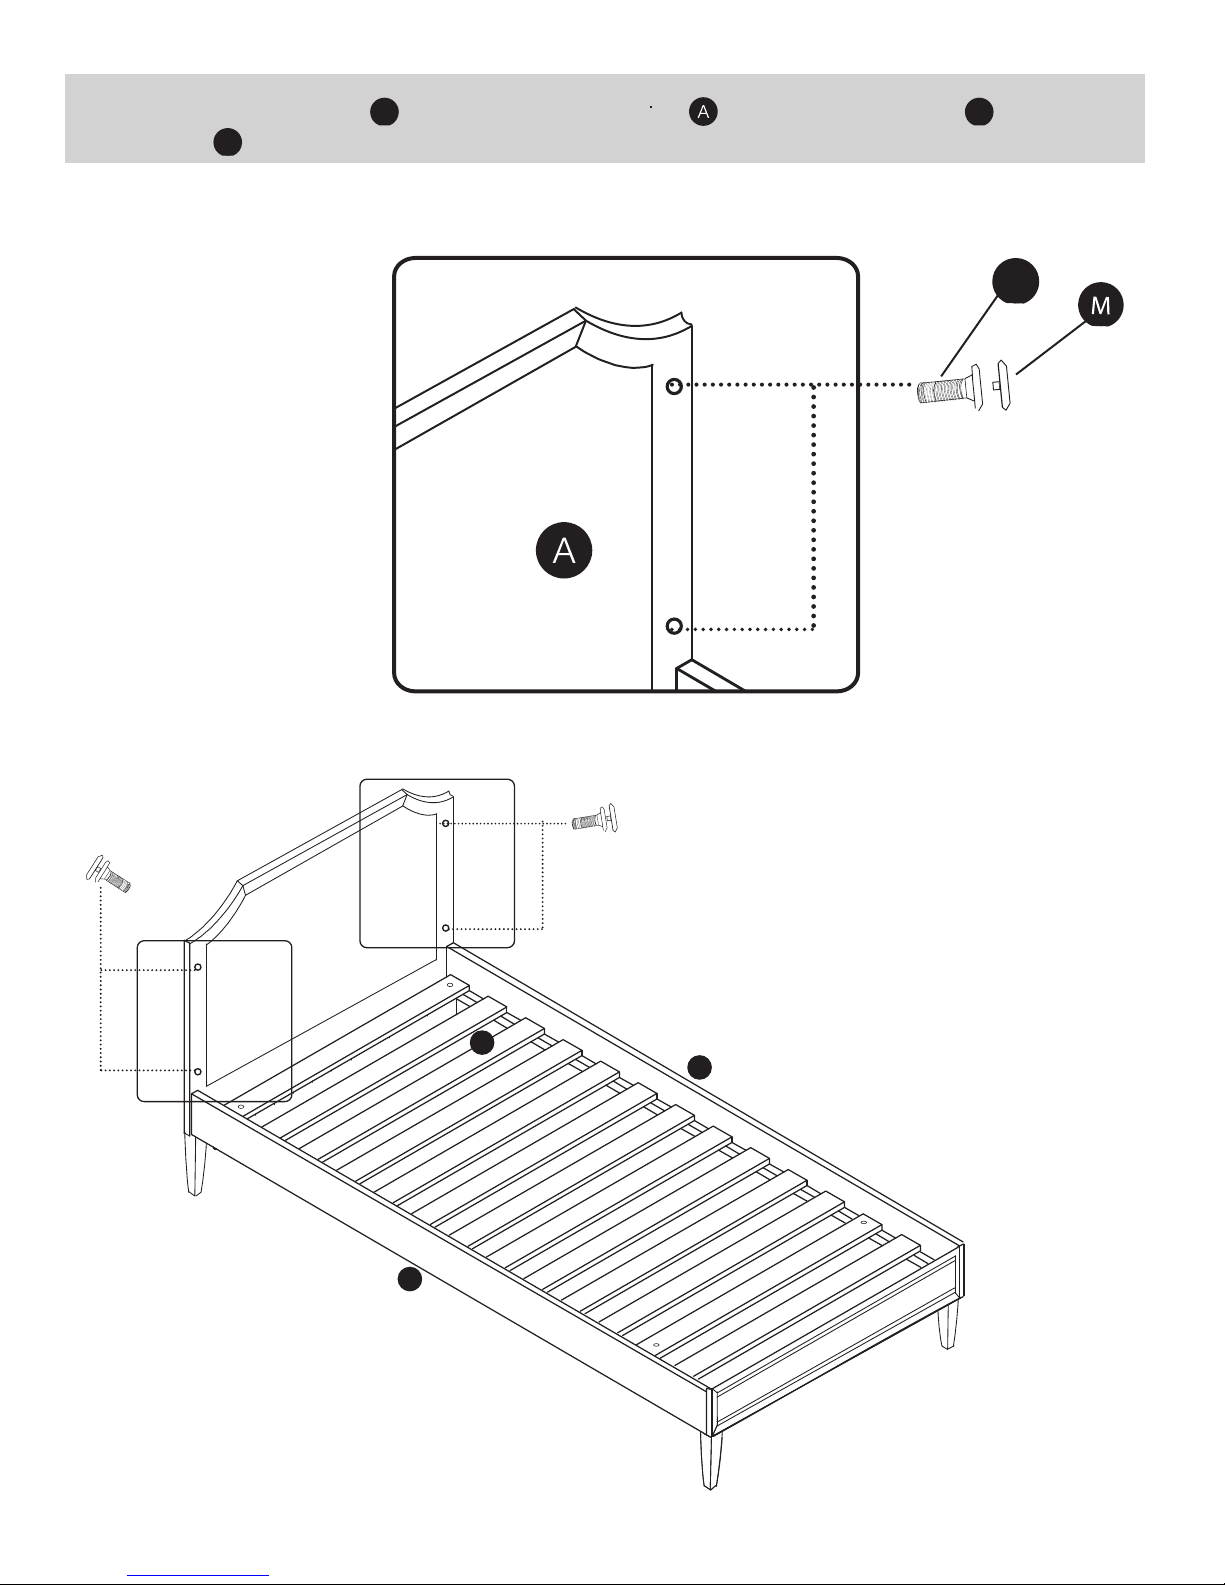
8
Attach two CAP BOLTS to each side of HEADBOARD . Insert four plastic CAPS into CAP
BOLTS .
L
L
M
L
C
I
B
Page 8
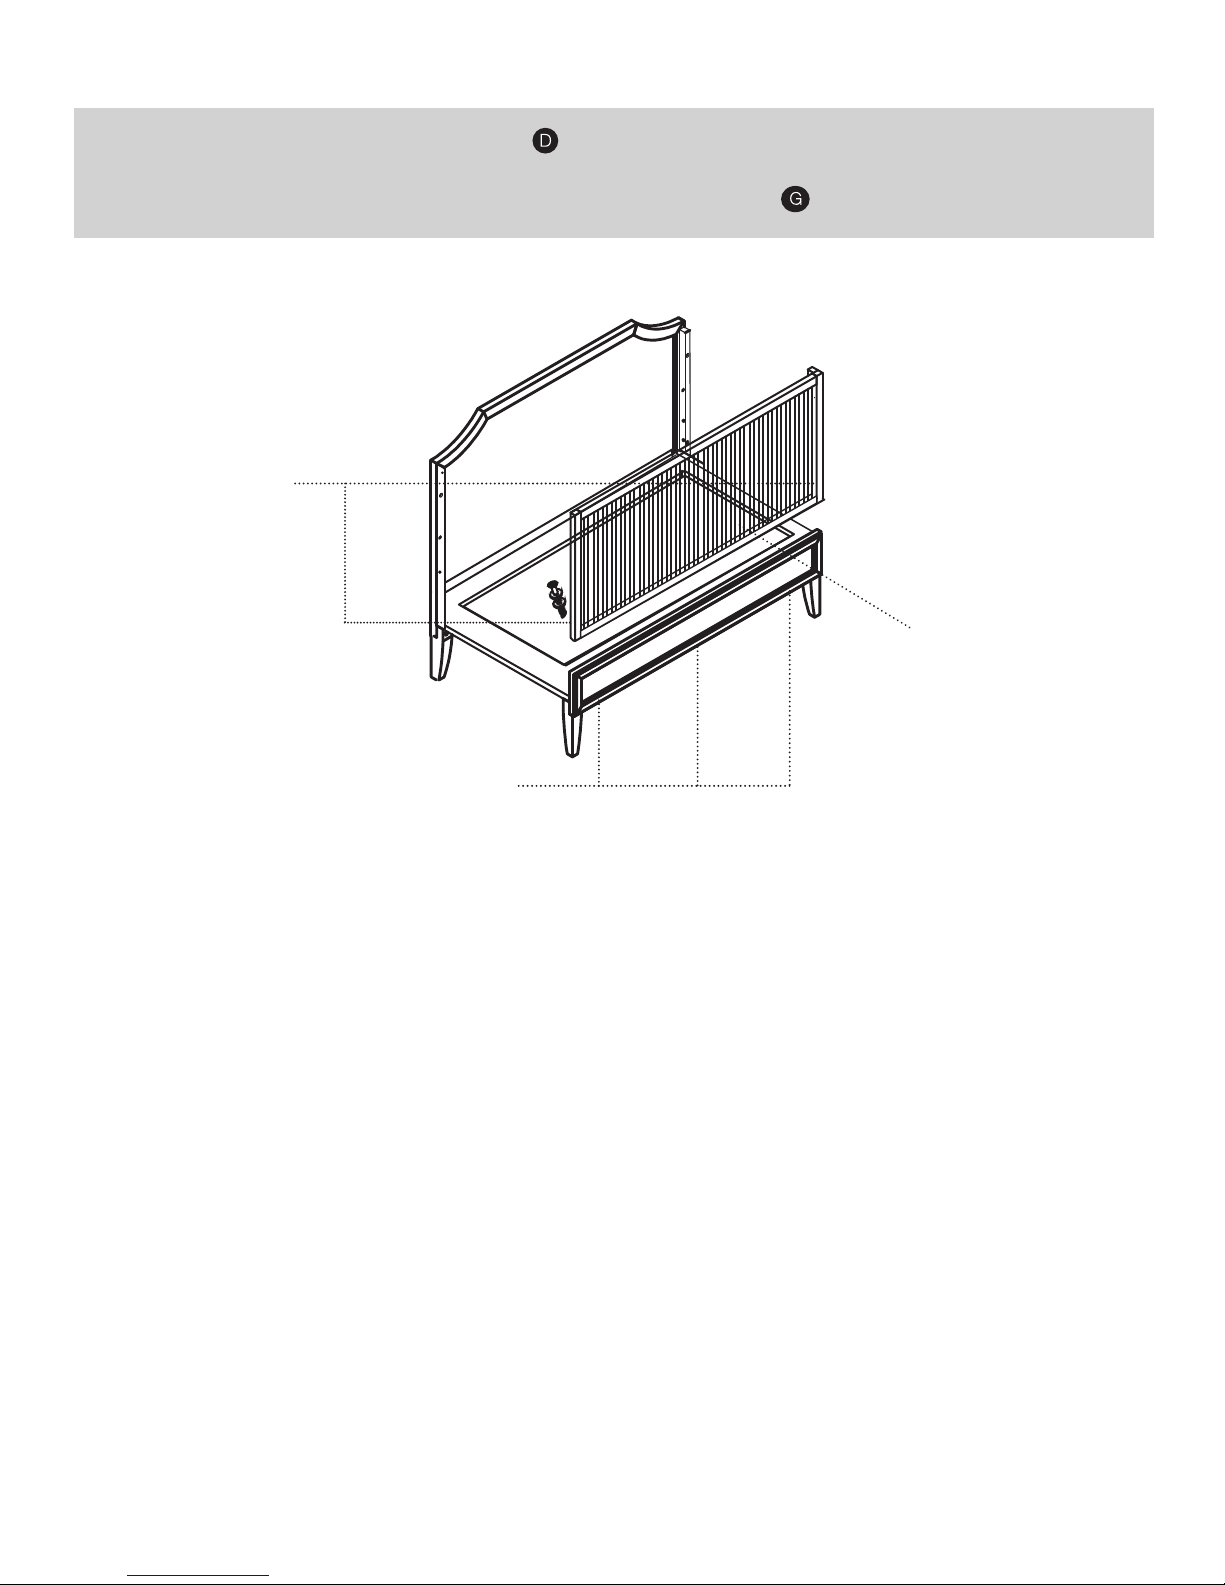
Remove SIDE RAIL from FOOTBOARD by removing two RAIL CONNECTOR BOLTS, three BASE
CONNECTOR BOLTS, LOCKING WASHERS, and REGULAR WASHERS from the footboard
3
connector holes and base connector holes with ALLEN WRENCH .
rail connector bolts
side rails
base connector bolts
Page 9

operation
Periodically check to make sure every component is properly and
securely in place and all bolts and fasteners are tight.
Do not scratch or chip the finish. Do not use abrasive chemicals for
cleaning. Clean with mild soap on a soft rag. Rinse and dry thoroughly.
If you ever refinish this furniture, be sure to use only a non-toxic finish
specified for children’s furniture.
 Loading...