

Ducasa TP520 User Manual
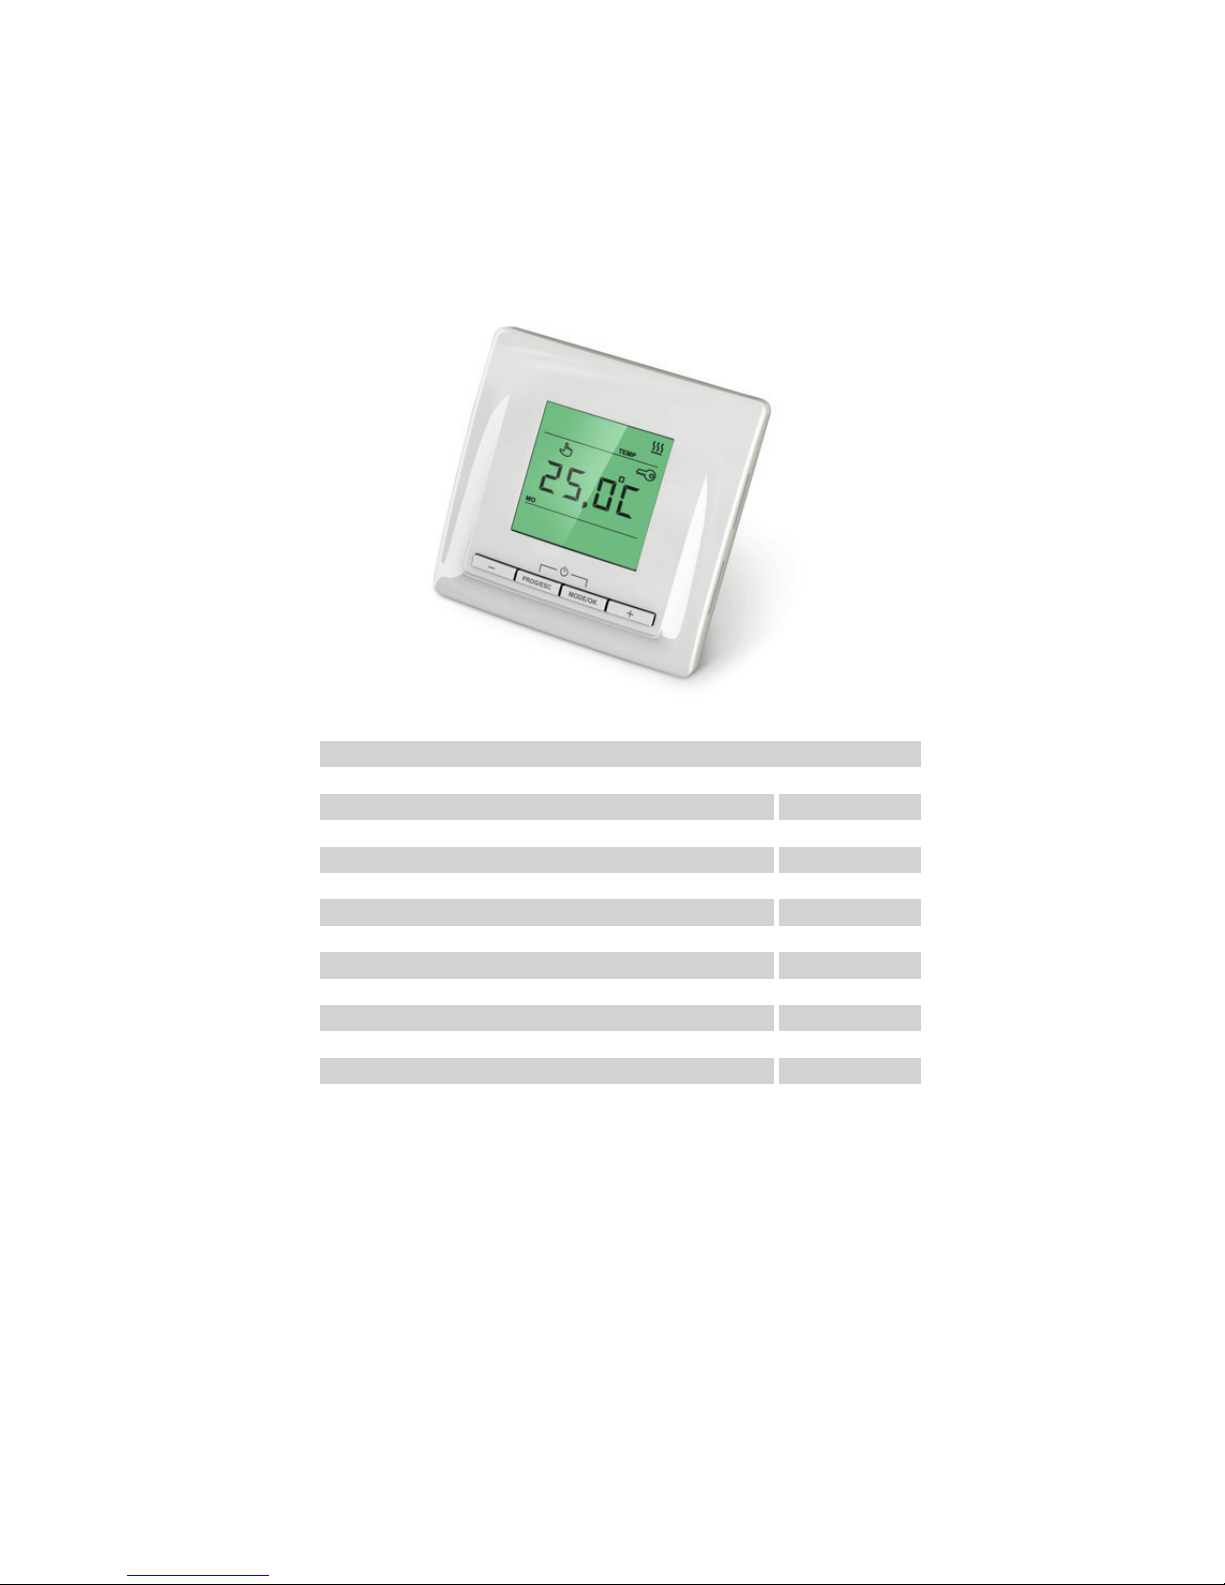
THERMOSTAT TP520
CONTENT
IMPORTANT INFORMATION FOR SAFE USAGE
CONTROLS AND SETTINGS
DISPLAY STRUCTURE
SET DAY AND TIME
EVENT TIME PROGRAMMING
TEMPERATURE RANGE PROGRAMMING
SCREENSAVER
SELECT OPERATION MODE
ALARM INDICATION
TECHNICAL DATA
LINE DIAGRAM
MENU STRUCTURE
WARRANTY
1
2
2
3
4
6
6
7
7
8
8
8
8
IMPORTANT INFORMATION FOR SAFE USAGE
Manufacturer's guarantee does not cover malfunctions caused by mechanical damage, improper installation, or exploitation for purposes, or
under conditions, not provided by the User- and Installation Manual. Please keep in mind that the Installation Manual and the Connection
Diagram are no replacement for the professional skill of the device installer. We recommend that you apply for professional service for the
thermostat and heating system installation. Only qualified electricians should perform the connections and power networking of the device.
Switch off power before connecting wiring to the thermostat or disconnecting the device for testing.
Introduction
Thank you for choosing the TP 520 electronic regulation device, the new intelligent heating control system. With this product you will see how
easy it is to maintain your comfort at a lower cost; it will take care of keeping your home warm and cozy all the time. Designed with innovation
and inspiration, the new thermostat is highly reliable, and easy to set and use.
Separate settings can be programmed for different times of the day, whether or in or out.
Application
The thermostat TP520 is designed to control underfloor heating systems (heating mats, sections, film heaters). The thermostat maintains
comfortable heating temperature and saves energy.
2
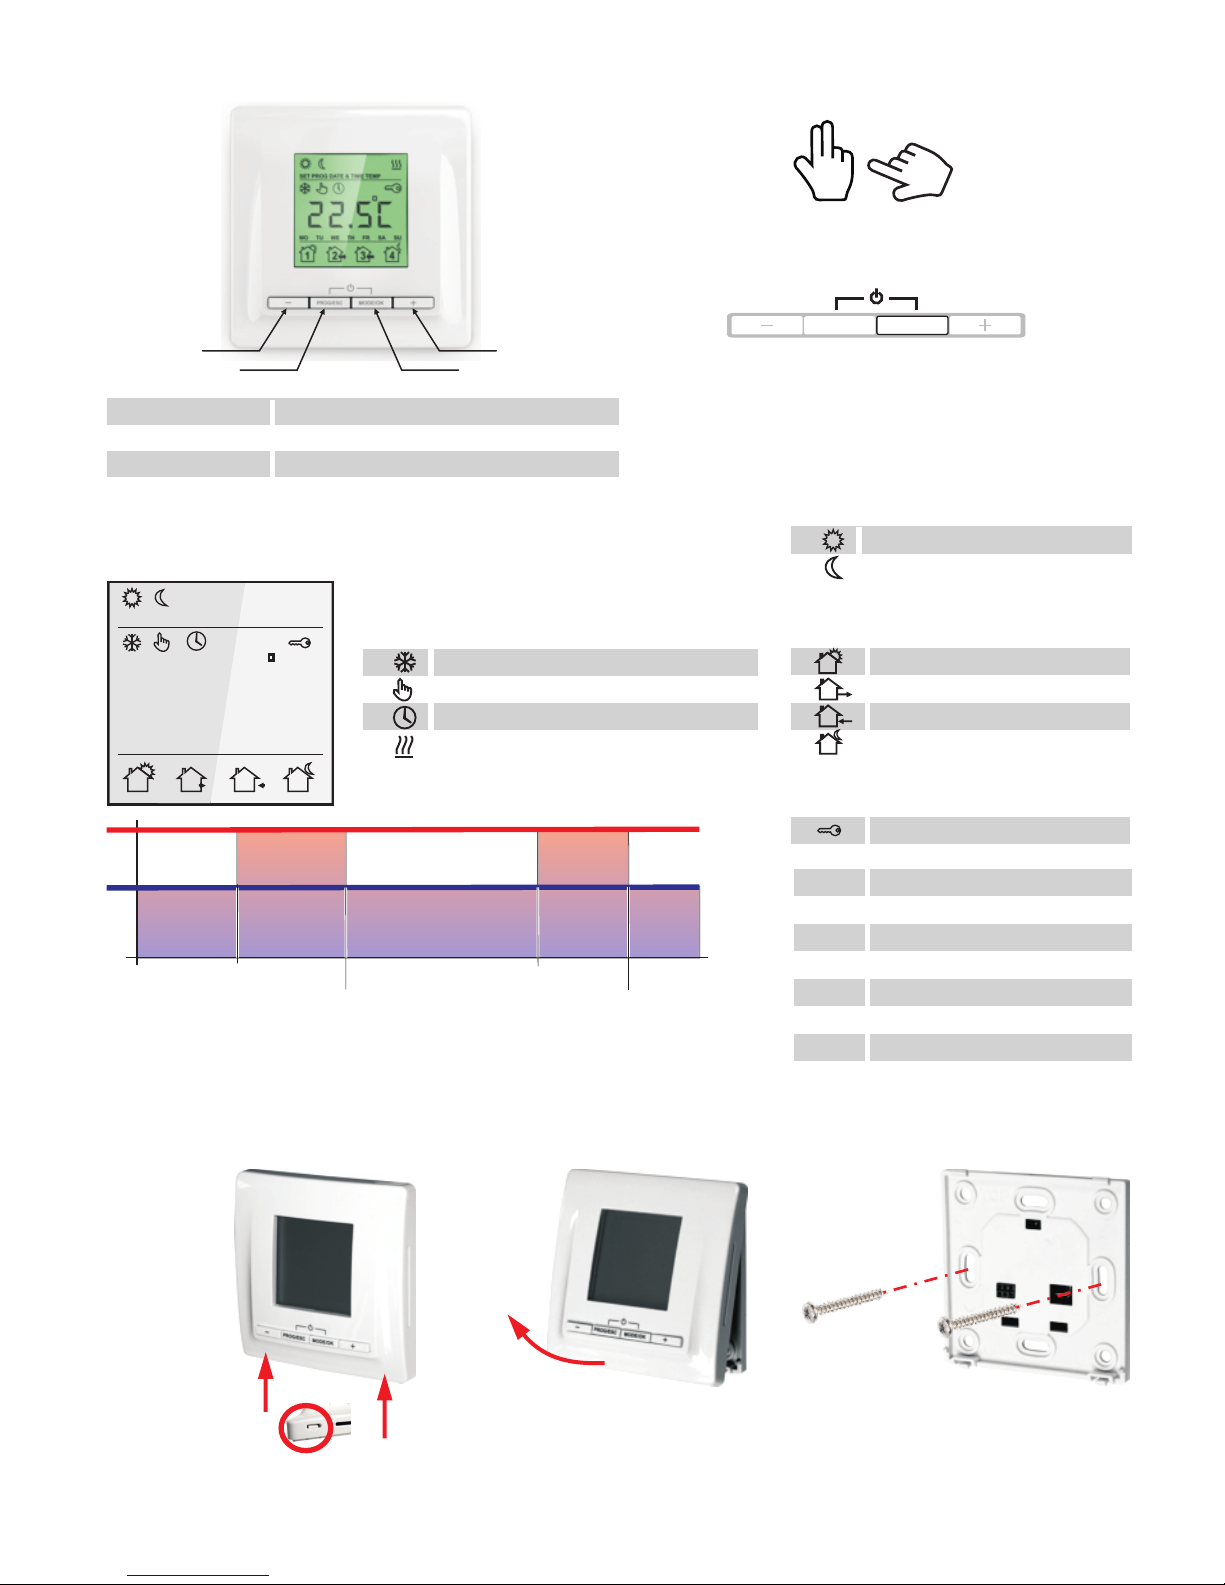
TEMPTIMEDATEPROGSET
MO TU WE TH FR SA SU
28,0C
1 2 3 4
DISPLAY STRUCTURE
Other
Operation modes
Temperature settings
freeze protection mode
constant temperature maintenance
programm mode
heating on
Comfort modus, temp. adjustable
Economy modus, temp. adjustable
Programm modes
4
2
3
1
„WAKE UP“
„LEAVING HOME“
„COMING HOME“
„GOING TO SLEEP“
PROG / ESC
MODE /OK
decrease the values
enter the programm mode and EXIT
switch the indication & set limits and modes
increase the values
1
2
3
4
-
+
Hands are used, if it is necessary to push
several butons together or push buttons for
longer time
To start the described action, the marked
button must be pushed
PROG/ESC
MODE/OK
1
2
3
4
CONTROLS AND SETTINGS
RESERVATION
Technical data are subject to change without notice. Changes, errors and printer's errors do not justify claims for damages. For safety
components and systems the relevant standards and regulations are to be observed, as well as the corresponding operating and installation
instructions.
During the „COMFORT“ period the desired comfort temperature will be maintained.
During the „ECONOMY“ period the temperature will be reduced to the desired
minimum temperature to safe energy.
INSTALLATION
Thermostat is locked
MO Monday
TU Tuesday
WE Wednesday
TH Thursday
FR Friday
SA Saturday
SU Sunday
Confort temperature
Minimum temperature
Wake up
Leaving home
Comming home
Going to sleep

3
SET DAY AND TIME
8 sec.
PROG/ESC
MODE/OK
+
-
SET TIME
Set the required hour with the “+” or “–” button.
Confirm the selection with MODE/OK button.
Now the minutes procedure start.
5
Set the required minutes with the “+” or “–” button.
Confirm the selection with the MODE/OK button.
The „Day and time setting“ procedure is completed.
6
SET
TIME
WE
12 40
PROG/ESC
MODE/OK
SET
TIME
WE
12 00
PROG/ESC
MODE/OK
TU
TEMP
19,0C
Unlock the thermostat
Press and hold the PROG/ESC button for 8 seconds
TEMP
WE
19,0C
PROG/ESC
MODE/OK
PROG/ESC
MODE/OK
WE
SET
DATE & TIME
1 2
8s
ENTER THE PROGRAMMING
SET DAY
Press the MODE/OK button. The „Day
of the week symbol“ will start to blink
3
Set the actual day of the week with the “+” or “–” button. Confirm
the selection with MODE/OK button.
4
SET
DATE
MO
PROG/ESC
MODE/OK
PROG/ESC
MODE/OK
SET
DATE
TU
SET
DATE
TU
PROG/ESC
MODE/OK
 Loading...