

Page 1
Flush Mount
IMPORTANT SAFEGUARDS
READ AND FOLLOW ALL SAFETY INSTRUCTIONS
ULTRA 75 UL 924 LISTED PHOTOLUMINESCENT EXIT SIGN
NOTICE
EXTERNAL ILLUMINATION SOURCE REQUIRED
ACTIVATION
Minimum 5-foot candles (54 lux) of unfiltered fluorescent, LED, metal halide, or mercury vapor lighting.
Install Ultra75 Photoluminescent exit signs only in locations where an external illumination source is present, is
deemed reliable and is supplied by a circuit not controlled by automatic timers or sensors, and whose controls are
accessible only to authorized personnel. This reliable external illumination source is to be energized at all times
during building occupancy.
Ultra75 Photoluminescent exit signs are UL 924 Listed for INDOOR/OUTDOOR, wet location use.
Check with your applicable installation codes (such as NFPA 101 – Life Safety Code) to perform periodic visibility
tests.
Should any changes in your external lighting types or lighting levels occur, make sure that the Ultra75 exit sign is
still being illuminated with a minimum of 5-foot candles (54 lux) of unfiltered LED, fluorescent, metal halide, or
mercury vapor lighting.
Periodically clean sign face with a damp cloth. Do not use any thinners or solvents on the sign face.
VIEWING DISTANCE
75 foot viewing distance
DIRECTIONAL INDICATORS
Two self-adhesive photoluminescent directional indicators are supplied with each sign. Small dots are provided to
the left of the letter E and to the right of the letter T for easy alignment. If your exit sign is to be located other than
directly over an exit, apply a directional indicator to the left of the E, pointing left, or to the right of the T, pointing
right, or both, as appropriate.
Mounting of Dual-Lite DPLA75 Exit Sign to Surface
1. Place sign face down and drill four holes through sign in each corner.
2. Place the exit sign in position and mark the screw hole locations on the surface. Then drill four 3/16” holes into
surface.
3. If anchors will be required, install them at this time (supplied).
4. Attach the exit sign to the surface by using the four supplied phillip head screws. Be careful not to over tighten
the screws.
5. If directional arrows are to be used, apply them to the exit sign at this time.
a. Alignment dots are provided on the face of the sign to ensure proper positioning of the arrows.
i. For exit paths straight ahead, no arrows are needed.
ii. For exit paths to the left, apply the arrow on the left side of the exit sign.
iii. For exit paths to the right, apply the arrow on the right side of the exit sign.
iv. If exit paths are located to the left and right, apply both arrows to the exit sign.
Flag, Ceiling, or T-Bar Mount
Installation Instructions for the Dual-Lite DPLA75 Exit Sign
1. If directional arrows are to be used, apply them to the exit sign at this time.
a. Alignment dots are provided on the face of the sign to ensure proper positioning of the arrows.
i. For exit paths straight ahead, no arrows are needed.
ii. For exit paths to the left, apply the arrow on the left side of the exit sign.
iii. For exit paths to the right, apply the arrow on the right side of the exit sign.
iv. If exit paths are located to the left and right, apply both arrows to the exit sign.
2. Place the exit sign bracket in position and mark the screw hole locations. Drill four each 3/16” holes.
3. If anchors will be required, install them at this time (supplied).
4. Attach the exit sign bracket to the wall using the screws provided.
5. Align sign against bracket and mark drill holes on back of sign.
6. Drill two each 3/32” holes through the back of the sign where indicated by your alignment marks.
7. Position the exit sign against the mounting bracket and align the holes.
8. Secure the exit sign to the bracket by inserting the bolts and tightening the acorn nuts which are supplied with the
sign.
2. Place the exit sign bracket in position and mark the screw hole locations. Drill four each 3/16” holes.
3. If anchors will be required, install them at this time (supplied).
4. Attach the exit sign bracket to the wall using the screws provided.
5. Align sign against bracket and mark drill holes on back of sign.
6. Drill two each 3/32” holes through the back of the sign where indicated by your alignment marks.
7. Position the exit sign against the mounting bracket and align the holes.
8. Secure the exit sign to the bracket by inserting the bolts and tightening the acorn nuts which are supplied with the
sign.
2. Place the exit sign bracket in position and attach to the T-Bar using the supplied T-Bar clips.
3. Align sign against bracket and mark drill holes on back of sign.
4. Drill two each 3/32” holes through the back of the sign where indicated by your alignment marks.
5. Position the exit sign against the mounting bracket and align the holes.
6. Secure the exit sign to the bracket by inserting the bolts and tightening the acorn nuts which are supplied with the
sign.
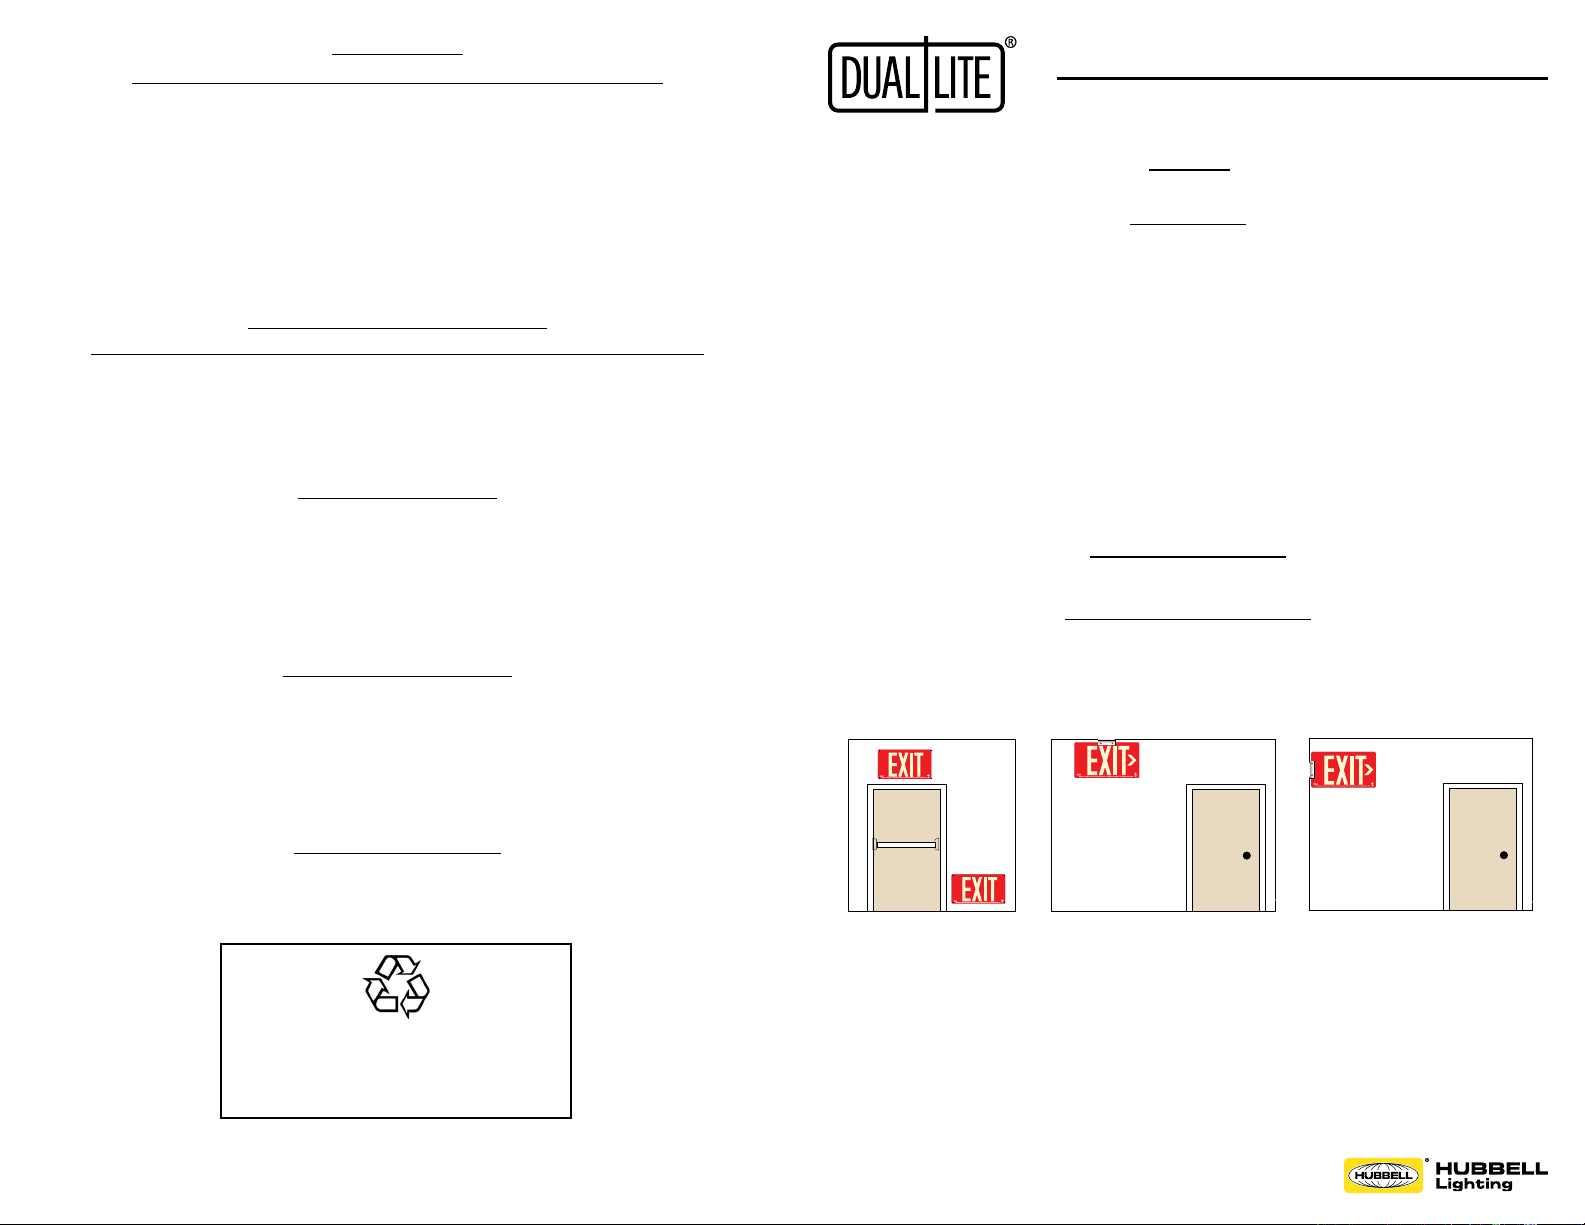
FOR FLAG MOUNT
FOR CEILING MOUNT
FOR T-BAR MOUNT
DPLA75
UL 924 LISTED PHOTOLUMINESCENT EXIT SIGN
Notice:
External Illumination Source Required
Minimum 5-foot candles (54 lux) of unltered uorescent, LED, metal halide, or mercury vapor lighting.
Install Dual-Lite DPLA75 Photoluminescent exit signs only in locations where an external illumination source is
present, is deemed reliable and is supplied by a circuit not controlled by automatic timers or sensors, and whose
controls are accessible only to authorized personnel. This reliable external illumination source is to be energized at
all times during building occupancy.
Dual-Lite DPLA75 Photoluminescent exit signs are UL 924 Listed for high location, oor proximity and
INDOOR/OUTDOOR, wet location use.
Check with your applicable installation codes (such as NFPA 101 – Life Safety Code) to perform periodic visibility
tests.
Should any changes in your external lighting types or lighting levels occur, make sure that the Dual-Lite DPLA75 exit
sign is still being illuminated with a minimum of 5-foot candles (54 lux) of unltered LED, uorescent, metal halide, or
mercury vapor lighting.
Periodically clean sign face with a damp cloth. Do not use any thinners or solvents on the sign face.
Directional Indicators
Two self-adhesive photoluminescent directional indicators are supplied with each sign. Small dots are provided to
the left of the letter E and to the right of the letter T for easy alignment. If your exit sign is to be located other than
directly over an exit, apply a directional indicator to the left of the E, pointing left, or to the right of the T, pointing
right, or both, as appropriate.
SURFACE MOUNT
UPPER OR LOWER
Activation
Viewing Distance
75 foot viewing distance
CEILING MOUNT
FLAG MOUNT
Copyright
RECYCLING INFORMATION
All steel, aluminum and thermoplastic parts are recyclable.
NOTICE: Emergency units contain rechargeable batteries which
Hubbell Lighting, Inc. Life Safety Products • www.dual-lite.com
©
Hubbell Lighting, Inc., All Rights Reserved • Specifications subject to change without notice. • Printed in U.S.A.
must be recycled or disposed of properly.
DPLA75 0604088_A
09/18
 Loading...