

Dual Electronics Corporation MRF40 Installation And Owner's Manual
MRF40
Marine
Installation
RF
and
Remote
Owner·s
Control
Manual
Installation
MRF40
MRF40
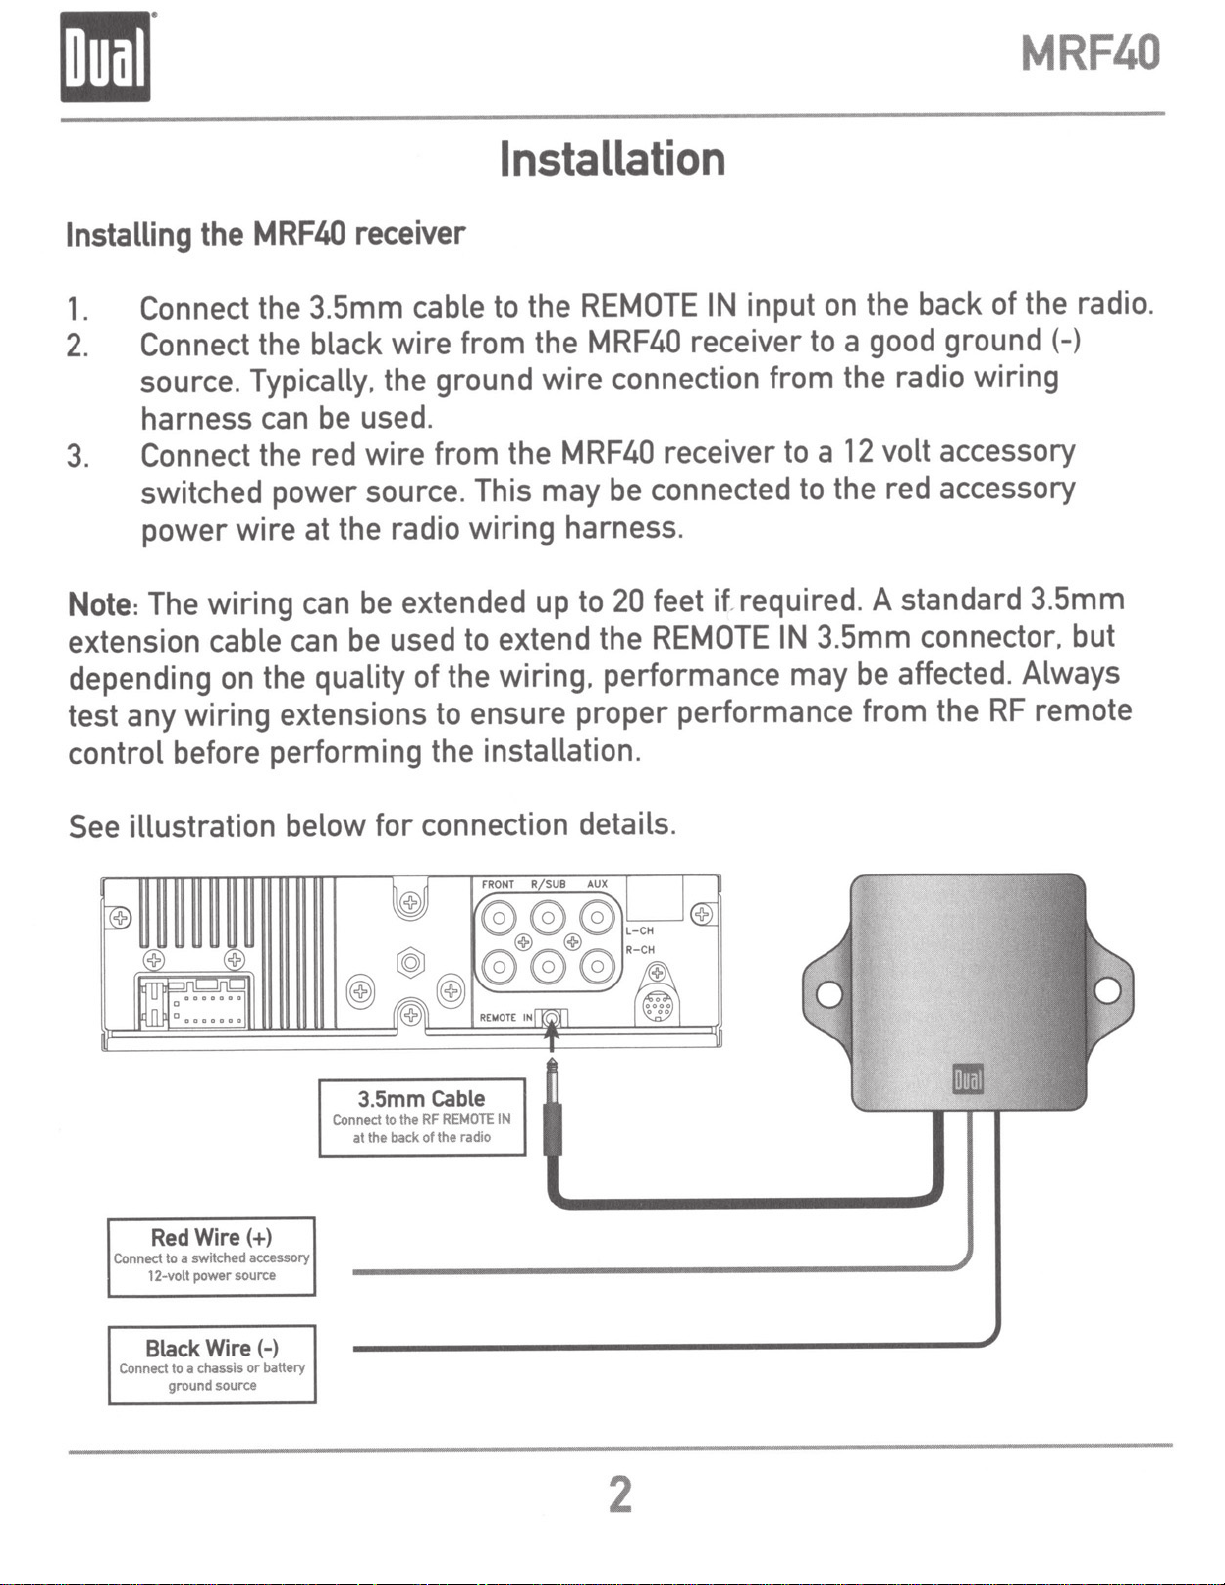
Installing
1.
Connect the 3.5mm cable
the
2. Connect the black wire from the
receiver
to
REMOTE
the
MRF40
the back of the radio.
IN
input
on
receiver to a good ground (-)
source. Typically. the ground wire connection from the radio wiring
harness
3. Connect the red wire from the
switched power source. This may
can
MRF40
be
receiver to a
connected
to
volt accessory
12
the red accessory
used.
be
power wire at the radio wiring harness.
required. A standard 3.5mm
Note:
The wiring
extension cable
the quality of the wiring. performance may
depending
on
can
can
extended up
be
used
be
extend the
to
to
feet
20
REMOTE
if
3.5mm connector. but
IN
affected. Always
be
test any wiring extensions to ensure proper performance from the
control before performing the installation.
RF
remote
See
illustration below for connection details.
Cable
5mm
Connect
12-volt
Black
Connect
Red
a
to
to
ground
Wire(+)
switc!Md
aource
power
Wire
or
chassis
a
aource
.ccessory
(-)
battery
3.
Connect
the
at
to
back
the
RF
of
REMOTE
radio
the
IN
2
Installation
MRF40
Initial
1.
2.
setup
Turn
visible through the top of the receiver.
Link
button
3
feet
connection.
from
Mounting
1.
Locate a mounting location that is away from hot
location that is protected from splashing water.
on
the power to the radio and
the
on
of
the
the
MRF40
the
the
MRF40
MRF40
remote
MRF40
receiver.
Note:
this
remote.
receiver
to
remote
The
LED
step
I
the
receiver
for 5
must
MRF40
seconds.
on
the
be
repeated
receiver. A blue
by
pressing
while
receiver will
if
the
or
LED
and
the
flash
holding
remote
to
confirm
battery is
moving parts. and a
should
the
is within
removed
be
MUTE
the
2.
3.
Note:
The
while the
The
Mounting the receiver in a higher location
range.
Mount the receiver using screws
RF
RF
remote signal has the ability
RF
remote is effective when in other cabins
will
ensure maximum
or
cable ties.
Remote
IR
remote requires a direct line of sight to the receiver to function.
vs.
IR
Remote
to
penetrate bulkheads and obstacles.
or
around the vessel.
RF
signal
3
 Loading...