

DT Swiss F 535 ONE Service Manual

FORKS
F 535 ONE
APT VOLUME SPACER
USER MANUAL
V2018.08
1. ADDING / REMOVING APT VOLUME SPACERS
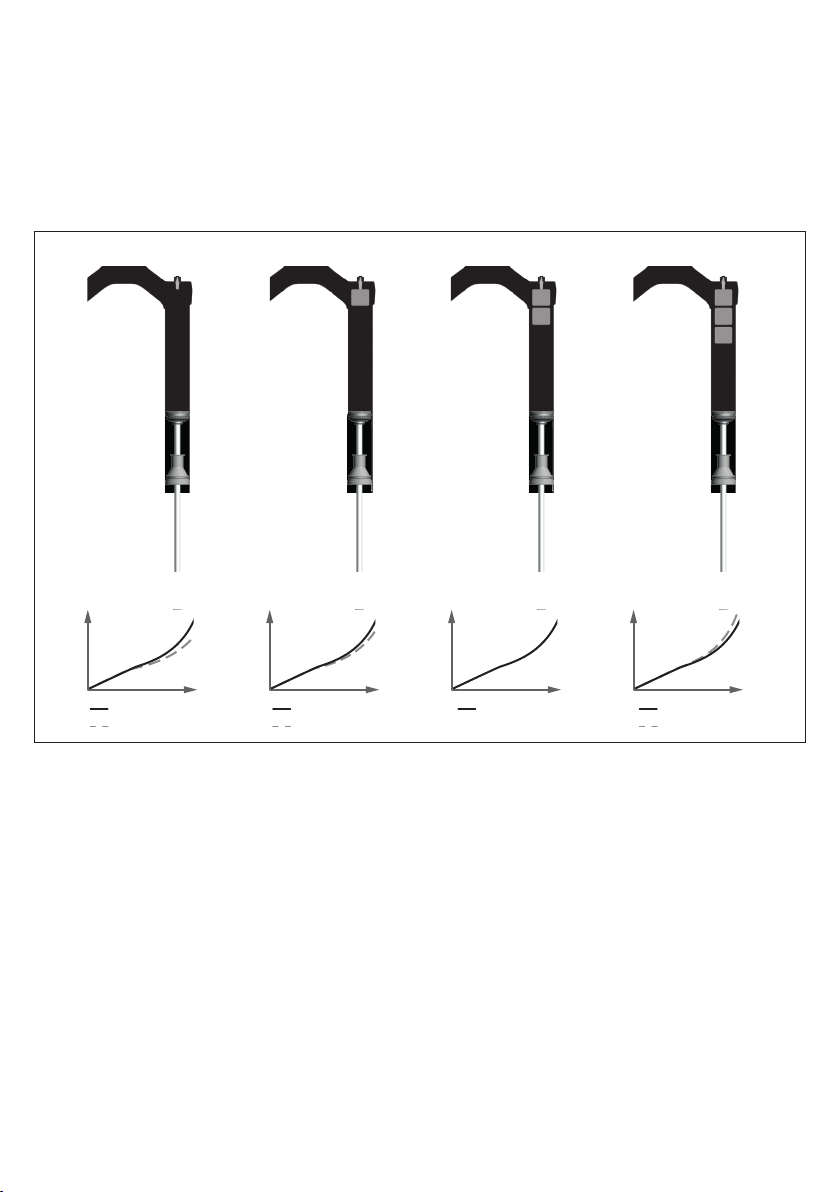
-2 SETTING -1 SETTING +1 SETTINGSTOCK SETTING
1.1 OVERVIEW / FUNCTION
The APT (Adaptable Progression Tune) system allows the rider to adjust the progression of the air
spring curve by adding or removing volume spacers in the fork‘s air chamber. That enables riders
to adjust their spring curve to their riding style and the trails they are riding. The beauty of the
system lies in the fact that the forks suppleness is unaffected, regardless of the setting chosen.
The fork is delivered with two mounted volume spacers. A further volume spacer is included for
personal adjustment.
STOCK SETTING
-2 SETTING
STOCK SETTING
-1 SETTING
STOCK SETTING
STOCK SETTING
+1 SETTING
- 2 SETTING: COMFORTABLE LINEAR
In this setting, without spacers, the suspension fork has a linear spring curve across the entire
stroke and is barely progressive at the end of the travel. It is suitable for moderate off-road use by
comfort-oriented riders.
- 1 SETTING: RATHER COMFORTABLE, RATHER LINEAR
More ambitious riders looking for a rather comfortable setting use the setting with a single APT
spacer offering a spring curve with a low progression for a smooth ride feel.
STOCK-SETTING: RATHER PROGRESSIVE
The stock setting of the forks has two APT spacers. This setting results in a rather progressive
spring curve that gives more experienced riders the support they are looking for with their active
riding style.
+ 1 SETTING: VERY PROGRESSIVE
When three APT spacers are used, the fork gets progressive and offers a direct ride feel. That
makes this setting suitable for strong riders with an aggressive riding style.
2
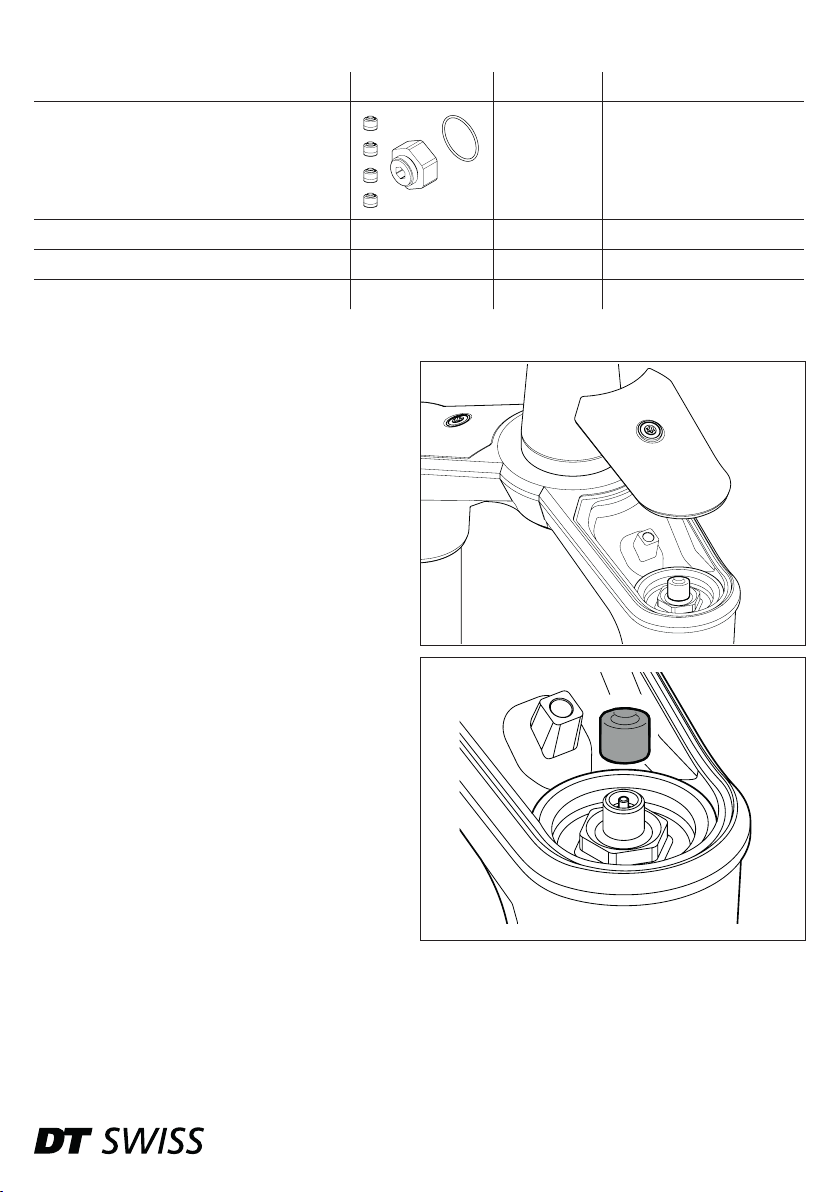
1.2 REQUIRED TOOLS AND MATERIALS
Required tools and materials Specication Quantity article number
APT ADJUSTMENT KIT F 535
15 mm hexagon socket 1
28 mm open-end wrench 1
torque wrench 25 Nm 1
1.3 RELEASING THE AIR
1. Unscrew the fastening screw of the cover on
the spring side.
2. Remove the cover.
3. If necessary, clean the area under the
cover to prevent dirt from entering the air
chamber.
4. Unscrew the valve cap.
1 FWXXXXXXXXXX18795S
F 535 - Technisches Handbuch 3
 Loading...