

DTM Print Primera AP550e Quick Start Manual
LABEL APPLICATOR
Mode
Recall/
Reset
+
-
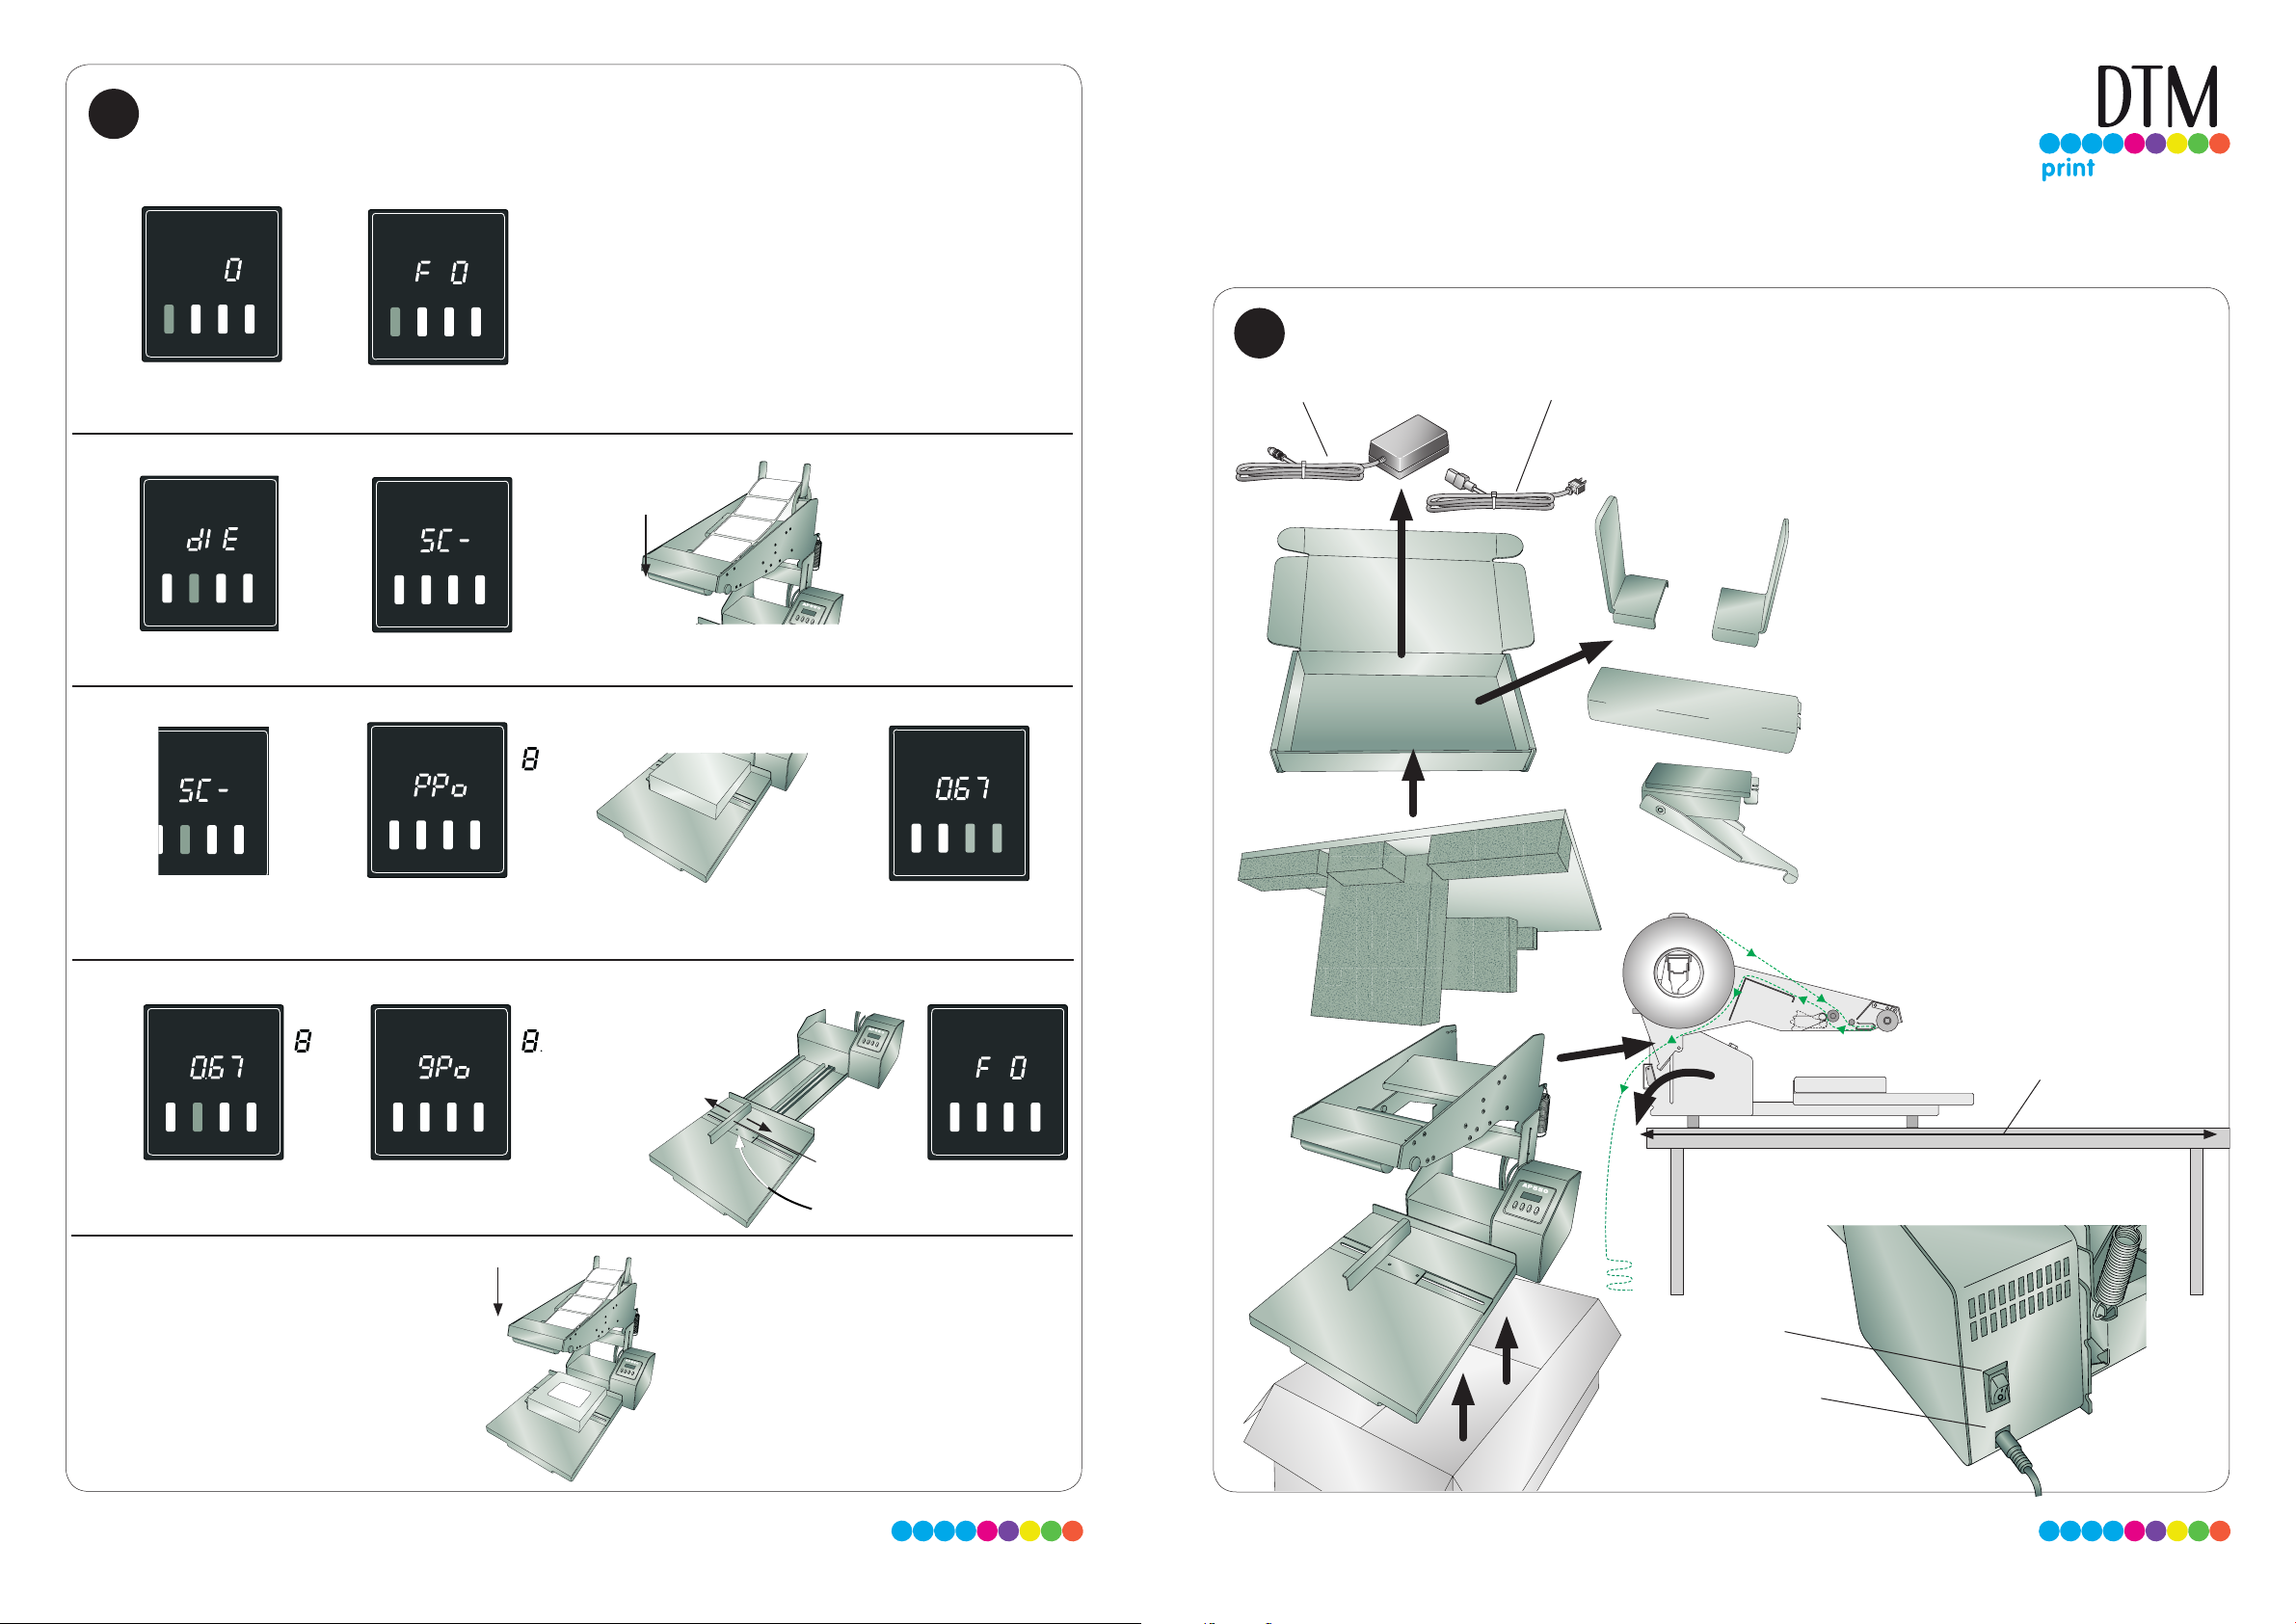
C Label/Container Settings (for die-cut labels)
15. Access Label/Container Settings
15a 15b
Mode
Recall/
Reset
-
+
Mode
Recall/
Reset +
-
Primera AP550e Quickstart
A Unpack and Setup
Press “Mode” once.
When “F 0” is displayed hold “Mode” for
2 seconds to access Label/Container
Settings.
16. Sensor Calibration
16a 16b 16c
Recall/
Reset +
Mode
Press “Recall/
-
Mode
Recall/
Reset +
-
“SC-” is displayed.
Reset” twice.
Push here
LABEL APPLICATOR
Mode
Recall/
Reset
+
Push down on arm until “0.00” is
displayed.
-
17. Platform Position
17a 17b 17c 17d
Recall/
Reset +
-
Press “Recall/
Reset” twice.
Mode
Recall/
Reset +
-
“PPo” is displayed.
Load the container.
Mode
Recall/
Reset
-
+
Press and hold “+” or “-” to move
the platform to the desired label-
ing position.
Power CordPower Adapter
1. Remove the AP550e from its
packaging.
2. Remove all items from the supply box.
3. Place the unit toward the back of a
table with a depth of 76 cm or more.
4. Connect the power and switch on the
AP550e.
18. Guide Position
18a 18b
Recall/
Reset +
Mode
Press “Recall/ Reset ”
-
Mode
“gPo” is displayed.
once.
19. Start Labeling
Lower the Application Arm quickly until it touches
the container.
The platform will move toward you.
Maintain downward force on the arm until the
label is completely applied.
Recall/
Reset +
-
Push here
18c 18d
Loosen the Thumb Screw
under the platform to adjust
the guide
side-to-side.
Free Technical Support!
Contact our DTM Print support team
LABEL APPLICATOR
Mode
Recall/
Reset
+
via email at support@dtm-print.eu, by
-
phone at +49 611 92777-0 or use the
online live chat on our webpage
dtm-print.eu. This service is free for all
our customers.
LABEL APPLICATOR
Mode
Recall/
Reset
+
-
Container
Guide
Thumb Screw
under platform
Mode
Recall/
Reset +
-
Press “Mode” to
store settings.
Mode
LABEL APPLICATOR
Recall/
Reset
+
76 cm or more
-
Power Switch
Power Input (12v)
074392-190225
Liner Drive Roller
Label Guide Roller
Application Rolle
r
Peel Edge
Liner Idler Roller
Label Path
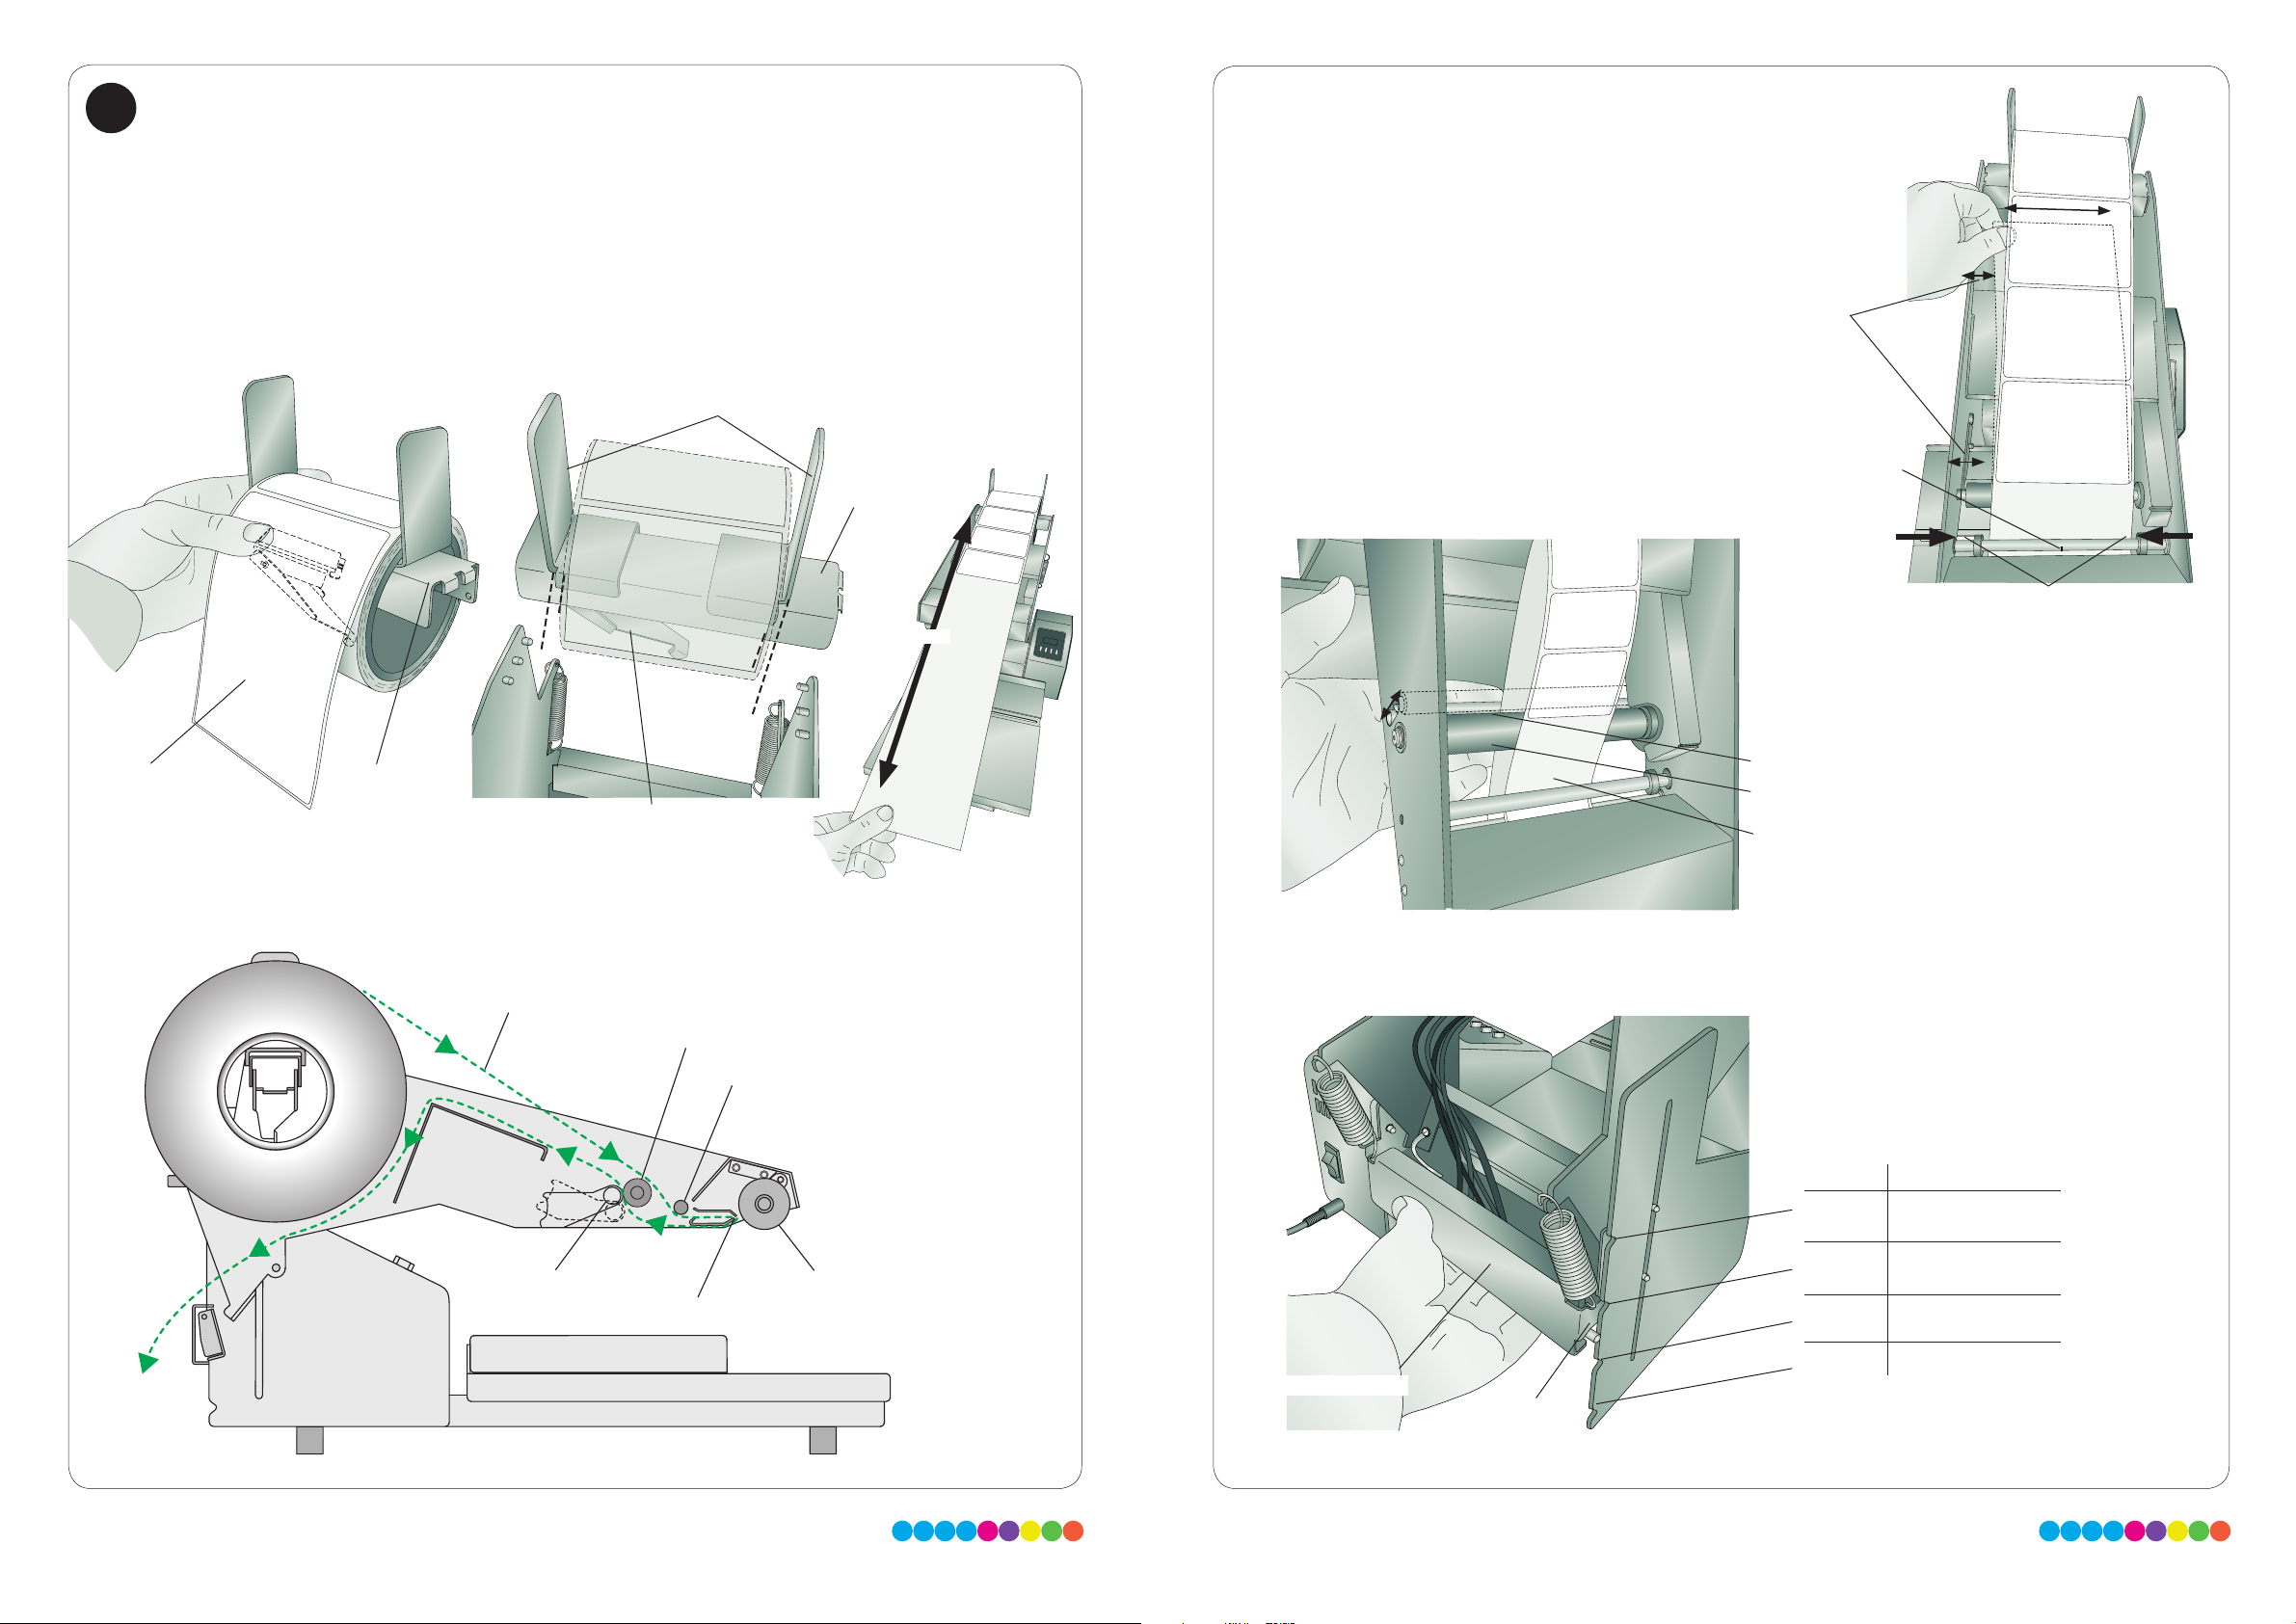
B Load Label Stock
5. Place the label roll on the Roll Bar as shown. For narrow rolls you may have to ip guides so
the “L” faces away from the roll on each side.
6. Place the Roll Drag Arm under the Roll Bar so that the rounded tip is near the center of the roll.
7. Place the Roll Bar with labels on the pins so that the bar is fully seated on the pins.
8. Remove approximately 38 cm of labels from the liner.
Roll Guides
Roll Bar
10. Align the leading edge of the label
stock with the roll as shown.
11. Make sure the labels will be fed under
the Sensor Location Line.
12. Move the Guide Collars so they are
close to, but not pinching the label
stock.
13. Lock the labels in place by pushing up
on the metal Liner Idler Roller. Make
sure there are no labels past the Liner
Drive Roller.
Align Here
Distance from
label stock to arm
side plate should
be equal in these
locations.
Sensor Location Line
labels facing up holes to the rear
9. Load the label stock according to the diagram below:
Label Path
Liner Idler Roller
Roll Drag Arm
Liner Drive Roller
Peel Edge
Label Guide Roller
Application Roller
38 cm
Mode
AP550
LABEL APPLICATOR
Recall
Reset
+
-
Lock
Unlock
Liner Idler Roller
Liner Drive Roller
no labels here
14. Move the Application Arm to the appropriate height by squeezing
the Pin Release Bar and pulling up on the arm.
Position Container Height
Notch 4 15-20 cm
Notch 3 10-15 cm
Notch 2 5-10 cm
Guide Collars
Pin Release Bar
Notch 1 0-5 cm
Pin
 Loading...