

Page 1

Denta/Dentaplus
Owner´s Manual
Page 2
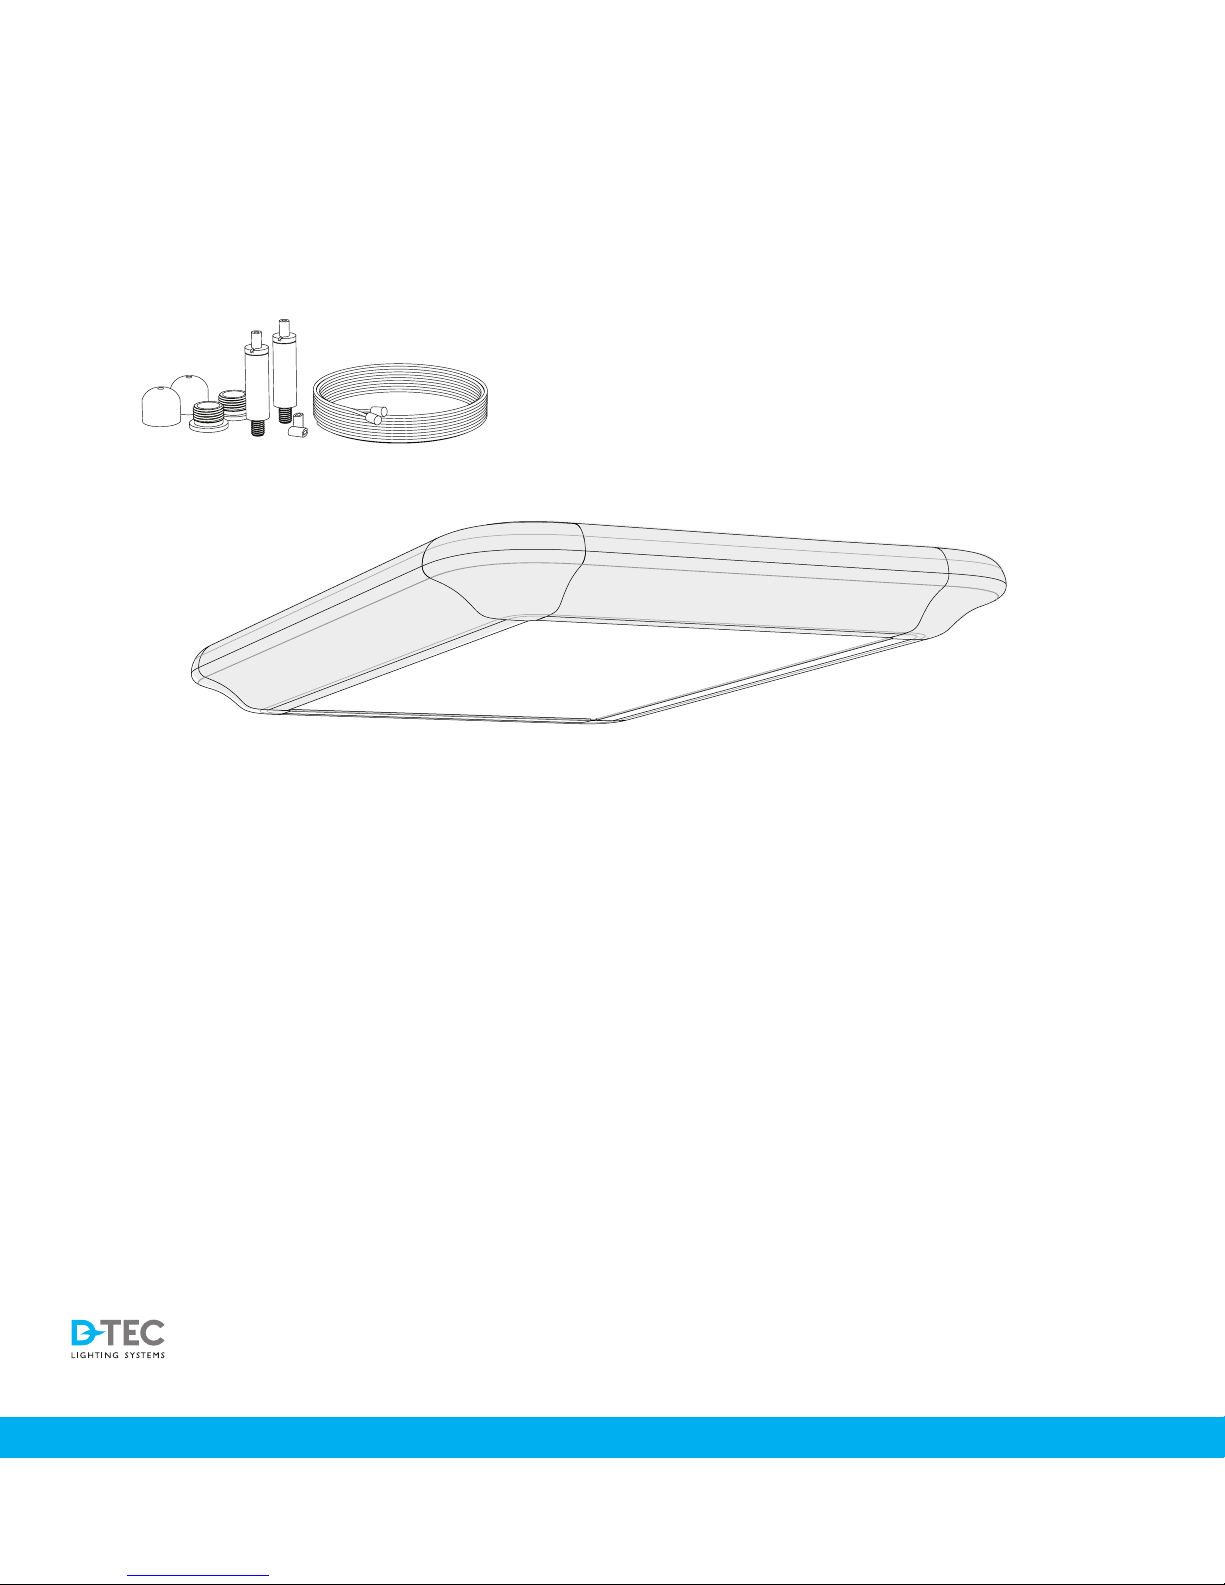
1. Unpacking your Denta/Dentaplus
Open the packaging carefully without using any sharp objects!
The packaging includes:
• Wire arrangements for attaching the luminaire to the ceiling
(4 pieces)
• The Denta/Dentaplus luminaire
Note: Do not use sharp objects
when unpacking the luminaire!
Page 3
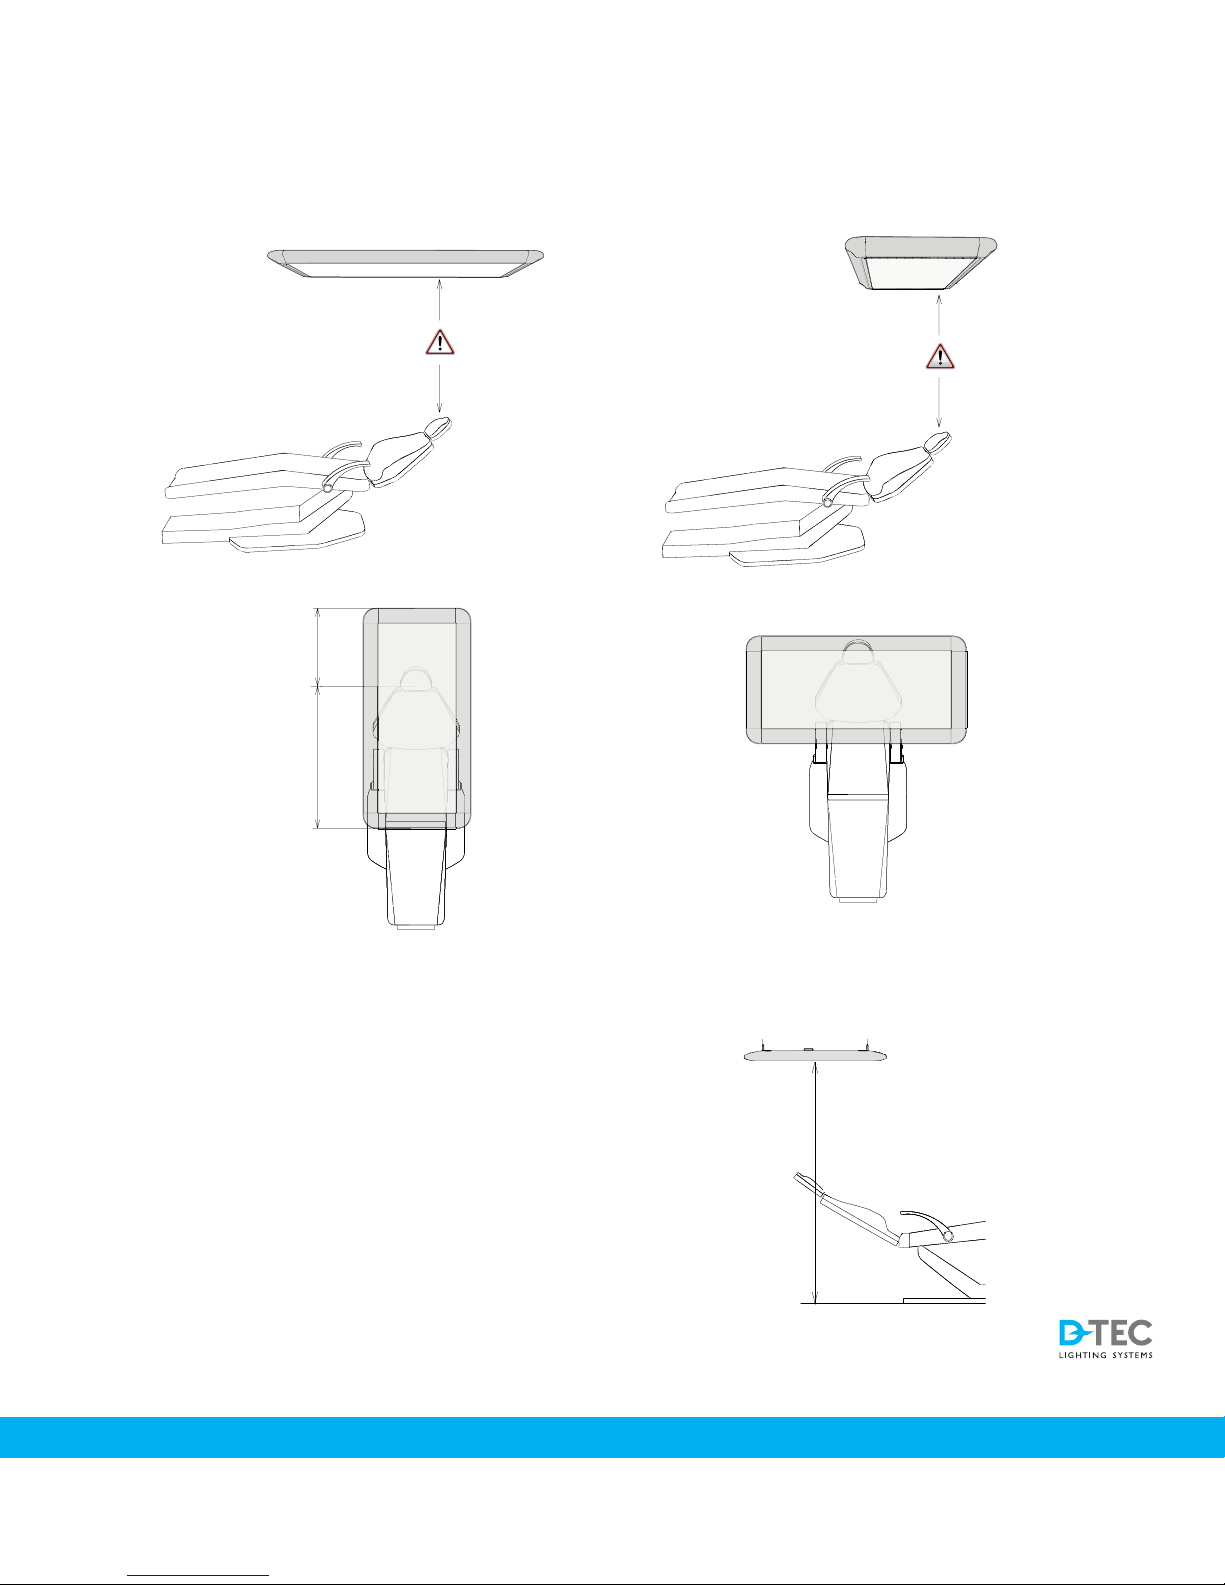
2. Positioning your Denta/Dentaplus
The luminaire should be positioned in one of the following two posi-
tions:
• Parallel position - the eyes of the patient should be in line with 1/3rd
of the luminaire.
• Crosswise position - the eyes of the patient should be in line with
the top of the light source.
Note: The recommended height of the luminaire is to be placed 2,2
meters above oor level
Crosswise
Parallel
2200
4 attachment points
1/3
2/3
Page 4
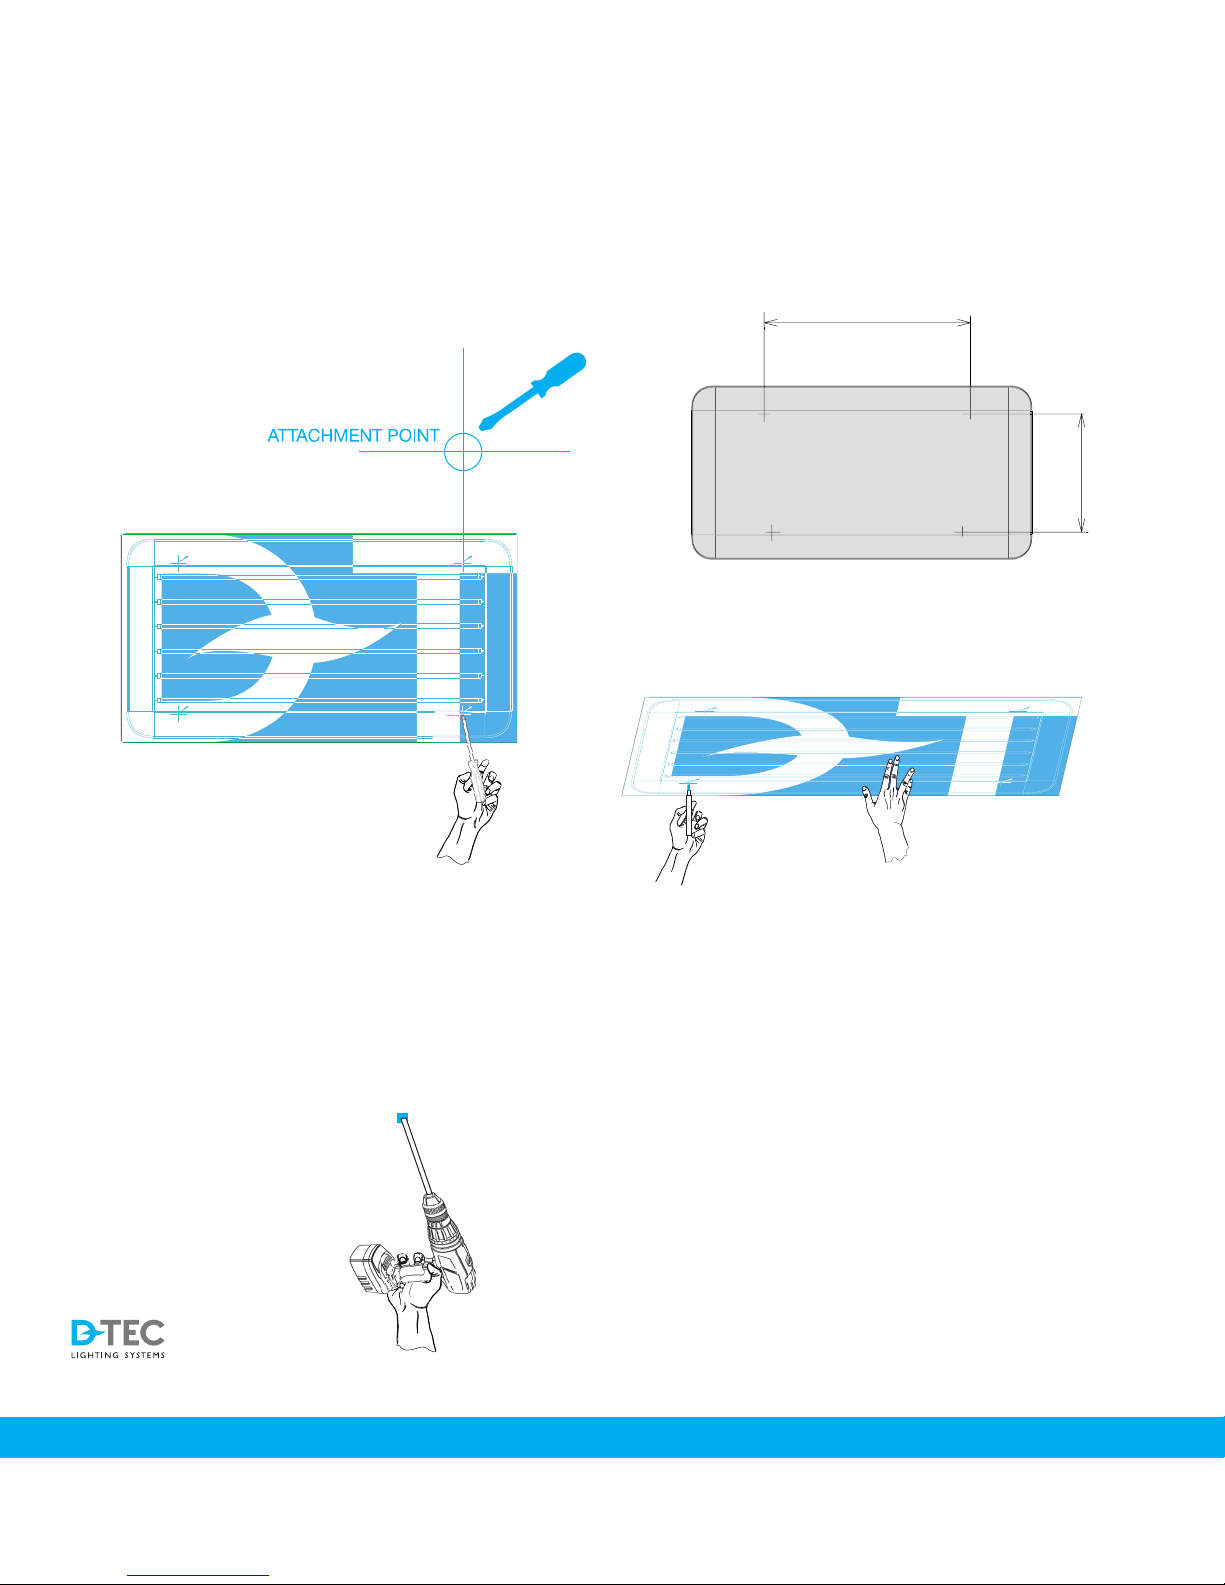
3. Preparing the mounting of your
Denta/Dentaplus
After unpacking the luminaire use the packaging as a guide for mark-
ing the attachment points in the ceiling.
• On the outside of the cardboard, there are four attachment points
marked out. Punch a hole in these four points with a screwdriver or
similar.
• Hold the cardboard lid where you want to position the luminaire in
the ceiling and mark the four points where you would like the wires to
be attached and drill holes accordingly
c/c 530
c/c 1000
ATTACHMENT POINT
ATTACHMENT POINT
ATTACHMENT POINT ATTACHMENT POINT
ATTACHMENT POINT
ATTACHMENT POIN
T
ATTACHMENT POIN
T
ATTACHMENT POINT
Page 5
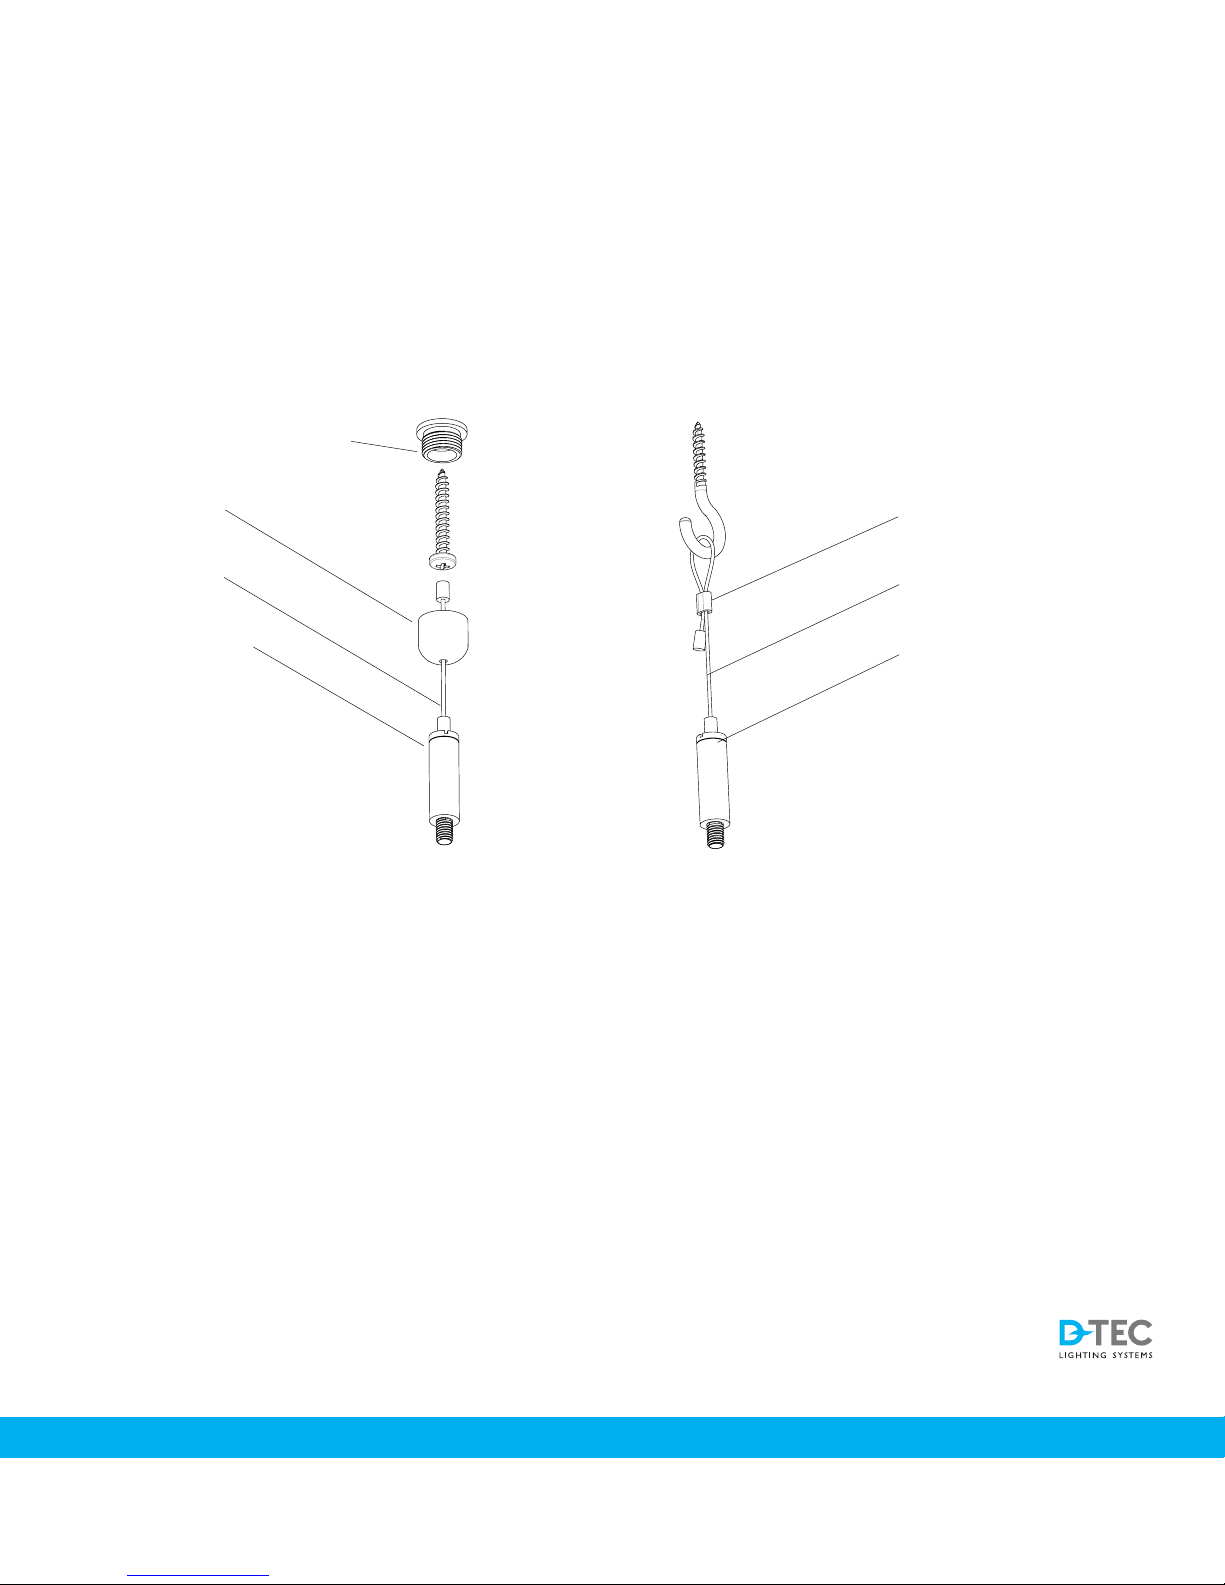
4. Mounting your Denta/Dentaplus in
the ceiling
There are two options of mounting kits enclosed with your luminaire.
Use the kit suitable to your needs and preferences.
Ceiling attachment
Cap
Wire
Gripper
Aluminum nipple
Wire
Gripper
Page 6
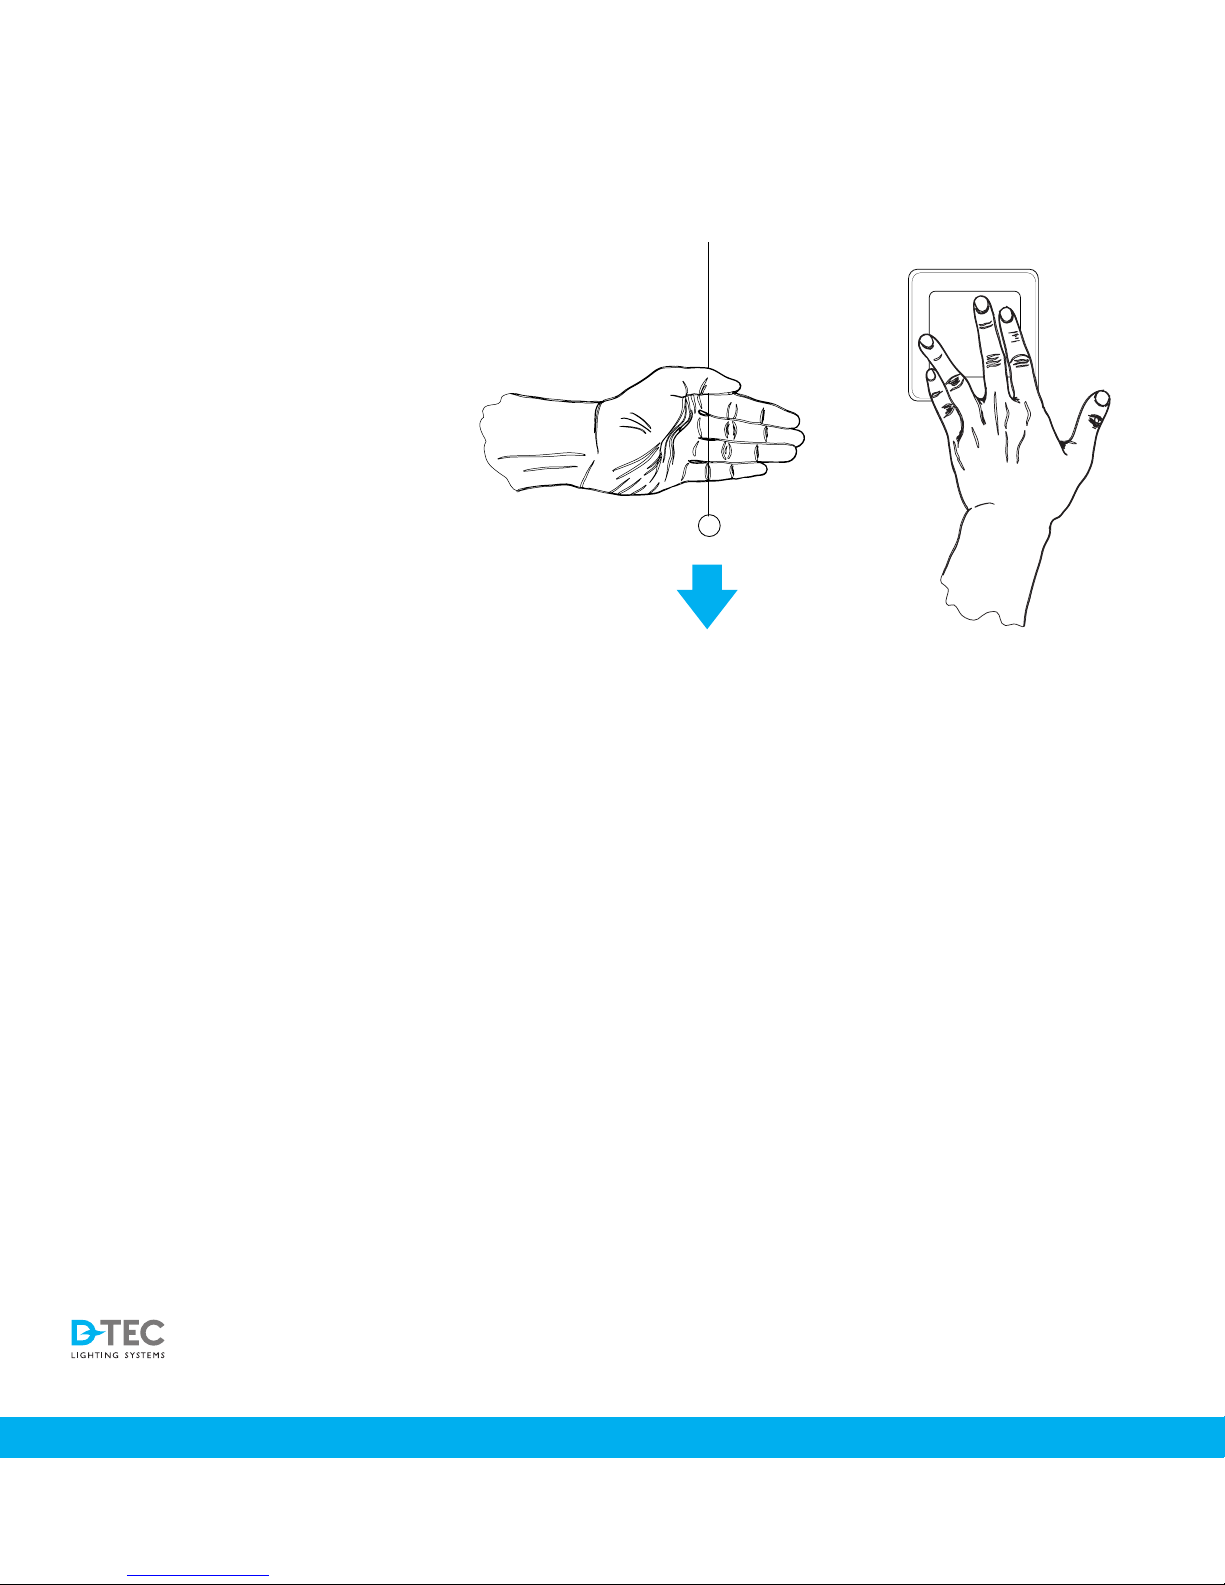
5. Operating your Denta luminaire
The luminaire is operated by a pulling string/cord or, on special re-
quests, by a wall switch. The luminaire could be faded in such a way
that the two middle sections of lights are switched off by a pull of the
string.
The indirect light is optional and will always be unchanged/constant.
Caution! Ensure you fade out the lamp when working with
lightcuring materials.
Page 7
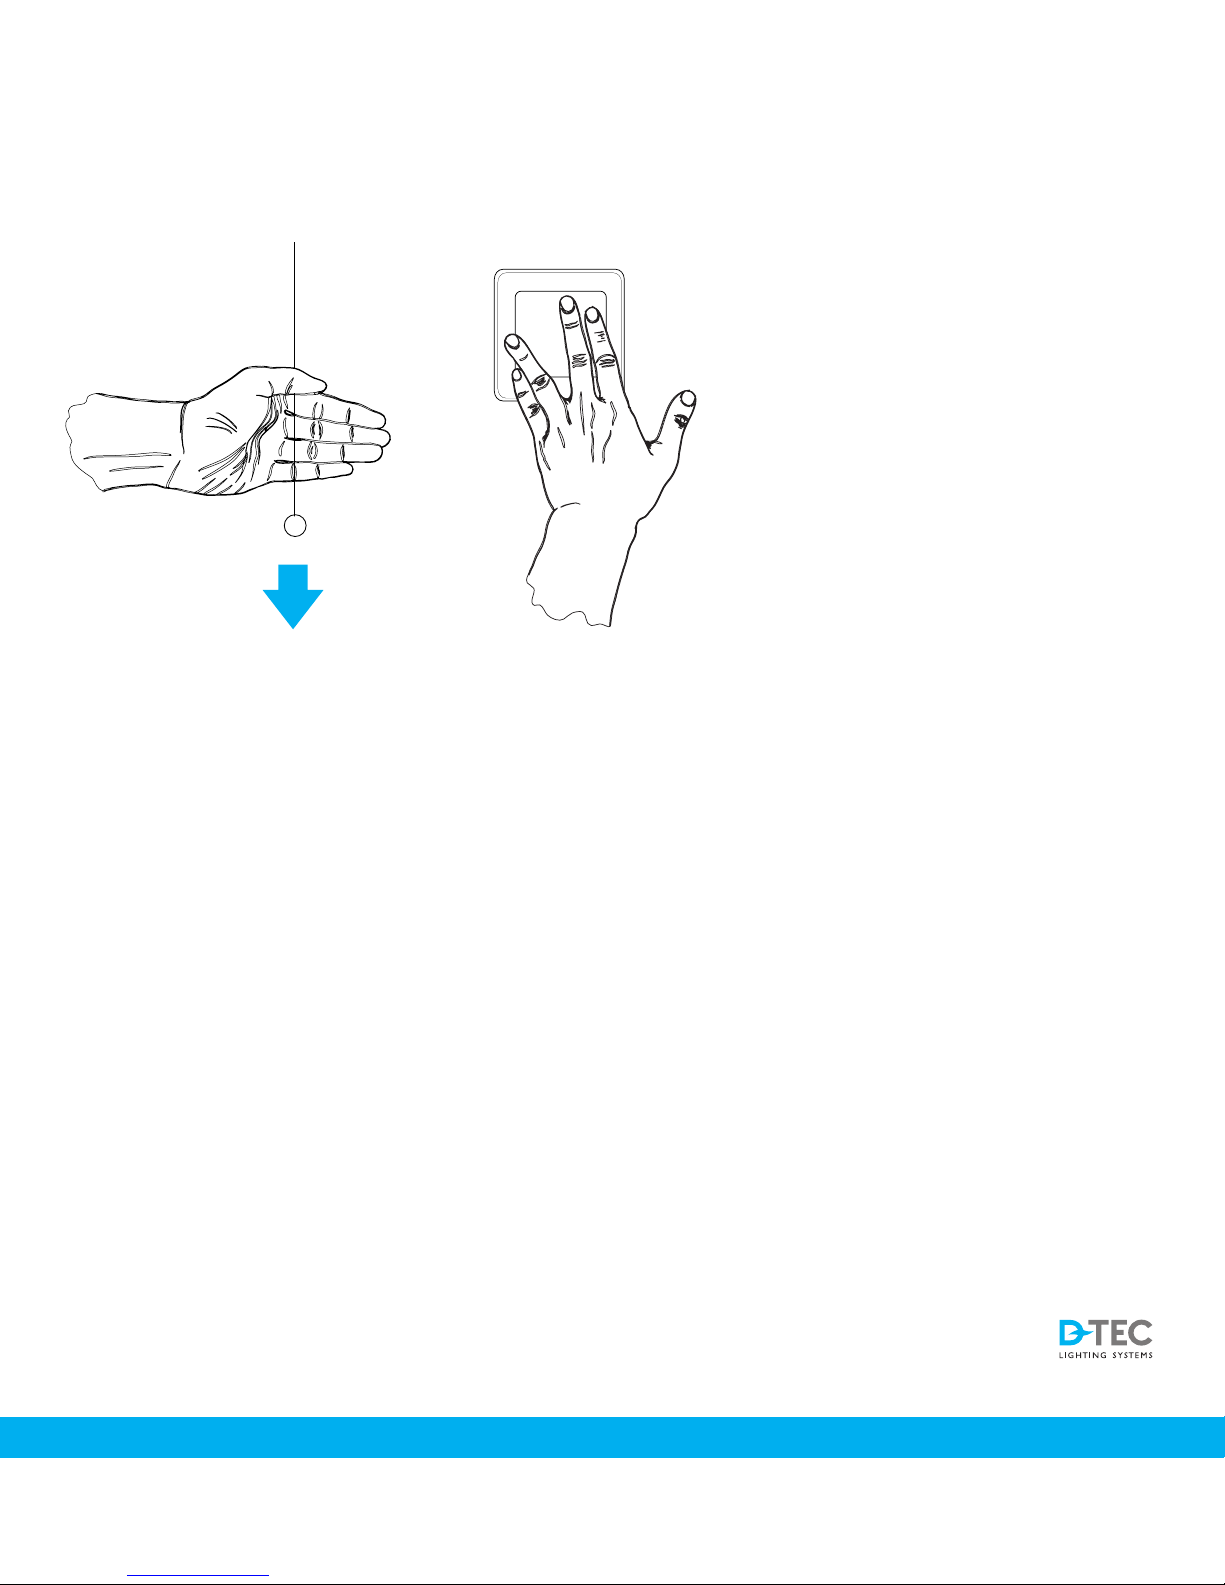
6. Operating Your Dentaplus luminaire
The luminaire is operated by a pulling string/cord or, on special re-
quests, by a wall switch. Instructions to operate the dimmer function:
• Switching the lamp on/off: short pull (<0,5 second)
• Dimming: Long pull (>0,5 second), the dimming direction is
changed with each pull.
• To reset: pull and hold the string for approximately 30 seconds
The last dimmer setting is remembered until the next time the lumi-
naire is switched on.
The indirect light is optional and will always remain at the same
brightness, that is, unchanged/constant and not affected by the dim-
ming device.
Caution! Ensure you fade out the lamp when working with
lightcuring materials.
Page 8
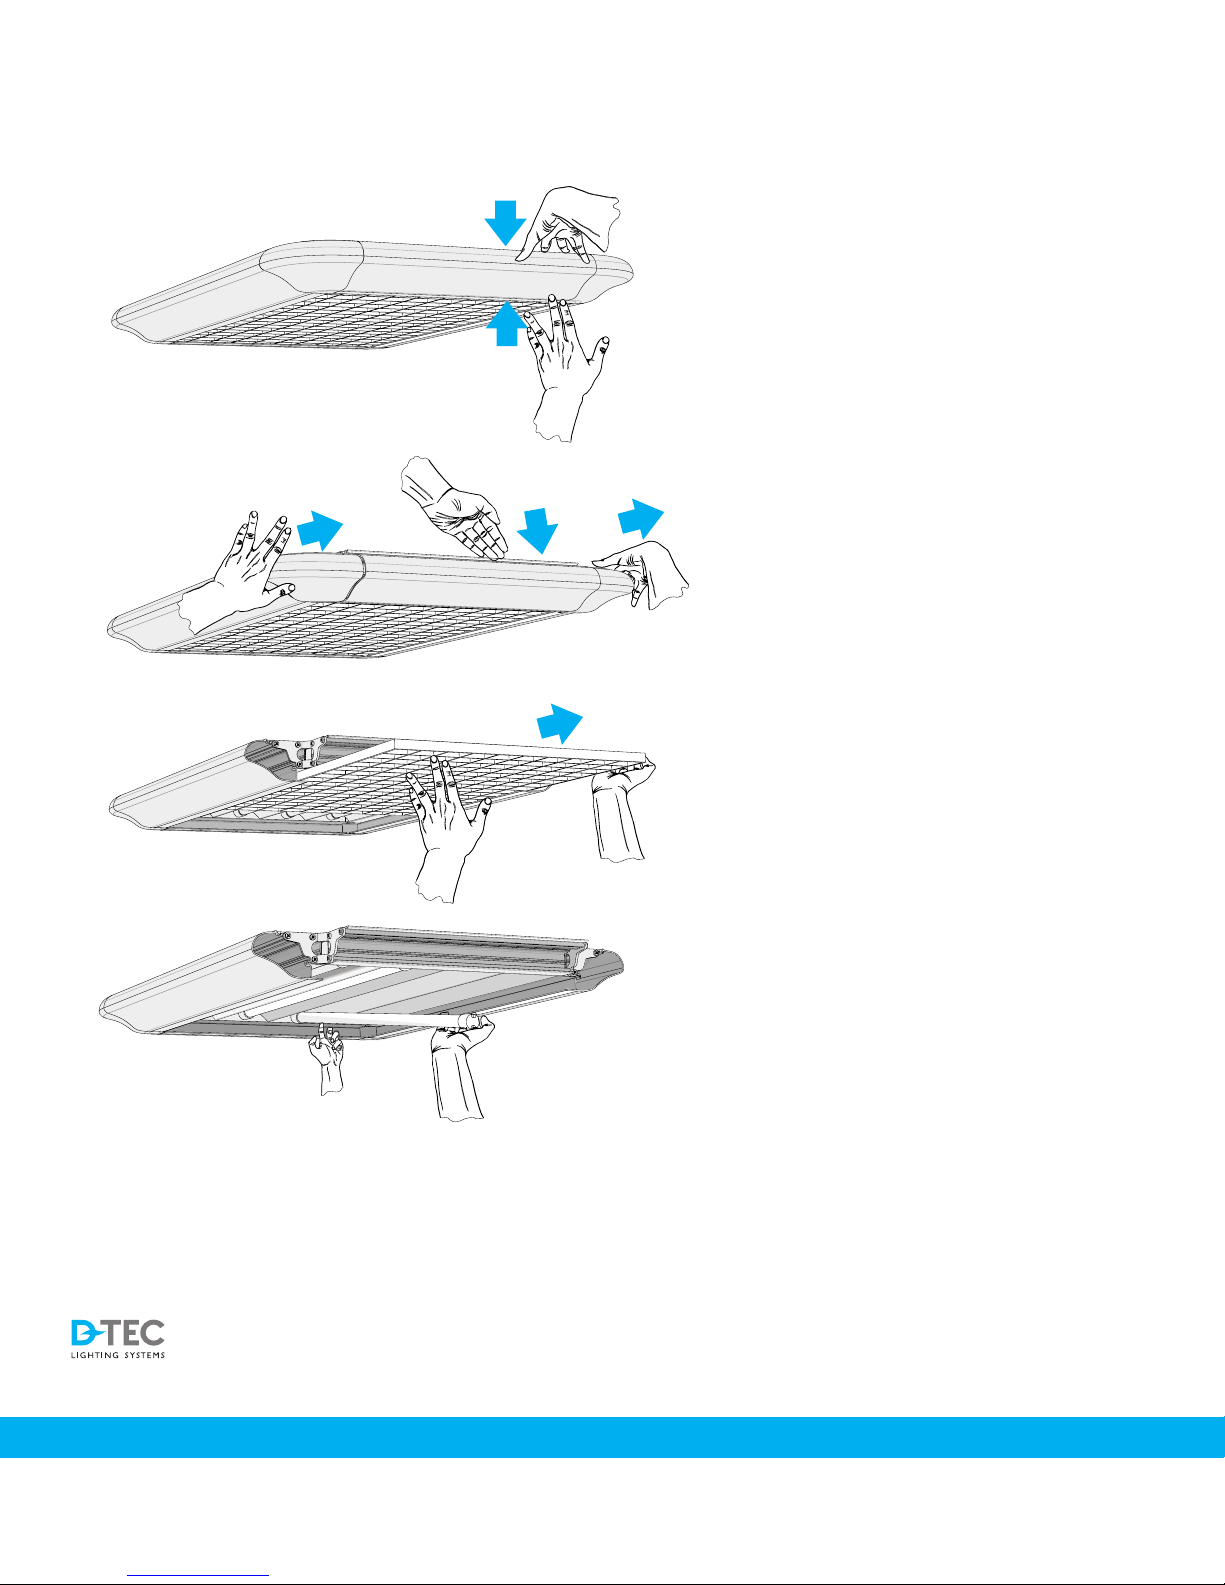
7. Exchange of uorescent light tubes
• Denta: 6 x 28 W
• Dentaplus: 6 x 54 W
1.
2.
3.
3.
4.
5.
Page 9
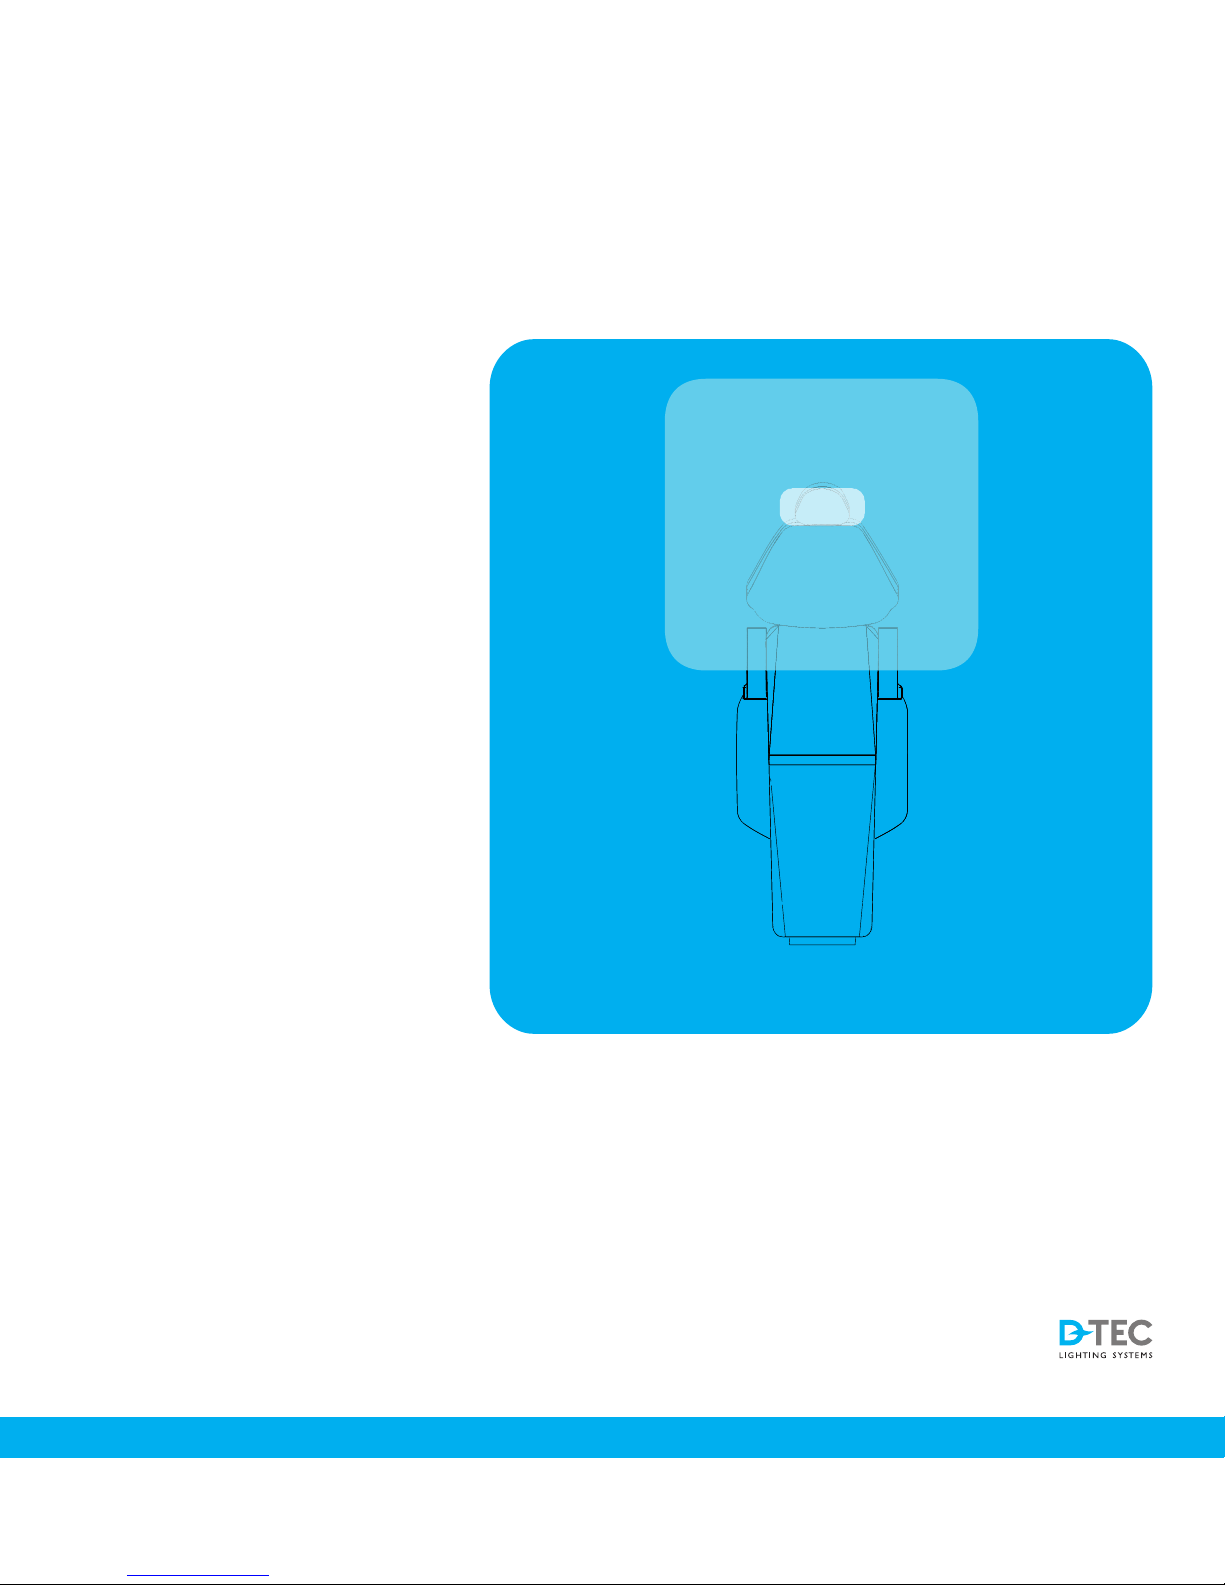
8. General information
Image of recommended light conditions for dentists.
• Zone 1 = 20 - 40 000 lux
• Zone 2 = 3 - 5000 lux
• Zone 3 = 500 - 1000 lux
Zone 3
Zone 2
Zone 1
Page 10

On-line support
http://www.d-tec.se/support
• Owner’s manual
• Användarmanual
• Bedienungsanleitung
• Mode d’emploi
Page 11
IM
18
Facts: Denta/Dentaplus
• Environmentally friendly and energy-saving
• CDP (conical de-glaring prism)
• Option of indirect light and dimmer
• High intensity of illumination
Denta: 4 000 lux/1,2 m
Dentaplus: 280-5 800 lux/1,2 m
• Size 1 355 x 700 x 55 mm
• Weight 11 kg
D-TEC AB
Varavägen 12
SE-465 94 Nossebro
Tel +46 (0)31 969 302 Fax +46 (0)31 966 092
E-mail [email protected]
www.d-tec.se
 Loading...