

Page 1

4. Battery Operation & Recharging
Automatic Battery Monitoring & Recovery System (ABMR)
The main amplier is equipped with an auto battery monitoring and recovery system. This continuously monitors the battery
and will automatically turn-off the amplier completely if the voltage drops to a dangerous level, which might harm
the battery. The system can instantly recover by switching on the supplied AC/DC adapter. When the low-battery LED
illuminates, the built-in battery needs to be charged immediately. Plug in the AC/DC adapter to input jack on the front
panel. The charge LED will illuminate and will automatically turn off when the charging completed in approx. 10h. Continue
to charge some extra hours to ensure battery fully charged.
5. Important Notes
- The impendance of the external speaker should be greater than 16Ω.
- Do not use an AC/DC adapter other than that supplied otherwise guarantee void.
- Please do not use a fuse other than the specied rated one of 250V/5A.
- Charging should be done at regular intervals to conpensate for natural discharging.
6. Warranty information
DTC Audio hereby warrants that this product will be free from defects in material and workmanship for a period of one year
from the date of purchase. At our option, we will repair or replace the defective product and promptly return it to you. You
should retain proof of purchase to validate the purchase date and return it with any warranty claim.
If you believe this product is defective within the warranty period, carefully repack the unit, insure it, and return it freight
prepaid to your nearest dealer or authorized service center or direct to us.
This warranty does not apply in case of abuse of the product use contrary to our instructions, or unauthorized repair. All
implied WARRANTIES of MERCHANTABILITY of FITTNESS FOR A PARTICULAR PURPOSE are disclaimed and we hereby disclaim
liability for incidental, special or consequential damages resulting from the use or unavailability of this product.
THIS WARRANTY SUPERSEDES ALL WARRANTIES THAT ARE INCLUDED WITH THIS PRODUCT.
NOTE: The information contained in this manual is believed to be correct at the time of going to press. However, DTC Audio
reserves the right to change or modify the specication without notice or obligation to update existing units
- PC30D
PORTABLE WIRELESS AMPLIFIER WITH USB, SD-CARD & DVD PLAYER,
PITCH CONTROL AND 7” WIDE TFT SCREEN
Parellaan 28, 2132 WS Hoofddorp, The Netherlands, www.dtc-audio.com info@dtc-audio.com
ETS LOGISTICS BV
Page 2
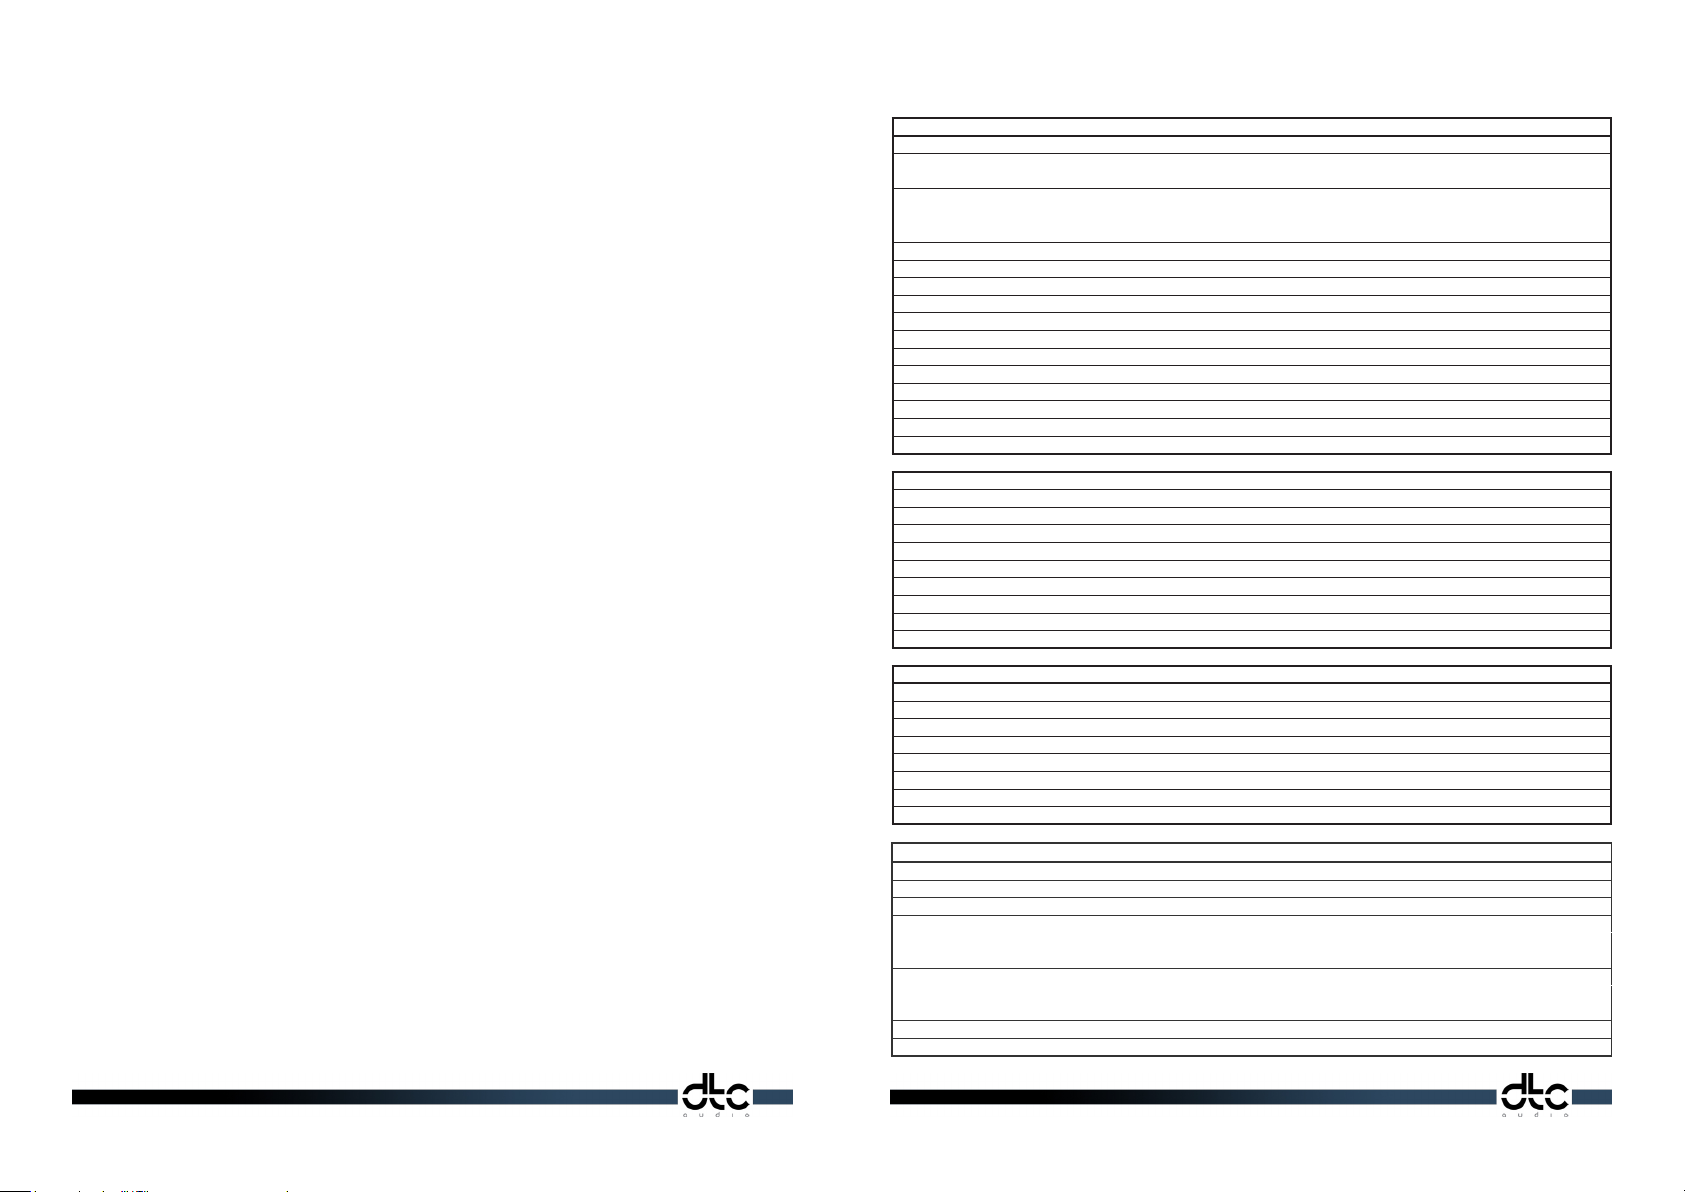
Contents 3. Technical Specication
Amplier Specication
Max. Power Output RMS-100Watt
No. of Mic Input
Volume Control
Tone Control 1 x Treble, Independent
Aux. Input/Output 1 x In-RCA / 1 x Out-RCA
Speaker 8” Dynamic Full range + 2” Tweeter
External Speaker >16Ω
Built-In Battery 12V/14A, Rechargeable & Explosion-proof
Charging Approx. 10-hours for a Single charge
Discharge Protection 10.4V (Factory set: Lowest voltage for ABMR)
AC/DC Adapter (SMPS) AC100-240V 50-60Hz / DC15-16V/4.5A UL/CE/CSA/TÜV
Weight Approx. 17Kg-Nett
Dimensions 270mm(L) x 270mm(W) x 420mm(H) Nett
1 x Wired Microphone by combination jack
1 x UHF Wireless Microphone (Other frequencies are option)
1 x Wired Microphone
1 x Wireless Microphone
1 x Aux
1 x Bass, Independent
340mm(L) x 340mm(W) x 540mm(H) Gross
1) Champ-PC30D Panel
2) Operating Instructions
3) Technical Specication
4) Battery Operation & Recharging
5) Important Notes
6) Warranty Information
Wireless Receiver Specication
Carrier Frequency UHF 863 ~ 865MHz (Other UHF/VHF Frequencies are option)
Oscillation Mode PLL Synthesized
No of Channel Single-Ch (Option Dual-Ch)
Preset Frequency 16-Frequencies
Bandwidth 24MHz
Modulation Mode FM (F3E)
S/N Ratio >105dB
THD <0.5% @1KHz
Frequency Response 50Hz~18KHz
TFT-LCD Monitor Specication
Type 7” TFT-LCD Wide Color, Aspect ratio of 16:9
Color System NTSC/PAL Auto selection
Resolution 1440 x 234 dots
DVD/USB/SD-Card Specication
Pitch Adjustment DVD/USB/SD-Card: -30% ~ +30%
USB Player Support MP3-USB with USB2.0 Full speed
Playable Discs DVD, Divx, MPEG4, CD, VCD, JPG, DVD-R/W, CD-R/W
Remote Control
Output level
Play/Pause, CD/USB/SD-Card, Pitch-Up/Down, Folder-Up/Down, Program, Mute,
Supported Memory
Search time Approx. 5 sec.
1.2V ± 2dB
THD Less than 0.1% / 1KHz
Page 3

Connection Diagram
Beware : Shut off all power before making connections
Operating the DVD player
Play related Buttons
: STOP/RETURN Button - Press once to memorize stop position. Press twice to re-play from rst track.
: PLAY/PAUSE Button – For hold or continue play
: OPEN/CLOSE Button – To load or un-load disc.
Display Playing Time and State
Press [OSD] button. TV screen will display current play time state. i.e., playing time,
running time. Press [OSD] each time, the screen will show time alternatively
(the time displayed in the front panel will accordingly change)
The content to be displayed each time will be subject to the type of the disc.
Primal Setting for Video/Audio
The initial setting of the DVD player both for video (VGA or RGB) and
audio (stereo-mono or 5.1Ch) is very important.
Improper setting will cause failure to operate at all.
1) In case the display does not appear on the screen, press [P/N] button of remote control unit to select video output matching with your TV, Monitor
or Projector.
2) In case you do not have audio, press [AUDIO] button to select the correct audio output of stereo (mono) or 5.1Ch If 1) & 2) above have been
done correctly, you will have audio/video output.
How to use the Disc menu
This menu appears when playing DVD
Press [TITLE] button to see the Title menu.
Press [MENU/PBC] button to see disc menu.
- Select desired item by [▲][▼][ ][ ] button and press [ENTER]
- Press [MENU/PBC] button to change PBC function.
- Note the contents of disc menu differs per individual disc.
Play Fast Forward and Backward
While playing, you can press or on the remote control to play fast forward and backward. Five speeds 2X, 4X, 8X, and 32X are available.
If you press once, the speed increases by one shift. When the speed reaches max. speed, press this key again to return to normal state.
Slow Play
While playing, press [SLOW] to play slowly at different speed. You can play slow
forward or backward. Four speeds 1/2, 1/4, 1/8, 1/16X are available.
If you press [SLOW] once, the speed decreases by one shift, nally it returns to normal.
Skip to Next or Previous Track
While playing, press the or button to skip to next or previous track.
Repeat Play
While playing, you can press [RPT] to select different repeat content.
1. For DVD disc, press [RPT] to repeat chapter, press [RPT] again to repeat
title again, press [RPT] again to exit.
2. For non-DVD disc, when PBC is off, press [RPT] to repeat the track content,
press [RPT] again to repeat all discs, press [RPT] again to exit
MP3 Operation
MP3 is a disc which is recorded with an MP3 format audio program.
This DVD player supports MP3 discs, see the following examples:
Press [▲] [▼] button, the yellow band moves to “MP3”,
Inserting the battery into the remote control unit
then press [ENTER] to play the selected track.
1. -PC30D Panel
Page 4

2. Operating Instructions
Audio
Using the UHF Wireless Microphone
1. Open the battery compartment of wireless hand-held mic or belt-pack transmitter mic
Using the DVD Player
Safety Precautions
There are dangerous voltages inside this product. To prevent electric shock do not open the cabinet yourself. For service
please contact our regional representative ofce or direct to us as per the instructions of Limited Warranty
and insert supplied 2 x AA type batteries in their correct +/- polarity.
2. Set Ch-number of amplier and microphone both to same number by Ch-selector
switch using supplied plastic “I” screw driver. ( Please see the schematic below )
3. Clockwise insert the supplied BNC wireless antenna into it’s socket on the operating panel.
4. Plug your wired microphone into the combination jack on the operating panel.
5. Turn on the main power on/off switch. Power-on LED will be illuminated.
6. Adjust the volume level of wired mic and try while setting treble/bass to proper level.
7. Adjust the volume level of wireless mic on the amplier. Turn on the switch of wireless
mic and try. The on-air LED next to the Ch-selector switch will be illuminated.
8. In the case of frequency interference occurring, try to set Ch to another Ch-number.
9. Use the aux in/out RCA jack to feed out or feed in audio signals to and from another source.
Front Panel
1. Power on-off switch
2. Mode select
7. Play button
8. Back
10. Stop button
16. Eject
20. A-B repeat
21. Pitch control faster/slower
23. Next
Remote Control
1 POWER
Turns power on/off
2 MODE
Select play of DVD/USB/SD-card.
3 SCAN-Not in use
(Only for DMB operation: Option)
4 ZOOM
Zooms in/out the screen
5 ENTER
Selects a menu item
6 GOTO
Jumps to a DVD title/track/chapter
7 PLAY
Return to normal pitch of Play disc
8 BACK
Moves to previous Chapter/Track
9 PAUSE
Pauses disc play
10 STOP
Stops disc play
11 SLOW
Rewinds disc at 1/2 or 1/4 speed
12 TITLE
Displays the track number of disc
Using the Wired Microphone
1. Turn on the main power on/off switch, the power-on LED will be illuminated
2. Plug 1/4” plug into the wired mic socket and adjust the volume using the wired mic volume knob.
(see number 6 and 9) on the operating panel.
NOTE: Wired microphones are also as sensitive to feedback as wireless microphones, therefore it is advisable to follow the same advice as in the
above information for optimum performance
Using Auxiliary Equipment
1. Use the Aux in/out jack connection to feed in or out audio signals from another source
2. Typical sources to feed into the amplier are MP3 players, DVD players, laptops and palm devices
etc. where you want to amplify the sound to larger audiences.
3. The feed out socket can be used to connect to ampliers and mixers.
13 NUMBER
Jumps to a song of a CD or MP3
14 DVD/AUX MODE CHANGE
Change mode of DVD/DMB/AUX
15. VOLUME
Increase or decrease volume
Play
1. With your TV remote control, change connected TV to proper video input mode (VIDEO-IN)
2. Press the remote control of [POWER] or [ ] on the DVD front panel. (Standby to disc open mode)
3. Load a disc in the disc slot with label side up. Place a single disc in the slot. The disc will be inserted
automatically. Then the DVD player begins to read it so as to identify different disc formats, then display on the screen.
4. When directory or menu picture displays on the screen, press the direction
buttons [▲][▼][ ][ ] on the remote control to move lighting band to desired track.
You can also directly press number buttons to select a specic track.
16. EJECT
Ejects disc
17. DISPLAY
Moves to the title/track/chapter
18. SET-UP
Sets up various functions
19. CH+/CHSelect
tracks of CD/USB/SD-card
20 A-B REPEAT
Repeat play of selection
21 PITCH UP-DOWN or MOVE
Adjust pitch Up/Down or
Move to an item in the menu
22 MUTE
Mutes sound
23 NEXT
Turns to the next capter/tack
24 FAST REWIND
Fast rewind disc at 2 ~ 8 times
25 FAST FORWARD
Fast forward disc at 2 ~ 8 times
26 SLOW
Forwards disc at 1/2 ~ 1/4 times
27 MENU
Display menu of a disc in play
28 LANGUAGE
Select language (When disc support)
29 S-TITLE
Select sub-title language (-ditto-)
30 ANGLE
Shows various angled display(-ditto-)
 Loading...