

Page 1

DStv EXPLORA
QUICK GUIDE
Page 2

Please Note
• Use of PVR and/or XtraView functionality requires payment of an additional monthly fee.
• HD channels, BoxOffice And DStv Catch Up available on selected packages.
• Data charges apply when connecting the DStv Explora to the internet. Visit dstv.com/GetConnected for full
Terms and Conditions.
• There is no DStv Catch Up or BoxOffice content when the DStv Explora is first installed. This content will
start downloading as soon as installation is complete. Please be patient while we download the latest
movies, series and more to your DStv Explora.
DStv Explora – features at a glance
• HD capable (720p and 1080i)
• Dolby Digital 2.0 capable
• BoxOffice
• DStv Catch Up
• Connect the Explora to the internet
for more DStv Catch Up and
Remote Recordings
• View one channel, while recording
another
• Record up to 220 hours
• Series Recording
• Multiple Search options
• Pause Live TV for up to 2 hours
• Fast Forward, Rewind, Instant
Replay and Slow Motion
• Favourite Channels (5)
• Subtitles when watching live TV,
after pausing TV, and on user
recordings (where available)
• User friendly HD menu
• New remote control, with easy to
use PVR buttons
• Parental Control
• Widescreen capable
• XtraView capable
Page 3

Welcome to your new world of extraordinary entertainment!
Congratulations on the purchase of your new DStv Explora!
The moment you connect your DStv Explora, is the moment your TV viewing experience surpasses all
your expectations.
TV on your terms. Record up to 220 hours of the world’s top content. You’ll never need to watch the
clock again.
Quality viewing. Watch your favourite series, movies, sporting events and more in crystal clear HD.
With more clarity and detail than ever before.
Movie nights. Rent a blockbuster movie from BoxOffice. And remember, the first one’s on us! All you
need to do is make the popcorn.
Catch up or find something new. There’s no reason to miss out on a moment of entertainment.
With hundreds of the hottest series, shows, movies, sporting highlights and more on DStv Catch Up,
you’ll never be lost for something to watch.
Discover. Use one of the many search features to discover even more great entertainment.
Easy to use. A new remote with buttons for all the big features, plus HD menus, make it a pleasure to
use.
Double duty. Link your new DStv Explora to another XtraView capable decoder to get access to more
than one channel in your home at the same time.
Get started by using this Quick Guide to familiarise yourself with the functions and features your new
DStv Explora has to offer.
Finally, visit dstv.com and register for a Connect ID which will allow you to manage your account, set
recordings on your DStv Explora when you’re away from home, clear errors and more.
An extraordinary world of entertainment awaits …
Page 4

1
DStv Explora Quick Guide
Contents
Getting Connected ...................................................................... 2
Getting Connected to the Internet ................................................. 4
Getting Started .......................................................................... 5
Personalising your DStv Explora ................................................... 6
DStv Explora Map ...................................................................... 7
BoxOffice .................................................................................. 9
DStv Catch Up ........................................................................... 10
The TV Guide ............................................................................. 12
Search ...................................................................................... 14
Instant Search ............................................................................ 15
Watching TV .............................................................................. 16
Listening to Audio Channels ......................................................... 19
Trickmodes ................................................................................ 20
Recordings ................................................................................ 21
Remote Recordings .................................................................... 23
Series Recordings ....................................................................... 24
The Playlist ............................................................................... 26
Apps ......................................................................................... 27
Parental Control ......................................................................... 28
Favourite Channels ..................................................................... 29
All about Icons ........................................................................... 30
Important Safety Information ....................................................... 34
Page 5
2
DStv Explora Quick Guide
Getting Connected
Quick Notes
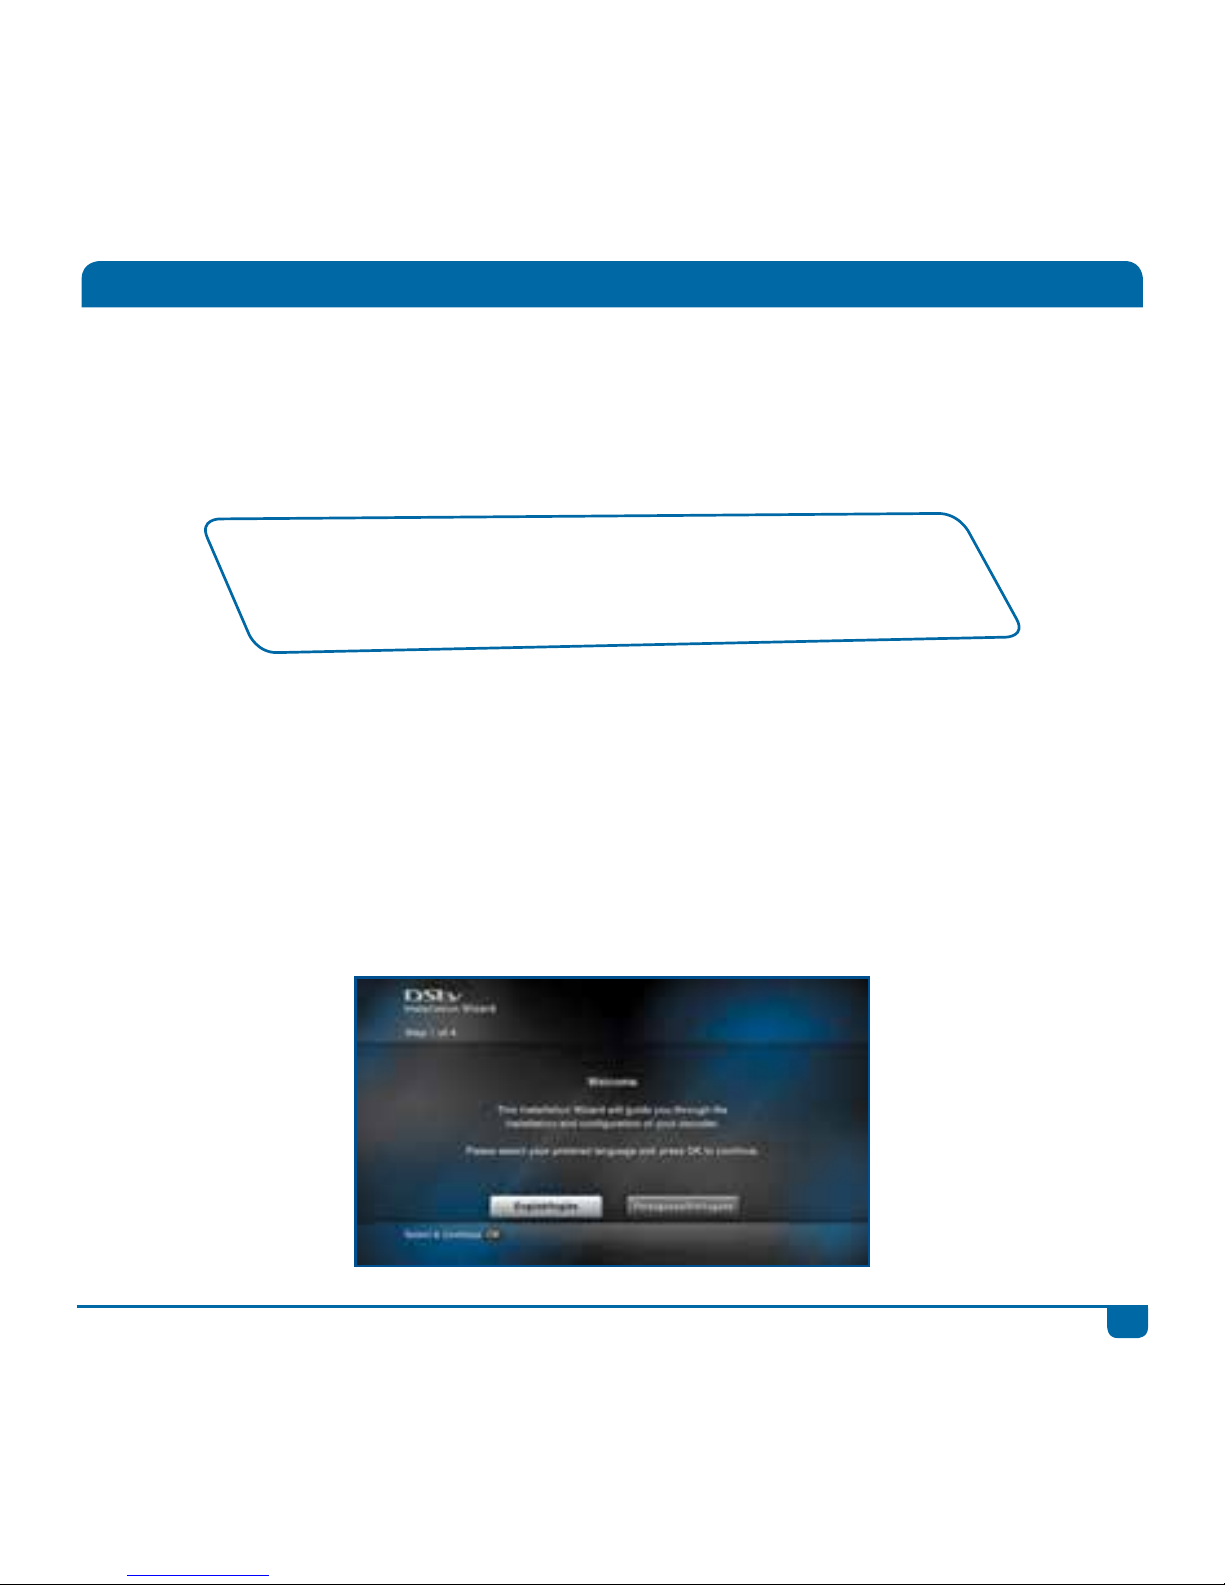
1. Once the DStv Explora has been correctly connected to the satellite dish and switched on, there
is an Installation Wizard to guide you through the first time set-up.
2. Remember, you will need to contact your nearest MultiChoice Call Centre to activate your new
DStv Explora.
3. There is no DStv Catch Up or BoxOffice content when the DStv Explora is first installed. This
content will start downloading as soon as installation is complete. Please be patient while we
download the latest movies, series and more to your Explora.
• We recommend the use of a DStv Accredited Installer for all installations.
• To find your local installer, visit dstv.com
• If your DStv Explora is installed with any other type of LNB, the
installation may require changes to receive future services.
NOTE! The performance of the DStv Explora and availability of all features is directly related to the
quality of the installation (including use of approved equipment and correct alignment of the satellite
dish).
Installation of the DStv Explora requires an 90cm satellite dish together with a DStv Smart LNB.
Page 6

3
DStv Explora Quick Guide
Getting Connected
Please wait for all three tuners to show signal on this screen,
before pressing OK to continue.
Quick Tip
Read through our helpful Quick Guide for the remote (also packaged with the
DStv Explora) to quickly learn about the different buttons and what they do.
Page 7

4
DStv Explora Quick Guide
Getting Connected to the Internet
The DStv Explora can now be connected to the internet for more DStv Catch Up. You’ll also be able
to schedule remote recordings when you’re away from home.
There are two ways to connect your DStv Explora to the internet.
Via Ethernet
If your DStv Explora is in the same room as your router, or if you want to connect it directly, you can
link them using an Ethernet cable (available from any electronic store).
Using our DStv WiFi Connector
If your DStv Explora isn’t in the same room as your router, or if you want to avoid running a cable
from your router to your DStv Explora, you can connect wirelessly using our DStv WiFi Connector.
Visit dstv.com/GetConnected for full instructions and step-by-step guidelines.
Quick Tips
• Data charges apply when connecting the DStv Explora to the internet and we
recommend an uncapped ADSL account, with a minimum 2Mbps download
speed. For the best experience, a download speed of at least 10Mbps is
recommended. Visit dstv.com/GetConnected for full Terms and Conditions.
Page 8

5
DStv Explora Quick Guide
This Quick Guide will help you find your way around the main features of your DStv Explora and get
you viewing in no time.
Five important things you need to know when using your new DStv Explora :
The DStv Explora has ONE central menu with all content and settings. Press the DStv
button to go straight to DStv Central. (See the DStv Explora Map for more info)
When looking for something to watch, use the hotlink buttons on your remote to go directly
to BoxOffice, DStv Catch Up, your Playlist, the TV Guide or Search.
With all the great content available, BoxOffice, DStv Catch Up and your Playlist have
folders allowing you to easily find what you’re looking for. The Planner also has folders, so
you can see all schedules or limit your view to just the reminders or one of the other options.
There’s also series stacking, which groups episodes in a season together (available in both
your Playlist and DStv Catch Up).
Press OK on any programme name to see the list of available actions. These range
from being able to schedule recordings, set reminders and even getting a list of when a
programme will be aired again over the next 8 days.
To change viewing options (like language and aspect ratio), press OPTIONS. Pressing this
same button when viewing a list, lets you change the sort order or how the information is
displayed.
Getting Started
Page 9
6
DStv Explora Quick Guide
Personalising your DStv Explora
We recommend that you personalise the settings on your new DStv Explora to have the best
possible viewing experience.
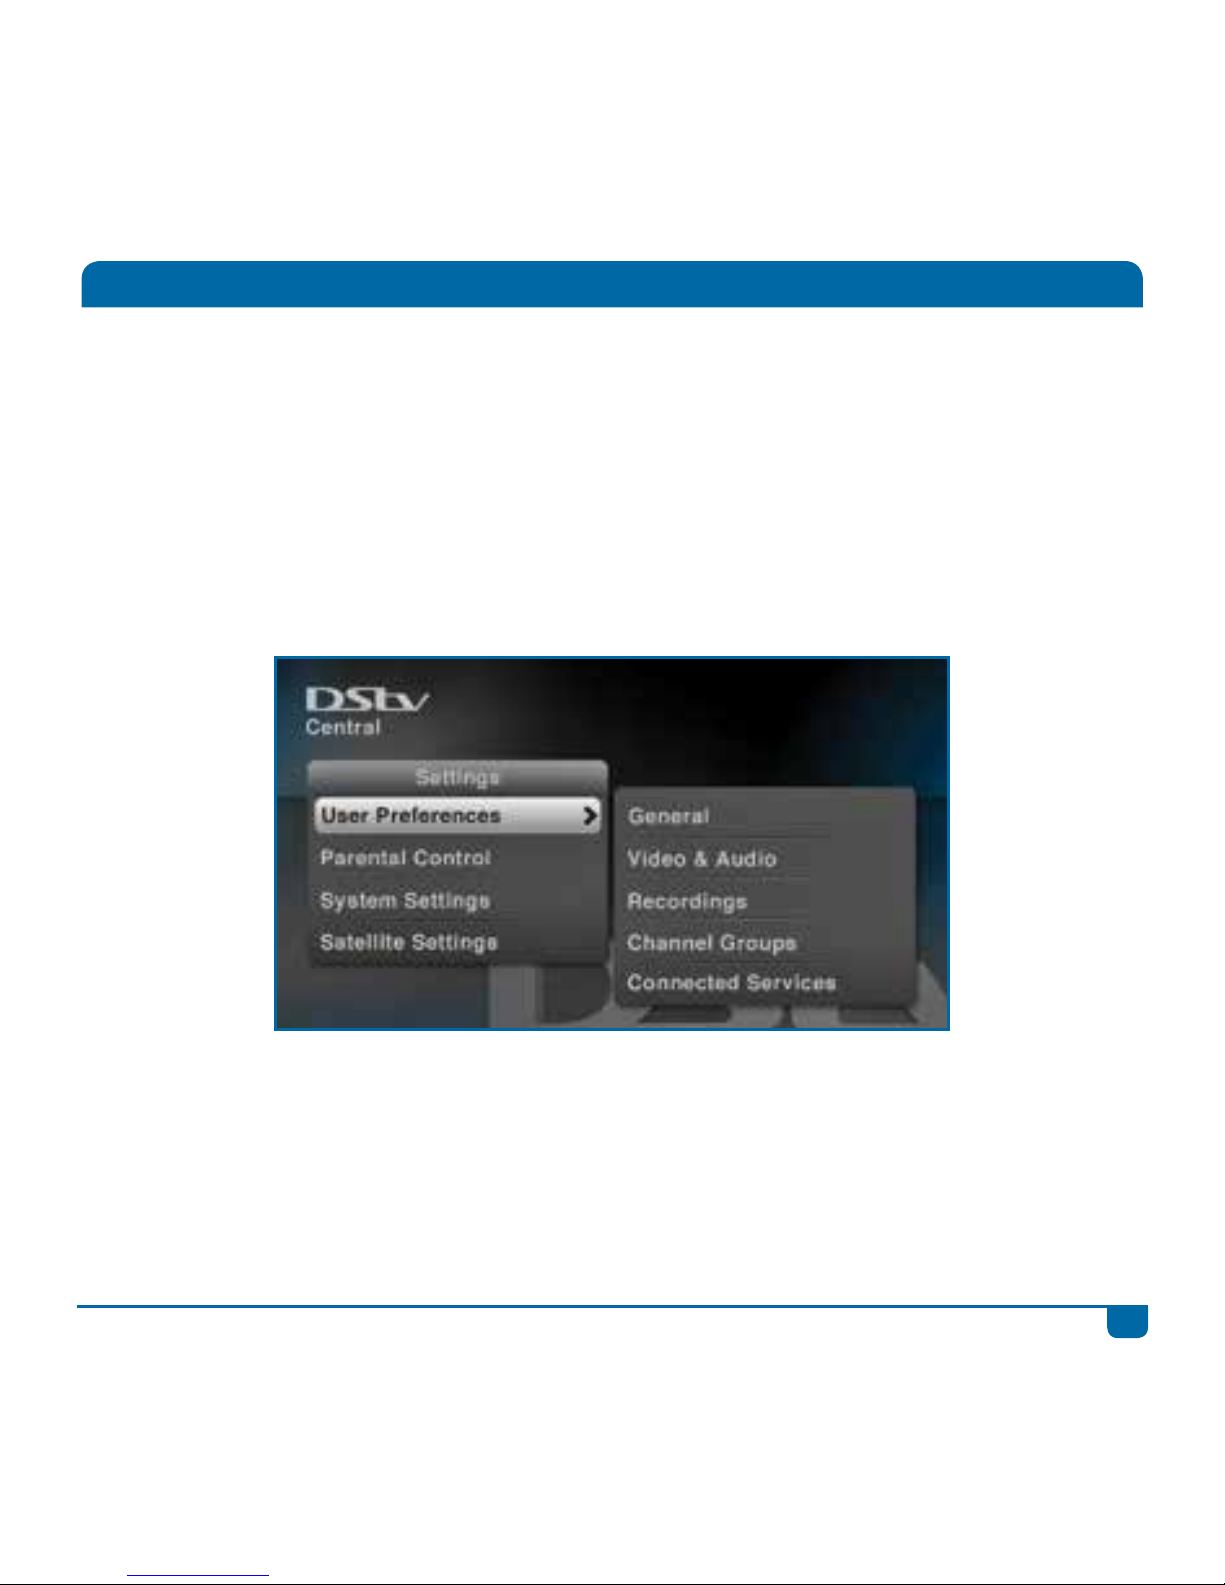
Press the DStv button and go to “User Preferences” in “Settings” to set your preferences for default
language, aspect ratio, recording defaults and more.
If you have connected your DStv Explora to the internet, use Connected Services on this menu to
enable the features.
Page 10

7
DStv Explora Quick Guide
DStv Explora Map
Just Added Watch Now
• Playlist
• BoxOffice
• DStv Catch Up
• Go to Live TV
• Audio Channels
Search
• Movies
• Series
• Sport
• Theme Search
• Word Search
• Advanced Search
Planner
• Schedules
• Season Manager
• Get Connected/
Downloads
• Create Manual
Recording
• TV Guide
Central
Just Added
A quick snapshot of the latest DStv Catch Up
and BoxOffice titles on your DStv Explora.
Watch Now
Everything that you can watch – all in one place!
Catch up on your favourite series, rent a movie,
download a show, watch something you’ve
recorded, tune to live TV or listen to one of the
many audio channels on offer. Remember you
can also go directly to BoxOffice, DStv Catch
Up or your Playlist using the hotlink buttons on
your remote.
Search
Explore our world of entertainment using one
of the search options available. You can also go
directly to Search using the hotlink button on
your remote.
Planner
Everything you need to do your planning – all in
one place! Check your schedules, manage your
series recordings or look through the TV Guide.
Remember, you can also go directly to the TV
Guide using the hotlink button on your remote.
Press
to access DStv Central at any time
Page 11
8
DStv Explora Quick Guide
Apps
• News24
• Weather
• SuperSport
Active
• Brands On
Demand
Etc...
Settings
• User Preferences
• Parental Control
• System Settings
• Satellite Settings
Help
• Contact Us
• Mail Messages
• General
Information
• Tools
• Explora Videos
Apps
Your one stop access to all the interactive
services available on your DStv Explora.
Press OK while watching TV for quick access to
the list of available apps.
Settings
This section of the menu includes all settings
that you can personalise, together with Parental
Control, Satellite Settings and more. This is also
where you enable the Connected Services.
Help
Here you can find our contact details, your mail
messages as well as Information Central (which
you need when contacting our call centre). You
can also test the internet connection on your
DStv Explora here.
Page 12
9
DStv Explora Quick Guide
BoxOffice
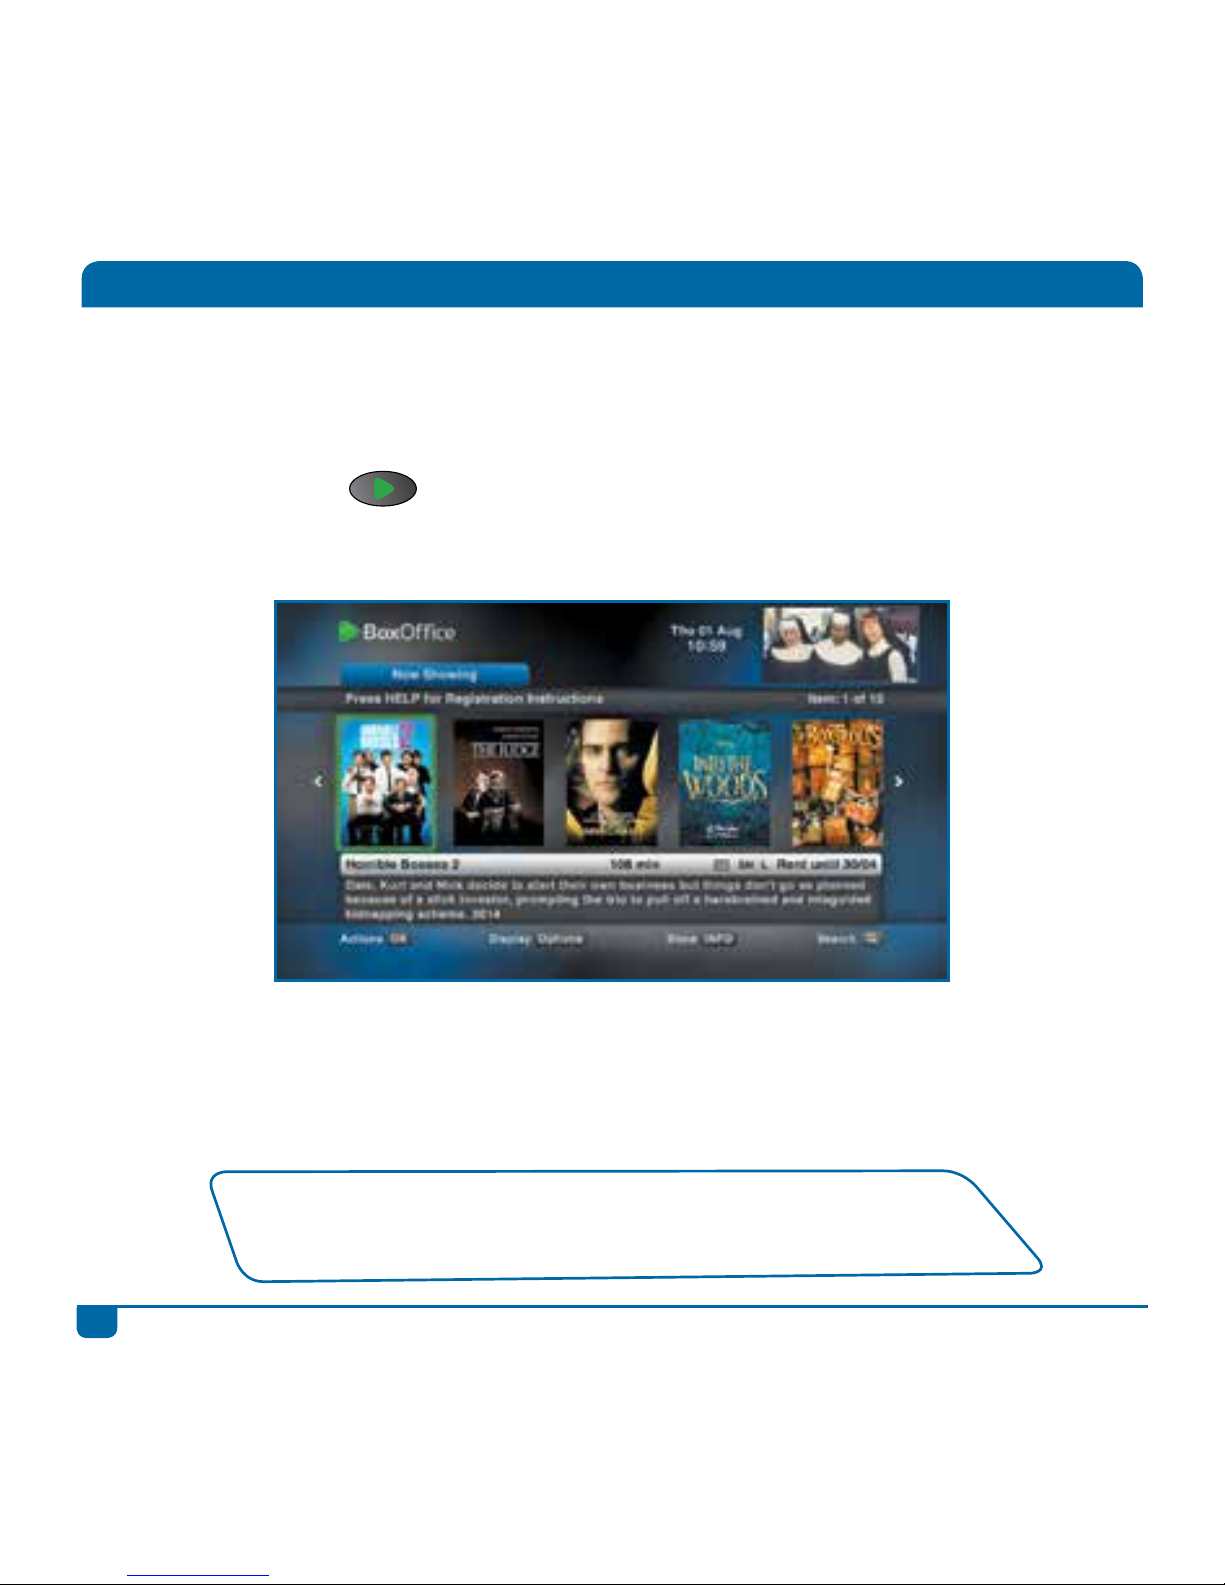
Rent blockbuster movies from the comfort of your home with BoxOffice, and keep them for 48
hours. With a selection of the hottest movies available to rent and watch instantly on your DStv
Explora, there’s never been a better time to plan a big night in.
Press the BOXOFFICE
button to go directly to the selection of available movies.
Note: BoxOffice is only available in selected countries on selected packages.
Press SEARCH to quickly find a BoxOffice movie.
Visit dstv.com/boxoffice for more information and for other great ways to enjoy the freshest
movies.
There are no BoxOffice movies listed when the DStv Explora is first installed. The
movies will start downloading as soon as installation is complete. Please be patient
while we download these to your DStv Explora.
Page 13
10
DStv Explora Quick Guide
DStv Catch Up
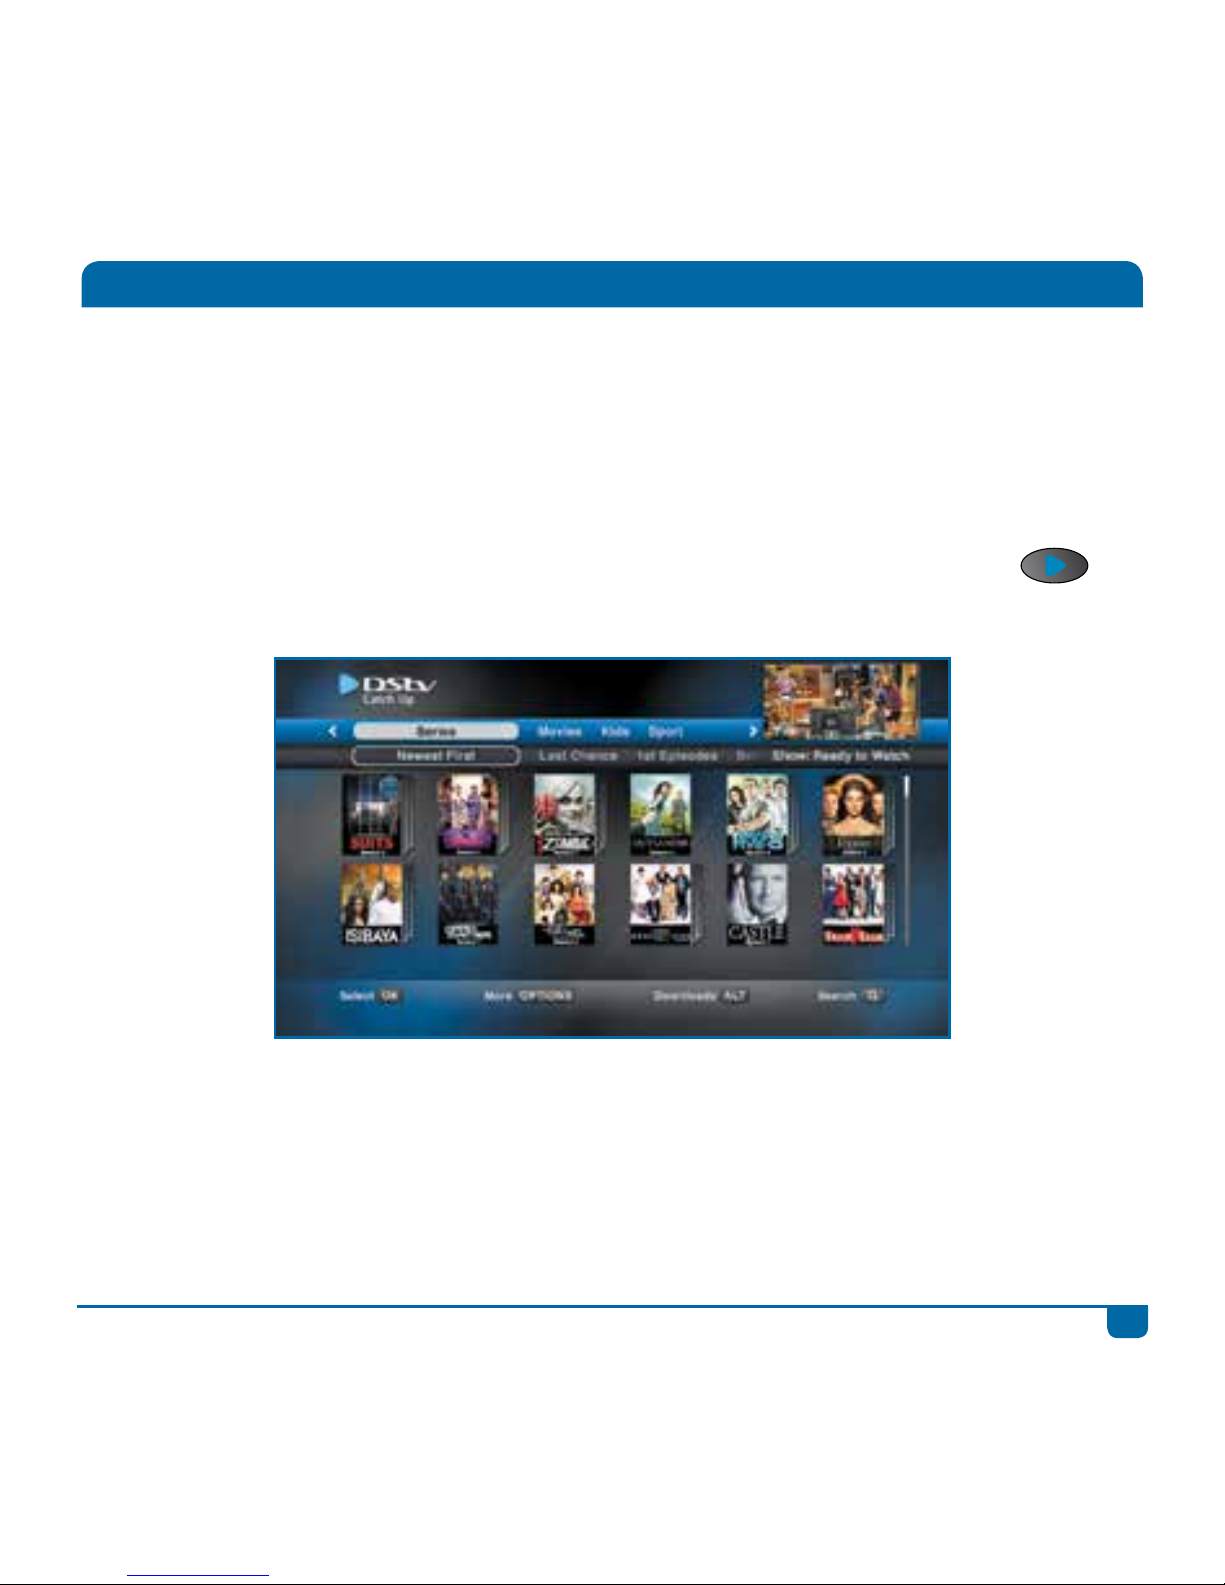
With DStv Catch Up, there’s never a reason to miss your favourite show.
Catch up on a selection of series, movies, kids’ entertainment, sports highlights, reality shows and
more. And for many series, we have series stacking (with multiple episodes available), so you can
snuggle up on the couch for an afternoon of binge viewing.
We also have Express from the U.S. which brings you the hottest new series – ready for you to
watch within 24 hours of the U.S. broadcast. It’s TV on your terms. Press the CATCH UP
button for quick access to all the latest programming we’ve recorded for you.
Press SEARCH to quickly find what you’re looking for on DStv Catch Up.
Page 14
11
DStv Explora Quick Guide
DStv Catch Up
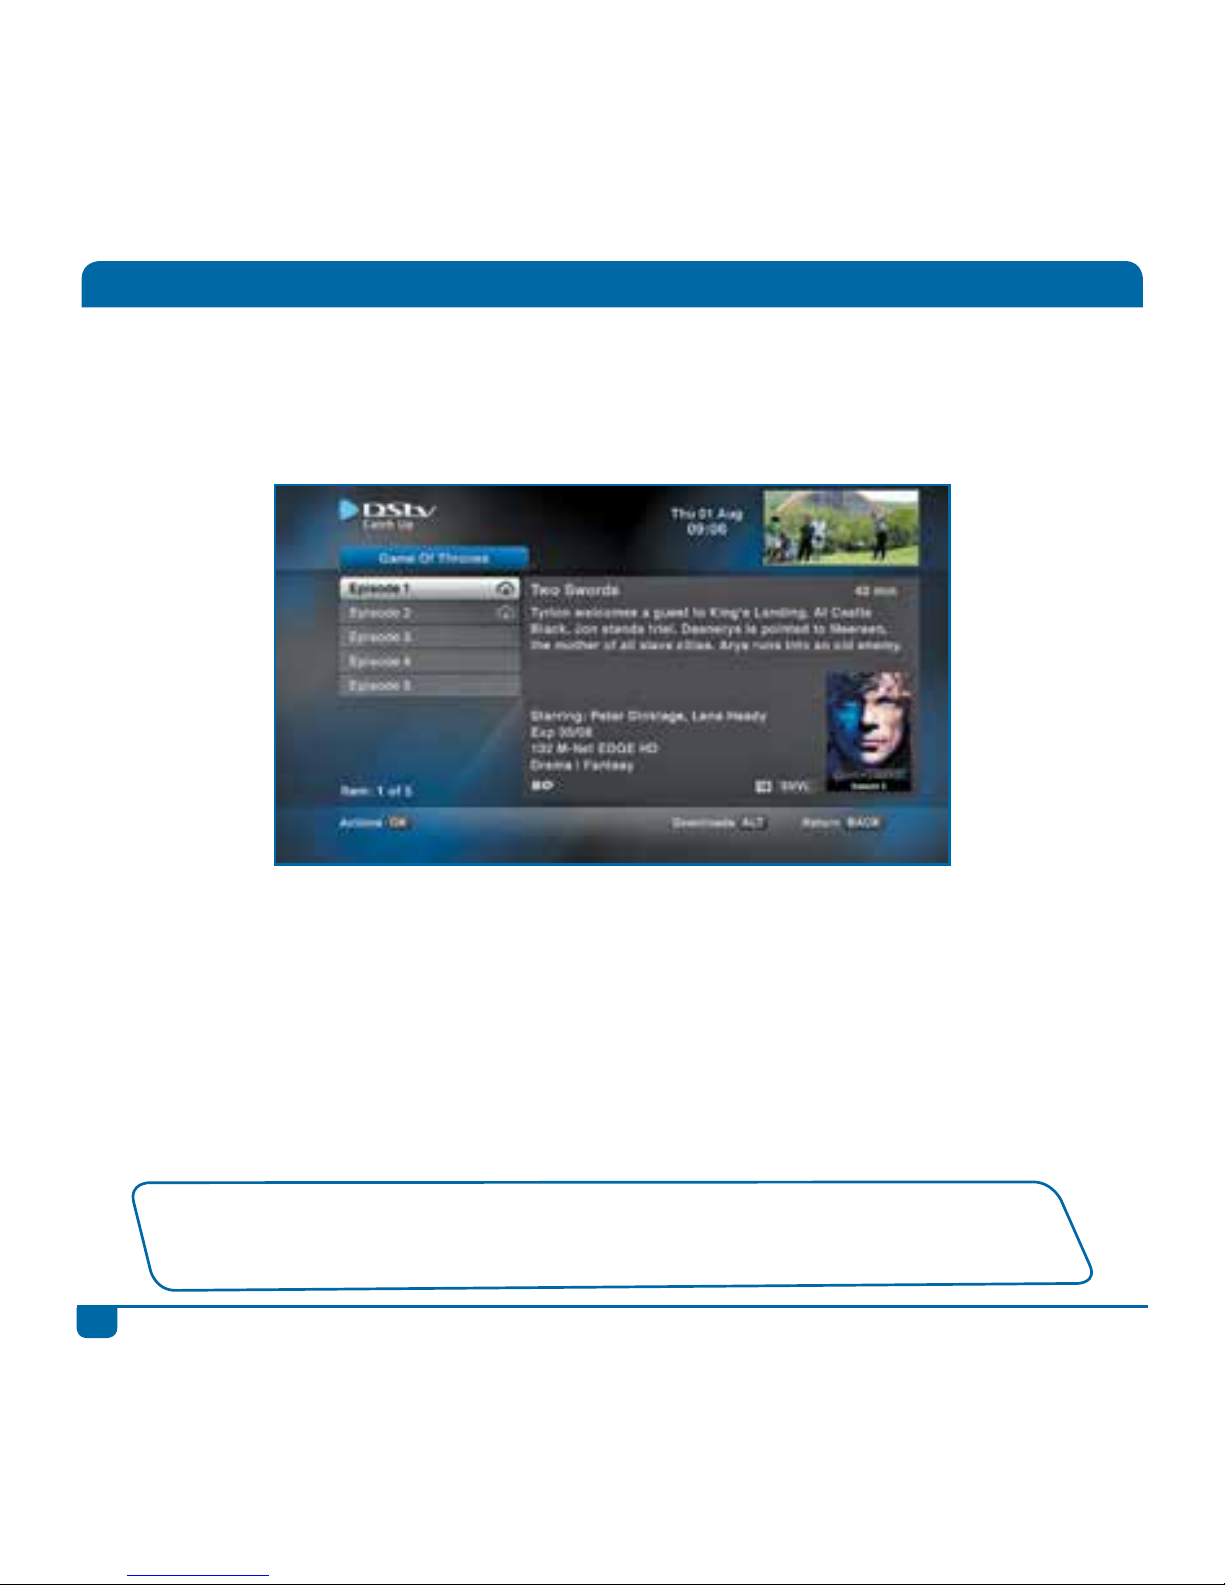
When you connect your DStv Explora to the internet, you’ll discover extra Catch Up titles including
series, movies, sports, kids’ shows and exclusive entertainment – all downloadable straight to your
DStv Explora to watch in your own time.
Note: DStv Catch Up is only available in selected countries on selected packages.
Visit dstv.com/catchup for more information and for other great ways to enjoy the best of DStv
Catch Up.
There are no DStv Catch Up titles listed when the DStv Explora is first installed. These will start
downloading as soon as installation is complete. Please be patient while we download the latest movies,
series and more to your DStv Explora.
Page 15
12
DStv Explora Quick Guide
The TV Guide
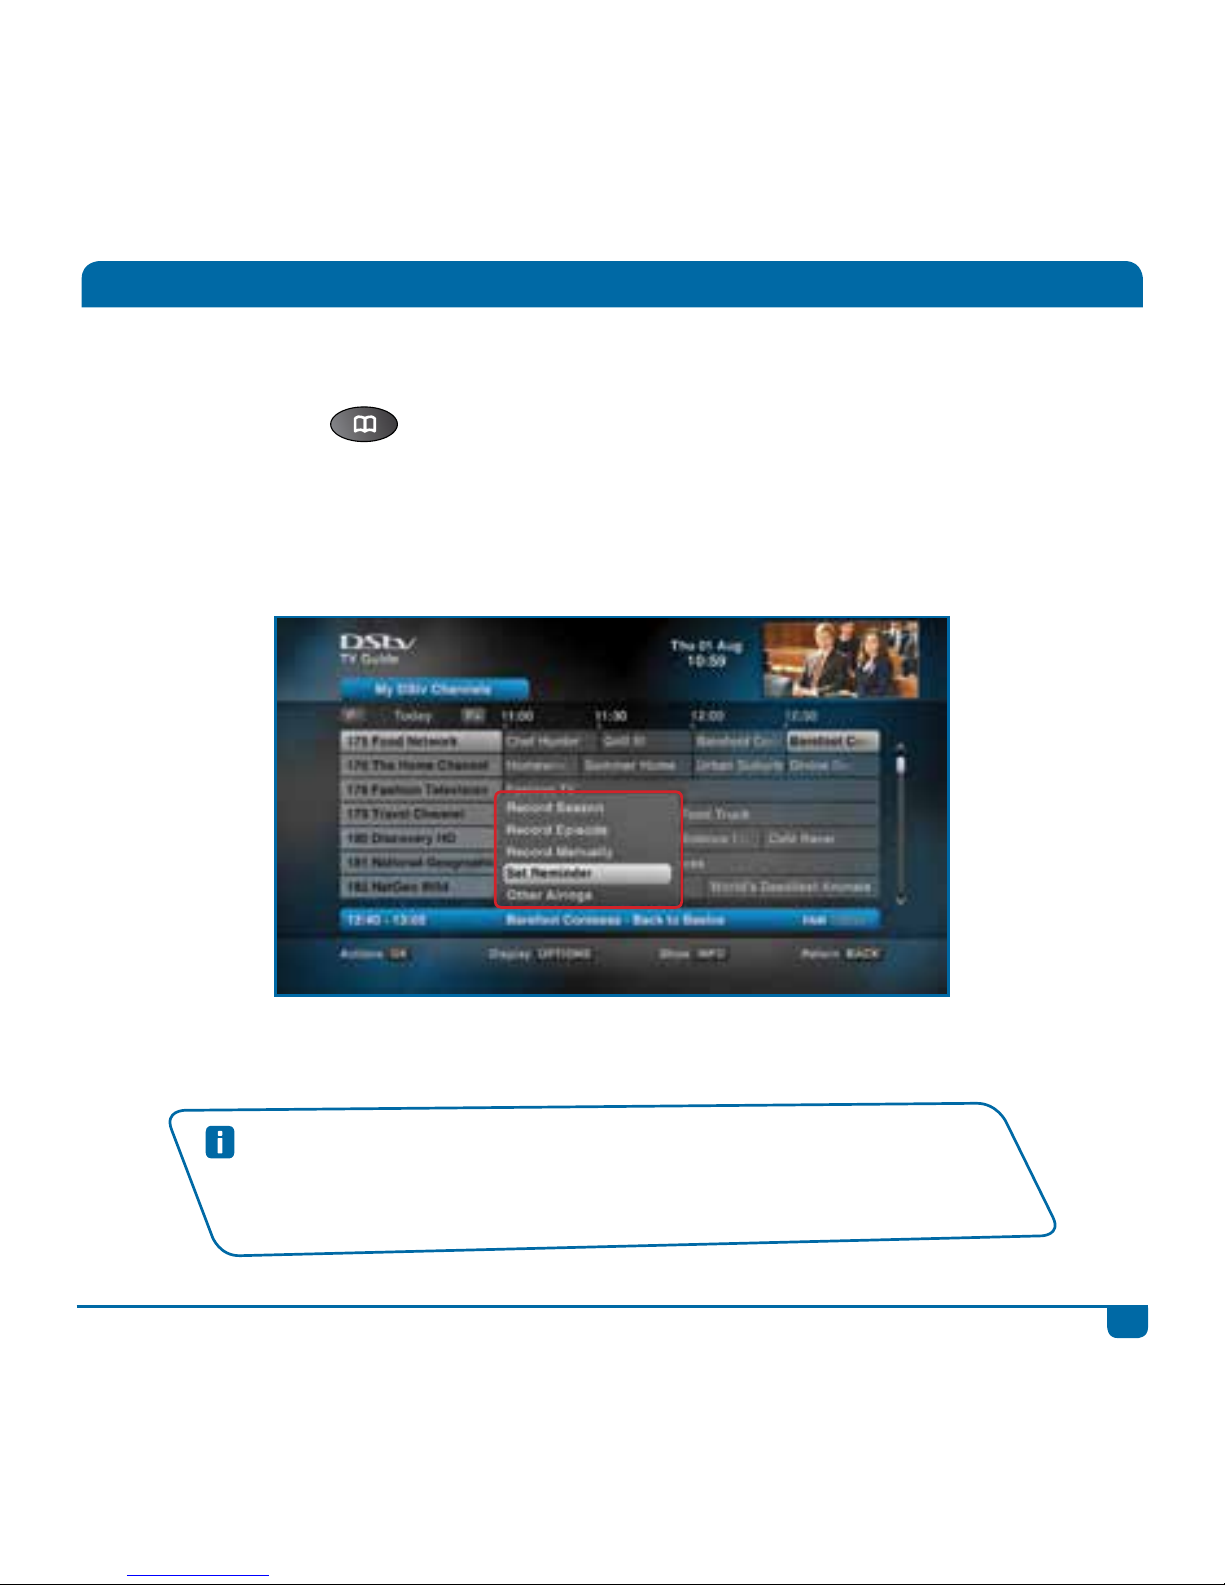
The TV Guide lists 8 full days of programming information, allowing you to easily plan your viewing.
Press the TV GUIDE
button for quick access to our programme schedules.
Press OK on any programme to see the available actions. You can set reminders, schedule
recordings and find out when the programme will be aired again over the next 8 days.
Quick Tips
• Press OPTIONS to change the way the schedules are displayed.
• Press P+ / P- to jump 24 hours at a time.
• Enter a channel number to quickly jump to schedules for a specific channel.
Page 16
13
DStv Explora Quick Guide
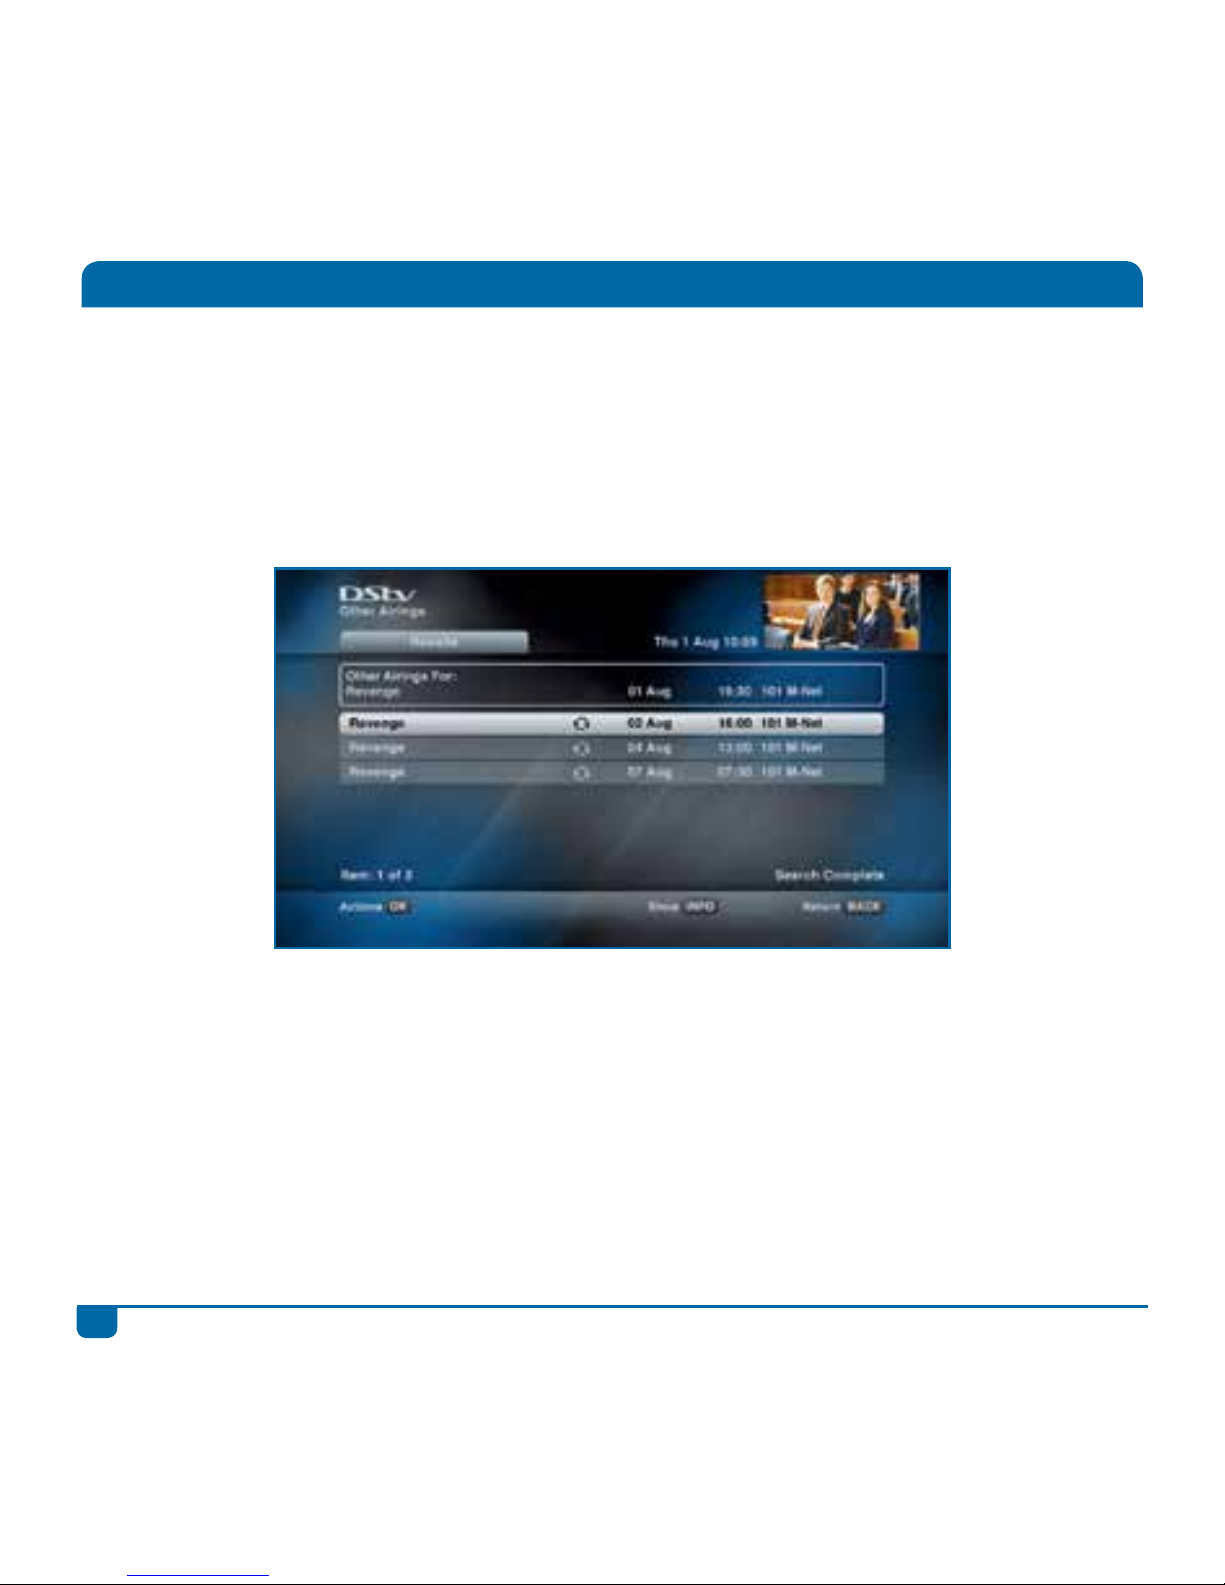
A great feature of the DStv Explora is being able to find out when a programme is on again within
the next 8 days.
If you see a programme that you missed (or that clashes with something else you’re already
recording), press OK on the programme and select Other Airings to see when the programme is on
again in the next 8 days.
You can then schedule a recording on one of these alternatives to ensure that you don’t miss out on
your favourite programme.
The TV Guide
Page 17
14
DStv Explora Quick Guide
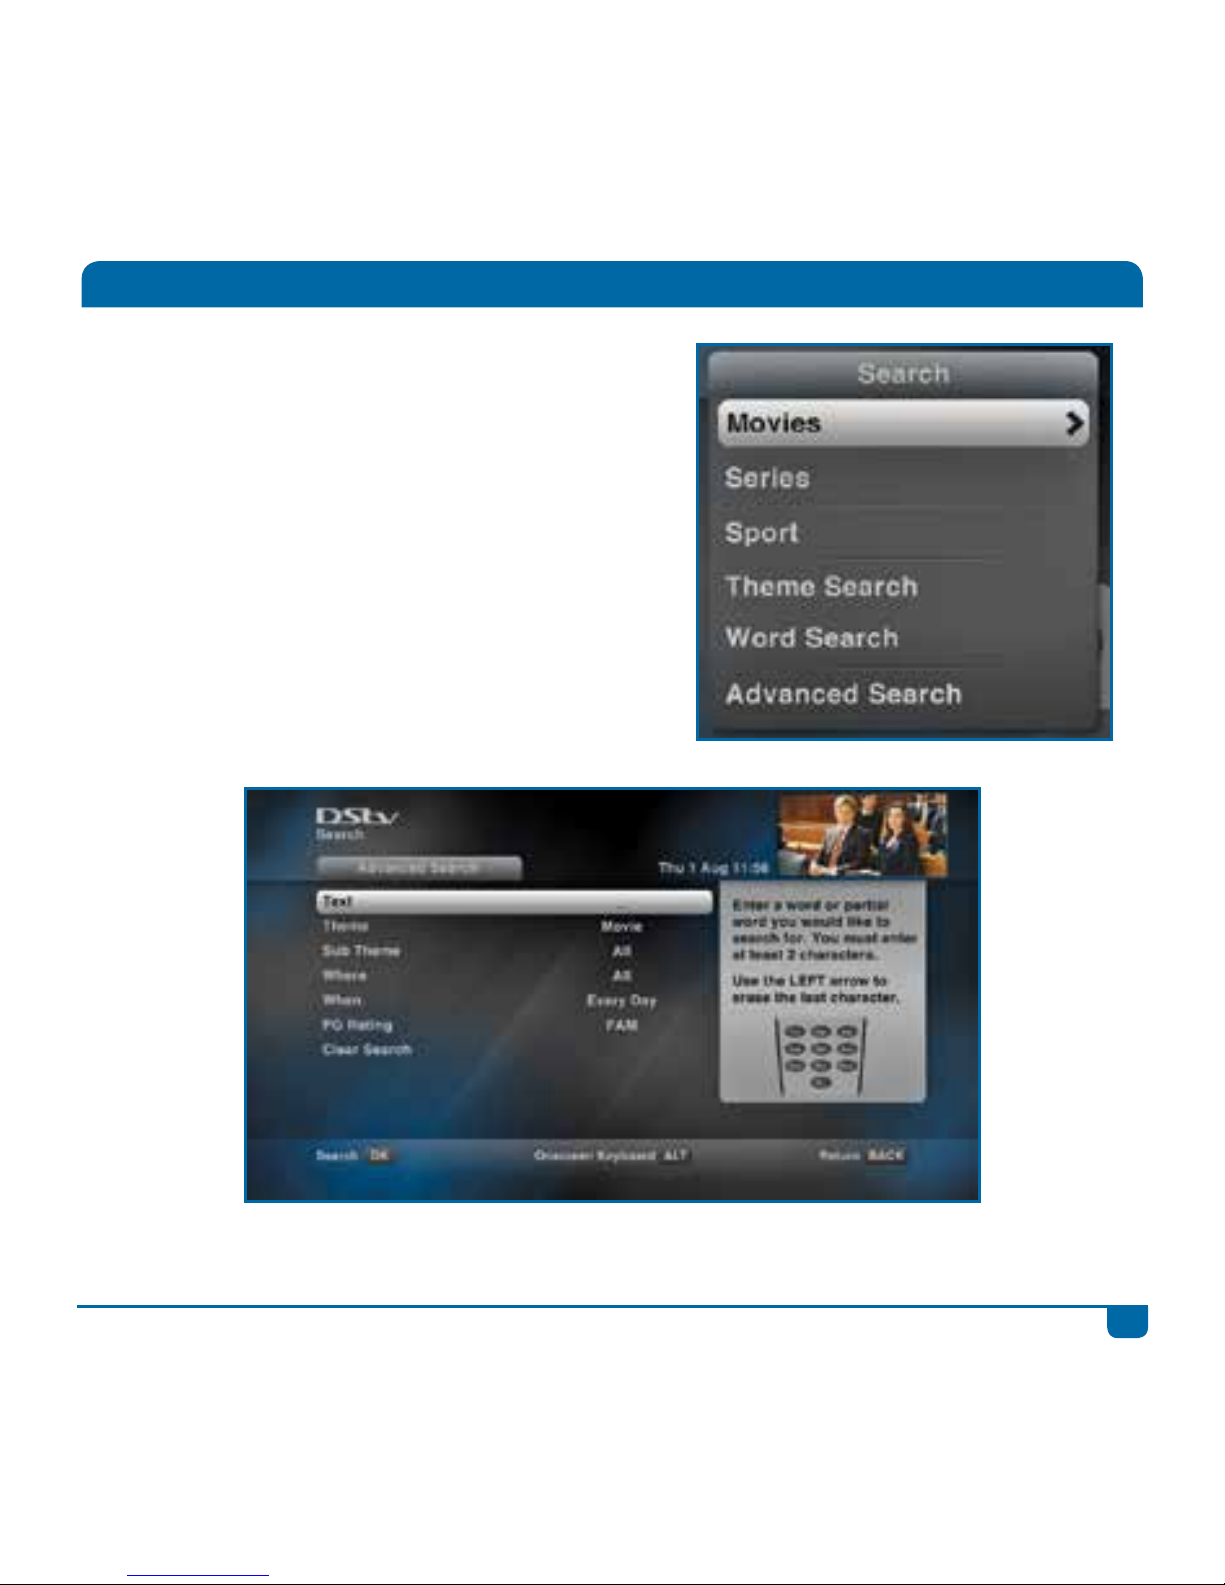
Search
Sit back and discover great entertainment with our
easy to use Search.
Press SEARCH to see all the options available.
You can find movies by genre, the newest series, what
live sport is coming up or what movies are starting in
the next hour.
There’s also Advanced Search to help you find exactly
what you’re looking for. You can even filter the results
by PG rating. It’s that easy.
Page 18
15
DStv Explora Quick Guide
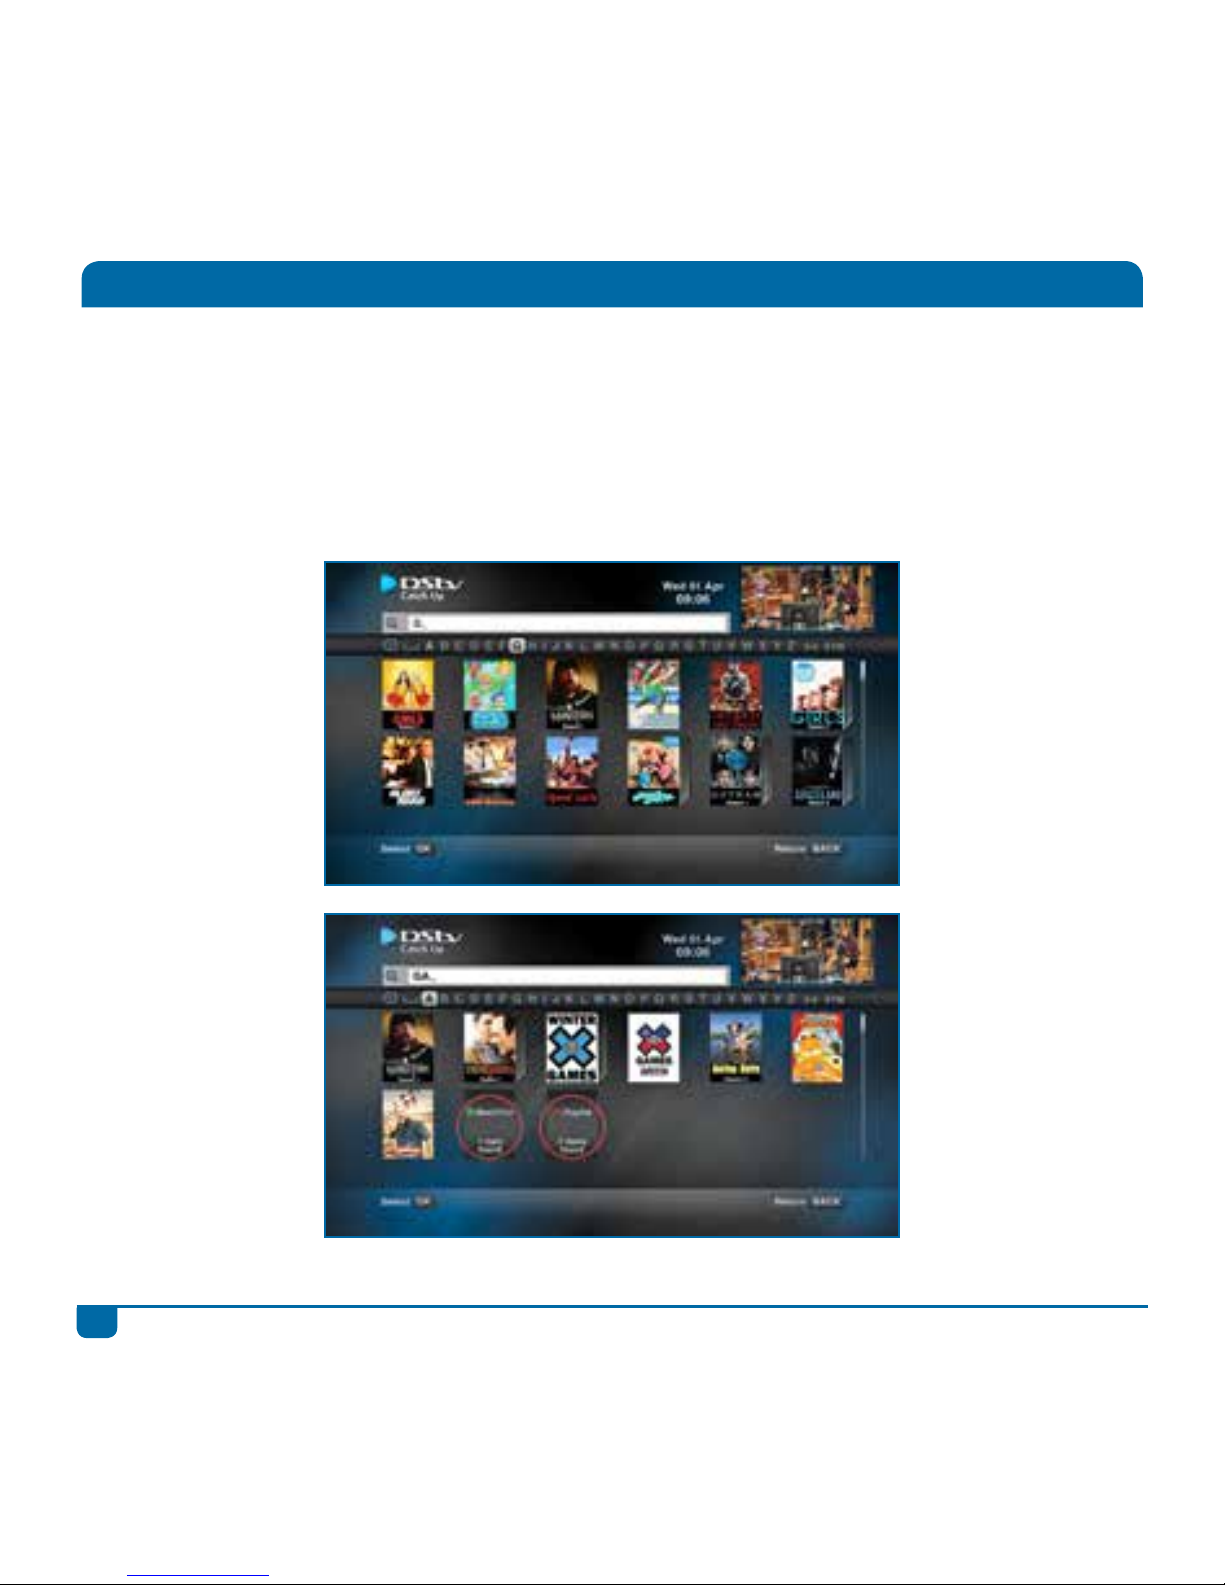
Instant Search
With so much great content, we’re making it easier for you to find what you’re looking for!
When you’re in your Playlist, DStv Catch Up or BoxOffice, just hit the SEARCH button to access
Instant Search.
Enter any word from the title (using the onscreen keyboard or by using the SMS buttons on your
remote) and we’ll instantly show you matching results.
We even show you matching titles in the other two sections.
Page 19
16
DStv Explora Quick Guide
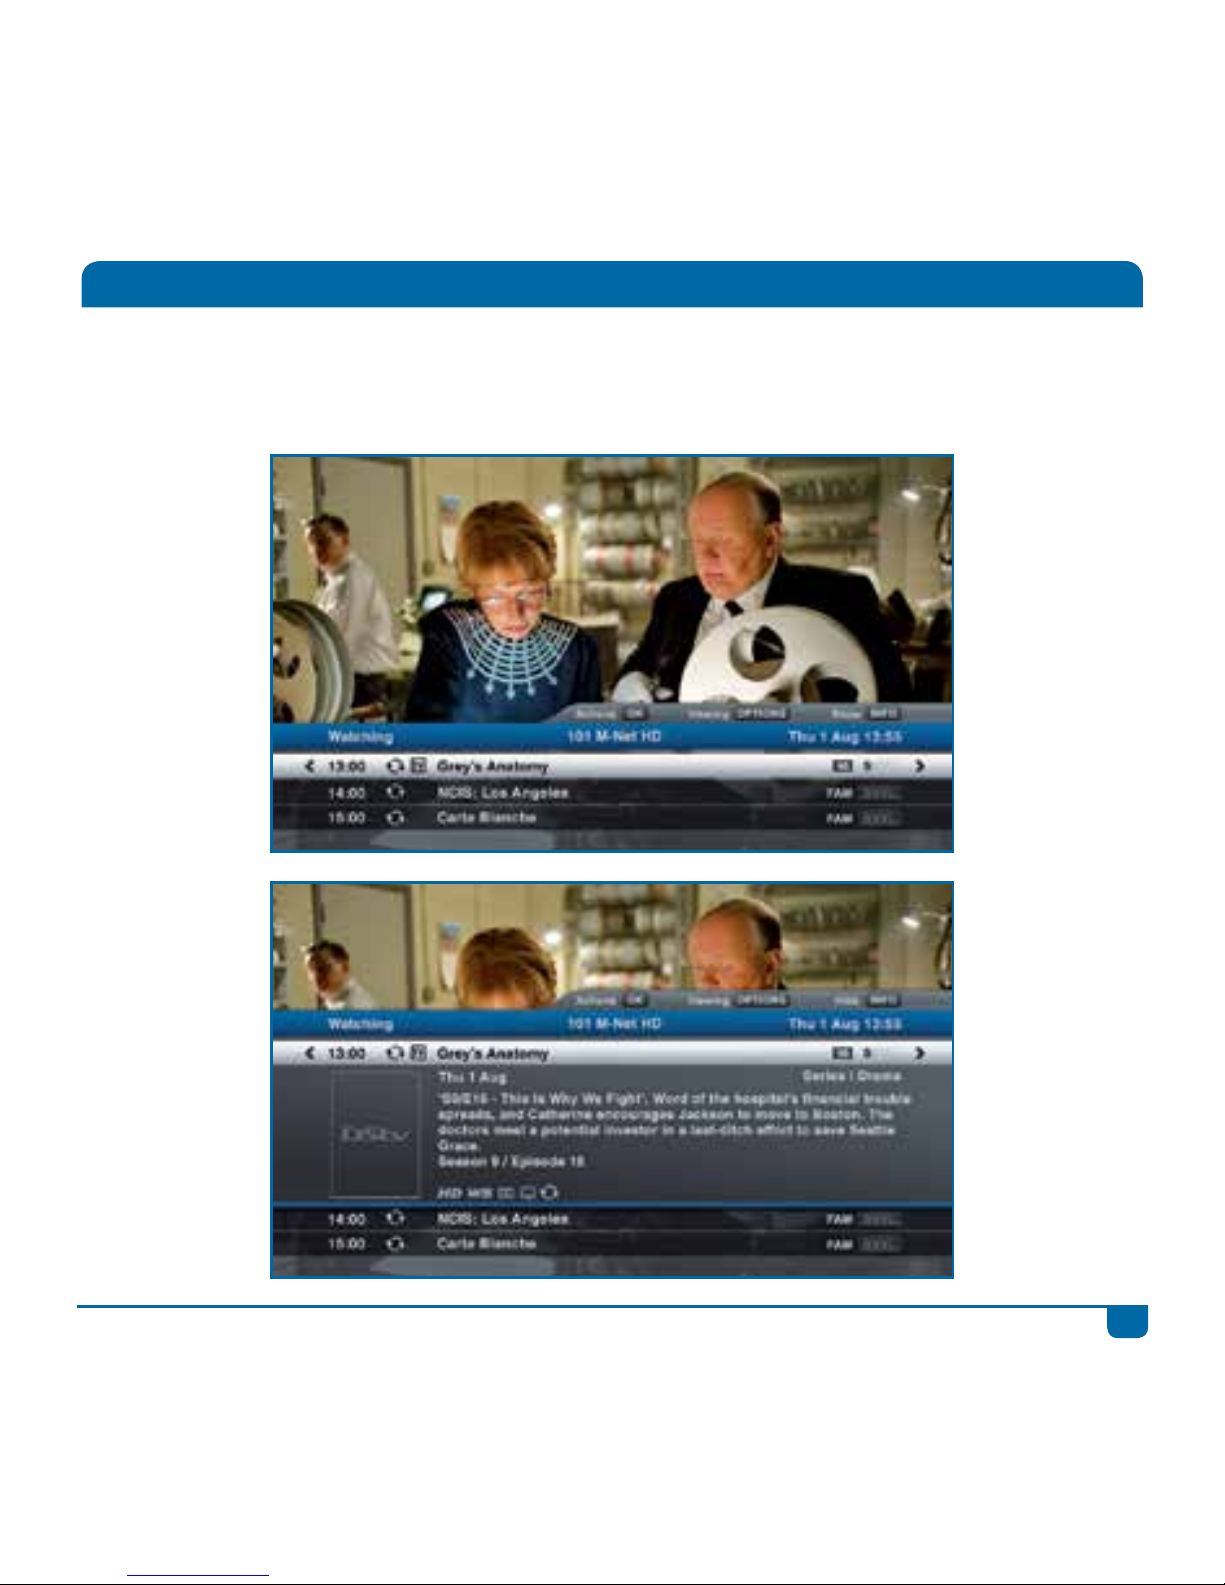
Watching TV
To see the title of the programme you’re watching, press i. For additional information about the
programme, press i again.
Page 20
17
DStv Explora Quick Guide
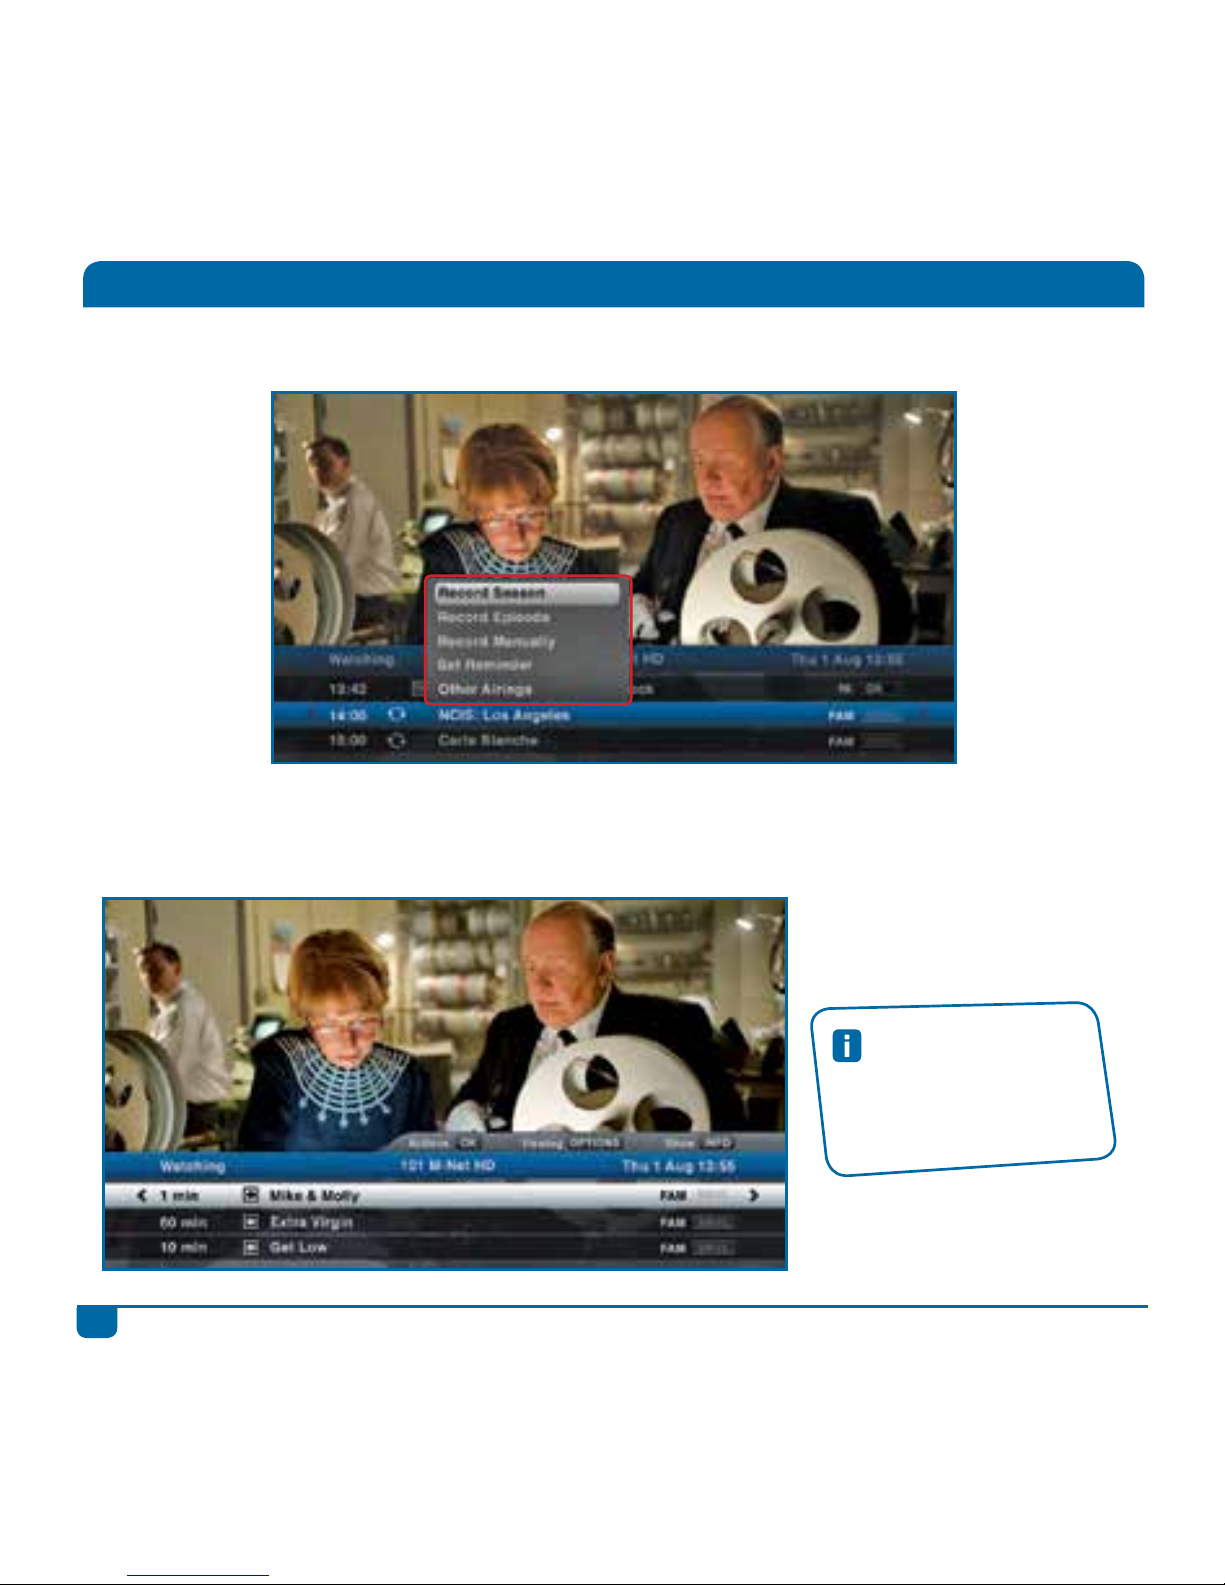
Press OK on any programme to see the available actions.
You can also press the UP arrow when the i-Plate is displayed to see the content in the buffer (the
DStv Explora keeps the last 2 hours of viewing so that you can rewind at any time.)
Watching TV
Quick Tip
Arrow DOWN to see
programming info for
a full 24 hours on any
channel.
Page 21
18
DStv Explora Quick Guide
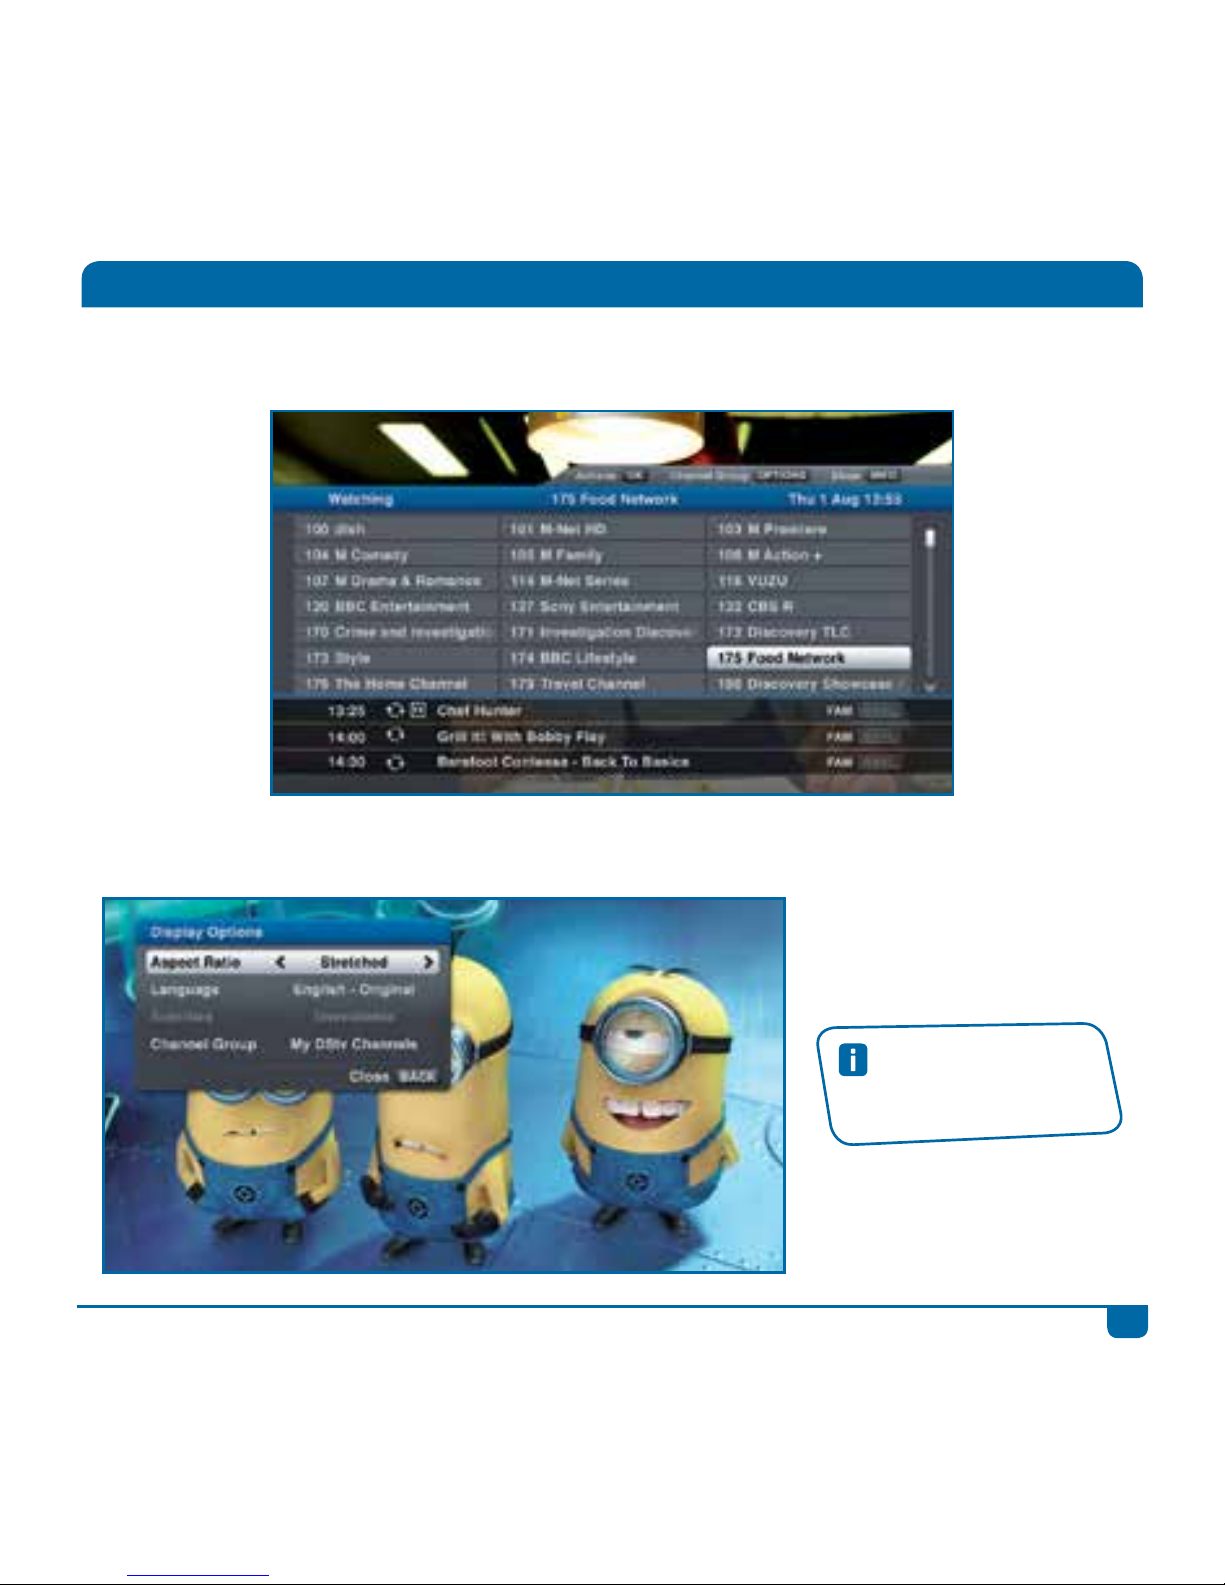
To see what’s on other channels, press GRID and use the arrows to move the highlight. You can also
press OK to tune to a selected channel.
To change the aspect ratio, select another language or to display subtitles, press OPTIONS.
Watching TV
Quick Tip
To change aspect ratio
on the fly, press ARC.
Page 22
19
DStv Explora Quick Guide
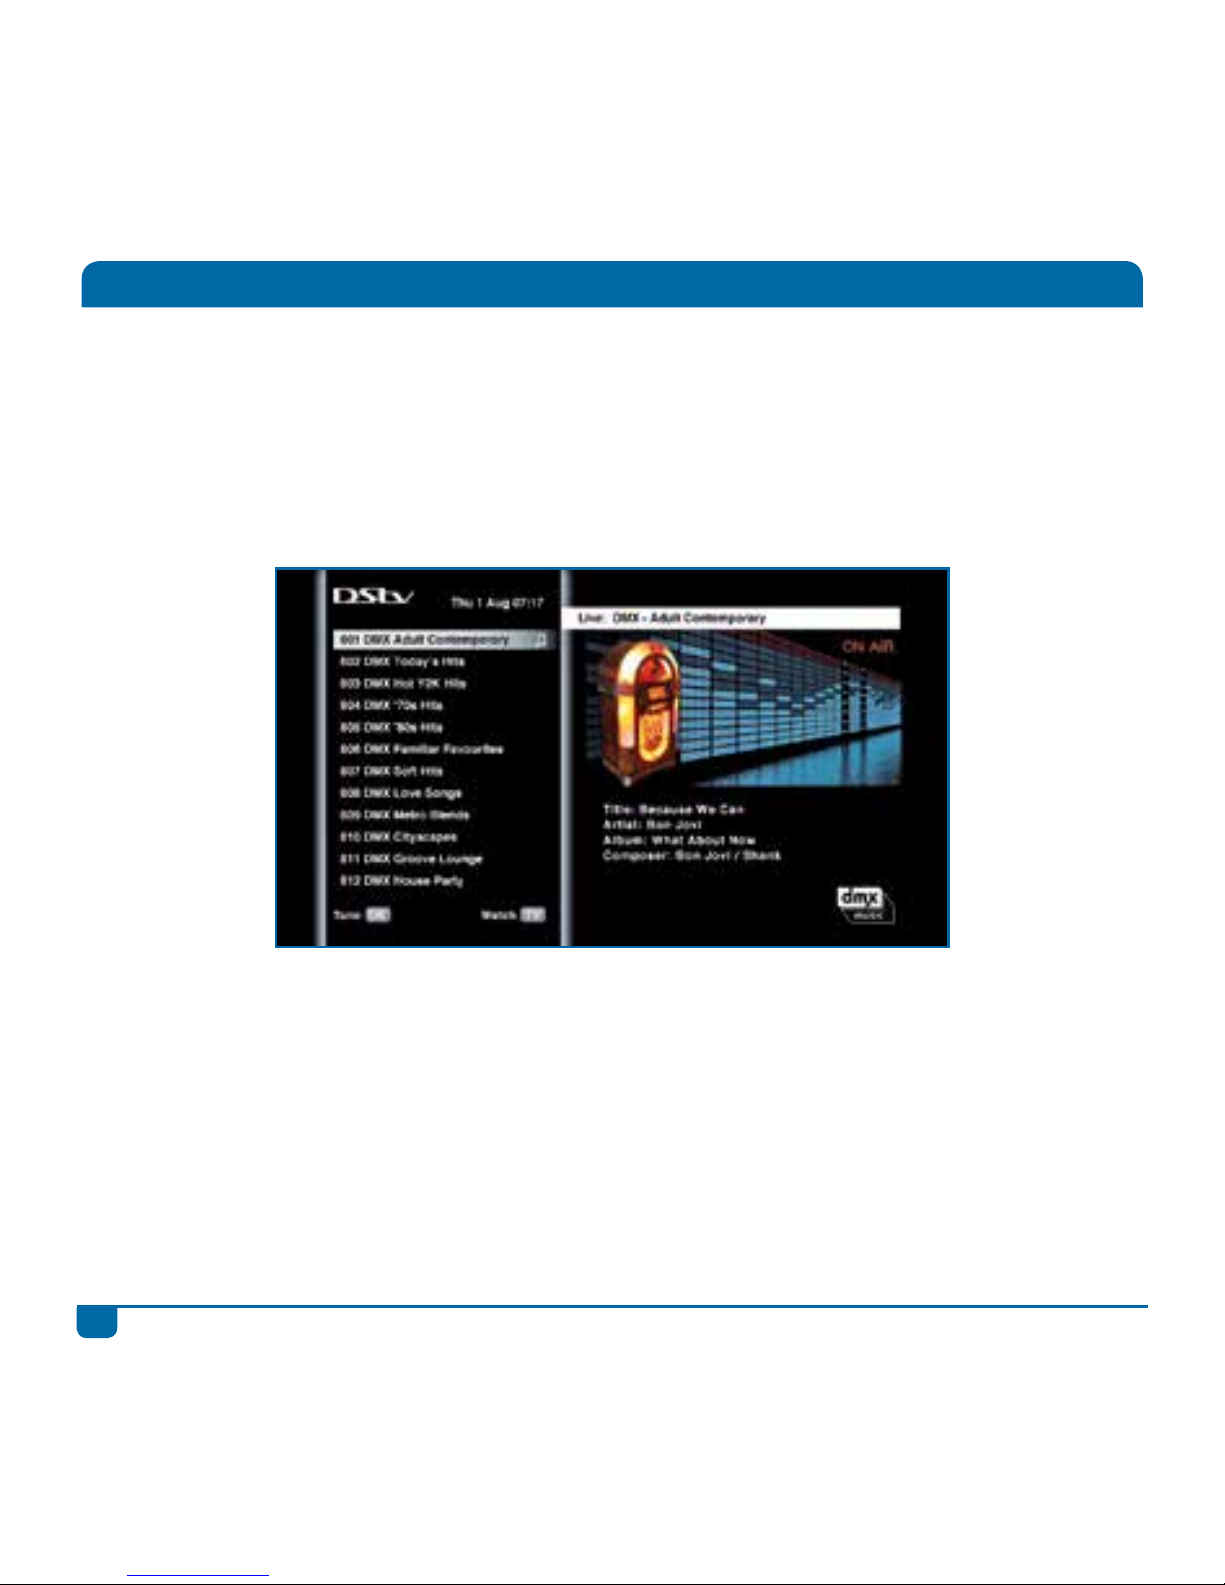
DStv offers a wide range of audio channels. It’s now easy to access and listen to your favourite radio
station or DMX channel.
• When watching TV, enter the number of the audio channel on the remote, or
• Press GRID, find the audio channel you want to go to and press OK, or
• Press the DStv button, select “Watch Now”, go to “Audio Channels” and press OK
To quickly return to live TV, press the TV button.
Listening to Audio Channels
Page 23
20
DStv Explora Quick Guide
Trickmodes
Need to answer the phone, but don’t want to miss a thing? Press PLAY/PAUSE and the DStv
Explora will wait for you to come back. You can pause live TV for up to 2 hours!
To resume viewing, just press PLAY/PAUSE again.
To fast forward, press FF once to fast forward slowly, and again (up to three times) to fast forward at
the maximum speed. Press PLAY/PAUSE to resume viewing.
To rewind, press REW once to rewind slowly, and again (up to three times) to rewind at the
maximum speed. Press PLAY/PAUSE to resume viewing.
And if you want to watch that unbelievable goal again or catch what the villain just said, press
REPLAY to jump back 10 seconds. Each time you press REPLAY, the video jumps back another 10
seconds.
Now that you’ve seen the goal, you’ll want to watch it in slow motion - press and hold the
PLAY/PAUSE button to activate Slow Motion. Then press FF or REW to view the video in
slow motion at various speeds.
Quick Tip
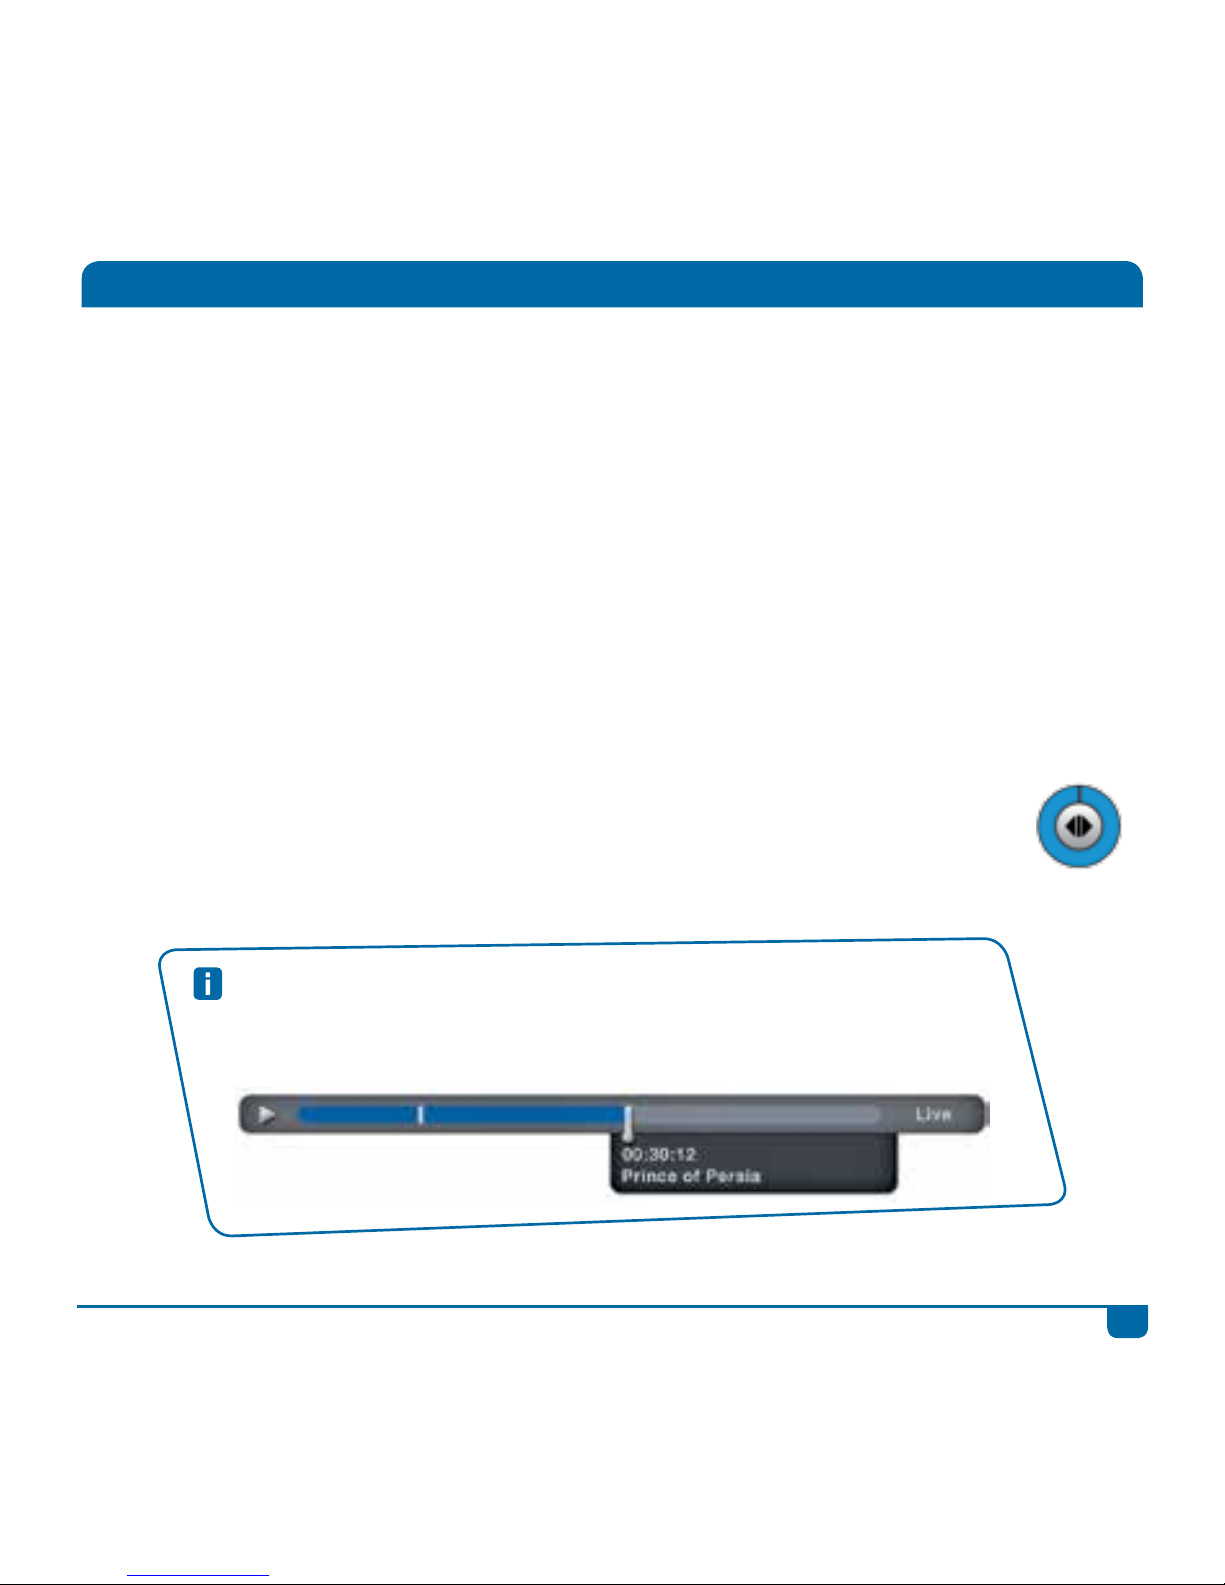
You can also use the Status Bar to “jump” through content. When watching any
programme, press STATUS BAR. Use FF or REW to quickly move through the content,
or use the LEFT/RIGHT arrows to jump to the bookmarks.
Page 24
21
DStv Explora Quick Guide
Recordings
The DStv Explora allows you to record up to 220 hours of your favourite programming, ensuring that
you always have something to watch.
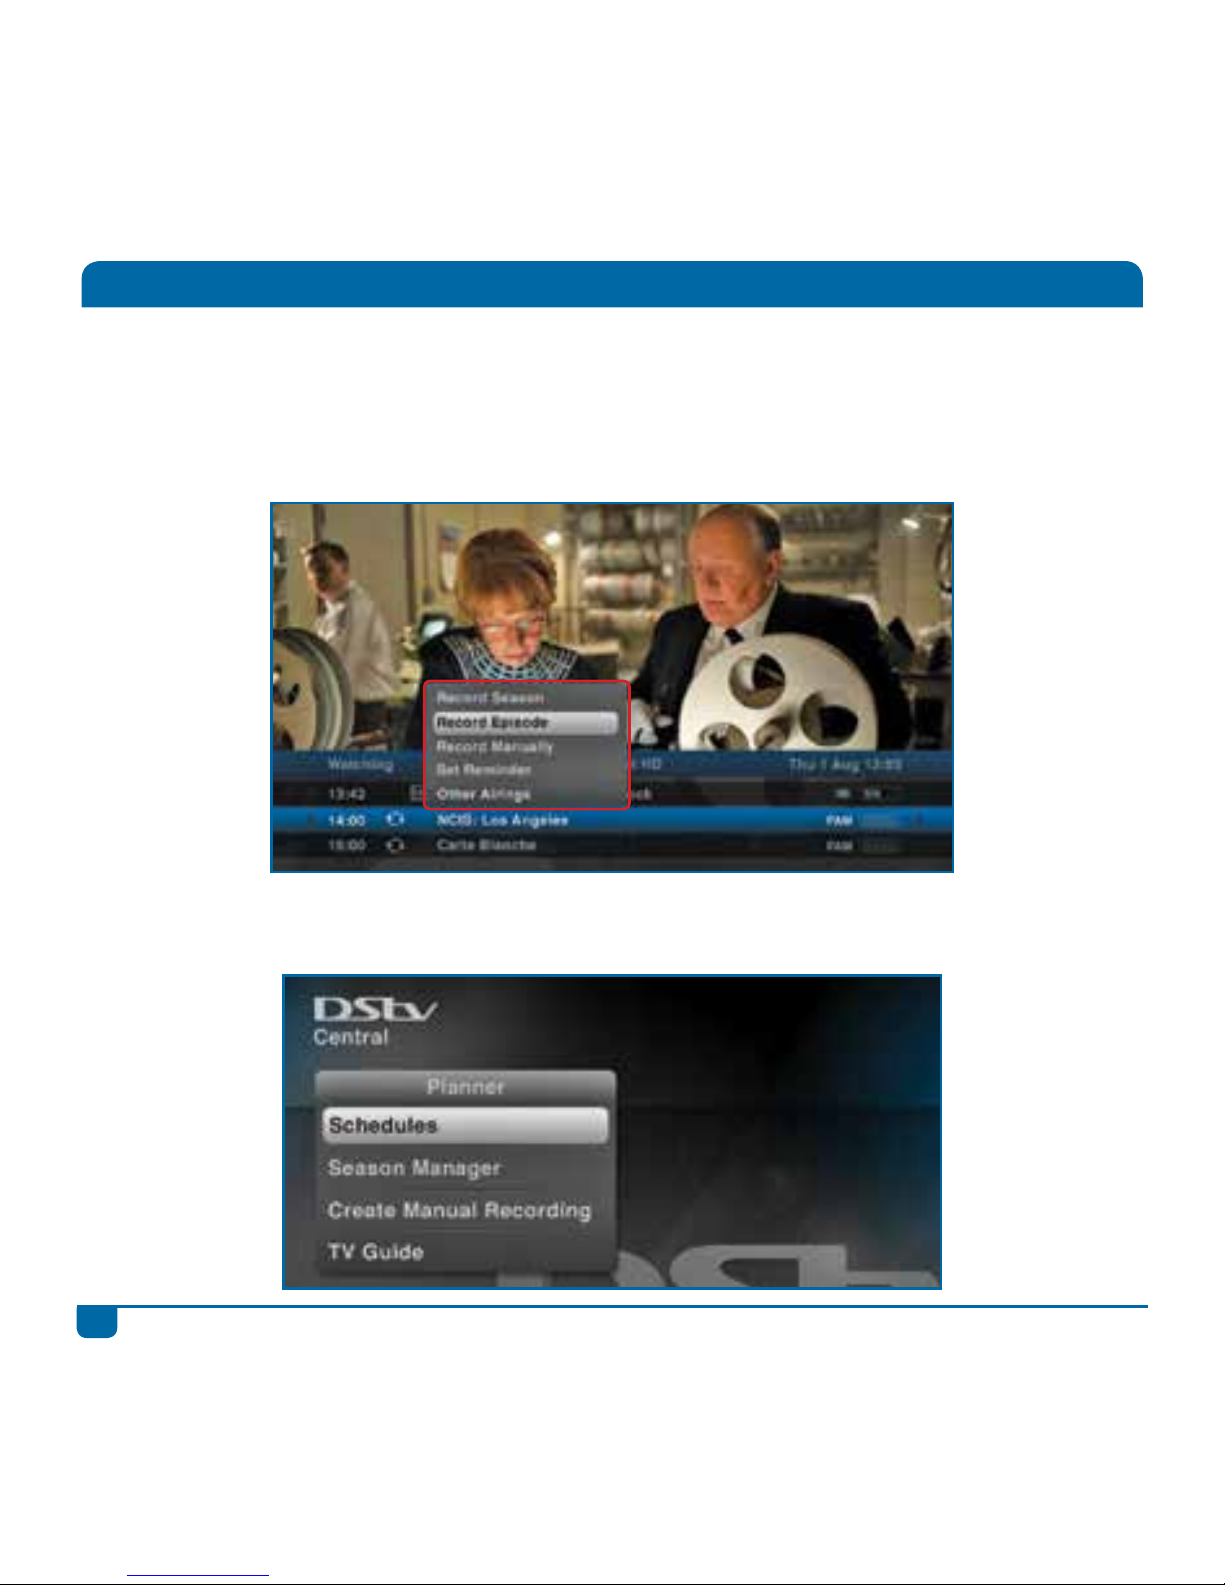
Step 1 Press OK on any programme to see the recording options available. If the programme is
part of a series, you can record just the episode, or the entire season of the series.
Step 2 After scheduling a recording, the programme is marked as a scheduled recording and listed
in “Schedules” in “Planner”.
Page 25
22
DStv Explora Quick Guide
Step 3 You can edit or delete the scheduled recording at any time.
Step 4 When the programme has recorded, it will be listed in your “Playlist” in “Watch Now”. (If
for any reason the programme failed to record, it will be listed in “Failed Recordings” in
your “Schedules”).
Step 5 The programme is now ready for viewing!
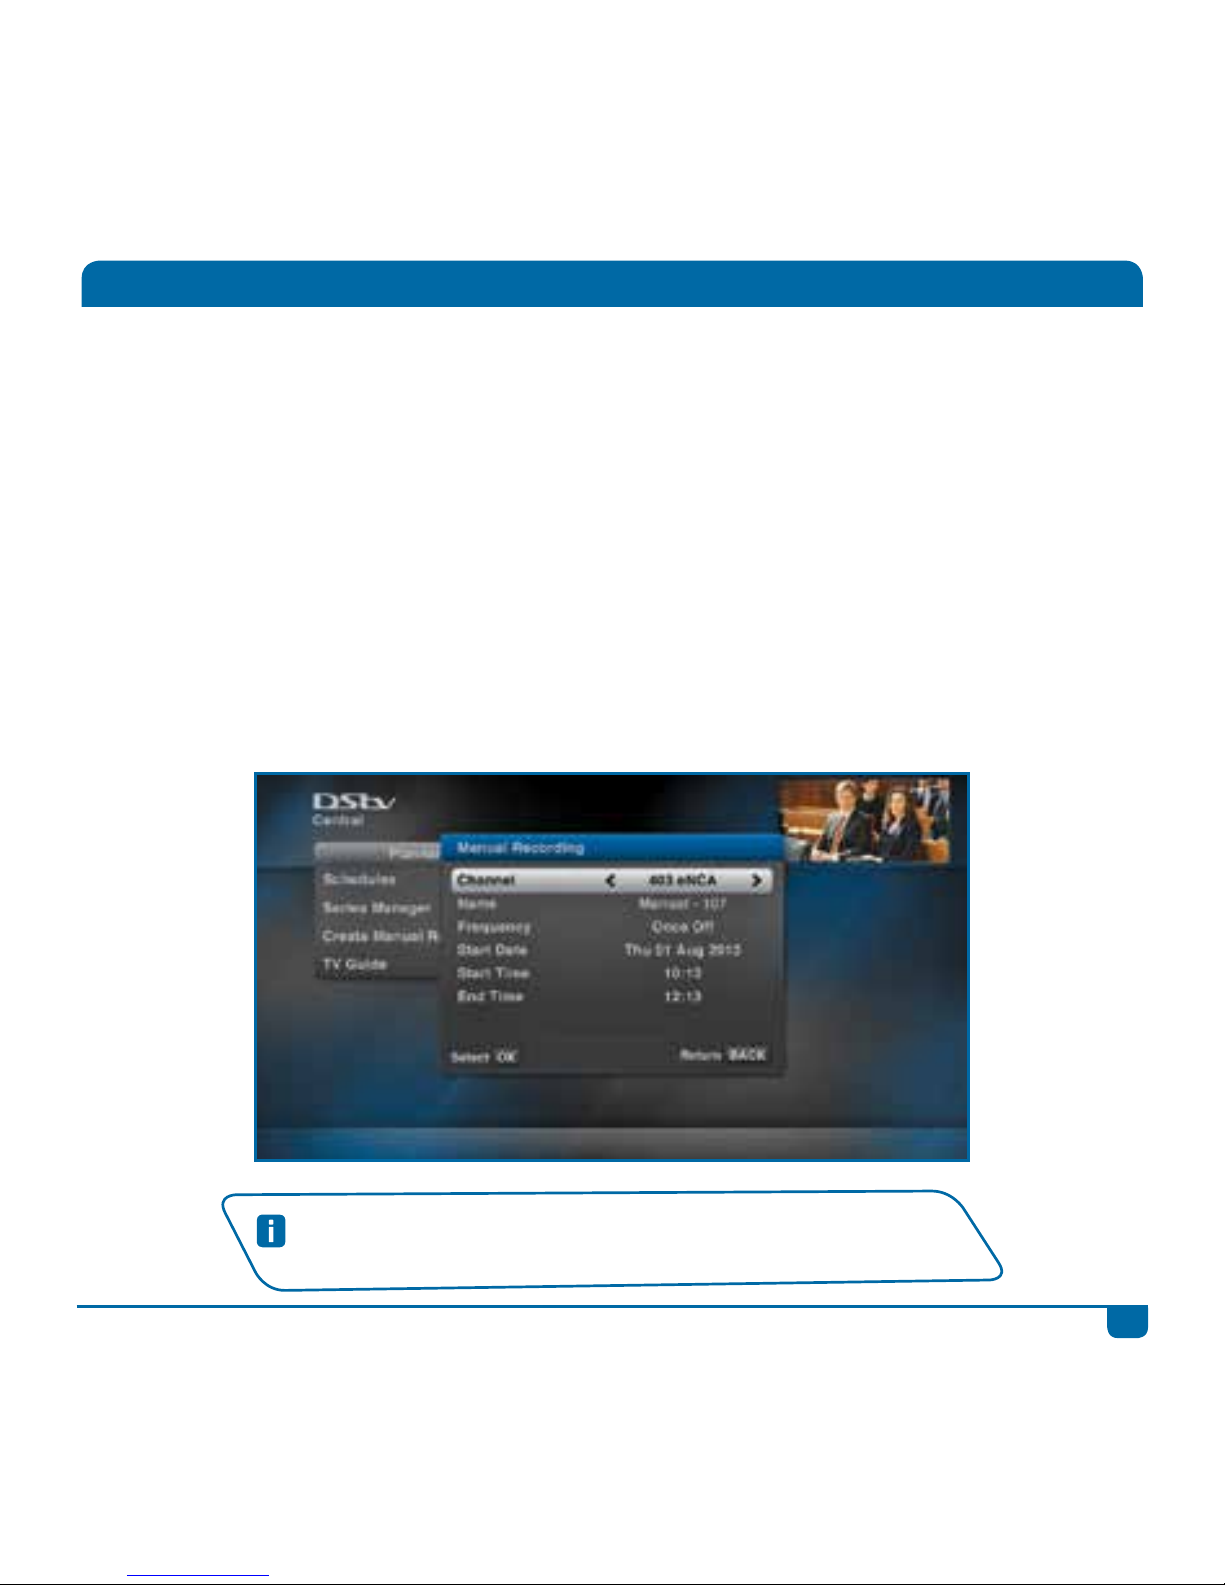
You can also create manual recordings. Example: You want to record the first 10 minutes of the
news each morning so that you can quickly catch up on news headlines. Select “Create Manual
Recordings” from “Planner” and schedule the recording as required. Manual Recordings can be
scheduled once off, daily, weekly or just on weekdays. You can also set manual recordings from the
Actions list (when you press OK on any programme).
Quick Tip
Set up your Recording preferences in “User Preferences” in “Settings”.
Recordings
Page 26
23
DStv Explora Quick Guide
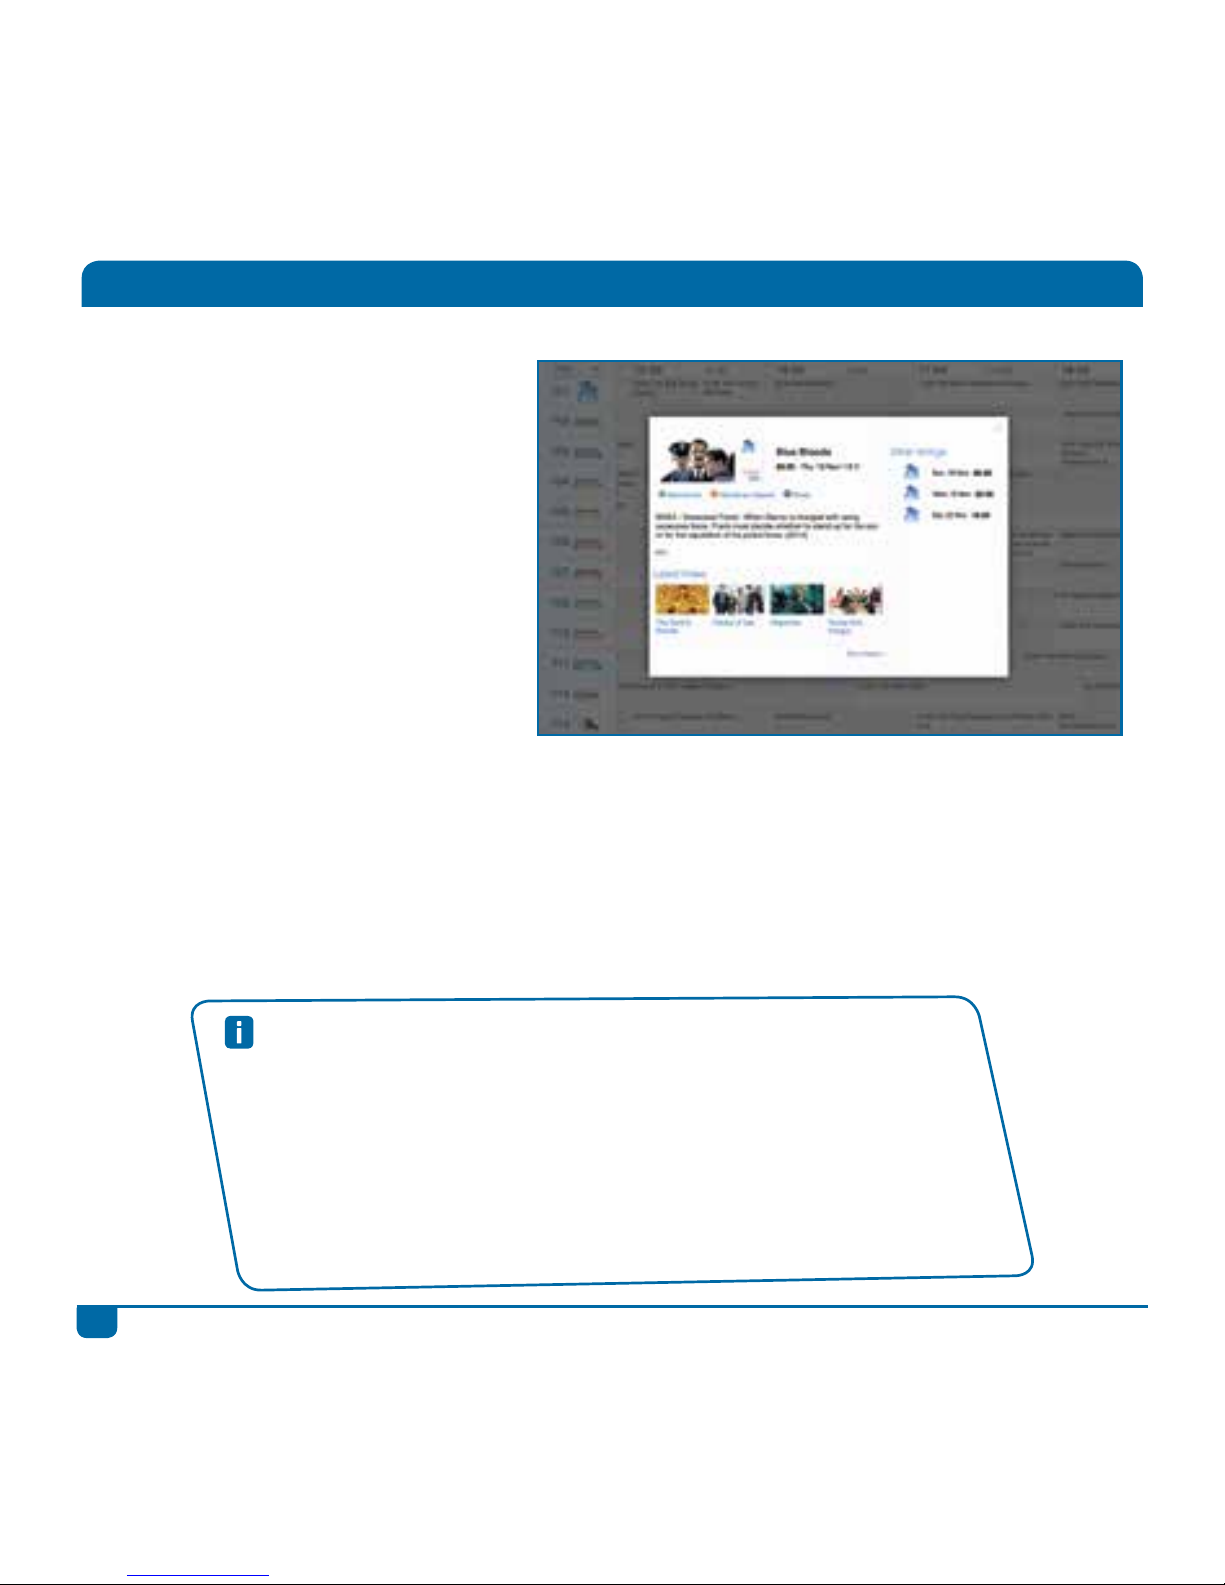
Remote Recording is a feature allowing
you to schedule a recording when you’re
away from home.
Once you’ve connected your DStv
Explora to the internet, you need to get
a Connect ID and link it to your DStv
Explora smartcard number.
If using your laptop, login in to our TV
Guide, select the programme you want
to record and we’ll do the rest. And if
you’re using a smartphone or tablet,
download our app (DStv Now) and follow the same steps.
All Remote Recordings take priority, so if there are any other scheduled recordings in progress or in
conflict, these will be deleted and rescheduled where possible.
Note : Remote Recordings are only available in selected countries.
Visit dstv.com/GetConnected for more information, including full Terms and Conditions.
Remote Recordings
Quick Tips
We recommend switching on the “Auto Delete” feature on your DStv Explora. This
automatically deletes recordings if space is required for new ones. To switch “Auto
Delete” on :
• Press the blue DStv button
• Go to “Settings”
• Select “User Preferences”
• Select “Recordings”
• Set “Auto Delete” to “On”
• Press BACK to save your setting
Page 27
24
DStv Explora Quick Guide
Series Recordings
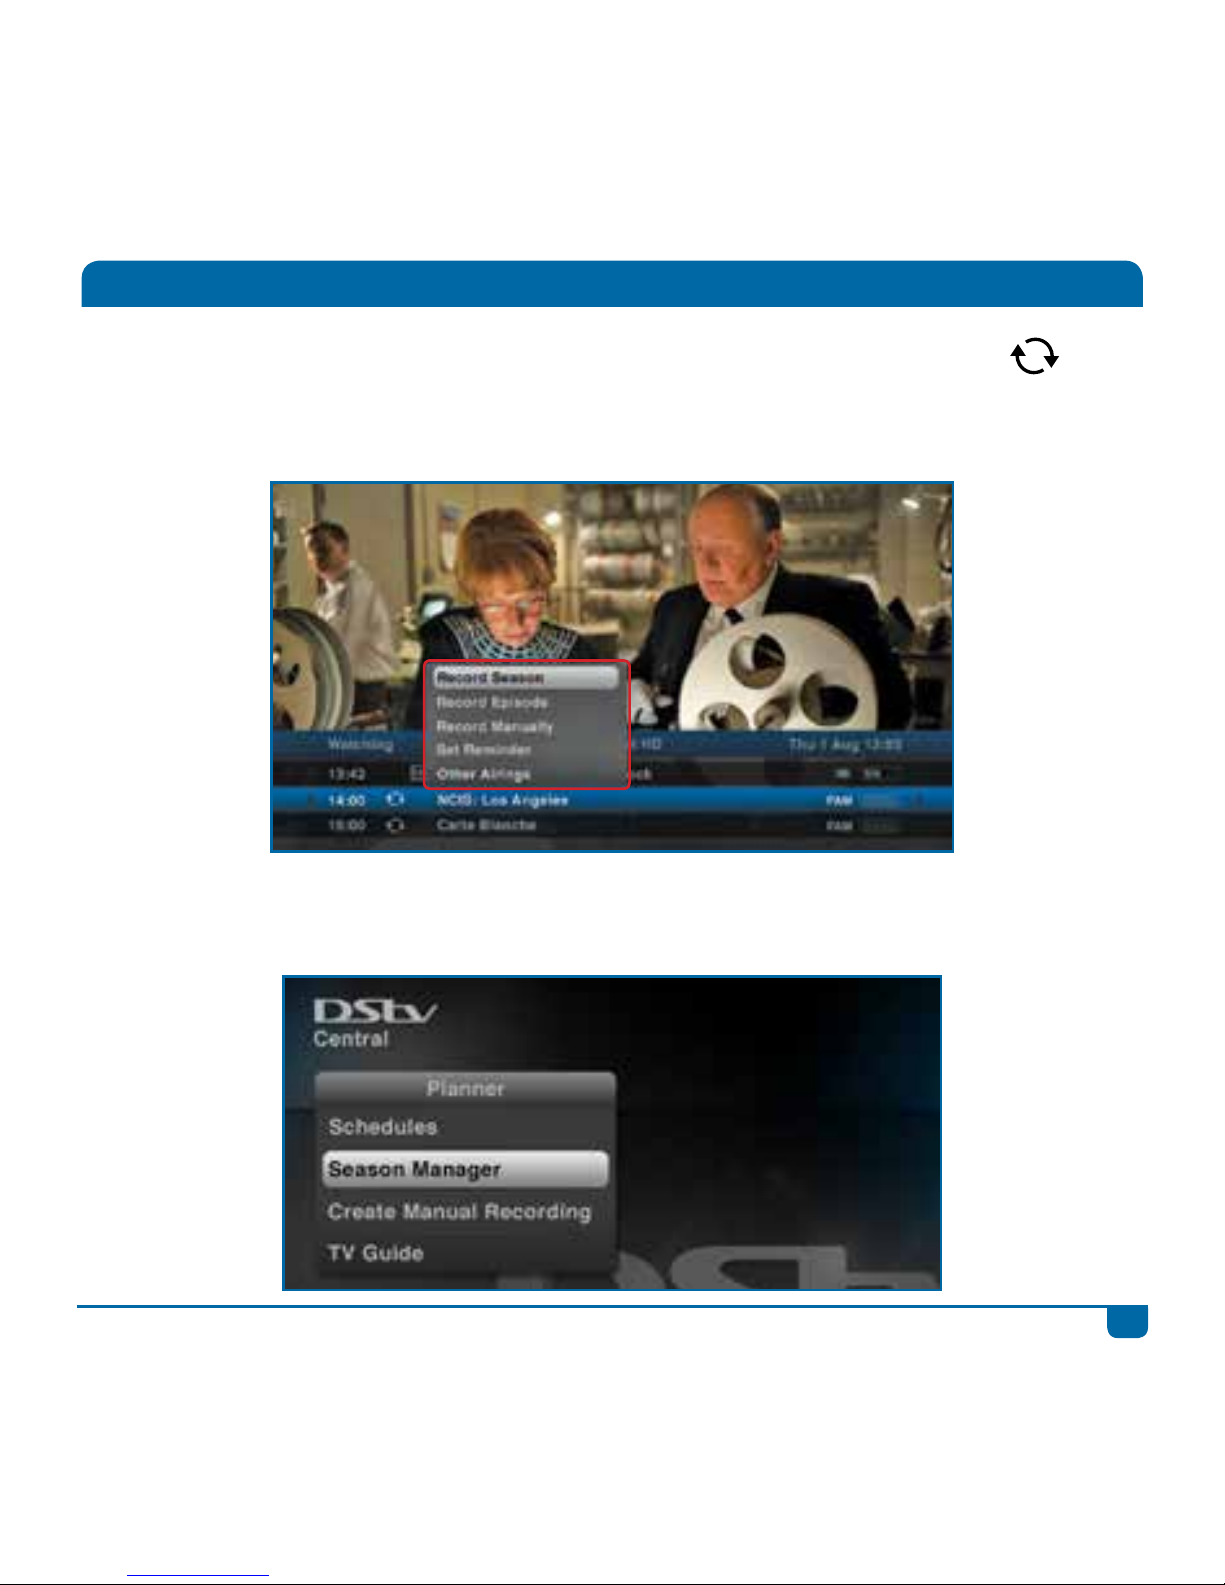
The DStv Explora offers series recording on selected programming. Look out for this icon
which indicates that series recording is available.
Step 1 Press OK on the programme with the series icon and select Record Series.
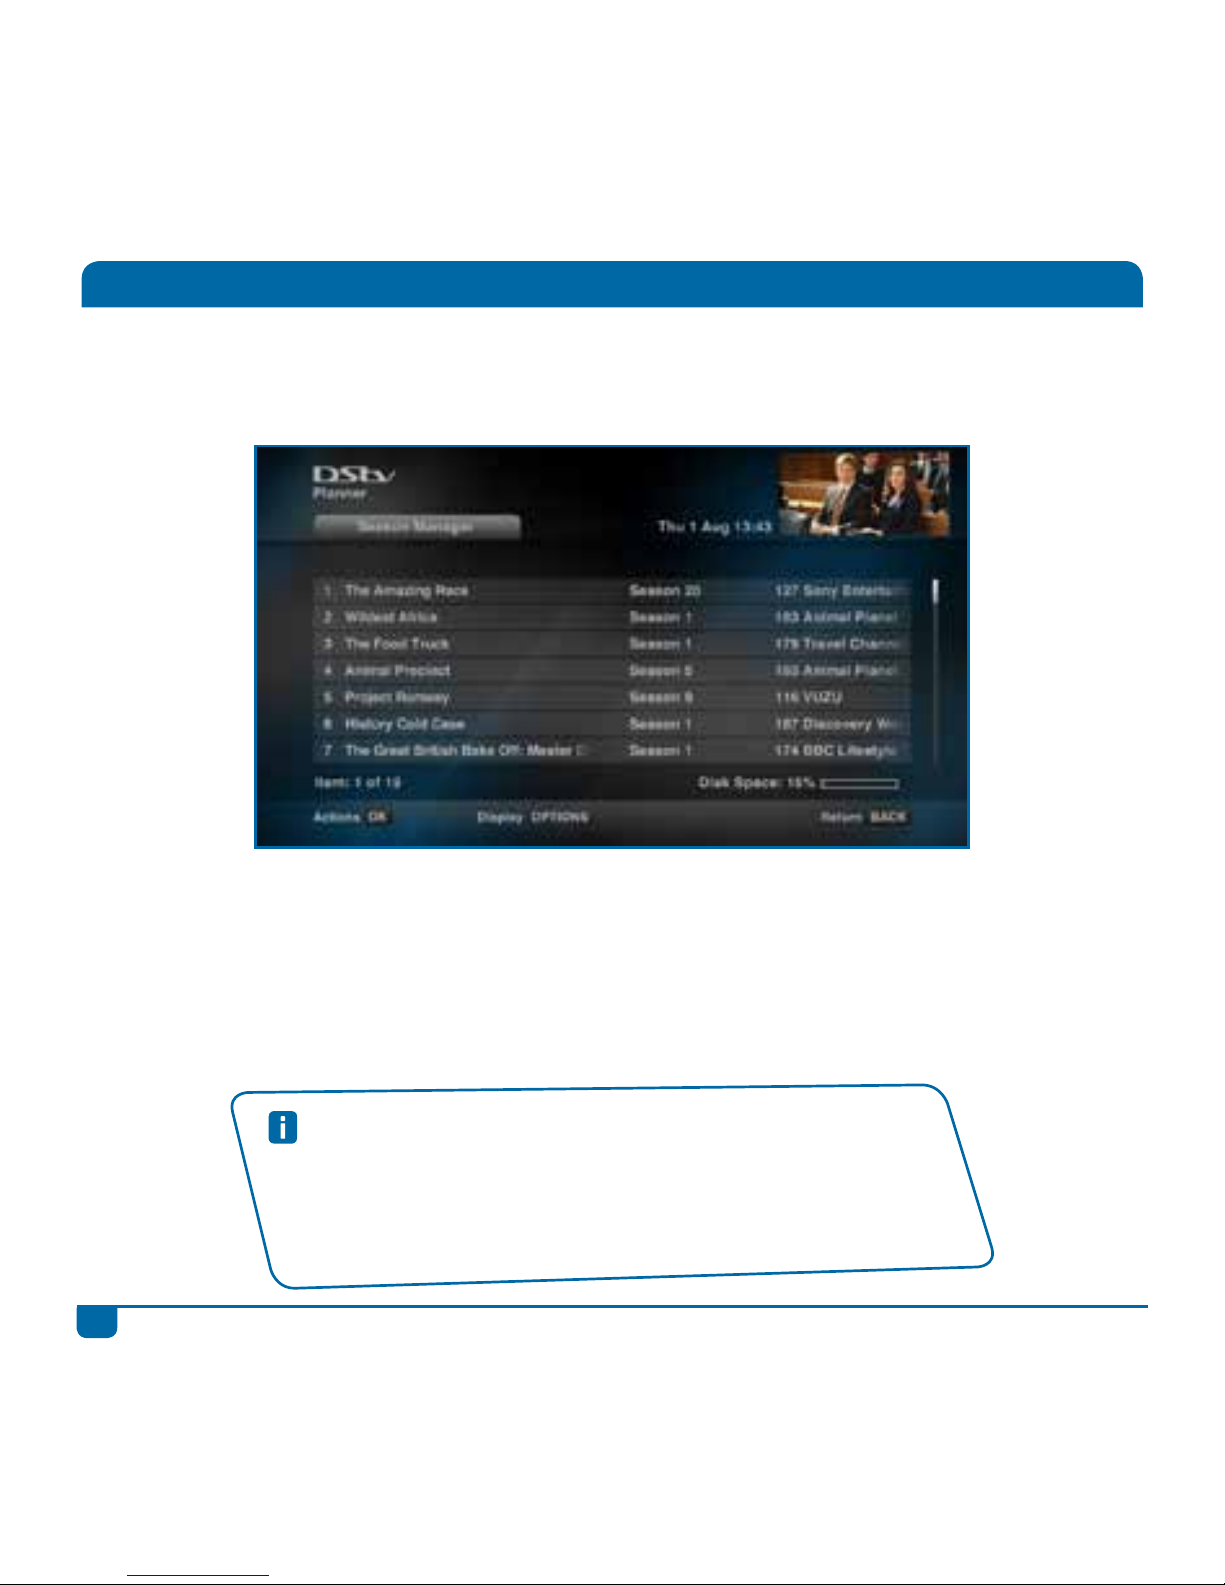
Step 2 Any new episodes within the next 8 days will be marked as scheduled recordings and
listed in “Schedules” in “Planner. The series will also be listed in “Series Manager” in
“Planner”.
Page 28
25
DStv Explora Quick Guide
Step 3 You can edit or delete the series recording at any time. You can also prioritise your series,
so that your DStv Explora knows which is more important to you in the event of a conflict.
Step 4 When the programme has recorded, it will be listed in your “Playlist” in “Watch Now”.
(If the programme failed to record, it will be listed in “Failed Recordings” in your
“Schedules”).
Step 5 The programme is now ready for viewing!
Series Recordings
Quick Tips
• You will need to delete the series from the Season Manager once the
season has come to an end.
• If a series is always on at the same time, but does not have series
recording available - you can use Manual Recordings to set a recurring
recording.
Page 29
26
DStv Explora Quick Guide
The Playlist
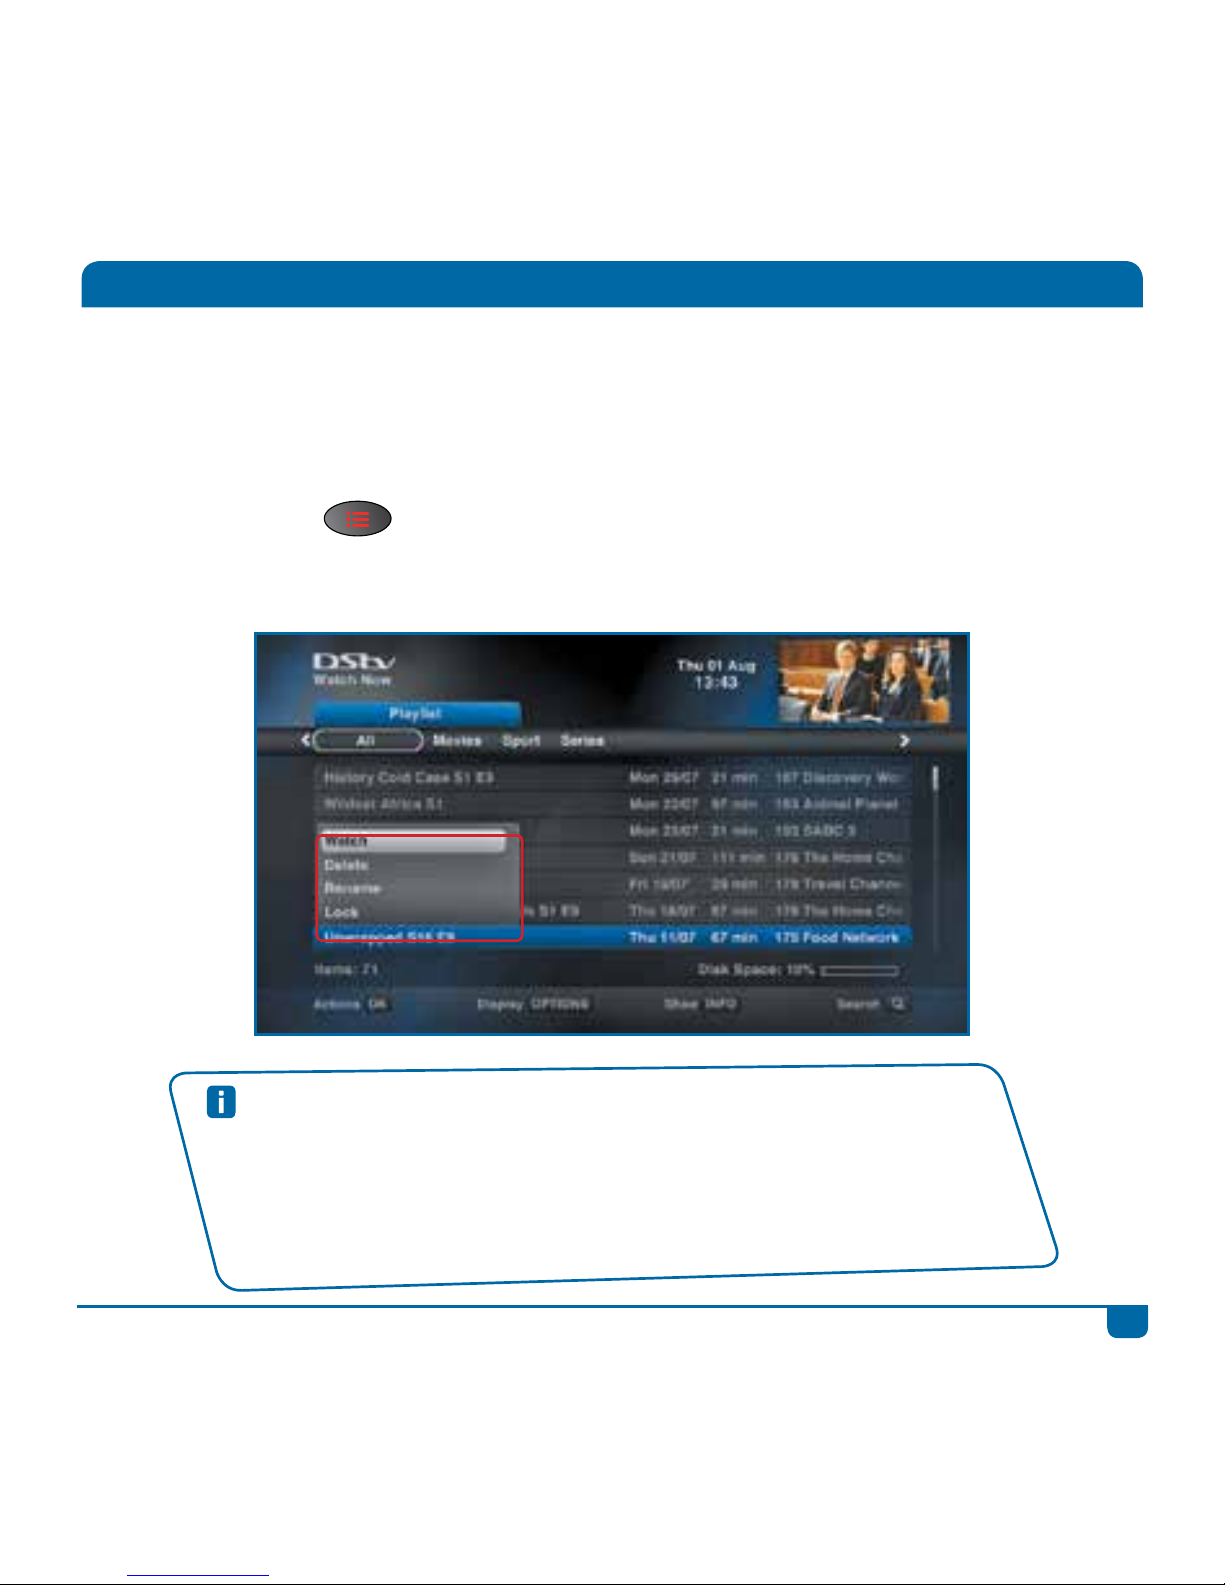
The DStv Explora allows you to record up to 220 hours of your favourite programming and your
Playlist is where you will find all the programmes you’ve recorded. You get to choose what you want
to watch, when you want to watch it. (We’ve also sorted your recordings based on content, and
neatly stacked your series episodes together, making it easier for you to find what you’re looking for.)
Press the PLAYLIST
button to go directly to your list of recordings.
Select a programme and press OK to see the available options.
Quick Tips
• Press SEARCH to quickly find what you’re looking for in your Playlist.
• Press OPTIONS to change the order of the programmes in the Playlist.
• You can “jump” to the schedules by pressing ALT at any time.
• You can lock your recordings to prevent them being accidentally deleted. Press OK
and select Lock.
• Set up your recording preferences in “User Preferences” in “Settings”.
Page 30
27
DStv Explora Quick Guide
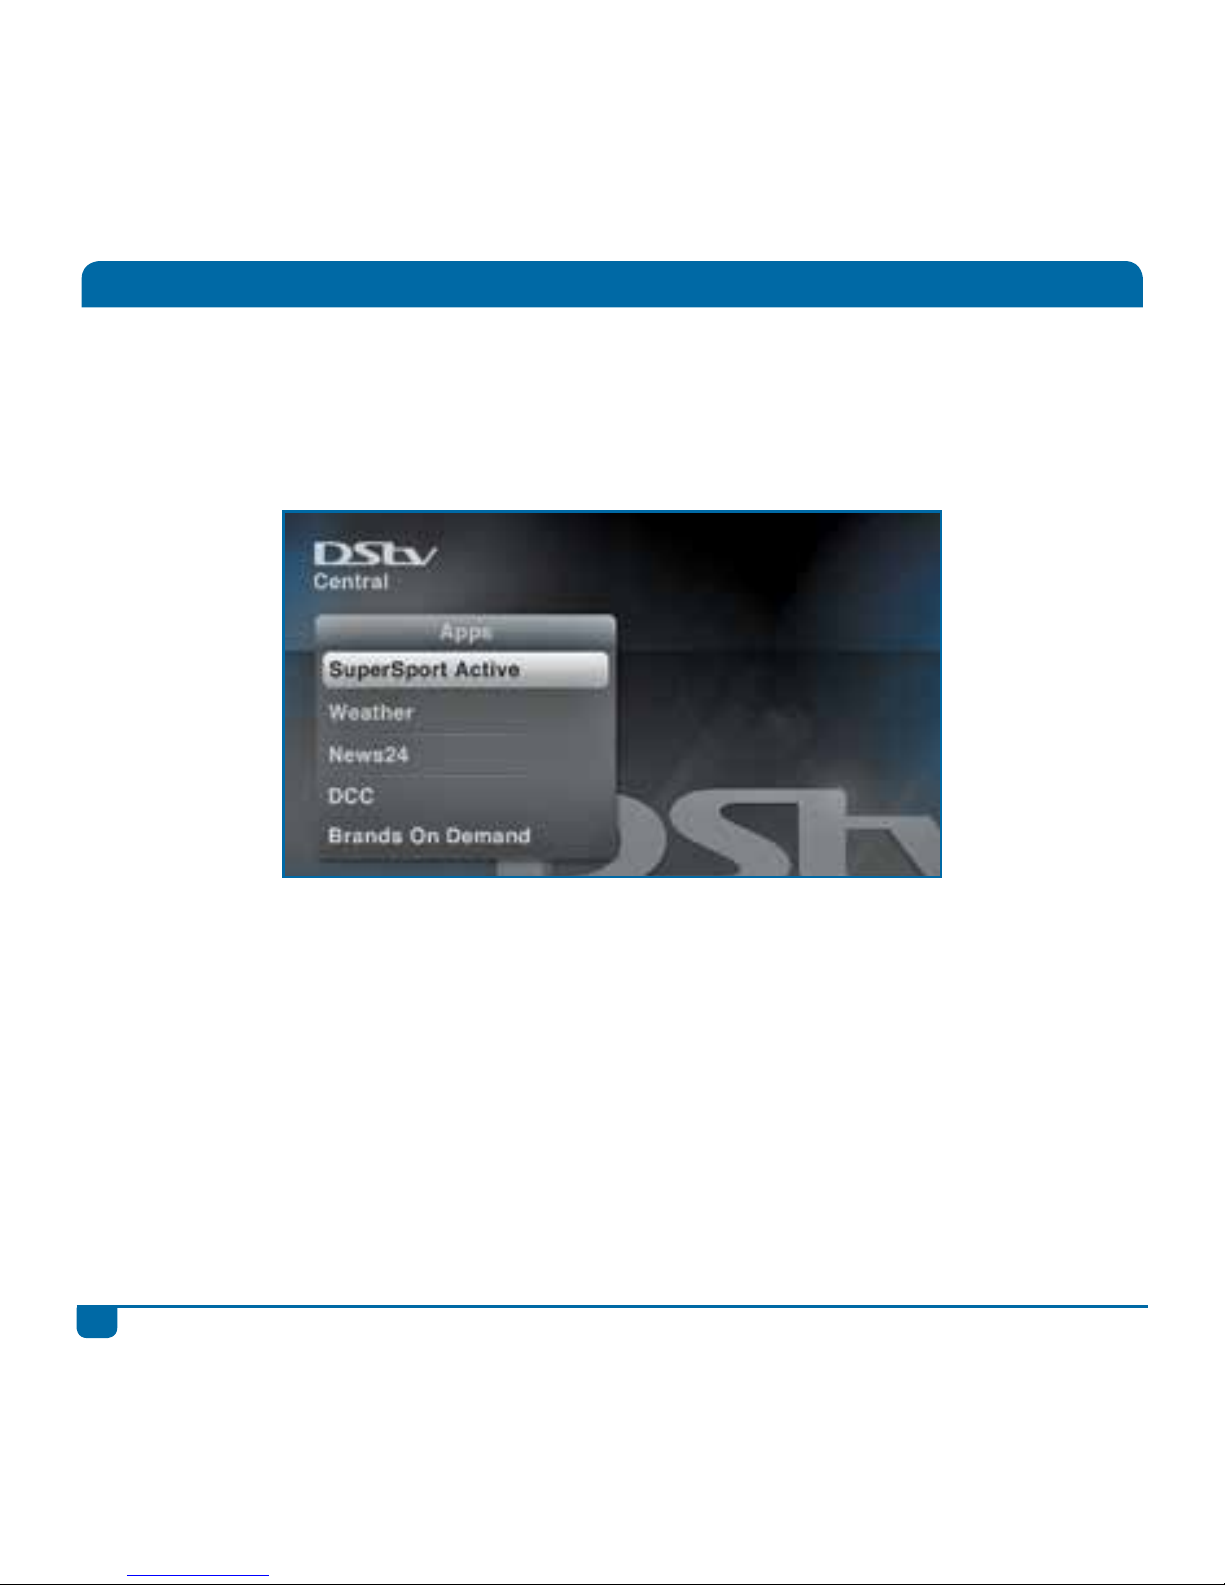
Apps
Would you like to know the latest sports scores? Or see news updates and the latest weather
forecasts?
Press OK while watching TV and make your selection from the available Apps.
Page 31
28
DStv Explora Quick Guide
Parental Control
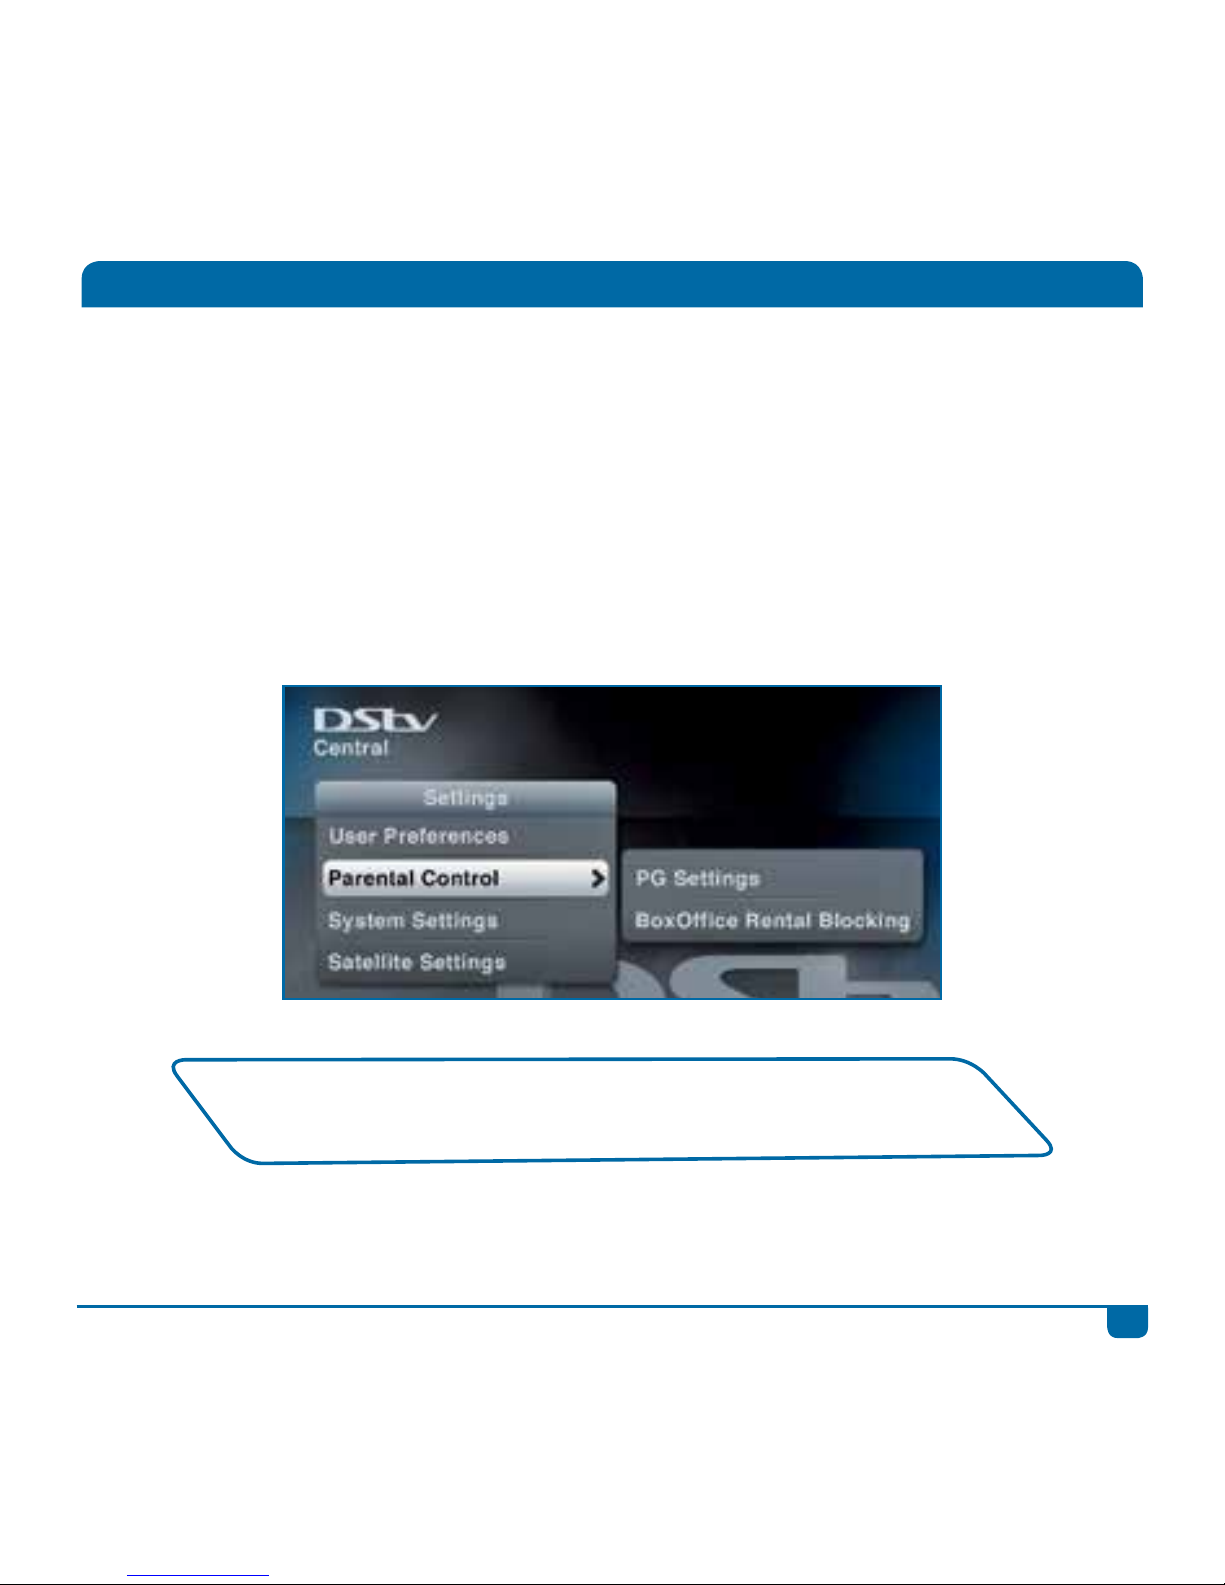
The DStv Explora has a Parental Control feature which allows you to block programming based on
the PG rating. This feature also allows you to block entire channels. Viewing is then only available
once a valid PG PIN has been entered.
The default PG PIN is 1234. If you block the PG PIN, please contact your closest call centre and
ask them to reset it.
You can also block BoxOffice movies from being charged to your account.
To make use of this feature, go to “Parental Control” in “Settings”.
All programming carries a PG rating and includes SNVL notification
(an indicator of programming content – Sex, Nudity, Violence, Language).
Page 32
29
DStv Explora Quick Guide
Favourite Channels (Channel Groups)
Quick Tip
When watching TV, press OPTIONS to change the channel group.
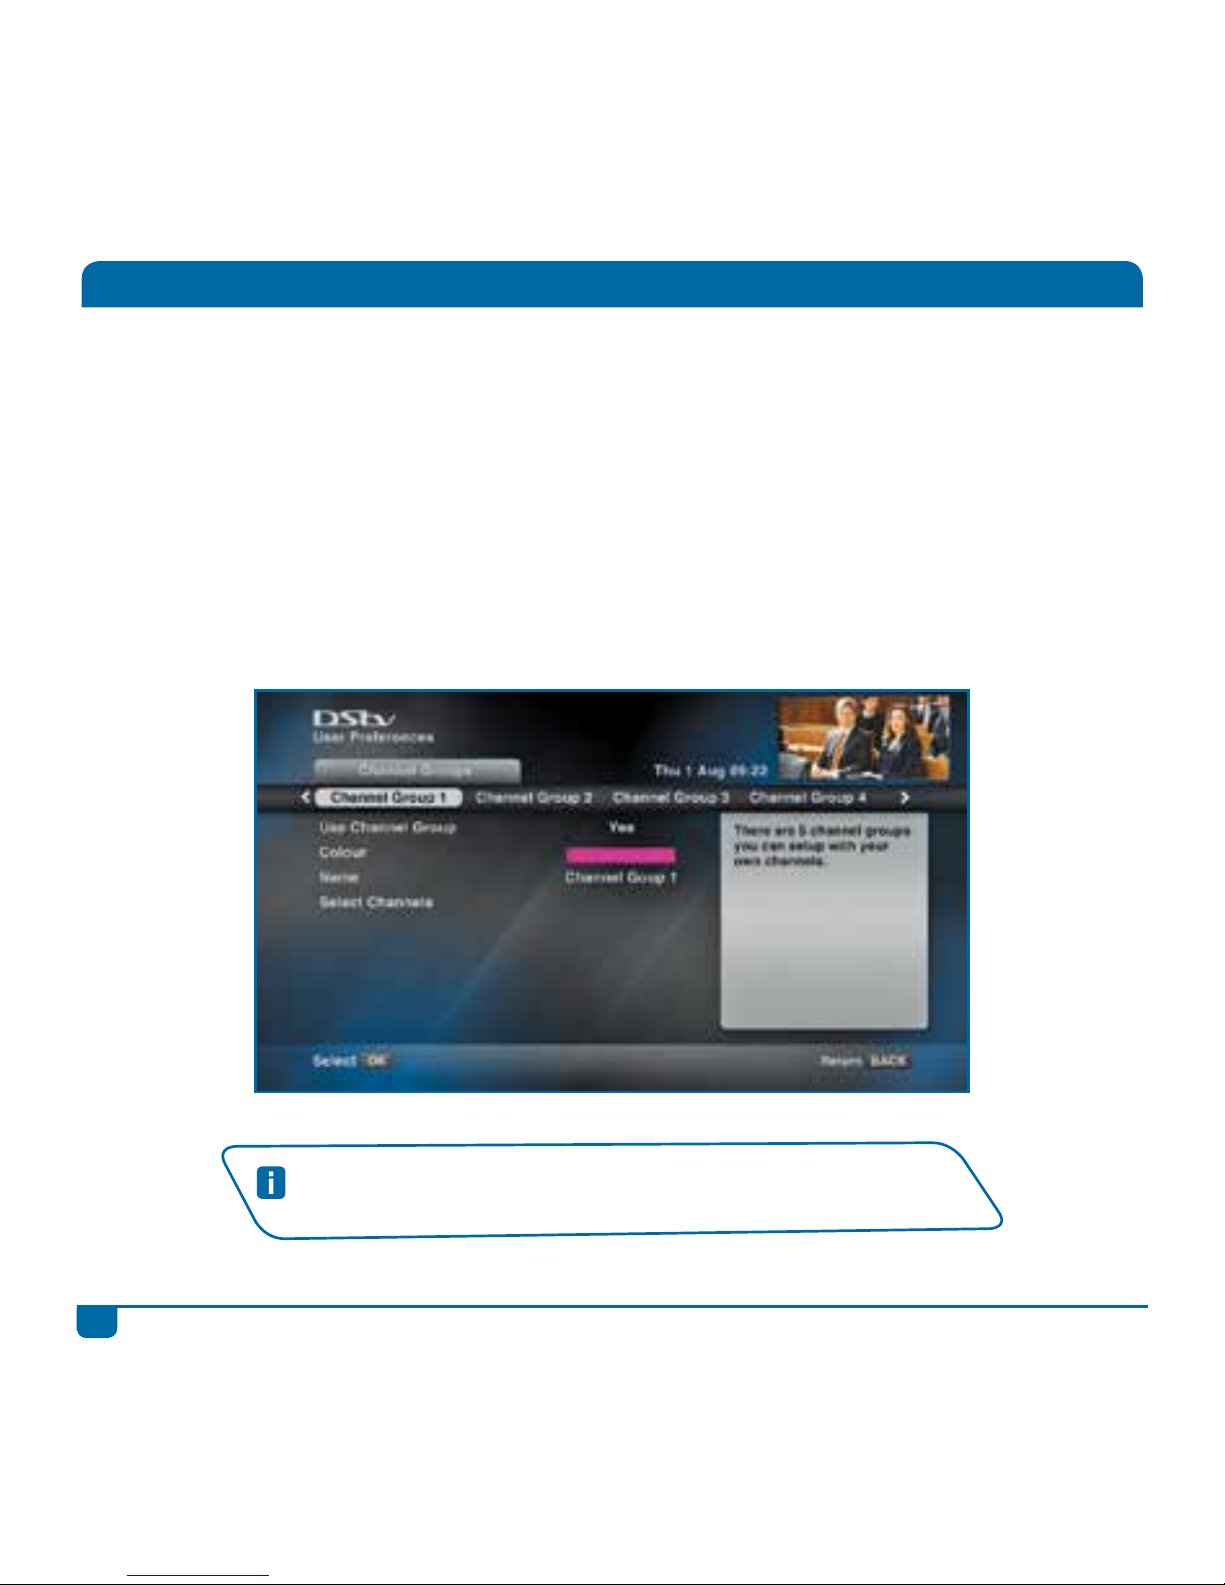
You can set up Favourite Channels on the DStv Explora so that when watching TV or using the TV
Guide, you only see the selected channels.
DStv Explora allows you to set up to five different channel groups, giving you the option to create a
group for each family member, or even groups for the various types of channels.
You can then name these channel groups (like “Mom’s Channels”, “Dad’s Stuff”, “Sports”, etc). We
even let you select a colour for the i-Plate when you’re watching channels in this group.
Press the DStv button and go to “User Preferences” in “Settings”. Then select “Channel Groups”.
Page 33
30
DStv Explora Quick Guide
All about Icons
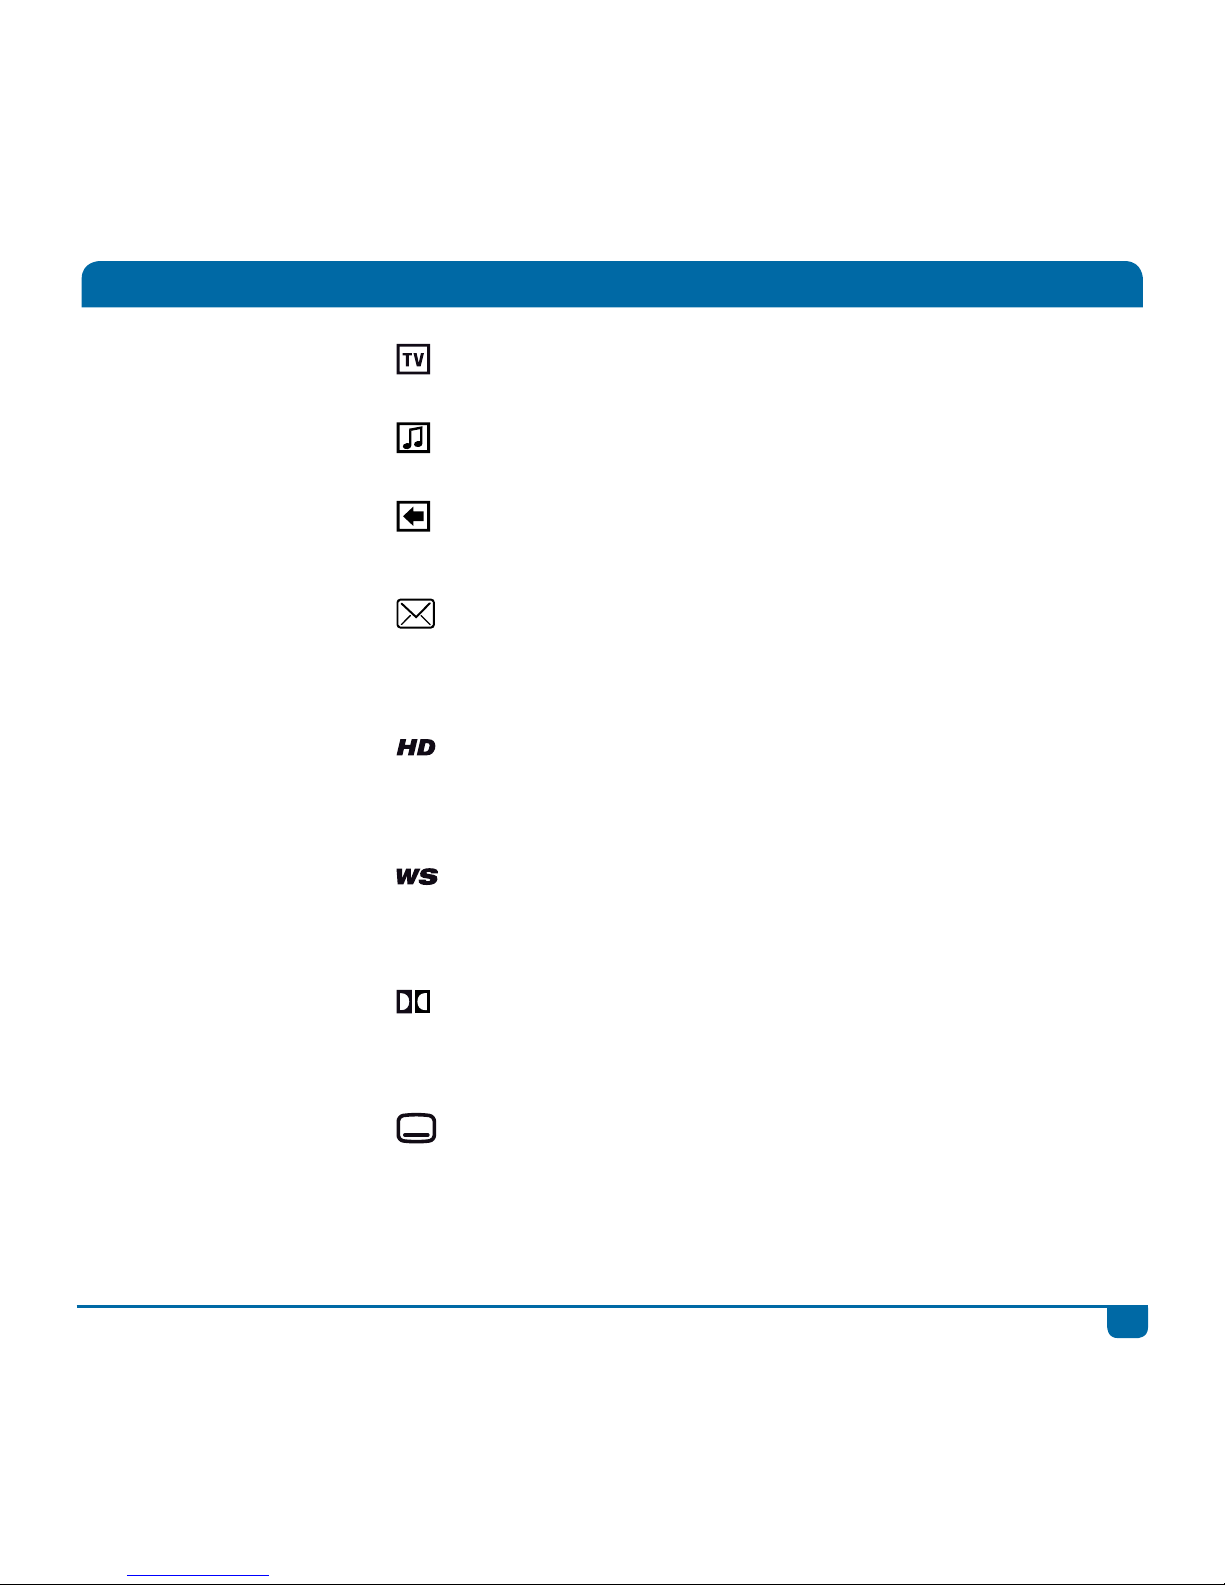
Live TV Shows which programme is currently live.
Audio Channel
Indicates an audio channel.
Buffer
Only seen on the i-Plate. This shows which
programmes are in the buffer and available for viewing.
Mail Message
This displays on the front panel of your DStv Explora
when have mail from DStv. Press the DStv button and
go to “Help” to read your mail.
High Definition
Programme is in High Definition. This icon is displayed
with the programme synopsis. Press i on any
programme to see this additional information.
Widescreen
Programme is in widescreen (16:9). This icon is
displayed with the programme synopsis. Press i on any
programme to see this additional information.
Dolby
Programme has a Dolby soundtrack. This icon is
displayed with the programme synopsis. Press i on any
programme to see this additional information.
Subtitles
Programme has Subtitles available. This icon is
displayed with the programme synopsis. Press i on any
programme to see this additional information.
Quick tip: You can select to automatically display
subtitles. See “User Preferences” in “Settings”.
Page 34
31
DStv Explora Quick Guide
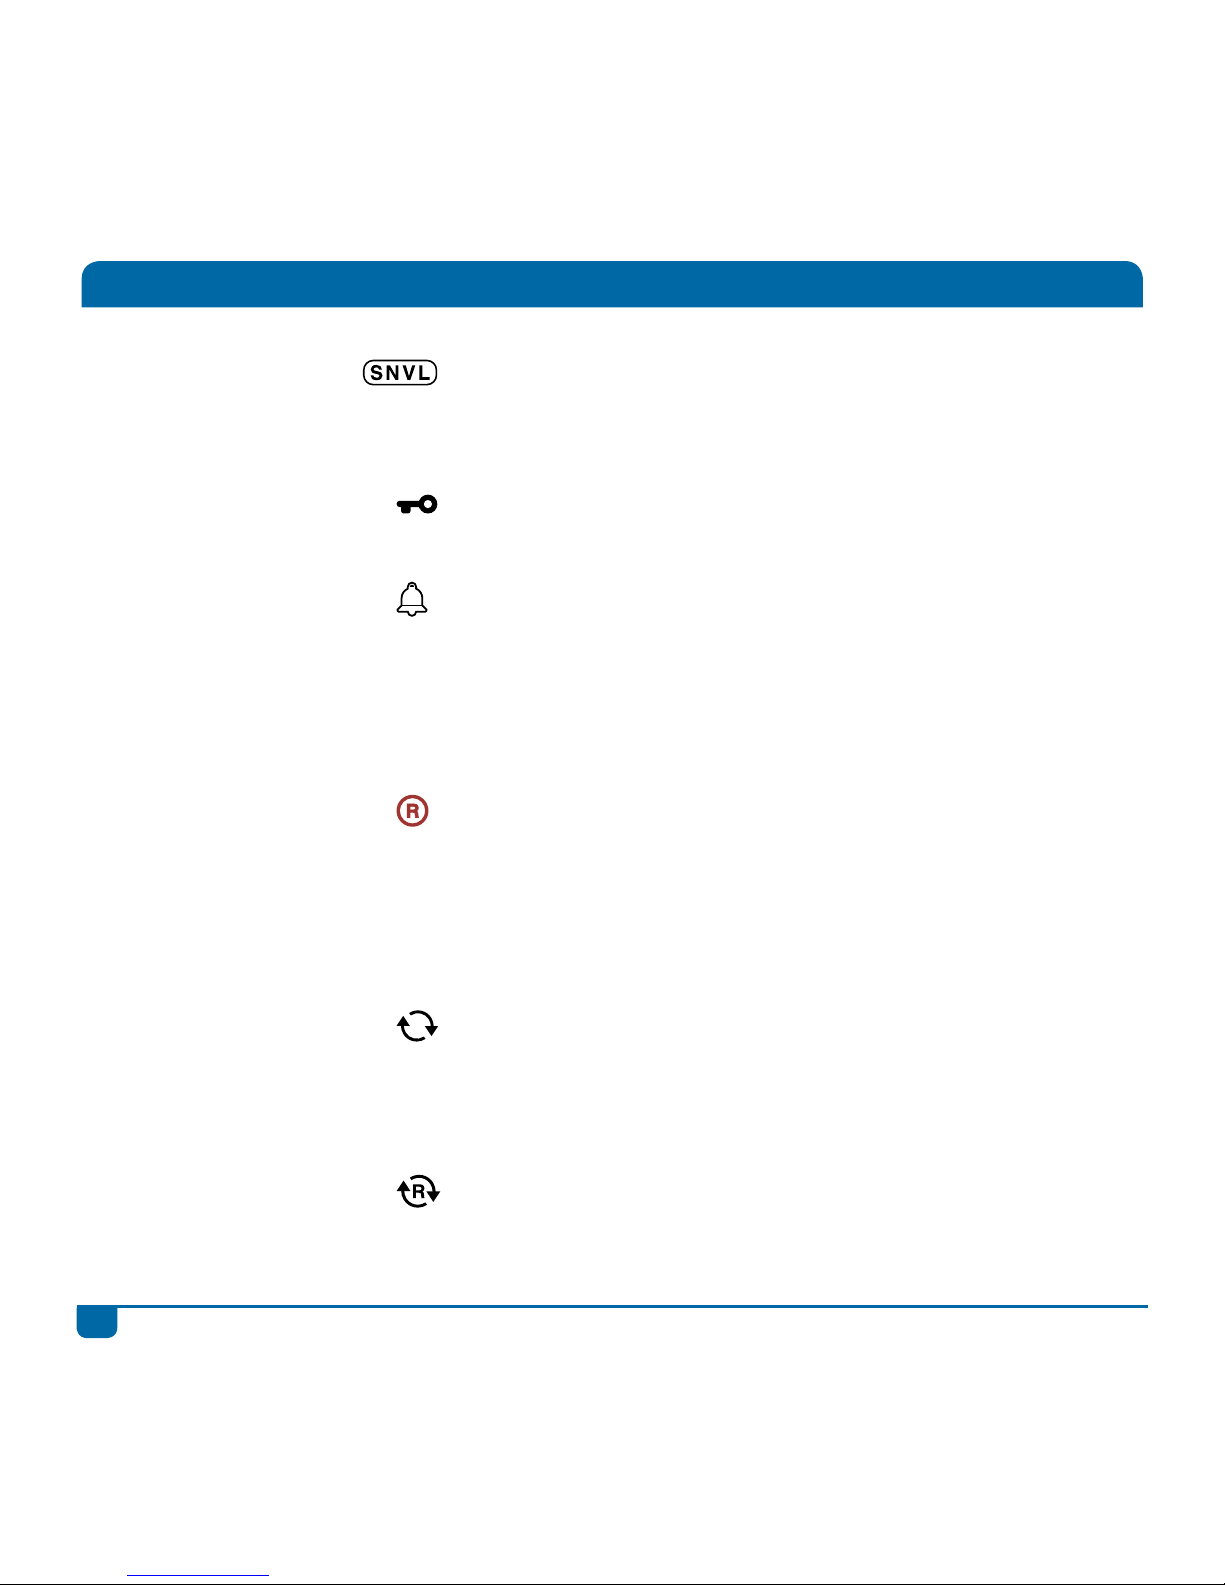
SNVL
This information is displayed for all programmes and
is an indicator of programming content (Sex, Nudity,
Violence, Language).
PG Block
Content is blocked due to Parental Control settings.
A valid PG PIN is required to watch this content.
Reminder
You can set a reminder for any future programme
(select the programme, press OK and “Set Reminder”).
This icon will then display with the programme
information. To see all reminders – press the DStv
button and go to “Schedules” in “Planner”.
Scheduled
Recording (Single)
You can schedule a single recording of any programme.
Select the programme, press OK and “Record
Episode” or “Record Programme”. This icon will then
display with the programme information. To see all
scheduled recordings – press the DStv button and go to
“Schedules” in “Planner”.
Series Link
This programme is part of a series and has series
recording available. Select the programme, press OK
and “Record Series”. To see all series recordings - press
the DStv button and go “Series Manager” in “Planner”.
Booked Series
This programme is part of a series that you have
already set a series recording for.
All about Icons
Page 35
32
DStv Explora Quick Guide
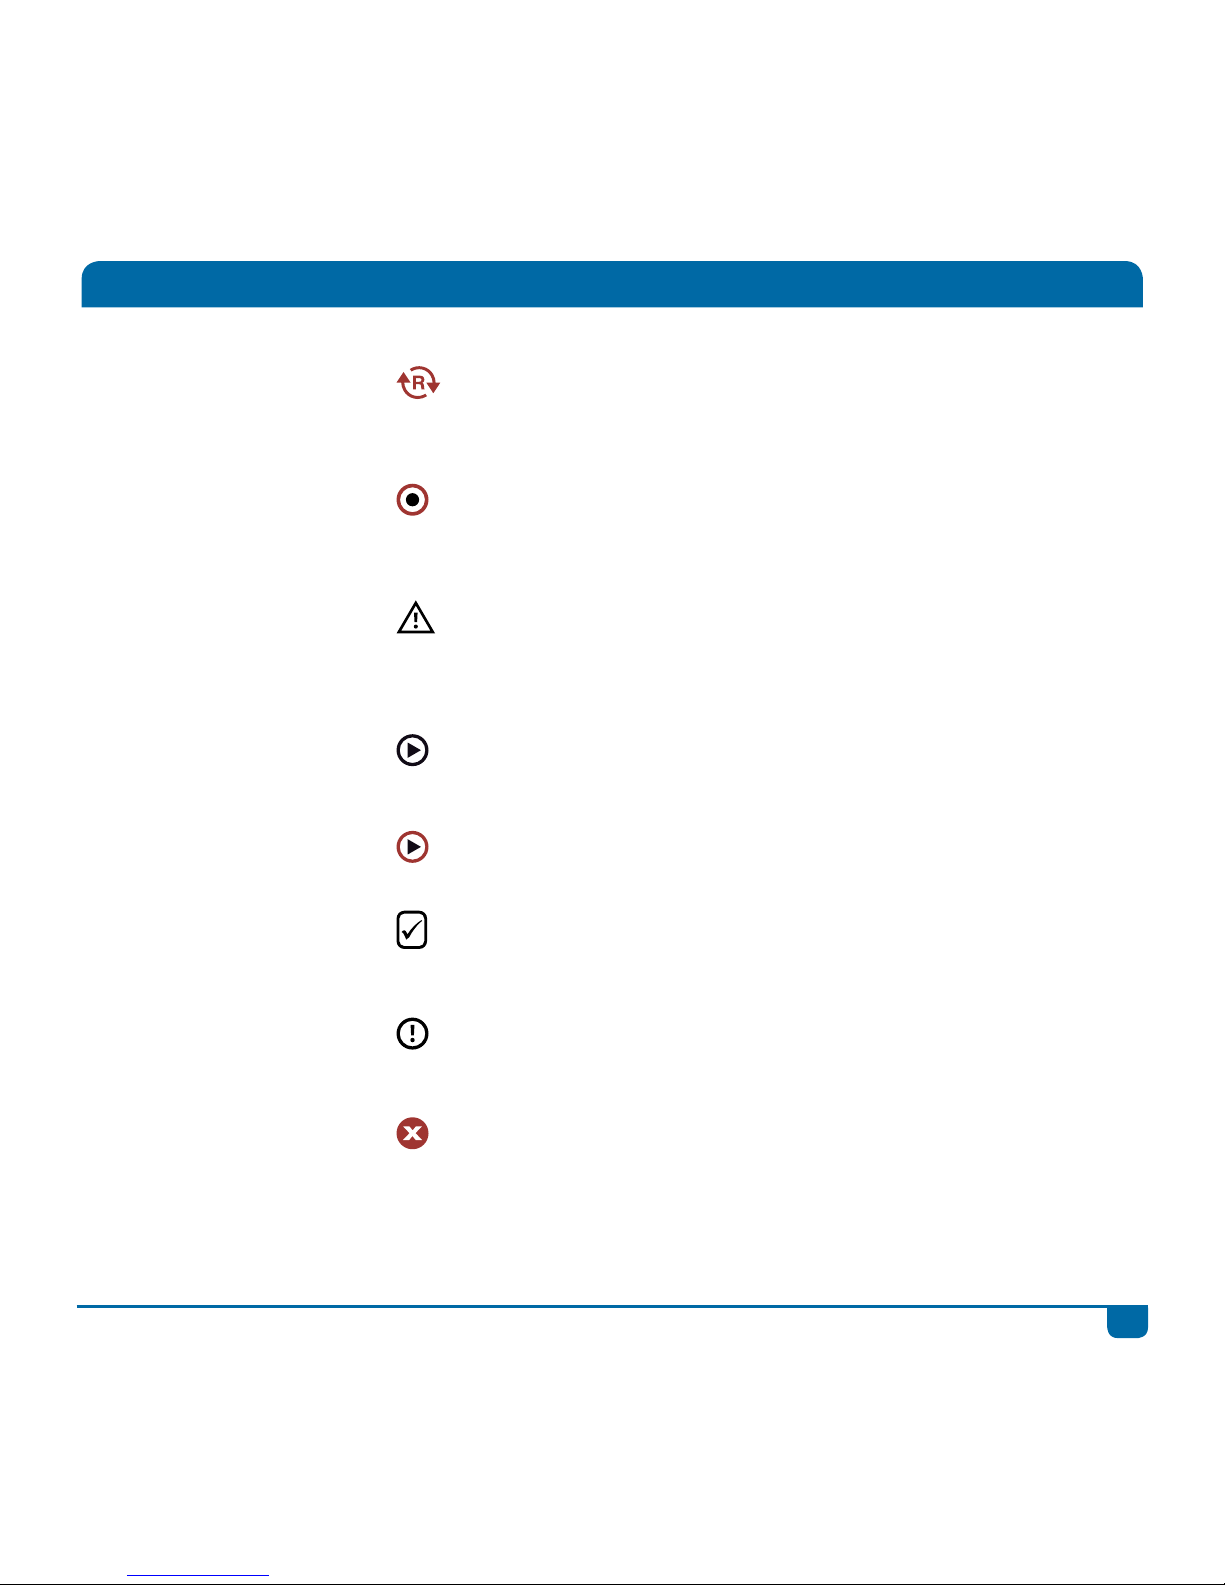
Scheduled
Recording (Series)
This programme is part of a series and this episode is
scheduled to record as part of your series recording.
Recording in
Progress
Indicates a recording in progress. You can stop a
recording in progress at any time by pressing the STOP
button on the remote.
Conflict
You have scheduled recordings which are in conflict.
Press the DStv button and go to “Schedules” in the
“Planner” to resolve the conflict.
Playback
This icon indicates playback of recorded content.
Playback Recording
in Progress
This icon indicates playback of a recording which is still
in progress.
Viewed Content
This icon indicates that you have partially or fully
viewed the content.
Alert!
This icon will only be seen in your Playlist and indicates
an incomplete recording.
Failed Recording
This indicates a failed recording. To see all failed
recordings, press the DStv button and go to
“Schedules” in “Planner”.
All about Icons
Page 36
33
DStv Explora Quick Guide
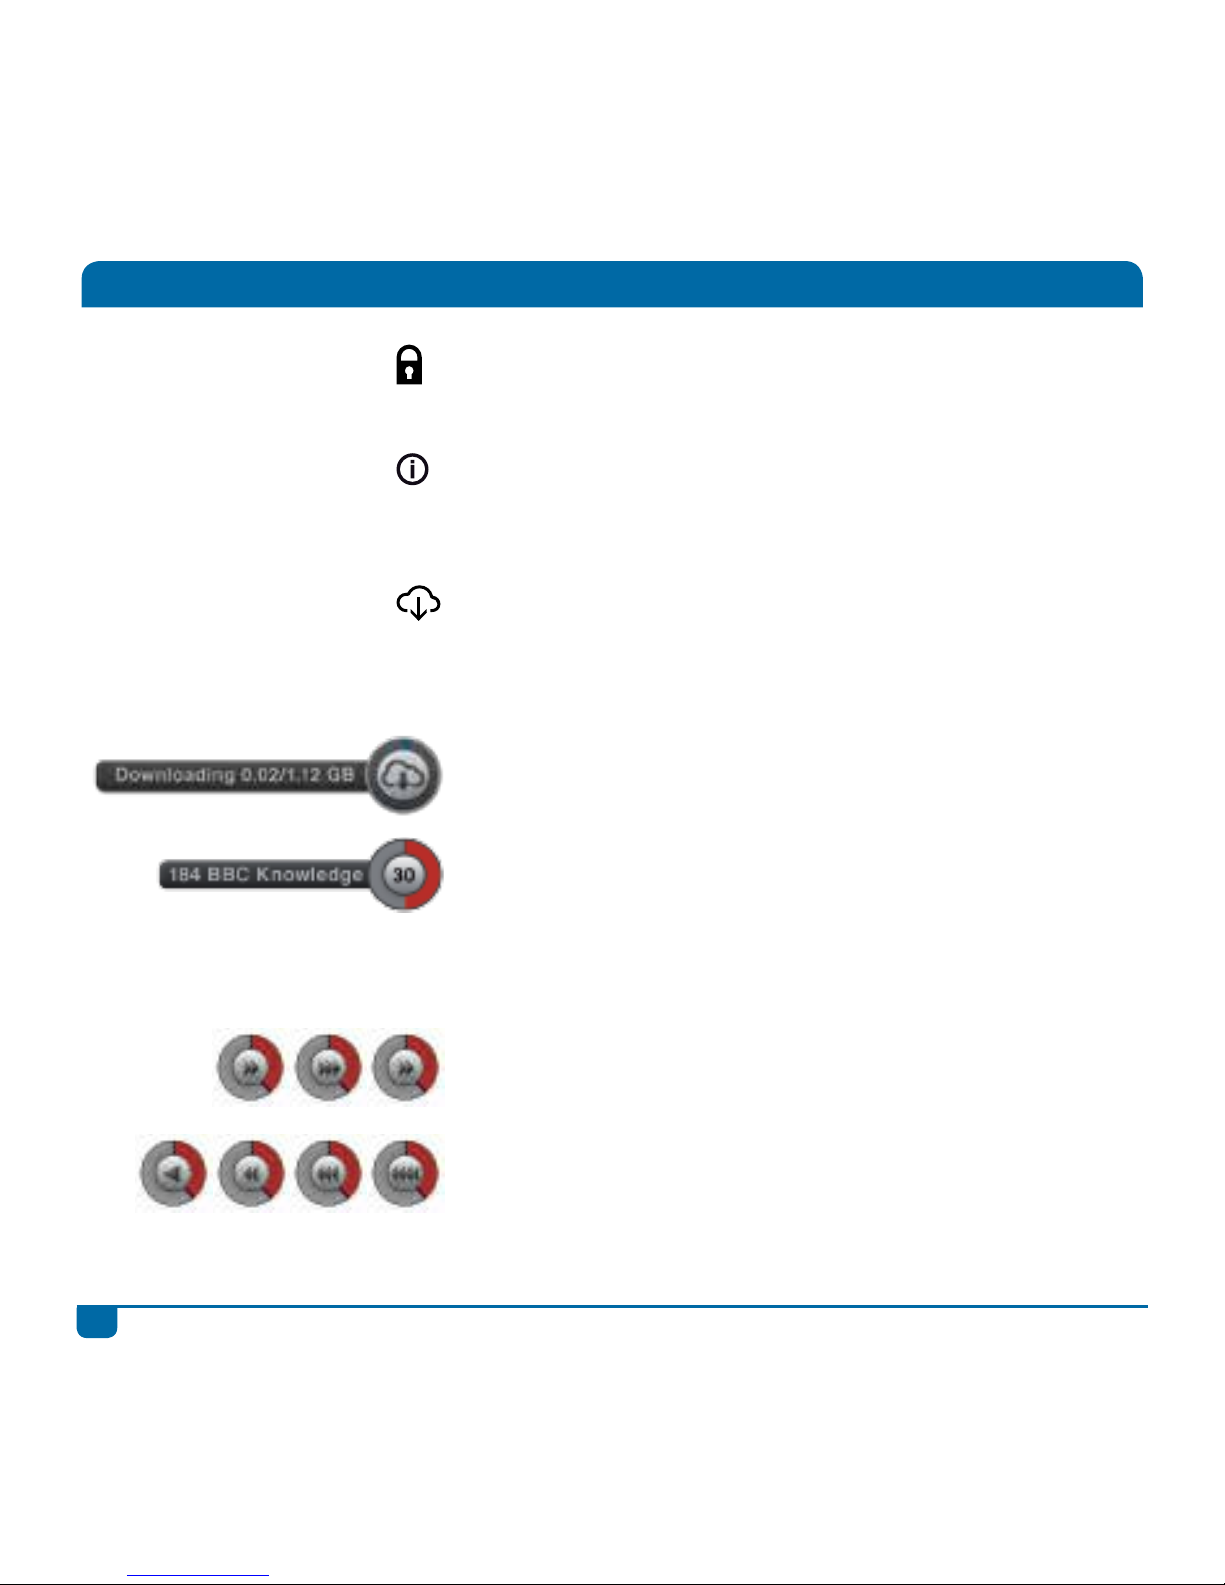
Lock This content has been locked to prevent it from
accidentally being deleted.
Info
This icon is only used in the TV Guide, and only when
we don’t have space to show you the programme title.
Press i to see programme information.
Download
This icon indicates extra DStv Catch Up content that
you can download to your DStv Explora. You have the
option to watch it while it downloads, or wait for it to
fully download before watching it.
This icon is displayed onscreen when content is being
downloaded.
This displays on the top right of your screen when you
have a recording in progress. It includes the channel
that is being recorded as well as the time remaining on
the recording. Remember, you can press STOP at any
time to stop a recording in progress.
Indicates use of FF and the current FF speed, as well as
your position in the content being viewed.
Indicates use of REW and the current REW speed, as
well as your position in the content being viewed.
All about Icons
Page 37

34
DStv Explora Quick Guide
This DStv Explora meets International Safety Standards. Please read the following recommended
safety precautions carefully.
Mains Supply
The DStv Explora operates at 12 V DC and is connected to the mains supply using the supplied
power supply, rated 100 - 240 Vac 50/60Hz. Connect the power supply unit to the decoder and
the power cable to the power supply unit, before connecting the other end of the power cable to
the mains wall socket. Disconnect the power supply unit from the mains before connecting or
disconnecting any other cables to the decoder’s back panel.
Liquids & Spillage
Keep liquids away from the DStv Explora and do not put anything on top of it which may spill
(example: lit candles, plants or containers of liquid). Do not use the DStv Explora in extreme
temperature and humid conditions..
Ventilation
It is essential to keep the DStv Explora cool to prolong the life of the hard disk. Do not block the
ventilation holes and ensure that free airflow is maintained around the DStv Explora. To maintain
adequate ventilation of the decoder, ensure that there is at least 10cm of free space above and to
the sides of the DStv Explora. Never stand the DStv Explora on soft furnishings or on carpet. Do not
use, or store the DStv Explora near a heater or where it is exposed to direct sunlight. Never stack
other electronic equipment on top of, or below the DStv Explora.
Cleaning
Before cleaning the DStv Explora, first disconnect it from the mains. Use a dry cloth to clean the
exterior.
Important Safety Information
Page 38

35
DStv Explora Quick Guide
Important Safety Information
Servicing
Do not attempt to repair the DStv Explora yourself. You should also never remove the cover of the
DStv Explora. Any tampering with the DStv Explora will invalidate the warranty. Refer all servicing
to a qualified MultiChoice agent or branch.
Lightning
If the DStv Explora is installed in an area subject to intense lightning activity, protection devices for
the power supply unit’s mains connector are recommended.
Earthing
The earthing system must comply with local regulations.
Hard Disk
To avoid possible damage to the internal hard disk, do not pick up or move the DStv Explora while
it is connected to the power supply. If you want to move the DStv Explora, first stop any recordings
in progress, then put the DStv Explora into standby, and wait 30 seconds before disconnecting it.
Features of the DStv Explora and how it works may differ based on the active subscription as well as
software changes. Graphics may also differ from what you see on screen due to these factors.
Information correct at time of publishing. If you have any queries about the features, please contact us
via our forums, Facebook page or Twitter.
e&oe (Africa/September 2015, V2.7 FPNS)
504-9092574
Page 39

Find us on
dstv.com
pace.com
Page 40

 Loading...