

DS Services of America 300m Series Owner's Manual
Water Dispenser Owner’s
Manual – 300m Series
m
TM
IMPORTANT: This manual includes important safety material; please read all
instructions before plugging power supply cord into receptacle.
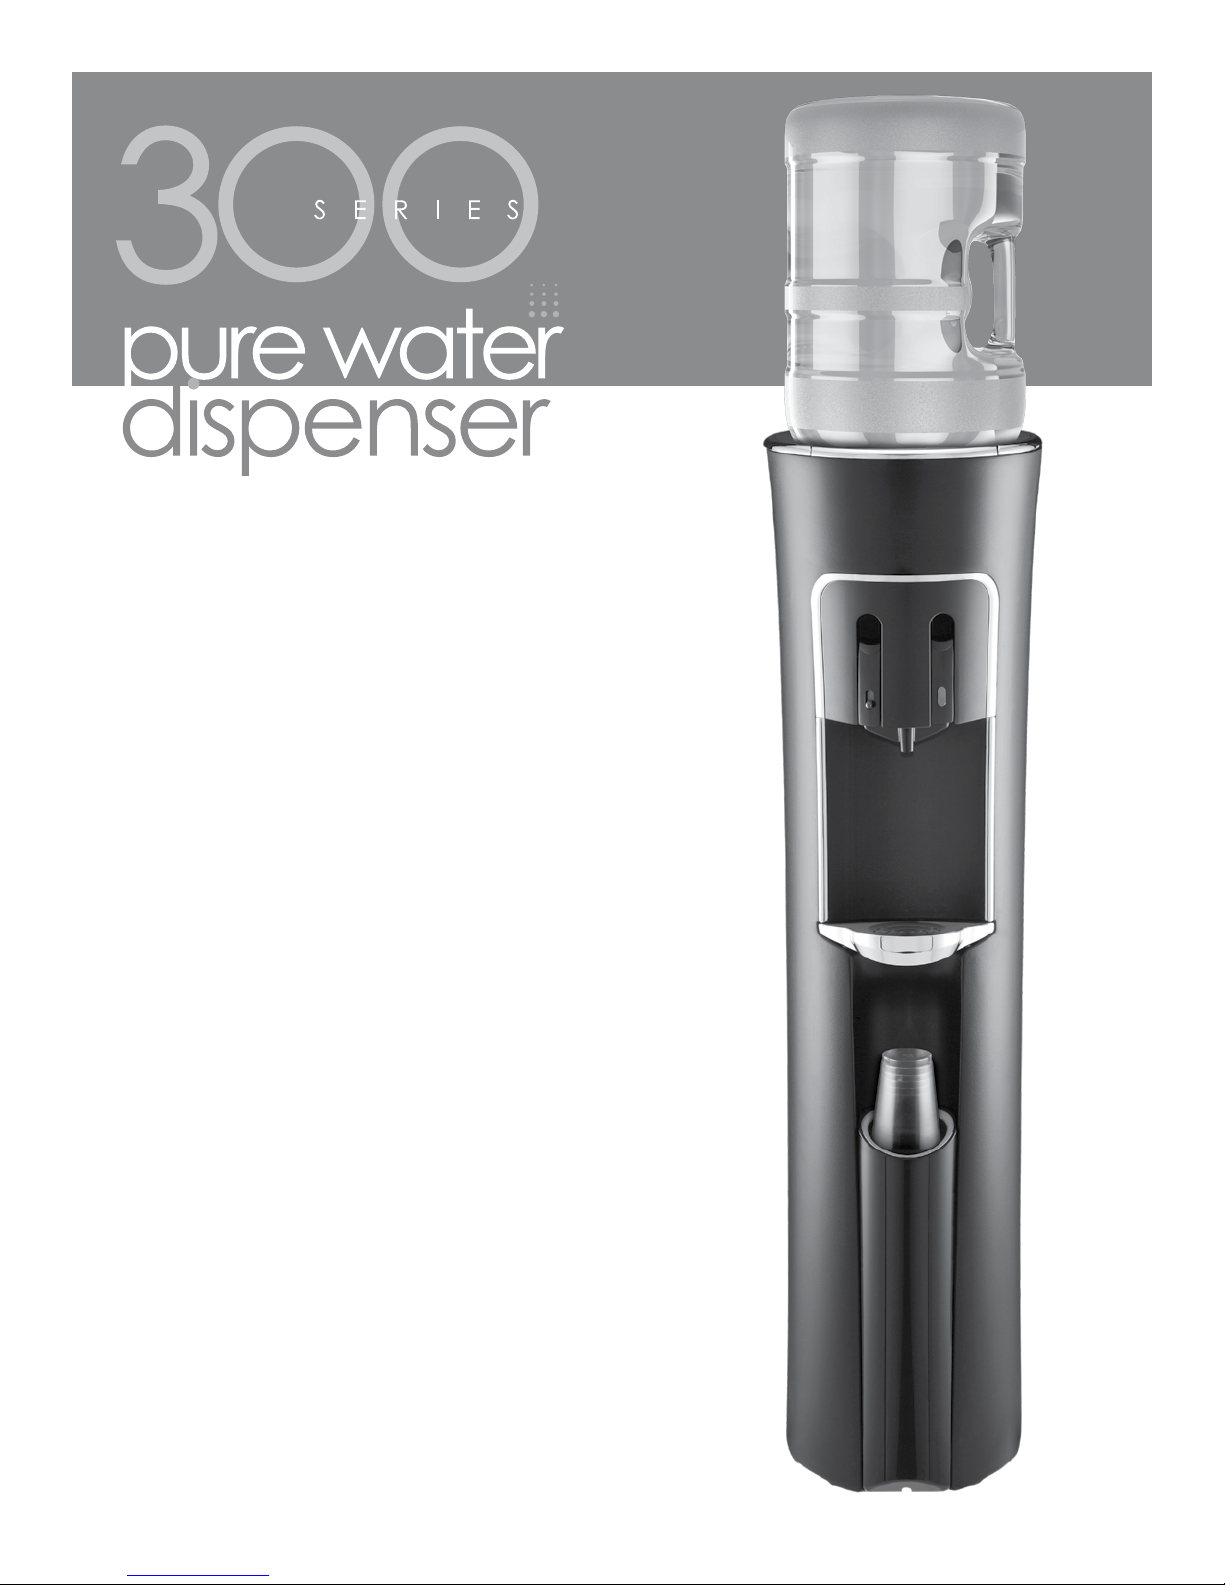
Load water
1
bottle FIRST.
STOP & READ DIRECTIONS
before plugging in dispenser.
2
THEN plug
in dispenser.
Dispense water
3
from hot and
cold faucets.
STOP
Read complete HOW TO INSTALL instruction sequence before
plugging in and turning on dispenser. Failure to follow proper
installation instructions may cause damage to water dispenser.
SAFETY PRECAUTIONS
Basic safety precautions should be followed when using electrical appliances, including:
• Only plug in dispenser in the sequence the manual indicates (see HOW TO INSTALL AND USE).
• In accordance with these instructions, the dispenser must be properly located and installed before use
(see HOW TO INSTALL AND USE).
• Use only bottled water in the dispenser.
• Keep all gasoline or other flammable vapors and liquids away from this and other appliances.
• Dispenser must be unplugged before cleaning, sanitizing or repairing (see CLEANING AND SANITIZING).
• Wipe up any water spills immediately after loading or unloading water bottles.
• Do not use with water that is microbiologically unsafe or of unknown quality.
• The dispenser heats water to a temperature above 190° F (90° C). Water temperatures above 125° F (52° C) can cause severe
burns or death from scalding. Most at risk of being scalded are children, the disabled and the elderly.
• Ensure the dispenser stands upright for 2 hours before loading water bottle, plugging in and turning unit on.
• Always lift dispenser by handle located on rear of unit. Lifting dispenser by faucets will damage the unit.
• Follow proper grounding safety precautions and instructions prior to plugging in the unit
(see GROUNDING SAFETY PRECAUTIONS AND INSTRUCTIONS).
• Supervise children when using the dispenser (see CHILD SAFETY).
GROUNDING SAFETY PRECAUTIONS AND INSTRUCTIONS
WARNING: The dispenser must be grounded – if the appliance is improperly grounded,
the result could be electric shock.
Ensure that the available power supply matches the dispenser’s voltage specifications indicated on the nameplate label
(located at the rear). Please ensure that dispenser is set up so access to the power outlet and plug is unobstructed.
IMPORTANT: To provide additional protection from the risk of shock, the dispenser MUST be
connected to a ground fault circuit interrupter (GFCI) outlet at all times. Use of an extension
cord will void any warranties.
2
CHILD SAFETY
CAUTION: Supervise children when using the dispenser.
The hot dispenser faucet is equipped with a child
safeguard that reduces the risk of hot water being
dispensed accidentally or by small children. To dispense
hot water, simultaneously depress the child safety lock
(located above the left hot faucet handle) and the left
hot faucet handle. Do not allow children to hang, climb
or stand on the dispenser; the dispenser could fall over
and the child could be injured.
RECEIVING
Inspect the dispenser box carefully for any evidence of shipping or handling damage before signing to receive goods.
In case of shipping damage, claims should be filed immediately with the carrier.
HOW TO INSTALL AND USE
WARNING: Read through every step in HOW TO INSTALL AND USE before plugging in
or turning unit on.
1. Keep dispenser unplugged and in the off position until the water bottle has been loaded and water flows through the faucet.
2. Ensure dispenser stands upright for a minimum of 2 hours before loading water bottle, plugging in and turning on dispenser.
3. Place dispenser a minimum of 2 inches away from the wall to ensure ventilation.
4. Install dispenser on a level floor strong enough to support it when fully loaded.
5. Do not install dispenser where it will be subject to direct sunlight, heat or moisture.
6. Do not install dispenser where the temperature will go below 50° F (10° C) or above 100° F (38° C).
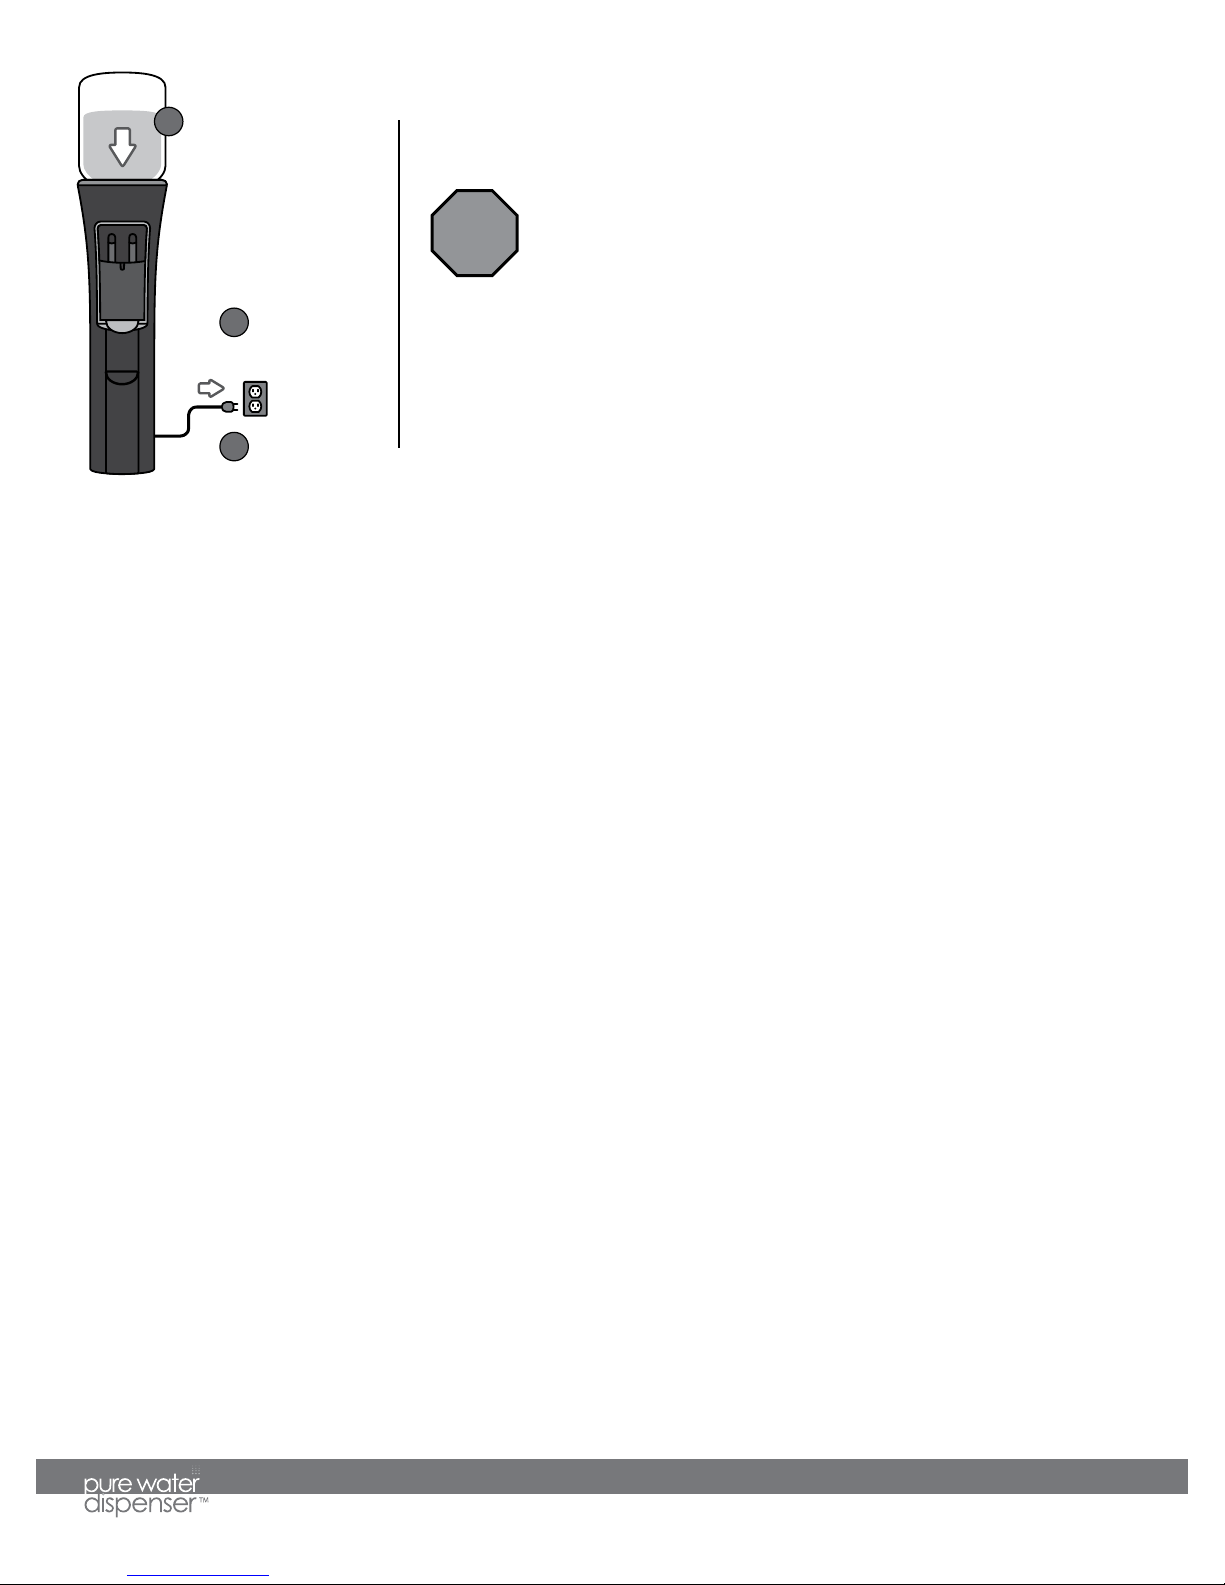
7. Wipe down the water bottle cap and neck to ensure there is no debris.
8. Remove tamper-evident seal from plastic bottle
cap. Do NOT remove plastic cap if using a NO-SPILL
water bottle.
NOTE: Be sure to use a NO-SPILL water bottle.
Using bottles without the NO-SPILL feature can
cause leaking to occur.
9. Ensure the No Leak® EZ-Fill® system is fully seated.
10. Load water bottle by lifting and inserting it onto
the probe, ensuring bottle is fully aligned with the
dispenser and centered over the probe. Be certain
fingers and other body parts are clear of underside
of bottle. Apply slight pressure until the plug inside
the cap pushes in and the bottle is seated. Water
will begin to flow into the tank causing air
bubbles in the bottle.
3
 Loading...