

Page 1
Public Address System
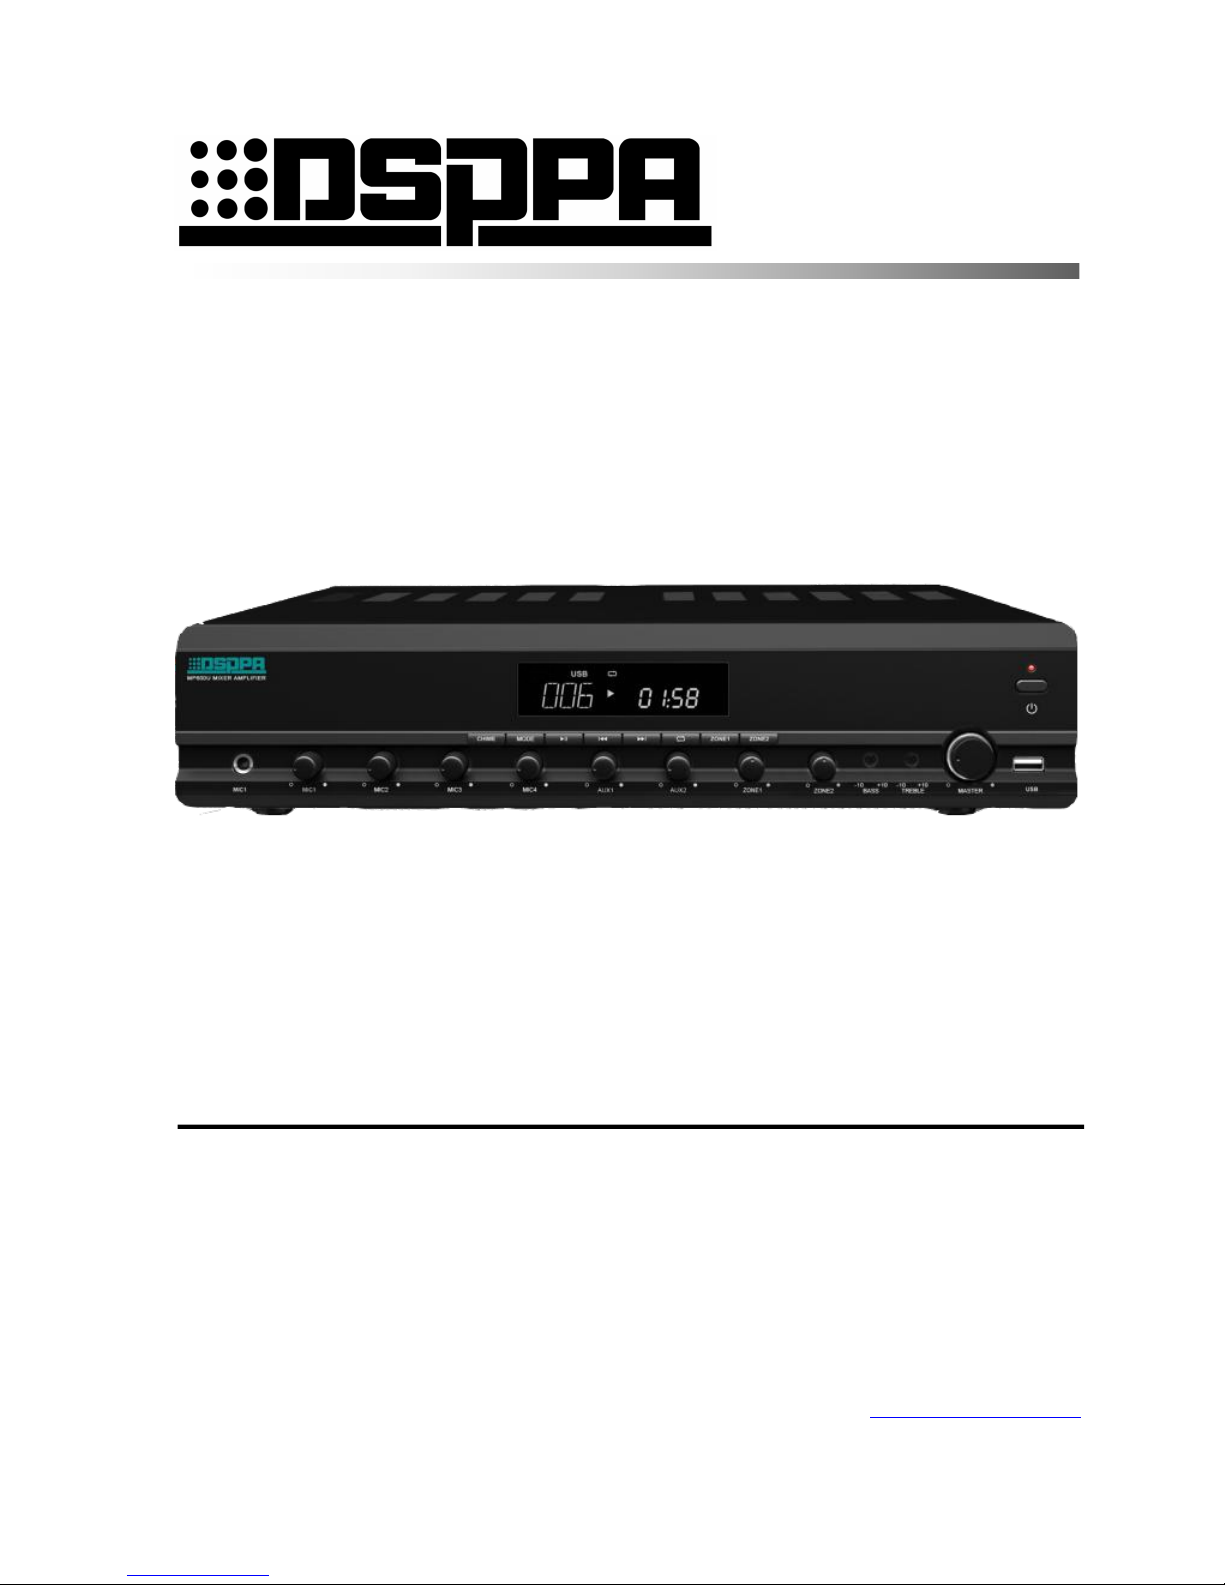
Mixer Amplifier MP200U
MP300U
MP600U
MP1000U
User Manual
Thank you for using our DSPPA public address system. Please read this User Manual carefully to make better use
of this equipment.
Guangzhou DSPPA Audio Co., Ltd.
http://www.DSPPA.com
http://www.dsppatech.com
Page 2

Matters needing attention
Please read the following before operating the product.
Warning
The following basic requirements must be strictly observed, to avoid potential personal injury and
equipment or property damages to you or any person nearby. The basic requirements include without
limitation to the following:
Power source/power cable
• Please disconnect the device from power source
by pulling the plug other than the power cord.
Pulling the power cord may result in damages.
• Please keep the power cord away from heat source.
Do not over-bend the power cord or place it
anywhere it can be stepped on or may cause to trip.
• This is connected to power source via the plug and
any failure or danger occurs, the user can
disconnect the device from power source by pulling
out the plug out from the socket, therefore, it is
required that the power socket should be located
somewhere with easy access.
• The device is not completely disconnected from
power source when it is switched "OFF". For sake
of safety, please disconnect the device from the
socket if it is not in user.
Positioning
• Please disconnect the device from power source
before relocating the device.
• For avoiding deformation of panels and damages
to internal components, please do NOT place the
device where there is heavy dust or violent
vibration, or where it is extremely cold or hot.
• Please keep this device off water drops or splash
or vase filled with water or any other articles of
similar nature.
Connection
• Please disconnect other equipment from power
source before they are connected to this product.
Please tune volume to its minimum level before the
device is powered ON or OFF.
• All terminals on the device marked with are
live and dangerous, and should be connected by
trained personnel.
When abnormal conditions are realized
• Please disconnect the device from power source
immediately in case the power cord is worn or
damaged or if the sound is suddenly cut off or any
abnormal odor or smoke comes out from the device,
and then have the device inspected and repaired by
professional personnel.
Precautions in Operation
• Please do NOT insert any finger into any gap or
opening of the device.
• Please prevent foreign objects (paper, plastics or
metal etc.) from being inserted or falling into any
gap or opening of the device. In such case, please
cut off power source immediately.
• Please do NOT put the body or any heavy object
on the device and do NOT operate the buttons or
switches or connections with excessive force.
Do NOT open
• Please do NOT remove the cover of the equipment,
otherwise you may get an electric shock.
• Do NOT attempt to remove any internal
component from the device, or to modify the
equipment in whatever manner. In case of any
abnormal condition, please stop using the device
immediately and have it inspected and repaired by
professional personnel.
Other Precautions
• Our company shall not be responsible for data loss
or damages due to improper use of unauthorized
modification to the device.
• The images and screen display in this Manual are
only for description and may be different from
screen images in actual operation. The screen
display depends on the product.
Page 3

* * PA Mixer Amplifier
Content
1.Product Instruction.....................................................................................................................................................2
2. Feature.......................................................................................................................................................................3
3. Description of Appearance........................................................................................................................................4
3.1 Description of front panel...............................................................................................................................4
3.2 Description of rear panel................................................................................................................................ 5
4. Connection Diagram.................................................................................................................................................6
5. Operation Instruction................................................................................................................................................7
Specification................................................................................................................................................................11
Page 4

* * PA Mixer Amplifier
1. Product Description
This is a newly developed combined amplifier of DSPPA. Total MP200U/ MP300U/ MP600U/ MP1000U four models, with
open mold plastic panel, standard 2U cabinet type, chassis and cover plate on both sides of the circular design, is the only design of
the industry, filling the appearance of exquisite and elegant. The same type of the industry is not comparable with the product.
2. Features
With segment code LCD screen, more user-friendly choice of function and operation function.
4 kinds of audio source mode selection: AUX/ BL/ FM/ USB.
With Bluetooth, FM, MP3, independent audio source, Bluetooth and fixed password connection.
The front panel with 1-channel imbalance 6.35 interface MIC 1, user-friendly in front operation, and an independent MIC 1
volume controller, adjustable volume size.
With 3-channel balance XLR MIC 2-MIC 4 interface, respectively, with independent gain regulation and independent
phantom power control switch, the user can select a microphone with phantom power also select a microphone without
phantom power.
2-channel AUX IN unbalanced Lotus input interface, AUX with mode selection, the user can switch BL/ FM/ USB modes to
use, with independent AUX IN volume adjustment.
With digital tone adjustment, bass and treble adjustments are possible regardless of the source mode, and the size of the
adjustment can be displayed on the LCD screen, which is unmatched by any other product.
Digital master volume control mode
With power indicator and signal indicator
With 1-channel LINE OUT, can be easily connected to the next amplifier or other devices
With 485 interface, can connect with RM20 remote microphone, do not need external independent to RM20.
With CHIME and SIRNE short-circuit trigger function, users can remotely control or be controlled by other devices,
independent bell and alarm sound output, and separate volume control
With MUTE short-circuit trigger mute function, users can remotely control or be controlled by other devices
With the 3-level custom priority function, priority order is; EMC>MIC1> remote paging, the user can dial switch hit "On" of
the back panel corresponding red to set the priority
With 1-channel EMC alarm signal input, you can input the alarm signal from other devices to the machine, and have an
independent volume adjustment.
The machine also has 1-channel pre-out function, you can connect mixer or other preamplifier.
The machine with short-circuit without output and temperature protection function.
Page 5

* * PA Mixer Amplifier
3. Description of Appearance
3.1 Description of Front Panel
1 2 3 4 5 6 7 8 9 10 11
1. LCD Screen 9. Zone 2 selection key 17. Zone 1 Volume Control
2. Chime Button 10. Power On/Off Switch 18. Aux 2 Input Volume Control
3. Mode Selection Key 11. Power Indicator 19. Aux 1 Input Volume Control
4. Play/Pause keys 12. USB Interface 20. Mic 4 Volume Control
5. Fast-rewind key/previous song 13. Master Volume Control 21. Mic 3 Volume Control
6. Fast-forward/Next song 14. Treble Adjustment 22. Mic 2 Volume Control
7. Cycle 15. Bass Adjustment 23.Mic 1 Volume Control
8. Zone 1 selection key 16. Zone 2 Volume Control 24.Mic 4 Input
24 23 22 21 20 19 18 17 16 15 14 13 12
Page 6
* * PA Mixer Amplifier
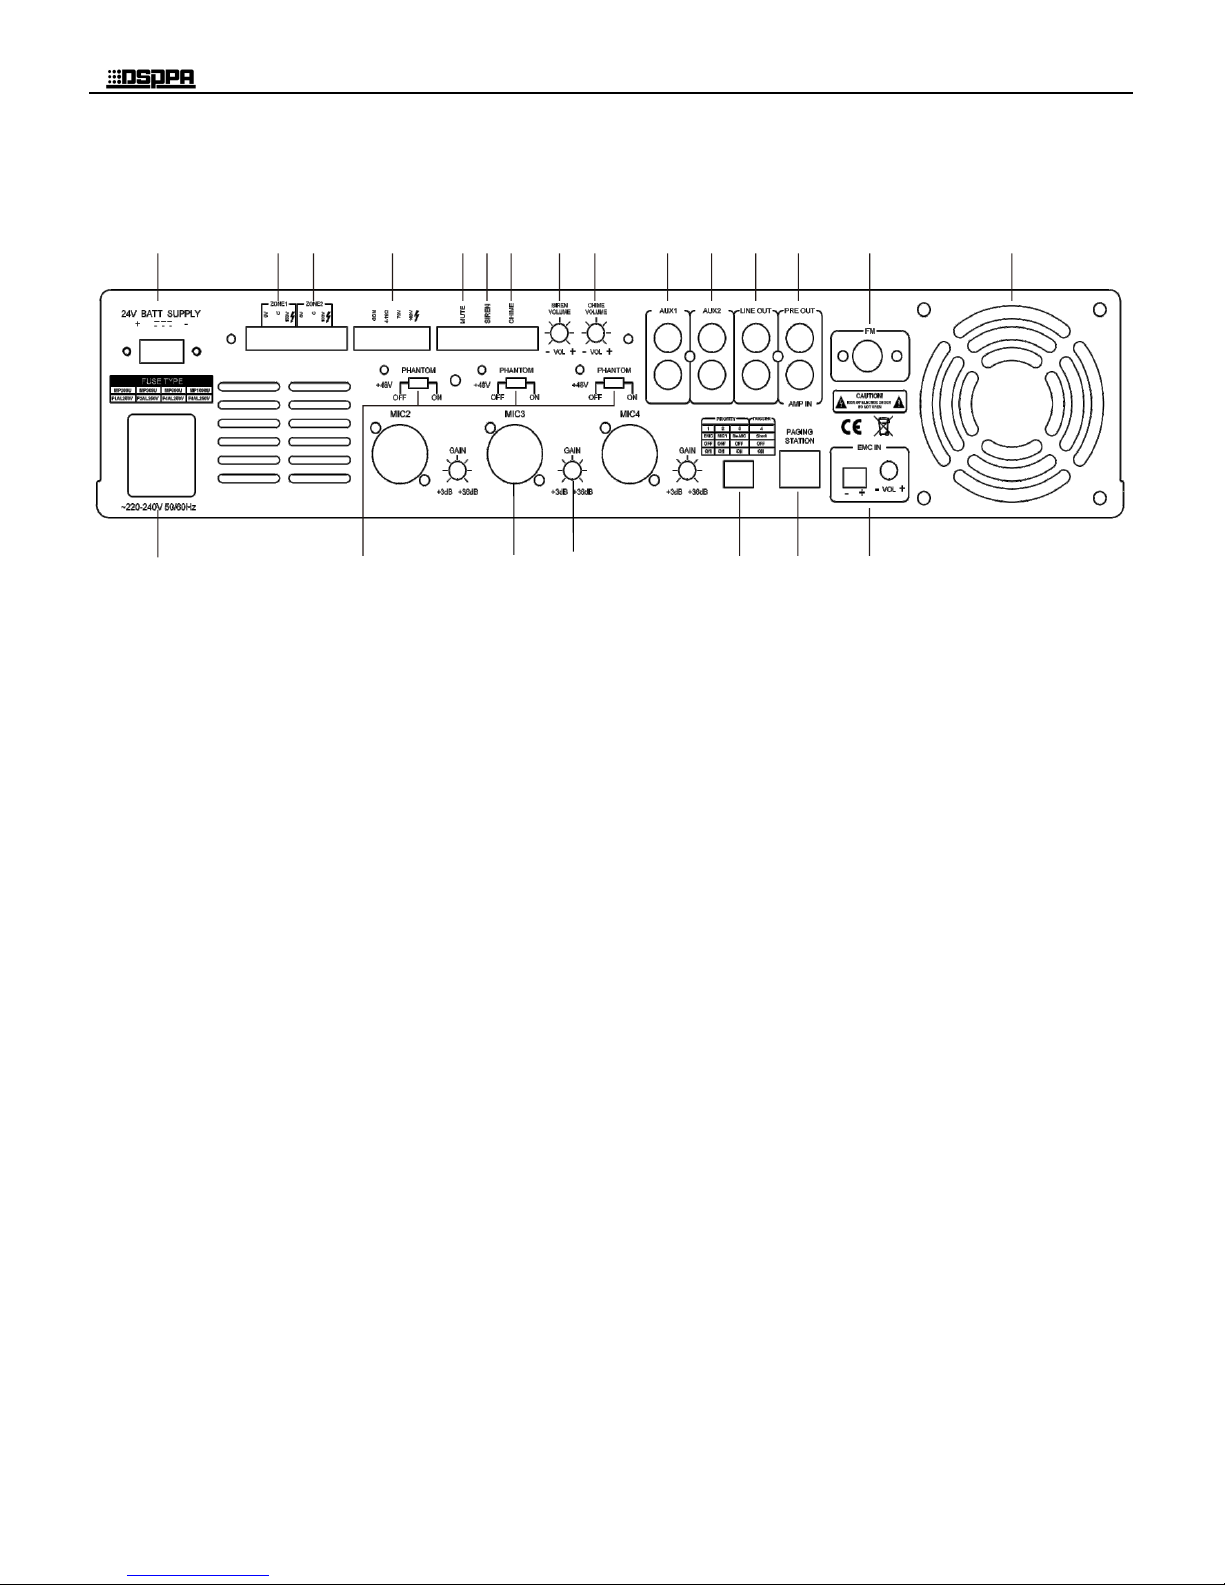
3.2 Description of Rear Panel
1 2 3 4 5 6 7 8 9 10 11 12 13 14 15
22 21 20 19 18 17 16
1. 24V DC Input Interface 12. Line out
2. Zone 1 Speaker Output 13. Expanded preamplifier Interface
3. Zone 2 Speaker Output 14. FM Tuner Antenna
4. 70V/100V/4-16ΩSpeaker Output 15. Cooling Fan
5. Mute dry contacts 16. Electromagnetic compatible Interface
6. Alarm dry contacts 17. Paging Mic Interface
7. Chime dry contacts 18. Priority Setting
8. Siren Volume Adjustment 19. Gain Adjustment
9. Chime Volume Adjustment 20. Mic 2, 3, 4 Inputs
10. Auxiliary Input 1 21. 48V Phantom Power on/off Switch
11. Auxiliary Input 2 22. AC 220V-240V Power Supply
Page 7

* * PA Mixer Amplifier
1
To MIC 1
Tuner, CD,
Recorderor
4. Connection Diagram
To MIC 1
MIC 1 with
Tuner, CD,
Recorderor
Page 8

* * PA Mixer Amplifier
2
5. Operation Instruction
1 2 3 4 5 6 7 8 9 10 11
24 23 22 21 20 19 18 17 16 15 14 13 12
1. Screen 9. Zone 2 17. Zone 1 Volume
2. Chime 10. Power Switch 18. AUX 2 Input Volume
3. Mode selection key 11. Power Indicator 19. AUX 1 Input Volume
4. Play/Pause keys 12. USB Interface 20. Mic 4 Volume
5. Rewind key/previous song 13. Volume Control 21. Mic 3 Volume
9. Fast-forward/Next song 14. Treble 22. Mic 2 Volume
10. Cycle 15. Bass 23.Mic 1 Volume
11. Zone 1 16. Zone 2 Volume 24.Mic 4 Interface
1. Start up
Press button 10 and indicator 11 will turn red and the screen will show “on”.
2. After starting up
This device has memory function. It will stay at the interface where you leave last time.
3. CHIME
Press button 2 “CHIME” under normally running status to enter mode selection interface. Four
modes are available “AUX”, “BT”, “FM” and “USB”.
Page 9

* * PA Mixer Amplifier
3
4.
Press button 4 under normally running status. The device will play or pause under “BT” and “USB” mode. It
will mute. Long press the button and it will start to search radio stations and save searched ones.
5.
Press button 5 under normally running status. The device will play previous songs under “BT” and “USB” mode.
It will choose previous radio. Long press the button and it will decrease total volume.
6.
Press button 6 under normally running status. The device will play next songs under “BT” and “USB” mode. It
will choose next radio. Long press the button and it will increase total volume.
7.
Press button 7 under normally running status. The device will do single loop or list loop under “BT” and “USB”
mode.
8. ZONE 1
Press button 8 under normally running status. The device is able to control on and off of zone 1 under any mode.
9. ZONE 2
Press button 9 under normally running status. The device is able to control on and off of zone 2 under any mode.
12. USB interface
Plug USB in under any mode will trigger USB play with memory function.
13. MASTER switch
This switch is to control total volume under any mode. Switch clockwise to volume up. Switch Counterclockwise
to volume down.
14. TREBLE switch
This switch is to adjust treble under any mode. Switch clockwise to increase. Switch Counterclockwise to
Page 10

* * PA Mixer Amplifier
4
decrease.
15. BASS switch
This switch is to adjust bass under any mode. Switch clockwise to increase. Switch Counterclockwise to decrease.
16. Zone 2 switch
This switch is to control volume of zone 2. Switch clockwise to volume up. Switch Counterclockwise to volume
down.
17. Zone 1 switch
This switch is to control volume of zone 1. Switch clockwise to volume up. Switch Counterclockwise to volume
down.
18. AUX 2 switch
This switch is to control volume of AUX 2. Switch clockwise to volume up. Switch Counterclockwise to volume
down.
19. AUX 1 switch
This switch is to control volume of AUX 1. Switch clockwise to volume up. Switch Counterclockwise to volume
down.
20. MIC 4 switch
This switch is to control volume of MIC 4. Switch clockwise to volume up. Switch Counterclockwise to volume
down.
21. MIC 3 switch
This switch is to control volume of MIC 3. Switch clockwise to volume up. Switch Counterclockwise to volume
Page 11

* * PA Mixer Amplifier
5
down.
22. MIC 2 switch
This switch is to control volume of MIC 2. Switch clockwise to volume up. Switch Counterclockwise to volume
down.
23. MIC 1 switch
This switch is to control volume of MIC 1. Switch clockwise to volume up. Switch Counterclockwise to volume
down.
24. MIC 1interface
This is a 6.35mmm interface which microphones could plug in directly or use switcher.
1 2 3 4 5 6 7 8 9 10 11 12 13 14 15
22 21 20 19 18 17 16
1. 24V Input Interface 12. Line out
2. Zone 1 Output 13. Expanded preamplifier Interface
3. Zone 2 Output 14. FM
4. Constant Power/Impedance Output 15. Fan Port
5. Mute 16. Electromagnetic compatible Interface
6. Alarm 17. Paging Mic Interface
7. Chime 18. Dialing switch
Page 12

* * PA Mixer Amplifier
6
8. Siren Volume 19. Gain Adjustment
9. Chime Volume 20. Mic 2, 3, 4 Interface
10. Aux Input 1 21. 48V Phantom Power
11. Aux Input 2 22. AC Power Interface
1. 24V Input Interface
2. Zone 1 Output
Connect positive electrode of constant voltage speakers to interface “100V” and negative side to “0V”.
3. Zone 2 Output
Connect positive electrode of constant resistance speakers to interface “100V” and negative side to “0V”.
4. Constant Power/Impedance Output
Connect constant resistance speakers or constant voltage speakers with corresponding interface.
5. Mute
Short circuit to trigger mute mode.
6. Alarm
Short circuit to trigger mute mode..
7. Chime
Short circuit to trigger chime mode.
Page 13

* * PA Mixer Amplifier
7
8. Siren volume
This switch is to control volume of alarm. Switch clockwise to volume up. Switch Counterclockwise to volume
down.
9. Chime volume
This switch is to control volume of Chime. Switch clockwise to volume up. Switch Counterclockwise to volume
down.
10. AUX input 1
11. Aux Input 2
12. Line out
13. Expanded preamplifier Interface
Page 14

* * PA Mixer Amplifier
8
14. FM
15. Fan Port
16. Electromagnetic compatible Interface
17. Paging Mic Interface
18. Dialing switch
19. Gain Adjustment
20. Mic 2, 3, 4 Interface
21. 48V Phantom Power
22. AC Power Interface
Page 15

* * PA Mixer Amplifier
9
1. On/off
2. EQ. Under MP3 playing mode, you can choose different sound effect- Classic, Jazz, Rock, Mega bass and Pop.
Under TUNER mode, you can play radios that have been saved.
3. Rewind/Previous song
4. Number button
5. Cycle
6. Volume down
7. Fast-forward/next song
8. Play/Pause
9. Sound effect control
10. Volume up
11. Mute
12. Mode selection
1
2
3
11
10
9
8
Page 16

* * PA Mixer Amplifier
10
Safety Precautions
1. Safety Precautions
Please do NOT connect this device to the power source, before the system is correctly wired.
It is important to ensure that input voltage to the device is the same as required voltage of the device,
otherwise the device may be damaged.
There is dangerous voltage in the device, which may cause personal electric shock. Please do NOT open
the case without permission, to avoid potential risks of electric shock.
The device is not completely disconnected from power source when it is switched "OFF". For sake of
safety, please disconnect the device from the socket if it is not in use.
Please do NOT place the device where it is extremely cold or hot.
Good ventilation must be provided in the working environment of the device, to avoid excessive
temperature during its operation, which may cause damages to the device.
Please unplug the device from power socket in raining and wet days or if the device is not in use for a
long time.
Please disconnect the power plug from sockets, to ensure the device has been completely disconnected
from power source, before any component is removed from or re-installed in the device or before any
electric connector of the device is disconnected or reconnected.
In case of any failure of the device, please do NOT open the case and repair without permission from a
professional personnel, to avoid accident or additional damages to the device.
Please do NOT place any corrosive chemicals near or on the device.
2. Matters needing attention
Our company provides a three-year free warranty service (including free replacement parts) over quality
issues as from the date of purchase, provided that the device is installed and used in accordance with
requirements specified in the User Manual.
For warranty, the user must show the Warranty Card and the receipt kept by the user and purchase
invoice of the device as supporting documents.
The following conditions are beyond the scope of warranty:
1.Product damage due to improper installation, use or handling;
2.Product damage due to abnormal conditions (such as excessive power source voltage or ambient
humidity);
3.Product damage due to acts of God;
4.Product SN is changed, altered or removed;
5.Product has been repaired or modified by any person without duly authorization from our company;
Please keep the User Manual and Warranty Card in good custody.
For issues and precautions not mentioned in this User Manual, if required, please contact the distributor
or visit our website at http://www.dsppatech.com.
In case of any failure in the warranty period, please contact service personnel (or distributor) of our
company for service. The company shall not be made liable for damages due to unauthorized
dis-assembly or maintenance or service by unauthorized personnel.
Page 17

* * PA Mixer Amplifier
11
Specification
Note: The performance specifications are subject to changes without further notification.
Item
MP200U
MP300U
MP600U
MP1000U
Rated output power
60W
120W
250W
350W
Input sensitivity
MIC1 :5mv (unbalanced 6.35 interface input)
MIC2-MIC4:±5mv (balanced XLR input)
AUX IN:300mv±30mv(unbalanced RCA input)
EMC IN:375mv±30mv(unbalanced terminal)
Freq. Response
60HZ-16KHZ ±3dB
THD
≤1% at 1KHZ
Screen
Multi-functional segmented LCD screen
SNR
≥75dB
Total volume
Adjust volume from 0 to 32 with number displayed on screen
Audio adjustment range
Bass:100HZ ±10±2dB Treble:10KHZ ±10±2 dB with number displyed on
screen
Priority
3-level custom priority,EMC>MIC1>remoter paging
485 interface
485 communication protocol
Phantom power
48V±2V
AUX IN
2 channel AUX IN
EMC IN
1 channel EMC IN
LINE OUT
1 channel LINE OUT:1V at 1KHZ
Chime
support
support
support
support
Alarm
support
support
support
support
MUTE
support
support
support
support
Bluetooth
support
support
support
support
FM
support
support
support
support
MP3
support
support
support
support
Zone
2 zones
2 zones
2 zones
2 zones
Remote control
support
support
support
support
DC 24V input
support
support
support
support
Working power
AC 220-240V/50HZ/60HZ
Power dissipation
120W
250W
500W
700W
Package size
(L X W X H)542mm*470mm*155mm
Product size
(L X W X H)420mm*403mm*88mm
Gross weight
Net weight
Page 18

* * PA Mixer Amplifier
12
Guangzhou DSPPA Audio Co., Ltd
Caution
● The device is not completely disconnected from power source when it is switched "OFF". For sake of safety,
please disconnect the device from the socket if it is not in use.
● Please keep this device off water drops or splash or vase filled with water or any other articles of similar
nature.
● Please do NOT remove the cover of the equipment, otherwise you may get an electric shock. Where
necessary, repair to the equipment should be conducted by qualified professionals.
● All terminals on the device marked with are live and dangerous, and should be connected by trained
personnel.
● This is connected to power source via the plug and any failure or danger occurs, the user can disconnect the
device from power source by pulling out the plug out from the socket, therefore, it is required that the power
socket should be located somewhere with easy access.
 Loading...