

User Manual

Introduction:
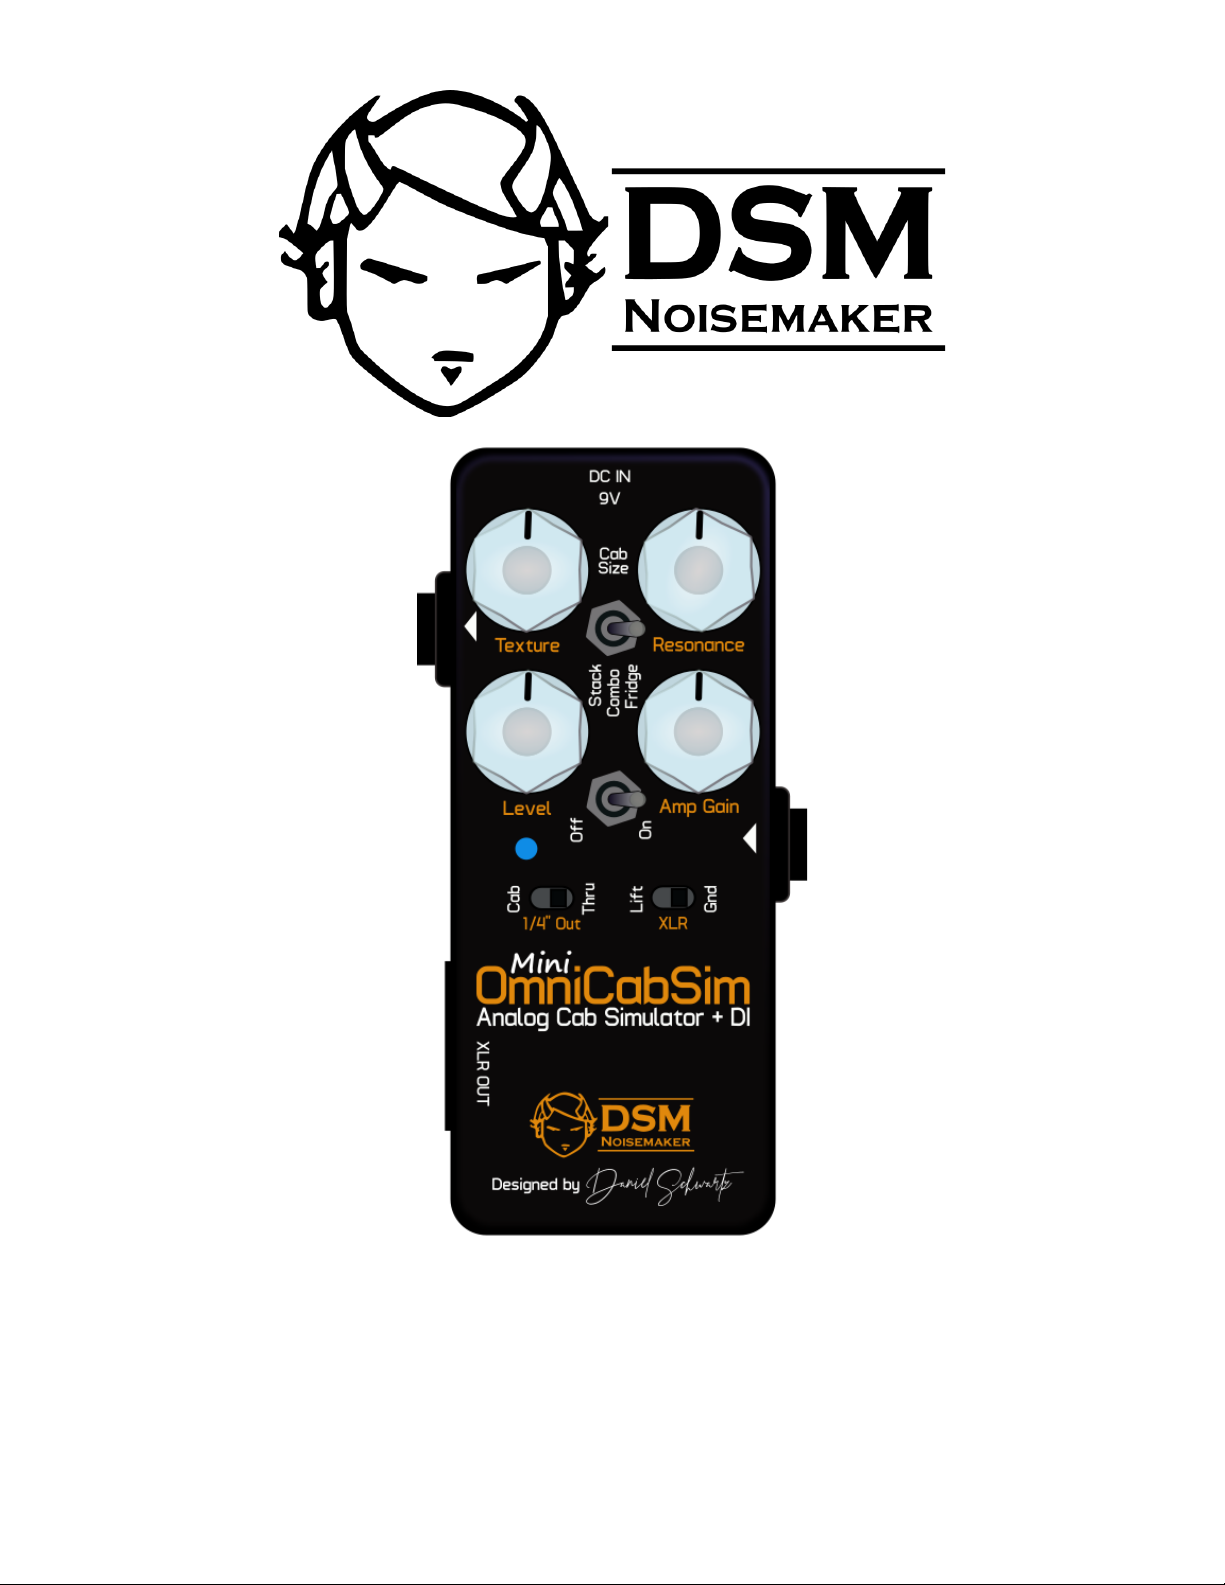
Congratulations for getting your hands on the Omnicabsim Mini pedal, the small brother of
their famous Omnicabsim Deluxe cabinet simulator, praised by bass and guitar players
worldwide.
As usual with DSM noisemaker´s products, this super practical pedal is packed with a lot of
features and easy to use layout in a small package that will fit on any pedalboard with a tight
real estate. It features the Omnicabsim´s most important controls of: Texture (High response),
Cab Size and Resonance, allowing the user to get amazing cabinet tones in just seconds.
The Cab size switch options are Combo and Stack for Guitar use, and Fridge for bass use,
getting that perfectly tight, punchy low end response on any situation and style
The Texture control lets you fine-tune the high frequency response of the virtual cabinet, which
goes from super dark to extended range sparkle. On middle positions, the warmth and rich
overtones of distortions are superbly voiced by its carefully designed filters.
But that's not all. This is really a miniature Power Amp + Cabinet combo in miniature. The Amp
Gain knob emulates the complex overdrive characteristics of tube power amps. Crank it up and
you get the smooth clipping, compression and extra midrange byte of a loud amp taken to its
limits. This gives a whole new dimension to the omnicabsim concept. Not only you get the right
frequency response to play direct, now you can get the right “feel”, too.
Also, it features a Balanced DI XLR output for low noise direct performances, and a ¼” output
jack that can be set as a through output or effected output.
Powering up:
Before powering up the device, please make sure:
- Your power supply is 9v to 12v DC, center negative, and has a nice and clean voltage.
Do not use household cheap unregulated supplies not meant to be used with instrument
pedals.
- The destination amplifier/board/interface is OFF or with the input level set at zero (or
muted). If the Mini Cabsim is powered while the amp is on, it may make a WHOOMP
sound as the internal capacitors charge. Other way is to set the output level at zero or
bypass the pedal before powering up.
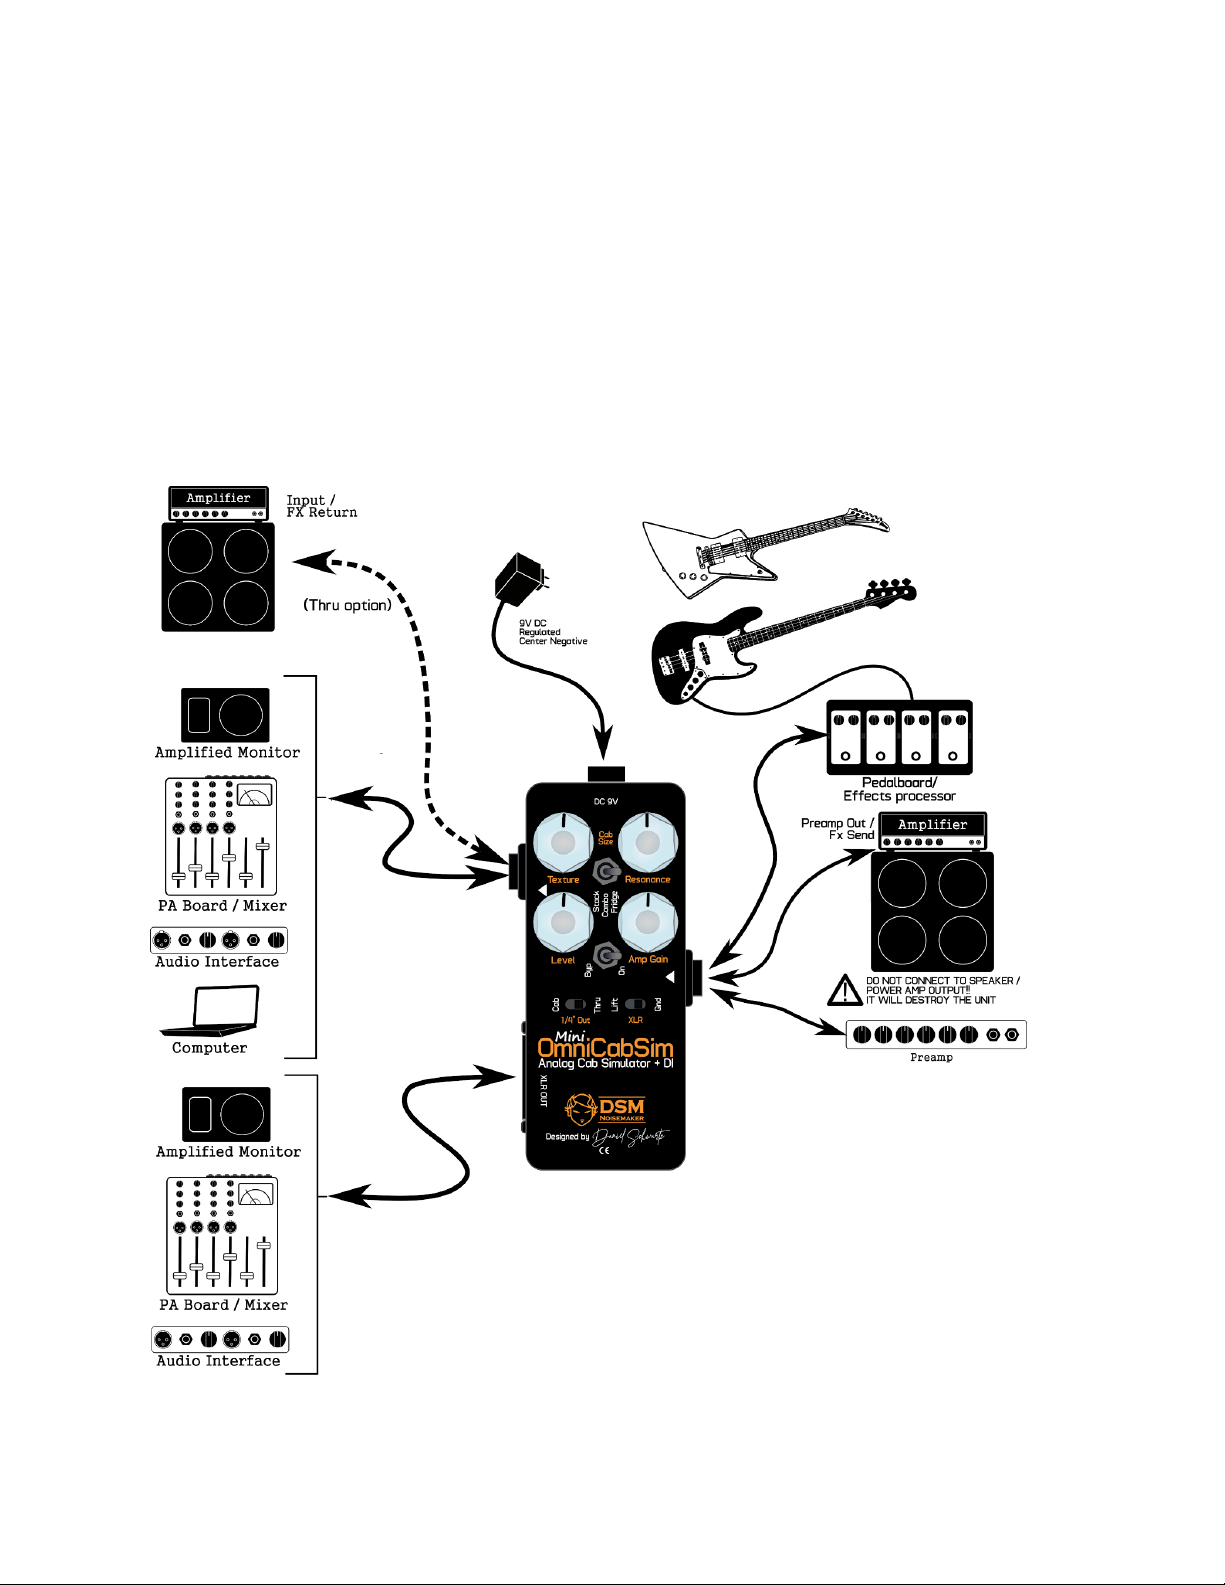
Connections:
The Omnicabsim MINI features:
- ¼” Input Jack: Connect here the output from your pedalboard/ amp fx send, or just the
instrument (for best results, a high output instrument, or a preamp is recommended)
- ¼” Output Jack: This output can be set to carry the Cabinet simulator signal or the
Bypass signal.
- XLR Output: Active balanced output for direct inputs. This output will only carry the
cabinet simulator signal (unless the pedal is bypassed).
- DC Input: As stated previously, use only a regulated 9V to 12V DC, center negative,
2.5mm jack power supply.

Controls:
Switches:
- Bypass Switch: Toggles between the effect and the input signal. Note: Be
aware that DI levels are lower than instrument/preamp level. The level knob will
help you get the right DI signal level, but if you bypass the pedal, the level may
be much higher.
- Cab size Switch: Select 3 cabinet sizes:
- Stack: 4x12 cabinet low end response with a peak
resonance at 95Hz. All Rock and metal tones.
- Combo: 1x10 combo with rich low mids centered at
160Hz. Great for blues and vintage tones
- Fridge: 8x10 Bass monster with a peak resonance of
65Hz.
Cab Size Switch resonance peaks.
- ¼ output Switch: Select the TR (¼) output function between the Cabinet
simulation or the unaffected input signal. Great to send your unaffected signal to
your guitar or bass amp (or DAW, for later reamping).
- Ground Switch: Connects and disconnects (Lift) the ground signal from the XLR
cable shield. Use only if having ground loop issues.

Knobs:
- Level: Sets the master output level of the effect.
- Gain: Emulates the gain of a power amp, starting from linear behaviour to slight
compression up to soft clipping. It also considers the output transformer core saturation,
limiting the lows and highs as the gain raises.
The amount of clipping is also dependent on the input signal level. If the input signal is
too high, it will distort too soon, if it’s too low, it may never distort. Carefully choose the
gain and set the input level (the output level of the previous device) to get the desired
clipping behaviour. As a rule of thumb, set the level knob at 75% and the gain at 50%
and you should get about unity compared to the bypassed signal. Adjust the input level
if there’s too much difference.
For high gain guitar tones, lower Amp Gain levels works best for tighter tones. For low
gain (like OD’s or bluesy tones) a higher Amp Gain will give you that extra attack and grit
of tube power amps.
For Bass, the amp gain set at 50-75% will work as a hard limiter, very nice for enhancing
those slaps attacks.
Clipping and limiting behavior of the Amp Gain Knob

- Texture: The texture controls the shape and response of the high end. It models the
variety of sharp low pass filters naturally made by speaker’s inductance and reactance.
You can precisely set the amount of high end fizz by turning this knob. It can make the
nastiest fuzz sound like velvet if set right.
Texture Knob range.
- Resonance: This knob controls the amount of resonance of the cabinet. Open
back cabinets tend to have less resonant lows than closed backs. Also, bigger
cabinets have higher resonance levels. The right amount of resonance will
depend of the amount of low end coming from the input signal. Set until you feel
the lows are as tight or loose as you want. On lower levels it will work as a low
cut filter.
Resonance control range

Technical Specs:
● Size (cm): 3.5w X 10.8h X 4.5t
● Weight: 180gr.
● Input Impedance: 200K Ohms
● Output impedance:
○ Out: 1k Ohms
○ XLR: 100 Ohms
● Power Consumption: 20mA
Always use a good quality power source. Regulated 9v DC, center negative is
recommended. Avoid cheap switching or poorly filtered power supplies.
EMI and EMC emissions:
The manufacturer claims that the above product fulfills the requirements as set by EN55013,
EN55020, EN60555-2, EN60555-3, RoHS, WEEE. EMC / EMI This equipment has been tested
and found to comply with the limits for a Class B Digital device, pursuant to part 15 of the FCC
rules. These limits are designed to provide reasonable protection against harmful interference in
residential installations. This equipment generates, uses and can radiate radio frequency energy
and, if not installed and used in accordance with the instructions, may cause harmful
interference to radio communications. There is no guarantee that interference will not occur in a
particular installation. If this equipment does cause harmful interference to radio or television
reception, which can be determined by turning the equipment off and on, the user is encouraged
to try to correct the interference by one or more of the following measures: · Reorient or relocate
the receiving antenna. · Increase the separation between the equipment and receiver. · Connect
the equipment to an outlet on a circuit different from that to which the receiver is connected. ·
Consult the dealer or an experienced radio/TV technician for help
Warranty:
All of our products have a 2 year warranty covering production defects or malfunctions. If you
have any issue with your unit, please contact your dealer or contact us at
info@dsmnoisemaker.com
 Loading...