

ds-messwerkzeuge FVE 100, FVE 150, P 340 100, P 340 150 User Manual
DS
Bedienungsanleitung
User manual
Video-Endoskop
Video Borescope
[ FVE 100 ] und [ FVE 150 ]
Artikel-Nr.: P 340 100 DSArtikel-Nr.: P 340 150
x106244x @ http://www.ds-messwerkzeuge.de/bedienungsanleitungen/fve.pdf
[ FVE 100 ]

K
B
LIEFERUMFANG
Video-Endoskop, Schwanenhalssonde 100 cm,
TV-Kabel, USB-Kabel, Li-Ion-Akku, Ladegerät,
Magnet, Haken, Spiegel, Koffer, Bedienungsanleitung
WARN- UND SICHERHEITSHINWEISE
Bitte richten Sie sich nach den Anweisungen
der Bedienungsanleitung.
Anleitung vor Benutzung des Gerätes sorgfältig
lesen.
Niemals das Gehäuse öffnen.
Reparaturen nur vom autorisierten Fachhändler
durchführen lassen.
Keine Warn- oder Sicherheitshinweise entfernen.
Kamera und Sonde sind wasserdicht, jedoch
nicht das Gerät. Video-Endoskop nicht in Wasser tauchen. Gerät nicht in feuchter / nasser
Umgebung (Regen) betreiben.
Doppelte Isolierung nach CE-Standards.
Sonde sorgfältig an das Gerät anschrauben, um
Elektrounfälle zu vermeiden.
Das Gerät nicht direkter Sonnenstrahlung, starken Lichtquellen oder Reflektoren aussetzen.
IT CONSISTS OF
Video-Borescope, gooseneck probe 100 cm,
video cable, USB cable, Li-Ion batteries, charger, magnet tip, hook tip, mirror tip, hard case,
user manual
SAFETY INSTRUCTIONS
Please follow up instructions given in user
manual.
Carefully read the instructions before using the
instrument.
Do not open instrument housing.
Repairs should be carried out by authorized
workshops only. Please contact your local dealer.
Do not remove warning labels or safety instructions.
The camera is waterproof, but not the instrument. Do not use the instrument under water.
Do not use the instrument in humid / wet condition (rain).
Carefully screw the probe onto the instrument
in order to avoid electro shocks.
Do not use the instrument in direct sun light,
in bright illumination and with reflectors.
INTENDED USE OF INSRUMENT
ESTIMMUNGSGEMÄßE VERWENDUNG
Optical check / survey of unaccessible places
Für optische Kontrolle / Überwachung von un-
via borescope, i. e. sanitary installations, elec-
zugänglichen Stellen per Video-Endoskop, z. B.
trical industry, construction.
Sanitär-, Elektro-, Baubranche.
2

F
K
UMGANG UND PFLEGE
Please handle measuring instruments with care.
Messinstrumente generell bitte sorgsam behan-
Clean with soft cloth only after any use. If
deln.
Nach Benutzung mit weichem Tuch reinigen
necessary damp cloth with some water.
If instrument is wet clean and dry it carefully.
(ggfs. Tuch in etwas Wasser tränken).
Wenn das Gerät feucht war, sorgsam trocknen.
Pack it up only if it is perfectly dry.
Transport in original container / case only.
Erst in den Koffer oder die Tasche packen,
wenn es absolut trocken ist.
Transport nur in Originalbehälter oder -tasche.
CARE AND CLEANING
FUNCTIONS
UNKTIONEN
Optical check of machine interior for service
Für optische Einblicke in das Innenleben von
and repair.
Maschinen zur Wartung und Instandhaltung.
Survey and check of objects under water (drai-
Beobachtung und Kontrolle von Objekten unter
nage works). - Please only put camera with
Wasser (Drainagearbeiten). - Nur die Sonde mit
probe under water - not the instrument!
amera unter Wasser tauchen - auf keinen Fall
das Gerät!
TV output
TV-Ausgang
LED illumination for working in dark surroun-
LED-Beleuchtung für Arbeiten in dunkler Um-
dings
gebung
USB charging of 2000mAh Li-Ion battery
2000mAh Li-Ion-Akku wird über Mini-USB-
Adjustment of contrast, illumination and colours
Anschluss geladen
Image rotation of 180°
Kontrast, Helligkeit und Farben einstellbar
Standby function
Bild auf Display um 180° drehbar
Standby-Funktion
3

T
K
ECHNISCHE DATEN
Camera head
amerakopf
Viewable angle 0° and 180°
Blickfeld 0° und 180°
Focal length 6 - 7 cm
Brennweite 6 - 7 cm
Viewable distance 5 - 15 cm
Sichtbarer Abstand 5 - 15 cm
Diameter of camera 17 mm
Kameradurchmesser 17 mm
Lichtquelle LED
Light source LED
Display
Display
Displaygröße 3“
Display size 3“
Resolution 960 x 240 pixels
Auflösung 960 x 240 Pixel
Image transmisstion Gooseneck tube
Bildübertragung zu LCD Schwanenhalssonde
to LCD
CMOS Bildsensor 300.000 Pixel
Videoausgang (zu TV) PAL / NTSC
TECHNICAL DATA
CMOS image sensor 300.000 pixels
Video output (to TV) PAL / NTSC
Verschiedenes
Sondenlänge 100 cm
Bend radius of probe 6 cm
Biegeradius 6 cm
Protection class probe
Schutzklasse Sonde und
and camera IP 67
Kamera IP 67
Stromversorgung 3,7V/2000mAh Li-Ion
Power supply 3,7V/2000mAh Li-Ion
Betriebsdauer 4 h
Operating time 4 h
Temperaturbereich -10 - + 50°C
Temperature range -10 - + 50°C
Humidity range 15 - 85 % RH
Feuchtigkeitsbereich 15 - 85 % RH
Dimensions 240 x 160 x 100 mm
Abmessungen 240 x 160 x 100 mm
Weight with probe 0,584 kg
Gewicht mit Sonde 0,584 kg
Various
Probe length 100 cm
4
F
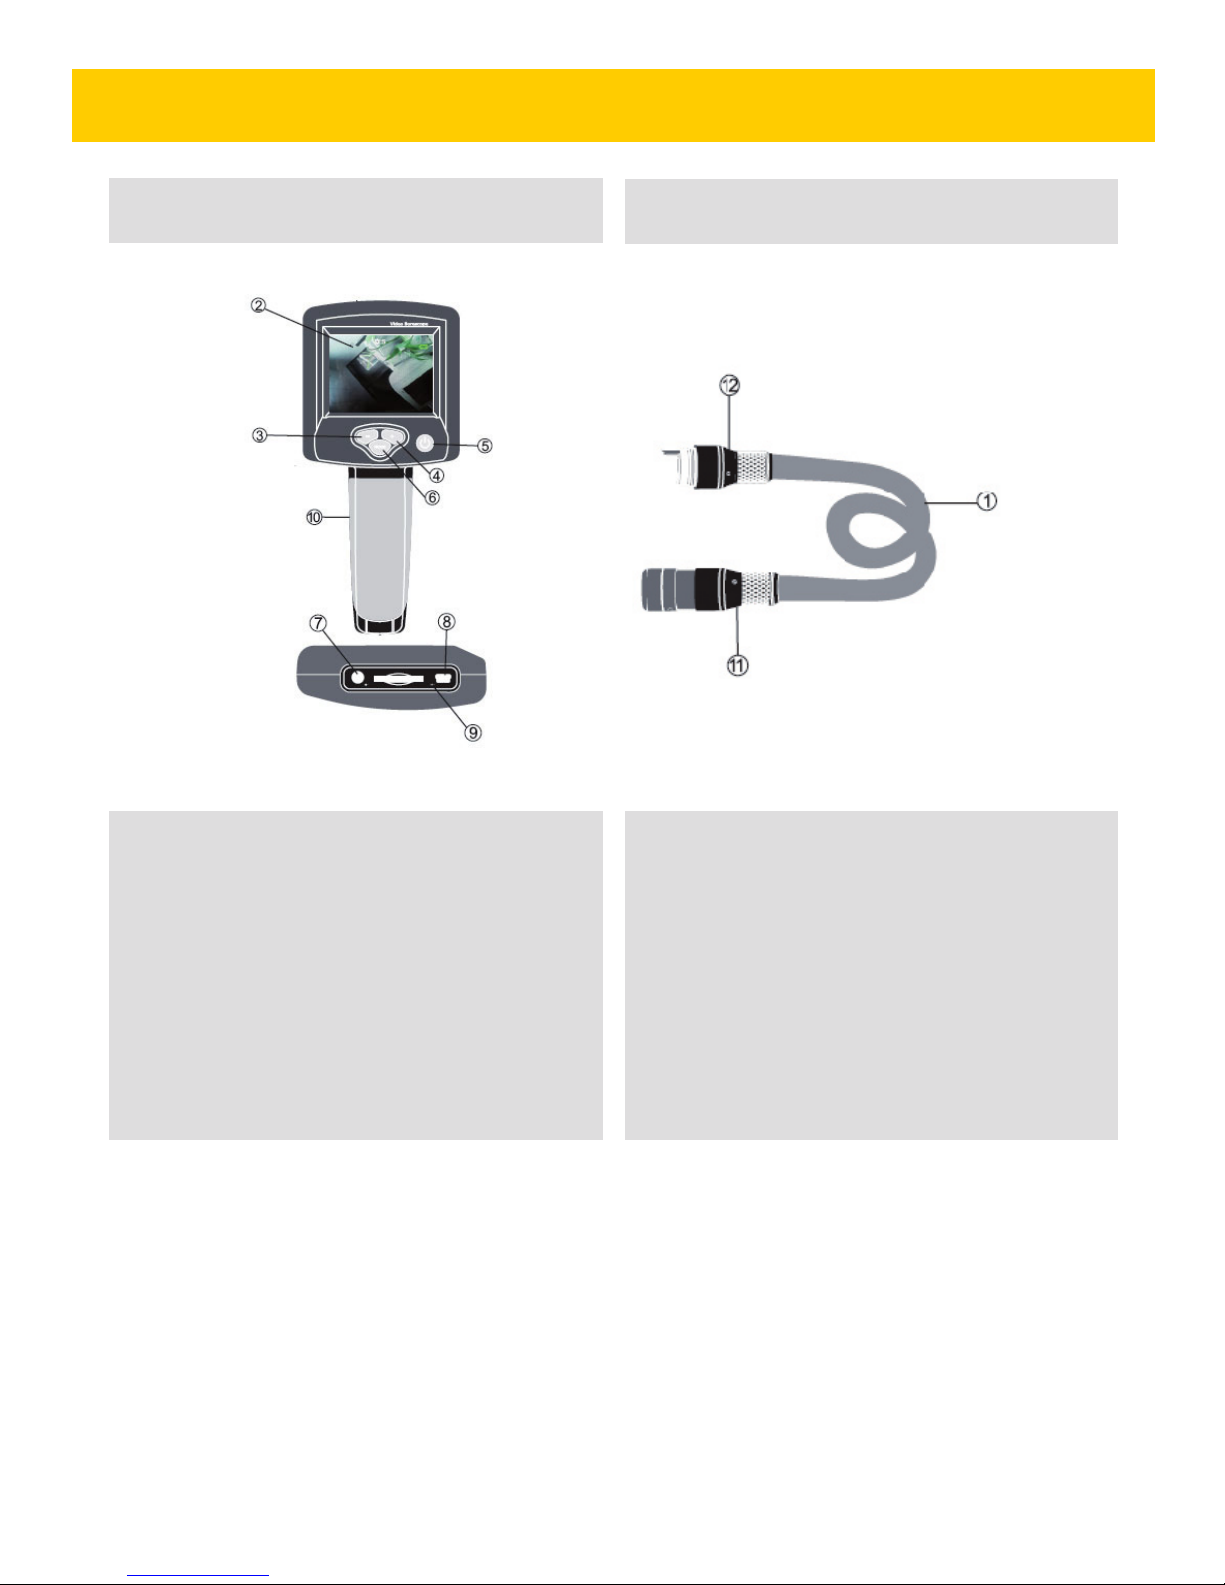
BEDIENELEMENTE
EATURES
1) Schwanenhals
2) Display
3) Einstellung Kontrast, Helligkeit (-)
4) Einstellung Kontrast, Helligkeit (+)
5) An-/Aus-Schalter
6) Auswahl-Modus
7) TV-Ausgang
8) USB-Ladeanschluss
9) Reset-Taste
10 Li-Ion-Akku
11) Kamera
12) Kameraanschluss
1) Gooseneck
2 Display
3) Adjustment contrast, illumination (-)
4) Adjustment contrast, illumination (+)
5) On/Off button
6) Mode button
7) TV output
8) USB charge port
9) Reset button
10 Li-Ion battery
11) Camera
12) Camera connection
5
BEDIENUNG
Taste 6 drücken, um das Gerät einzuschalten.
Taste erneut drücken, um es wieder auszuschalten.
Wenn das Gerät ausgeschaltet ist und mit dem
Mini-USB-Ladeanschluss verbunden wird, startet
automatisch der Ladevorgang, und das Display
schaltet sich ein.
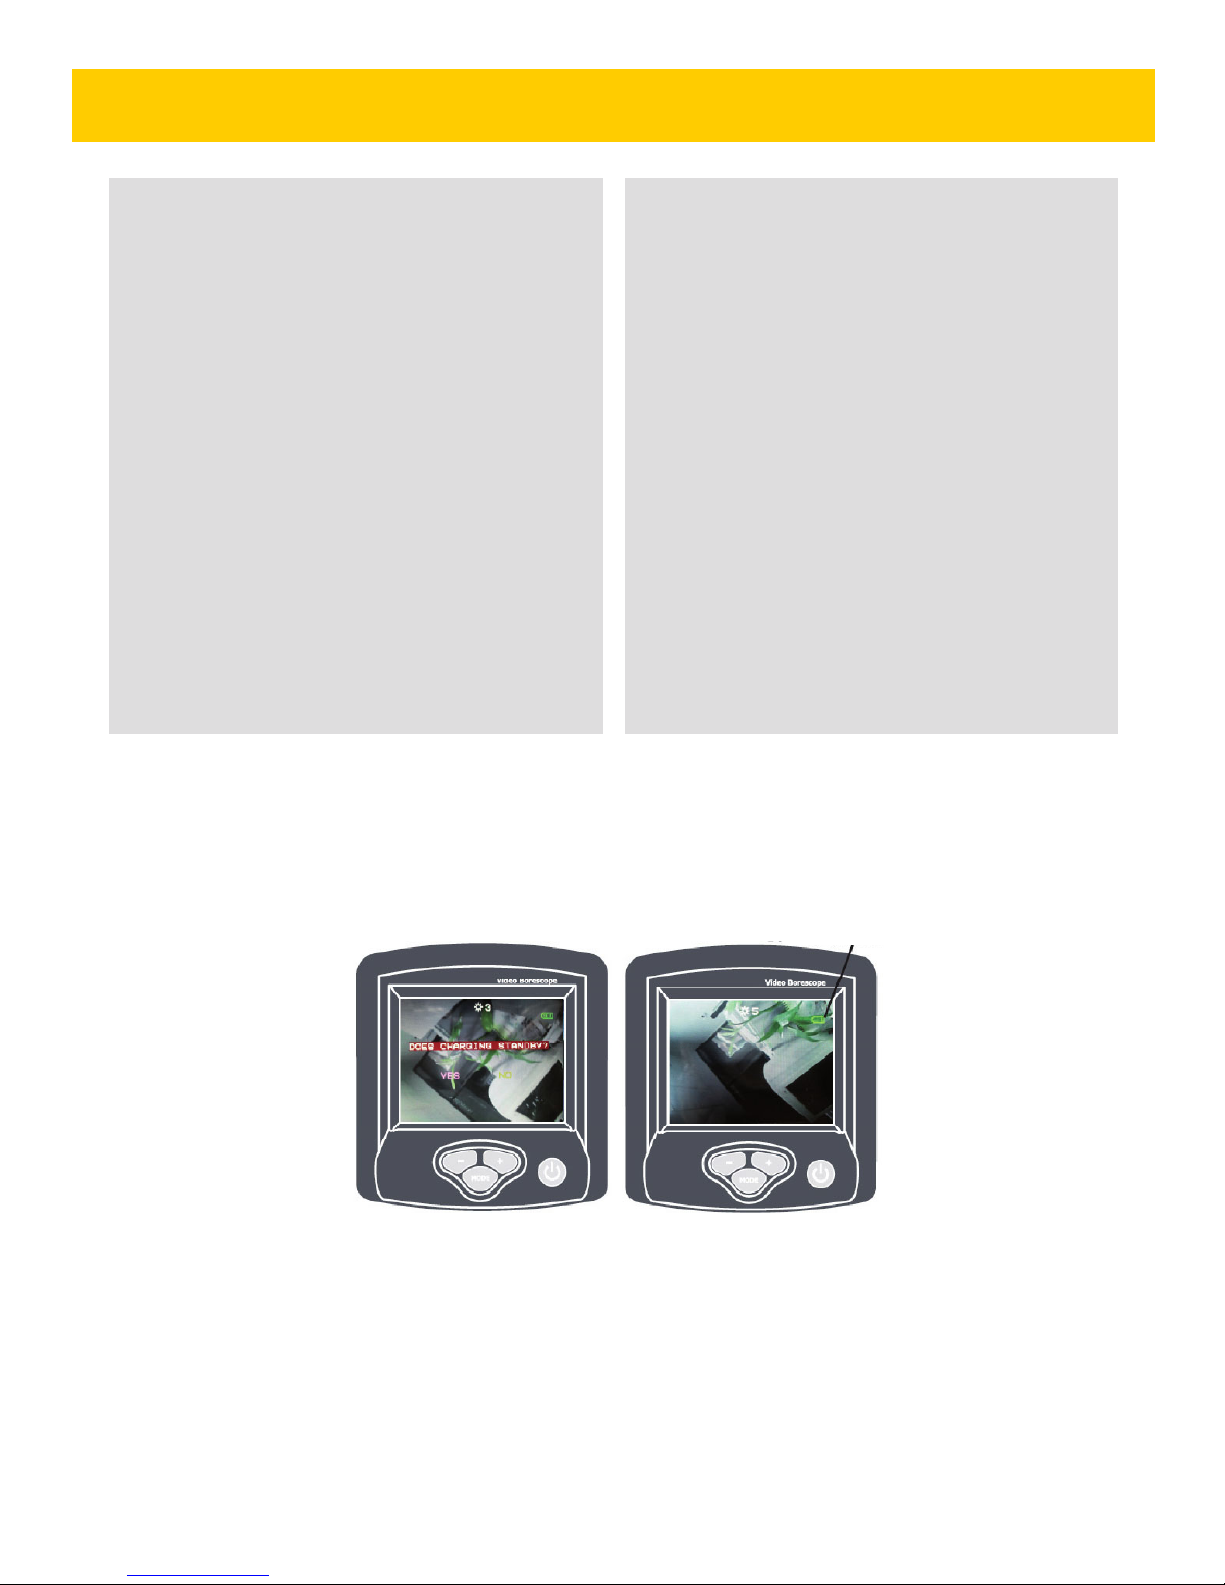
Das Gerät fordert die Bestätigung oder den Abbruch des Ladevorganges:
Auswahl „+“ = ja, „-“ = nein.
Bestätigung der Auswahl mit der MODE-Taste.
Wenn der Ladevorgang bestätigt wurde, werden
alle Programme geschlossen, und das Gerät lädt
im Standby-Modus. Wenn der Ladevorgang ababgebrochen wurde, beginnt die normale Menüführung.
OPERATION
Press button 6 to switch on the borescope.
Press button again to switch it off.
If instrument is off and if it is then connected
with mini USB charging cable charging process
starts automatically and display switches on.
In this status you can continue charging process
by pressing „+“ and confirm by pressing MODE.
Then the instrument closes all programs and
remains in stand by mode.
If you interrupt charging process by pressing
„-“ and confirming with MODE the instrument
enters into its main menu.
Batteriezustandsanzeige
Battery status indicator
6
B
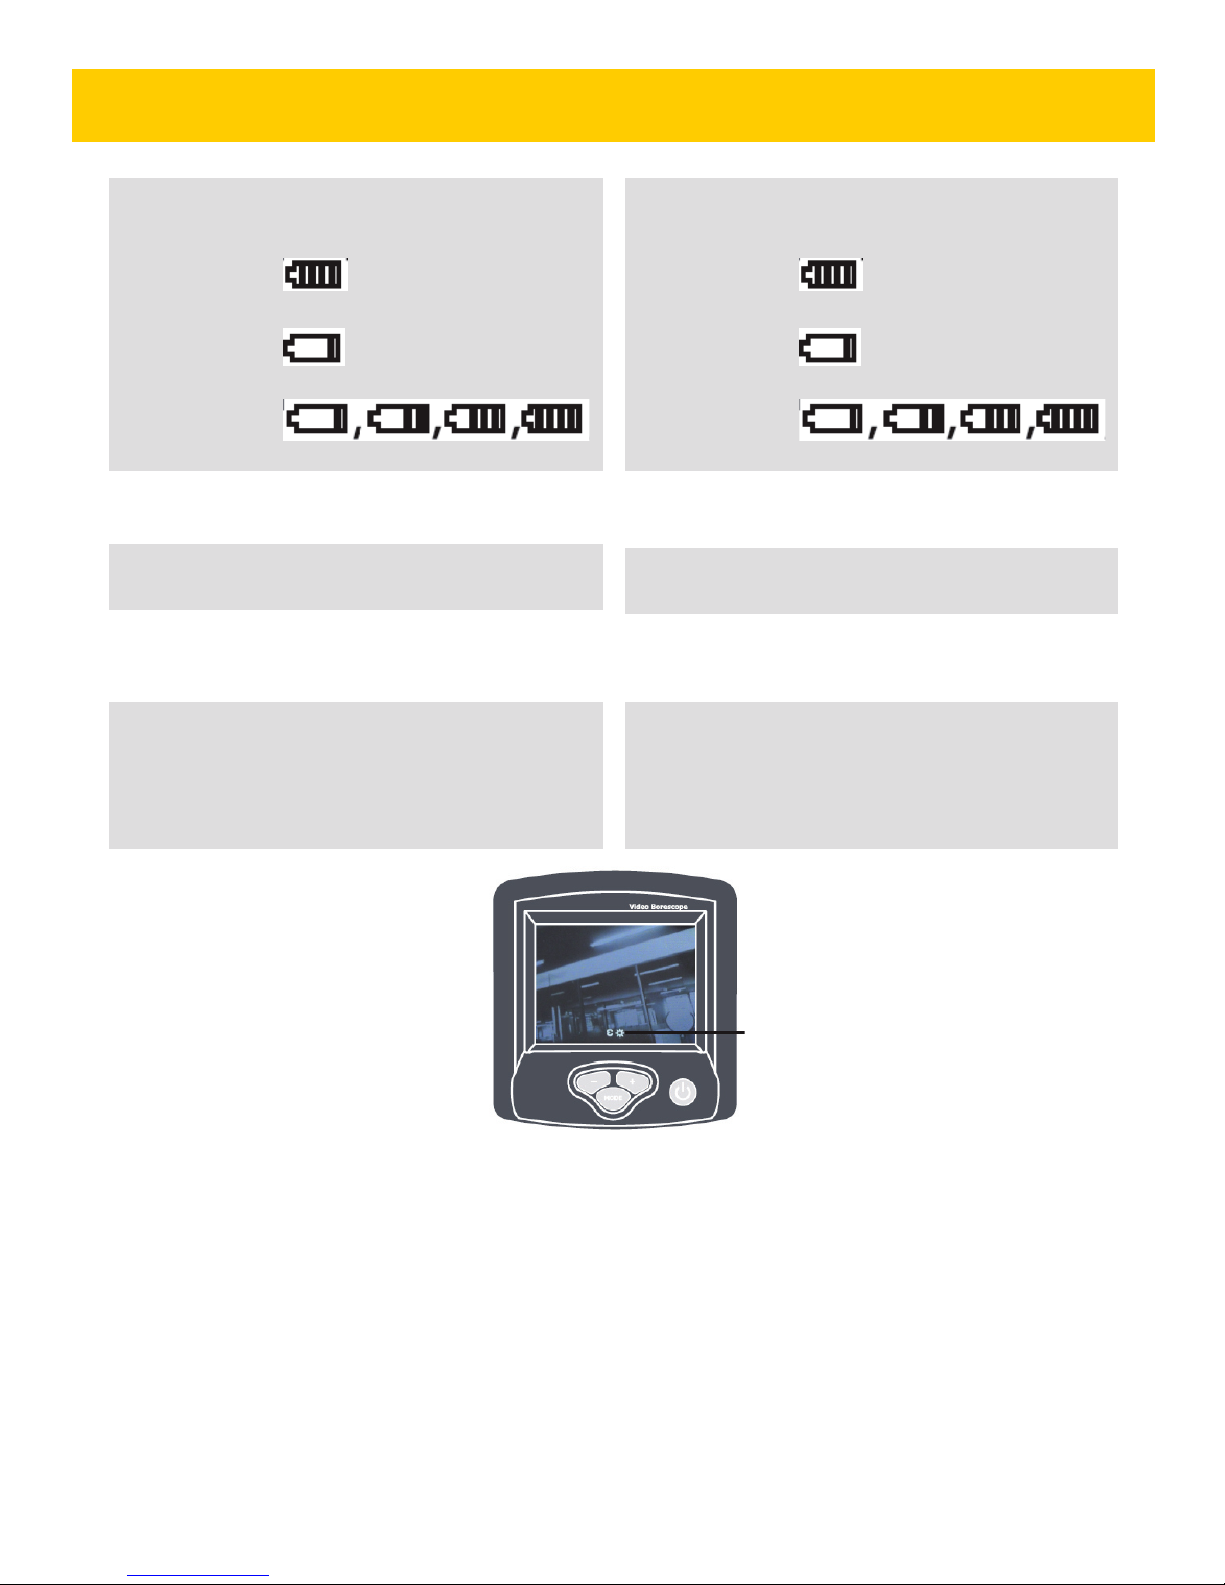
ATTERIEZUSTANDSANZEIGE
Voll geladen
Fully loaded
Leer
Empty
Wird geladen
Being charged
BATTERY STATUS INDICATOR
BILDROTATION UND BILDEINSTELLUNG
IMAGE ROTATION AND IMAGE SETTING
1) Bildrotation
Bei eingeschaltetem Gerät MODE-Taste kurz
drücken; das Bild schwenkt um 90°.
1) Image rotation
When instrument is switched on shortly press
MODE button. Now the image rotates by 90°.
7
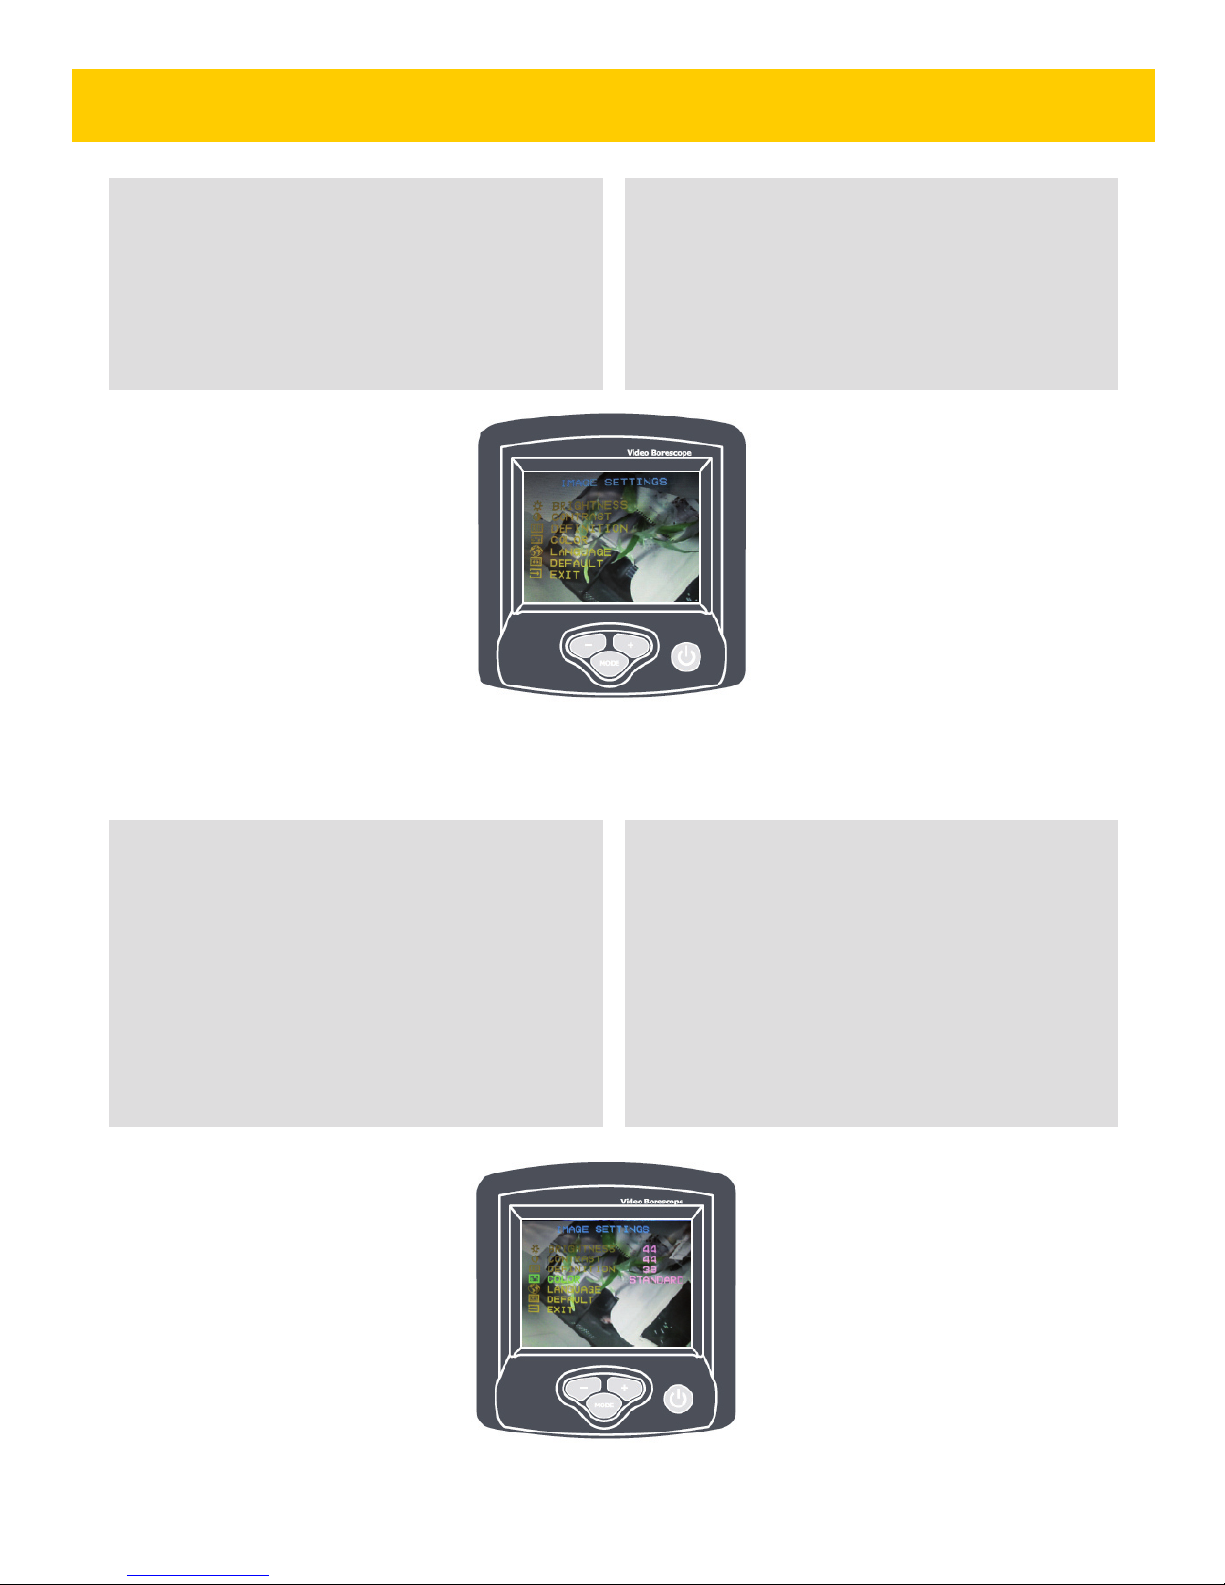
2) Bildeinstellung
When instrument is switched on press MODE
Bei eingeschaltetem Gerät MODE-Taste lang
button long to enter into image setting mode.
drücken; nun ist das Gerät im Modus Bildein-
Now you can regulate i. e. brightness, contrast,
stellung. Hier können z. B. folgende Parameter
definition, colour etc.
eingestellt werden: Helligkeit, Kontrast, Auflösung, Farbe etc.
2) Image setting
Mit den Tasten „+“ und „-“ können Sie den
Cursor zum gewünschten Menüpunkt bewegen.
Den ausgewählten Menüpunkt mit der MODETaste bestätigen. Hier nun mit den Tasten „+“
und „-“ die gewüschte Einstellung festlegen
und mit der MODE-Taste bestätigen.
Wenn alle Einstellungen erfolgt sind, mit dem
Cursor Menüpunkt EXIT wählen und mit der
MODE-Taste bestätigen, um die Bildeinstellung
zu beenden.
Move the cursor to the selected menu by
pressing buttons „+“ and „-“. Confirm the
menu chosen by pressing MODE. With the
buttons „+“ and „-“ you can now fix the
image setting requested. Confirm the value
chosen by pressing MODE.
After having made all settings move the cursor
to EXIT and confirm with MODE. Now this
menu is closed.
8

A
UTOMATISCHE BILDFORMATERKENNUNG
(PAL / NTSC)
(PAL / NTSC)
The instrument automatically recognizes the
Das Gerät erkennt beim ersten Einschalten auto-
image format when switched on for the fist
matisch das Bildformat (PAL oder NTSC) und
time and enters into the corresponding standard
befindet sich dann sofort im entsprechenden
mode.
Standardmodus.
ATTENTION: This recognition only works when
BEACHTE: Dies geschieht nur beim ersten Ein-
the instrument is switched on for the first time.
schalten des Gerätes.
The standard setting is PAL.
Die Werkseinstellung ist PAL.
AUTOMATIC IMAGE FORMAT CONVERSION
EINSTELLUNG DER BILDHELLIGKEIT
Die Werkseinstellung der Bildhelligkeit ist 3.
Mit den Tasten „+“ und „-“ können Sie die
Helligkeit verändern. Die niedrigste Einstellung
ist 0 (bei dieser Einstellung leuchtet die LED
nicht mehr), die maximale 5.
SETTING IMAGE ILLUMINATION
The standard illumination is 3.
With the buttons „+“ and „-“ you can adjust
the image illumination. The lowest illumination
is 0 (= LED does not light anymore), the maximum illumination is 5.
9
 Loading...