

DSLR Pros Sundance HD Edition Aerial Kit, Cannes HD Edition Aerial Kit User Manual

Sundance HD Edition Aerial Kit Contents List
Congratulations on your purchase of a DSLRPros Sundance HD Edition Aerial Kit.
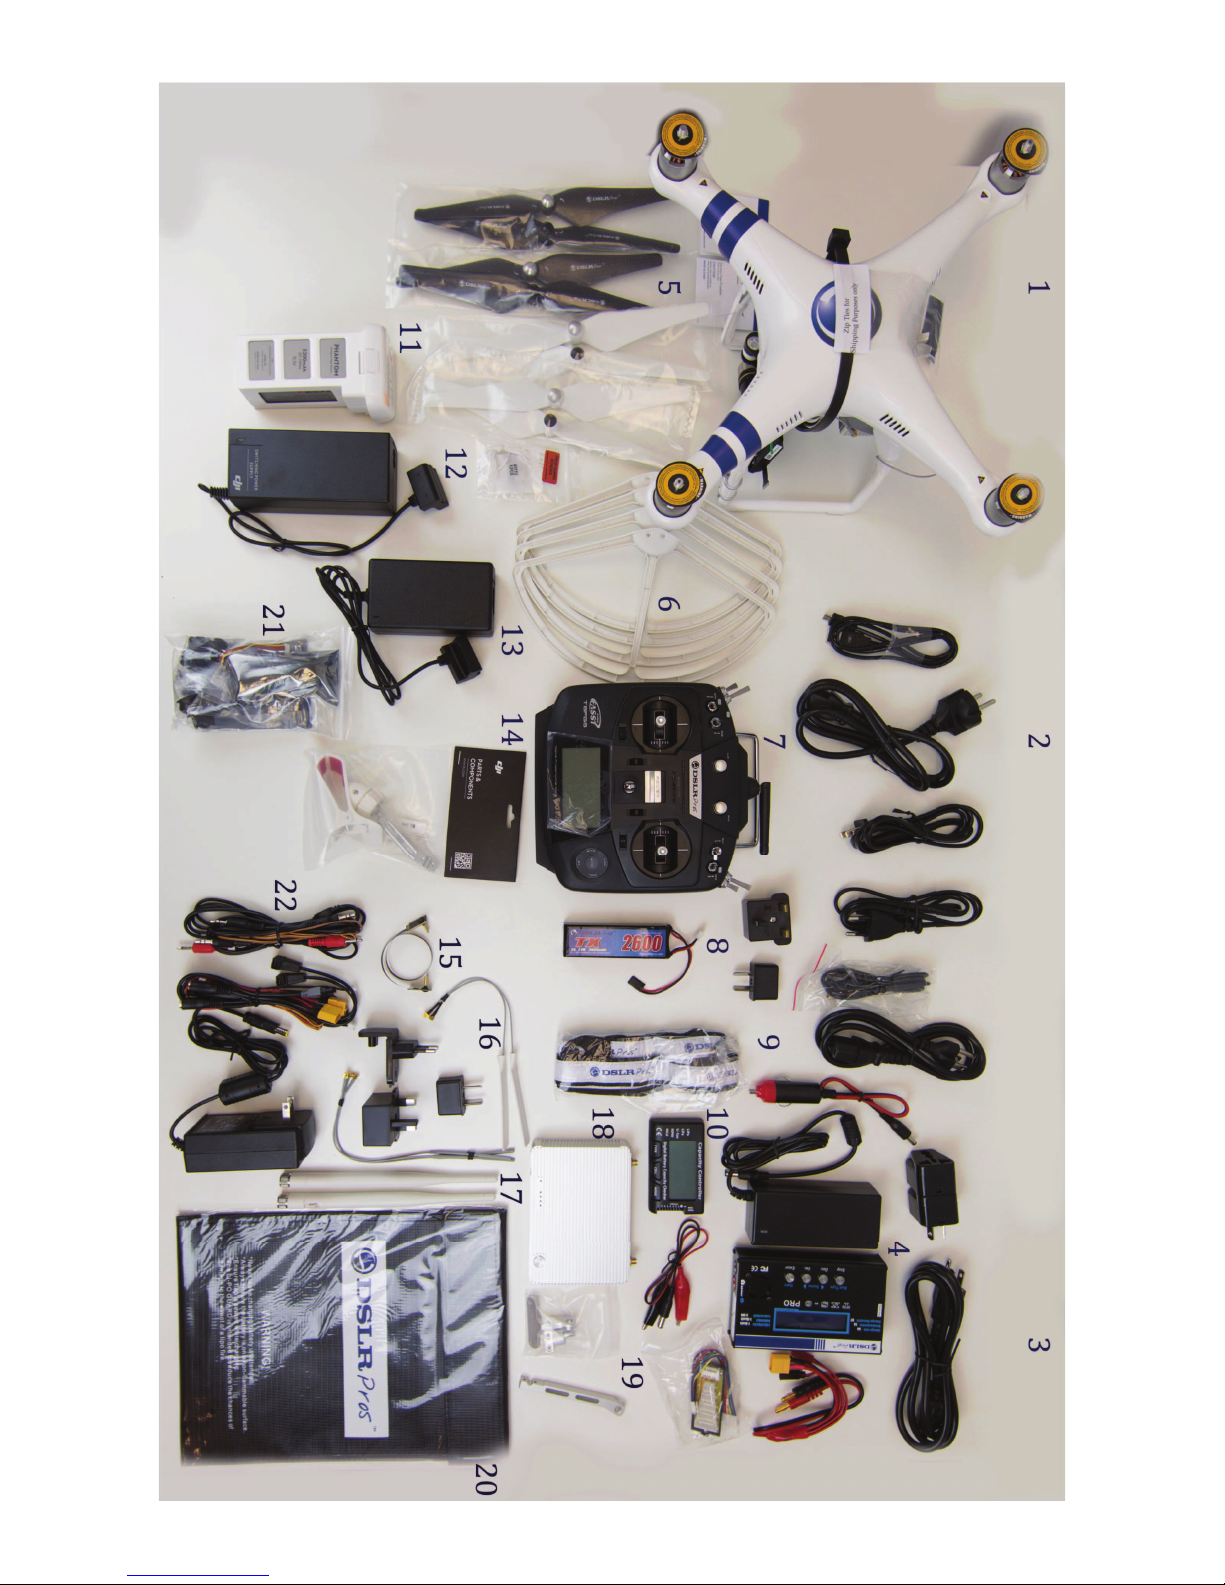
Inside your P2 Tough Case you will find the following items with numbers that
correspond to the kit image on the following page.
1. DJI Phantom 2 With 3-Axis Gimbal Pre-Installed
2. Assorted A/C Power Cables With International Plug Adaptors
3. A/C Power Cable For TXS-8 Pro LiPo Charger
4. DSLRPros TXS-8 Pro LiPo Charger with Balance Board and Necessary Cabling
5. 2 Sets Of 4 9" Propeller Blades (Carbon Fiber and Plastic Blades Are Not To
Be Used Together)
6. Set of 4 Propeller Guards and Propeller Guard Screws
7. Futaba Transmitter
8. LiPo Battery For Futaba Transmitter
9. Deluxe DSLRPros Radio Tx Lanyard
10. LiPo Battery Capacity Checker
11. 3 DJI Smart Flight Batteries (1 Shown)
12. 1 DJI Charging for Smart Flight Battery
13. 1 Additional Charging Block for DJI Smart Flight Battery
14. DJI Smartphone Mount
15. HDMI Cable For GoPro To DJI Lightbridge Air System
16. Set of 2 DJI Lightbridge Air System Paddle Antennas & Air System Antennas
17. Set of 2 Antennas For DJI Lightbridge Ground System
18. DJI Lightbridge Ground System
19. DJI Lightbridge Transmitter Mount
20. DSLRPros LiPo Battery Guard Bag
21. Assorted Cables For DJI Lightbridge System (Please Refer To Your Lightbridge
Manual For Detailed Explanations For Each Of These Cables)
22. Assorted Power Cables and International Plug Adaptors (Please Refer
To Your Lightbridge Manual For Detailed Explanations For Each Of These
Power Cables)
PLEASE READ ALL TOPICS BEFORE POWERING ON FOR FIRST TIME
New pilots should NOT fly the Phantom with the Gimbal attached until they have had at least 10 hours of
flight practice. Refer to the Zenmuse H3-3D operator's manual for installation and removal instructions
(found on www.dji.com).
DJI Phantom 2 Wiki: http://wiki.dji.com/en/index.php/Phantom_2
DJI Phantom 2 Videos: http://www.dji.com/product/phantom-2/video
For DSLRPros videos please visit our YouTube Channel
Link: http://www.youtube.com/channel/UCJUVqDvAzr1jbdrmhxsH7jw
1. Turning On Your Transmitter and Phantom 2
2. Advanced Calibration
3. Compass Calibration
4. LED Break Down
5. GoPro Shooting Preferences
6. Flight Modes
7. Futaba Controller/Transmitter
8. Propeller Installation
9. Gimbal Installation & Removal
10. Updating Your Software
11. Battery Safety
12. Using The DJI Lightbridge
13. Using The Zeiss Cinemizer OLED (If Applicable)
WARNING:
DO NOT fly with zip ties attached to Phantom. Zip ties are installed for shipping purposes only.
DO NOT use WiFi with the GoPro on the Phantom. This will cause the pilot to lose control over the craft
and result in a flyaway.
DO NOT power on the Phantom without a GoPro attached to the
gimbal. This will damage the gimbal and render it unusable.
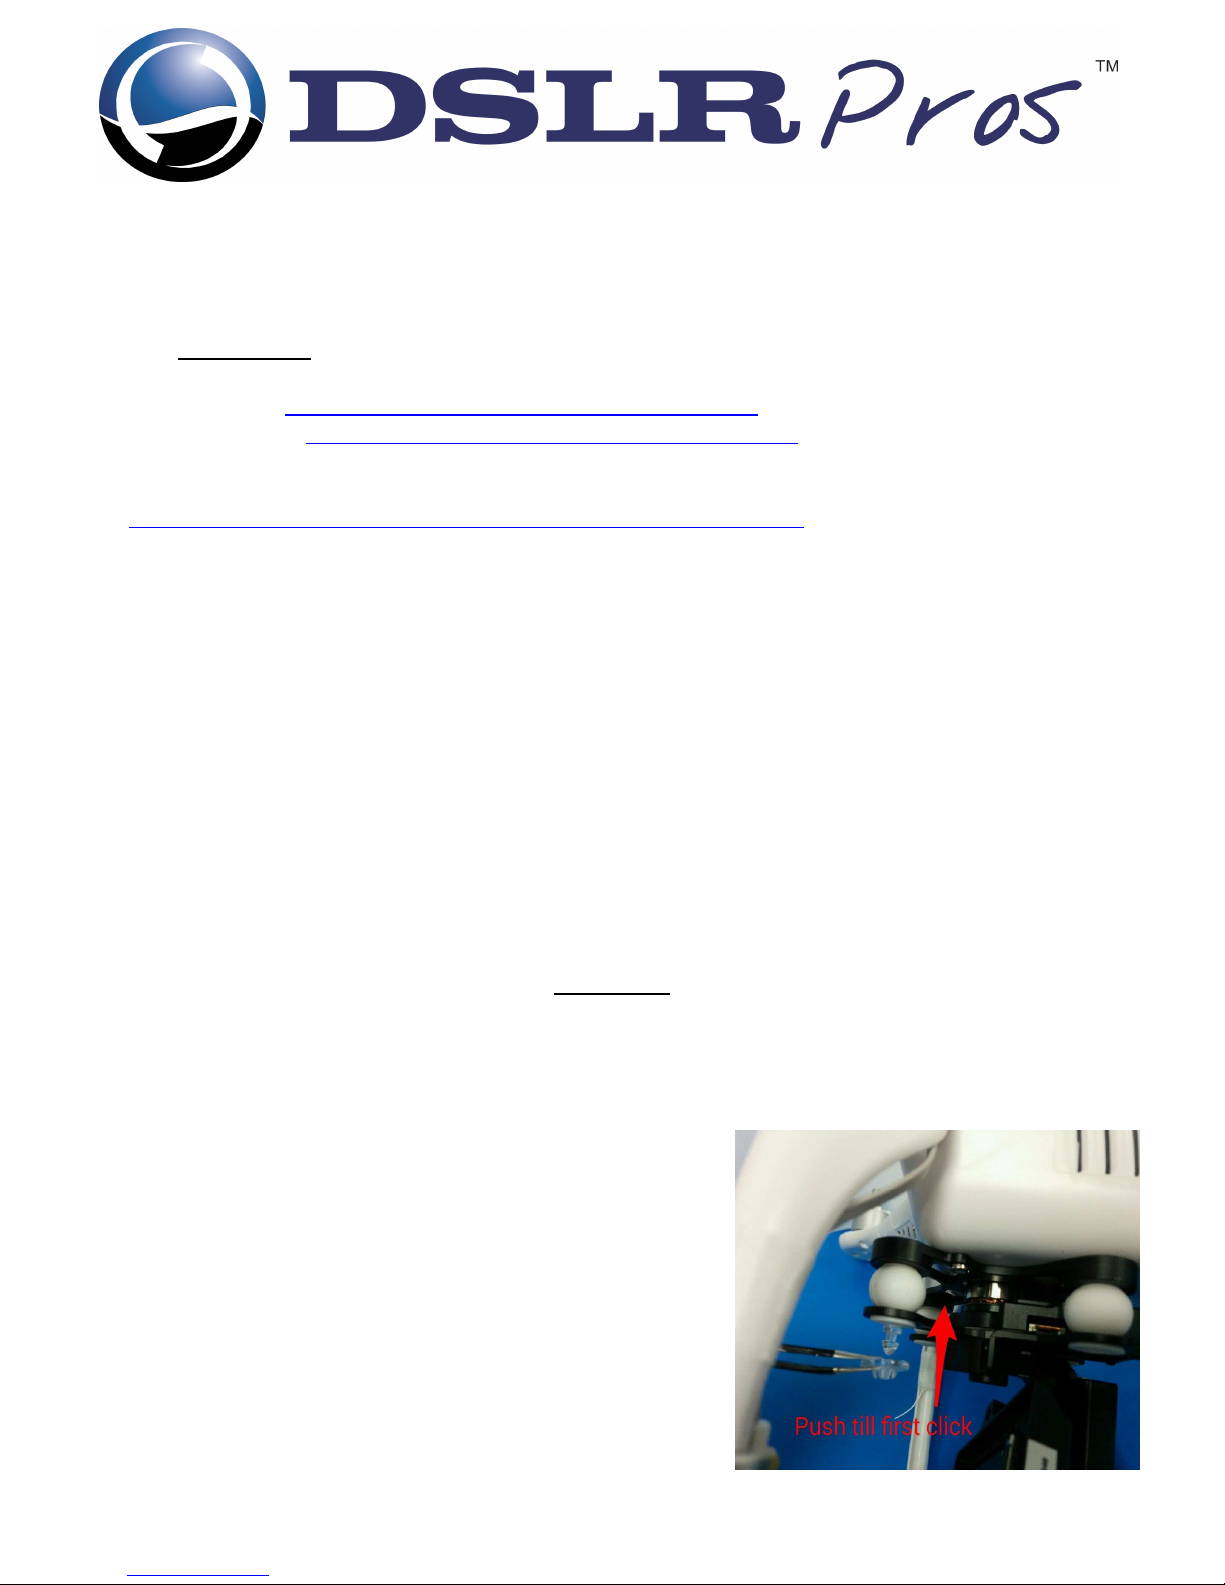
Be sure to add the anti-drop caps to the gimbal before flying with
the gimbal attached.
It is the owner's responsibility to be certain that the propeller
blades are attached properly and securely fastened before every
flight. It is recommended that novice pilots learn to fly with the
white plastic propellers

1. Turning On Your Transmitter and Phantom 2
• Always turn on your transmitter before turning on your craft. To turn on our transmitter press the
power switch to the "on" position. Make sure your throttle is all the way down and the toggle
switches are in the uppermost position before turning on your transmitter.
• To turn on your Phantom 2 insert the DJI Smart Flight Battery into the craft, press the circular
power button once, then press again and hold until the Power Light on the battery turns red.
2. Advanced Calibration
Make sure the settings have been properly adjusted so that the Phantom 2 can run with the best
performance possible.
• Plug the Phantom into your PC or Mac using the USB cable provided.
• Power on the transmitter with the throttle all the way down.
• Power on the Phantom.
• Open the DJI Phantom Application.
• Go to the “Tools” tab.
• Click “Advance.”
• Make sure there is no metal anywhere around the compass.
• Do not touch the table that the craft is on and make sure it is very still.
• Click “advanced cali.”
• When a box pops up that says “power down MC” ignore it, click OK, and do not touch anything.
• When the advanced calibration has completed successfully, a green check mark will appear to the
right of the status bar.
3. Compass Calibration
It is important to calibrate your compass outdoors every time you fly your craft. This allows the
Phantom 2 to track its own position from multiple satellites and ensures optimal performance.
• Set the Phantom 2 on a flat surface.
• With the throttle down and all switches in the uppermost position power up the transmitter and
then power up the Phantom 2.
• Wait until the Phantom 2 has full GPS lock. You will know the craft has full GPS lock when the LEDs
under the arms are green and blinking.
• Flip the flight mode switch from “GPS” to “Atti” five times in a steady motion until the lights on the
underside of the craft turn a solid, unblinking yellow.
• Pick up the Phantom 2 (do not hold by compass).
• Hold the Phantom 2 straight out and turn your body in a complete circle until the lights turn from
yellow to green.
• Stop turning.
• Rotate the Phantom 2 vertically so that the USB port is facing straight down and repeat your 360-
degree rotation until the lights blink green again.
• Place the Phantom 2 back on the ground and look to see that there are only green blinking lights. If
not, repeat the process.
4. LED Break Down
This list will help users understand the meaning of some of the different LED light combinations
on the Phantom 2. Please refer to your DJI Phantom 2 manual for more information.
 Loading...