

Page 1
Alcotest 7410
Plus
Alcotest 7410
Plus
RS
Atemalkohol-Messgerät
Breath Alcohol Monitor
1-126-01.tiff
Gebrauchsanweisung
Instructions for Use
D
Page 2

2
Inhalt
Seite
Zu Ihrer Sicherheit .................................................................................. 4
Verwendungszweck ................................................................................6
Vorbereiten ............................................................................................... 7
Ein- und Ausschalten ............................................................................. 8
Messung durchführen ........................................................................ 10
Voraussetzungen ................................................................................... 10
Anforderungen an die Testperson ..................................................... 10
Messen .................................................................................................... 11
Wartezeit zwischen zwei Messungen ........................................ 12
Passive Probenahme ..................................................................... 13
Speicher- und Datenoptionen ............................................................. 14
Option "dAt" (Daten-Modus) ........................................................ 15
Option "tSt" (Test) .......................................................................... 17
Option "StA" (Statistik) .................................................................. 18
Option "con" (Konfiguration) ........................................................ 19
Option "doc" (Dokumentation) .................................................... 20
Option "End" (Ende) ...................................................................... 20
Contents
Page
For Your Safety ........................................................................................ 4
Intended Use ............................................................................................ 6
Preparation ............................................................................................... 7
Switching On and Off ............................................................................ 8
Making Measurements ....................................................................... 10
General Conditions .............................................................................. 10
Conditions for Test Person ................................................................. 10
Measuring ............................................................................................... 11
Interval between Two Measurements ........................................ 12
Passive Sampling ........................................................................... 13
Memory and Data Options .................................................................. 14
Option "dAt" (Data Mode) ............................................................. 15
Option "tSt" (Test) .......................................................................... 17
Option "StA" (Statistics) ................................................................ 18
Option "con" (Configuration) ....................................................... 19
Option "doc" (Documentation) .................................................... 20
Option "End" (End) ......................................................................... 20
Page 3

3
Seite
Instandhaltung ...................................................................................... 21
Instandhaltungsintervalle ..................................................................... 21
Reinigen .................................................................................................. 21
Gerät entsorgen .................................................................................... 21
Akku laden .............................................................................................. 22
Versorgungseinheit auswechseln ...................................................... 23
Batterien auswechseln ......................................................................... 24
Kalibrieren ............................................................................................... 26
Mit dem Dräger Mark II Simulator ............................................... 26
Mit Kalibriergas ............................................................................... 28
Störungen, Ursache, Abhilfe ............................................................ 29
Was ist Was ............................................................................................ 33
Technische Daten ................................................................................ 34
Bestell-Liste ........................................................................................... 40
Stichwortverzeichnis ........................................................................... 42
Page
Maintenance .......................................................................................... 21
Maintenance Intervals ........................................................................... 21
Cleaning .................................................................................................. 21
Disposal of the Instrument .................................................................. 21
Charging Power Supply Unit .............................................................. 22
Replacing Power Supply Unit ............................................................. 23
Changing Batteries ............................................................................... 24
Calibration ............................................................................................... 26
With the Dräger Mark II Simulator .............................................. 26
With Calibration Gas ..................................................................... 28
Fault, Cause, Remedy ......................................................................... 31
What's What ........................................................................................... 33
Technical Data ...................................................................................... 34
Order List ................................................................................................ 40
Index ........................................................................................................ 42
Page 4

4
Zu Ihrer Sicherheit
Gebrauchsanweisung beachten
Jede Handhabung an dem Gerät setzt die genaue Kenntnis und
Beachtung dieser Gebrauchsanweisung voraus. Das Gerät ist nur
für die beschriebene Verwendung bestimmt.
Instandhaltung
Instandsetzung am Gerät nur durch Fachleute.
Für die Instandsetzung empfehlen wir den DrägerService.
Bei Instandhaltung nur Original-Dräger-Teile verwenden.
Kapitel "Instandhaltungsintervalle" beachten.
Zubehör
Nur das in der Bestell-Liste aufgeführte Zubehör verwenden.
Kein Betrieb in explosionsgefährdeten Bereichen
Alcotest
7410
Plus
/ Alcotest 7410
Plus
RS ist nicht für den
Betrieb in explosionsgefährdeten Bereichen zugelassen.
Alcotest ist ein eingetragenes Warenzeichen von Dräger
For Your Safety
Strictly follow the Instructions for Use
Any use of the instrument requires the full understanding and strict
observation of these instructions. The instrument is only to be
used for the purposes specified here.
Maintenance
Repair of the instrument may only be carried out by trained
personnel.
We recommend that all repairs be carried out by DrägerService.
Only original Dräger spare parts may be used for maintenance.
Observe chapter "Maintenance Intervals".
Accessories
Do not use accessory parts other than those in the order list.
Not for use in areas of explosion hazard
Alcotest
7410
Plus
/ Alcotest 7410
Plus
RS is neither approved nor
certified for use in areas where combustible or explosive gas
mixtures are likely to occur.
Alcotest is a registered brand name of Dräger
Page 5

5
Haftung für Funktion und Schäden
Die Haftung für die Funktion des Gerätes geht in jedem Fall auf
den Eigentümer oder Betreiber über, soweit das Gerät von
Personen, die nicht dem DrägerService angehören, unsachgemäß
gewartet oder instandgesetzt wird oder wenn eine Handhabung
erfolgt, die nicht der bestimmungsgemäßen Verwendung
entspricht.
Für Schäden, die durch Nichtbeachtung der vorstehenden
Hinweise eintreten, haftet Dräger nicht.
Gewährleistungs- und Haftungsbedingungen der Verkaufs- und
Lieferbedingungen von Dräger werden durch vorstehende
Hinweise nicht erweitert.
Dräger Safety AG & Co. KGaA
Liability for proper function or damage
The liability for the proper function of the instrument is irrevocably
transferred to the owner or operator to the extent that the
instrument is serviced or repaired by personnel not employed or
authorized by DrägerService or if the instrument is used in a
manner not conforming to its intended use.
Dräger cannot be held responsible for damage caused by noncompliance with the recommendation given above.
The warranty and liability provisions of the terms of sale and delivery of Dräger are likewise not modified by the recommendations
given above.
Dräger Safety AG & Co. KGaA
Page 6

6
Intended Use
For rapid determination of alcoholic intoxication by measuring breath alcohol
concentration.
For mobile use at testsites or for stationary
use, also in combination with the Alcotest
7410 Printer.
Alcotest
7410
Plus
/ Alcotest 7410
Plus
RS
stores, depending on version, up to 9700
test results. Additionally elementary
statistics are available at once.
Alcotest
7410
Plus
RS can be connected to
an IBM compatible PC via its built in
RS 232-interface.
Memory options, indications of sequential
test number and passive sampling can be
enabled or disabled by DrägerService.
Verwendungszweck
Zur schnellen Ermittlung der Alkoholisierung durch Messung der Atemalkoholkonzentration.
Für den mobilen netzunabhängigen Einsatz
vor Ort oder für den stationären Betrieb,
auch in Verbindung mit dem Alcotest
7410
Printer.
Alcotest
7410
Plus
/ Alcotest 7410
Plus
RS
speichert versionsabhängig ca. 9700
Messungen mit ergänzenden Informationen
und stellt einfache statistische Auswertungen zur Verfügung.
Alcotest
7410
Plus
RS kann über die
Schnittstelle RS 232 an einen IBM-kompatiblen PC angeschlossen werden.
Die Option Datenspeicherung, Testnummern-Anzeige und passive Probenahme
kann bei Bedarf vom DrägerService aktiviert bzw. deaktiviert werden.
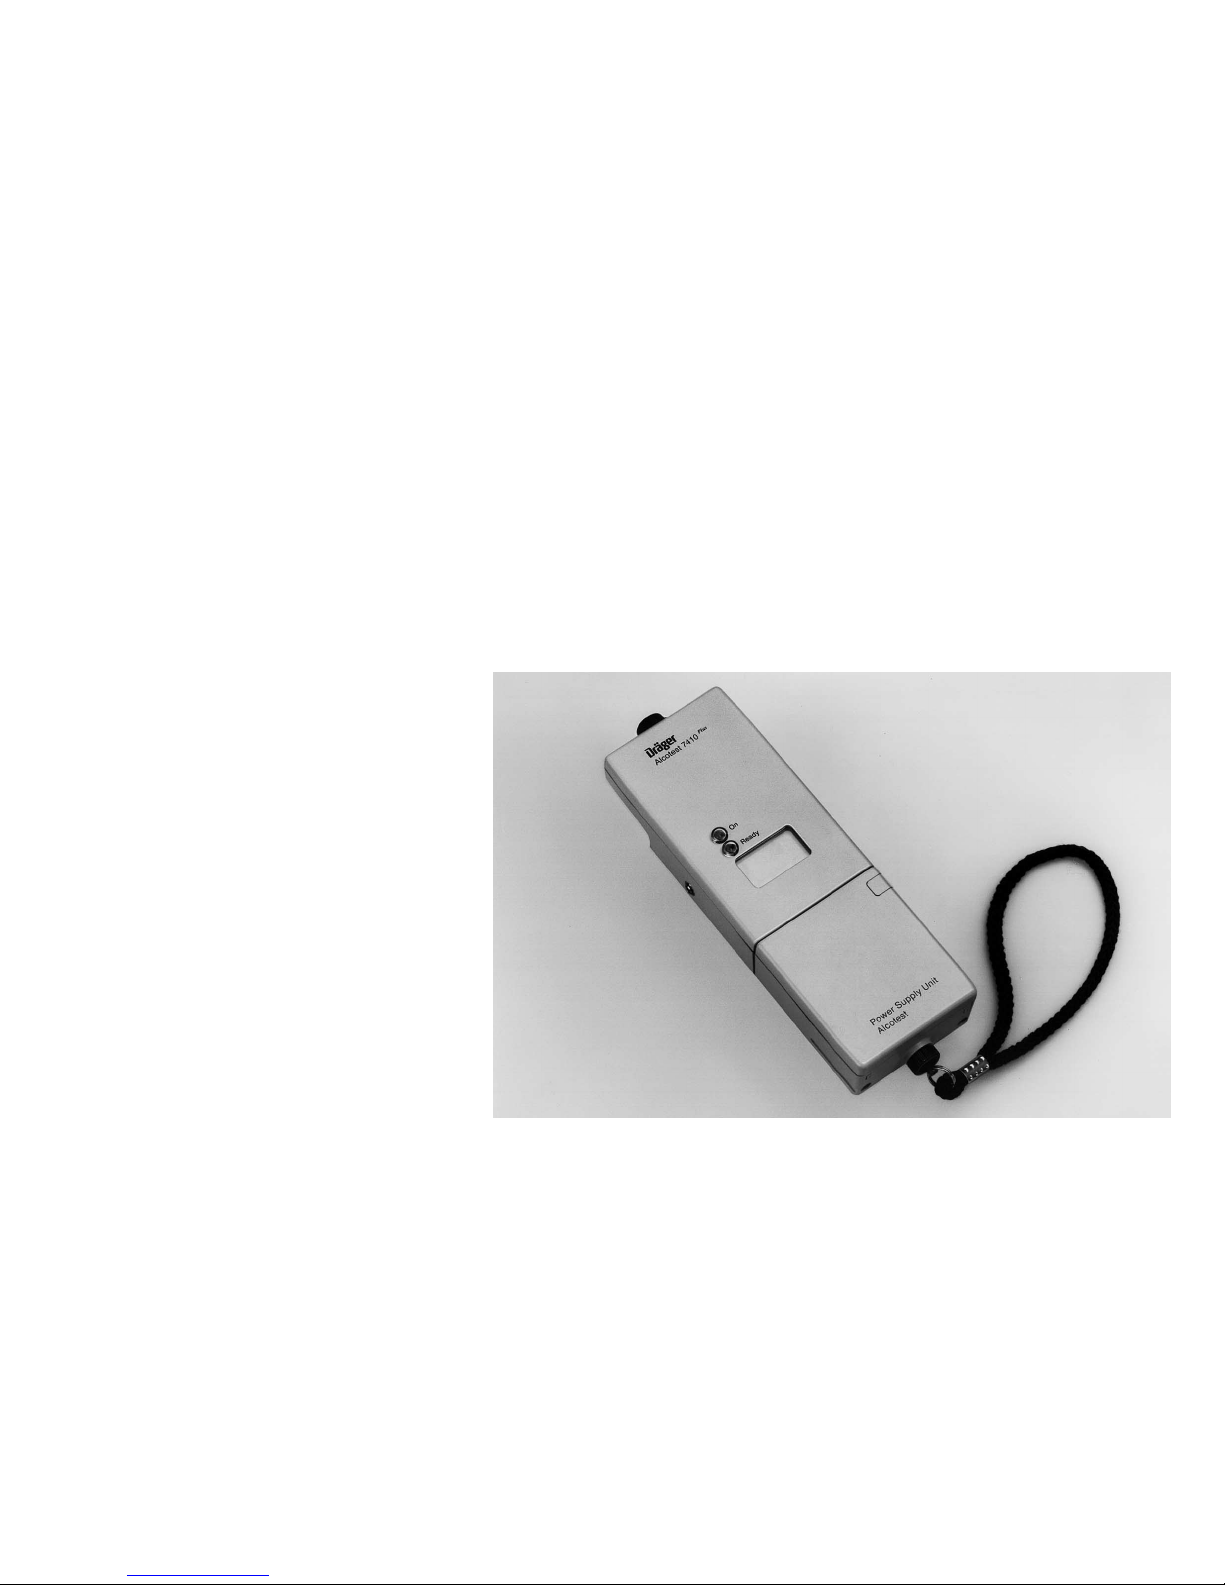
00123399_3
Alcotest 7410
Ready
On
Plus
Power Supply Unit
Alcotest
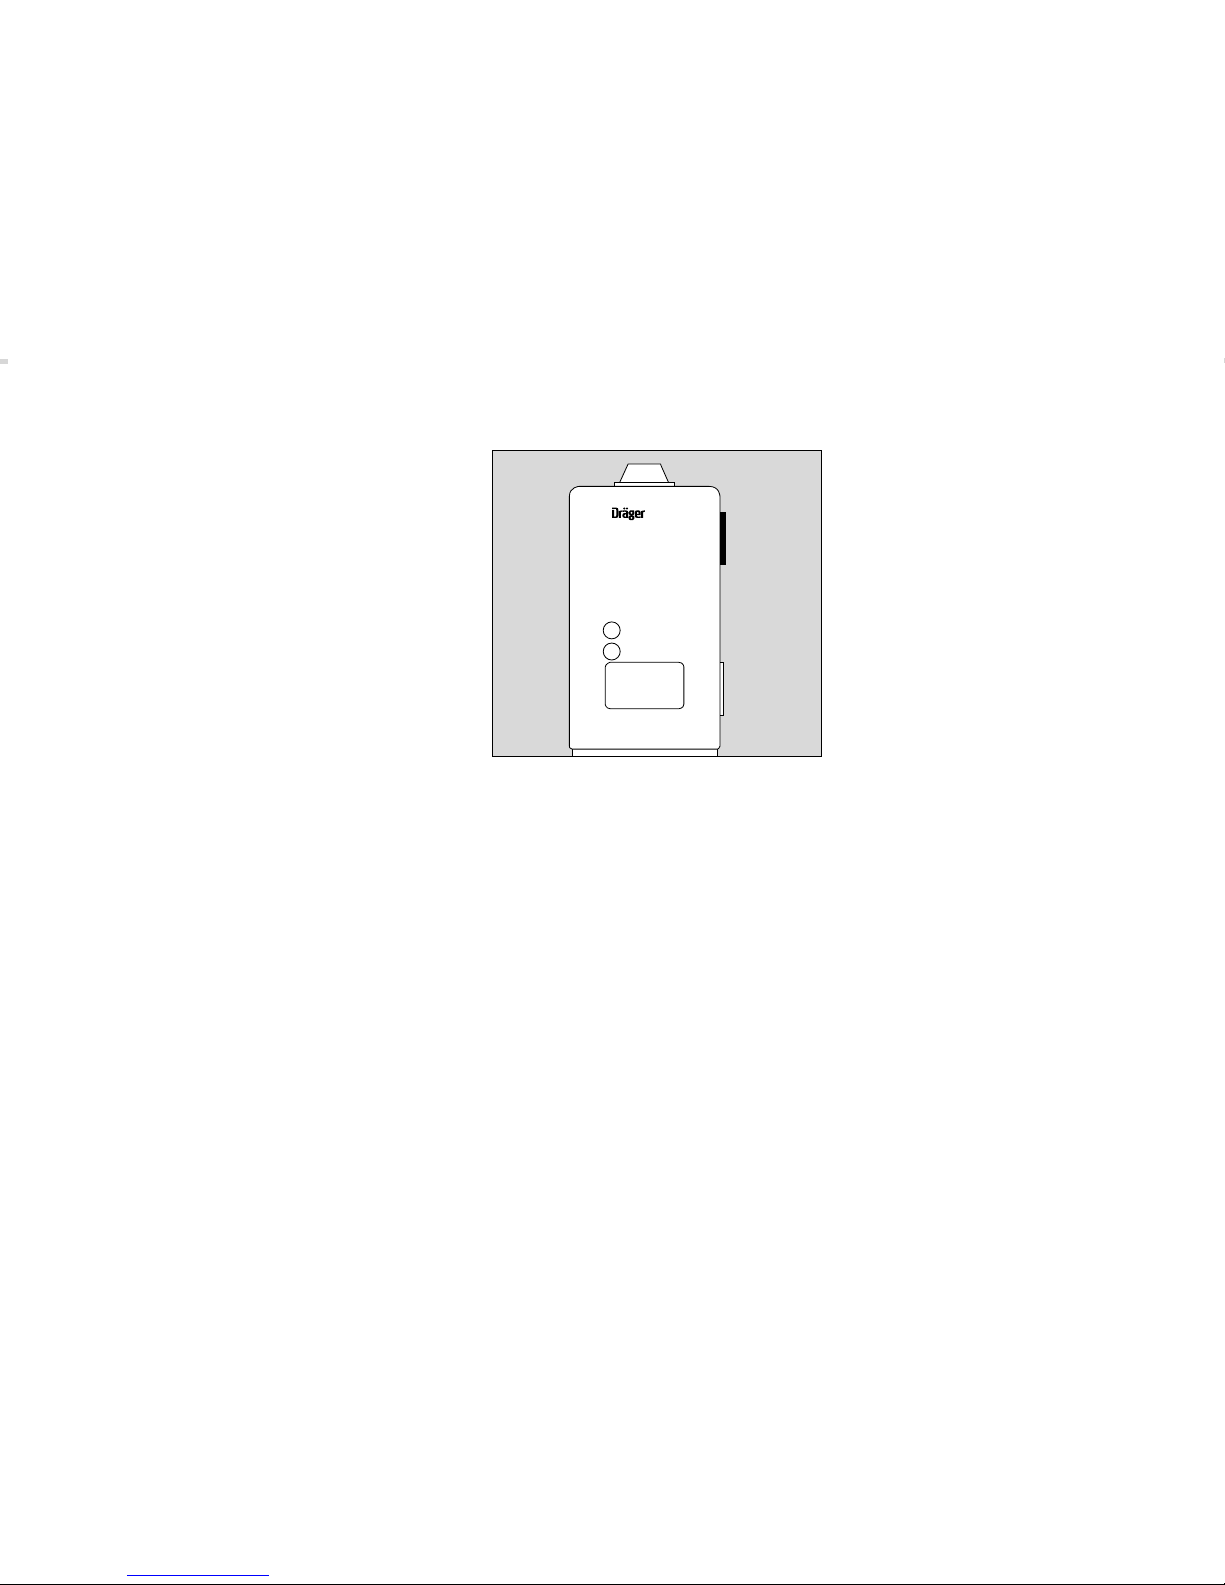
Page 7
Vorbereiten
Alcotest 7410
Plus
/ Alcotest 7410
Plus
RS
wird werkseitig kalibriert ausgeliefert.
1 Kalibrierdatum am Aufkleber ablesen.
● Liegt das Datum weniger als 6 Monate
zurück: Gerät ist sofort einsatzbereit.
● Liegt das Datum mehr als 6 Monate
zurück: Gerät kalibrieren oder durch
den DrägerService kalibrieren lassen.
Preparation
Alcotest 7410
Plus
/ Alcotest 7410
Plus
RS
is factory-calibrated.
1 Check calibration date on adhesive
label.
● If the date is less than 6 months ago the
instrument is ready for use.
● If the date is more than 6 months ago:
calibrate the unit or call DrägerService
for calibration.
7
00223399_3
Alcotest 7410
Ready
On
1
Plus
Page 8
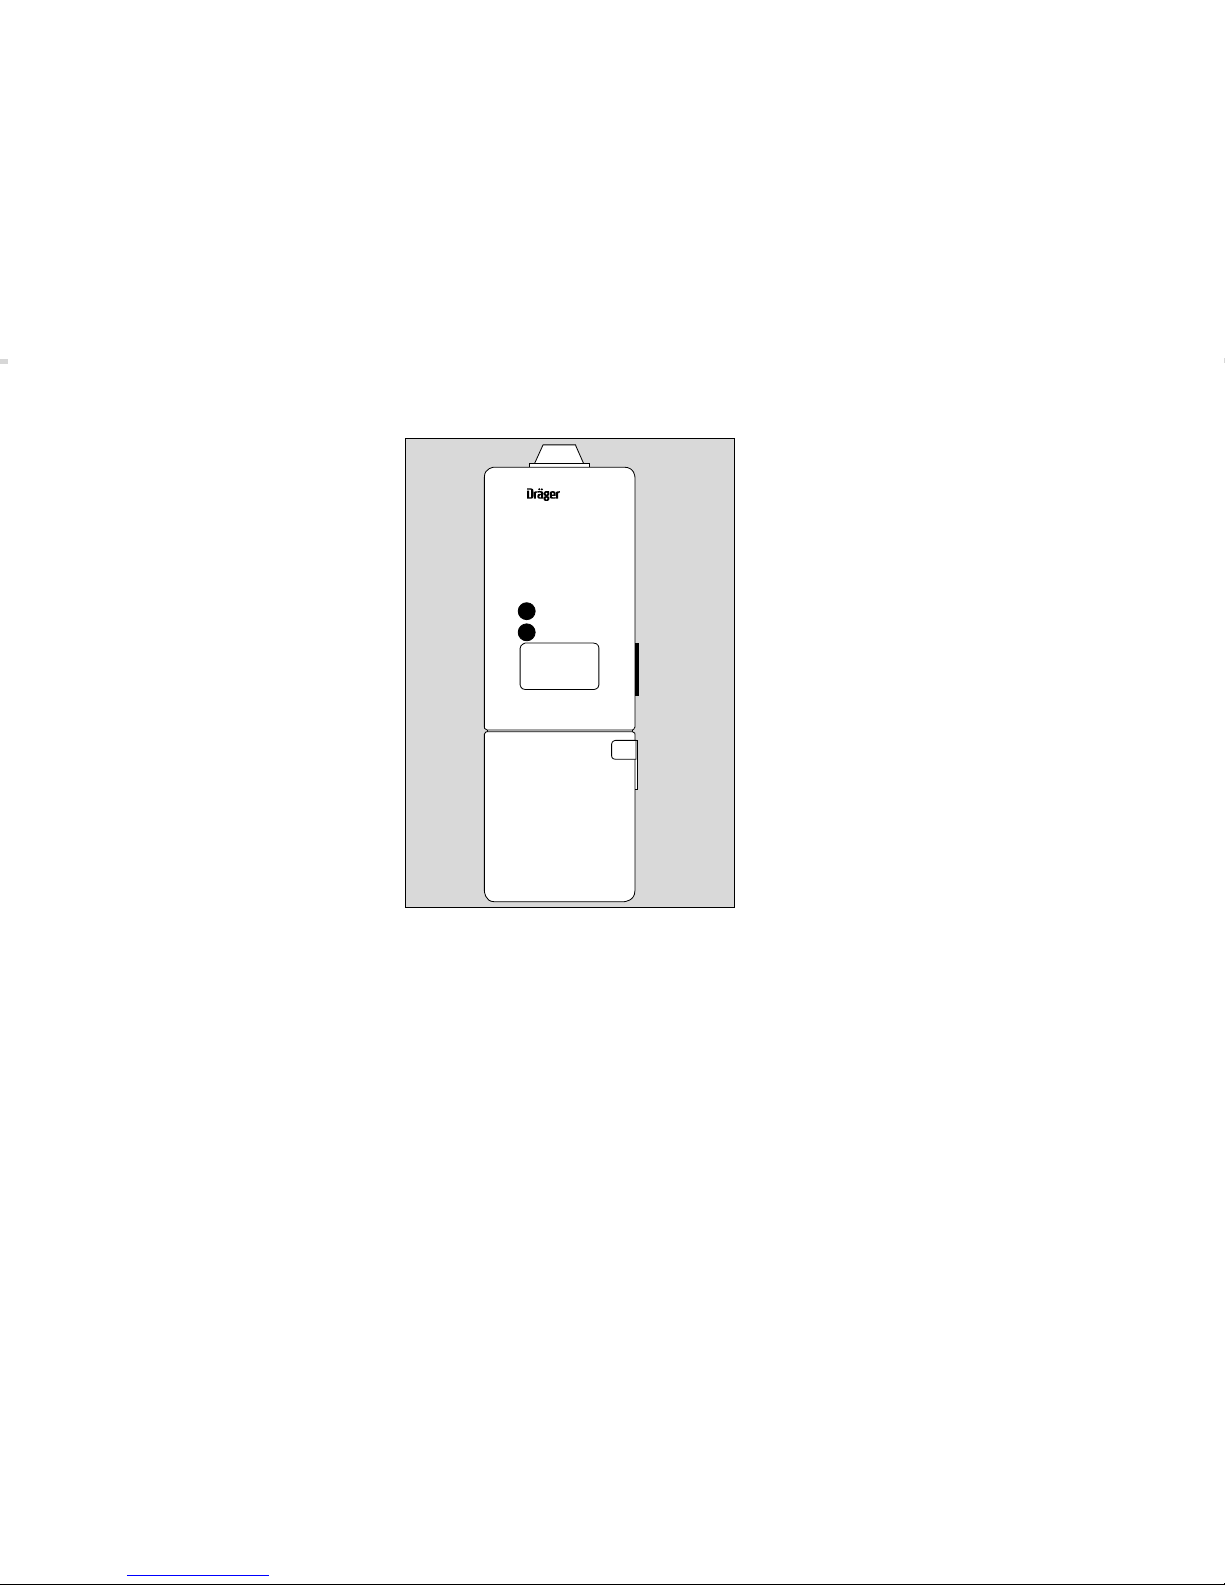
8
Ein- und Ausschalten
Einschalten
1 Taste einmal kurz drücken.
2 Die gelbe On-Lampe leuchtet und ein
Selbsttest einschließlich der Prüfung
des Displays wird durchgeführt.
– Das Symbol » PLS « (für "Plus") und die
Messeinheit erscheinen kurz in der
Anzeige.
– Abhängig von der Geräteversion
erscheinen Datum und Uhrzeit:
» dd « für Tag, z. B. 12
» nn « für Monat, z. B. 08
» yy « für Jahr, z. B. 02
– Anschließend erscheint » – – – «, ggf.
ein Punkt für die Kommastelle und das
Symbol » WAIT «.
3 Die grüne Ready-Lampe leuchtet und
ein kurzer Signalton ertönt.
– Bei aktivierter Anzeige der sequen-
tiellen Testnummer erscheint abwechselnd » nr_ « bzw. » no_ «, gefolgt von
der aktuellen Testnummer.
Beispiel:
Für die Testnummer 12345 erscheint in
der Anzeige » 12t «, gefolgt von » 345 «.
Alcotest
7410
Plus
/ Alcotest 7410
Plus
RS
ist messbereit.
Switching on and off
Switching on
1 Press button once shortly.
2 The yellow On-light is lit and a self test
including display test is carried out.
– The symbol » PLS « (for "Plus") and the
measuring unit are shown briefly.
– Depending on instrument option date
and time are shown:
» dd « for day, e.g. 12
» nn « for month, e.g. 08
» yy « for year, e.g. 02
– This is followed by the display » – – – «
with a full stop for the decimal point,
where relevant and the symbol
» WAIT «.
3 The green Ready-light is lit and a short
signal tone sounds.
– If enabled alternately the test number
symbol » no_ « or » nr_ « is displayed
followed by the current test number.
For example:
For test number 12345: » 12t «, followed
by » 345 «.
Alcotest
7410
Plus
/ Alcotest 7410
Plus
RS
is ready for measurement.
00323399_3
Alcotest 7410
Power Supply Unit
Alcotest
1
2
3
Plus
Page 9
9
Switching off
1 Press button twice shortly directly one
after the other.
When the instrument is not used after
being "ready for use", it will switch off
automatically 4 minutes after becoming
ready for measurement.
When results are being shown on the
display the instrument will switch off automatically, normally after 60 minutes.
When the power supply unit is almost flat,
the instrument will switch off itself
automatically.
When display indicates the battery symbol
» Lo Bat «, the operation can be continued
approx. for another 5 minutes.
Ausschalten
1 Taste zweimal kurz direkt nacheinander
drücken.
Das Gerät schaltet automatisch ab, wenn
4 Minuten nach Erreichen der Messbereitschaft keine Messung durchgeführt wurde.
Mit einem Messergebnis in der Anzeige
erfolgt eine automatische Abschaltung, in
der Regel nach 60 Minuten.
Bei entladener Versorgungseinheit schaltet
sich das Gerät selbsttätig aus.
Wenn in der Anzeige das Batteriesymbol
» Lo Bat « erscheint, ist der Betrieb für
weitere ca. 5 Minuten möglich.
00423399_3
Alcotest 7410
Ready
On
1
Plus
Page 10

Messung durchführen
Voraussetzungen
– Für jede Testperson ist ein neues Mundstück einzusetzen.
– Keine Alkohol- und Lösungsmitteldämpfe (Desinfektionsmittel)
in der Umgebungsluft.
– Keine hohen Alkoholkonzentrationen auf den Sensor geben,
z. B. durch Spülen des Mundes mit hochprozentigen
Alkoholika kurz vor der Messung, denn sie verringern die
Lebensdauer des Sensors.
– Genügenden Abstand zur Antenne von Mobiltelefonen und
Sendeanlagen einhalten.
– Die Ausblasöffnung an der Geräterückseite muss offen sein.
Anforderungen an die Testperson
– Wartezeit mindestens 15 Minuten nach der letzten
Alkoholaufnahme in den Mund!
Restalkohol im Mund kann die Messung verfälschen. Auch bei
aromatischen Getränken (z. B. Fruchtsaft), alkoholischen
Mundsprays, medizinischen Säften und Tropfen und nach
Aufstoßen und Erbrechen können Verfälschungen auftreten.
Eine Mundspülung mit Wasser oder nichtalkoholischen
Getränken ersetzt die Wartezeit nicht!
– Die Testperson soll vor der Probenahme normal und ruhig
atmen, nicht mehrmals tief ein- oder ausatmen.
Making Measurements
General Conditions
– Use a new mouthpiece for each person being tested.
– No alcohol and solvent vapours (desinfectants) in the ambient
air.
– Do not allow a high alcohol concentration to reach the sensor,
as for instance from rinsing the mouth with high-percentage
alcohol just before measurement, since this will shorten the
lifetime of the sensor.
– Keep at a sufficient distance from the antenna of mobile
phones or transmitters.
– Keep the vent at the rear of the instrument open.
Conditions for Test Person
– There must be an interval of at least 15 minutes after
alcohol has been taken into the mouth.
Actual residues of alcohol in the mouth may give false measurements. Such residues may be left by aromatic drinks (e. g.
fruit juices), alcoholic mouth sprays, medicines and drops, as
well as by burping and vomiting. Rinsing out the mouth with
water or non-alcoholic drinks do not substitute for an interval.
– The person being tested must breathe evenly and normally
before the test. Repeated deep breaths must be avoided.
10
Page 11
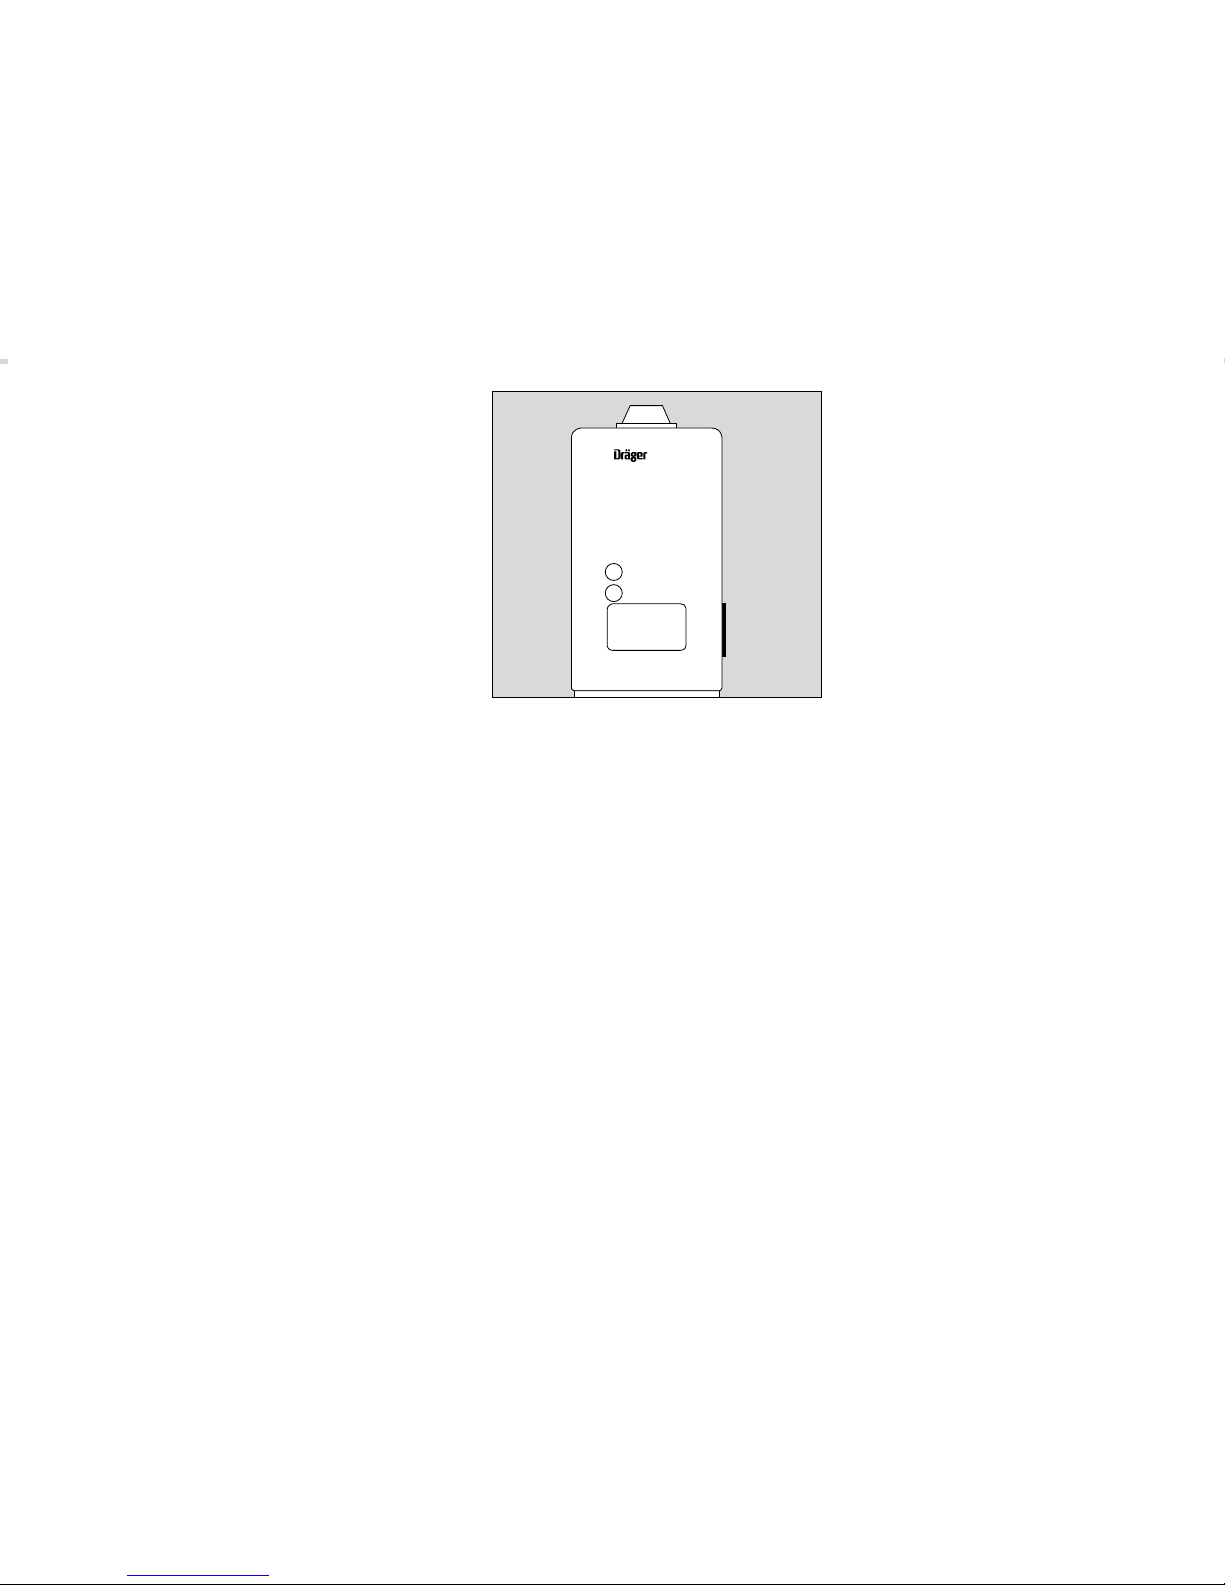
Messen
1 Neues Mundstück in den Halter
stecken.
2 Taste zum Einschalten kurz drücken
(siehe Seite 8).
3 Nach etwa 10 bis 30 Sekunden
leuchtet die grüne Ready-Lampe und
ein kurzer Signalton ertönt.
Das Gerät ist messbereit.
● Die Testperson veranlassen, tief einzu-
atmen und danach ohne zu unterbrechen in das Gerät zu blasen. Richtiges
Blasen wird durch einen Dauerton
bestätigt.
– Bei einer gültigen Atemprobe erlischt
die grüne Ready-Lampe und der
Dauerton verstummt.
Bei Sonderversionen ist ein anderer Ablauf
möglich.
● Nach einigen Sekunden erscheint
das Messergebnis in der Anzeige.
Es bleibt in der Regel 60 Minuten, oder
bis das Gerät durch zweimaligen
kurzen Tastendruck ausgeschaltet wird,
sichtbar.
● Nach kurzem Tastendruck ist das Gerät
wieder messbereit.
11
Measuring
1 Insert new mouth-piece into the holder.
2 Press button shortly for switching on
(see page 8).
3 After approx. 10 to 30 seconds the
green Ready-light is lit and a short
signal tone sounds. The instrument is
ready for measurement.
● Ask the person being tested to breathe
in deeply and blow evenly into the
instrument. Correct blowing is
indicated by a continuous tone.
– A valid test is terminated by ceasing of
green Ready-light and continuous
signal tone.
For customized versions the sequence may
differ.
● After several seconds the measured
value will be displayed and will remain
visible for normally 60 minutes or until
the instrument is switched off by
pressing the button twice shortly.
● After pressing the button shortly the
instrument is ready for measurement
again.
00523399_3
1
2
3
Page 12

Wird zu kurz oder zu schwach geblasen,
● erscheint kurz » E 0 « in der Anzeige.
● Ready-Lampe und Dauerton erlöschen, es folgen zwei kurze
Signaltöne, die rote Lampe leuchtet kurz auf.
● Das Gerät ist wieder messbereit, wenn die grüne Ready-
Lampe leuchtet.
● Testperson erneut blasen lassen.
Wartezeit zwischen zwei Messungen
Die Zeit bis zur nächsten Messung ist abhängig von der letzten
gemessenen Alkoholkonzentration (siehe Seite 37, Wartezeit für
Messbereitschaft). Zwischenzeitliches Abschalten verkürzt diese
Wartezeit nicht!
If blowing into the instrument was too short or too weak,
● » E 0 « is displayed briefly.
● Ready-light and continuous tone cease, followed by two short
signal tones, the red light is lit shortly.
● The instrument is again ready for measurement when the green
Ready-light is lit.
● The person being tested must blow into the instrument again.
Interval between Two Measurements
The interval after which the instrument will be ready for a next
measurement depends on the alcohol concentration previously
measured (page 37, intervals before readiness for operation). The
interval cannot be shortened by temporarily switching off the
instrument.
12
Page 13
Passive Probenahme
Abhängig von der Konfiguration kann das
Alcotest
7410
Plus
/ Alcotest 7410
Plus
RS
mit der Möglichkeit einer passiven Probenahme eingesetzt werden.
Bei der passiven Probenahme wird die
Probenahme durch den Bediener des
Gerätes manuell ausgelöst.
Dadurch ist es möglich, Alkohol in der
Umgebungsluft zu detektieren oder die
Ausatemluft nicht kooperationsfähiger
(z. B. bewusstloser) Personen auf die
Anwesenheit von Alkohol zu untersuchen.
● Das messbereite Gerät ohne Mund-
stück in die zu analysierende Luft
halten.
1 Taste kurz drücken.
– Das Gerät saugt Umgebungsluft an,
führt selbsttätig eine Messung durch
und analysiert den Alkoholgehalt.
– Misst das Gerät keinen Alkohol
erscheint die Anzeige » P «.
Bei Detektion von Alkohol erscheint die
Anzeige » F «.
● Nach kurzem Tastendruck ist das Gerät
wieder messbereit.
Passive Sampling
Depending on configuration the Alcotest
7410
Plus
/ Alcotest 7410
Plus
RS can be
used with the possibility of passive
sampling.
During the passive sampling the sampling
system is manually activated by the user of
the instrument.
Thus if it possible to detect alcohol in the
ambient air or to probe the exhaled air for
the presence of alcohol of persons who are
limited in the cooperation facilities (e. g.
unconscious).
● Place the instrument ready for measu-
rement without mouthpiece in the air to
be analysed.
1 press button shortly.
– The instrument samples the ambient
air, performs by itself a measurement
and analyses the alcohol content.
– If the instrument detects no alcohol, the
display shows » P «.
If alcohol was detected the display
shows » F «.
● After pressing the button shortly the
instrument is ready for measurement
again.
13
00423399_3
Alcotest 7410
Ready
On
1
Plus
Page 14
Speicher- und Datenoptionen
Alcotest 7410
Plus
/ Alcotest 7410
Plus
RS
bietet die Möglichkeit, die folgenden Speicher- und Datenoptionen anzuzeigen:
» dAt « (Daten-Modus)
» tSt « (Test)
» StA « (Statistik)
» con « (Konfiguration)
» doc « (Dokumentation)
» End « (Ende)
Zur Auswahl ist das Gerät zunächst ausgeschaltet.
1 Taste ca. 5 Sekunden gedrückt halten,
bis in der Anzeige die erste Option blinkt
(z. B. » tSt «).
● Durch kurzes Drücken der Taste wird die
nächste Option aufgerufen.
● Taste länger als 2 Sekunden drücken:
die angezeigte Option wird ausgewählt.
Memory and Data Options
Alcotest 7410
Plus
/ Alcotest 7410
Plus
RS
offers the possibility to show the following
memory and data options:
» dAt « (Data Mode)
» tSt « (Test)
» StA « (Statistics)
» con « (Configuration)
» doc « (Documentation)
» End « (End)
Before selection the instrument is switched
off.
1 Press button for about 5 seconds until
the display reads the first option (e.g.
» tSt «).
● By pressing the button shortly the next
option is accessible.
● Press button for more than 2 seconds:
the shown display option is chosen.
14
00423399_3
Alcotest 7410
Ready
On
1
Plus
Page 15

15
Option "dAt" (Data Mode)
The last measurement result of the
Alcotest
7410
Plus
/ Alcotest 7410
Plus
RS
can be printed on the Alcotest
7410
Printer within 60 minutes or, depending on
the Printer version, indefinitely until the next
test.
● When the display reads » dAt «, select
this option by pressing the button
(>2 seconds).
1 Press the button again (>3 seconds).
– The display shows » Prn «.
● Position the instrument onto the
printer.
Switching off:
1 Press button twice.
Option "dAt" (Daten-Modus)
Das letzte Messergebnis des Alcotest
7410
Plus
/ Alcotest 7410
Plus
RS kann auf
dem Alcotest
7410 Printer innerhalb von
60 Minuten oder, abhängig von der
Druckerversion, zeitlich unbegrenzt
ausgedruckt werden.
● Bei angezeigter Option » dAt « diese
durch langen Tastendruck (>2 Sekunden) auswählen.
1 Taste erneut (>3 Sekunden) drücken.
– In der Anzeige erscheint » Prn «.
● Gerät auf den Alcotest
7410 Printer
legen.
Ausschalten:
1 Taste zweimal kurz drücken.
00423399_3
Alcotest 7410
Ready
On
1
Plus
01623399_3
Page 16

Über die Schnittstelle RS 232 können beim
Alcotest
7410
Plus
RS Gerätedaten und die
gespeicherten Messergebnisse mit ergänzenden Informationen an einen IBM-kompatiblen PC übertragen und mit dem Programm
"VIEW 2000" ausgewertet werden.
Ferner können den Anlass einer Messung
beschreibende Daten zur Dokumentation
der Messung in das Alcotest
7410
Plus
RS
übertragen werden, wobei zur anschließenden Messung zwei Einzelmessungen gefordert werden.
Die Benutzung des Programms ist in seiner
Online-Hilfe ausführlich beschrieben.
● Bei angezeigter Option » dAt « diese
durch langen Tastendruck (>2 Sekunden) auswählen.
● Alcotest
7410
Plus
RS über PCAnschlusskabel mit einer seriellen
Schnittstelle (COM 1 bis COM 4) des
Computers verbinden.
● Dräger Software "VIEW 2000" auf dem
Computer starten. Programmpunkt
"Testdaten/Einlesen" aktivieren. Am PC
erscheinen Status-Meldungen. Wird die
Liste der Messwerte angezeigt, ist die
Datenübertragung beendet.
Ausschalten:
1 Taste einmal lang drücken (>2 Sekunden).
● Nach dem Signalton Taste zweimal kurz
drücken.
The built in RS 232-interface enables with
Alcotest
7410
Plus
RS data communication with an IBM compatible PC.
All data and test reports of the instrument
can be read out by the software
"VIEW 2000".
Additionally, data describing the reason of
a measurement can be transferred for
documentation into the Alcotest
7410
Plus
RS whereas two single measurements are
required for the following measurement.
The use of the software is explained in
detail in the online help.
● When the display reads » dAt «, select
this option by pressing the button
(>2 seconds).
● Connect Alcotest
7410
Plus
RS and
PC (COM 1 to COM 4) by using the
data transfer cable.
● Start Dräger Software "VIEW 2000" on
PC.
Run software option "Testdata/Load".
PC displays status information.
When the list of measuring results is
shown, data transfer has been terminated successfully.
Switching off:
1 Press button once (>2 seconds).
● After the signal tone press button twice
short-time.
16
00423399_3
Alcotest 7410
Ready
On
1
Plus
00623399_3
Page 17

17
Option "tSt" (Test)
Zeigt nach Eingabe der Testnummer das Messergebnis eines
Einzeltests an.
● Bei angezeigter Option » tSt « diese durch langen Tastendruck
(>2 Sekunden) auswählen.
● Die Anzeige zeigt die Grundeinstellung für die Testnummer
00001:
» tnr « gefolgt von » 00t « und » 001 «.
● Taste wiederholt drücken, um die blinkende gewünschte Ziffer
einzustellen. Taste länger als 2 Sekunden drücken = Ziffer bestätigen.
● Danach die nächste anwählbare Ziffernstelle einstellen.
● Ablauf für alle Ziffernstellen wiederholen.
● In der Anzeige erscheint die ausgewählte Testnummer, das
Messergebnis und die zugehörige Messeinheit.
Für weitere Testergebnisse:
● Taste erneut drücken, in der Anzeige erscheint » tnr «.
● Neue Testnummer eingeben und bestätigen.
Ausschalten:
● Taste zweimal kurz drücken.
Option "tSt" (Test)
Shows the measuring result of a particular test after selection of the
test number.
● When the display reads » tSt «, select this option by pressing
the button (>2 seconds).
● The display shows the basic setting for the test number
00001:
» tno « followed by » 00t « and » 001 «.
● Press button repeatedly to select the desired flashing figure.
Press longer than 2 seconds and confirm figure.
● Afterwards set the next significant figure.
● Repeat procedure for all desired figures.
● The display indicates the selected test number, the result and
the measuring unit.
For other test results:
● Press button again, the display reads » tno «.
● Select and confirm a new test number.
Switching off:
● Press button twice.
Page 18

Option "StA" (Statistik)
Zeigt die Anzahl der erfassten Tests in verschiedenen Konzentra-
tionsbereichen an. Die Festlegung der Konzentrationsbereiche
erfolgt bei der Herstellung des Gerätes oder durch den DrägerService.
● Bei angezeigter Option » StA « diese durch langen Tastendruck
(>2 Sekunden) auswählen.
● Die Anzahl der Messungen in den festgelgten Konzentrations-
bereichen wird nacheinander angezeigt.
Beispiel:
» ALL «
38
davon unterhalb eines festgelegten Grenzwertes
(z. B. unter 0,30 ‰, "Pass")
» P «
8
innerhalb eines festgelegten Konzentrationsbereiches
(z. B. 0,30 bis 0,79‰, "Alert")
» A «
17
oberhalb oder gleich einem festgelegten Grenzwert
(z. B. 0,80‰, "Fail")
» F «
11
und – falls vorgesehen –oberhalb oder gleich einem weiteren
festgelegten Grenzwert (z. B. 1,1‰, "High")
» H «
2
Das Gerät schaltet sich anschließend automatisch ab.
Option "StA" (Statistics)
Shows the classification of the stored test results in different
concentration ranges. The determination of the concentration
ranges is done during the production of the instrument or by
DrägerService.
● When the display reads » StA «, select this option by pressing
the button (>2 seconds).
● The number of results in the determined concentration ranges
is displayed one after the other.
Example:
» ALL «
38
thereof below a defined limit
(e. g. below 0.30 ‰, "Pass")
» P «
8
within a defined concentration range
(e. g. 0.30 to 0,79‰, "Alert")
» A «
17
above or equal to a defined limit
(e. g. 0.80‰, "Fail")
» F «
11
and – if defined – above or equal to a further defined limit
(e. g. 1.1‰, "High")
» H «
2
The instrument switches off automatically afterwards.
18
Page 19

Option "con" (Konfiguration)
Zeigt die installierte Versionsnummer der
Software sowie verschiedene eingestellte
Parameter an.
● Bei angezeigter Option » con « diese
durch langen Tastendruck (>2 Sekunden) auswählen.
● Durch kurzes Drücken der Taste wird
der jeweils nächste Parameter aufgerufen.
Die Parameter erscheinen in folgender
Reihenfolge:
● Software-Version, z. B. 6.10 und 01
und 7.00
● Grenze zwischen Pass und Alert, z.B. 0,30
● Grenze zwischen Alert und Fail, z.B. 0,80
● Grenze zwischen Fail und High, z. B. 1,10
● Einstellung des Blaskriteriums, z.B. std,
cl1, cl2
● Angaben von Mindestblasvolumen bei
einem Test, z.B. 1,2 Liter, und Messeinheit, z. B. mg/l
● Angaben zur Mindestblasdauer bei einem
Test, z.B. 4 Sekunden
● Aktivierung der passiven Messung, falls
aktiviert, z.B. ON (aktiviert)
● Aktivierung der Testnummernanzeige, z.B.
ON (aktiviert)
● Ende des Menüpunktes, Gerät schaltet
sich automatisch aus.
Option "con" (Configuration)
Shows the installed software version and
several parameter settings.
● When the display reads » con «, select
this option by pressing the button
(>2 seconds).
● By pressing the button shortly the next
parameter will be shown.
The parameters will appear as follows:
● Software release, e.g. 6.10 and 01 and
7.00
● Limit between Pass and Alert, e.g. 0.30
● Limit between Alert and Fail, e.g. 0.80
● Limit between Fail and High, e.g. 1.10
● Setting of blowing criteria, e.g. std, cl1,
cl2
● Information on minimum breath volume
while testing, e.g. 1,2 Litres, and measuring unit, e.g. mg/l
● Information on minimum time of
blowing while testing, e.g. 4 seconds
● Activation of passive measurement, if
activated, e.g. ON (activated)
● Activation of test-no. indication, e.g. ON
(activated)
● End of the menu, instrument switches
off automatically.
19
00723399_3
EL
P A
A F
F H
bLo
VOL
SEC
PSP
tno
End
Page 20

Option "doc" (Dokumentation)
Bietet die Möglichkeit, das Druckerprotokoll für die Verwendung
mit Standard- oder erweiterten Versionen des Alcotest
7410
Printers einzustellen.
Die Details sind abhängig von den verwendeten Versionen des
Alcotest
7410
Plus
/ Alcotest 7410
Plus
RS und des Alcotest
7410 Printer.
Option "End" (Ende)
Zum Ausschalten des Gerätes:
● Bei angezeigter Option » End « Taste länger als 2 Sekunden
drücken.
Option "doc" (Documentation)
Offers the possibility to select the printer protocol for use with
standard or extended versions of the Alcotest 7410 Printer.
The details depend on the used options of the Alcotest
7410
Plus
/
Alcotest
7410
Plus
RS and the Alcotest 7410 Printer.
Option "End" (End)
For switching off the instrument:
● When the display reads » End « press button for more than
2 seconds.
20
Page 21

Instandhaltung
Instandhaltungsintervalle
Bei Bedarf: Batterien auswechseln, siehe Seite 24 bis 25.
Halbjährlich: Kalibrierung überprüfen, siehe Seite 26 bis 28.
Reinigen
● nicht in Flüssigkeiten tauchen, keine Flüssigkeiten in die
Anschlüsse gelangen lassen!
Zum Reinigen:
● mit einem Einwegtuch abwischen.
Gerät entsorgen
– am Ende der Nutzungsdauer.
● Gerät entsprechend den nationalen Abfallbeseitigungvor-
schriften entsorgen,
oder
● Gerät von einem geeigneten Entsorgungsunternehmen
entsorgen lassen.
Auskünfte erteilen die Umwelt- und Ordnungsämter.
Maintenance
Maintenance Intervals
If necessary: changing batteries, page 24 to 25.
Every six months: Check calibration, page 26 to 28.
Cleaning
● Do not submerge in liquid – liquid must not enter the sockets.
To clean:
● wipe with a disposable tissue.
Disposal of the Instrument
– at the end of its service life.
● Dispose of the instrument in accordance with national waste
disposal regulations
or
● Ask a suitable disposal contractor to dispose of the instru-
ment.
The local environmental agency can supply further details.
21
Page 22

Akku laden
Wenn bei Benutzung einer Akku-Versorgungseinheit links unten in der Anzeige
das Symbol » Lo Bat « erscheint oder wenn
das Gerät sich vor Erreichen der Betriebsbereitschaft selbsttätig ausschaltet.
● Gerät oder Akku-Versorgungseinheit
mit der Frontseite nach vorn in die Ladestation stellen.
● Trageschlaufe nach vorn heraushängen
lassen, damit sie die Kontakte nicht
behindert.
● Kontrollampe an der Ladestation
leuchtet orange: Akku wird aufgeladen.
Ein entladener Akku ist in 24 Stunden
wieder vollständig aufgeladen.
● Bei einem Ladezustand von etwa 50 %
schaltet die Kontrolllampe auf grün um.
● Zur Sicherung der Betriebsbereitschaft
nicht benutzte Geräte oder Akku-Versorgungseinheit in der Ladestation aufbewahren.
Charging Power Supply Unit
When by using a rechargeable power
supply unit the » Lo Bat « symbol appears
in the left bottom of the display or when the
instrument has switched off itself before
being ready for use.
● Put the instrument or rechargeable
power supply unit into charger with the
display to the front.
● Allow carrying strap to hang free at the
front – it must not obstruct the contacts.
● Orange control lamp in charger is lit:
rechargable power supply unit is being
charged. It takes 24 hours to fully recharge a completely discharged power
supply unit.
● At a charging level of approx. 50 % the
control lamp changes to green.
● Keep the instrument or the recharge-
able power supply unit in the charger so
that it is ready for immediate use.
22
00823399_3
Lo Bat
00923399_3
Page 23

Versorgungseinheit auswechseln
1 Riegel herausschieben,
2 Verschluss gedrückt halten und die
Versorgungseinheit abziehen.
● Riegel an der betriebsbereiten Versor-
gungseinheit herausschieben.
● Messeinheit auf die Versorgungsein-
heit stecken und den Riegel wieder
hineindrücken.
Beim Anschließen einer betriebsbereiten
Versorgungseinheit kann sich das Gerät
selbsttätig einschalten.
Verbrauchte Akku-Versorgungseinheiten
– nicht ins Feuer werfen
– nicht gewaltsam öffnen, Explosions-
gefahr !
– nur als Sondermüll entsorgen,
entsprechend den örtlichen Abfallbeseitigungsvorschriften (enthält Nickel
und Cadmium!).
Auskünfte erteilen die örtlichen
Umwelt- und Ordnungsämter sowie
geeignete Entsorgungsunternehmen.
Replacing Power Supply Unit
1 Extract catch.
2 Keep lock pressed in and remove
power supply unit.
● Extract catch on charged power supply
unit.
● Attach measuring unit to power supply
unit and push catch back into its place.
When a charged power supply unit is
connected, the instrument may switch on
automatically.
Used rechargeable power supply units
– Do not incinerate.
– Do not open violently.
Risk of explosion!
– Only dispose of as special waste,
according to local waste disposal
regulations (contains nickel and
cadmium!).
Information can be obtained from environmental agencies and waste disposal
companies.
23
01023399_3
Ready
On
Power Supply Unit
Alcotest
1
2
Page 24

Batterien auswechseln
Wenn bei Benutzung einer Alkali-Batterieversorgung links unten in der Anzeige das
Symbol » LoBat « erscheint oder wenn das
Gerät sich vor Erreichen der Betriebsbereitschaft selbsttätig ausschaltet:
1 Riegel herausschieben.
2 Verschluss gedrückt halten und die
Versorgungseinheit abziehen.
3 Deckel der Versorgungseinheit
verschieben und abheben.
● Verbrauchte Batterien entnehmen und
neue Batterien einsetzen –
auf richtige Polarität achten!
3 Batteriefach schließen.
● Messeinheit auf die Versorgungsein-
heit stecken und den Riegel wieder
hineindrücken.
Erforderliche Batterien:
3 Stück 1,5 V (Babyzelle LR 14)
Changing Batteries
When by using an alkaline battery supply
unit the » LoBat « Symbol appears in the
left bottom of the display or when the
instrument has switched off itself before
being ready for use:
1 Extract catch.
2 Keep lock pressed in and remove
power supply unit.
3 Shift and lift cover of the power supply
unit.
● Remove used batteries and insert new
ones –
consider correct polarity.
3 Close battery compartment.
● Attach measuring unit to power supply
unit and push catch back into its place.
Required batteries:
3 of 1.5 V (LR 14)
24
01123399_3
Power Supply Unit
Alcotest
1
2
01223399_3
3
01323399_3
+
+
+
LR 14
LR 14
LR 14
Page 25

– Um nach Entladung der Batterien das
Gerät umgehend wieder einsetzen zu
können, wird das Bereithalten von
Ersatzbatterien oder einer Ersatz-Batterieversorgungseinheit empfohlen.
Verbrauchte Alkali Batterien
– nicht ins Feuer werfen,
– nicht wieder aufladen,
– nicht gewaltsam öffnen, Explosions-
gefahr!
– nur als Sondermüll entsorgen,
entsprechend den örtlichen Abfallbeseitigungsvorschriften.
Auskünfte erteilen die örtlichen
Umwelt- und Ordnungsämter sowie
geeignete Entsorgungsunternehmen.
Bei langer Lagerung
– Batterien aus dem Gerät heraus-
nehmen, wenn das Gerät länger als
6 Monate nicht benutzt wird.
Dies verhindert eine Beschädigung des
Gerätes durch auslaufende Batteriesäure.
– For immediate use of the instrument
after discharge of the batteries it is
recommended always to have replacement batteries or an additional battery
supply available.
Used alkaline batteries
– Do not expose to fire,
– Do not recharge,
– Do not force open. Danger of an
explosion!
– Only dispose of as special waste,
in accordance with local waste disposal
regulations.
Information can be obtained from environmental agencies and from waste
disposal companies.
During prolonged storage
– Remove batteries from the instrument if
it is not going to be used for more than
6 months, in order to prevent any
damage to the instrument from leaking
battery acid.
25
Page 26

Kalibrieren
– Nur durch befugte Personen.
– Anzeigevariante, Kalibrierbereich und
Standardkalibrierwert beachten.
– Ausblasöffnung an der Geräterückseite
frei halten.
– Kalibrierung mindestens halbjährlich
überprüfen.
Mit dem Dräger Mark ll-Simulator
● Gebrauchsanweisung des Simulators
beachten.
● Simulator für den Betrieb vorbereiten.
1 Trockenen Adapter in Mundstückhalter
und Ausgangsschlauch stecken. Die
Schlauchverbindung soll möglichst kurz
sein, max. 5 cm – sonst kühlt sich das
Kalibriergas zu stark ab und
kondensiert.
2 Kalibrierklammer aufsetzen.
3 Gerät einschalten. Nach dem Selbsttest
erscheint » CAL « in der Anzeige. Das
Gerät befindet sich jetzt in der
Betriebsart "Kalibrieren".
4 Grüne Ready-Lampe leuchtet auf und
ein kurzer Signalton ertönt.
Das Gerät ist bereit für die Kalibration.
26
Calibration
– Only by authorised persons.
– Note the display option, calibration
range and standard calibration value.
– Keep clear the vent at the back of the
instrument.
– Check calibration at least every
6 months.
With the Dräger Mark II Simulator
● Follow Instructions for Use for Mark II
Simulator.
● Prepare Simulator for operation.
1 Insert a dry adapter into mouthpiece
holder and outlet hose. The hose
connection should be as short as
possible – not more than 5 cm – otherwise the calibration gas will cool off too
quickly and condense.
2 Attach calibration clip.
3 Switch on the instrument. After self-test
the display shows » CAL «. The
instrument is now in the calibration
mode.
4 Green Ready-light is lit and a short
signal tone sounds.
The instrument is now ready for calibration.
01323399_3
2
1
3
4
Page 27

● In den Eingangsschlauch des Simulators blasen. Kalibriergas
strömt durch den Ausgangsschlauch und den Adapter in das
Gerät. Der erforderliche Durchfluss von mindestens 6 L/min
wird durch einen Dauerton bestätigt.
● Nach Erlöschen der Ready-Lampe, den Kalibriergasstrom
stoppen.
● Nach 3 bis 20 Sekunden erscheint der Messwert blinkend in
der Anzeige.
● Konzentration des verwendeten Kalibriergases einstellen:
Taste am Gerät drücken.
Bei gedrückter Taste zählt der Anzeigewert kontinuierlich hoch.
Wird dabei der zulässige Kalibrierbereich überschritten,
springt der Anzeigewert auf den Minimalwert zurück und zählt
von dort aus wieder hoch.
● Stimmt der Anzeigewert mit der Kalibriergaskonzentration
überein, Kalibrierklammer und Adapter abnehmen. In der
Anzeige erscheint jetzt kurz » CAL «. Die neuen Kalibrierdaten
sind gespeichert.
● Taste kurz drücken – das Gerät ist wieder messbereit.
● Datum mit Kugelschreiber auf einem neuen Kalibrieraufkleber
notieren und auf das Gerät kleben.
● Blow into the inlet hose of the Simulator. Calibration gas flows
through the outlet hose and the adapter into the instrument. A
continuous tone indicates that the flow exceeds the minimum
requirement of 6 L/min.
● When the Ready-light switches off, stop the flow of calibration
gas.
● After 3 to 20 seconds the measured value will flash on the
display.
● Set concentration of used calibration gas: press button on the
instrument, value increases.
When the button is kept pressed, the displayed value increases
continuously. If the permissible calibration range is exceeded,
the display will jump back to the minimum value and then
increase again.
● When the displayed value is identical with the calibration gas
concentration, remove calibration clip and adapter.
The display will now show » CAL « briefly. The new calibration
data are stored.
● Press button shortly – the instrument is ready for measurement
again.
● Enter date on a new calibration label using ball pen and attach
to the instrument.
27
Page 28
Mit Kalibriergas
1 Trockenen Adapter über einen
Schlauch mit der Gasflasche
verbinden, max. Schlauchlänge
1 Meter.
● Flaschenventil kurz öffnen, um
Schlauch und Adapter mit Prüfgas zu
spülen.
● Adapter in Mundstückhalter stecken.
● Weiter vorgehen wie bei "Kalibrieren
mit dem Dräger Mark II-Simulator"
beschrieben.
Hinweis:
Einfluss des atmosphärischen Drucks bei
der Kalibrierung berücksichtigen.
28
With Calibration Gas
1 Connect a dry adapter to the gas
cylinder with a hose, not more than
1 meter long.
● Open cylinder valve briefly to flush hose
and adapter with test gas.
● Insert adapter into mouthpiece holder.
● Continue as described in "Calibration
with the Dräger Mark II-Simulator".
Note:
Take care on influence of atmospheric
pressure on calibration value.
01523399_3
3
4
2
1
Page 29

29
Störung, Ursache, Abhilfe
Störung Ursache Abhilfe
Gerät schaltet sich selbsttätig aus Akku / Batterien entladen
Gerät war länger als 4 Minuten
messbereit
Der Messwert wurde angezeigt
und 60 Minuten (versionsspezifisch)
erfolgte keine weitere Messung
Akku laden, Seite 22, oder Batterien
auswechseln, Seite 24
Gelbe On-Lampe leuchtet nach dem Einschalten nicht oder nur schwach
und in der Anzeige stehen zufällige
Zeichen
Akku / Batterien tiefentladen
Kfz-Anschluss fehlerhaft oder
nicht angeschlossen
Akku laden, Seite 22, oder Batterien
auswechseln, Seite 24
Kfz-Anschluss überprüfen oder
auswechseln.
Grüne Ready-Lampe leuchtet nicht nach
dem Einschalten und 4 Minuten Wartezeit
Gerätefehler DrägerService in Anspruch nehmen
Kein Dauerton beim Blasen Gerät noch nicht messbereit Warten, bis grüne Ready-Lampe leuchtet
Fehlermeldung in der Anzeige Ursache Abhilfe
E 0 Testperson bläst zu schwach
oder mit Unterbrechung
Stärker und ohne Unterbrechung
blasen lassen
E 1 Sensorfehler Gerät aus- und einschalten. Erscheint die
Fehlermeldung erneut, Sensor durch DrägerService auswechseln lassen
Page 30

30
Fehlermeldung in der Anzeige Ursache Abhilfe
E 2 Gerät erkennt Kalibrierklammer
nicht
Kalibrierklammer korrekt aufsetzen
E 3 Kalibrierung nicht erfolgreich
Sensor verbraucht
Gerät erneut kalibrieren; durch Fachleute
z. B. den DrägerService
Sensor durch DrägerService auswechseln
lassen
E 4 Kalibrierwert unzulässig Kalibrieren mit zulässigem Wert
E 5 Fehler im Probenahmesystem Messung wiederholen. Erscheint die Fehler-
meldung erneut, DrägerService in Anspruch
nehmen
E 6 Gerätefehler DrägerService in Anspruch nehmen
E 7 Datenspeicherfehler DrägerService in Anspruch nehmen
FCC gefolgt von Err
rote Lampe + Hupe
Zu starke elektromagnetische Störung Störquelle beseitigen und Messung wieder-
holen.
000 gefolgt von dAt
rote Lampe + Hupe (nur Alcotest
7410
Plus
RS)
Datenspeicher voll, nicht initialisiert oder
beschädigt
Datenspeicher mit PC-Software "VIEW
2000" auslesen und löschen.
-LI rote Lampe + Hupe Spannung der Datenspeicherbatterie zu
niedrig
Datenspeicher mit PC-Software "VIEW
2000" auslesen (nur Alcotest
7410
Plus
RS).
DrägerService in Anspruch nehmen.
ds rote Lampe + Hupe (nur wenn Zeitanzeige
aktiviert)
Kalibrierintervall abgelaufen Gerät kalibrieren; durch Fachleute z. B. den
DrägerService.
Page 31
31
Fault, Cause, Remedy
Fault Cause Remedy
Instrument switches off automatically Power supply unit / batteries discharged
Instrument has been left ready
for measurement for more
than 4 minutes.
The result of the last test has
been displayed for at least
60 minutes (standard versions).
Charge rechargeable power supply unit,
page 22, or replace batteries, page 24
Yellow On-light is not lit after switching on
or is only faintly lit;
the display shows incomplete symbols
Power supply unit completely
flat, or 12-Volt connection defective
Recharge rechargeable power supply unit,
page 22, or replace batteries, page 24.
Check or replace 12-Volt connection, page 6
Green Ready-light not lit after switching
on and 4 min interval
Instrument malfunction Call DrägerService
No continuous tone when blowing
into the instrument
Instrument not yet ready
for measurement
Wait until green Ready-light is lit
Fault message in display Cause Remedy
E 0 Test person not blowing
hard or evenly enough
Ask to blow harder and more evenly
E 1 Sensor fault Switch instrument off and on,
if fault message re-appears, sensor must be
replaced by DrägerService
Page 32

32
Fault message in display Cause Remedy
E 2 Instrument does not
recognize calibration clip
Attach calibration clip correctly
E 3 Calibration not sucessful
Worn sensor
Calibrate again, by trained service
personnel, e.g. by DrägerService
Sensor must be replaced by DrägerService
E 4 Calibration value not permissible Calibrate with permissible value
E 5 Fault in sampling system Repeat measurement,
if fault message re-appears, call DrägerService
E 6 Instrument malfunction Call DrägerService
E 7 Data memory corrupted Call DrägerService
FCC followed by Err
red light + sound signal
Harmful electromagnetic interference was
detected
Redress interference,
repeat measurement.
000 followed by dAt
red light + sound signal (only Alcotest
7410
Plus
RS)
Memory completely occupied,
data area corrupted or not initialized
Readout of stored data. Clear memory afterwards using PC software "VIEW 2000".
-LI red light + sound signal Low voltage of data storage battery Readout of stored data using PC software
"VIEW 2000" (only Alcotest
7410
Plus
RS).
Call DrägerService.
dS red light + sound signal (only if display of
time is activated)
Calibration interval expired Calibrate the instrument, by trained service
personnel, e.g. DrägerService.
Page 33

Was ist Was
1 Mundstückhalter
2 Gelbe On-Lampe
3 Grüne Ready-Lampe bzw. rote Lampe
4 Anzeige
5 Taste
6 Riegel
7 Verschluss
8 Serielle Schnittstelle RS 232,
nur Alcotest
7410
Plus
RS
9 Versorgungseinheit
What's What
1 Mouthpiece holder
2 Yellow On-light
3 Green Ready-light resp. red light
4 Display
5 Button
6 Catch
7 Lock
8 Serial port RS 232,
Alcotest
7410
Plus
RS only
9 Power supply unit
33
1-126-01.tiff
1
2
3
4
8
5
6
7
Plus
9
Page 34

Technical Data
Measuring principle Electrochemical sensor
Measurement range
Breath alcohol concentration 0.00 to 1.50 mg/L
0 to 150 µg/100 mL
(Ethanol mass per breath
volume at 34 °C and
1013 hPa)
Blood alcohol concentration 0.00 to 3.00 ‰
0.00 to 3.00 g/L
0.000 to 0.300 %
(Ethanol mass per blood
volume at 20 °C and
1013 hPa.
By giving this data a
conversion factor
of 2100 between breath
and blood alcohol concentrations is used.)
Display range
‰ Option 0.00 to 9.99 ‰
%, A % Option 0.000 to 0.999 %
mg/L Option 0.00 to 9.99 mg/L
µg/100 mL Option 0 to 999 µg/100 mL
g/L Option 0 to 9.99 g/L
P/A/F 1-Option (PAF)
0.00 to 0.49 ‰ P (Pass)
0.50 to 0.79 ‰ A (Alert)
0.80 to 9.99 ‰ F (Fail)
Technische Daten
Messprinzip Elektochemischer Sensor
Messbereich
Atemalkoholkonzentration 0,00 bis 1,50 mg/L
0 bis 150 µg/100 mL
(Ethanol-Masse pro Atemvolumen bei 34 °C und
1013 hPa)
Bultalkoholkonzentration 0,00 bis 3,00 ‰
0,00 bis 3,00 g/L
0,000 bis 0,300 %
(Ethanol-Masse pro Blutvolumen bei 20 °C und
1013 hPa. Bei der Angabe
dieser Daten wird ein Umrechnungsfaktor von 2100
zwischen Atem- und Blutalkoholkonzentrations-Angaben verwendet.)
Anzeigebereich
‰-Variante 0,00 bis 9,99 ‰
%, A %-Variante 0,000 bis 0,999 %
mg/L-Variante 0,00 bis 9,99 mg/L
µg/100 mL-Variante 0 bis 999 µg/100 mL
g/L-Variante 0 bis 9,99 g/L
P/A/F 1-Variante (PAF)
0,00 bis 0,49 ‰ P (Pass)
0,50 bis 0,79 ‰ A (Alert)
0,80 bis 9,99 ‰ F (Fail)
34
Page 35

P/A/F 2-Variante (PA2)
0,00 bis 0,29 mg/L P (Pass)
0,30 bis 0,64 mg/L A (Alert)
0,65 bis 9,99 mg/L F (Fail)
P/A/F 4-Variante (SAP)
0,00 bis 0,21 mg/L S (Save)
0,22 bis 0,34 mg/L A (Alarm)
0,35 bis 9,99 mg/L P (Positiv)
Umgebungsbedingungen
bei Betrieb –5 bis 45 °C
–20 °C für max. 30 min
nach vorheriger Lagerung
bei über 0 °C.
20 bis 98 % r.F.
600 bis 1400 hPa
bei Lagerung –40 bis 65 °C,
20 bis 98 % r.F.
600 bis 1400 hPa
Probenahme
Blasdauer 4 bis 12 s (abhängig
von der Blasstärke)
Atemstrom >6 L/min
Atemvolumen >1,2 L
Kundenspezifische Abweichungen durch Optionen cL1 und cL2
möglich.
35
P/A/F 2-Option (PA2)
0.00 to 0.29 mg/L P (Pass)
0.30 to 0.64 mg/L A (Alert)
0.65 to 9.99 mg/L F (Fail)
P/A/F 4-Option (SAP)
0.00 to 0.21 mg/L S (Save)
0.22 to 0.34 mg/L A (Alarm)
0.35 to 9.99 mg/L P (Positiv)
Ambient conditions
For operation –5 to 45 °C (23 to 113 °F)
–20 °C (–4° F) for max. 30 min
and only after being kept above
0 °C (32 °F) until use.
20 to 98 % r.h.
600 to 1400 hPa
For storage –40 to 65 °C (–40 to 149 °F),
20 to 98 % r.h.
600 to 1400 hPa
Sample conditions
Blowing time 4 to 12 s (depends on the
intensity)
Flow >6 L/min
Volume >1.2 L
Variations by options cL1 and cL2 possible.
Page 36

Messgenauigkeit
max. Fehler der Wiederholbarkeit
mit Ethanolstandard
0 bis 1,00 ‰ ±0,05 ‰
0 bis 0,100 % ±0,005 %
0 bis 0,50 mg/L ±0,03 mg/L
0 bis 50 µg/100 mL ±3 µg/100 mL
0 bis 1,00 g/L ±0,05 g/L
>1,00 ‰ ±5 % vom Messwert
>0,100 %
>0,50 mg/L
>50 µg/100 mL
>1,00 g/L
Drift der Empfindlichkeit typisch 0,6 % vom
Messwert/Monat
Measurement accuracy
Reproducibility with an
ethanol standard
0 to 1.00 ‰ ±0.05 ‰
0 to 0.100 % ±0.005 %
0 to 0.50 mg/L ±0.03 mg/L
0 to 50 µg/100 mL ±3 µg/100 mL
0 to 1.00 g/L ±0.05 g/L
>1.00 ‰ ±5 % of measured value
>0.100 %
>0.50 mg/L
>50 µg/100 mL
>1.00 g/L
Sensitivity drift typically 0.6 % of measured
value/month
36
Page 37

Wartezeit für Messbereitschaft
1. Messung ca. 15 s
nach Berechnung eines
Messwertes im Bereich:
0,00 bis 0,40 ‰ 10 s
0,000 bis 0,040 %
0,00 bis 0,20 mg/L
0 bis 20 µg/100 mL
0,00 bis 0,40 g/L
0,41 bis 0,60 ‰ 25 s
0,041 bis 0,060 %
0,21 bis 0,30 mg/L
21 bis 30 µg/100 mL
0,41 bis 0,60 g/L
0,61 bis 1,10 ‰ 35 s
0,061 bis 0,110 %
0,31 bis 0,55 mg/L
31 bis 55 µg/100 mL
0,61 bis 1,10 g/L
1,11 bis 2,00 ‰ 60 s
0,111 bis 0,200 %
0,56 bis 1,00 mg/L
56 bis 100 µg/100 mL
1,11 bis 2,00 g/L
>2,00 ‰ 90 s
>0,200 %
>1,00 mg/L
>100 µg/100 mL
>2,00 g/L
37
Intervals before readiness for operation
1st measurement about 15 s
after terminating a result of a
previous test in range:
0.00 to 0.40 ‰ 10 s
0.000 to 0.040 %
0.00 to 0.20 mg/L
0 to 20 µg/100 mL
0.00 to 0.40 g/L
0.41 to 0.60 ‰ 25 s
0.041 to 0.060 %
0.21 to 0.30 mg/L
21 to 30 µg/100 mL
0.41 to 0.60 g/L
0.61 to 1.10 ‰ 35 s
0.061 to 0.110 %
0.31 to 0.55 mg/L
31 to 55 µg/100 mL
0.61 to 1.10 g/L
1.11 to 2.00 ‰ 60 s
0.111 to 0.200 %
0.56 to 1.00 mg/L
56 to 100 µg/100 mL
1.11 to 2.00 g/L
>2.00 ‰ 90 s
>0.200 %
>1.00 mg/L
>100 µg/100 mL
>2.00 g/L
Page 38

Kalibrierung
Kalibrierintervall abhängig von der gefor-
derten Messgenauigkeit,
typisch: 6 Monate
Zulässiger Kalibrierbereich
bei Angabe des Messwertes in:
‰ 0,50 bis 1,49 ‰
% 0,050 bis 0,149 %
mg/L 0,24 bis 0,71 mg/L
µg/100 mL 24 bis 71 µg/100 mL
g/L 0,50 bis 1,49 g/L
Standardkalibrierwert mit
Dräger Ethanol-Standardlösung
bei Angabe des Messwertes in:
‰ 1,00 ‰
% 0,100 %
mg/L 0,48 mg/L
µg/100 mL 48 µg/100 mL
g/L 1,00 g/L
Die Verwendung dieser Standardkalibrierwerte entspricht einem
Umrechnungsfaktor von 2100 zwischen Atem- und Blutalkoholkonzentrations-Angaben.
Calibration
Calibration interval depends on required
accuracy,
typically: 6 month
Permissible calibration range
for unit of measuring value:
‰ 0.50 to 1.49 ‰
% 0.050 to 0.149 %
mg/L 0.24 to 0.71 mg/L
µg/100 mL 24 to 71 µg/100 mL
g/L 0.50 to 1.49 g/L
Standard calibration value when
using Dräger Ethanol-Standard
solution for unit of measuring value:
‰ 1.00 ‰
% 0.100 %
mg/L 0.48 mg/L
µg/100 mL 48 µg/100 mL
g/L 1.00 g/L
The use of these standard calibration values corresponds to a
conversion factor of 2100 between breath and blood alcohol
concentration-values.
38
Page 39

Abmessungen 70 mm x 230 mm x 34 mm
(B x H x T)
Gewicht ca. 500 g
Stromversorgung
Wiederaufladbarer Akku 3 x 1,2 V; 2,4 Ah
Ladezeit 24 h
Betriebszeit bei
Raumtemperatur ca. 400 Messungen oder
6 h Dauerbetrieb.
Mit Batteriesymbol (Lo Bat)
in der Anzeige noch ca. 5 min.
Kraftfahrzeug-Anschluss 12 V
AlkalibatterieVersorgungseinheit 3 x 1,5 V (Babyzelle LR 14)
Betriebszeit bei ca. 600 Messungen oder
Raumtemperatur 12 h Dauerbetrieb
Schnittstellen
RS 232-Schnittstelle Zur Datenübertragung an
(nur Alcotest
7410
Plus
RS) einen IBM-kompatiblen PC.
Optische Schnittstelle Zur Datenübertragung an den
Alcotest
7410 Printer.
CE-Kennzeichnung Elektromagnetische Verträglichkeit
(Richtlinie 89/336/EWG)
Dimensions 70 mm x 230 mm x 34 mm
(W x H x D)
Weight approx. 500 g
Electrical supply
Rechargeable power
supply unit 3 x 1.2 V, 2.4 Ah
Charging time 24 h
Operational time at
room temperature about 400 measurements
or 6 h continuous operation.
With battery symbol (Lo Bat)
displayed, about another
5 minutes.
Motorvehicle connection 12 V
Alkaline battery
supply 3 x 1.5 V (Type LR 14)
Operational time at approx. 600 measurements
room temperature or 12 h continuous operation
Interfaces
RS 232 interface For data transmission to
(Alcotest
7410
Plus
RS only) IBM compatible PC.
Optical interface For data transmission to
Alcotest
7410 Printer.
CE-marking electromagnetic compatibility
(Directive 89/336/EEC)
39
Page 40

40
Order ListBestell-Liste
Benennung und Beschreibung Sach-Nr.
Alcotest
7410
Plus
Handmessgerät für Atemalkohol mit
Datenspeicher für ca. 9700 Datensätze
83 13 630
Alcotest
7410
Plus
RS
Handmessgerät für Atemalkohol mit Datenspeicher für ca. 9700 Datensätze und RS 232Schnittstelle zum Datenaustausch mit einem IBMkompatiblen PC
Bei Bestellung angeben:
83 13 690
Anzeigevariante: ‰, %, A %, mg/L, g/L,
µg/100 mL, P/A/F, P/A/0, PA2, SAP
Versorgungseinheit:
Akku,
Kfz-Anschluss 12 V,
Alkali-Batterieversorgung
Zubehör
Mundstücke (25 Stück)
mit Rückatemsperre, hygienisch geprüft
68 05 703
Akku-Versorgungseinheit 83 11 770
Alkali-Batterie-Versorgungseinheit
(für 3 x Babyzelle LR 14)
83 15 690
Kraftfahrzeug-Anschluss 12 V 83 11 790
Ladestation 230 V
mit zwei Ladeschächten und Duo LED
83 12 590
Name and Description Part no.
Alcotest
7410
Plus
Portable measuring instrument for breath alcohol
testing with data memory for about 9700 tests
83 13 630
Alcotest
7410
Plus
RS
Portable measuring instrument for breath
alcohol testing equipped with data memory
for about 9700 tests and RS 232 interface for
data communication with an IBM compatible PC
The following required when ordering:
83 13 690
Display options: ‰, %, A %, mg/L, g/L,
µg/100 mL, P/A/F, P/A/0, PA2, SAP
Power supply unit:
Rechargeable power supply unit,
motor vehicle connection 12 V,
alkaline battery supply
Accessories
Mouth-pieces (25 pieces)
with non-return valve, hygienically tested
68 05 703
Rechargeable power supply unit 83 11 770
Alkaline battery power supply unit
(for 3 x LR 14)
83 15 690
Motor vehicle connection 12 V 83 11 790
Charging station 230 V
with two charging slots and duo LED
83 12 590
Page 41

41
Benennung und Beschreibung Sach-Nr.
Alcotest
7410 Printer 83 15 950
Software Paket "RECALL"
Zum Auslesen der Datensätze des Alcotest
7410
Printers und Einstellung der Printer Optionen
83 13 140
Lederkoffer für Alcotest
7410 78 36 774
Koffer für Alcotest
7410 und Printer 83 14 210
PC-Anschlusskabel
Verbindungskabel mit Buchse für 25-polige
RS 232 Schnittstelle auf 3-poligen Klinkenstecker
83 12 160
PC-Anschlusskabel
Verbindungskabel mit Buchse für 9-polige
RS 232 Schnittstelle auf 3-poligen Klinkenstecker
83 13 250
PC-Software "VIEW 2000"
Software zum Datenaustausch vom
Alcotest
7410
Plus
RS
83 15 140
Kalibrierzubehör
Mark ll-Simulator 45 40 088
Ethanol-Standardlösung 1,0 ‰
(1 x 500 mL)
67 28 838
Adapter (25 Stück)
mit Wasserfalle
68 05 473
Kalibrierklammer 83 11 369
Kalibrieraufkleber (100 Stück) 68 05 739
Kalibriergas Ethanol-Stickstoff auf Anfrage
Name and Description Part no.
Alcotest
7410 Printer 83 15 950
Software Package "RECALL"
For data read-out of the Alcotest
7410 Printer
and adjustment of printer options
83 13 140
Leather-Case for Alcotest
7410 78 36 774
Case for Alcotest
7410 and Printer 83 14 210
Connecting cable for PC 25/3
Connecting cable with jack for 25-pole RS 232
interface on 3-pole jack plug
83 12 160
Connecting cable for PC 9/3
Connecting cable with jack for 9-pole RS 232
interface on 3-pole jack plug
83 13 250
PC-software "VIEW 2000"
Software for data transfer with the
Alcotest
7410
Plus
RS
83 15 140
Calibration accessories
Mark ll Simulator 45 40 088
Ethanol, standard solution 1.0 ‰
(1 x 500 mL)
67 28 838
Adapter (25 pieces)
with water trap
68 05 473
Calibration clip 83 11 369
Calibration label (100 pieces) 68 05 739
Calibration gas, ethanol-nitrogen on request
Page 42

42
A
bmessungen ....................................................................................... 39
Akku laden .............................................................................................. 22
Anforderungen an die Testperson .................................................... 10
Anzeigebereich ..................................................................................... 34
Ausschalten .............................................................................................. 9
Batterien auswechseln ........................................................................ 24
Bestell-Liste ............................................................................................ 40
CE-Kennzeichnung .............................................................................. 39
Daten-Modus ......................................................................................... 15
Datenoptionen ....................................................................................... 14
Dokumentation ...................................................................................... 20
Dräger Mark II Simulator ..................................................................... 26
Drift der Empfindlichkeit ...................................................................... 36
Einschalten ............................................................................................... 8
Ende ......................................................................................................... 20
Explosionsgefährdete Bereiche ........................................................... 4
A
ccessories ....................................................................................... 4, 40
Ambient conditions ............................................................................... 35
Areas of explosion hazard ..................................................................... 4
Calibration ...................................................................................... 26, 38
Calibration accessories ....................................................................... 41
Calibration date ....................................................................................... 7
Calibration gas ...................................................................................... 28
Calibration label .................................................................................... 27
CE marking ............................................................................................ 39
Changing batteries ............................................................................... 24
Charging power supply unit ............................................................... 22
Cleaning .................................................................................................. 21
Conditions for test person .................................................................. 10
Configuration ......................................................................................... 19
Customized versions ............................................................................ 11
Data mode .............................................................................................. 15
Data options ........................................................................................... 14
Dimensions ............................................................................................ 39
Display range ......................................................................................... 34
Disposal of the instrument .................................................................. 21
Sichwortverzeichnis Index
Page 43

Fehlermeldung .............................................................................. 29, 30
Gerät entsorgen ................................................................................... 21
Gewicht ................................................................................................... 39
Haftung ..................................................................................................... 5
Instandhaltung .................................................................................. 4, 21
Instandhaltungsintervalle ..................................................................... 21
Kalibrieraufkleber ................................................................................. 27
Kalibrierdatum .......................................................................................... 7
Kalibrieren .............................................................................................. 26
Kalibriergas ............................................................................................ 28
Kalibrierung ............................................................................................ 38
Kalibrierzubehör .................................................................................... 41
Konfiguration ......................................................................................... 19
Messbereich .......................................................................................... 34
Messbereit ................................................................................................ 8
Messen .................................................................................................... 11
Messgenauigkeit ................................................................................... 36
Documentation ...................................................................................... 20
Dräger Mark II Simulator ..................................................................... 26
Electrical supply ................................................................................... 39
End ........................................................................................................... 20
Fault ......................................................................................................... 31
Fault message ................................................................................ 31, 32
General conditions ............................................................................... 10
Intended use ............................................................................................ 6
Interfaces ................................................................................................ 39
Interval between two measurements ................................................ 12
Intervals before readiness for operation .......................................... 37
Liability ....................................................................................................... 5
Maintenance ..................................................................................... 4, 21
Maintenance intervals .......................................................................... 21
Making measurement ........................................................................... 10
43
Page 44

Messprinzip ............................................................................................ 34
Messung durchführen .......................................................................... 10
Passive Probenahme ........................................................................... 13
Probenahme ........................................................................................... 35
Reinigen ................................................................................................. 21
Restalkohol ............................................................................................. 10
Schnittstellen ......................................................................................... 39
Sicherheit .................................................................................................. 4
Sonderversionen ................................................................................... 11
Speicheroptionen ................................................................................. 14
Statistik .................................................................................................... 18
Störung ................................................................................................... 29
Stromversorgung .................................................................................. 39
T
echnische Daten ................................................................................ 34
Test .......................................................................................................... 17
Umgebungsbedingungen ................................................................... 35
Measurement accuracy ....................................................................... 36
Measurement range ............................................................................. 34
Measuring ............................................................................................... 11
Measuring principle .............................................................................. 34
Memory options ..................................................................................... 14
Order list ................................................................................................ 40
Passive Sampling ................................................................................. 13
Preparation ............................................................................................... 7
Ready for measurement ........................................................................ 8
Replacing power supply unit .............................................................. 23
Residues of alcohol .............................................................................. 10
Safety ......................................................................................................... 4
Sample conditions ................................................................................ 35
Sensitivity drift ....................................................................................... 36
Statistics ................................................................................................. 18
Switching off ............................................................................................. 9
Switching on ............................................................................................. 8
44
Page 45

V
erbrauchte Versorgungseinheiten ................................................. 23
Versorgungseinheit auswechseln ..................................................... 23
Verwendungszweck ................................................................................ 6
Voraussetzungen .................................................................................. 10
Vorbereiten ............................................................................................... 7
Wartezeit für Messbereitschaft .......................................................... 37
Wartezeit zwischen zwei Messungen .............................................. 12
Was ist was ............................................................................................ 33
Zubehör .............................................................................................. 4, 40
T
echnical data ....................................................................................... 34
Test .......................................................................................................... 17
Used power packs ............................................................................... 23
Weight ..................................................................................................... 39
What's what ............................................................................................ 33
45
 Loading...