

Drona Aviation PlutoX User Manual
PlutoX User Manual
V1.1

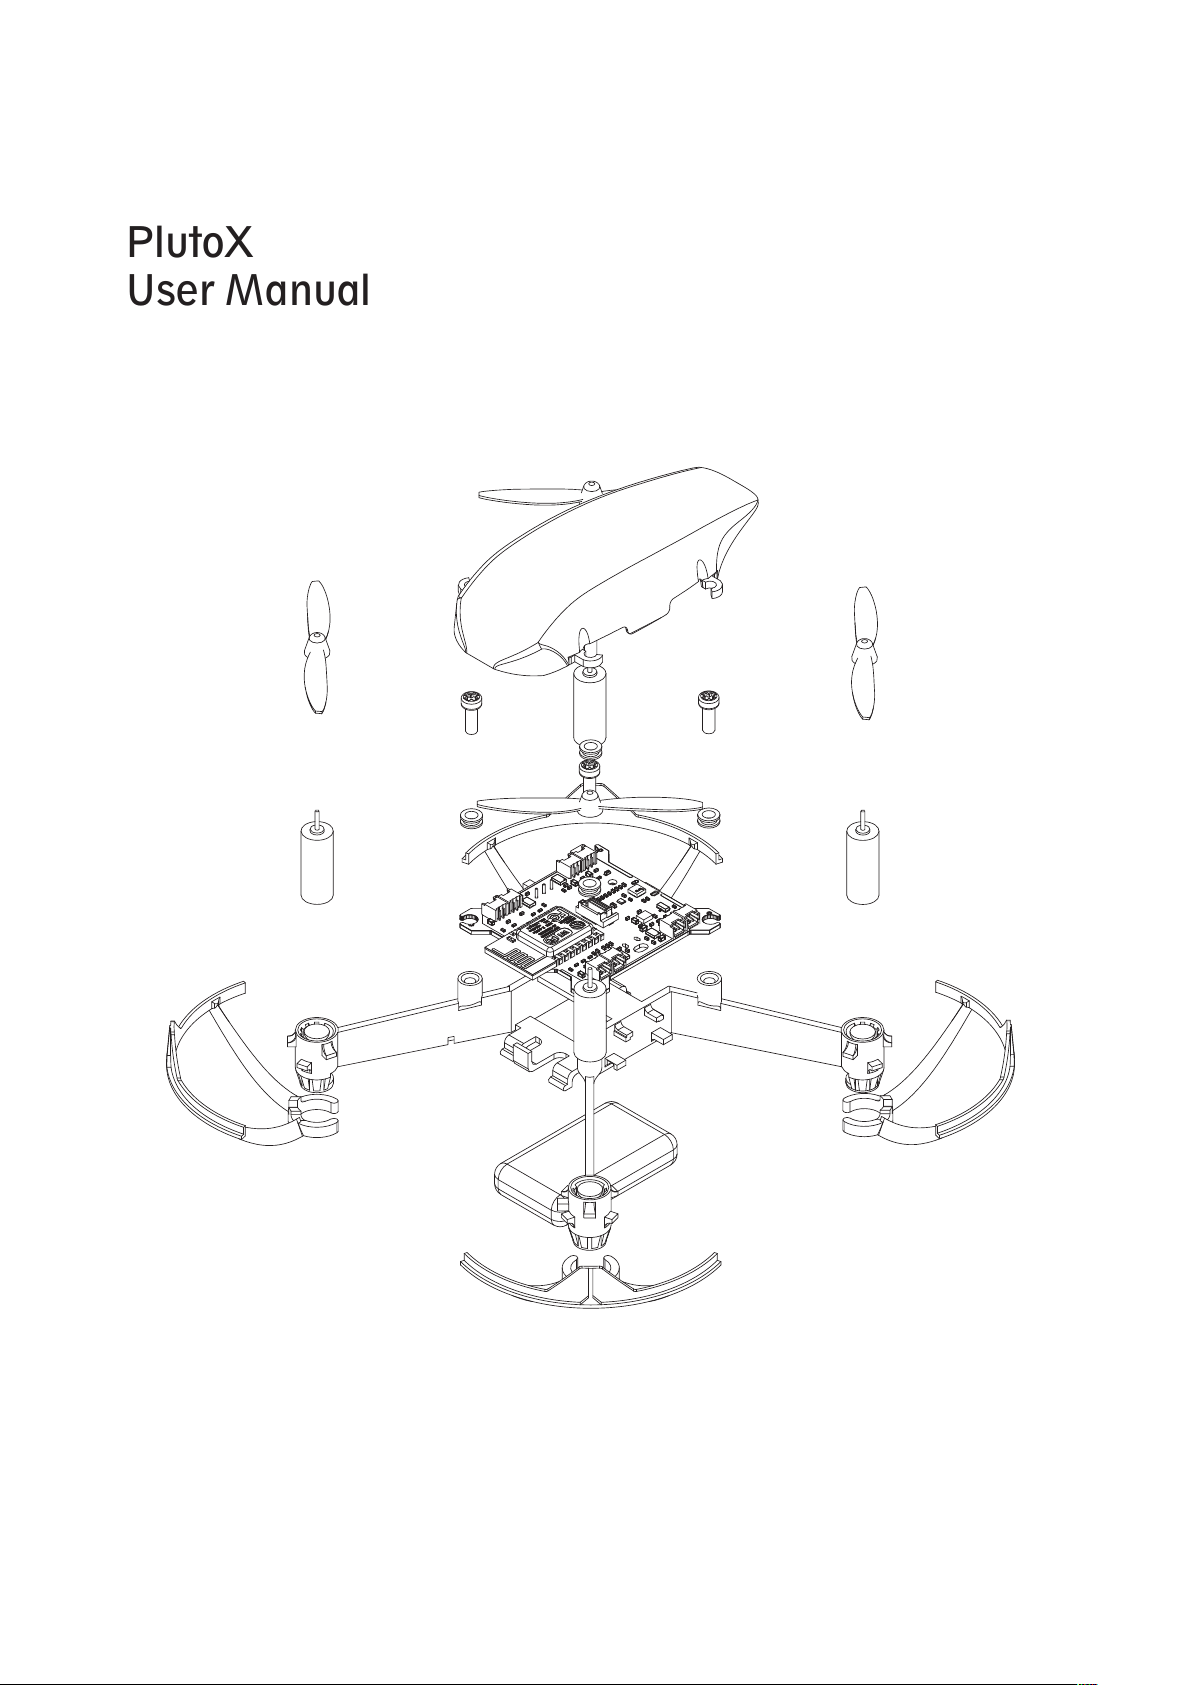
PlutoX
User Manual
.
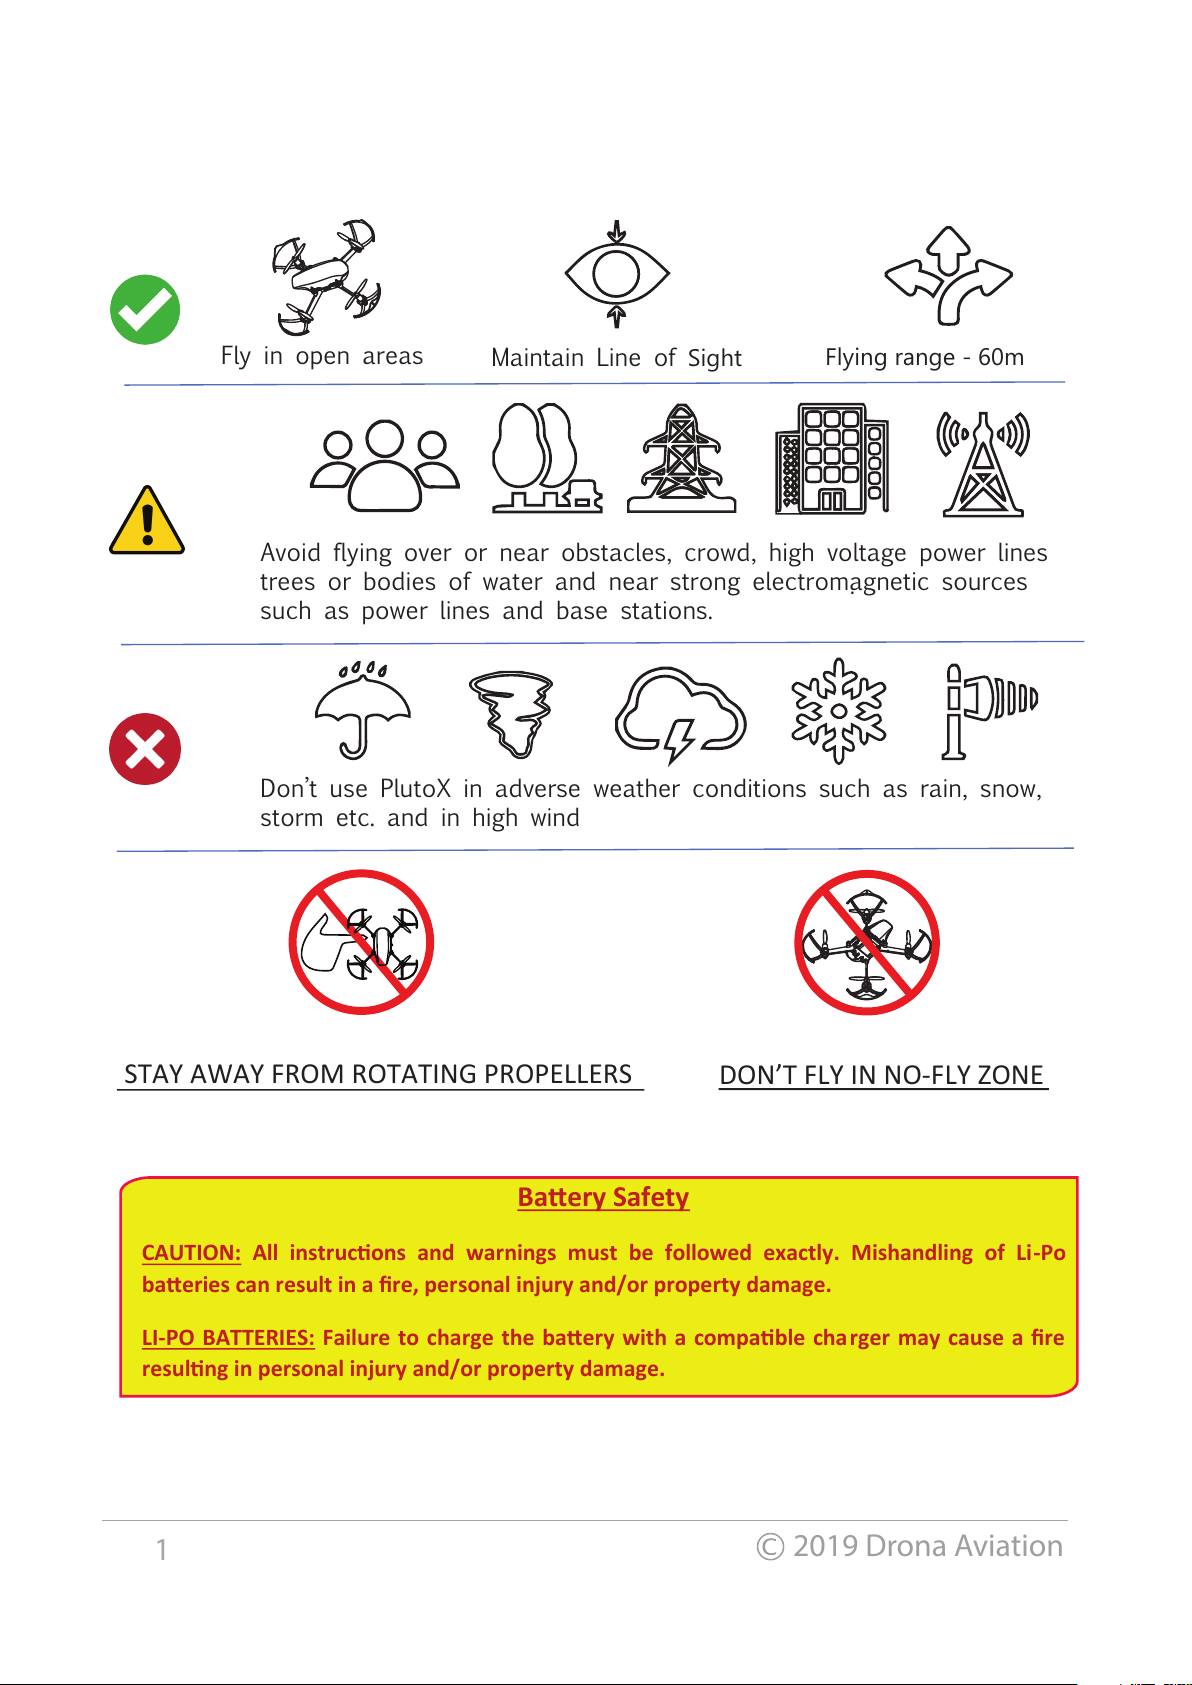
Fly in open areas
Maintain Line of Sight
Flying range - 60m
Avoid flying over or near obstacles, crowd, high voltage power lines
trees or bodies of water and near strong electromagnetic sources
such as power lines and base stations.
Don’t use PlutoX in adverse weather conditions such as rain, snow,
storm etc. and in high wind
STAY AWAY FROM ROTATING PROPELLERS
DON’T FLY IN NO-FLY ZONE
Baery Safety
CAUTION: All instrucons and warnings must be followed exactly. Mishandling of Li-Po
baeries can result in a fire, personal injury and/or property damage.
LI-PO BATTERIES: Failure to charge the baery with a compable charger may cause a fire
resulng in personal injury and/or property damage.
1
2019 Drona Aviation
Table of Contents
Introduction
Quick Flight
5
3
Assembly/disassembly
Battery charge
Trim
Control settings
Flight modes
Control Modes
Sensitivity
Max altitude
External Controller
Flight Controller Information
Updating the firmware
Developer Options
Trouble shooting
Failsafe Information
Spares
Support
Specifications
6
14
28
28
28
27
26
29
33
31
30
40
38
37
35
34
41
Box Contents
29
2
2019 Drona Aviation
FAQ
36


Introduction
Hi!
We know you must be excited to fly your PlutoX. Before you start
tinkering on your own, we strongly recommend that you follow the
quick start guide so that you have a seamless experience with your
first flight. This manual also helps you disassemble / assemble your
PlutoX and do more with your drone. Happy tinkering!!
Note: Please read and understand this manual completely. Drona
Aviation products are to be used by ages 14 and over. The instruction
manual, warranties and other associated documentation is subject to
change without notice. Drona Aviation assumes no responsibility for
inadvertent errors in this manual.
3
2019 Drona Aviation
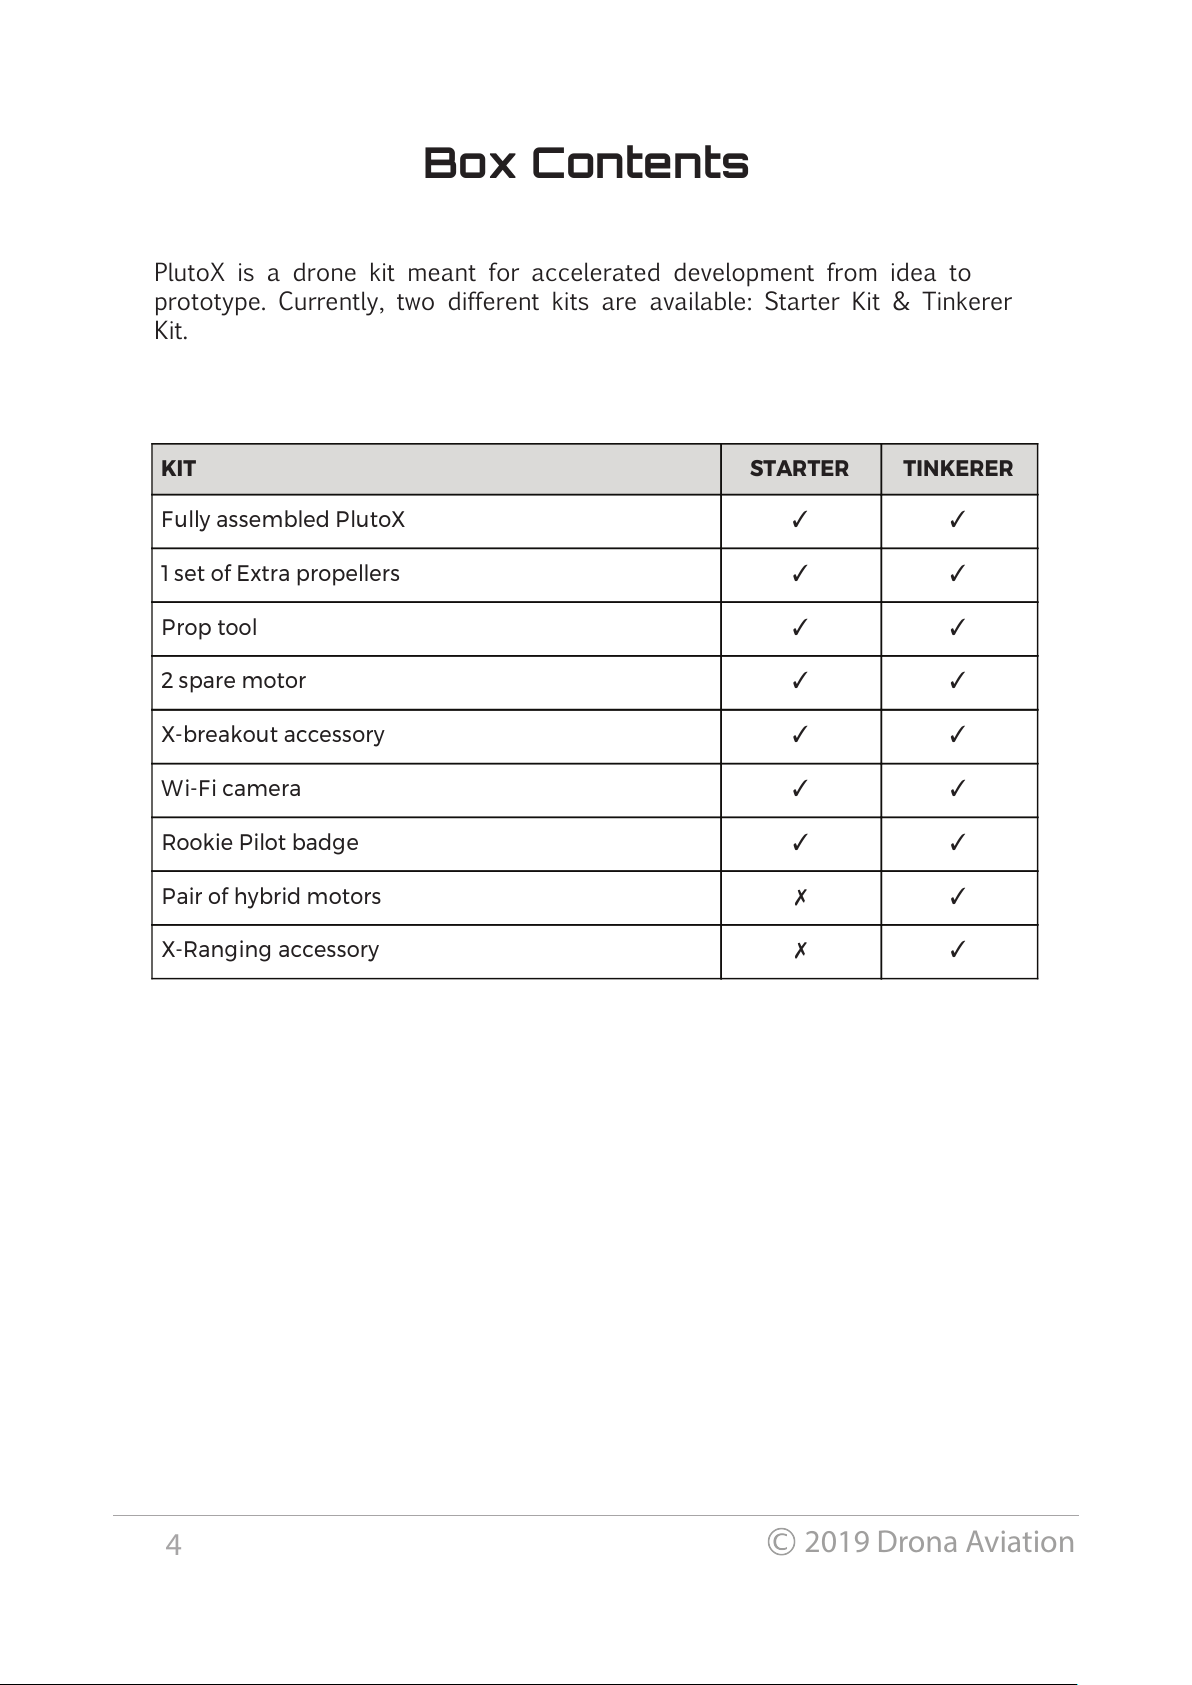
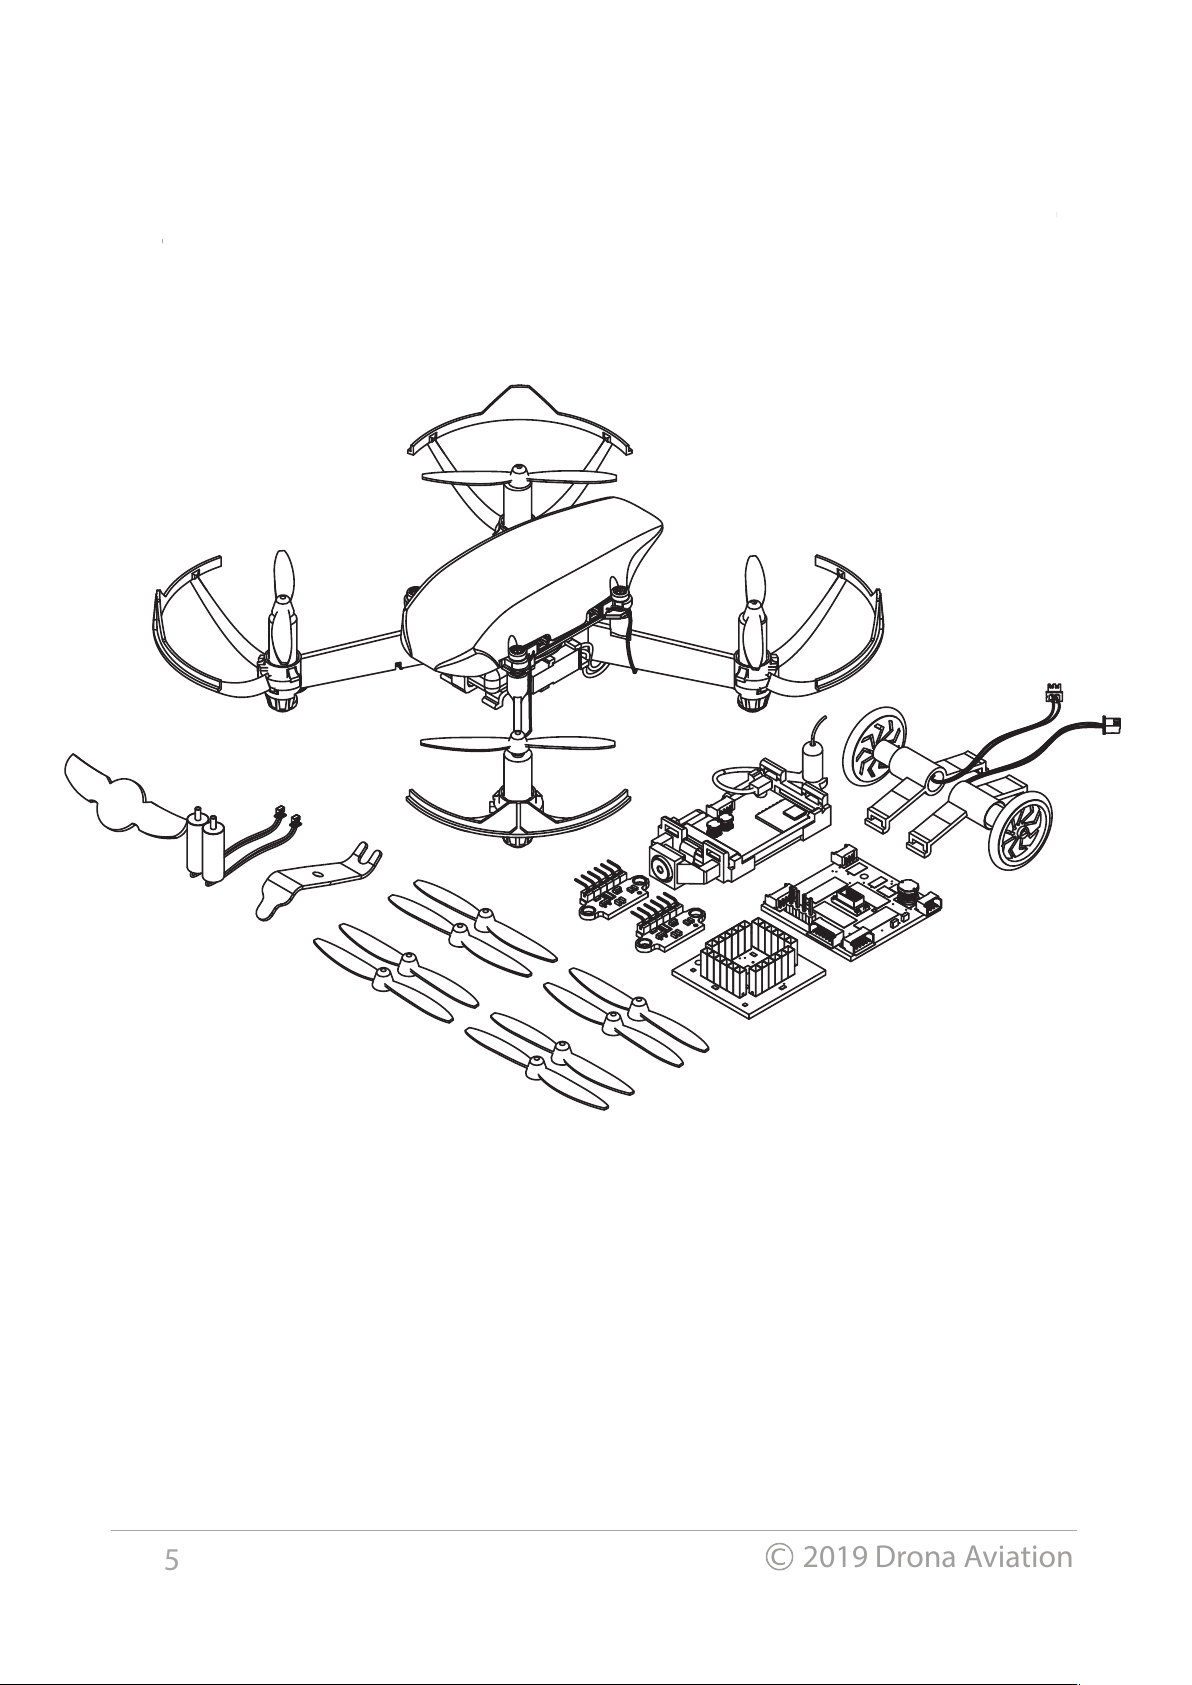
Box Contents
PlutoX is a drone kit meant for accelerated development from idea to
prototype. Currently, two different kits are available: Starter Kit & Tinkerer
Kit.
KIT STARTER TINKERER
Fully assembled PlutoX ✓ ✓
1 set of Extra propellers ✓ ✓
Prop tool ✓ ✓
2 spare motor ✓ ✓
X-breakout accessory ✓ ✓
Wi-Fi camera ✓ ✓
Rookie Pilot badge ✓ ✓
Pair of hybrid motors ✗ ✓
X-Ranging accessory ✗ ✓
4
2019 Drona Aviation
5
2019 Drona Aviation
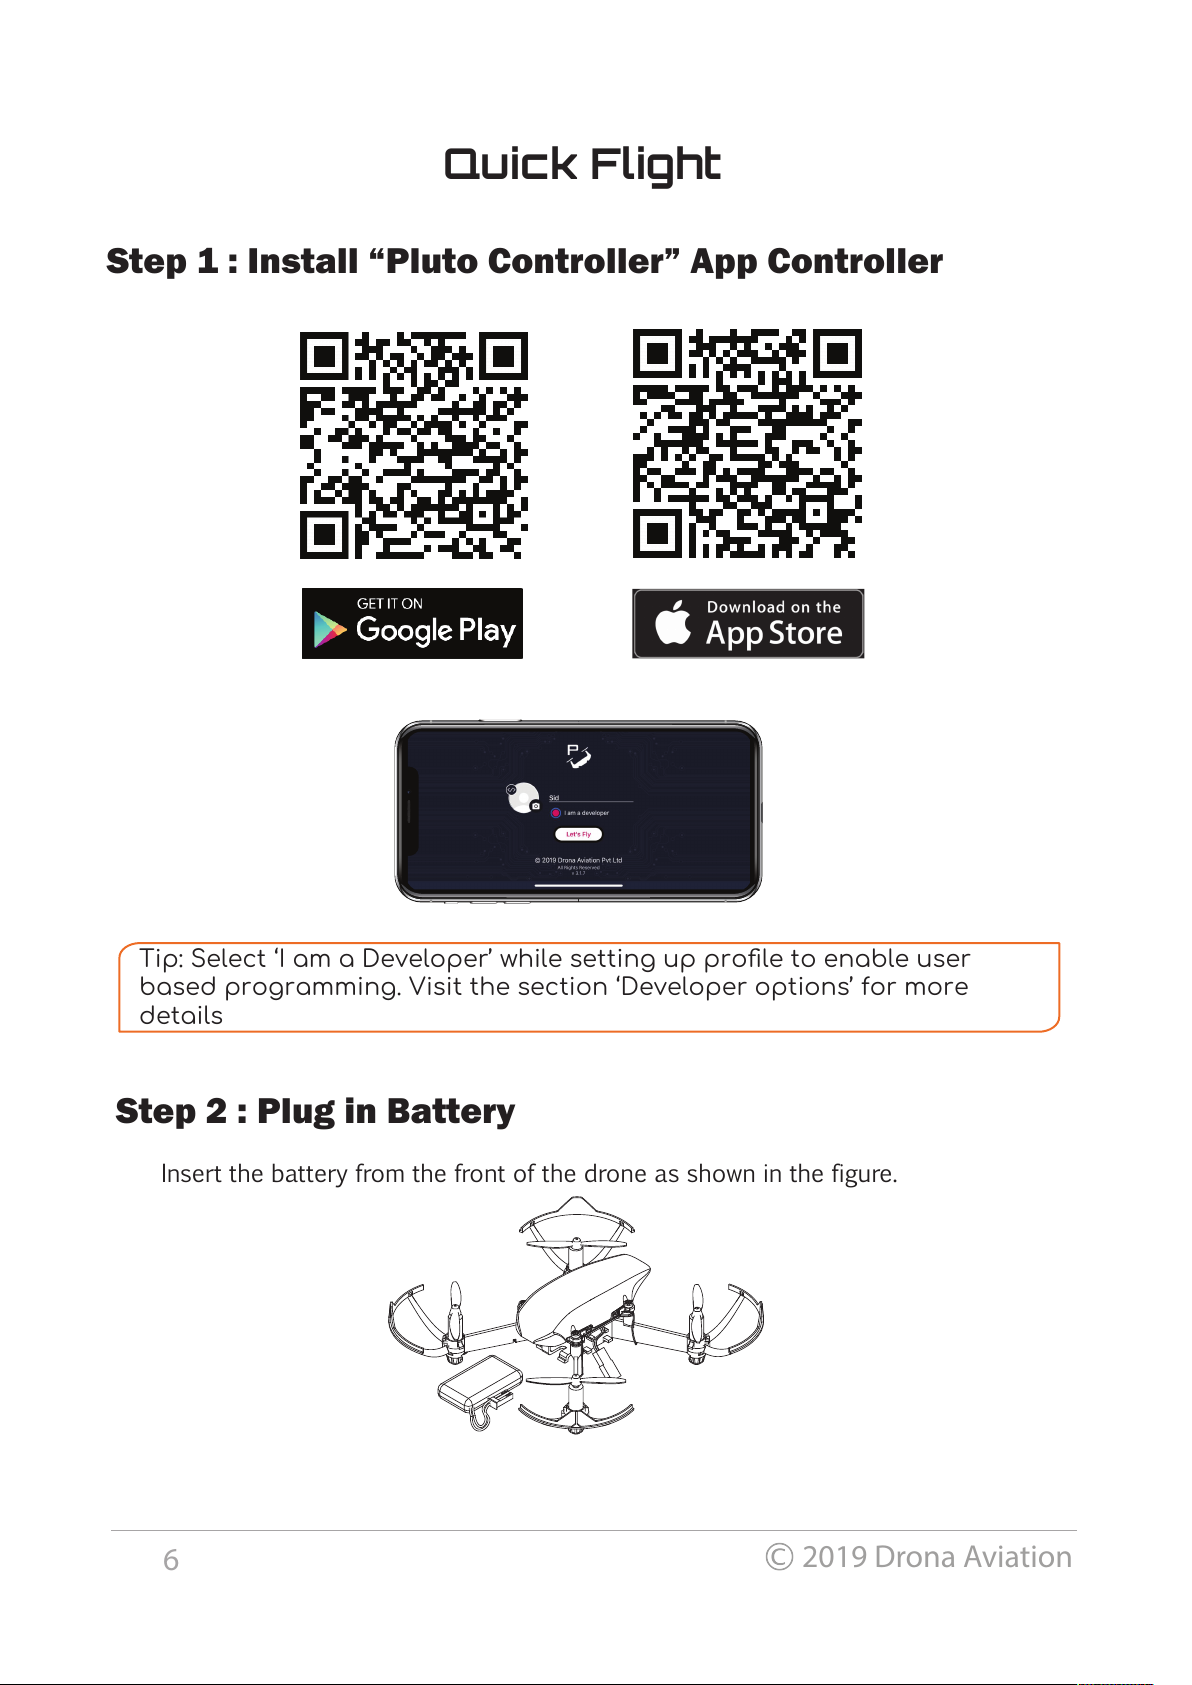
Step 1 : Install “Pluto Controller” App Controller
Quick Flight
Tip: Select ‘I am a Developer’ while setting up profile to enable user
based programming. Visit the section ‘Developer options’ for more
details
Step 2 : Plug in Battery
Insert the battery from the front of the drone as shown in the figure.
6
2019 Drona Aviation
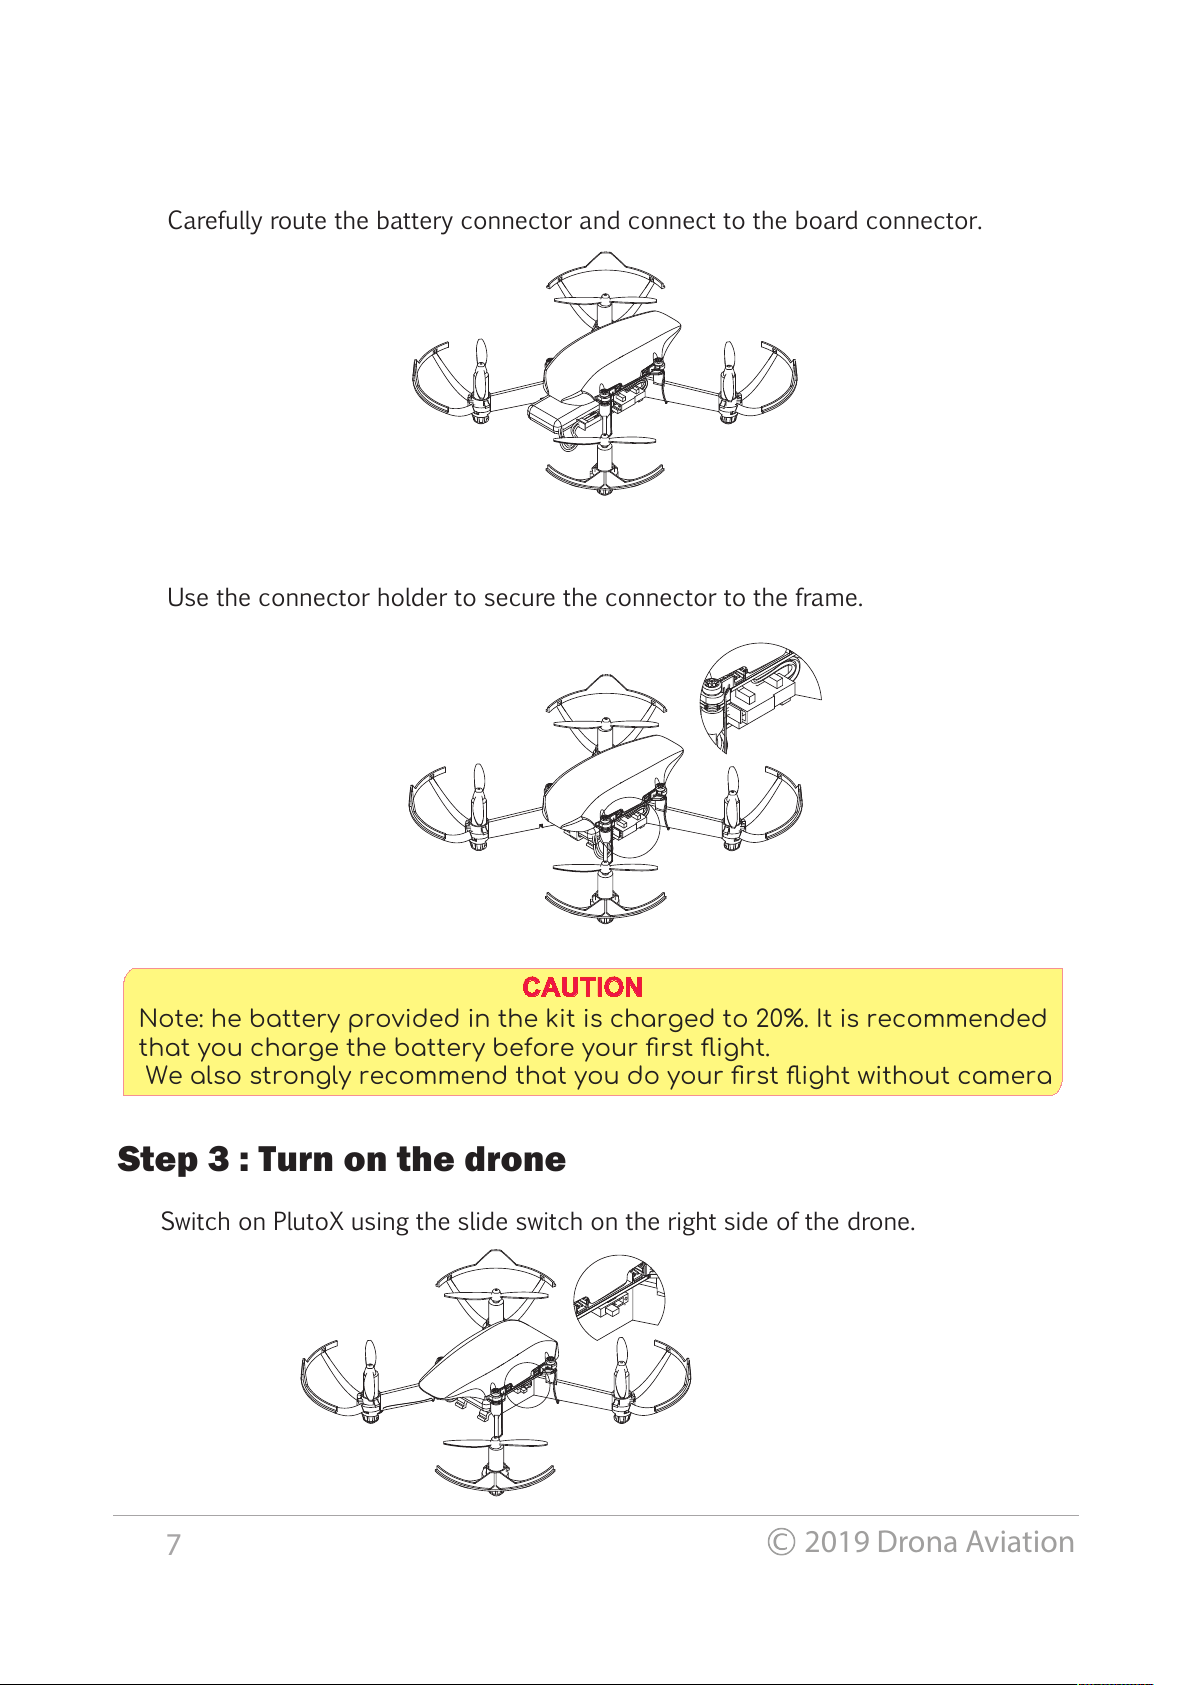
Step 3 : Turn on the drone
Carefully route the battery connector and connect to the board connector.
Use the connector holder to secure the connector to the frame.
Note: he battery provided in the kit is charged to 20%. It is recommended
that you charge the battery before your first flight.
We also strongly recommend that you do your first flight without camera
CAUTION
Switch on PlutoX using the slide switch on the right side of the drone.
7
2019 Drona Aviation
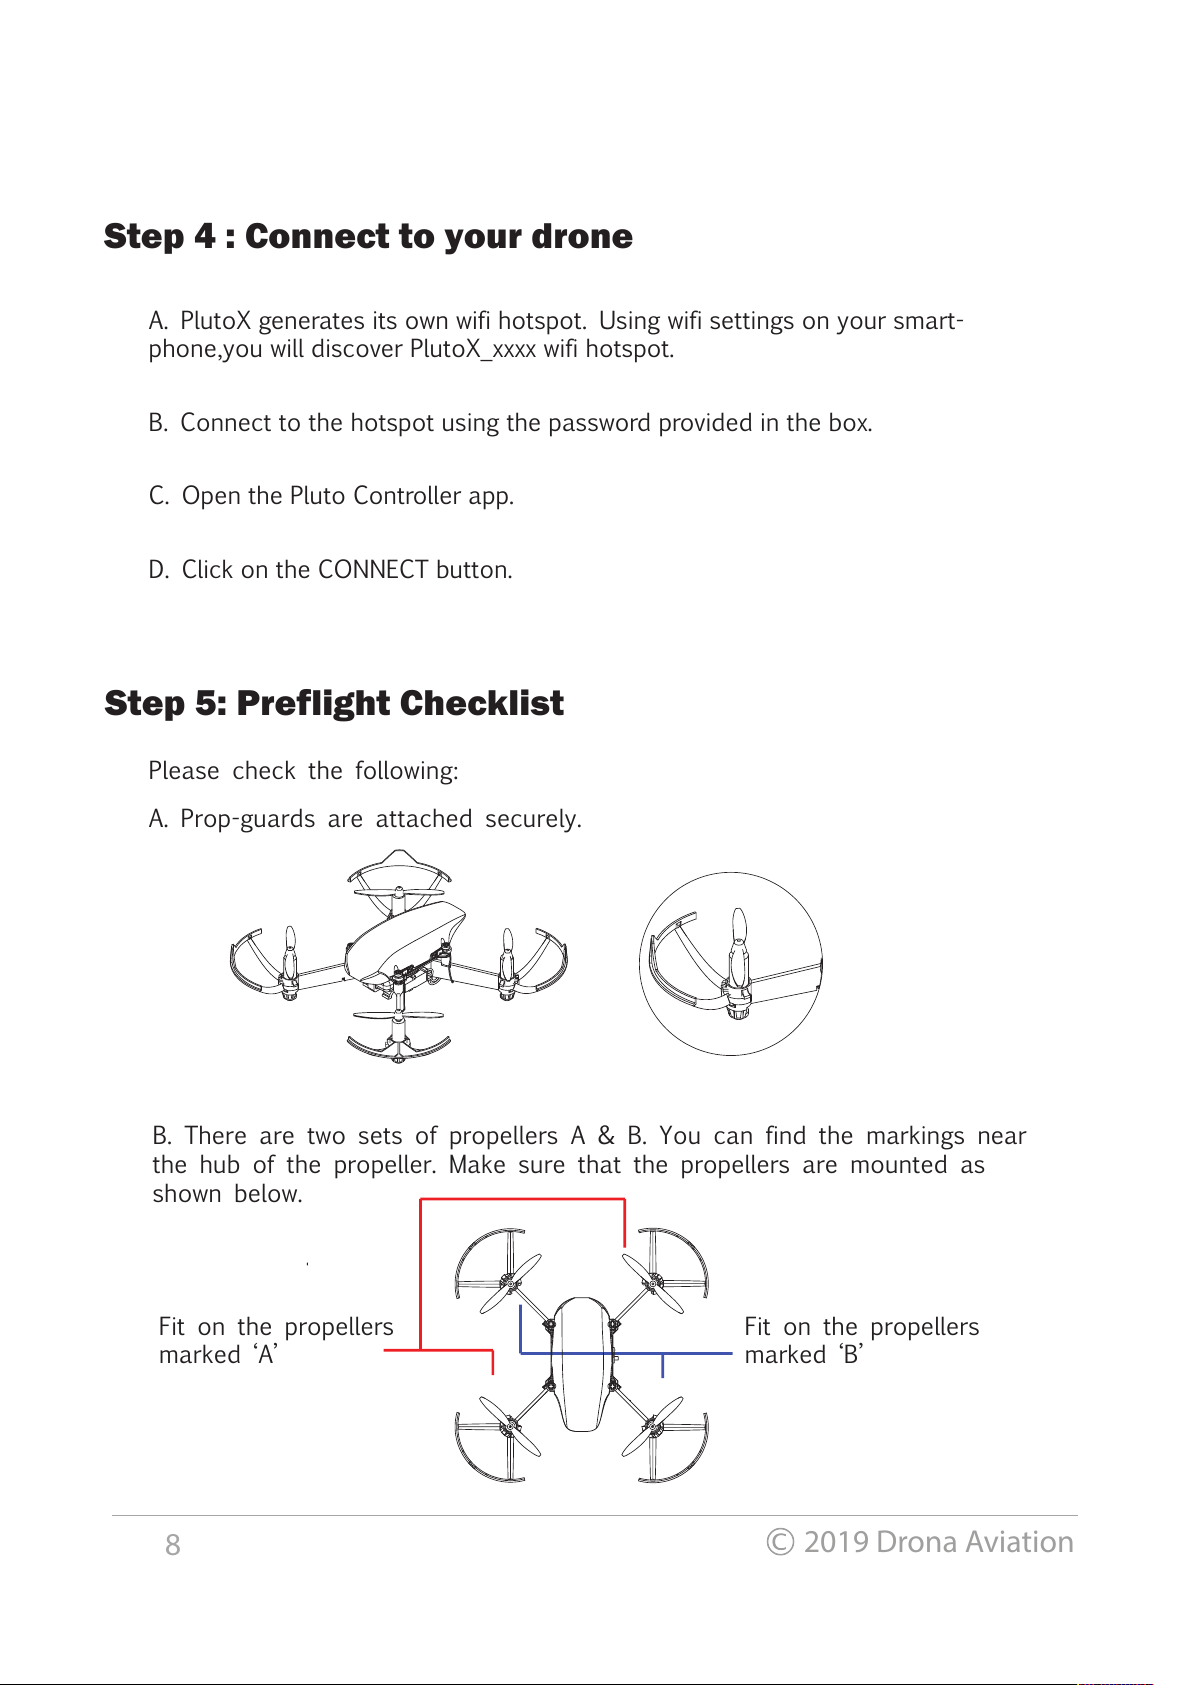
Step 5: Preflight Checklist
Please check the following:
B. There are two sets of propellers A & B. You can find the markings near
the hub of the propeller. Make sure that the propellers are mounted as
shown below.
Step 4 : Connect to your drone
A. PlutoX generates its own wifi hotspot. Using wifi settings on your smart-
phone,you will discover PlutoX_xxxx wifi hotspot.
B. Connect to the hotspot using the password provided in the box.
C. Open the Pluto Controller app.
D. Click on the CONNECT button.
Fit on the propellers
marked ‘A’
Fit on the propellers
marked ‘B’
A. Prop-guards are attached securely.
8
2019 Drona Aviation
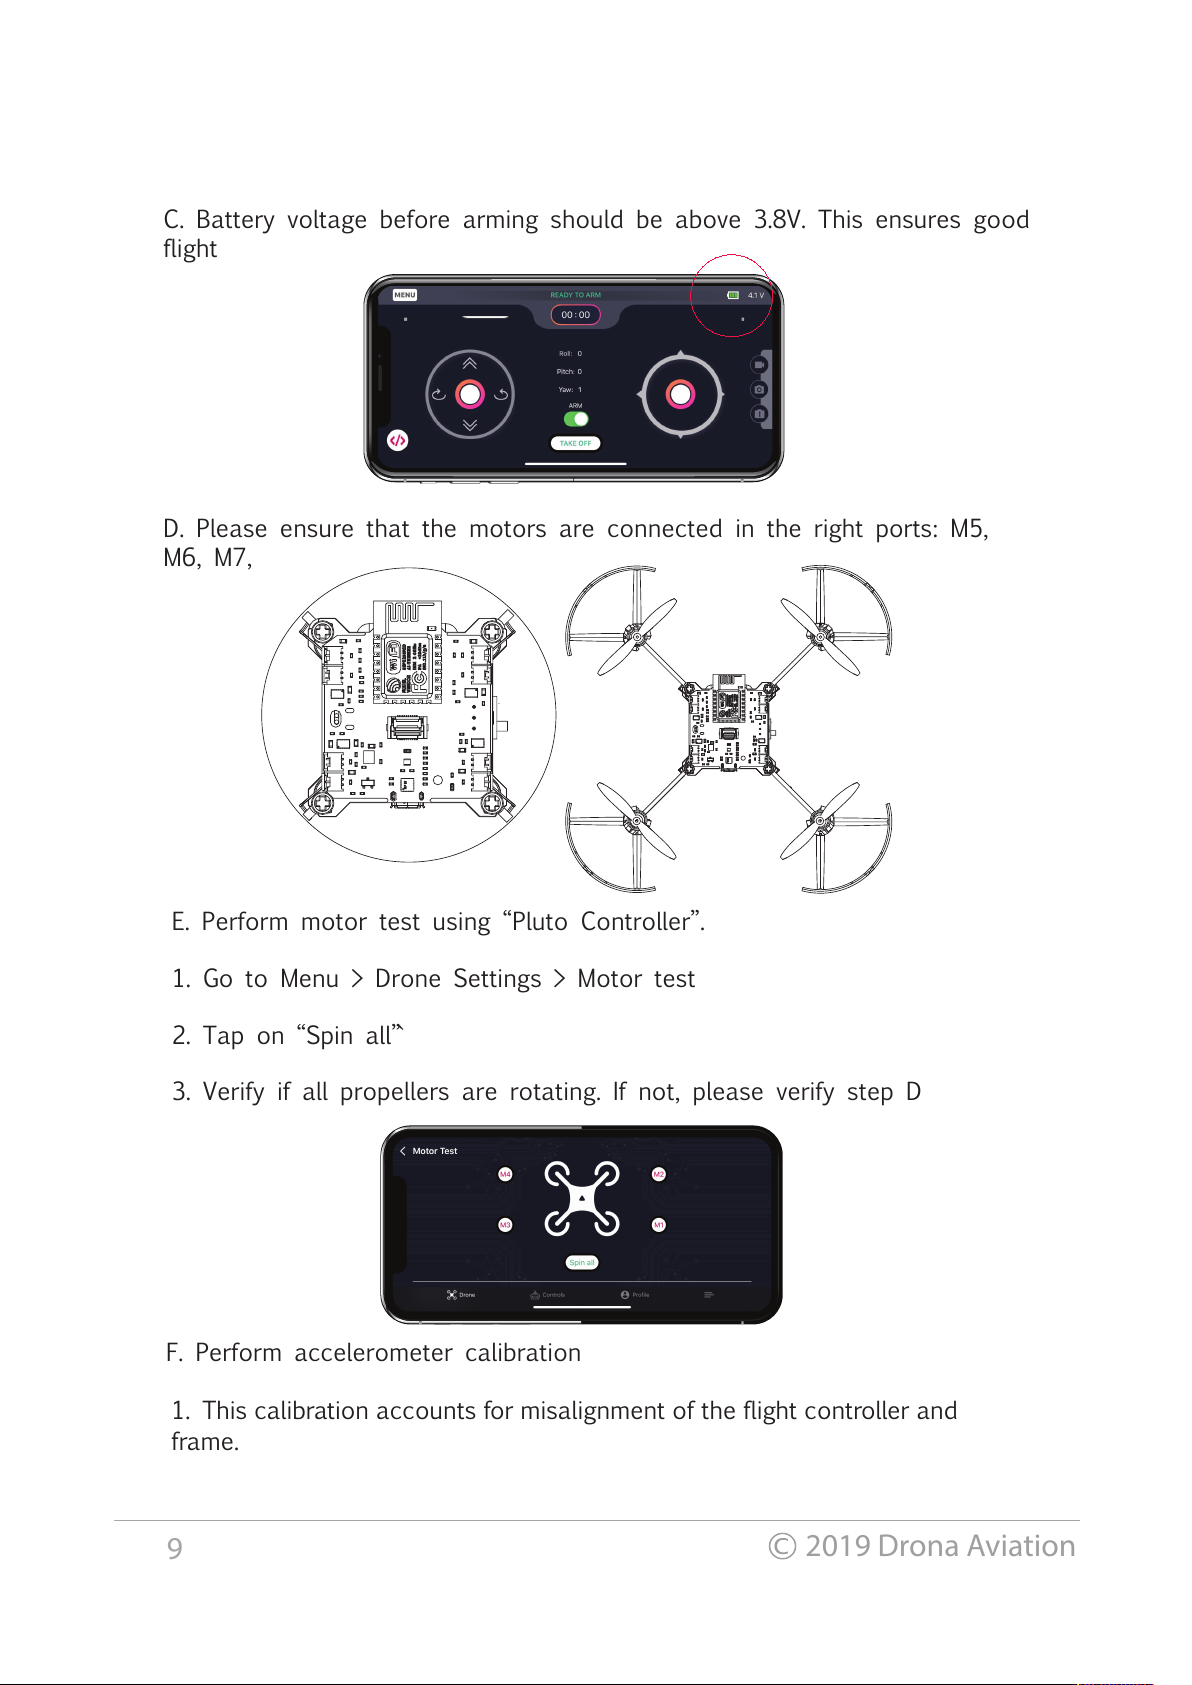
C. Battery voltage before arming should be above 3.8V. This ensures good
flight
D. Please ensure that the motors are connected in the right ports: M5,
M6, M7,
E. Perform motor test using “Pluto Controller”.
1. Go to Menu > Drone Settings > Motor test
2. Tap on “Spin all”`
F. Perform accelerometer calibration
3. Verify if all propellers are rotating. If not, please verify step D
1. This calibration accounts for misalignment of the flight controller and
frame.
9
2019 Drona Aviation
TIP: It's a good practice to perform Magnetometer calibration when:
a. Your are flying in a new location
b. Replacing the motors
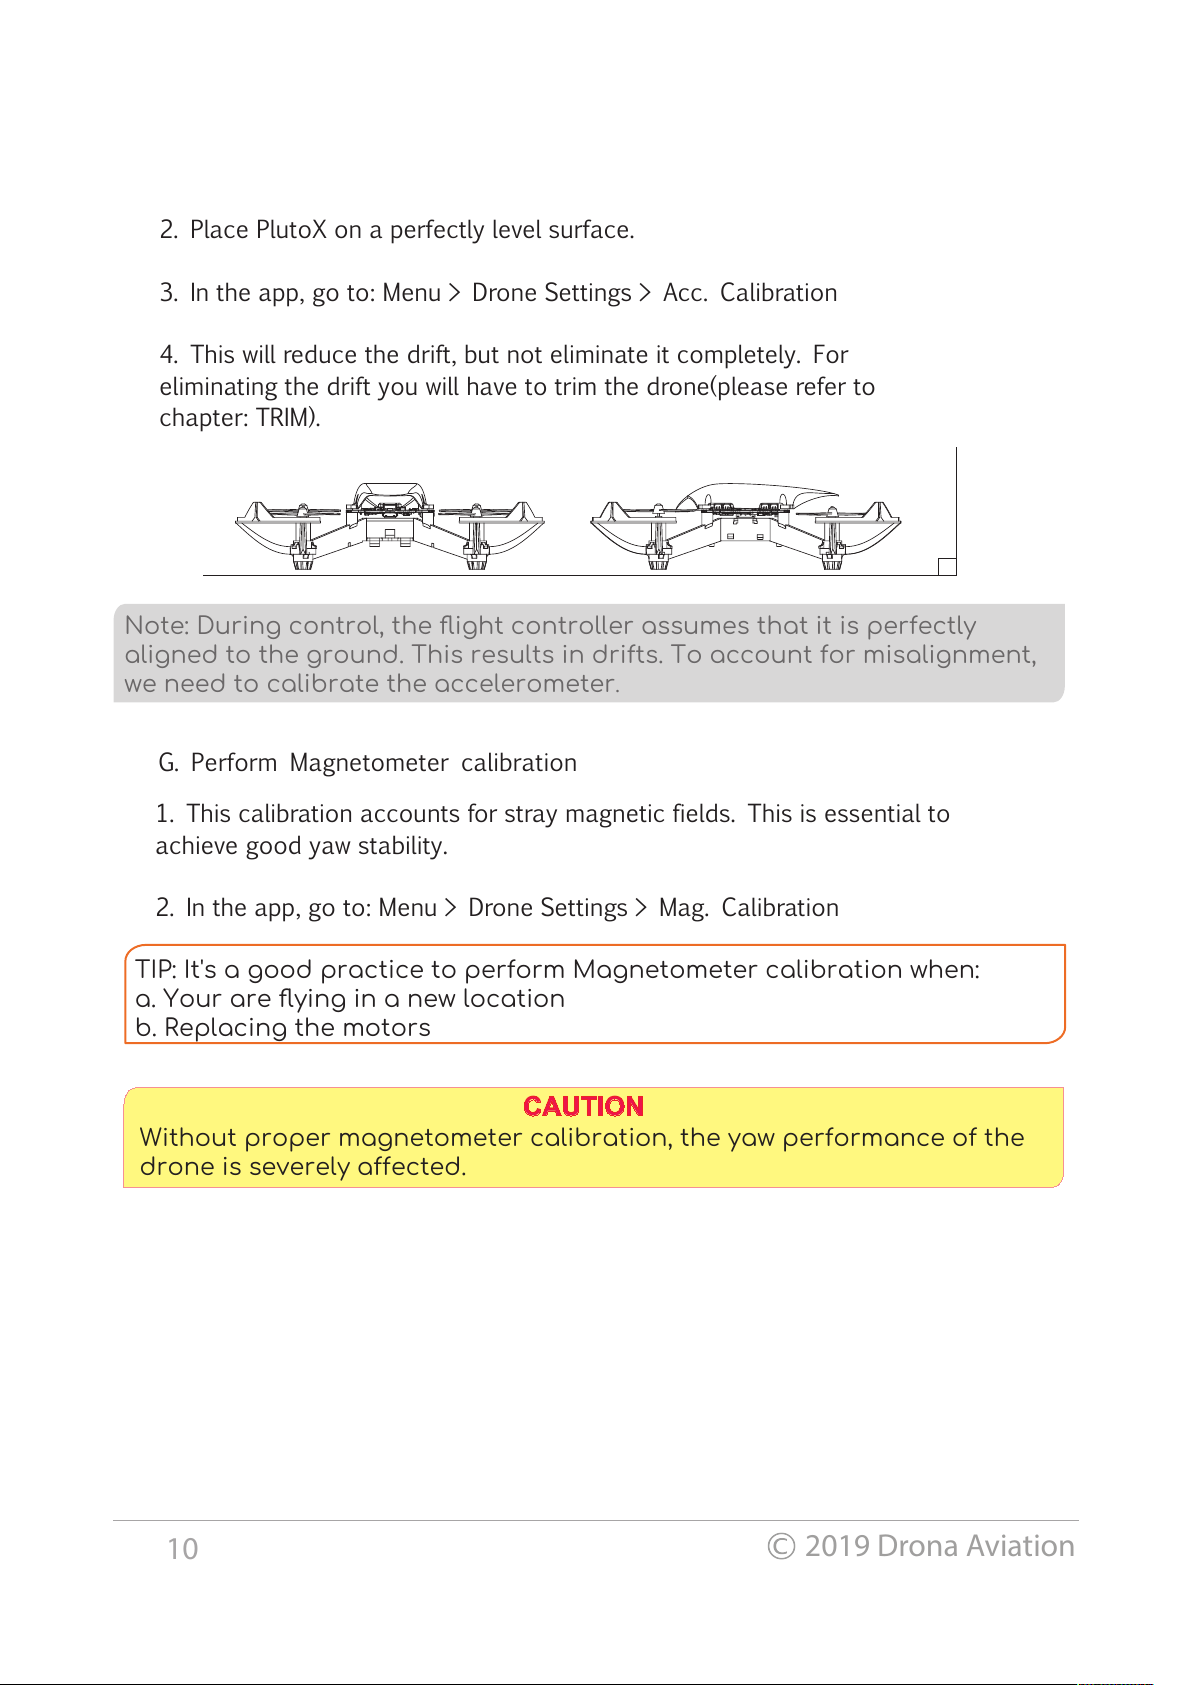
Note: During control, the flight controller assumes that it is perfectly
aligned to the ground. This results in drifts. To account for misalignment,
we need to calibrate the accelerometer
.
G. Perform Magnetometer calibration
1. This calibration accounts for stray magnetic fields. This is essential to
achieve good yaw stability.
2. In the app, go to: Menu > Drone Settings > Mag. Calibration
2. Place PlutoX on a perfectly level surface.
3. In the app, go to: Menu > Drone Settings > Acc. Calibration
4. This will reduce the drift, but not eliminate it completely. For
eliminating the drift you will have to trim the drone(please refer to
chapter: TRIM).
Without proper magnetometer calibration, the yaw performance of the
drone is severely aected.
CAUTION
10
2019 Drona Aviation
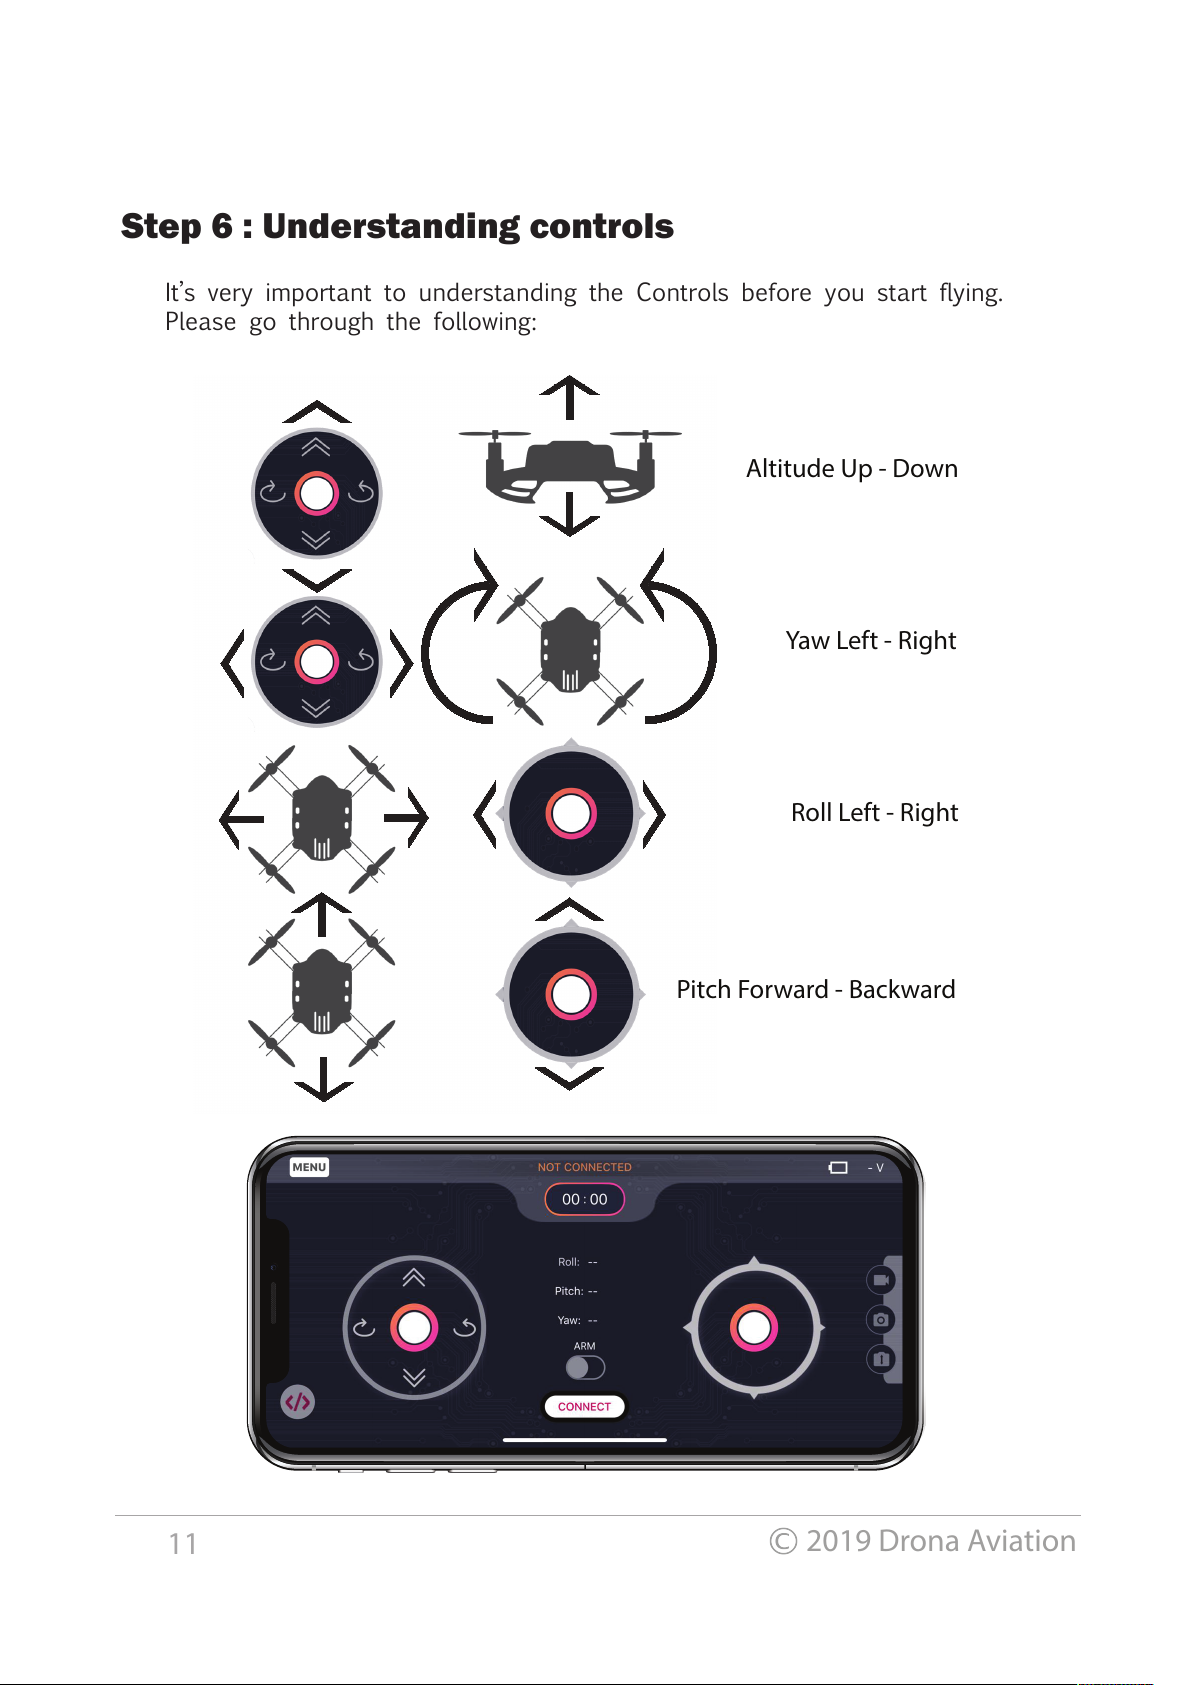
It’s very important to understanding the Controls before you start flying.
Please go through the following:
Altitude Up - Down
Yaw Left - Right
Roll Left - Right
Pitch Forward - Backward
11
2019 Drona Aviation
Step 6 : Understanding controls
 Loading...