

DriveRight OBD II, 8156OBD, 8160OBD Installation Manual

D
DriveRight OBDII Installa-
tion Guide
OBDII
Installation
Guide
Product # 8156OBD & 8160OB

FCC Part 15 Class B Registration Warning
This equipment has been tested and found to comply with the limits for a Class B digital device, pursuant to Part 15 of the
FCC Rules. These limits are designed to provide reasonable protection against harmful interference in a residential installation. This equipment generates, uses, and can radiate radio frequency energy and, if not installed and used in accordance with the instructions, may cause harmful interference to radio communications.
However, there is no guarantee that interference will not occur in a particular installation. If this equipment does cause
harmful interference to radio or television reception, which can be determined by turning the equipment on and off, the
user is encouraged to try to correct the interference by one or more of the following measures:
• Reorient or relocate the receiving antenna.
• Increase the separation between the equipment and receiver.
• Connect the equipment into an outlet on a circuit different from that to which the receiver is connected.
• Consult the dealer or an experienced radio/TV technician for help.
Changes or modification not expressly approved in writing by Davis Instruments may void the warranty and void the
user's authority to operate this equipment.
© Davis Instruments Corp. 2005. All rights reserved.
DriveRight OBDII Installation Guide
Rev. C (December 15, 2005)
Product # 8156OBD & 8160OBD
Document Part Number: 07395.198
This product complies with the essential protection requirements of the EC
EMC Directive 89/336/EC.
FOR HOME OR OFFICE USE
Tested to comply
with FCC standards
DriveRight is a registered trademark of Davis Instruments Corp., Hayward, CA.
Velcro is a trademark of Velcro Industries, Manchester, NH.
Information in this document subject to change without notice.
Introduction
)
This manual provides instructions and information necessary to install
DriveRight OBD. DriveRight OBD plugs into your vehicle’s OBDII
(On-Board Diagnostics II) port for a very quick and easy installation.
Note: DriveRight OBD only functions in vehicles equipped with a compatible OBDII
port. See “Appendix 1: OBDII Compatibility” on page 10 for a list of supported
OBDII protocols and vehicles.
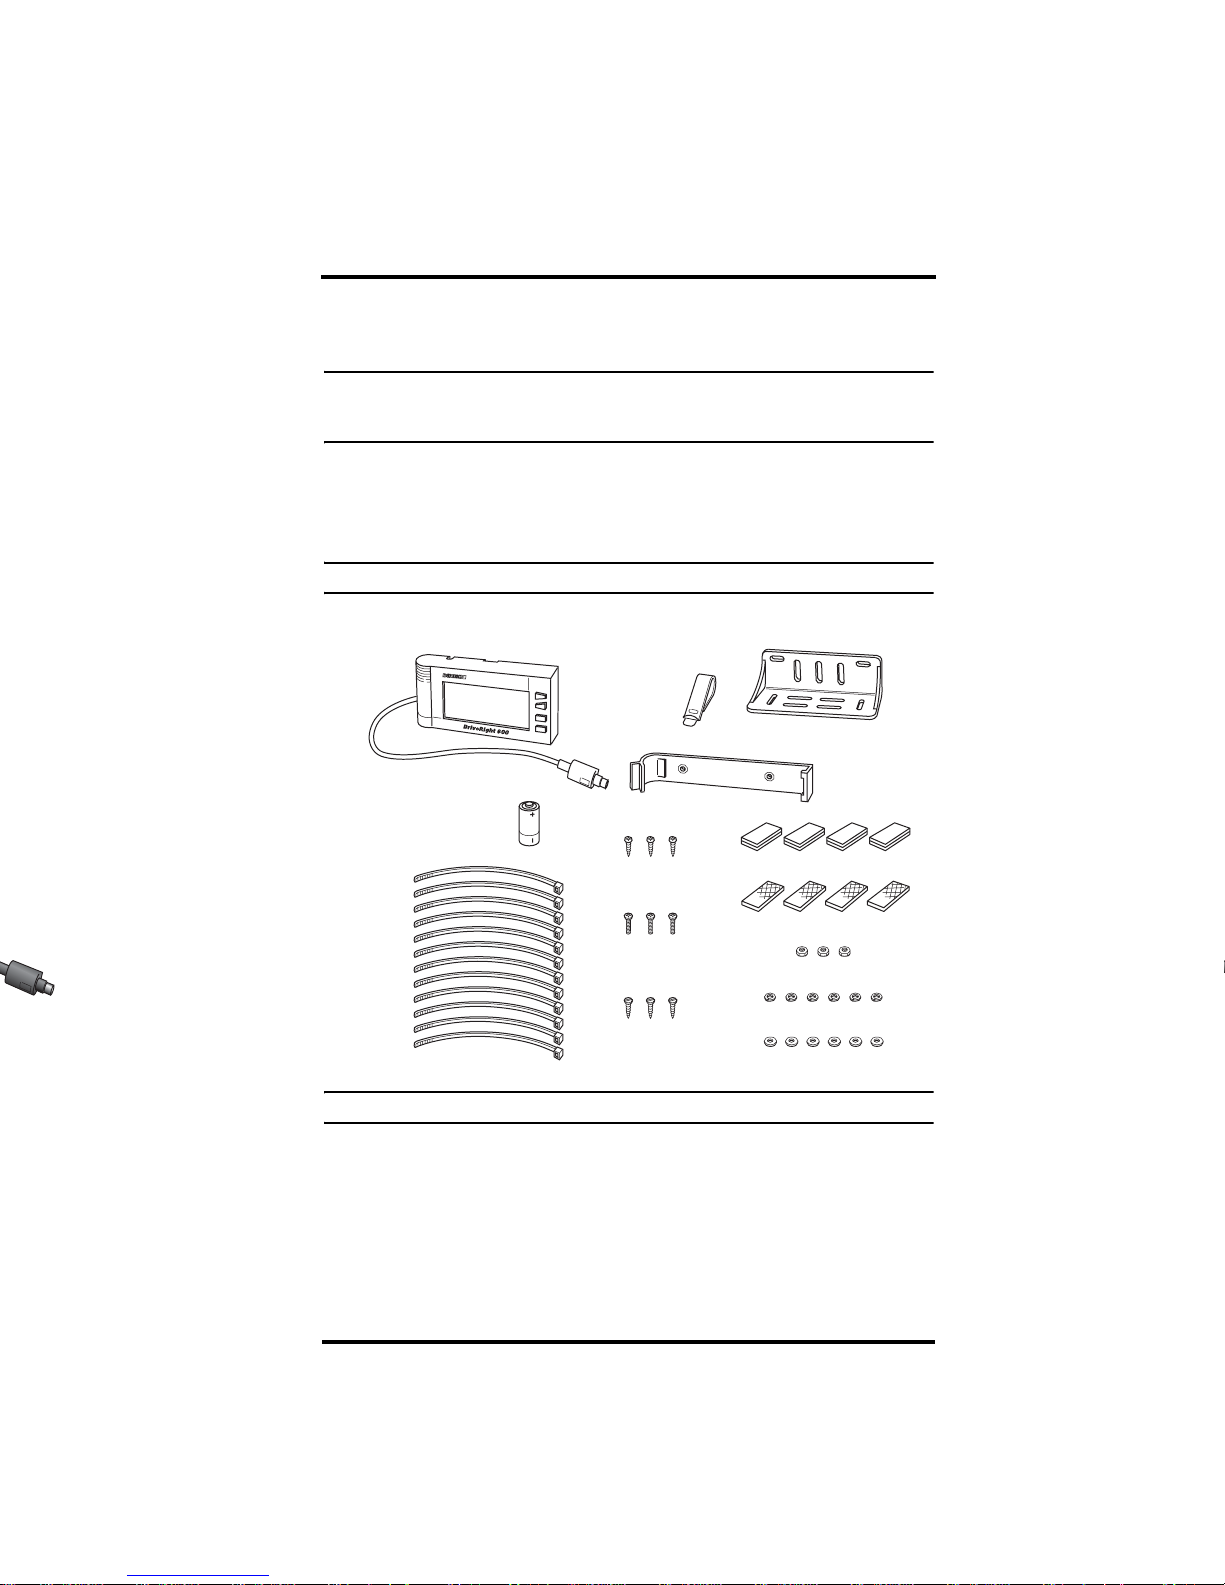
Components
Your DriveRight OBD should come with all of the components shown
below. Please make sure you have all listed items before proceeding.
Note: Hardware includes spare pieces not required for installation.
Console and Mounting Hardware
Visor Clip
Right Angle Adapter Bracket
DriveRight Display
Battery
(CR123
3V Lithium)
#6 x 1/2" Pan Head
Self-Tapping Screws (3)
Mounting Bracket
Velcro® Tape (4 pair)
Double-Sided Foam Tape (4 strips
6-32 x 1/2" Flat Head
Machine Screws (3)
#6 x 1/2" Flat Head
Tie Wraps (12)
Note: The 8160OBD does not include the display or battery.
Self-Tapping Screws (3)
6-32 Nuts (3)
#6 Split Lock Washers (6)
#6 Flat Washers (6)
1
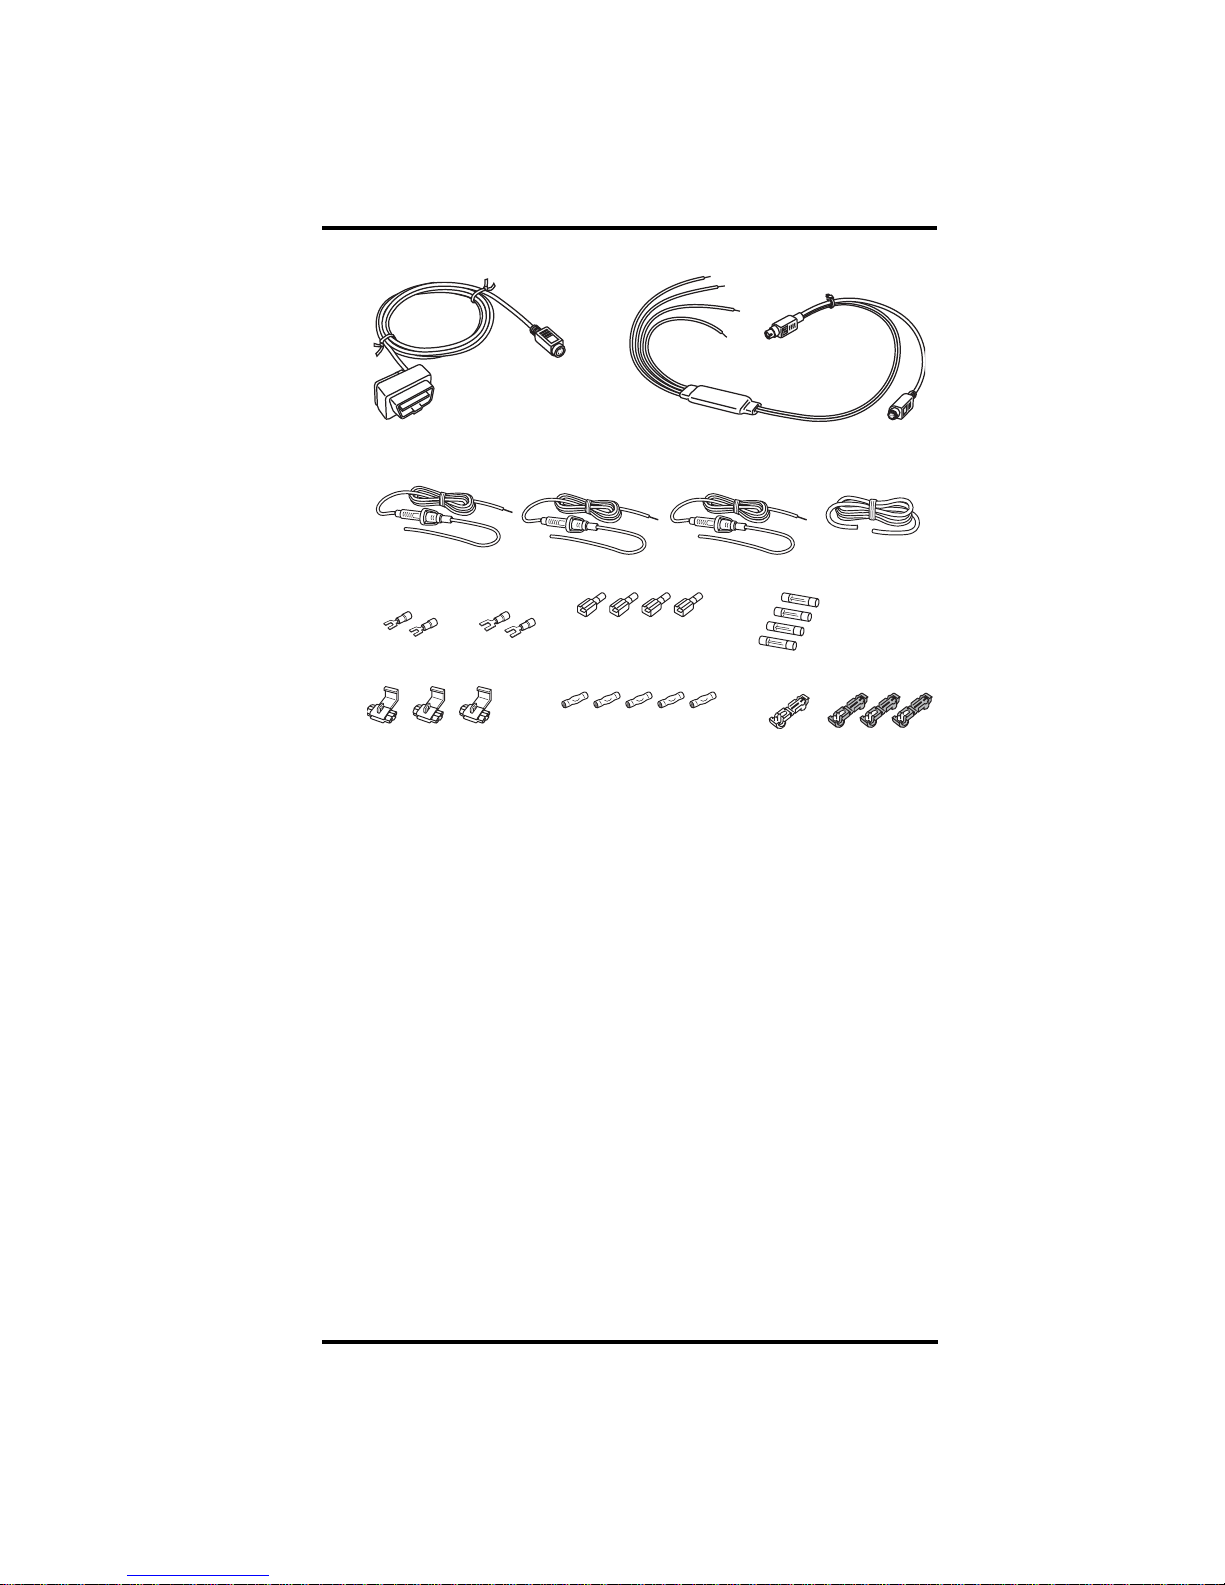
Cables
w
OBD Cable
Wiring Components
DriveRight 600
Adapter Cable
Red +12V Wire
ith Fuseholder (22 AWG)
Spade Terminal Sets:
#8-10 Studs
(3.5 - 5 mm)
In-Line Splice (3)
1/4" Studs
(6 mm)
Blue Wire (2) with Fuseholder (22 AWG)
Insulated Male Disconnects
(18-22AWG)
Butt Splices (5)
(26-22AWG or 24-20AWG)
(14-16AWG)
Black Ground Wire
(3AG 1-1/4 x 1/4",
.25A, Slo-Blo)
T-Tap Disconnects:
Blue
Additional DriveRight Documentation
Refer to the following documents for information on configuring and
using your DriveRight:
• The DriveRight User’s Guide included with your unit.
• The on-line help in the DriveRight software.
• The DriveRight FMS User’ s Manual located in an Adobe Acrobat
PDF file in your DriveRight program directory.
Tools and Materials Needed
DriveRight installation may require some or all of the following tools
and materials. Please review the installation instructions and make sure
you have all necessary items before proceeding with the installation.
All Installations
• Electric Drill with 7/64” (2.5 mm) Drill Bit - Used to drill tap
holes for #6 self-tapping screws.
• Medium Phillips Screwdriver
• Pliers
(22AWG)
Fuses (4)
Red (3)
(18-22AWG)
2

Installations using Adapter Cable Digital Inputs
If you are using the adapter cable digital inputs in your installation, the
following additional tools and other items may also be required:
•Crimping Tool
• Multimeter
• Fuse Tap - Required to obtain +12 V from the fuse panel.
Planning the Installation
The installation for DriveRight OBD is very simple. Unless you are
using the two digital inputs on the adapter cable, you only need to plug
the OBD cable into your vehicle’s OBDII port and then install the DriveRight console.
The digital inputs on the DriveRight 600 adapter cable may be used to
monitor any 12 VDC electrical device or accessory in the vehicle, but
they are typically used to monitor the brake lights, headlights, or seat
belts.
To install DriveRight OBD:
1. Plug the OBD cable into your vehicle’s OBDII port.
2. Connect the digital inputs (if used; DriveRight 600 only).
3. Install the DriveRight console in the vehicle.
4. Test the DriveRight installation.
3
 Loading...